Announcement

Collapse
No announcement yet.

Well it's finally installed... (RMT200)

Collapse
X
 
  • Filter
  • Time
  • Show
Clear All
new posts

    Well it's finally installed... (RMT200)

    Finally got most of the dash back together and confirmed everything is up and running properly for now. Pics with and without flash so you can get an idea of what it looks like.


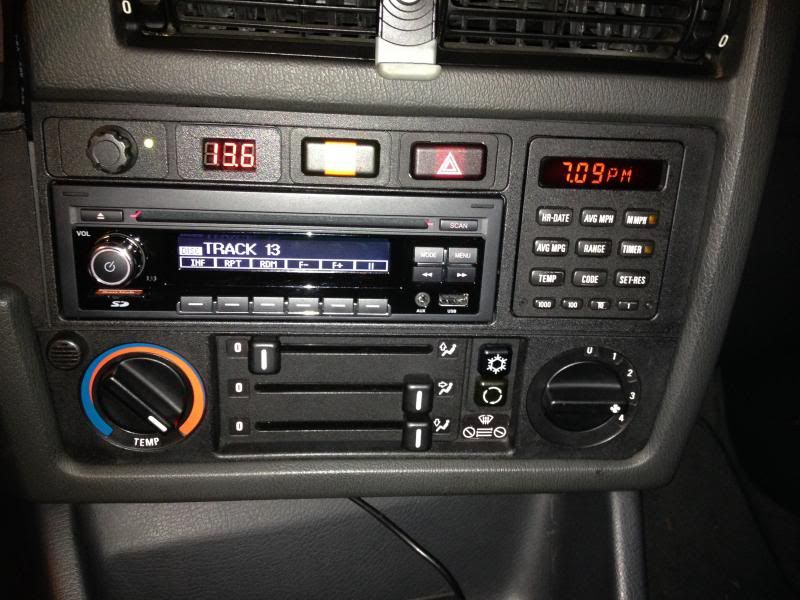
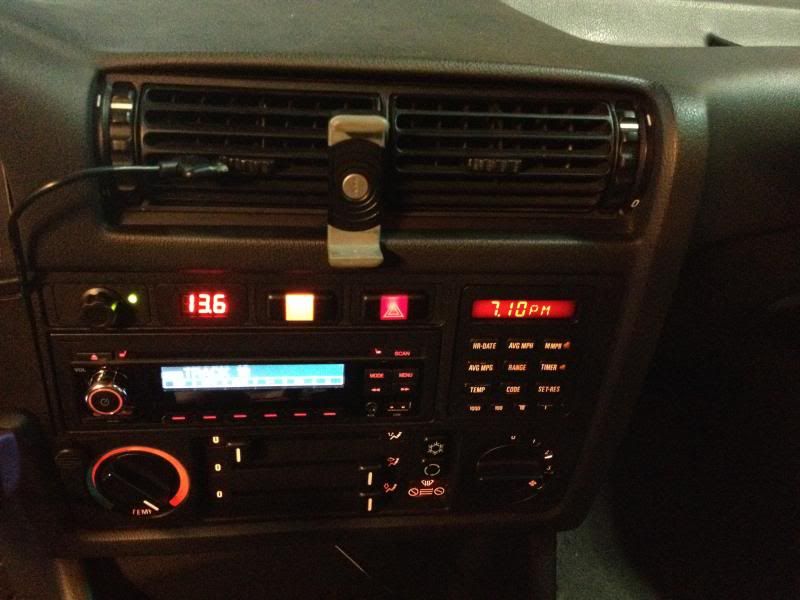
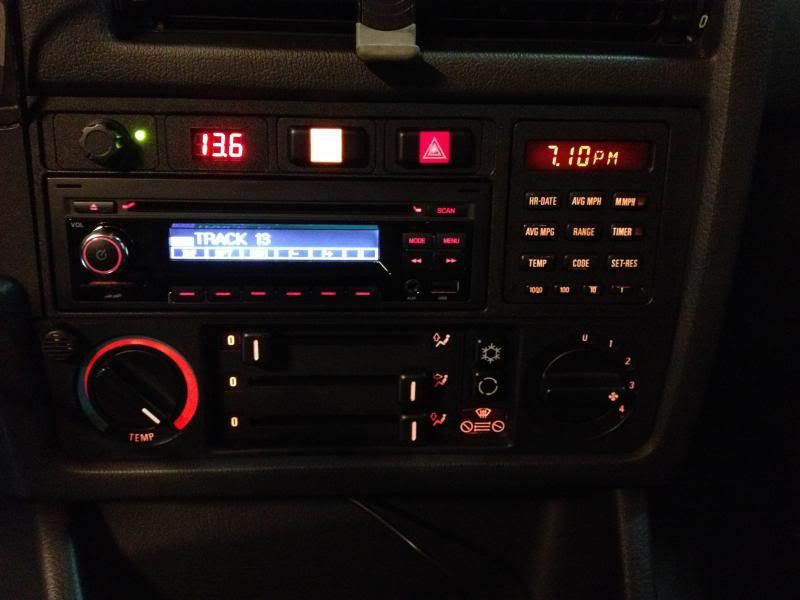
    It seems to pair up ok with my iPhone and will also stay paired with the BT dongle for my V1. Fortunately, I can stream both music to the RMT200 and use my V1connect app at the same time. Can plug in the USB to charge too, if need be.
    -Geno

    '87 325is (s52'd)
    '95 525iT
    '02 Range Rover 4.6 HSE
    '98 Disco 1

    #2
    just curious what the knob is for next to the digital volt meter?

    Comment


      #3
      It's the target acquisition calibration knob for my Anti-Prius Hood-Mounted Howitzer....;D :)


      Actually, it would be the sub control for the amp... for the sub I don't have yet.
      -Geno

      '87 325is (s52'd)
      '95 525iT
      '02 Range Rover 4.6 HSE
      '98 Disco 1

      Comment


        #4
        Looks great. Envious


        Sent from my iPhone using Tapatalk
        sigpic
        both these cars are gone :(

        Comment


          #5
          How did the mounting work? I assume that you had to trim the HVAC panel a little bit and work out some sort of attachment at the back of the unit, like the CD43?

          Transaction Feedback: LINK

          Comment


            #6
            I like the flush mount.. And the sub knob is nice too!

            e30 mtech2 cabrio bbs rs

            E30 M3 RESCUED

            Alpina C2 REP

            instragram e30company

            Comment


              #7
              Originally posted by bmwman91 View Post
              How did the mounting work? I assume that you had to trim the HVAC panel a little bit and work out some sort of attachment at the back of the unit, like the CD43?
              Very much like the CD43. You need to grind/sand down the plastic lip that the factory unit sets in. I stumbled upon these supposed "carbon fiber" reinforced square rods for model building at the local HobbyTown. I think I used a combination of 1/8" and 1/4" rods to build up the sides of the HVAC panel to get it to sit flush. The vertical supports need a bit more reinforcing since that is how the headunit "clips" in at the sides. I used a heavy duty superglue to attach the pieces to the HVAC panel
              -Geno

              '87 325is (s52'd)
              '95 525iT
              '02 Range Rover 4.6 HSE
              '98 Disco 1

              Comment


                #8
                Looks great. Please share any fabrication photos.

                Any issues with European vs US frequencies?
                1987 325e Commuter Project Blog

                1967 1600 Project Blog: www.TX02.blogspot.com

                Comment


                  #9
                  Geno, that looks great!

                  Closing SOON!
                  "LAST CHANCE FOR G.A.S." DEAL IS ON NOW

                  Luke AT germanaudiospecialties DOT com or text 425-761-6450, or for quickest answers, call me at the shop 360-669-0398

                  Thanks for 10 years of fun!

                  Comment


                    #10
                    Seeing that so many of you seem to be interested in flush mounting, there is a dirty little secret that I should have shared with Geno.


                    Depending on how deep you need to go, it can be as easy as cutting off the back mounting lip and either plastic welding or gluing the metra part on.

                    A great tool for cutting the lip is a body saw: http://www.globalindustrial.com/prod...E&gclsrc=aw.ds

                    If you use some strips of ABS (or those square bits Geno used) you can space that DIN flange as far as needed. Just cutting off the flange and gluing that new one on only gains you about 3/16", I don't know if its enough for CD43 etc to be perfectly flush, but is is very close.

                    Good luck and don't forget to post your results!

                    Luke

                    Closing SOON!
                    "LAST CHANCE FOR G.A.S." DEAL IS ON NOW

                    Luke AT germanaudiospecialties DOT com or text 425-761-6450, or for quickest answers, call me at the shop 360-669-0398

                    Thanks for 10 years of fun!

                    Comment


                      #11
                      Originally posted by StereoInstaller1 View Post
                      Seeing that so many of you seem to be interested in flush mounting, there is a dirty little secret that I should have shared with Geno.


                      Depending on how deep you need to go, it can be as easy as cutting off the back mounting lip and either plastic welding or gluing the metra part on.

                      A great tool for cutting the lip is a body saw: http://www.globalindustrial.com/prod...E&gclsrc=aw.ds

                      If you use some strips of ABS (or those square bits Geno used) you can space that DIN flange as far as needed. Just cutting off the flange and gluing that new one on only gains you about 3/16", I don't know if its enough for CD43 etc to be perfectly flush, but is is very close.

                      Good luck and don't forget to post your results!

                      Luke
                      THanks for the trim ring tip. I also saw this: http://www.amazon.com/Metra-89-30-09...Q7GG5PGFA4SNT7

                      For $4 more you get 3 spares (in different sizes) to use for practice in cutting/sanding/painting ABS.
                      Patrick Henry

                      1989 325iC build: http://www.r3vlimited.com/board/showthread.php?t=316880


                      Comment


                        #12
                        Well it's finally installed... (RMT200)

                        Geno, quick OCD question. Why is your power button crooked?

                        Edit: Nevermind. Got mine today and the power symbol spins with the volume knob. OCD Overdrive - ENGAGE.

                        Sent from my iPad using Tapatalk
                        Last edited by CurrusDei; 07-05-2014, 09:11 PM.
                        _______________________________________________
                        5 Year M3 Build, In Progress
                        RMT200 Retrofit

                        Comment


                          #13
                          So I am going to buy one of these and mod the LEDs to 605nm Orange to match the interior. A couple of questions first...

                          1) Do you have a wiring diagram / pinout table that says which wire is which on the main harness?
                          2) Can you take a few close-up pictures of the faceplate in daylight / full ambient lighting? I am thinking about ways to paint or de-gloss the chrome and shiny black plastic areas and just want to get some idea of how things are constructed.

                          Thanks!

                          Transaction Feedback: LINK

                          Comment


                            #14
                            Originally posted by bmwman91 View Post
                            So I am going to buy one of these and mod the LEDs to 605nm Orange to match the interior. A couple of questions first...

                            1) Do you have a wiring diagram / pinout table that says which wire is which on the main harness?
                            2) Can you take a few close-up pictures of the faceplate in daylight / full ambient lighting? I am thinking about ways to paint or de-gloss the chrome and shiny black plastic areas and just want to get some idea of how things are constructed.

                            Thanks!
                            Look, if you are buying one of these, we got way bigger fish to fry. You ain't got time to be fixing the color, it is close enough...but the lack of pre-amp outputs is simply not acceptable.

                            No preamp outputs...that is what you need to tackle. The pins are even in the plug and we know it is just some stupid thing Blaupunkt has done to mess up this deck and we need someone like you to fix it.

                            Closing SOON!
                            "LAST CHANCE FOR G.A.S." DEAL IS ON NOW

                            Luke AT germanaudiospecialties DOT com or text 425-761-6450, or for quickest answers, call me at the shop 360-669-0398

                            Thanks for 10 years of fun!

                            Comment


                              #15
                              Originally posted by StereoInstaller1 View Post
                              Look, if you are buying one of these, we got way bigger fish to fry. You ain't got time to be fixing the color, it is close enough...but the lack of pre-amp outputs is simply not acceptable.

                              No preamp outputs...that is what you need to tackle. The pins are even in the plug and we know it is just some stupid thing Blaupunkt has done to mess up this deck and we need someone like you to fix it.
                              Hmmmm...so that quad-lock connector housing has some empty terminals that normally have pre-amp outputs in them? I ordered myself an RMT200 earlier and I'll get a good look at the motherboard when it comes. If it is like many OEM units, there is a main DSP chip that also performs the DAC operation, and it outputs a low-power / pre-amp signal to the big power amp IC that drives the speaker outputs. That's how the CD43 is set up too, and I was looking into making a little pre-amp board for it at one point. Just some opamps really. The BIG question with these is about how good the DSP chip's DAC is since that is as far back into the signal chain you can get. From the schematics of aftermarket units with pre-amp outputs I have seen, they just take the DSP chip's DAC output and run it through a volume control IC and some opamps...so quality is still determined by the DAC subsystem on the DSP chip.

                              If you can hear a clear difference between running the speaker level outputs to an amp and using the pre-amp outputs, then I will take your word for it that the big power amp IC does some crappy stuff to the signal. Anyway, I'll dig around in the RMT200 when it comes. Hopefully it'll be reasonably easy to make a pre-amp output board that sounds good.

                              And I'm still changing the LEDs lol. This shit is going to be orange dammit! Enough thread hijacking though. I'll start one when I get my unit and start tearing it apart.

                              Transaction Feedback: LINK

                              Comment

                              Working...
                              X