
sub'd, interested to see the results
-
-
Holy cow.... This is gonna be awesome!
Closing SOON!"LAST CHANCE FOR G.A.S." DEAL IS ON NOW
Luke AT germanaudiospecialties DOT com or text 425-761-6450, or for quickest answers, call me at the shop 360-669-0398
Thanks for 10 years of fun!Comment
-
I can't wait to see this!
Sent from my iPhone using Tapatalk1993 Alpine White II 325i convertible (last year of E30 production)
1988 Zinnoberot 325 Super ETA coupeComment
-
Thanks for the update - interested to see what happens!-Geno
'87 325is (s52'd)
'95 525iT
'02 Range Rover 4.6 HSE
'98 Disco 1Comment
-
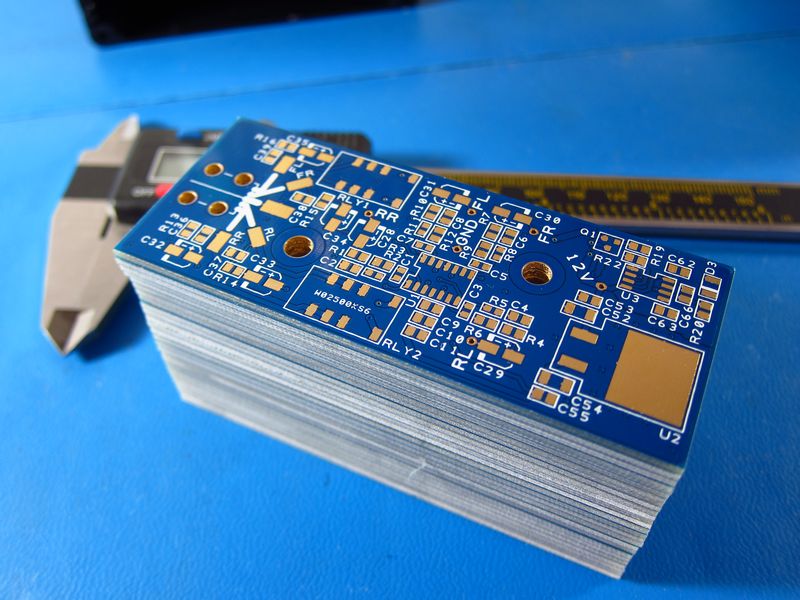
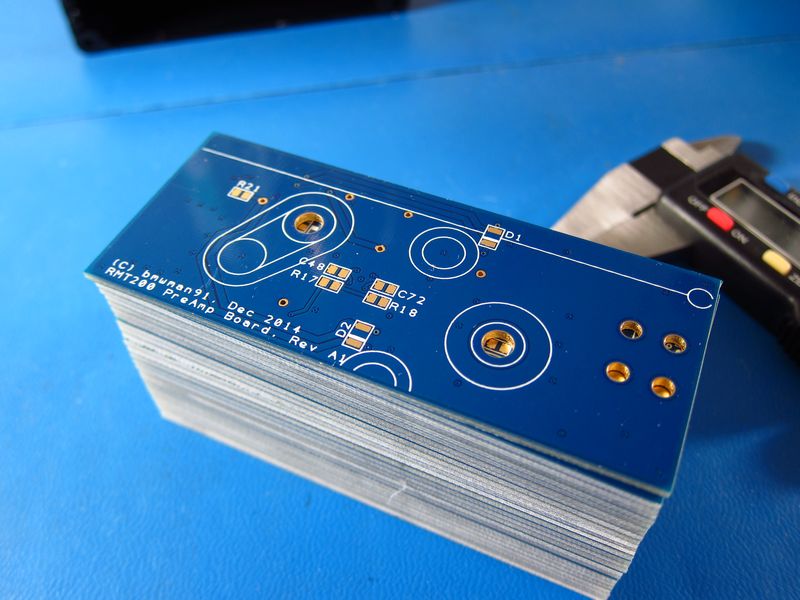
Ho ho ho...Not exactly sugarplums danging around, but these will definitely be more fun to stick in a car. I have all the components needed to make 10 of these, so I will be building the first one over the next week or so and giving it a test to make sure that things work properly. From there, we'll see!
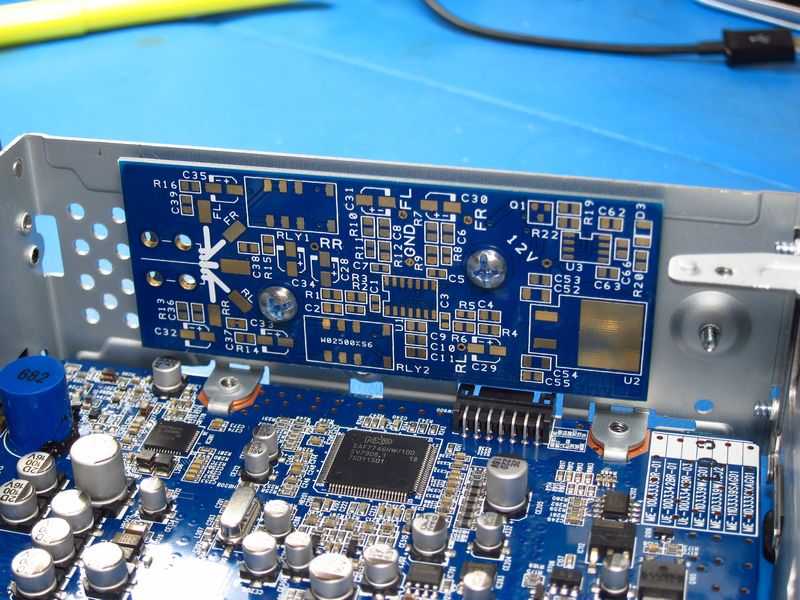
Here's where it mounts in the RMT200.
Comment
-
Very impressive thread! Glad to see people pursuing this head unit more. I agree it's so much nicer than the alien spaceships that dominate the aftermarket-seriously who designs those things?
I'll tell you my #1 complaint about the unit - the power button spins. It would have driven me nuts if I had been driving the car this past 6 months instead of it being in pieces in my garage.
I'm thinking I might paint over or plastidip over it, then remove the light from behind it.
Sent from my iPhone using TapatalkComment
-
You mean it bugs you that the power logo spins and will be in all sorts of odd orientations? Since the knob is easily disassembled, you should have no trouble painting over it cleanly.Comment
-
RMT200 Tear-Down and Modifications Thread
Yes. That's the plan. If I read correctly you just pulled hard and yours came off?
Sent from my iPhone using TapatalkComment
-
Where do you get your boards made?Comment
-
This was my first experience with them, and I was hesitant at first because they were quoting me at like 50% less than the place I was using. Some guys on the diyaudio forums had tried 3pcb and got good results, so I have it a shot and so far things look good!
I do my schematics and layout in DesignSpark PCB. It's free for commercial and non-commercial use. You sort of need to make your own symbol and footprint libraries, but for a free program it is super good.Comment
-
I am very impressed with the whole build. I love the idea! Any more solid idea of what it would cost for the complete setup? Unit and all? Any idea what it would a done unit cost to buy and mode done by you?
Comment
-
As of now, $135 shipped for the assembled board, mounting hardware and an extra ferrite chip to add to the head unit to activate the switched 12V antenna signal on the big rear connector.
If someone wanted to send me their HU and have me install all of it, it is looking like an additional $75 + shipping both ways. I will post install instructions so that buyers can do it themselves if they want, and it really won't take much skill, just a soldering iron with a reasonably fine tip, some solder and some hot glue (to support the wires after soldering/tapping them into the main board).Comment
-
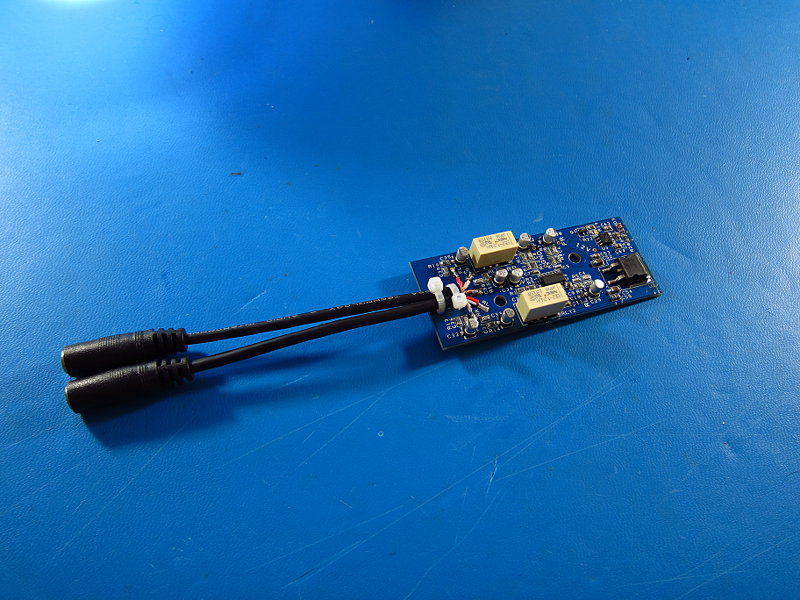
I have one of the boards mostly assembled now. Once it's all together I will run a few tests to make sure that things check out. From there, I will have to look into how to do some serious listening tests.
Here's my electronics dungeon at home. The Mad Science Man Cave.

One assembled board, mostly ready to go. I still need to install the wire leads that will tap into the RMT200 for power and audio signals.
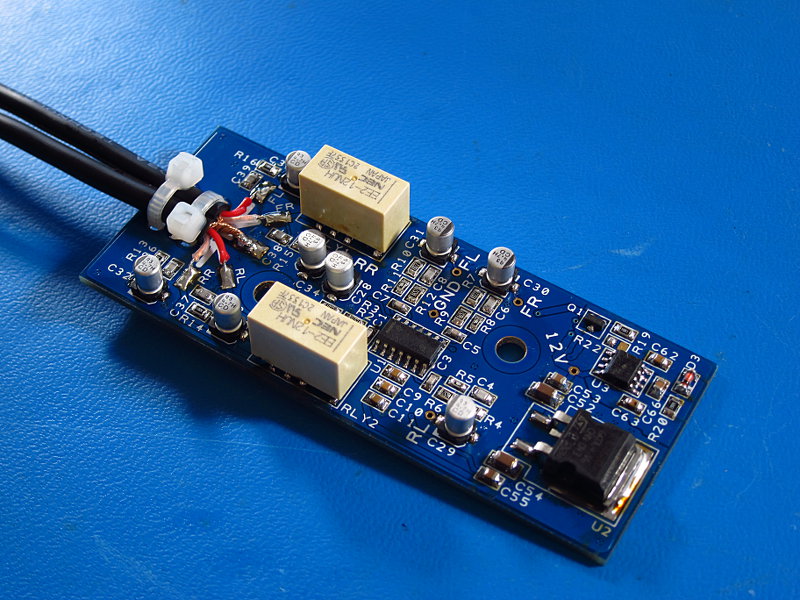
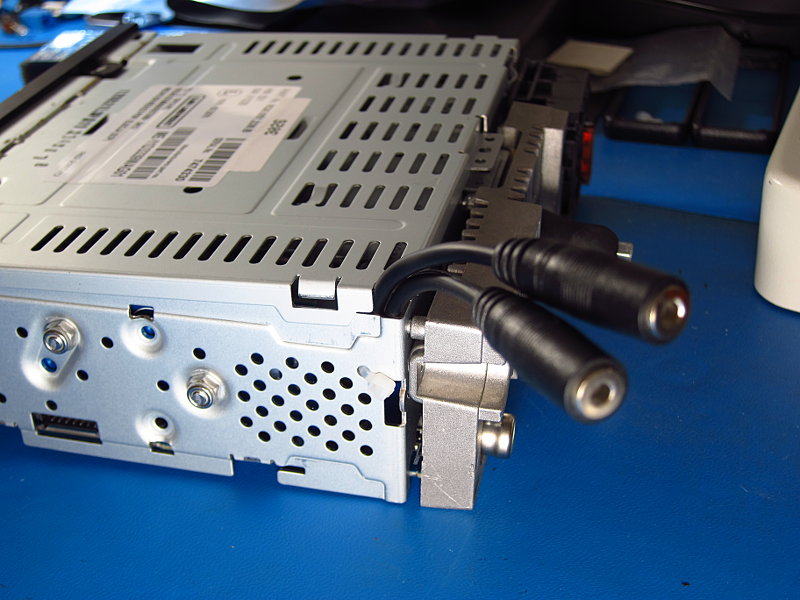
The pre-amp signals will be routed out using two 3.5mm stereo jacks. Getting these signals to an amp will be a simple matter of using some stereo 3.5mm to RCA adapter plugs. I originally wanted to run 4 RCA cables out of the HU, but there was no good way to do it: it would have either required some cheap thin RCA wires with minimal shielding, or beefy shielded RCA cables and some heavy cutting on the radio chassis. In this case, I bought a variety of different 3.5mm cable ends and these ones have pretty good shielding in them while still fitting out of the chassis with only some very minor Dremel cutting needed.
Here is how the board sits in the unit. It almost looks like it belongs there!
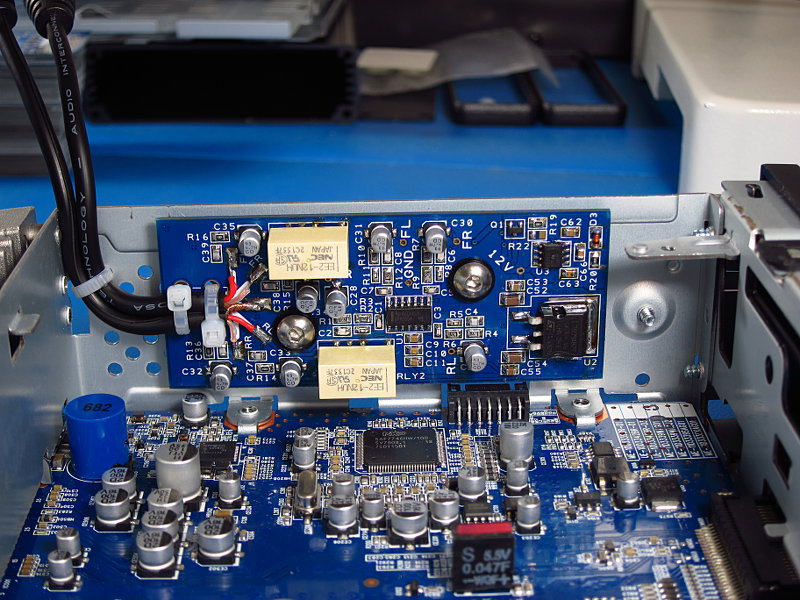
Clearance to the optical drive unit is good too.
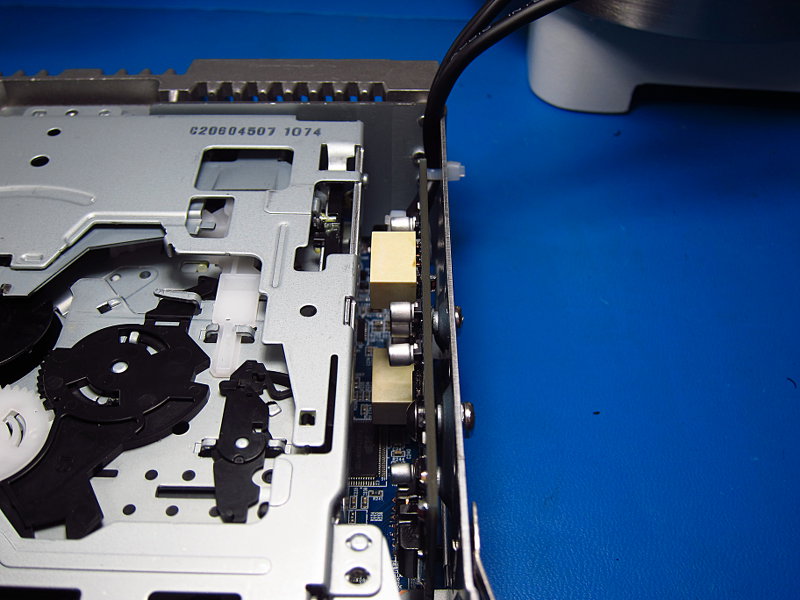
As I mentioned above, there aren't many cable routing options in this thing. The rectangular gap in the rear corner where these wires come out will need a few millimeters of cutting with a Dremel. Installation in the dash will probably take a little bit of finesse (and tilting of the HU), but it should work out just fine like this. You can also see the outside of the board's mounting hardware. It's all 18-8 stainless hardware with nylon ring lock washers to ensure that everything stays put.
Note that in this photo the top lid had not been trimmed yet, which is why it doesn't look like it fits.
 Last edited by bmwman91; 12-31-2014, 02:11 PM.
Comment
-
-
Hello from the VW crowd! I had to register here just to get involved with this. I have always been a fan of OEM look aftermarket radios over the spaceships out these days. Also fitted newer radios in older cars made pre-amps for them and what not. I was very surprised to see the top tri connector changed to USB ports from the pre-amps in every other radio.
I stumbled into this thread just looking for info if someone had pulled the faceplate off the radio to change LED's as I am looking to match the LCD to the bluish/purple that the newer VW's use. Now the Pre-amps are just going to be a plus!
One thing I can add is what you mentioned being able to power the radio up even with the ignition turned off. This a vw thing and would presume is why this radio has this feature. It is on a timer and will turn off eventually as to not drain your battery.
I and another will probably be interested in one of the pre-amp board when you get around to putting them together.Comment


Comment