

thanks!
-
-
BadCab re-post
NOTE: **ALL** of this info belongs to BadCab, not me. Just doing the community a favor by reposting his content on his thread.
Here is a direct link to the album with the pictures.
BadCab top photos on flickr
Well, i told some of you i would post a top replacment thread/guide so here is part 1.
My niece was able to drop her car off today and sat and sunday look like they are going to be nice weather wise so it is on. I want to get a jump on it so today my goal was to get the old top off and get as much of the old glue off as possible. That is a bear of a job.
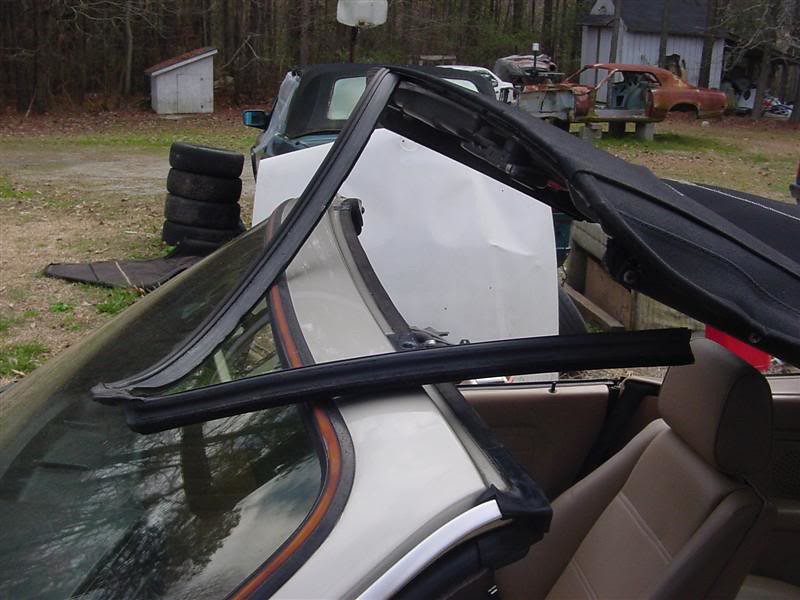
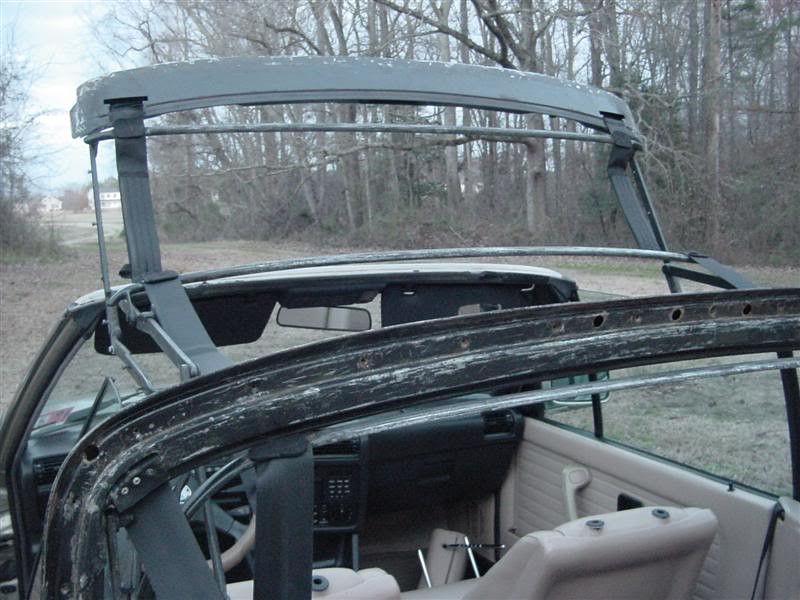
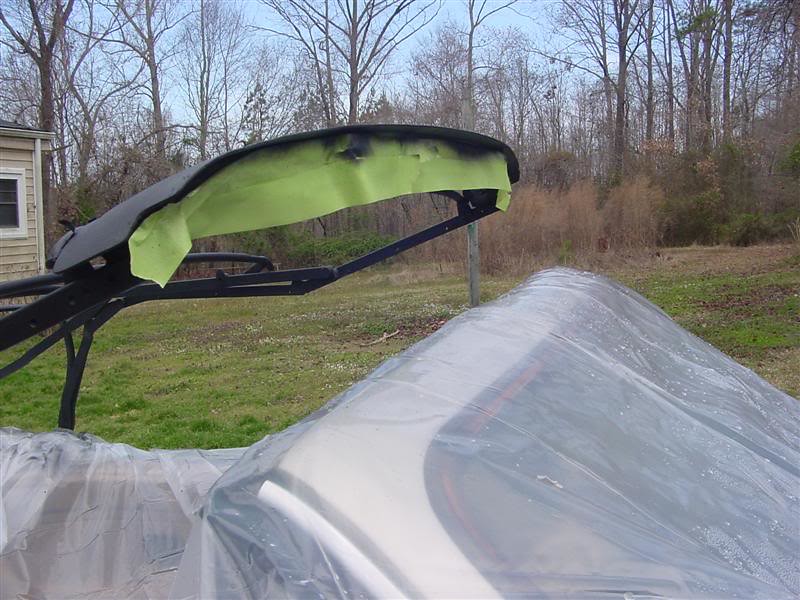
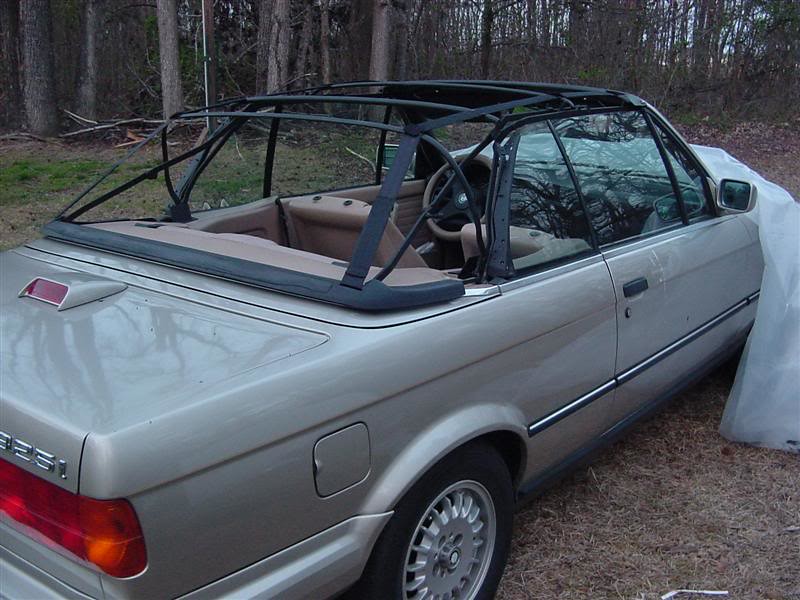
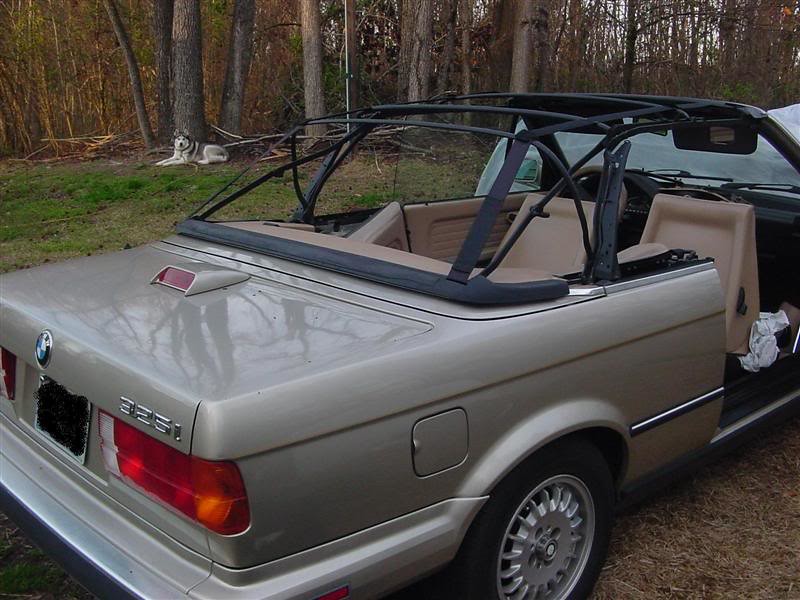
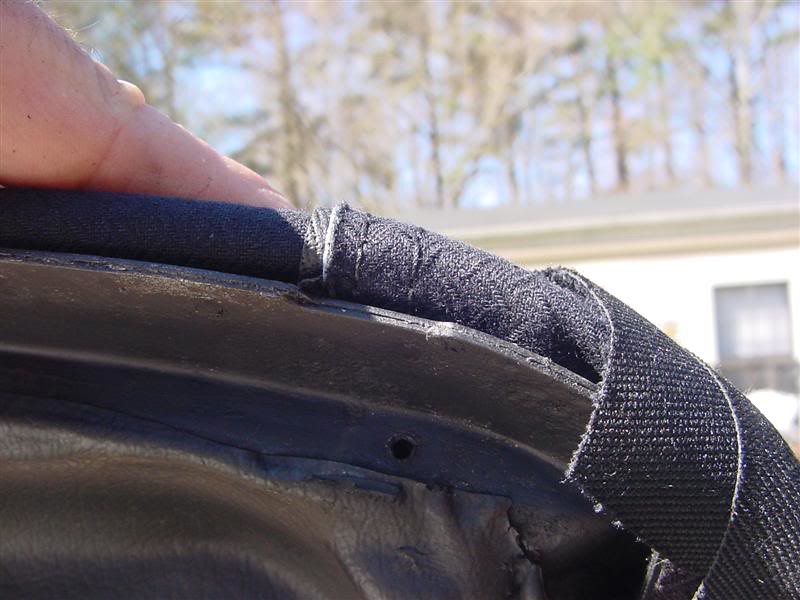
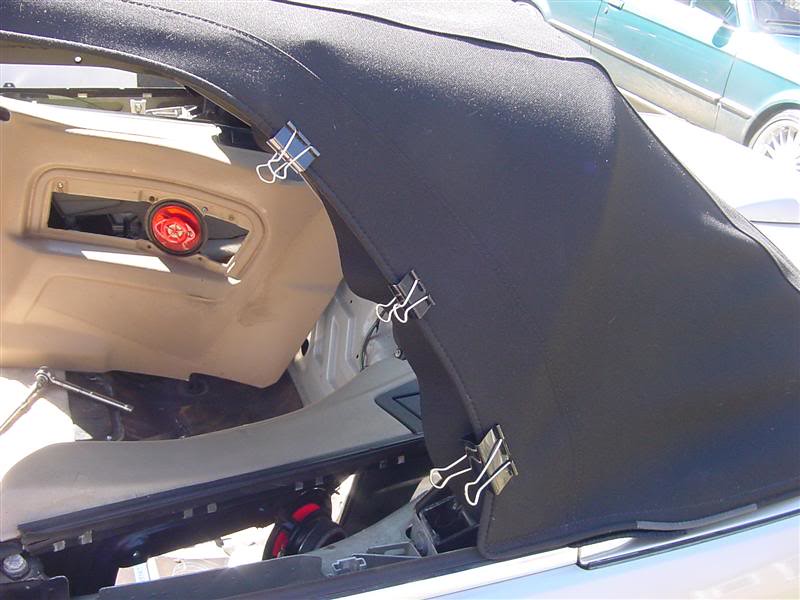
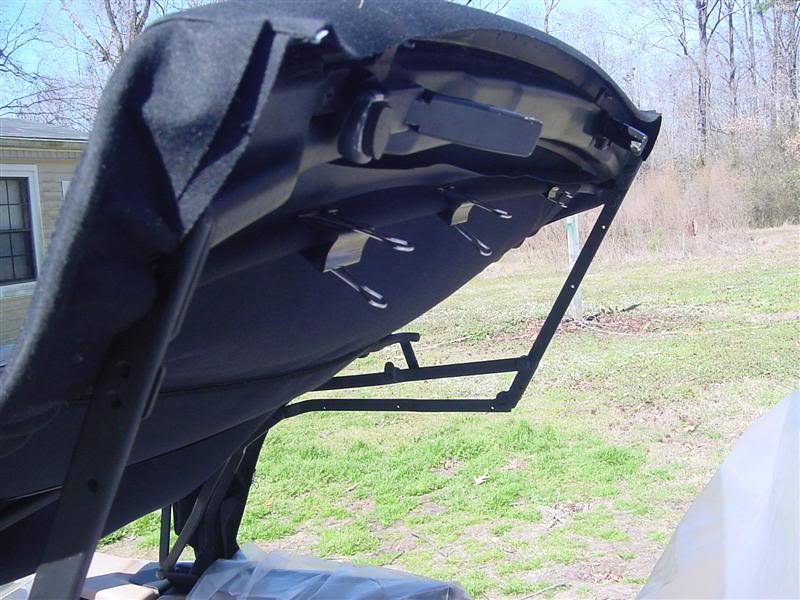
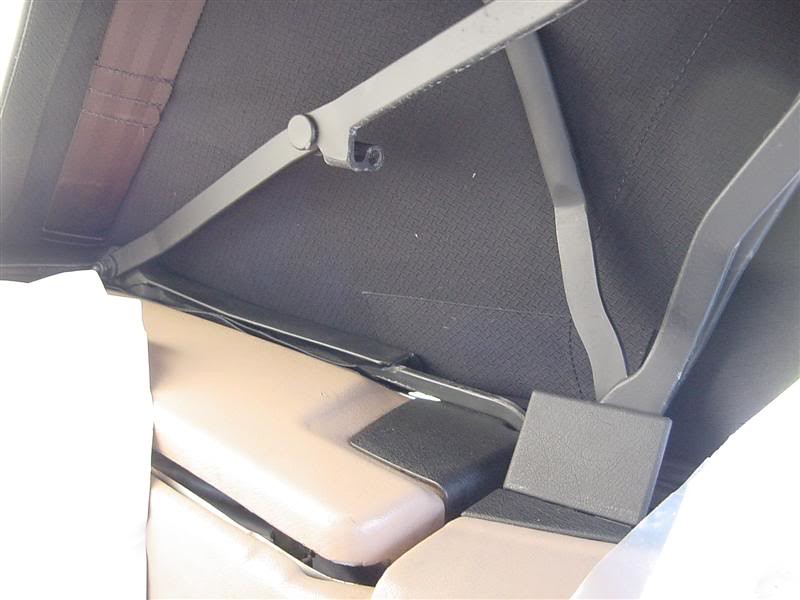
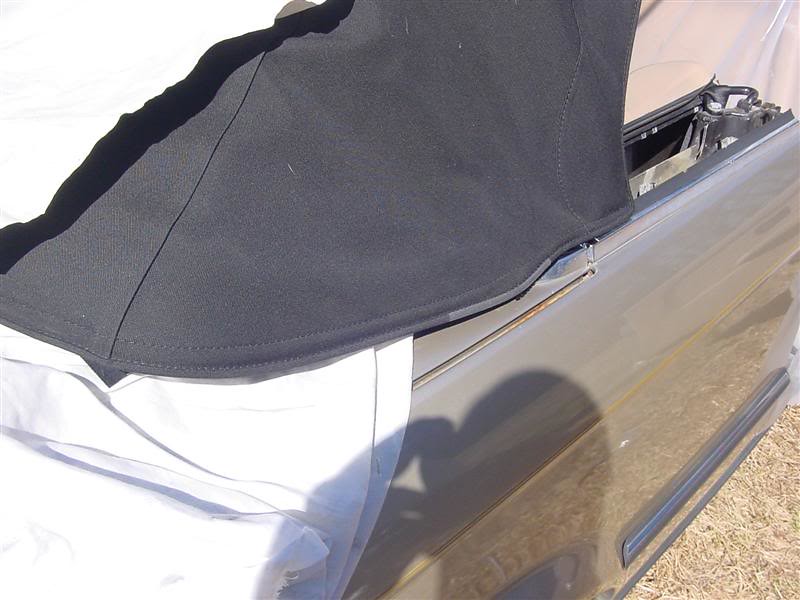
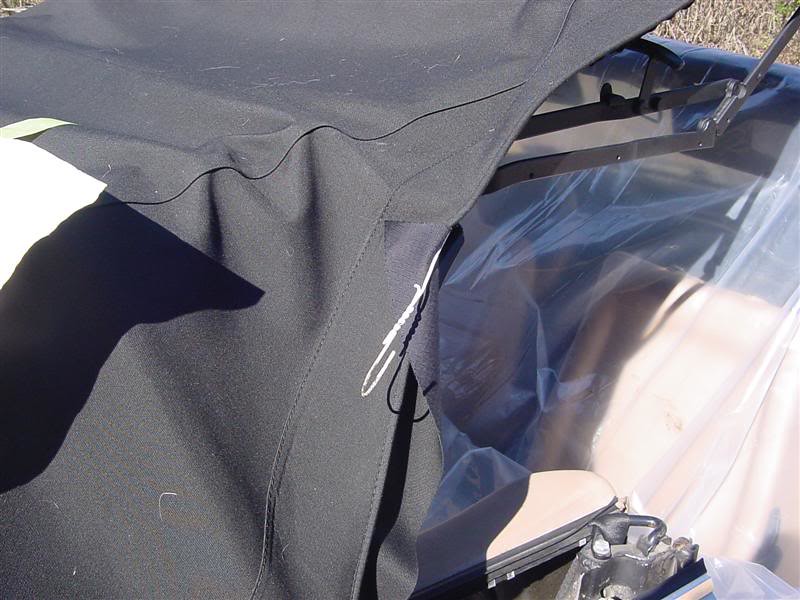
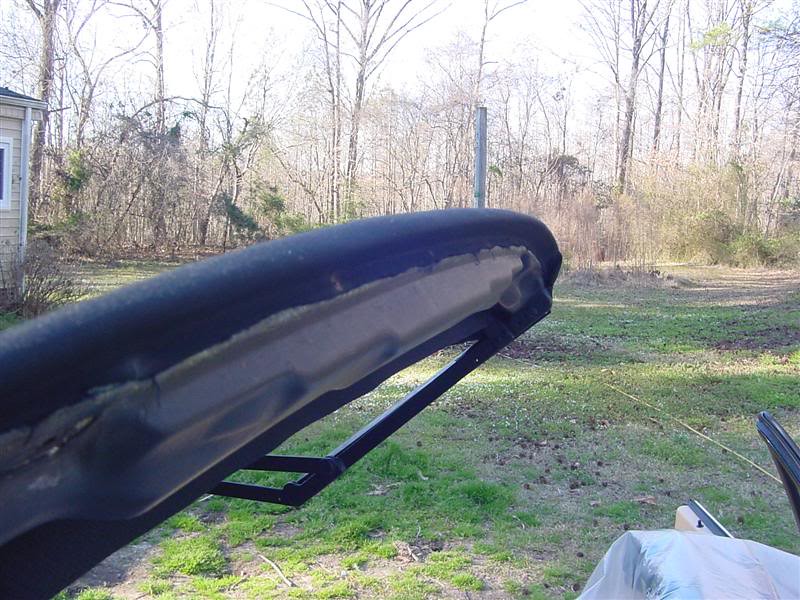
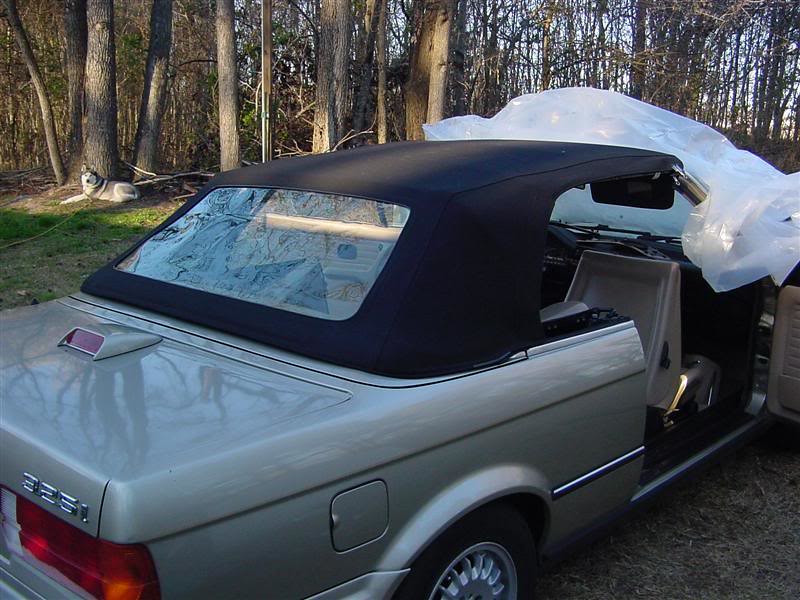
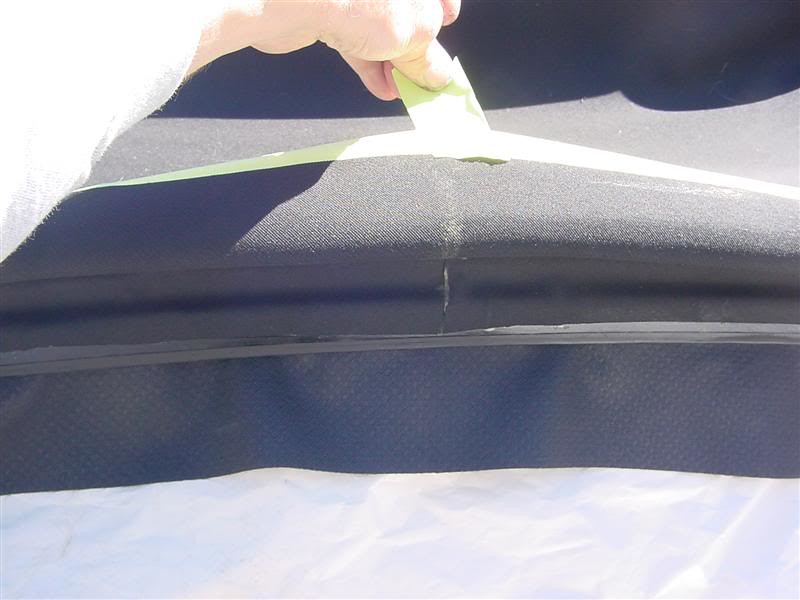
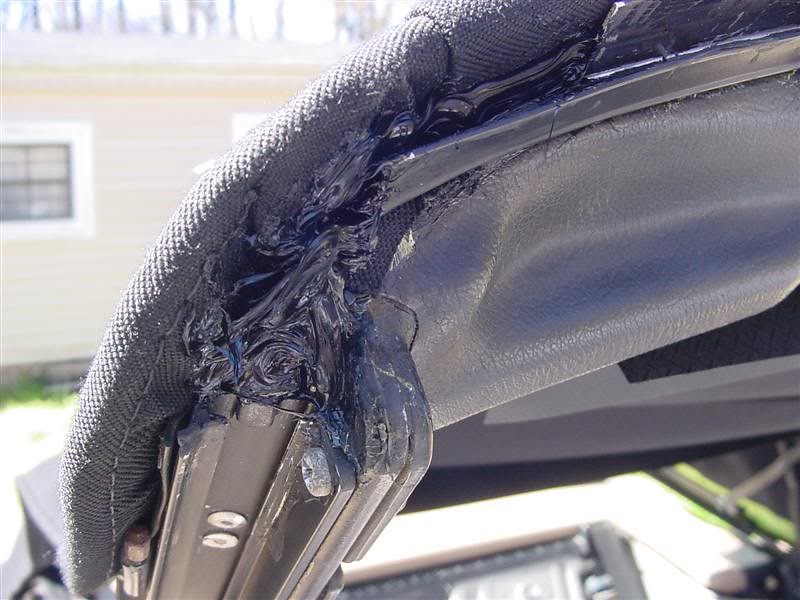
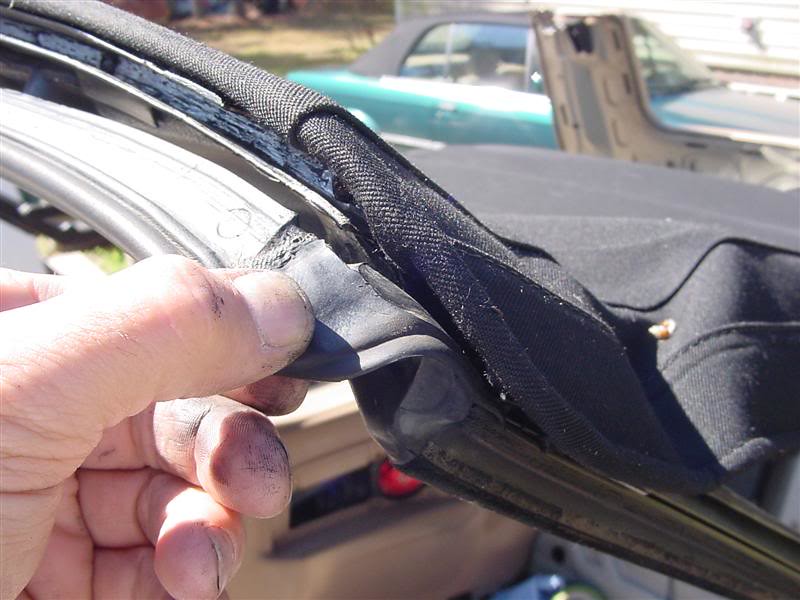
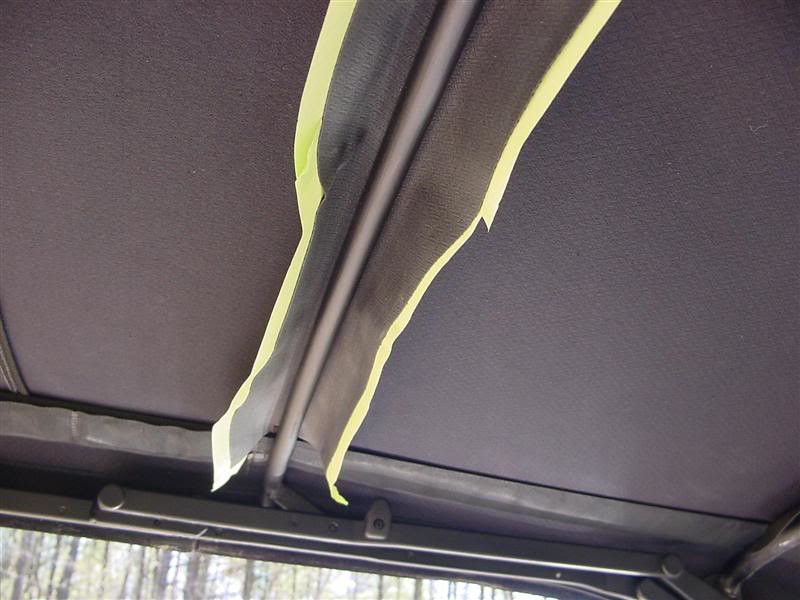
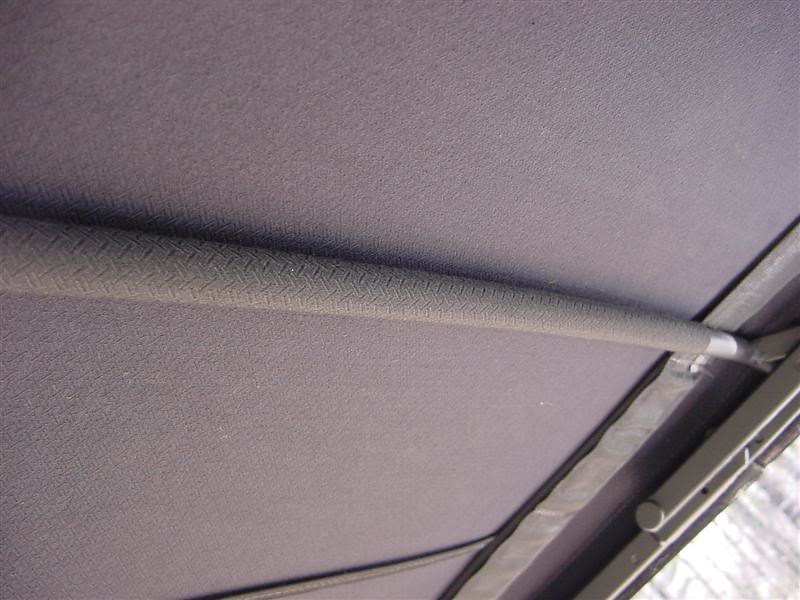
I'll start by showing you the old top to show some issues i have with it other than it's shot. As you can see the rear lower area does not go down far enough to contact the rear compartment door. The seal does so it is a top install issue.
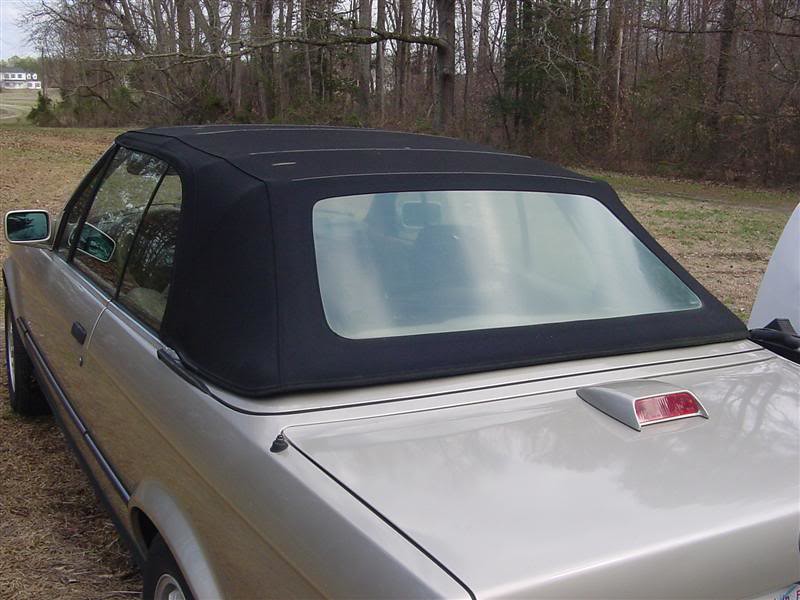
Also the top is too wide. This thing has shrunk and it's still way too big. When i put the car together for her both door windows would hit the top and get hung open. I removed and reattached the front area and shifted the top over so the drivers door window would just clear the top. When its like that the other sides door window hits the top still.
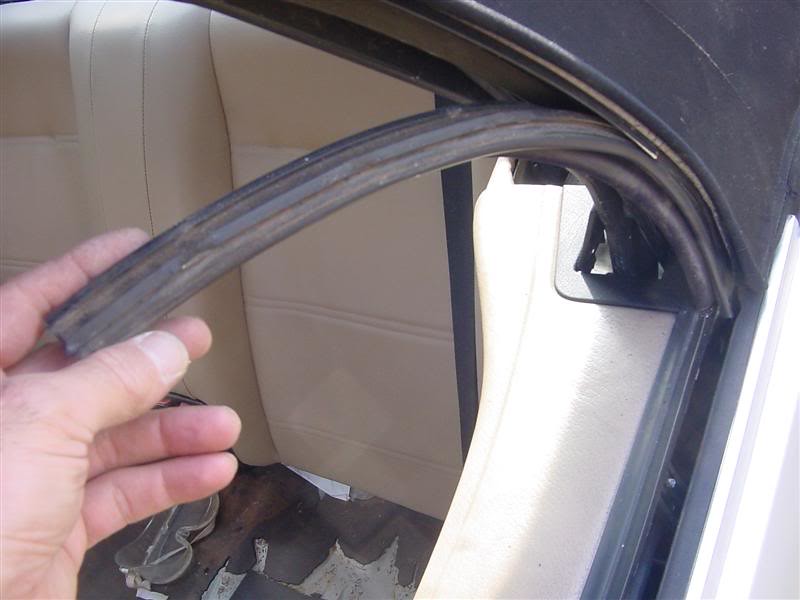
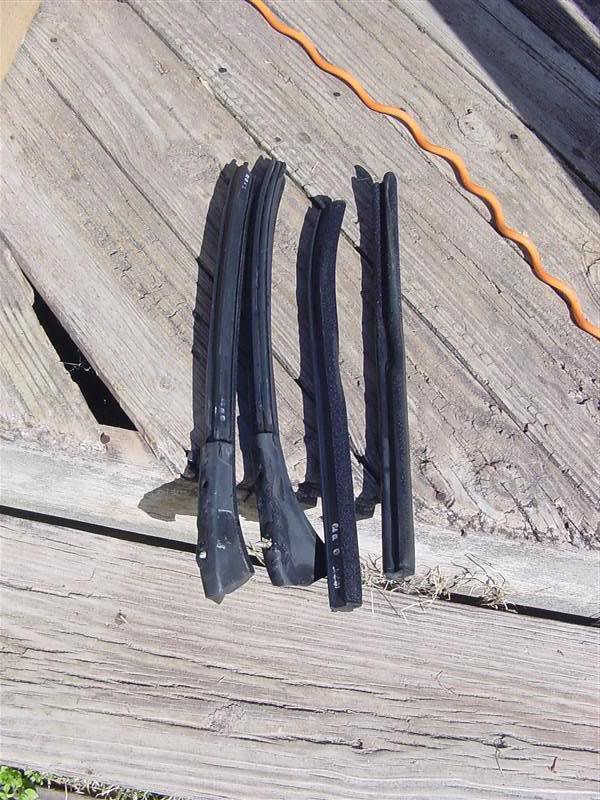
So on to the removal. First thing you should do is pop out the rear seat bottom and let it dry because the top has been leaking. I also pulled the headrests out just to get them out of the way. Then unlatch the top and pop up the front. First seal i take off is the front, pop the end of the seal up and just carefully pull the seal out of the channel.
Again be careful with this seal, do half, set it so it won't fall and repeat for the other side. Set it aside trying not to bend it too much.
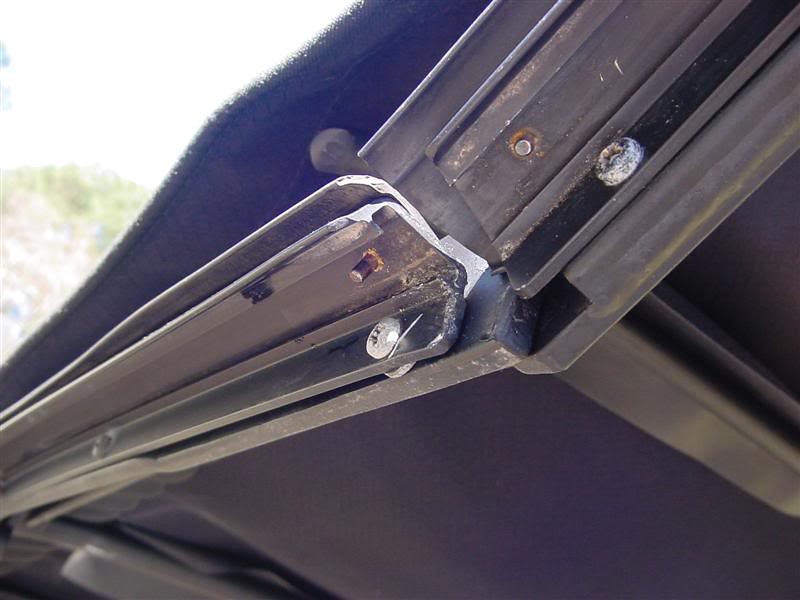
Then i go ahead and remove the middle seal and it's channel. There are 3 screws that hold it and the front most one has a washer used as a spacer behind the channel. Right side here.
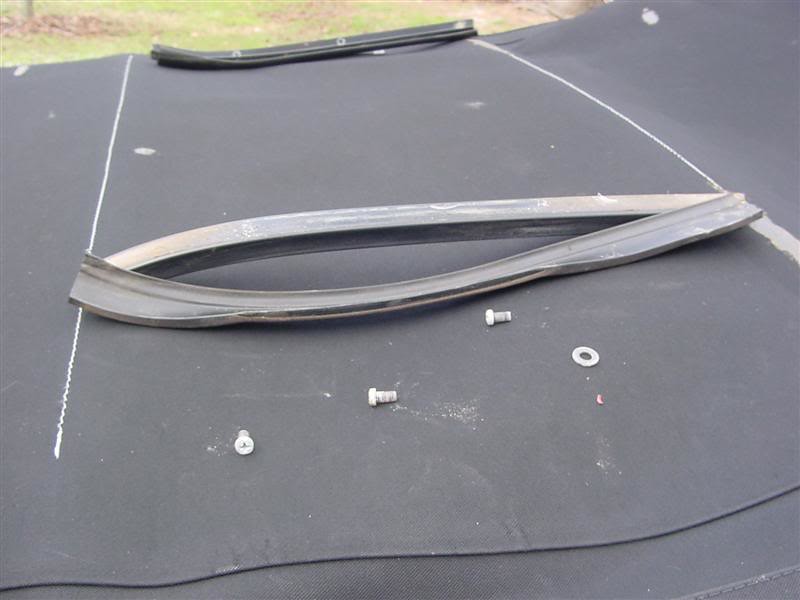
Then i pull off the front channel. Remove the row of screws and carefully pull the channel out.
Back to the rear. This is the pass side rear window guide. At the bottom there is a big philips screw and a rivot above it. When i did my 318 3 weeks ago mine did not have the bottom screws so your mileage may vary. Remove the screw if you have it and drill out the rivot. I used a 3/16" drill bit.
Once you do that you can again pry up the seal and remove it. Then drill out the 3 rivots and remove the channel Drivers side shown.

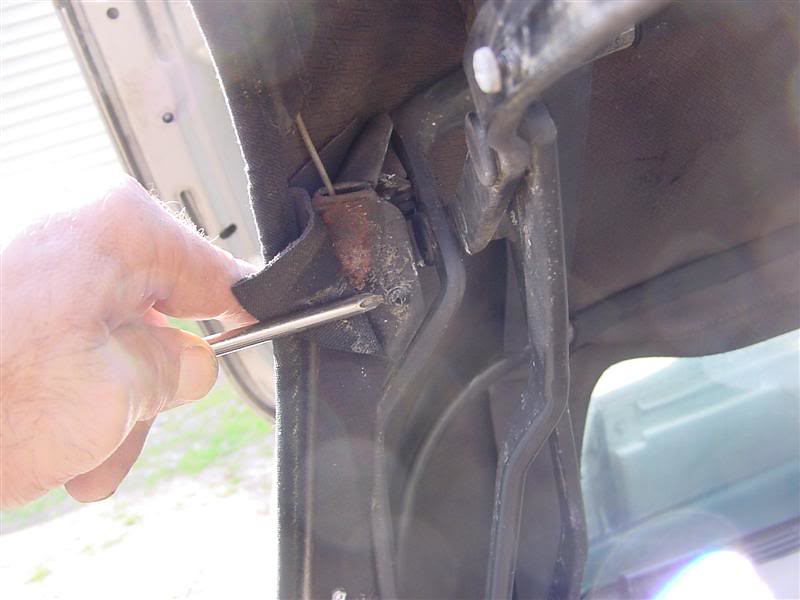
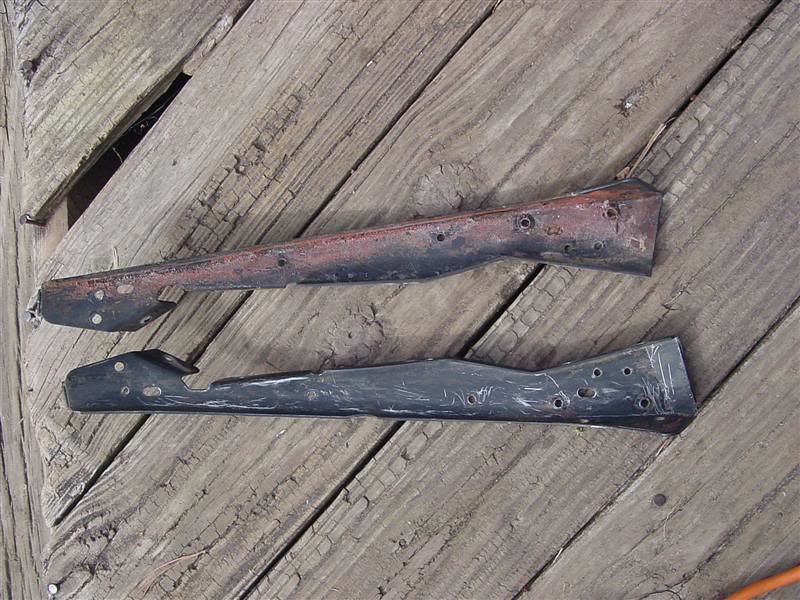
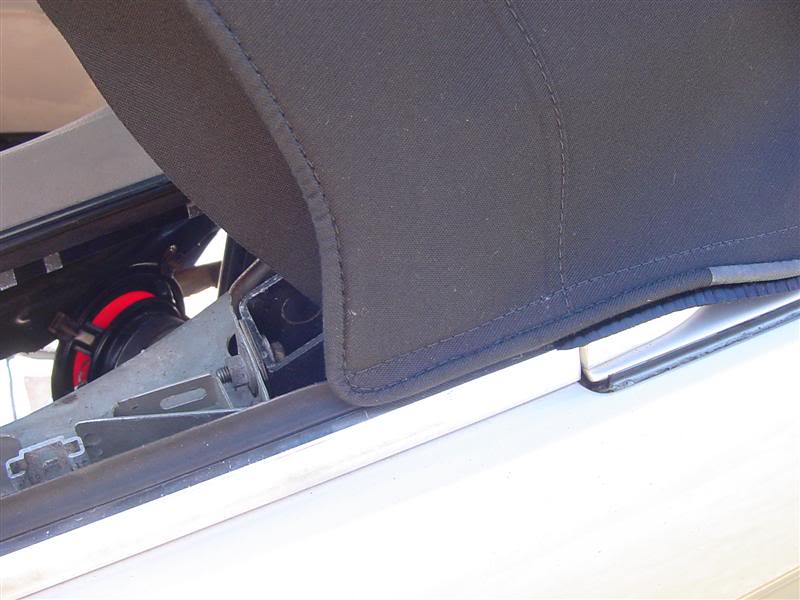
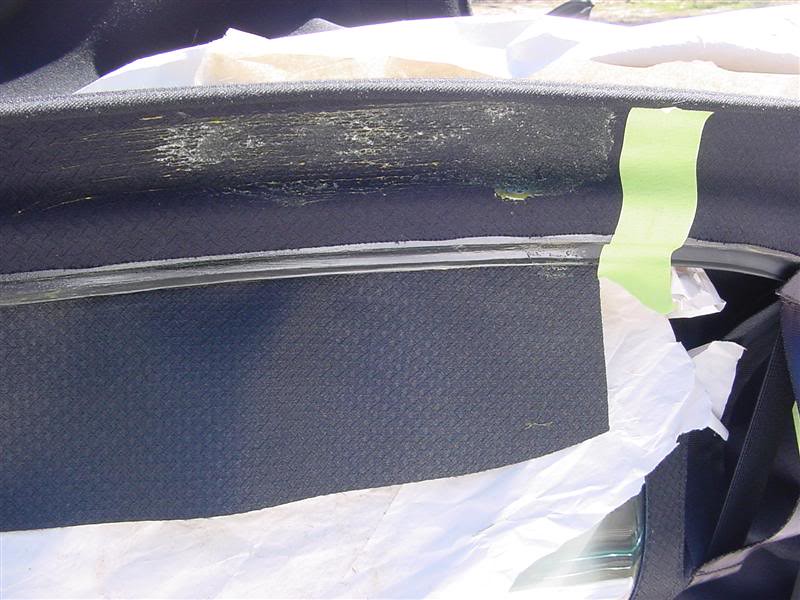
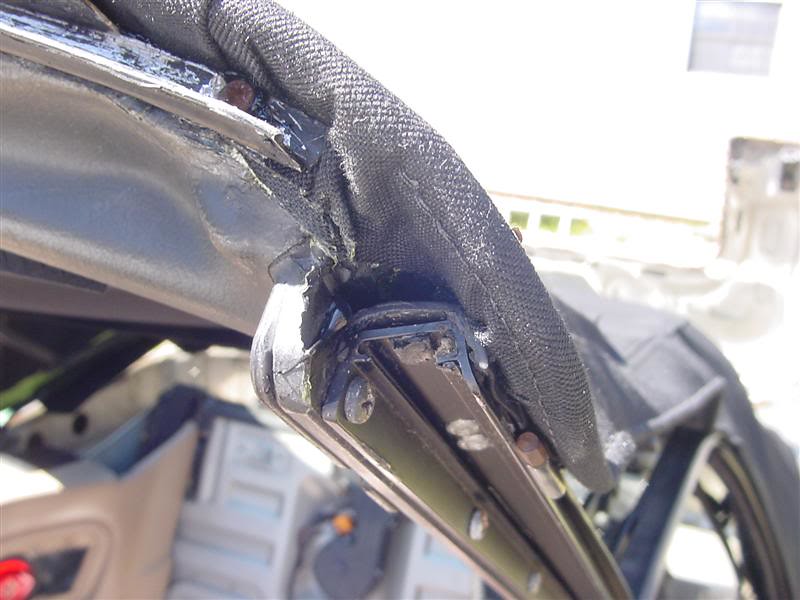
There are these little brackets on the side of the rear window guides. My 318's were screwed in with this kind of setup, this car has 1 of these and three rivots. I'll just put in 4 rivots when i put them back. It is easier to remove these after the top is removed because the screw goes in from the back and can be easy to strip if you try to struggle to do it with the old top still on. I was able to remove this one because the last guy put it in backwards..
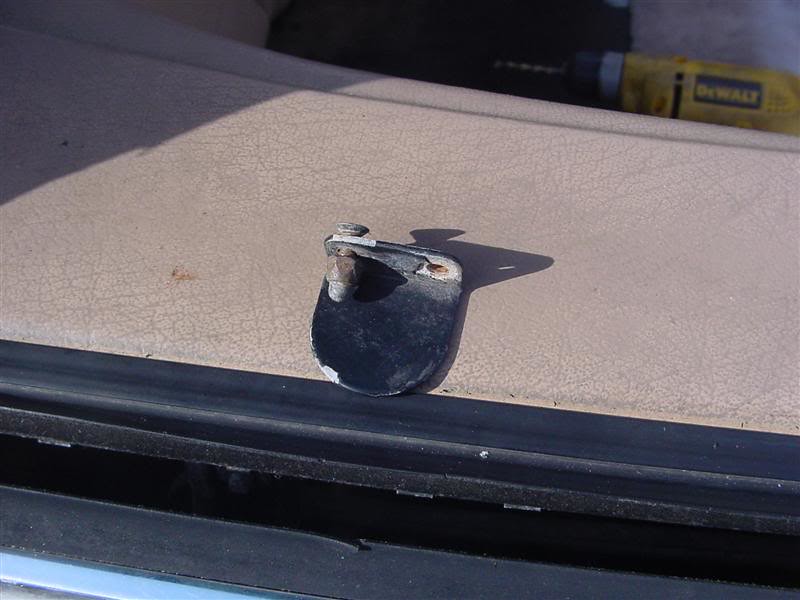
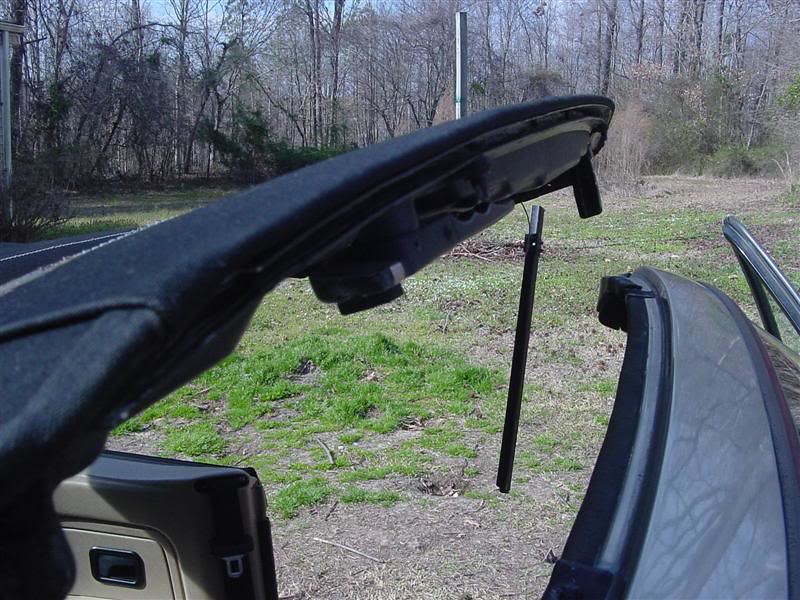
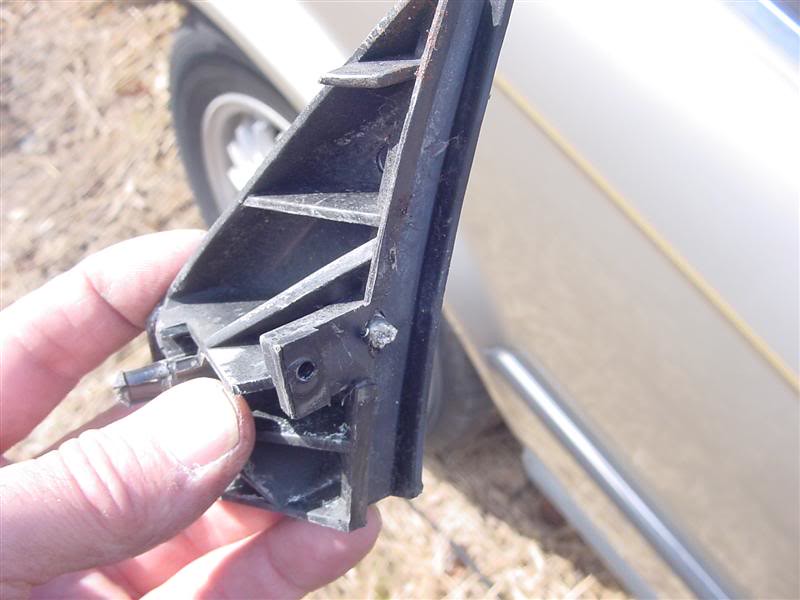
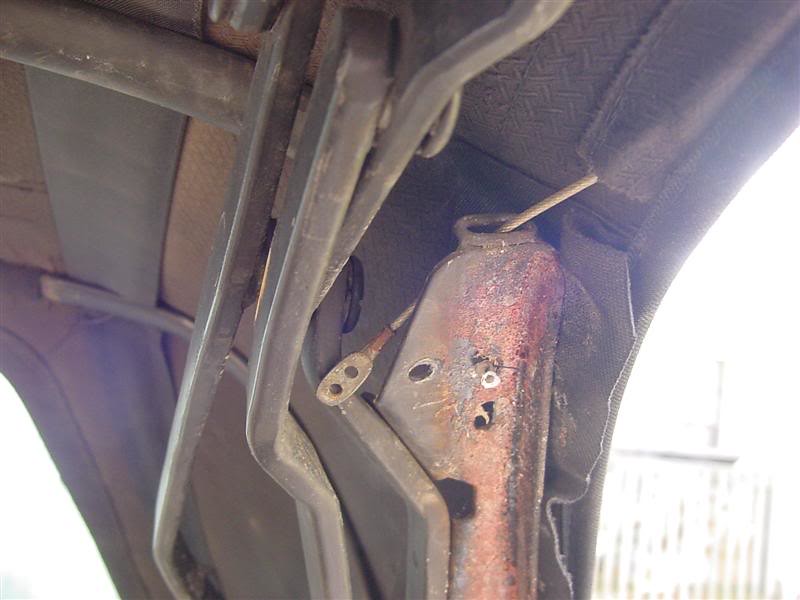
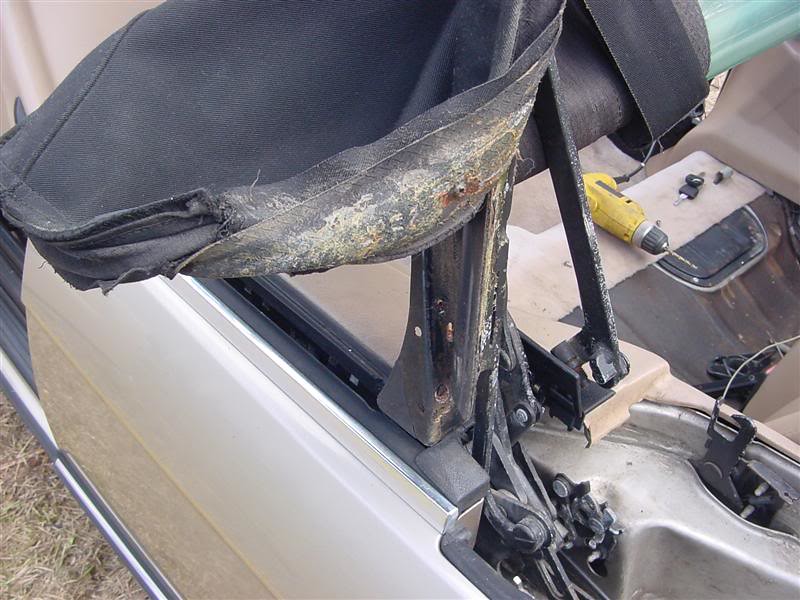
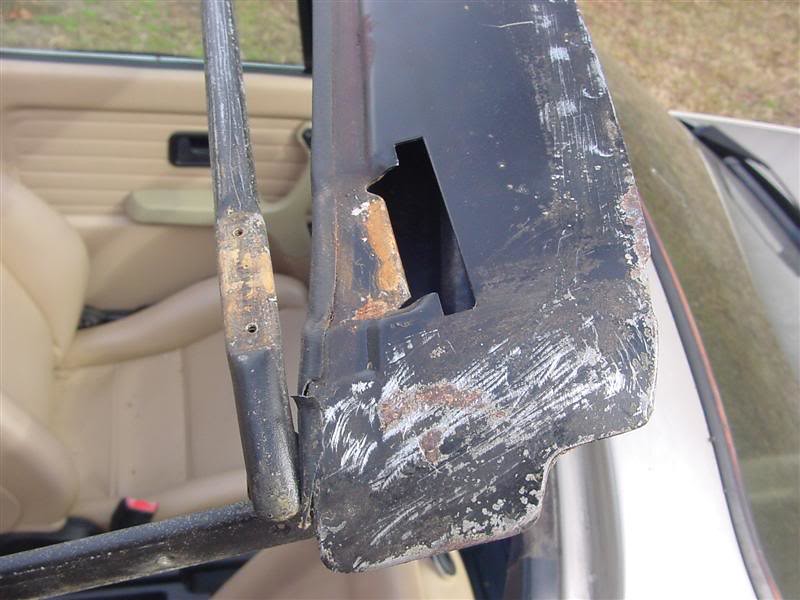
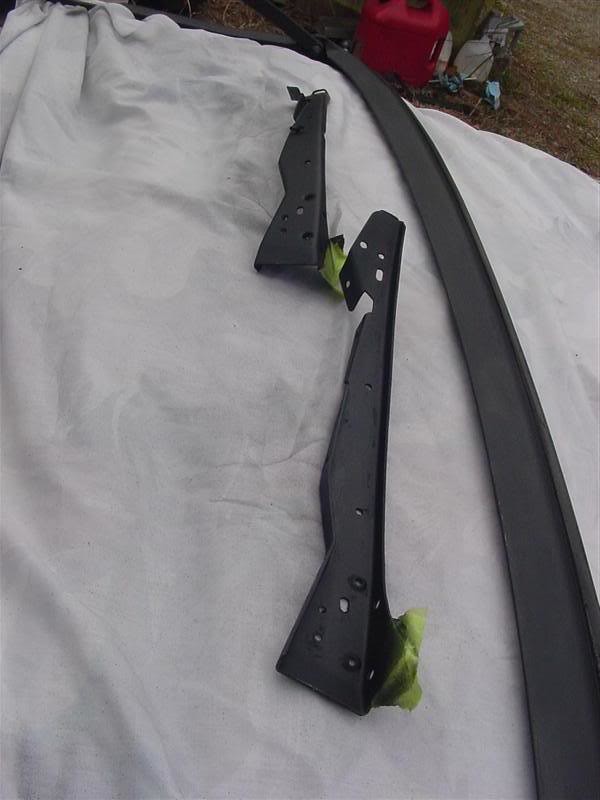
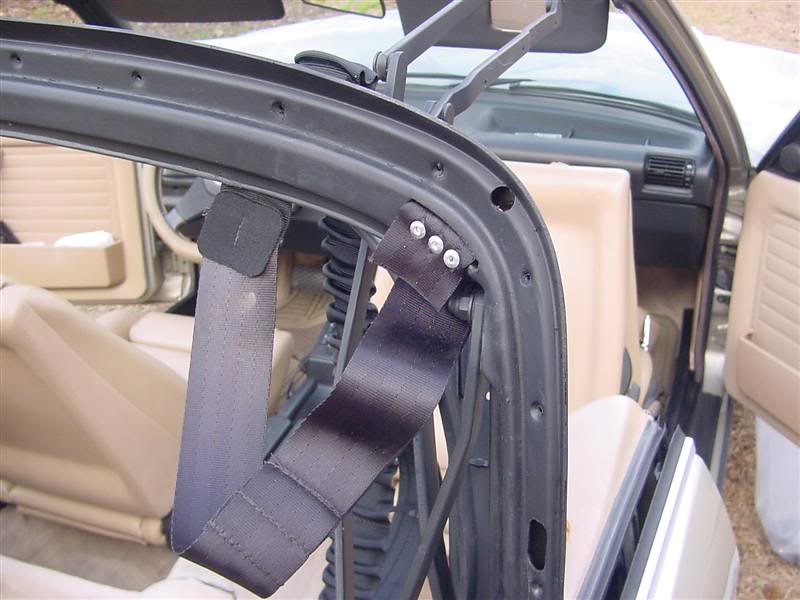
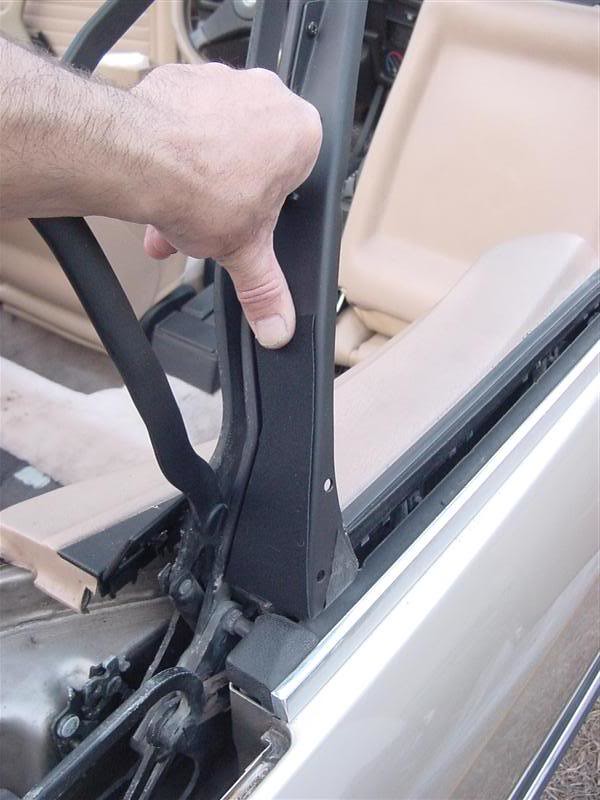
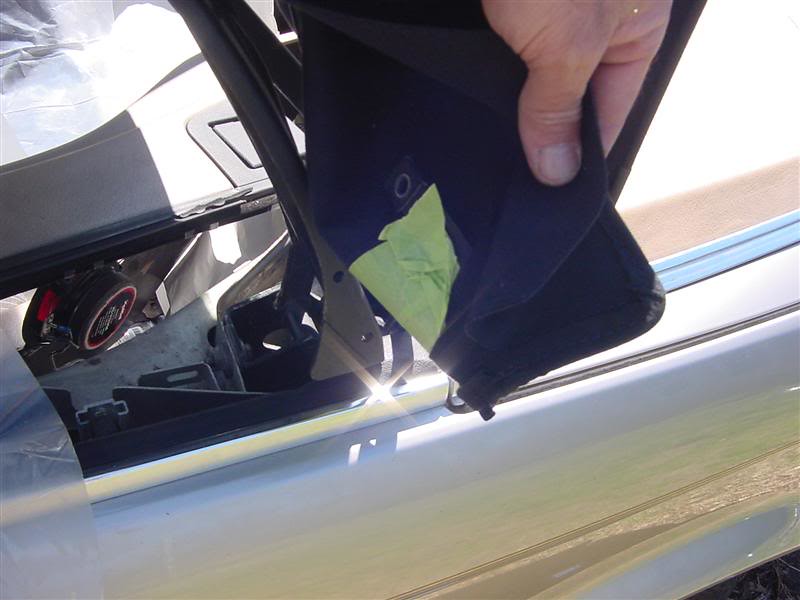
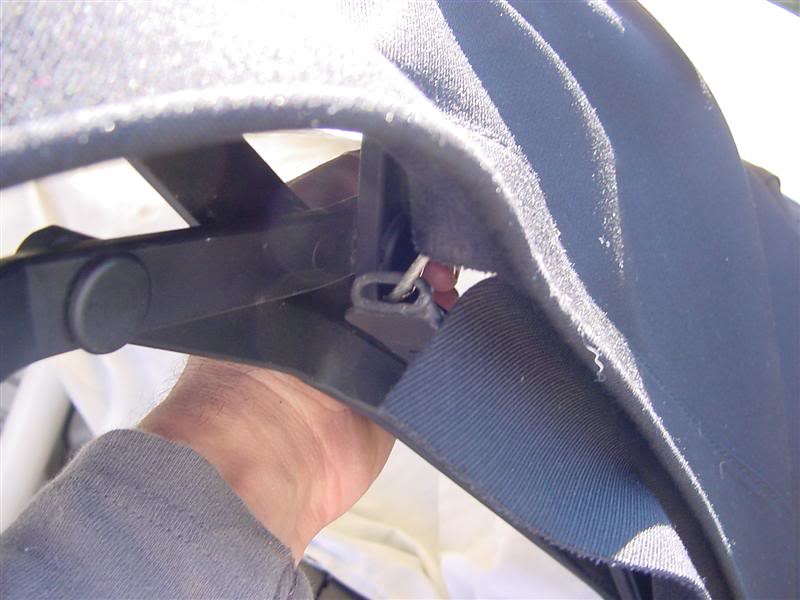
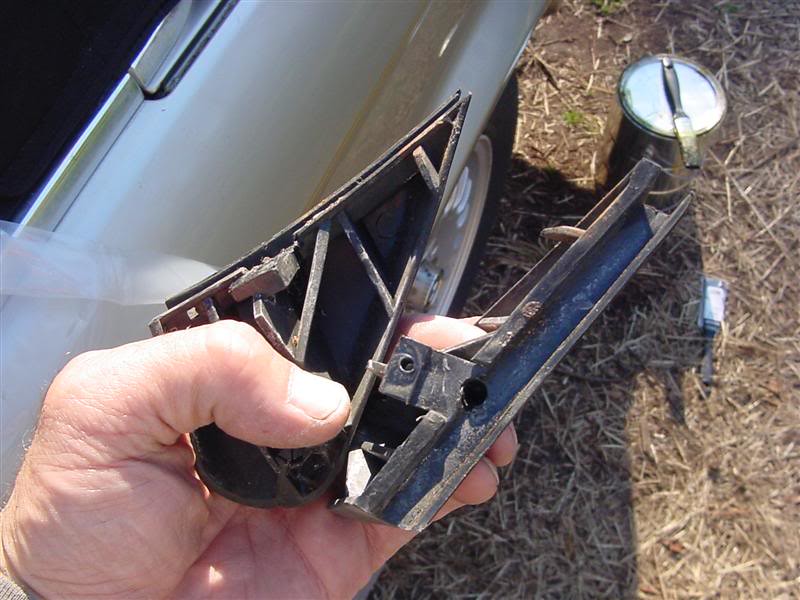
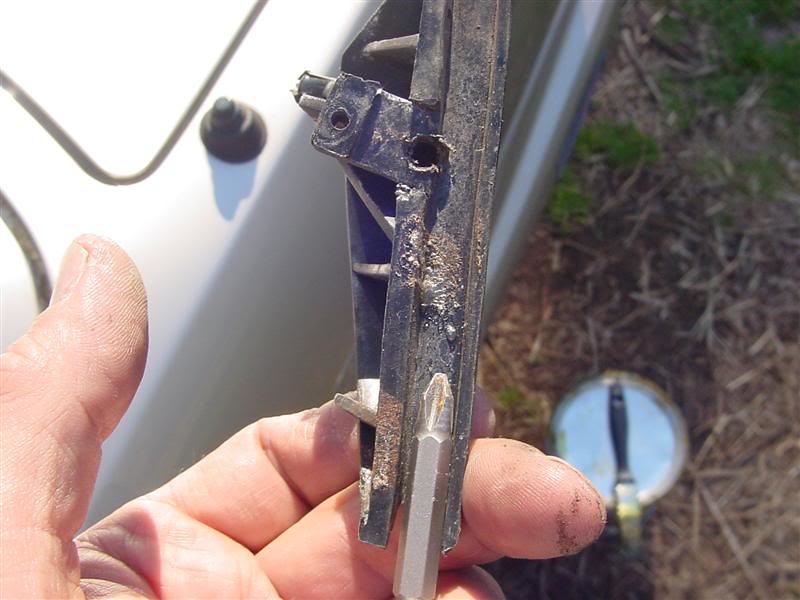
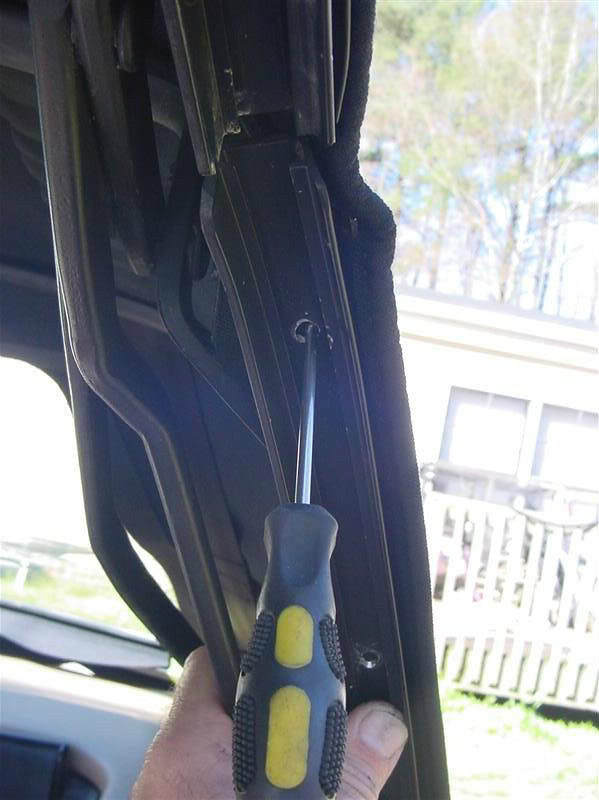
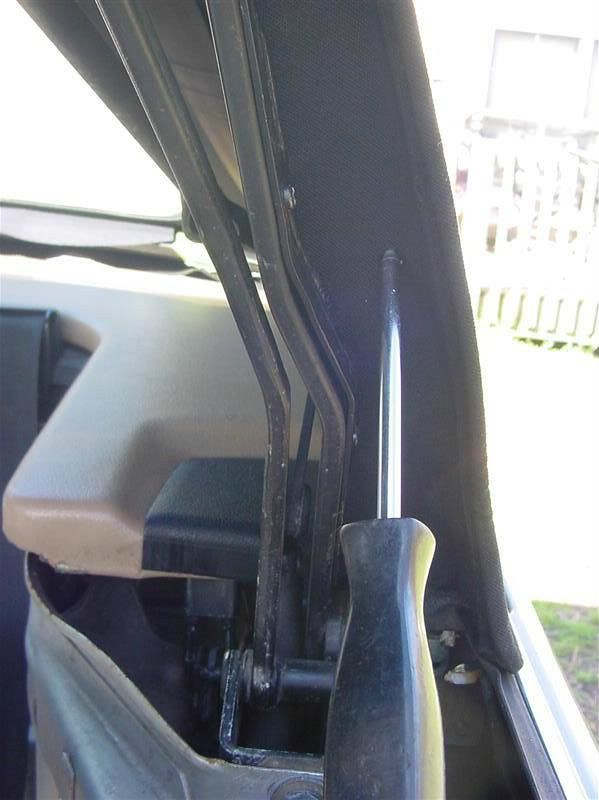
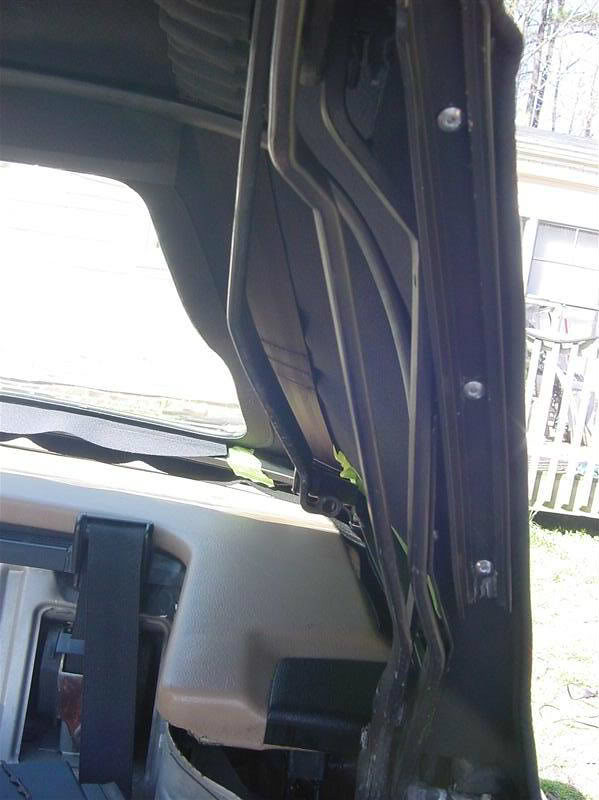
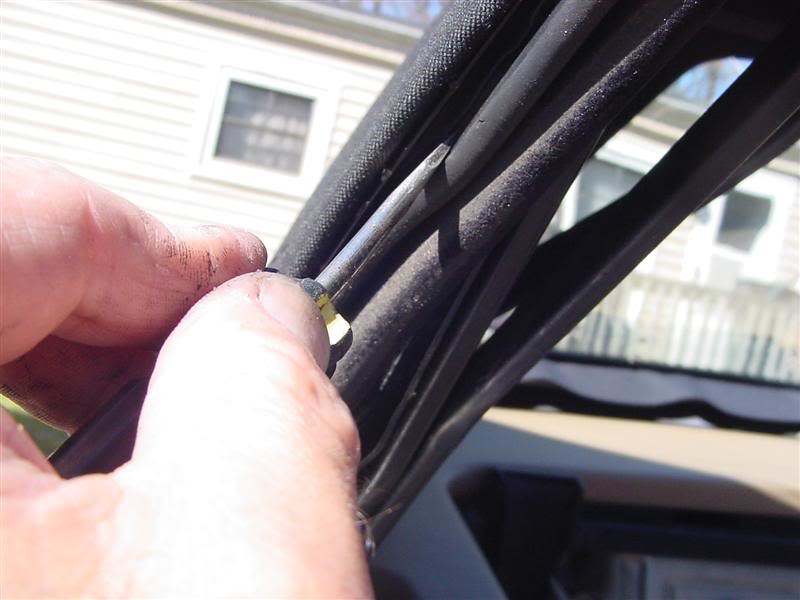
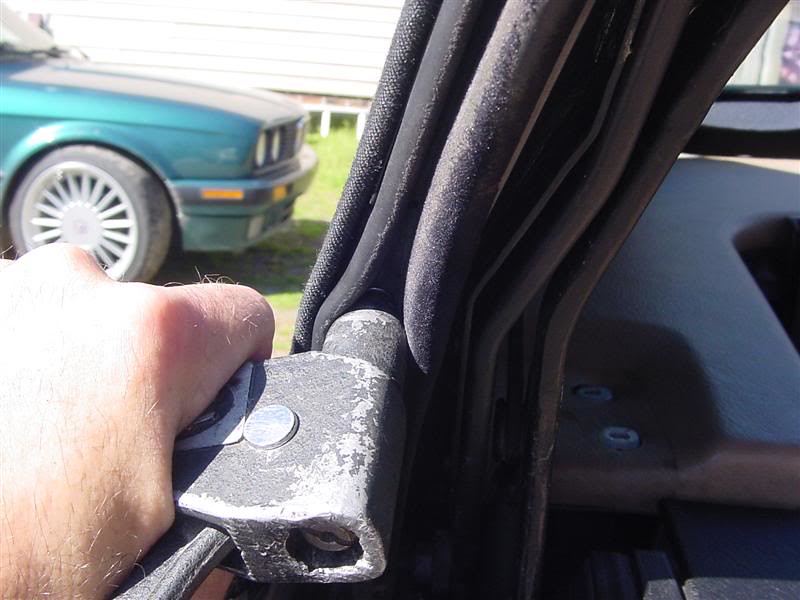
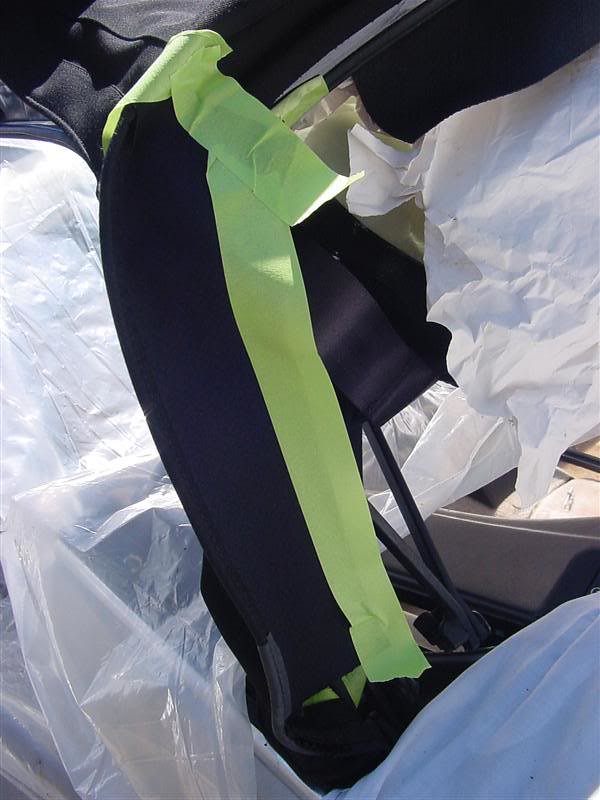
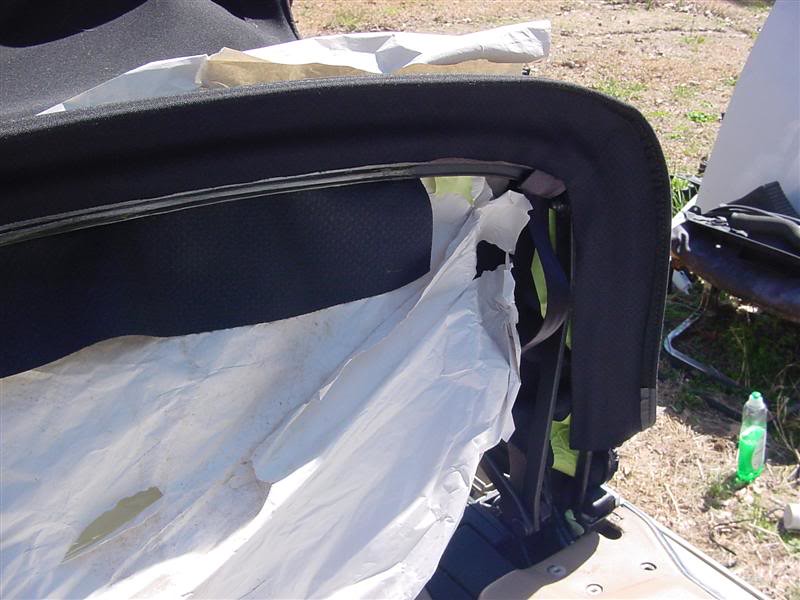
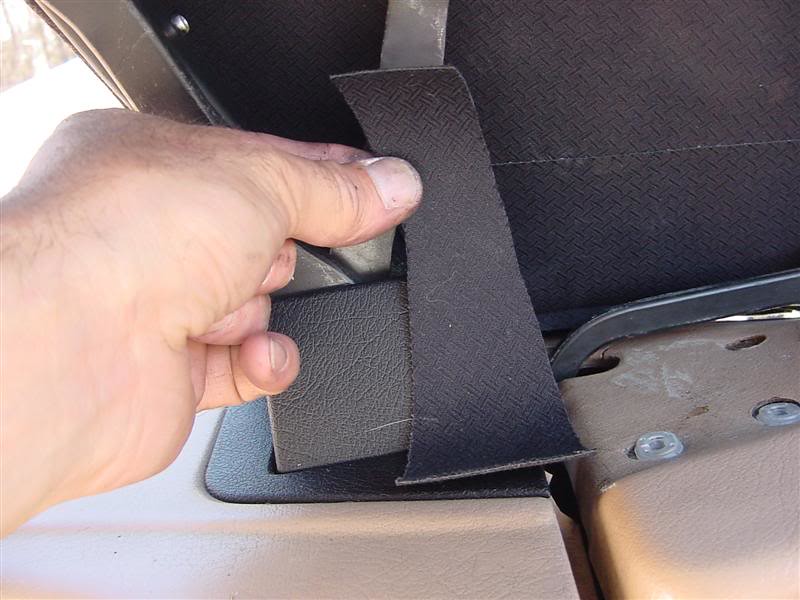
The top corners of the cwafflespillars have triangle looking plastic pieces that the side cables run under. I remove this screw.
Then while pulling the top open a bit and pulling the triangle piece's upper pin out of the hole you can push out the triangle part. Hard to see here.
This is what the part looks like. I am holding it upside down. The last guy didn't remove these and didn't remove the old rivot so his rivot was rivoted to the bigger one behind it.
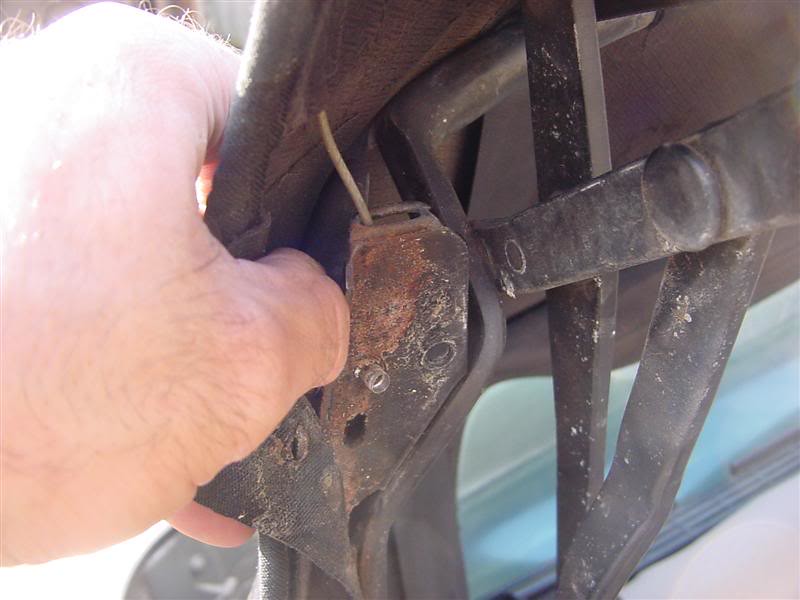
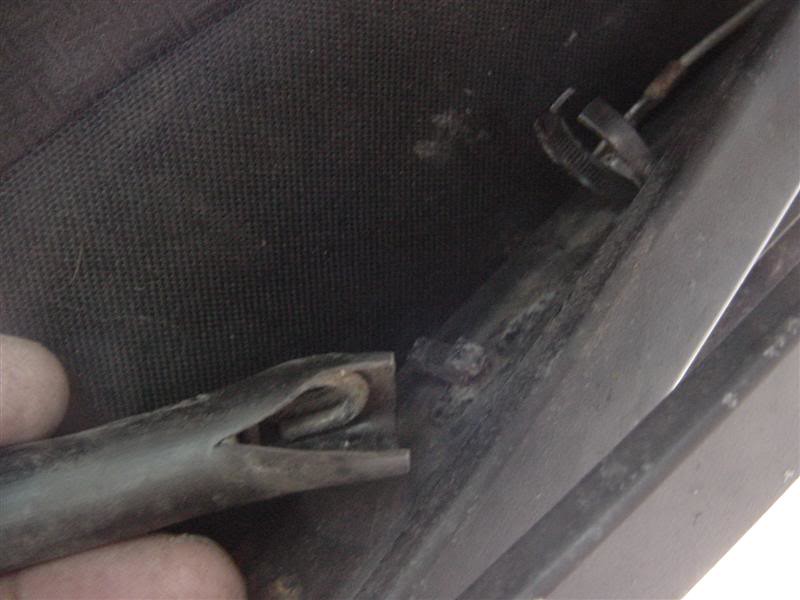
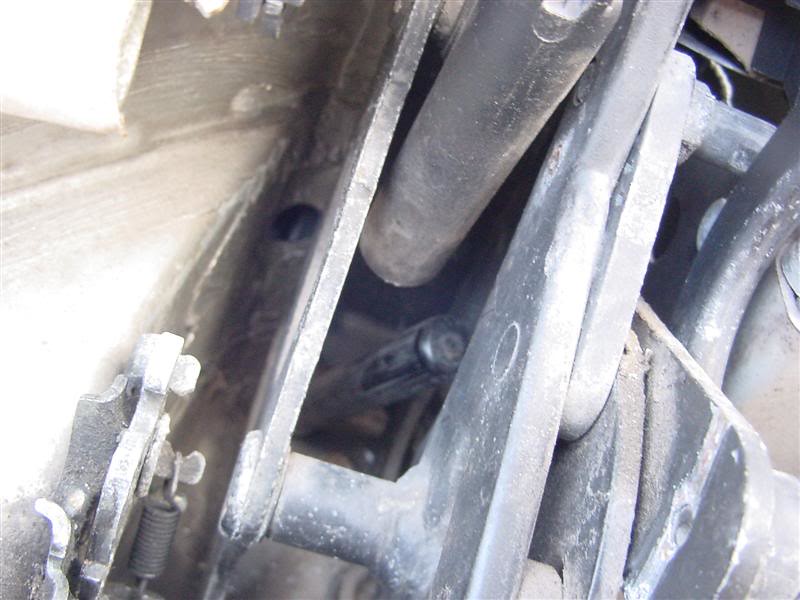
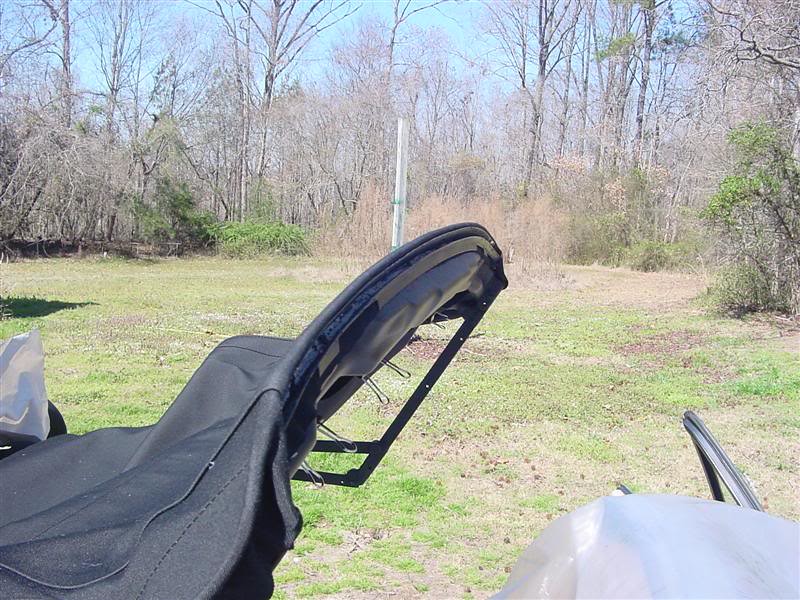
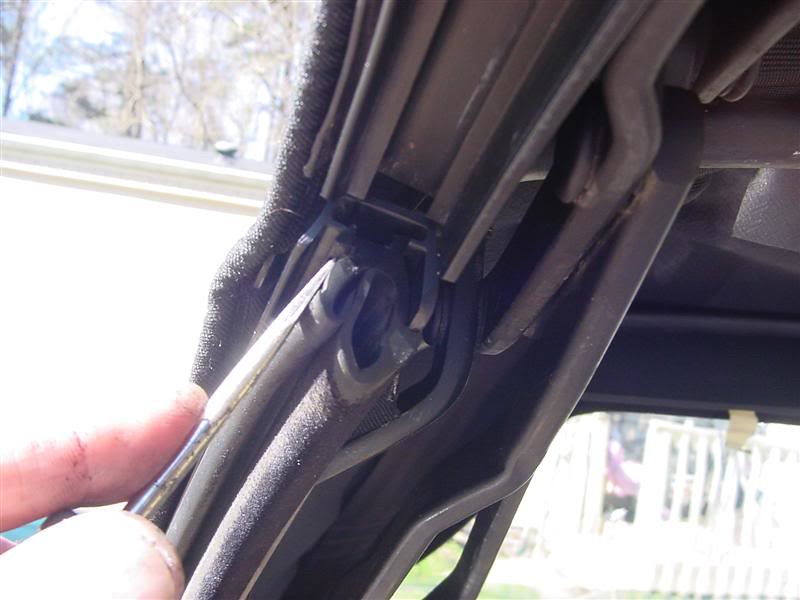
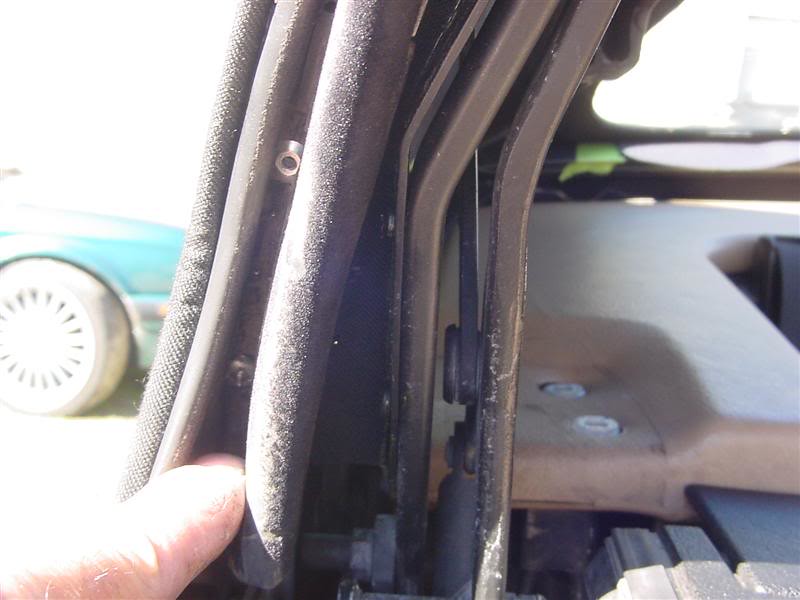
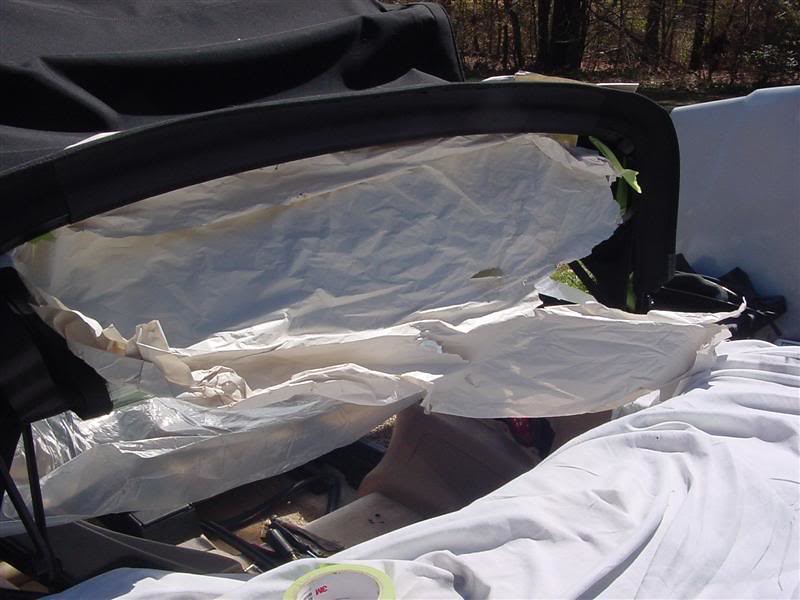
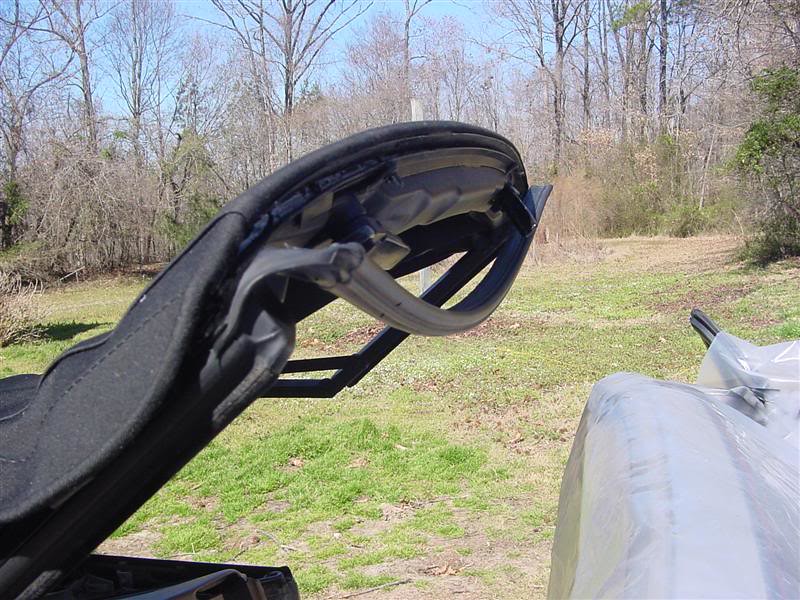
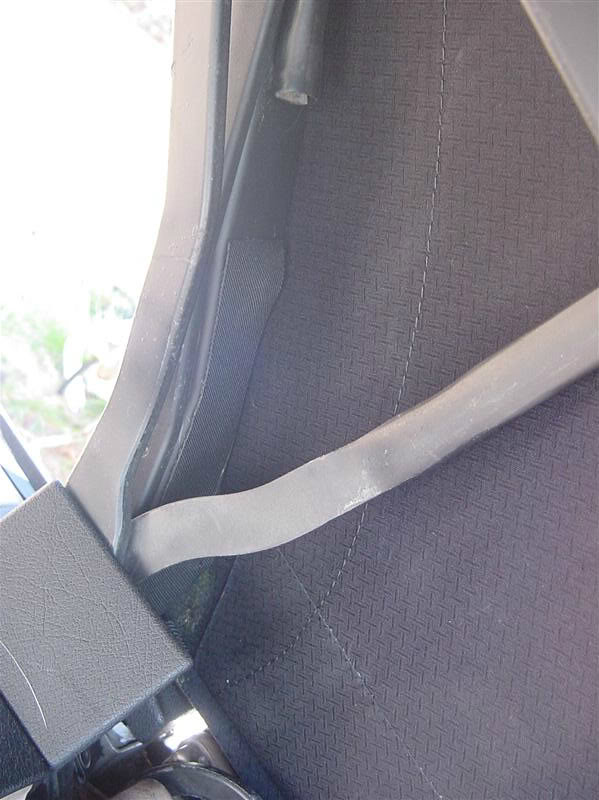
Now with the top pulled back you can easily access the rear part of the side cable .
 I BUY/SELL REFURBISHED CM5907s & CM5908s
HOWTOs:
DB vert plastic bumpers
OEM Keys
MTech1 docs
88 ix Lach/Card
91 ic Calypso 3.1
86 Cosmo 2.7
OEM+ or bust!

reelizmpro: I will always be an e30 guy.. I still do all of my own labor
TrentW: There's just something so right about a well-built M20 in an E30
e30m3s54turbo: I save my money for tuner parts.Comment
-
BadCab content
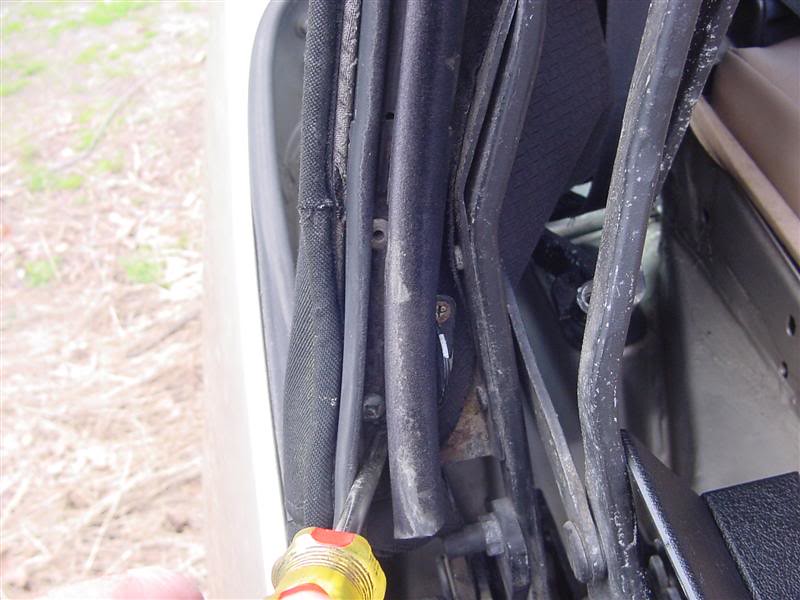
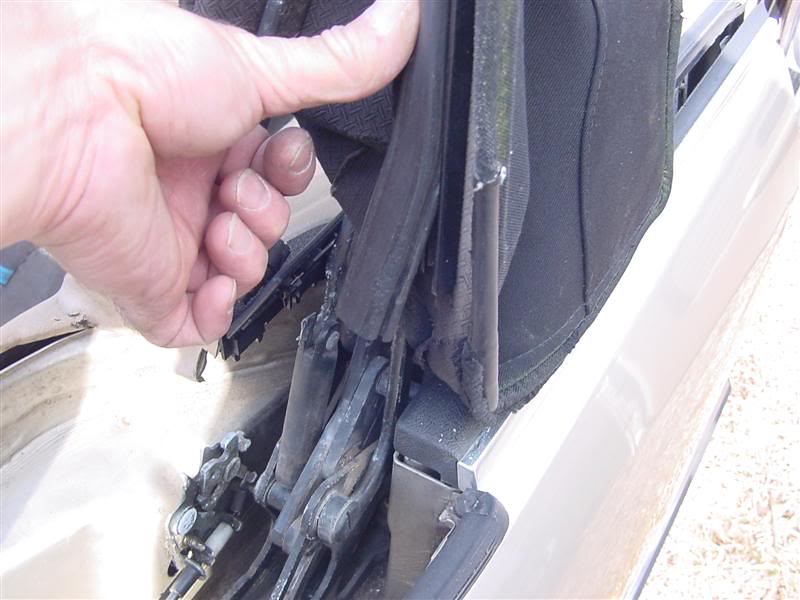
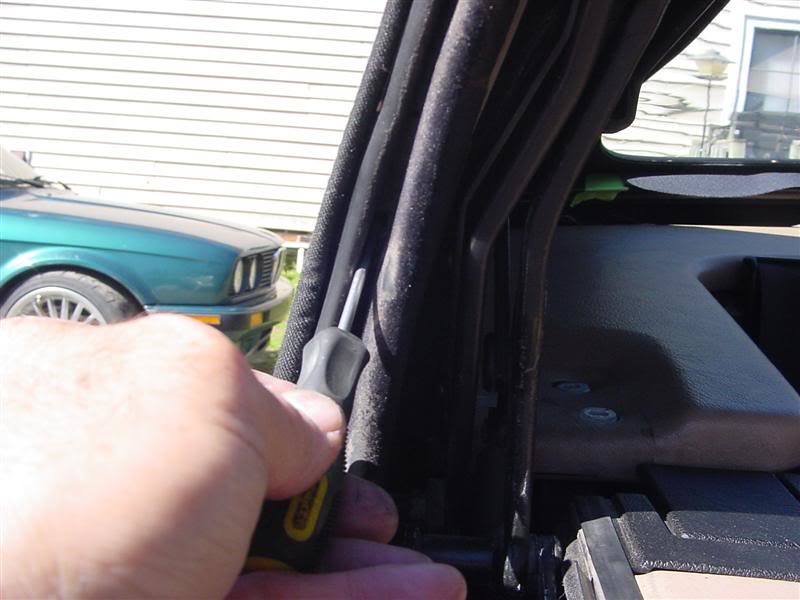
Now unscrew the front seal side channels. There are 4 screws on each side. The right side channel on this car had been opened up where the side cable is held by the last guy and i never closed it for fear of it breaking.
Left side is fkd up so my parts car will donate it's channel.
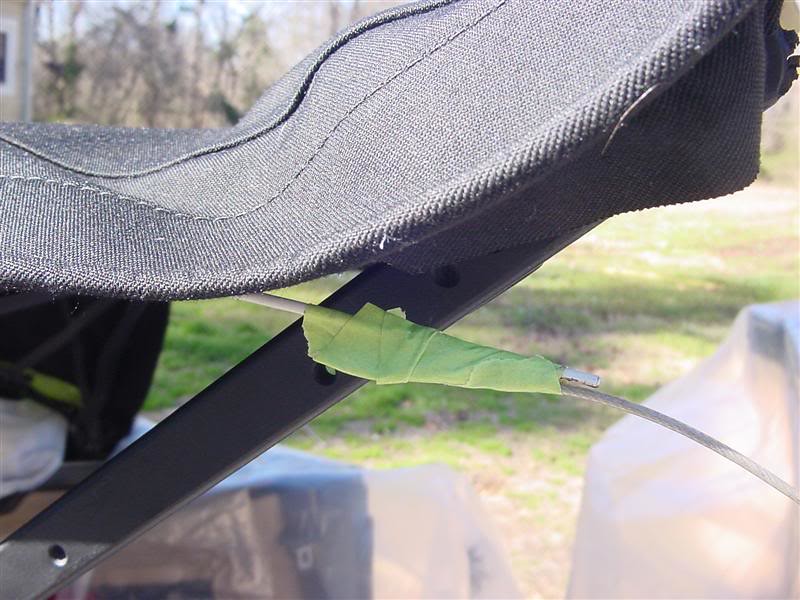
Once the front channel is unscrewed we are back here. Pull the top back a bit. You will need to cut the wire tie holding the side cable spring assembly down, then twist the spring 1/4 turn and remove it from the T mount on the frame.
Here is what it looks like, the t goes through the spring end and the plastic sheath.
With that done remove the spring from the cable and now you can slide the cable and channel out without messing the channel up. The cables were OK on my car and this one so no need to remove the cable from the front channel. If your cables are shot and are replacing them you might want to consider getting new front channels. Opening up those tabs that hold the cables just messes them up. No real other way around it. You may get one or 2 bends out of it before it looses integrety. Use your own descretion.
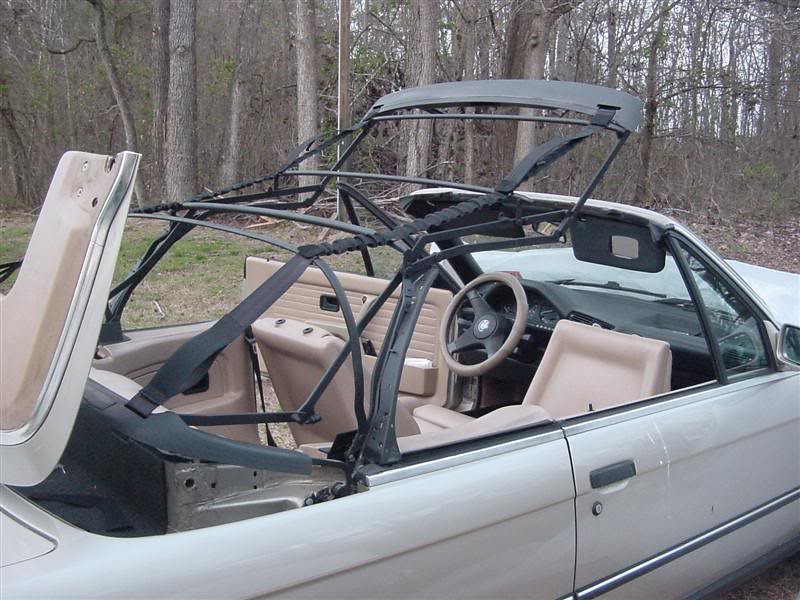
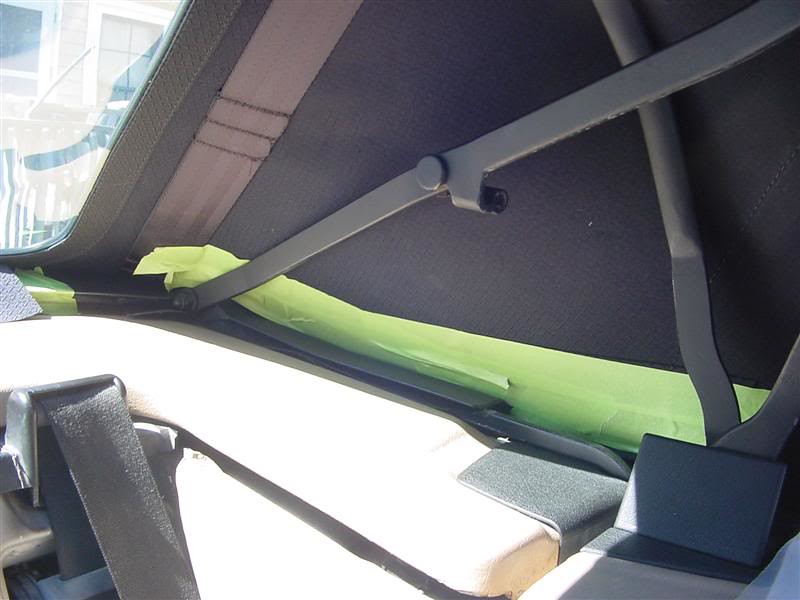
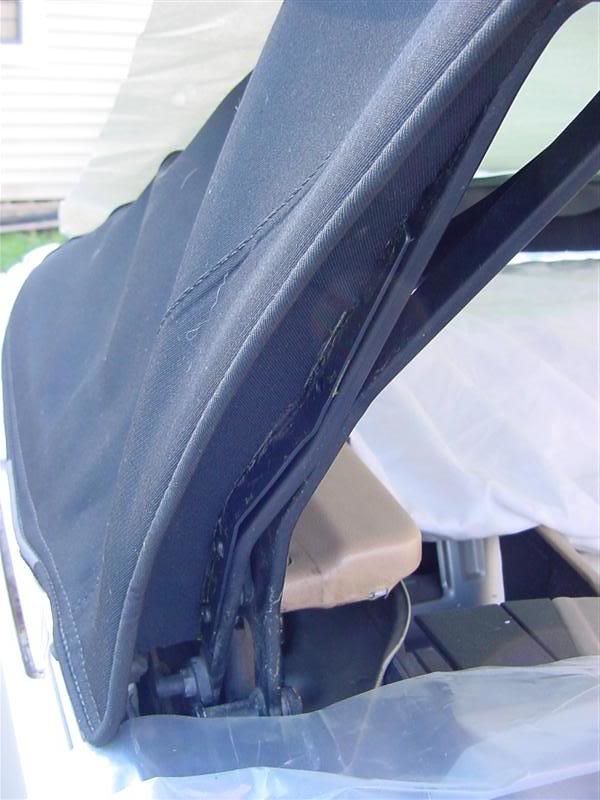
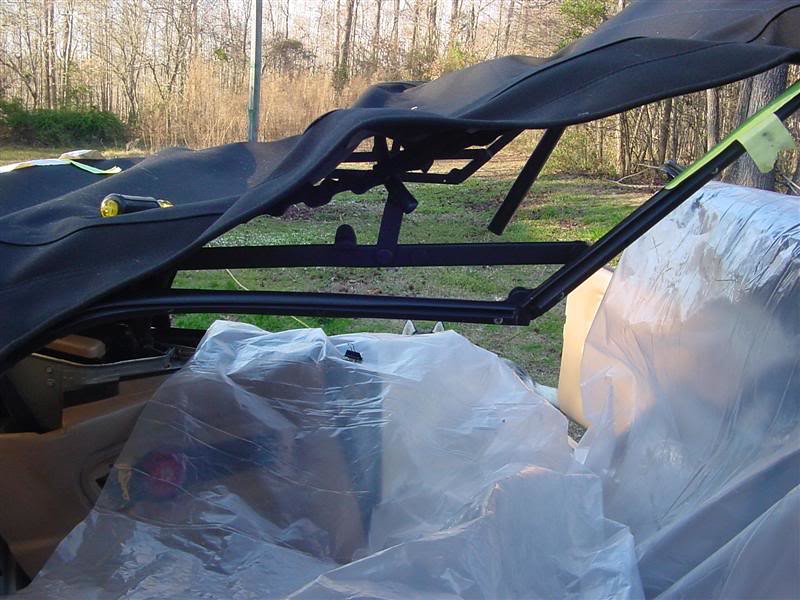
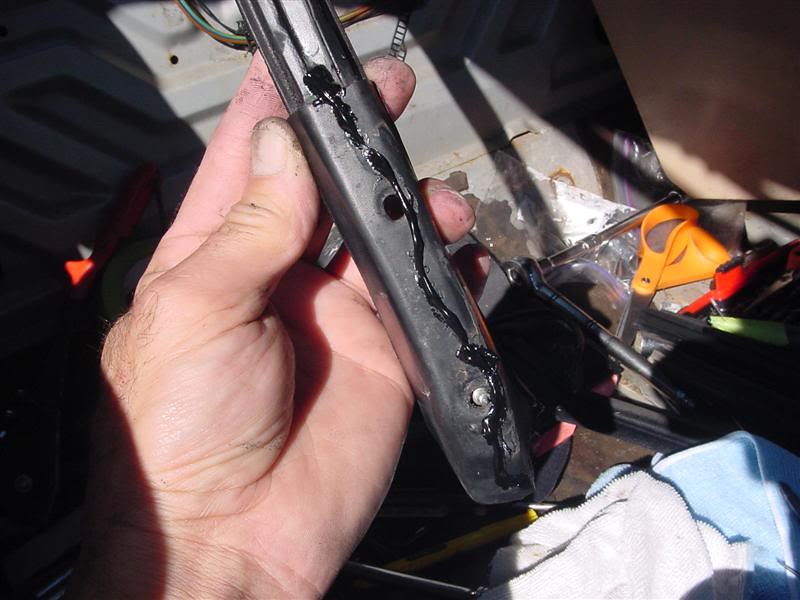
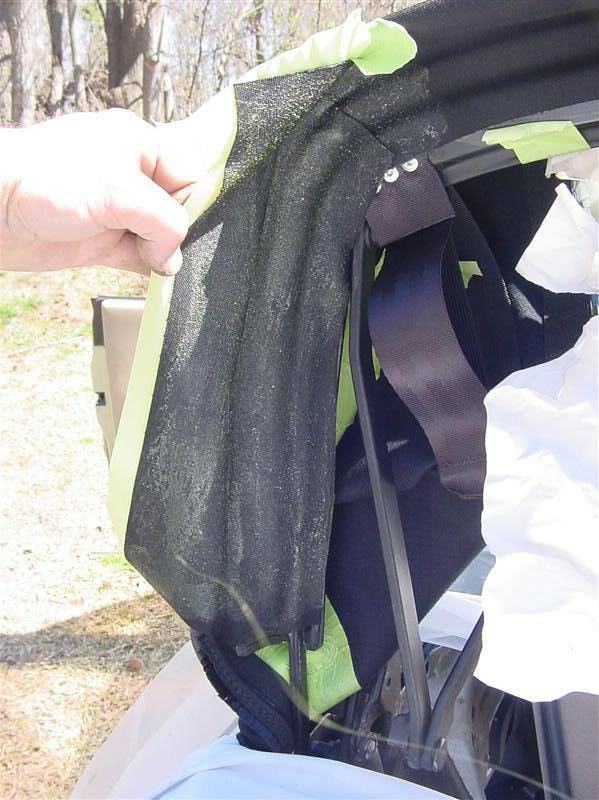
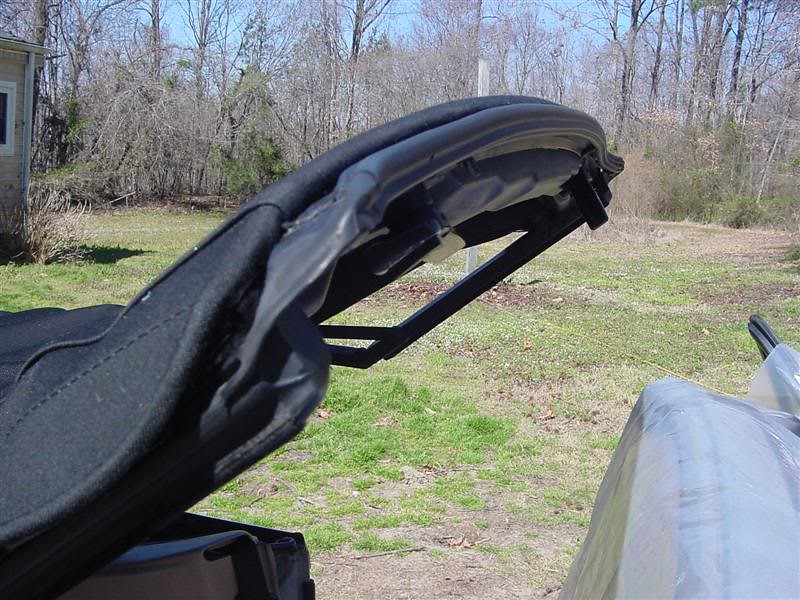
Then i pull the top off the front rail. If your top is shot like this one it will just tear away from the support bars like this.
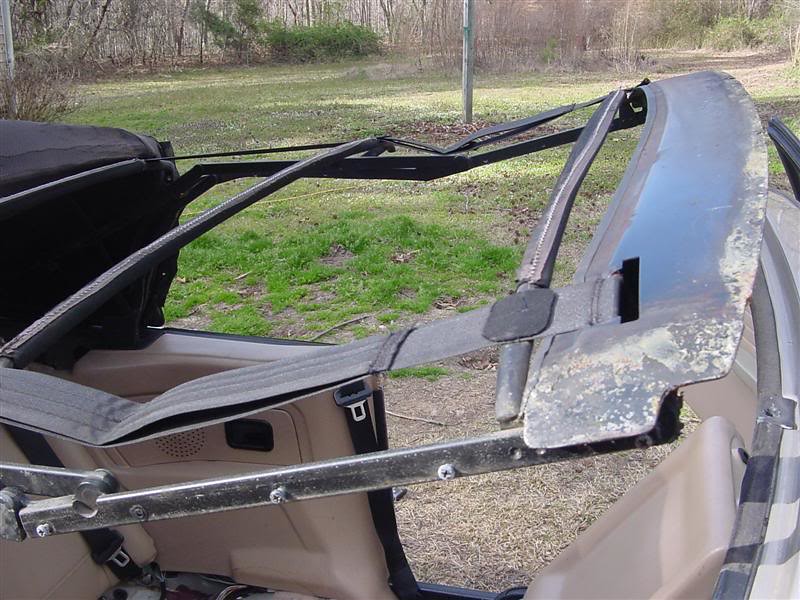
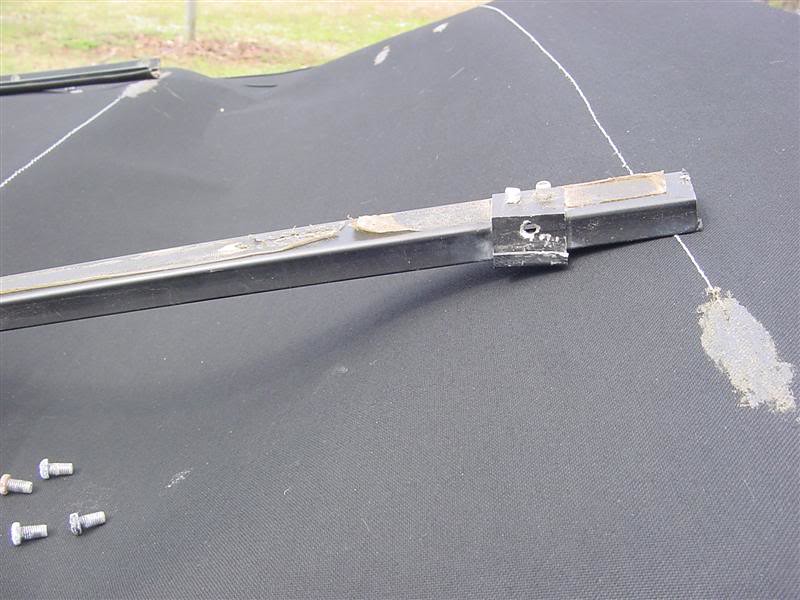
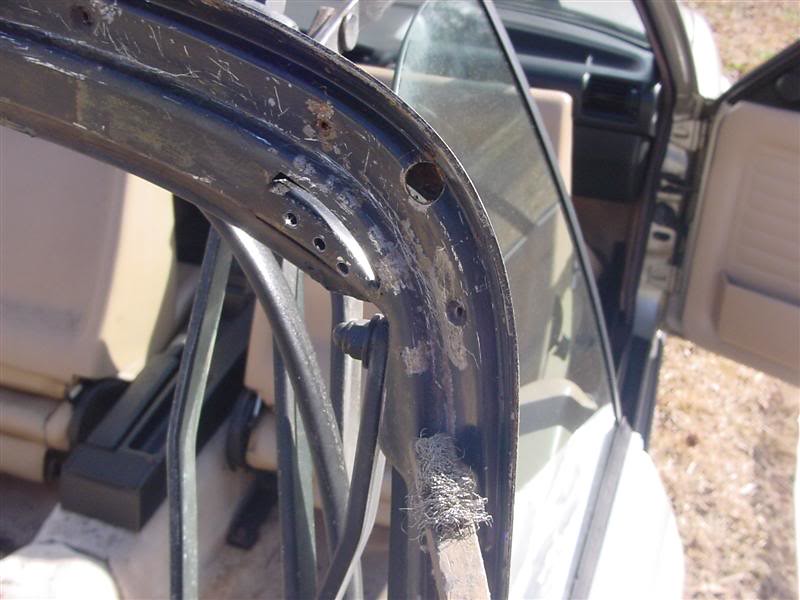
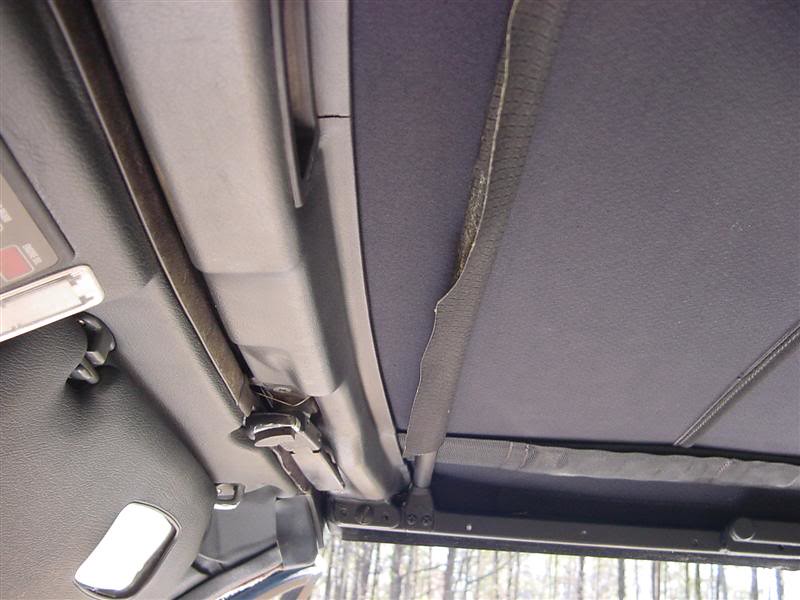
With the front removed and the front half of the c pillars i move to the back. Pull out the rear seal and remove the 100 screws holding the rail.
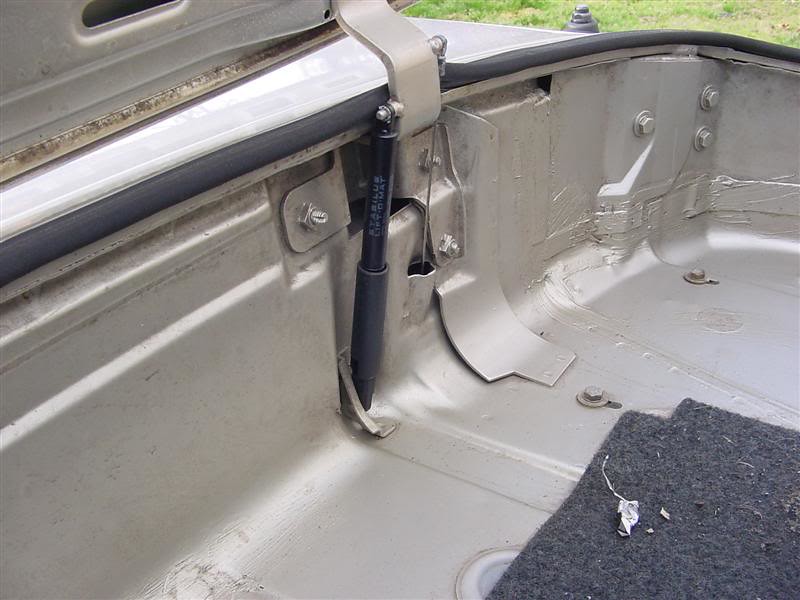
Couple of side notes, i guess this is what happens when the frame shocks are shot....
and i bought these Stabilis rear door shocks 2 years ago and so far so good.
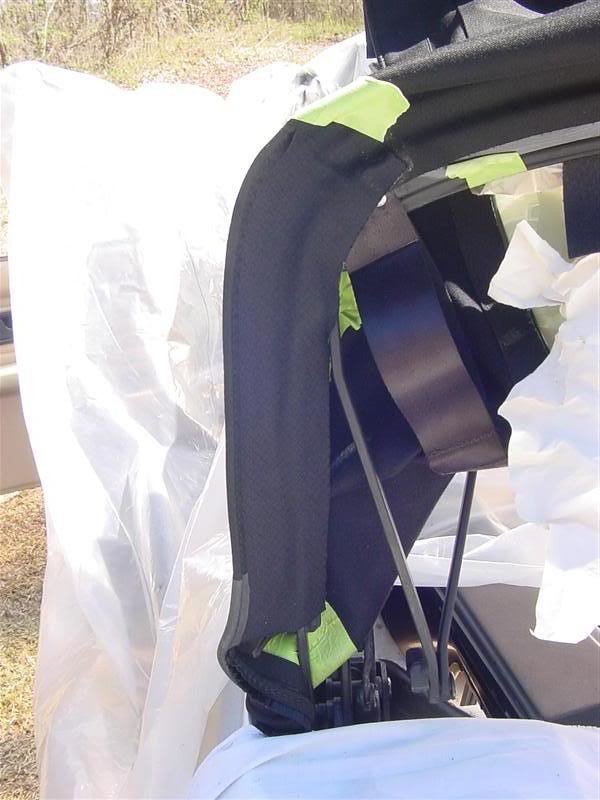
back to the top, once the rail is removed then pull off the top starting on one side. I started on the lower corner of the c pillar.
Then i close the compartment door and pull the top off. Don't yank too hard or you could bend the frame.
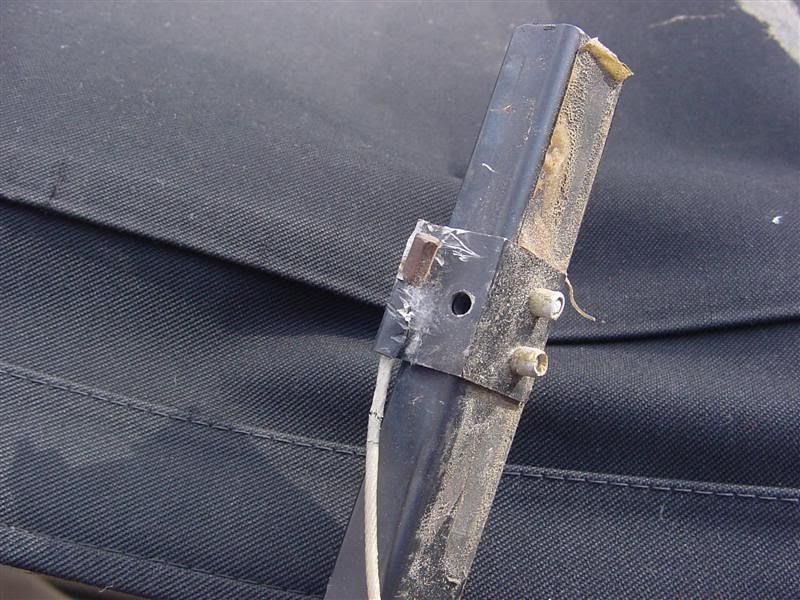
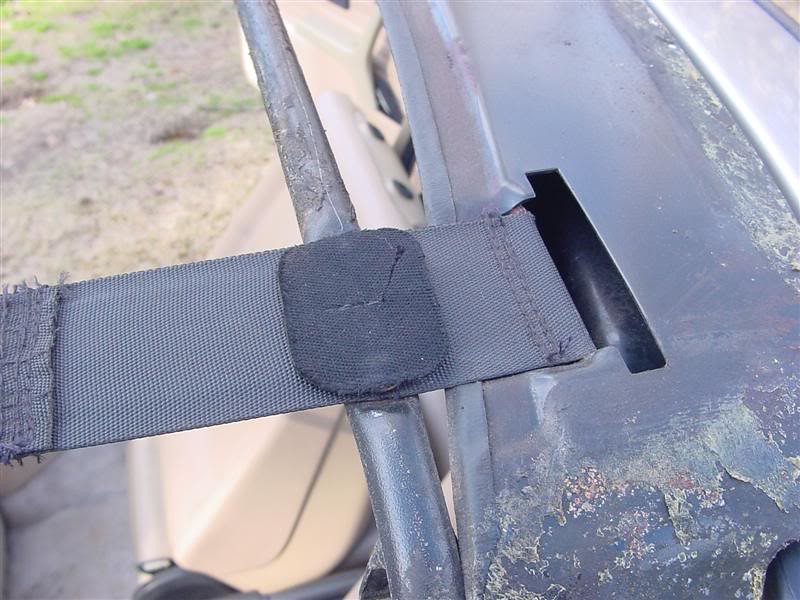
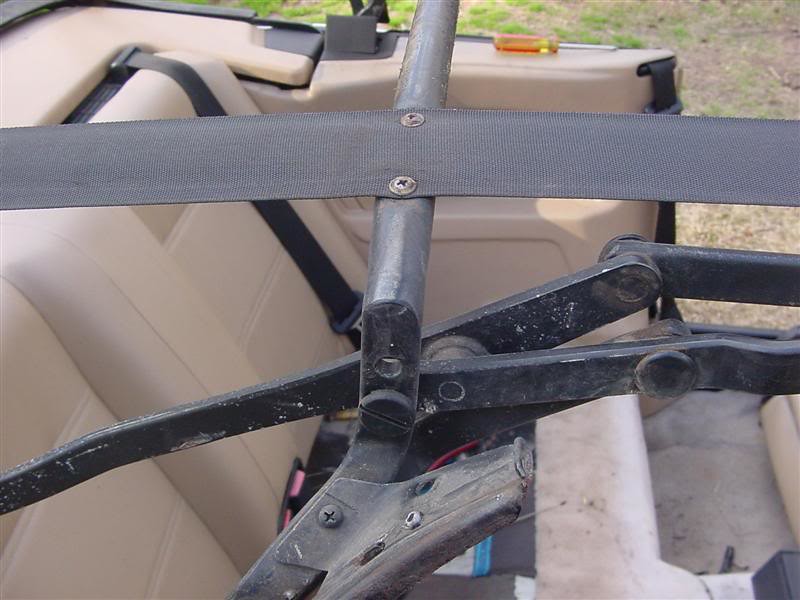
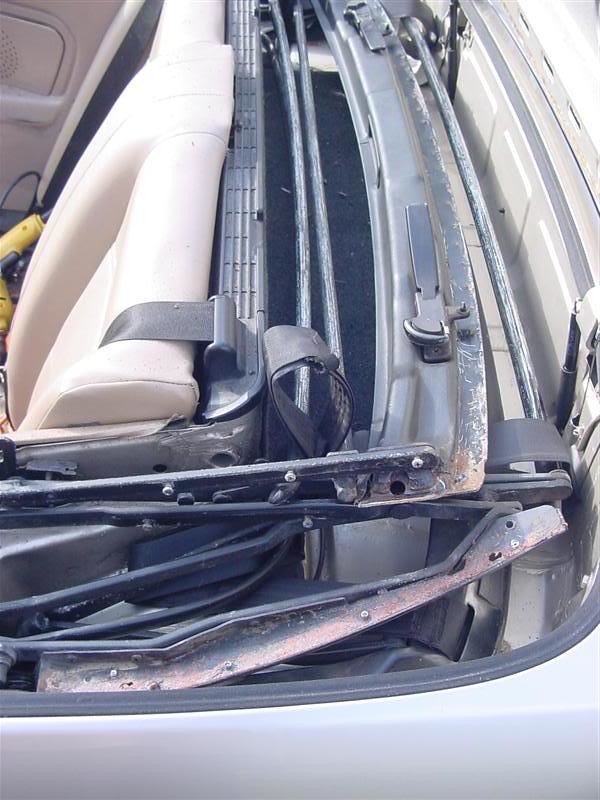
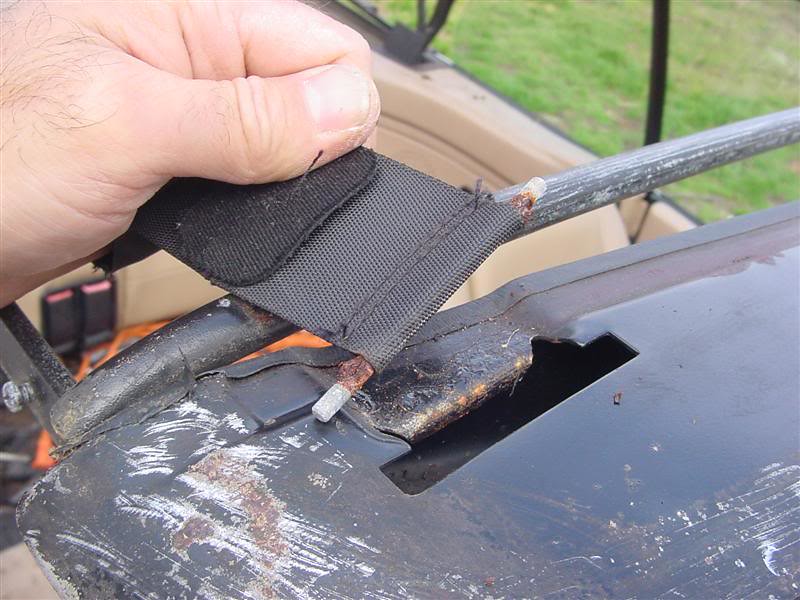
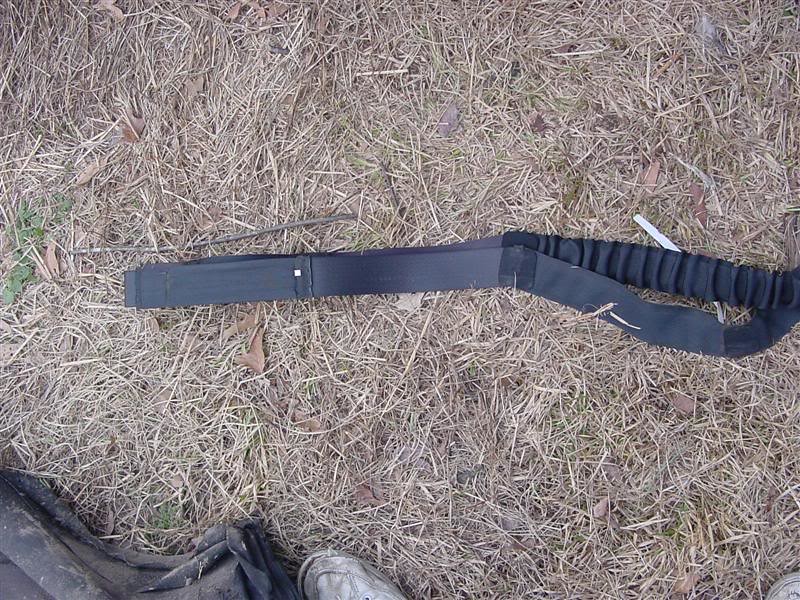
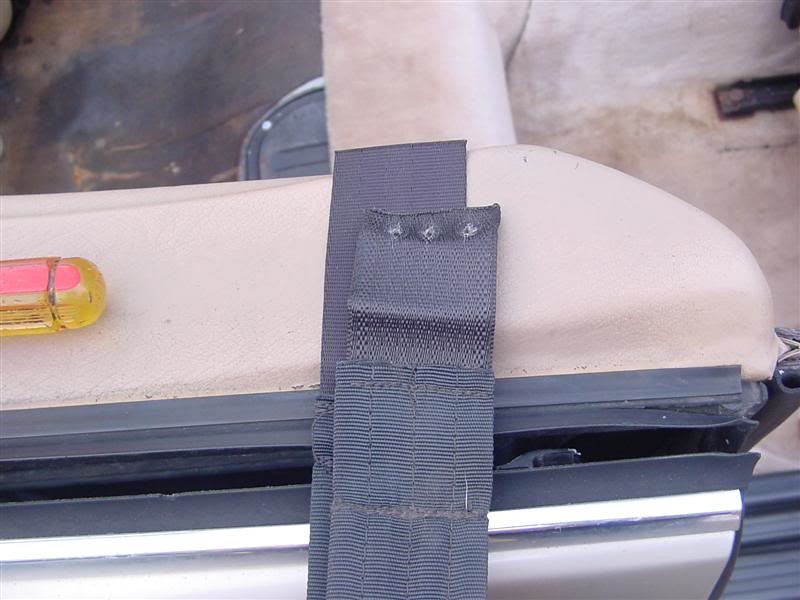
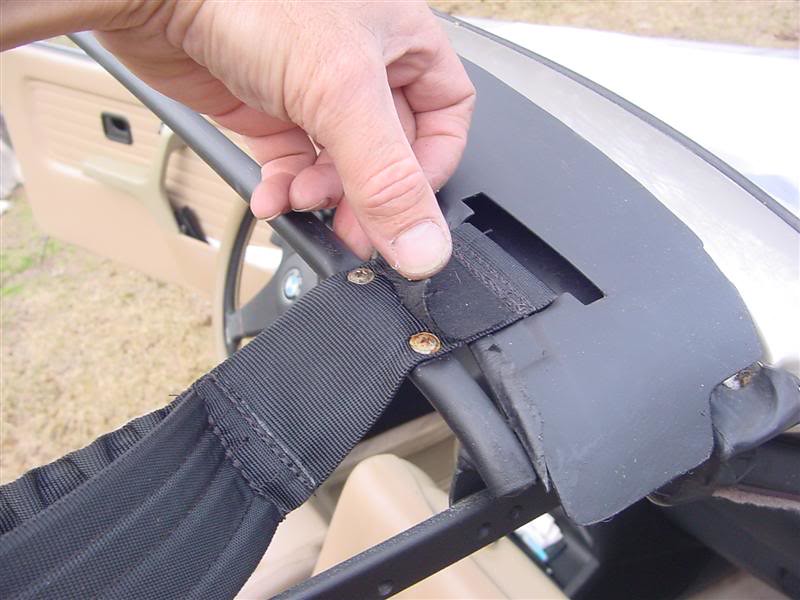
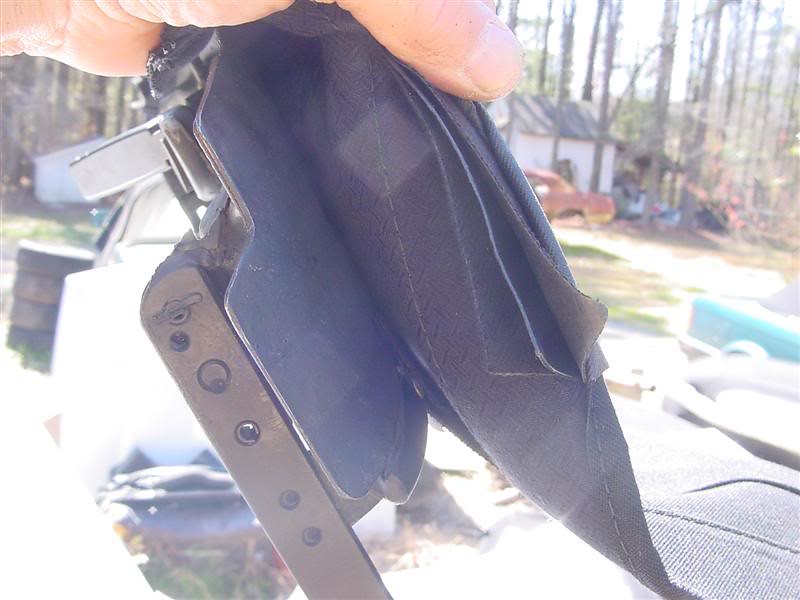
So now with the top off here is how the straps are attached. The front is held by a steel rod through a loop sewn into the strap and hooked into the front rail. Then they are held at each crossbar with 2 philips screws.
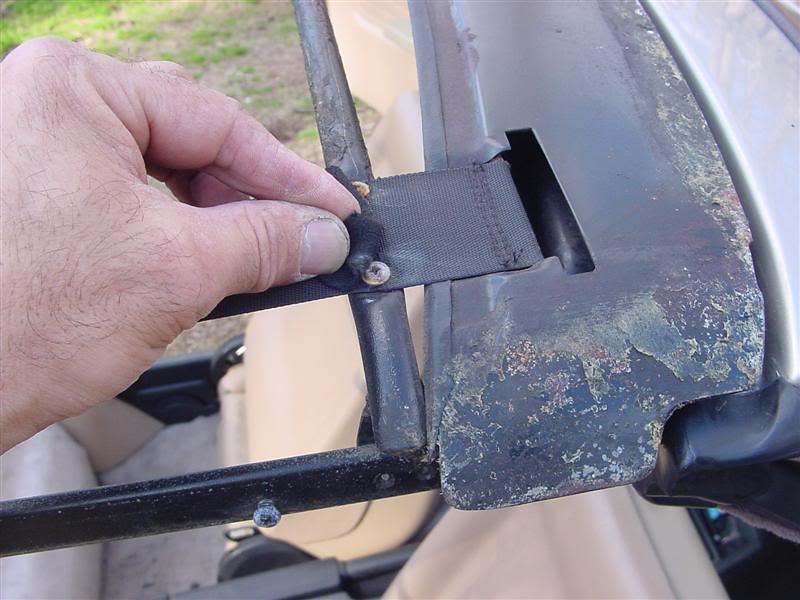
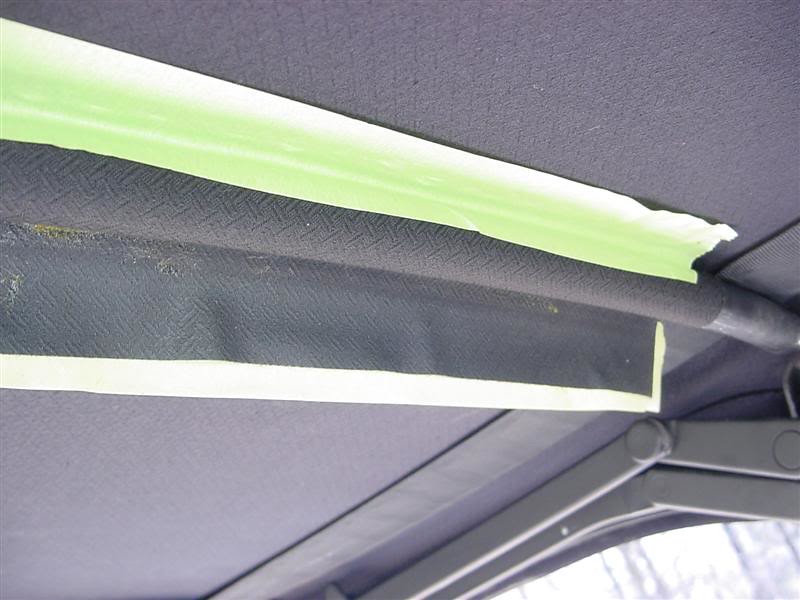
The new straps (and old) have pieces of top material sewn in at the areas there are screw except on one bar. You are supposed to cut new ones from the extra material that comes with the top. This top didn't get it done. The screws can chaff the top.
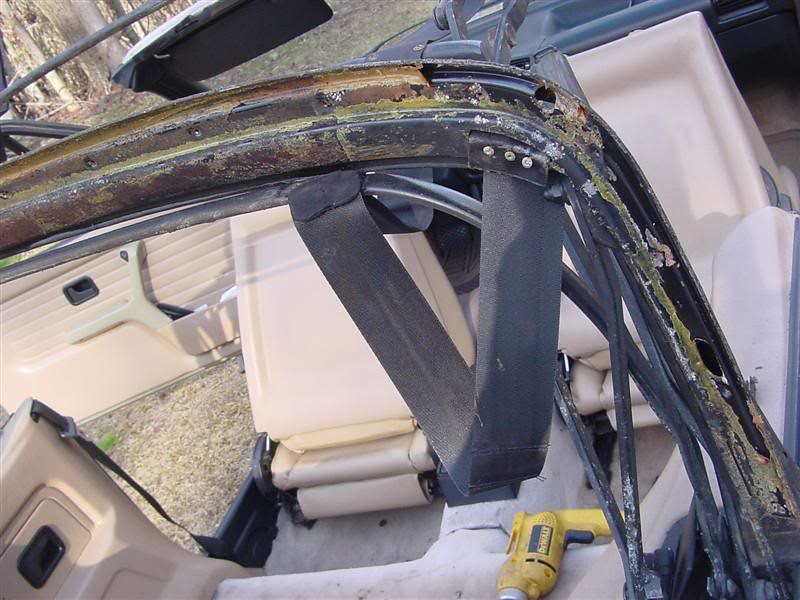
The rear of the straps are rivoted to the rear frame part. Not very well here though.....

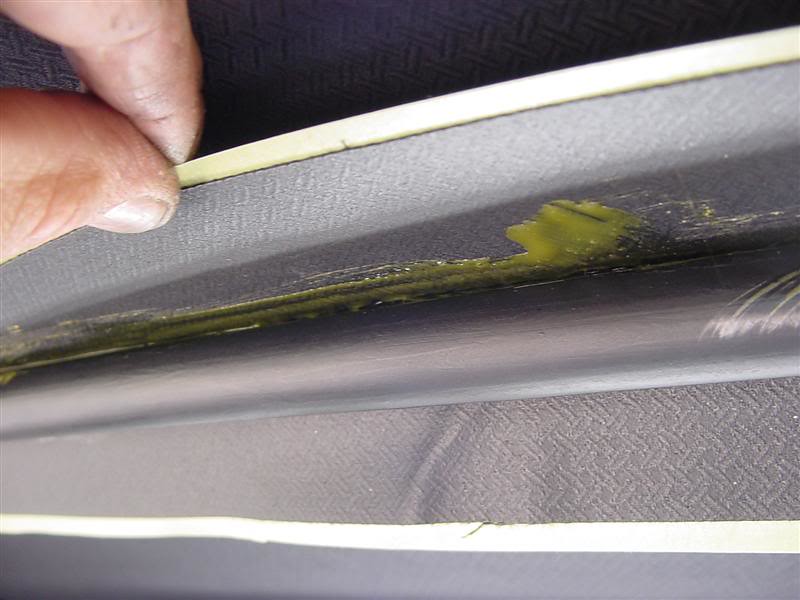
And so the fraking mess begins. This is where you either do it right and remove all the old glue or be a lazy fckr and just glue over the old glue. The stuff on this frame is one layer of hard dry glue, one of newer yellow glue, some rubbery stuff and a sticky layer. It is peeling off in some areas so i am scraping it all off and will repaint the bars. I hate doing things half assed.
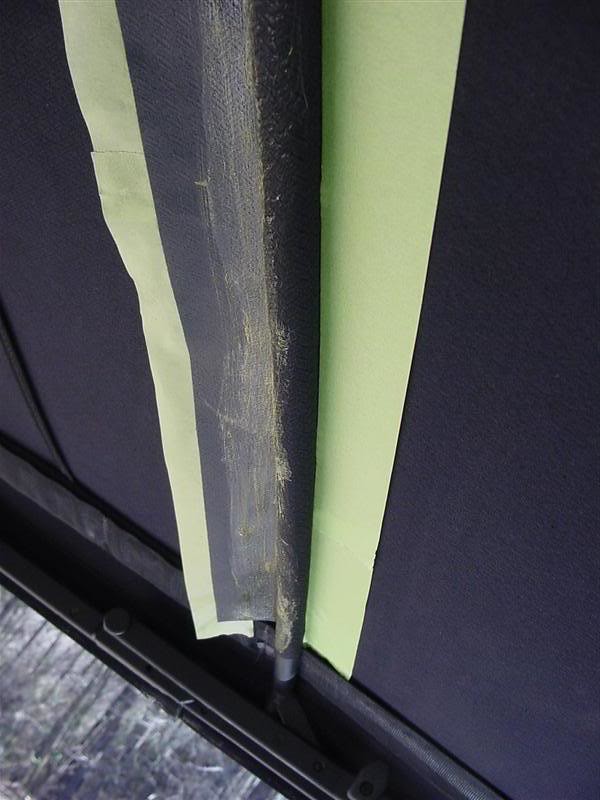
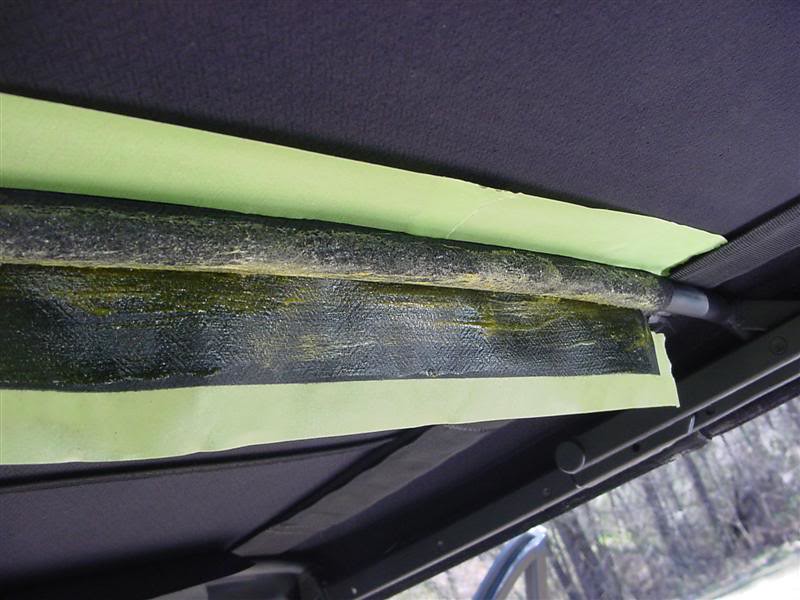
I was able to get all the bars and rear part done. Also the back sides of the c pillars before it got a bit dark and the skeeters started biting.
Another side note. We spoke of the spring at the bottom of the top and here is what it looks like.
Tonight and tommorow i am going to reglue the rubber strips to the channels.
Tommorow after work i will scrape the front seal area of its glue and rear window guide area, clean and sand the areas i scraped and repaint with some rustoleum flat black. Then i can get the top attached at the front and back and it will need to sit overnight tommorow to set. Then saturday and sunday if needed to finish it up. I am not in a hurry which helps this go easier. More to come tommorow....I BUY/SELL REFURBISHED CM5907s & CM5908s
HOWTOs:
DB vert plastic bumpers
OEM Keys
MTech1 docs
88 ix Lach/Card
91 ic Calypso 3.1
86 Cosmo 2.7
OEM+ or bust!
reelizmpro: I will always be an e30 guy.. I still do all of my own labor
TrentW: There's just something so right about a well-built M20 in an E30
e30m3s54turbo: I save my money for tuner parts.Comment
-
BadCab content
E30 vert top install Part DUH!
Forgot to mention the stuff i did yesterday took around 4hrs.
OK so today i planned on cleaning the frame and getting the top put on front and rear. I went ahead and finished scraping all the glue off the front rail. Next were the Cwafflespillars.
The rails unscrew pretty easily. I did not unscrew them on my car but it was a PITA to clean them so i pull them off this time. Much easier to scrape, but still a PITA scraping glue.
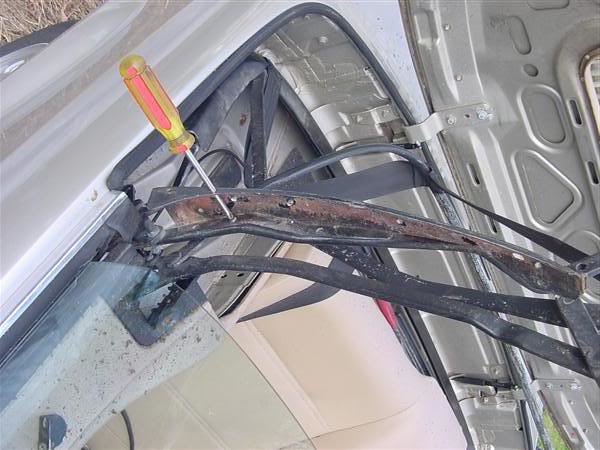
Makes it easier to clean/paint the frame also.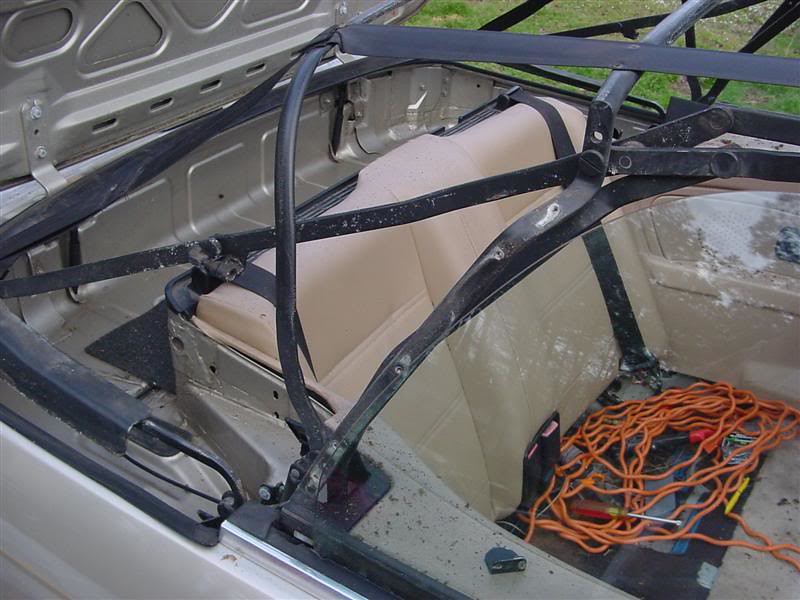
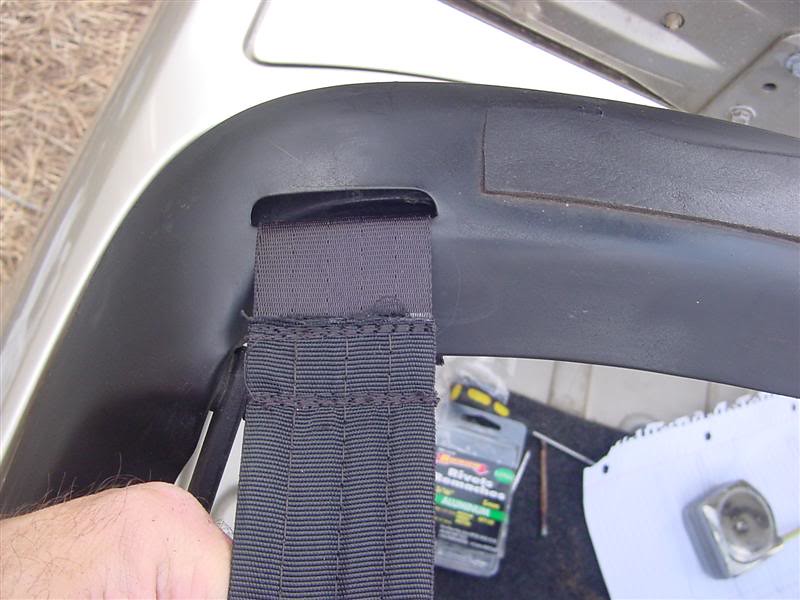
Front part of the straps hook into the front rail with these rods. Next time i do this i am getting new rods period. These were a bit rusted. One was savable but the other was bad. Stole one from the parts car. I looked to try to find the part # on realoem but i don't see it anywhere.

Go ahead and unscrew the screws off of the old straps. Time to take them off. I guess they could be taken off ealrier but i do it now. Unscrew the 2 screws from the straps near the front rail. Lift the front of the frame up and unhook the rod from the front rail. Now just unscrew the 2 screws at each crossbar and drill out the rear rivots. Don't cut up the old straps.
Then i went over the whole frame with paint thinner on a rag. After it dried most of the old glue just rubbed off with my hand. Then i went over it with a small SS wirebrush from Lowes. It removed alot of the rust and leftover/dried glue.
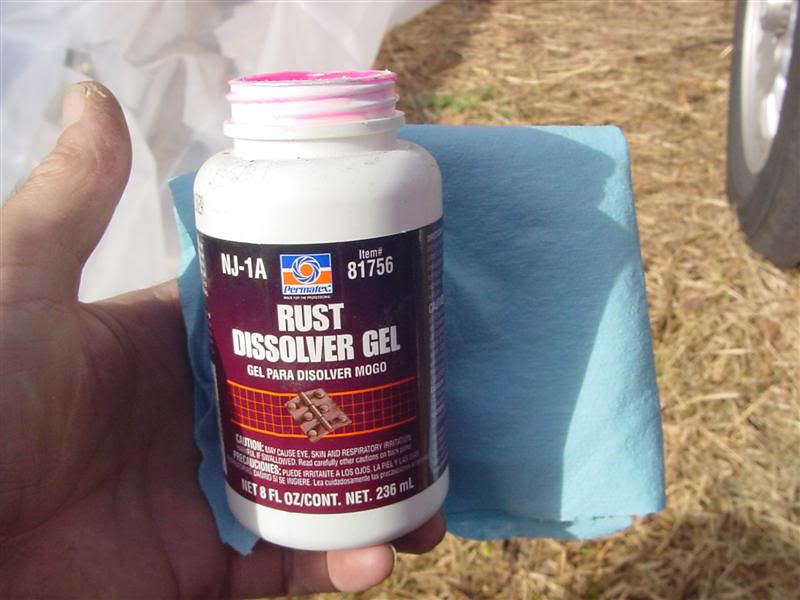
Then i wipe the whole frame down with naval jelly to eat the rust/corrosion a little.
While that sits i clean the C pillars. They are not rusted so no jelly is needed.
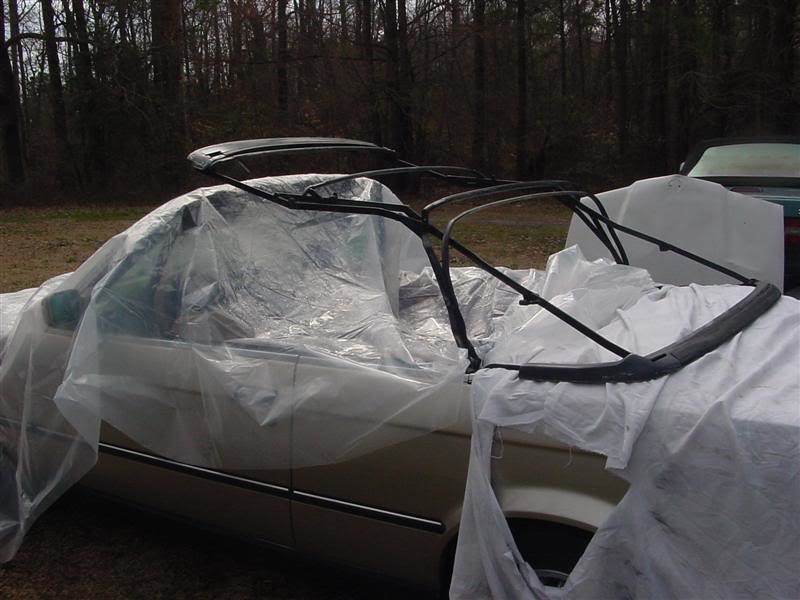
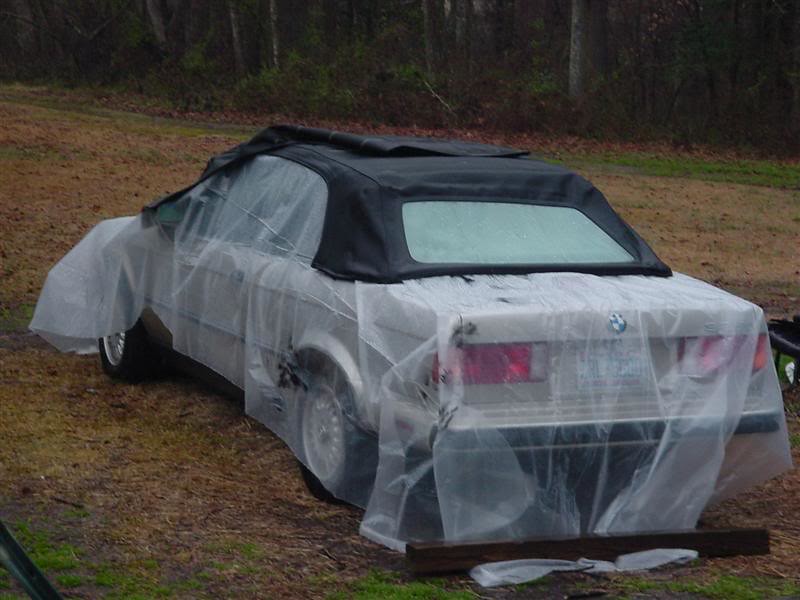
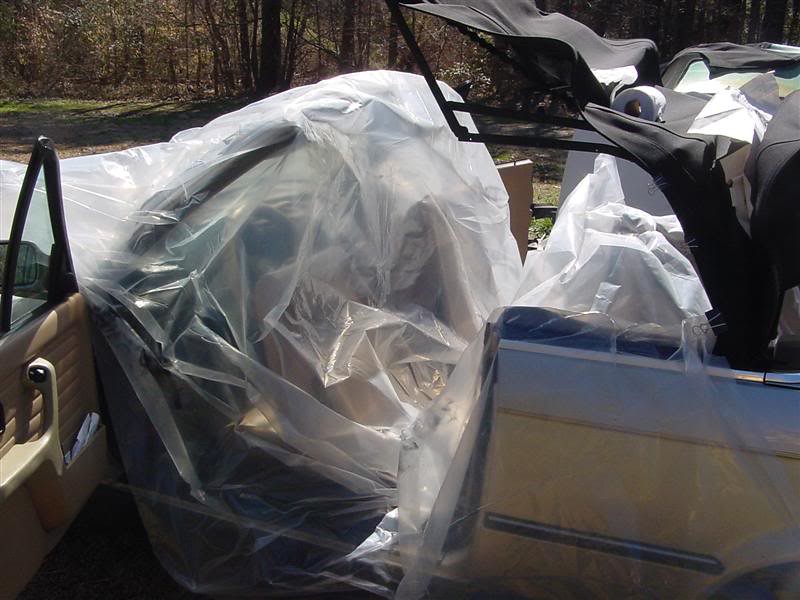
Using a sheet and some plastic i covered the car. Getting enough plastic to cover the car should be mandatory.
With the car covered i painted the frame with rustoleum flat black.
Don't be an idiot and paint your plastic trim, painters tape is your friend.
This was around 2 hours worth of work. This is when i had to go to my real job. I wanted to let the paint dry good anyways. At this point i am ready to start putting it back together.
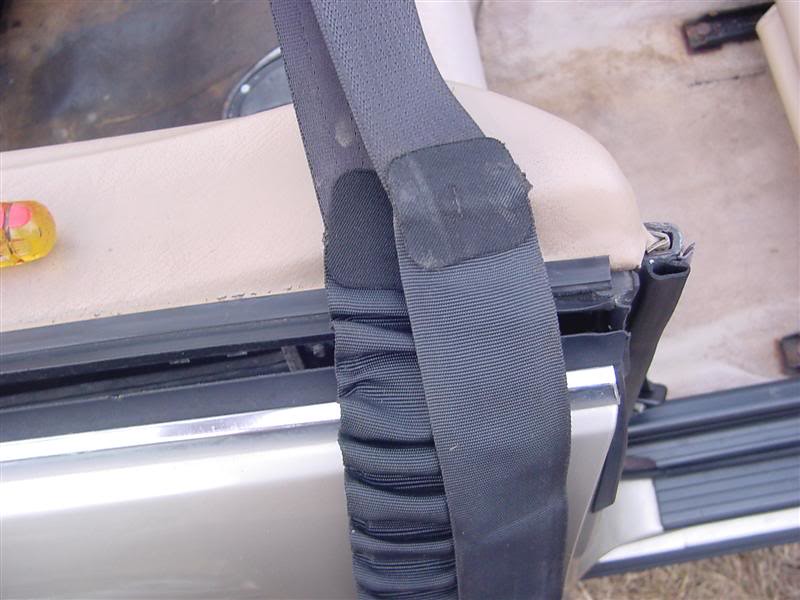
Got back from work, time to put on the straps.
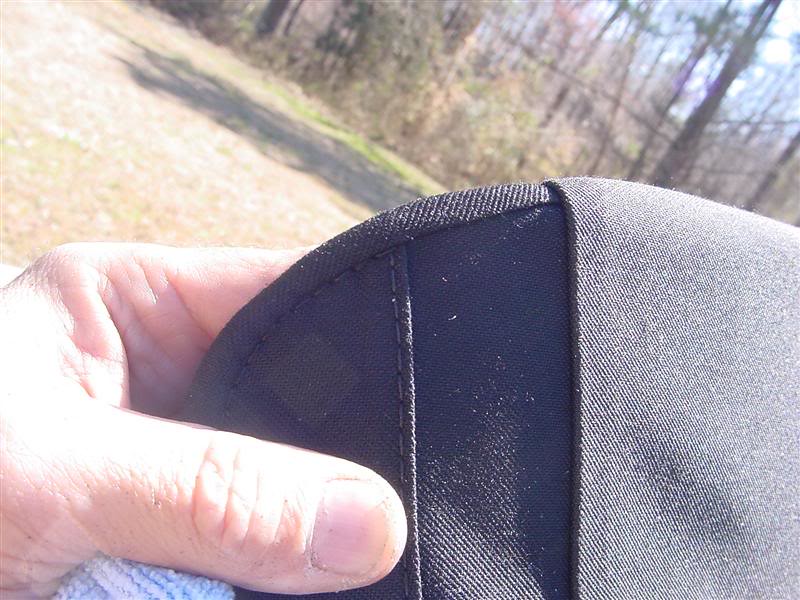
As you can see there is a kink sewn into the rear part of the strap. Make sure you get the correct one. This is the pass side.
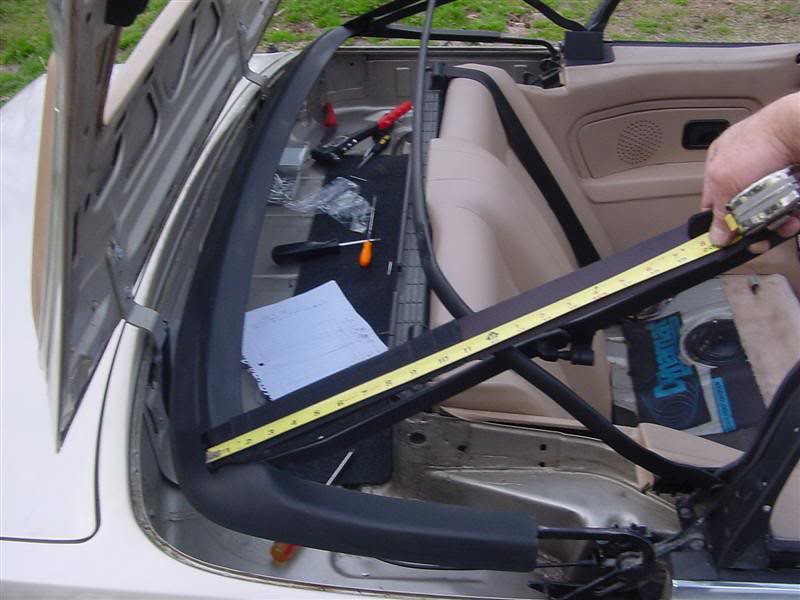
Your going to want to line up the kink part to the old one and mark were the old rivots were. By mark i mean stick you awl through it. I wanted the same look as my 318 so i used all those measurements and straps for this car. From the rivot holes in the straps to the screw holes in the kink is 21".
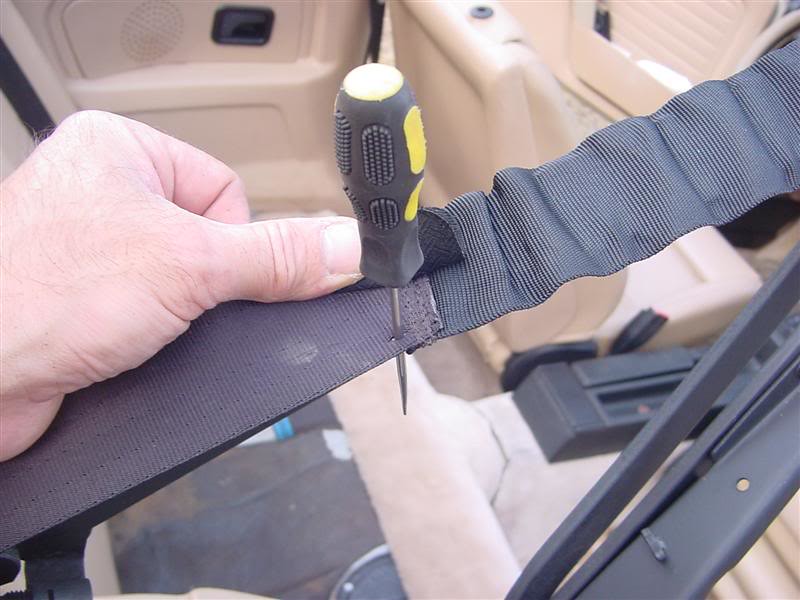
Here is a trick i found. After you poke your hole with the awl i use this T25 torx screwdriver to ream the whole in the strap to size.

Here are the rivots i used, bought at lowes...

After you do one rivot make sure you strap is square to the slot before you do the others.
and rivoted
Then go ahead and hook the strap at the front rail. Find the first hole and awl it. Then screw the screw into the strap. Then place it over the hole and screw it down. Make sure you take into account the position of the second hole when doing the first so the strap is evenly spaced in the middle of the frame holes.

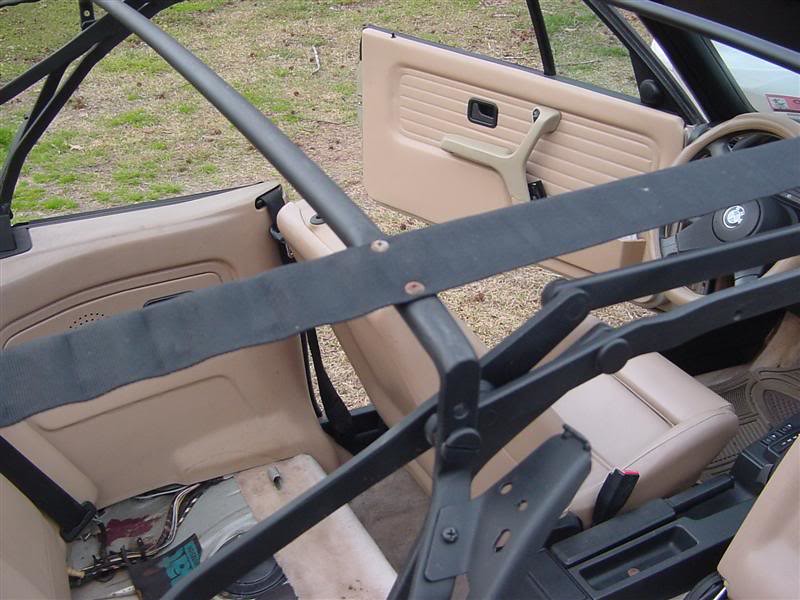
Done
Pull the strap tight and do the next bar.

Now move back to the rear
You measure up to the next bar up from the rear. 20"on the outside rivot and 20.5 on the inside
Using your awl put a hole for the screw and attach. Do the other screw.
Do the last bar. Notice how the last one has no material to cover the screws.
 Last edited by bradnic; 11-13-2018, 07:56 PM.I BUY/SELL REFURBISHED CM5907s & CM5908s
HOWTOs:
DB vert plastic bumpers
OEM Keys
MTech1 docs
88 ix Lach/Card
91 ic Calypso 3.1
86 Cosmo 2.7
OEM+ or bust!
reelizmpro: I will always be an e30 guy.. I still do all of my own labor
TrentW: There's just something so right about a well-built M20 in an E30
e30m3s54turbo: I save my money for tuner parts.Comment
-
BadCab content3
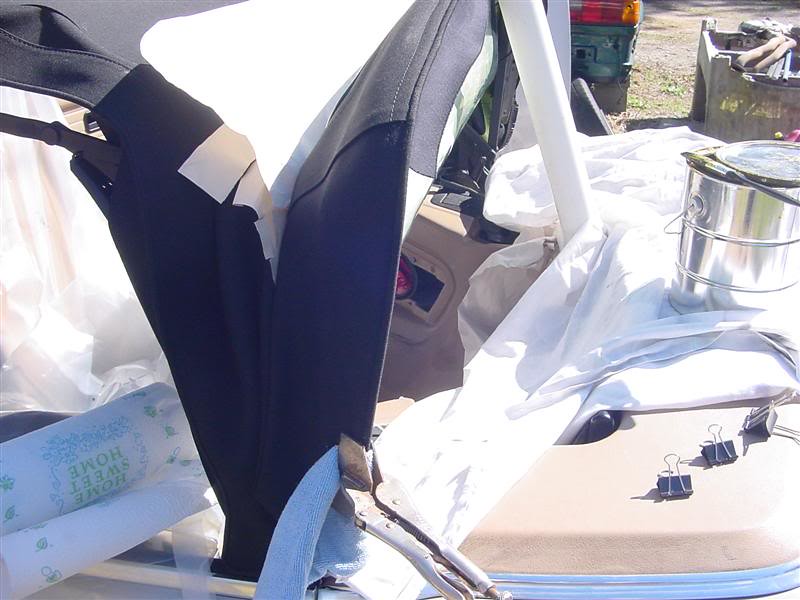
Your new top should come with some extra material from the window cutout. Cut some patches the same size as whats on the straps. These will be glued on later.

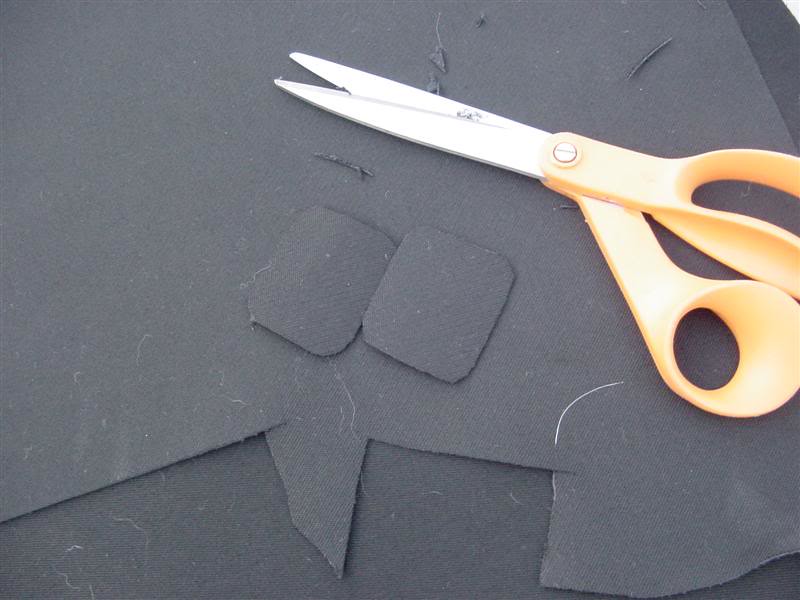
You also need a couple pieces to cover the rivots on the rear c pillar. This car didn't have them but mine did.

Strap ons.
Ok so now i notice the frame sits a bit high in the back. Saturday the frame gets unbolted and reshimmed at the front mounts to lower the rear .
And this is why plastic is mandatory!!! Rainy fridays.
Quick update. Got the frame reinstalled without a bunch of spacers and now it sits nice.
Ok so saturday gets here. Before i start i want to say these instructions should be used in conjunction with the 3 install videos on youtube. I watched the things today a bunch of times again to remind me of what order they say to do things. I don't always follow them to a tee but they are great videos.
First thing i did was glue the little patches on the middle crossbar screws for the straps.
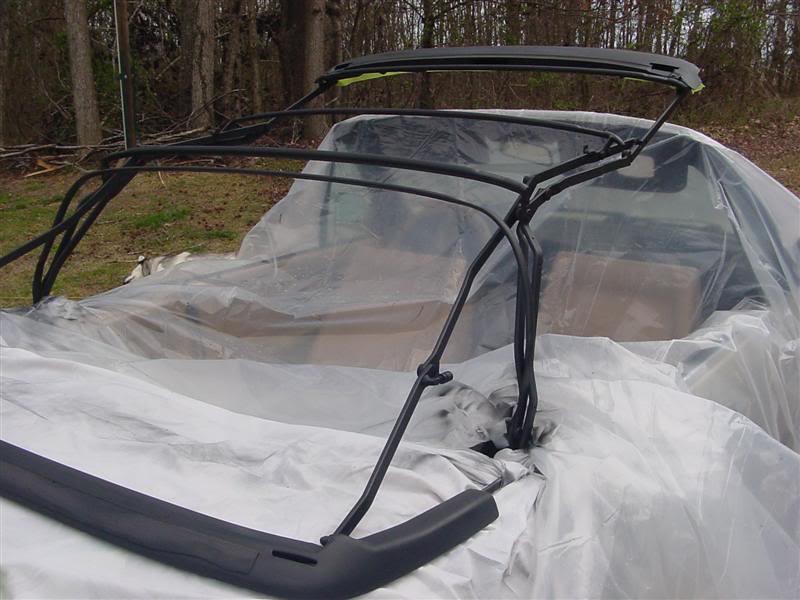
Next thing i do is lay the top on the car.
If you look at the corner that goes at the bottom of the c pillar there is an elastic piece that i have no idea where it goes,power top? Just move it out of the way. If you stick your finger in between the folds you will feel a piece of plastic sewn into the corner. You want to keep that part on the inside of the car when you slide it on the corners. Slide it on one side of the car and adjust the top material on that side so that the 2 layers of material go under the rear rail. Then do the rear part a bit. There is also a flap or material that goes around the top of the rear rail so make sure it is pulled out and not bunched up under the rail. Then do the other coner on the other side. You are going to have to pull up the rear rail like your getting ready to open the compartment to be able to get the corner onto the other side. Your not gluing it yet, this is just to get the top situated.

Then we move to the front, stick the corners on the front sides and make sure both side of the top are in the grooves or close. You'll be pulling it tight later. Again we are just getting the top situated and centered.
The corners are going to look sort of like this so that the bead is around the same thickness around the curvature.
Make note of where the bar and seams are and pull the sides back a bit to tighten them up and get the bar and seam to line up. Doesn't need to be perfect right now, just closewafflesish.
Moving to the side pull the top so that the sides are situated right.
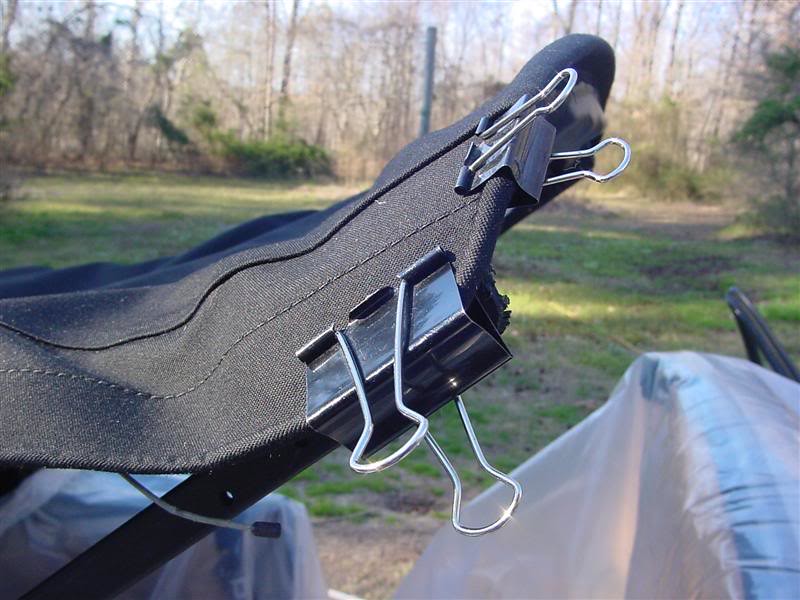
I use these big paper clips alot during the install, they are very handy for holding things in place. I use them here to hold the sides in place.
I bought my top from autotopsdirect on ebay so everything i say i got with the top is from them. I am not sure what you get from other companies.
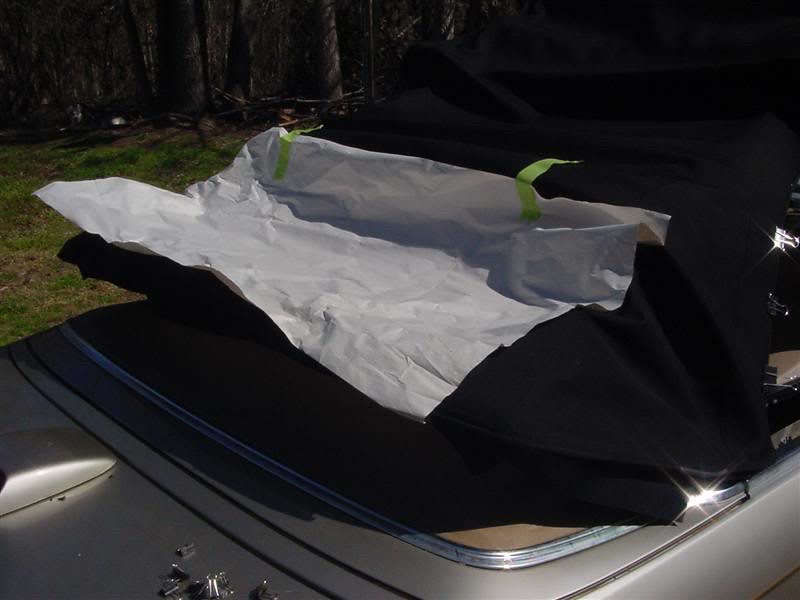
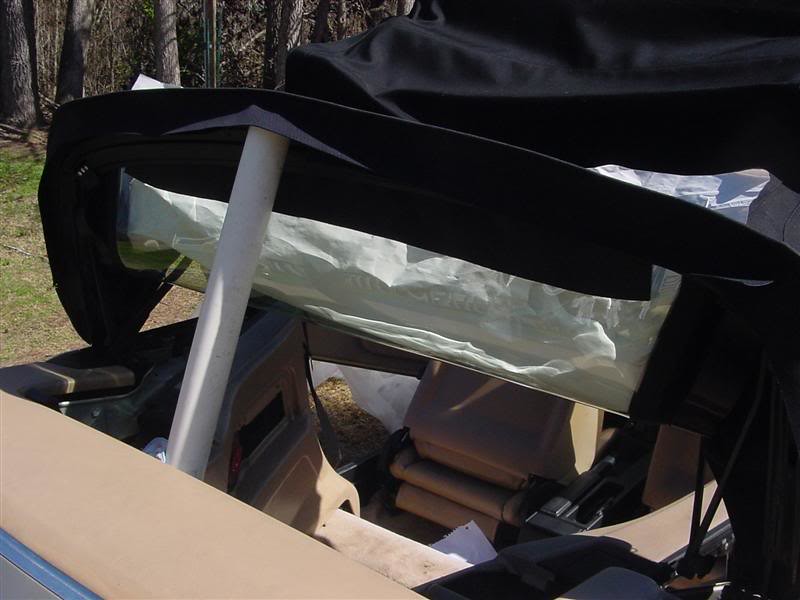
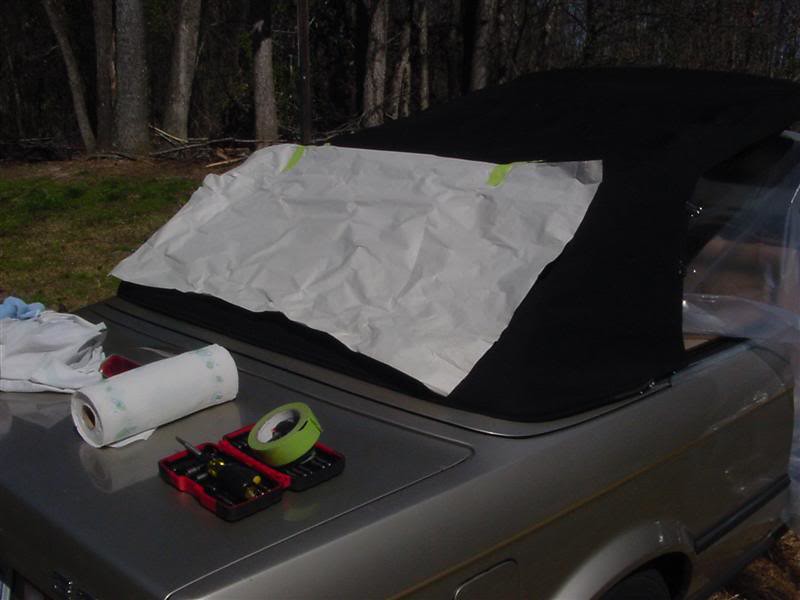
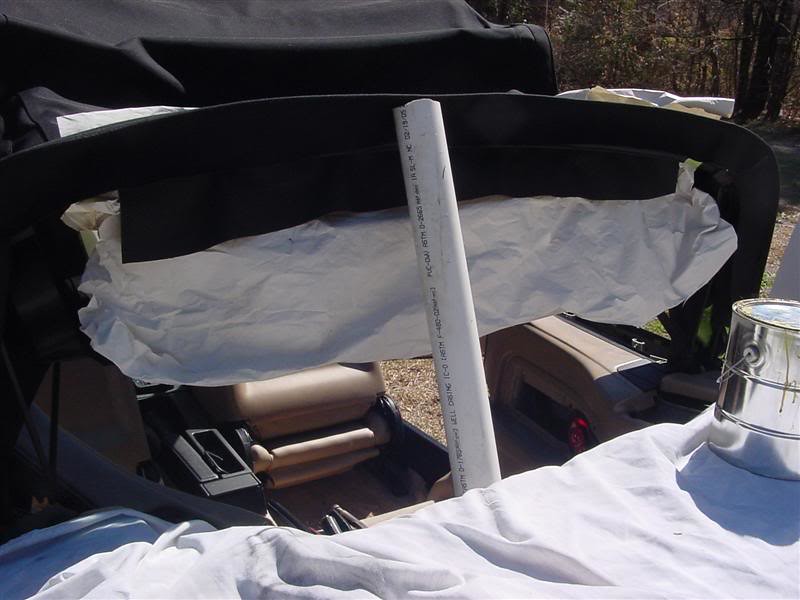
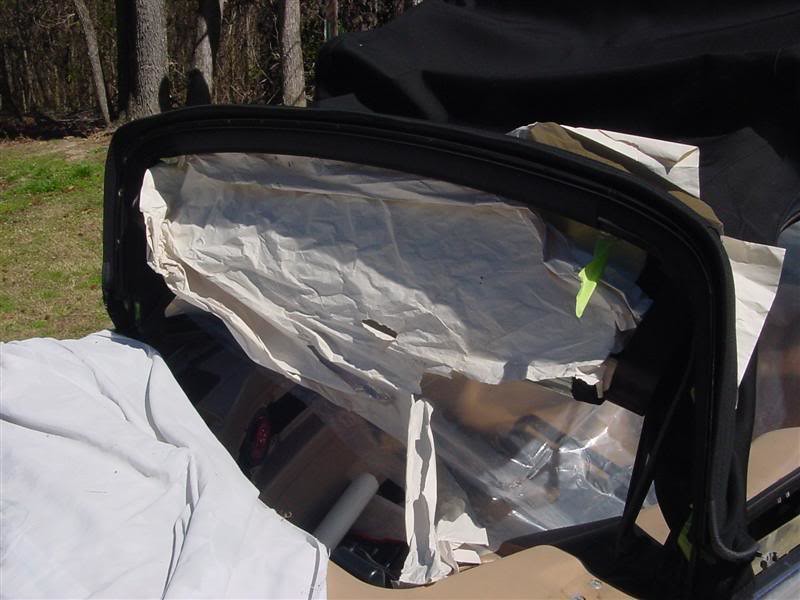
I got this paper with the top that is used to protect the window in shipping. I tape it to the top and leave it there throughout the install.
 [
[
I also take the second piece and stick it in between the rear rail and top so that it hangs . It is to keep glue from going onthe window. You know your going to fuck up, just prepare for it. I don't have the back seat in. If you leave it cover it or remove the 2 17mm bolts and pull it out.
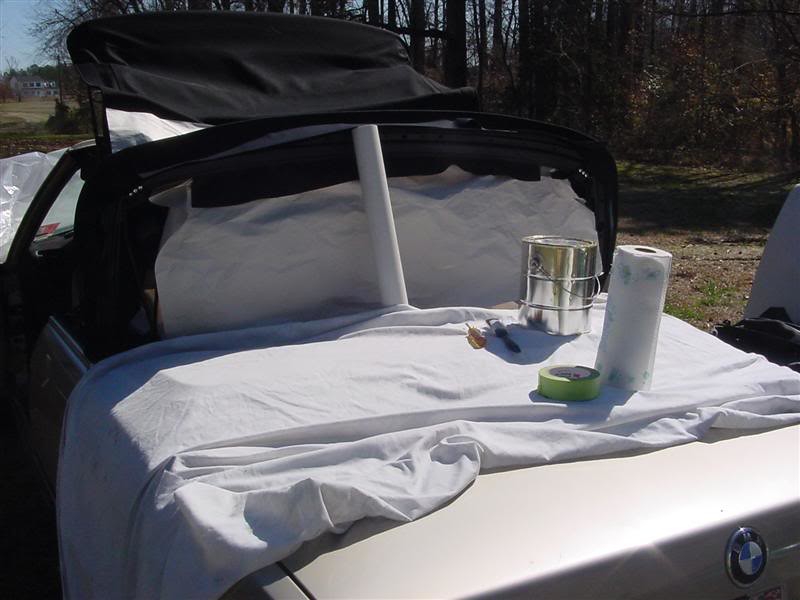
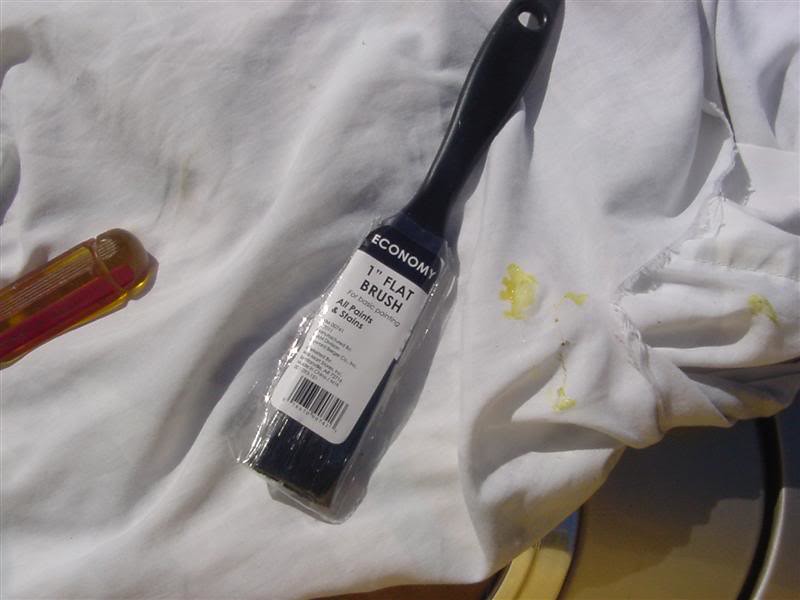
This is what i start with. Glue, paper towels, a $1 walmart brush some painter tape and a screw driver to open the can. The glue i am using is DAP Landau top and trim glue. This stuff is a PITA to get ahold of. I was quoted $20 for a gal and $170 to ship it. Not sure what the deal is but it is a fortune to get it shipped. My friend found a guy that delivered every few weeks or once a month and we split a 5gal can of it for $80. It is high heat proof and super strong.

First thing is to make sure the center slit is lined up with the center screw hole.

Here is where we begin gluing. You want to make sure the metal lip on the rail butts up against the sewn seam. You can roll the outer layer up and out of the way so you can see WTF you are doing. Try to keep the tops edge so it follows the direction that the rail lip is going. If you do a good job here it is easier later on.

Now that you know where it is going to go you can start to put some glue down. First cover the rail, take into account where the material stops so you don't just slap glue everywhere. Also you are only gluing the first layer and only the rear part. Stop at the corners. I do a coat then another on top of it. Put it on nice and thick but not so much it drips. Then put some on the material. I put enough on so the cloth is kinda saturated. I like my contact cement to be wet when i put it on so i can move it a little. Waiting for it to become tacky is going to set you up to fail when you can't move it after first contact.
When you go to put the material on the rail butt the rail up to the sewn seam and run your fingers along the edge back and forth gradually moving back to attach the material. Go untill you hit the first ledge on the rail surface and keep going. You want the material to follow the surface of the rail. Gaps lead to loosening later on.
Here is what i mean. Try not to leave any bumps or let the material bunch up. It's just going to mess the next layer up and eventually make the rear seal channel sit crooked.
Lay the plastic over the car so you don't make a mess. The first time you drip some glue you will thank yourself......and you will drip glue........no matter what you think.
While that sets i move to the front. You'll notice the corners have 2 layers of material and one plastic layer. Glue the inner layer to the top.then goop glue in between the plastic and mat., so the layers go, top/material/front rail/plastic/material. It all gets glued together into a sandwhich but for now just do the inner layer and rail and plastic. Don't do the outside material yet.
Double check your bead.
I use some visegrips (with some microfiber cloth to protect the top) to hold the seam in the notch while i glue the other side.
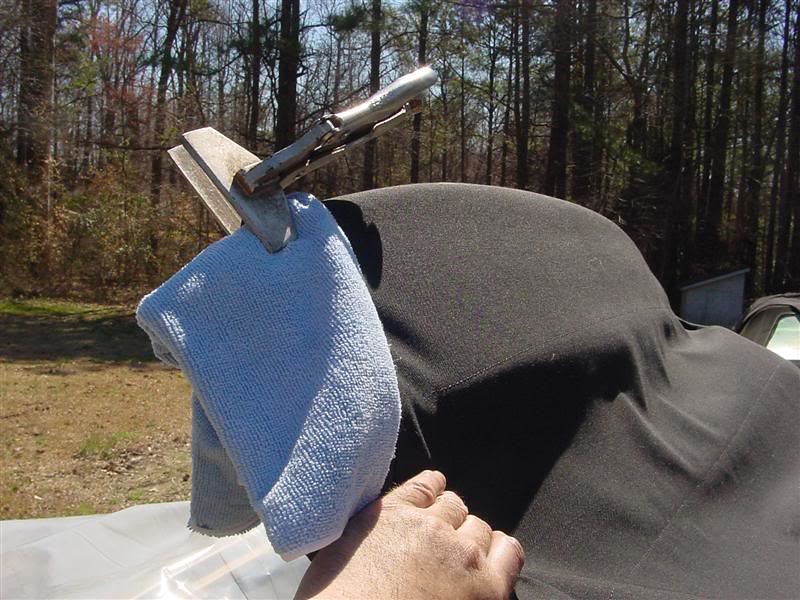
Once you get the other side glued and clamped let them sit a few minutes so the glue will set a little.
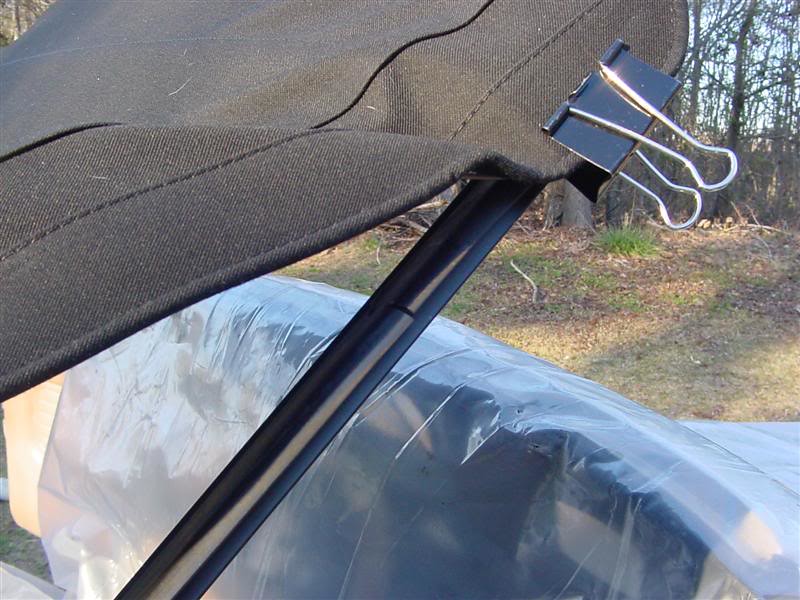
Here you can see i used more of those clamps to hold the top so the crossbar seam is lined up with the first crossbar. The clamps hold it in place so you know where to glue the material to the front rail.
Go ahead and glue the material to the front making sure to keep the material tight between the front rail and the first crossbar. I went ahead and temporarily mounted the front seal channel. I used my awl to find the second screw hole from the edge on one side of the car then did the same hole on the other side of the car. Then just go to each hole in the channel and poke it with thte awl. Screw the rail down. This is temporary, just to hold it whille it sets.
Stand back, walk around and take a look. Make sure your sides are still OK and that it looks right. Heres when i go to lunch so it all drys a while.
 Last edited by bradnic; 11-13-2018, 08:46 PM.I BUY/SELL REFURBISHED CM5907s & CM5908s
HOWTOs:
DB vert plastic bumpers
OEM Keys
MTech1 docs
88 ix Lach/Card
91 ic Calypso 3.1
86 Cosmo 2.7
OEM+ or bust!
reelizmpro: I will always be an e30 guy.. I still do all of my own labor
TrentW: There's just something so right about a well-built M20 in an E30
e30m3s54turbo: I save my money for tuner parts.Comment
-
BadCab content4
OK done with lunch,
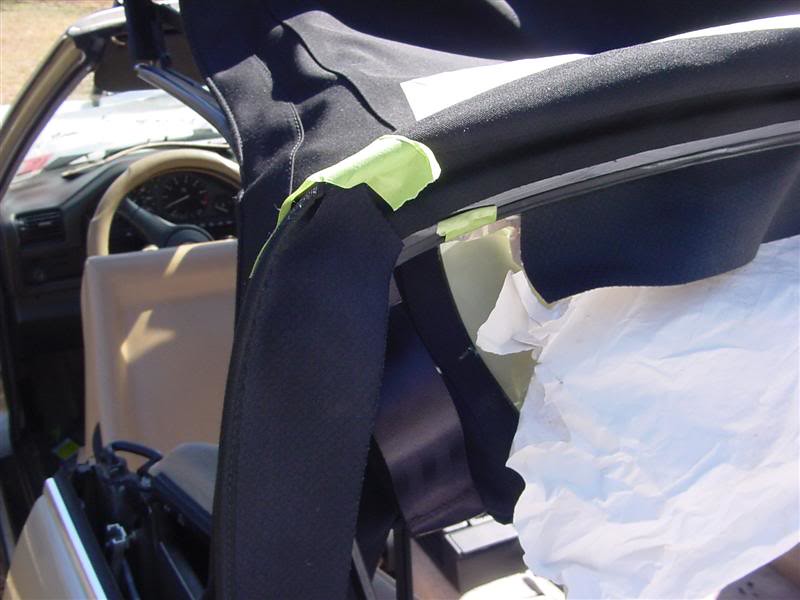
Here is just a little preventative step. Get inside the car and tape this area. This will make sure you don't mess up and put glue where you can see.
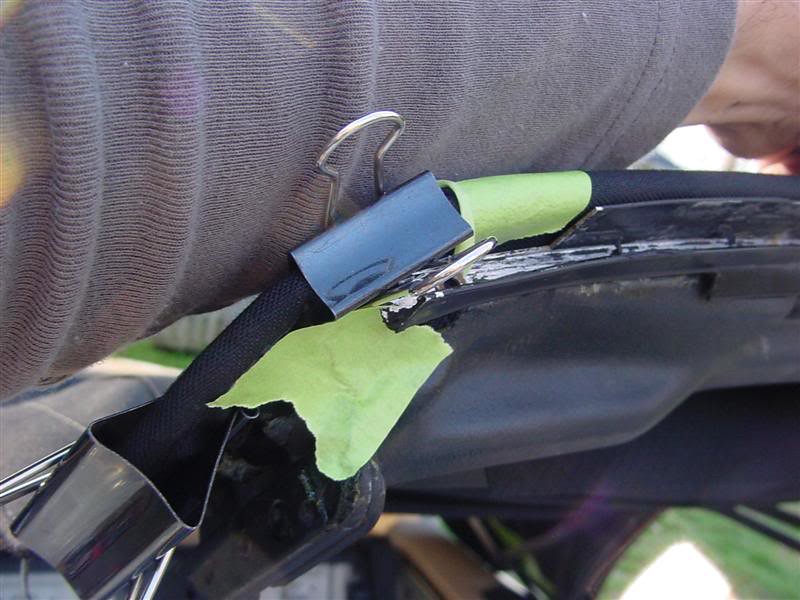
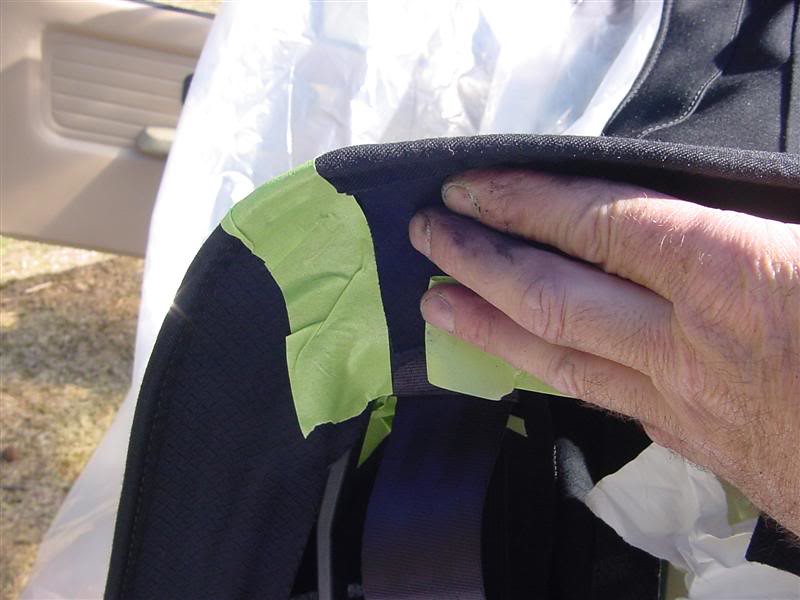
At this point i pulled the c pillar corners back off. Stuff the hole with glue and put some glue on the c pillar corners and put it back on. Do the other side.
I went ahead and clamped the corners with those big paper clips again until the glue set a little. Next up was the sides of the rear rail. This is a bit tricky as it doesn't like to sit correct with the rail sitting up in the air. Adjust the flaps, pull it down tight and use something to hold it in place while you apply glue. Just like the rear part, glue in the first layer making sure the top edge points down.
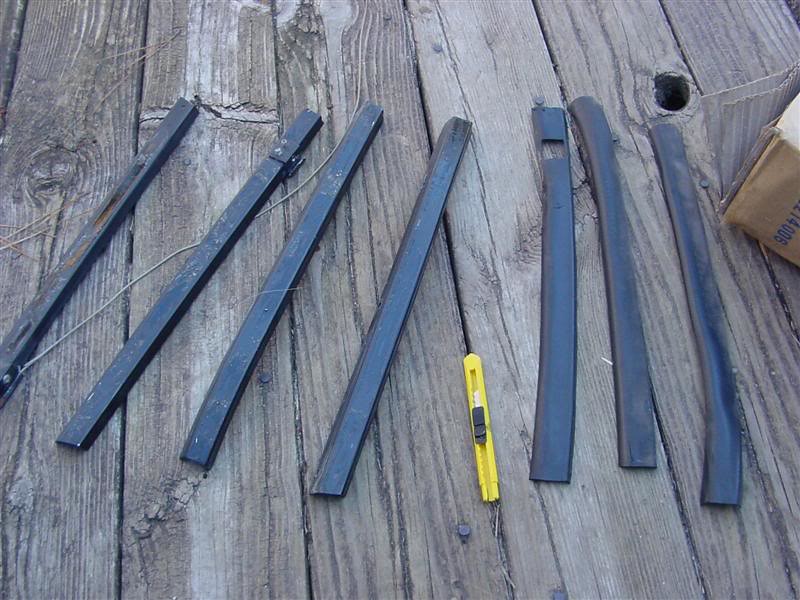
While that sets i go ahead and fix up the side channels. I usually do these at night but forgot this time. The 4 of them have rubber seals that use double sided tape to hold them to the channels. I just pull the seals off. Pull off the leftover tape from the channel and wipe both the channel and seal down good with alchohol.
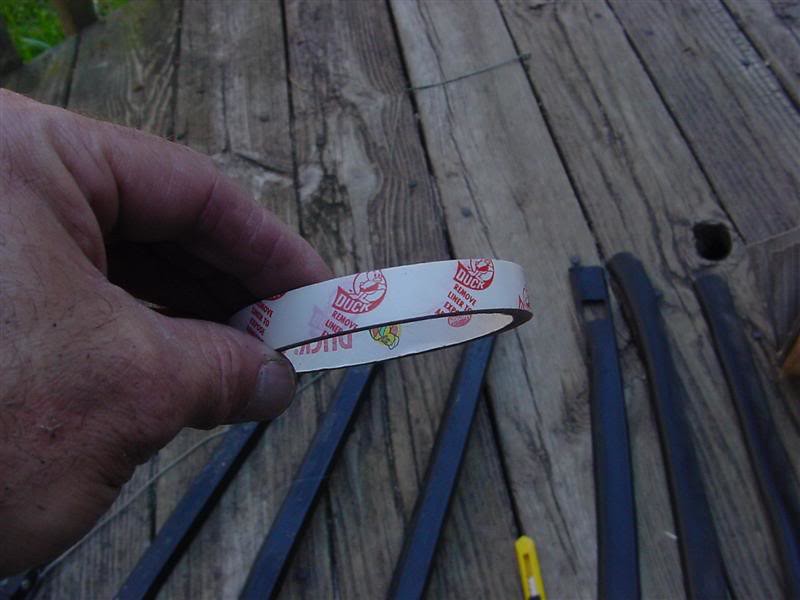
I used this double sided tape. It came with one of those kits for sealing your windows in the winter. Made by Duck, the tape company.

Make sure you put them on right. They only go one way. In this pic the left side is the side with the screw holes. The right side seals against the top.
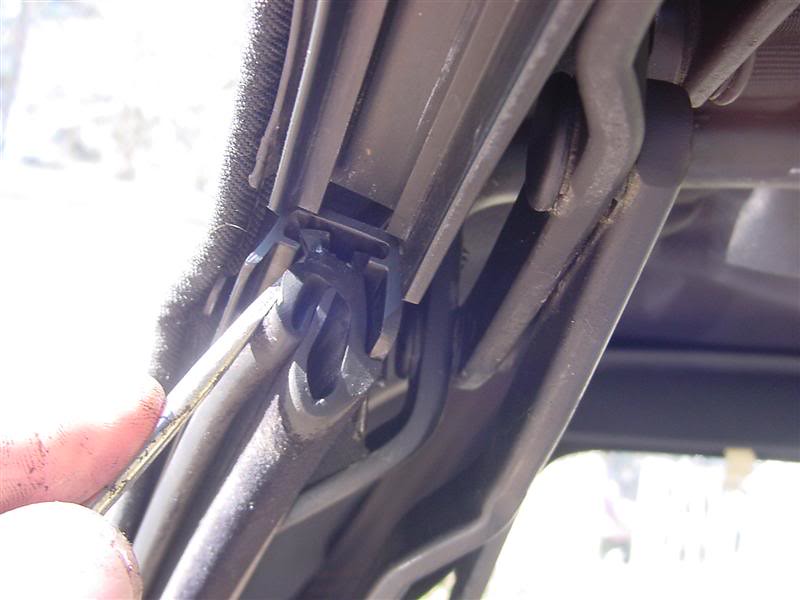
The install video calls for welding wire to guide the side cables. Welding wire is thin and sharp. I wouldn't use it for fear of poking a hole. I straightened out a coat hanger and filed the tip round. Run this through the cable channel in the top and tape the cable to the hanger and pull it through.

Once you pull the cable through run it through the eyelet at the top of the c pillar.
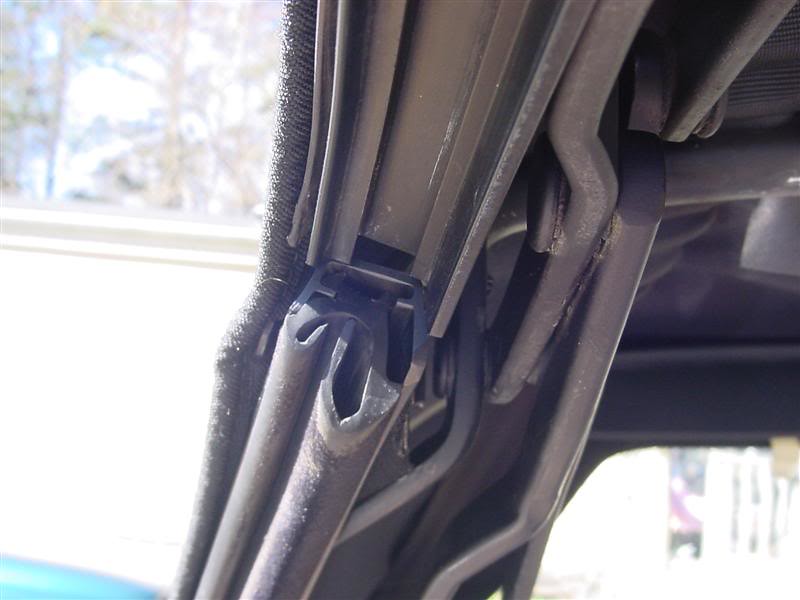
Then reattach your side cable, spring and sheath and hook it back on the c pillar.
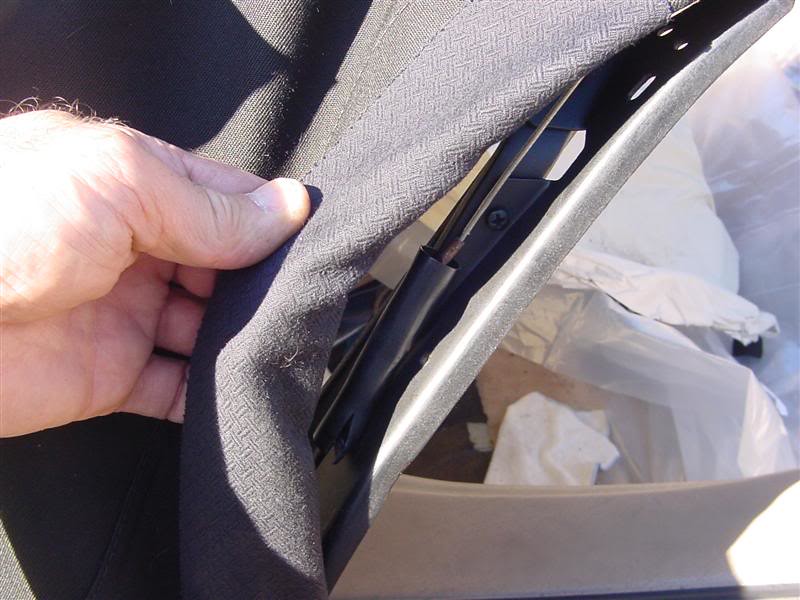
Time to reinstall your corners. Make sure you removed any left over rivots.
The side cable runs through this channel in the corner. Reinsert the corner in the pillar and reinstall the screw and washer that hold it in place.
Now make sure your sides are in the right spot.

Go ahead and glue it down. Again try not to let it bunch up, keep it all flat or the rear window channel will sit crooked.

Then trim it up.
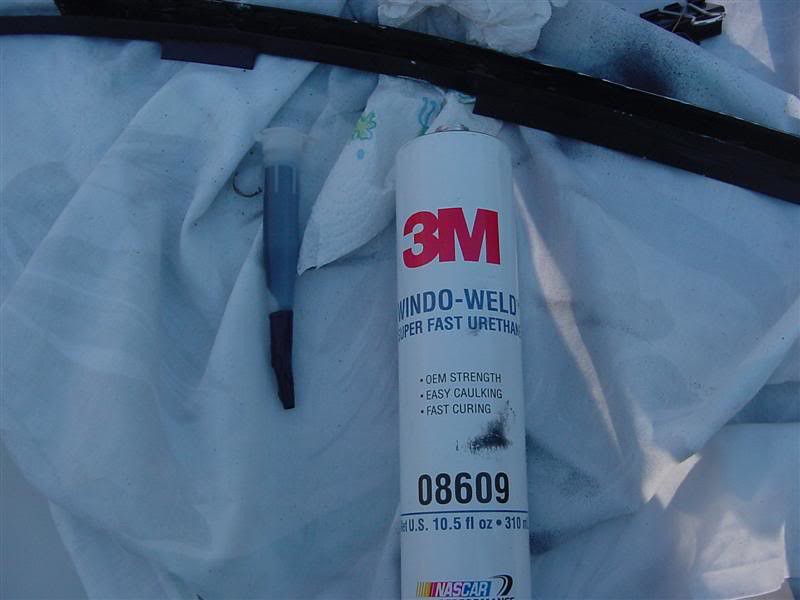
One thing i had to make sure i got done today is urethaning the front seal channel. It really needs to sit overnight. This is the stuff i use. Luckily the tube lasted the 2 weeks and is still usable. The tip was dryed but i was able to dig out the dryed stuff. This crap is $25+ a tube.
Before we do that go ahead a remove the channel again. We need to glue the corners before we do the channel. The corners have 2 layers. The first one i trim a square out of it so it isn't all bunched up. Make sure you don't cut the sewing seam.

Sorry for such a shitty pic but..... go ahead and trim the excess material so it just goes past the screw holes.
Then go ahead and glue the rest of the ends. Glue the outer piece of material to the plastic piece and clamp in place. You may need to reglue the part to the metal again. Just put some more glue and clamp it.
Hold the channel up there and put a piece of tape where the channel stops on the top and another where the channel ends. Do the other side. This way you know where to stop applying urethane.
Next you need to remove the handles that lock the top down so the channel can go in easier.
Apply 2 beads of urethane like the videos show. One thinner bead in the middle of the top area and another at the 90 degree corner. Reattach the channel and screw it down again. Start all of the screws before tightening any of them down. Then tighen them a bit and then go back and tighten them more until they are all pretty tight. I meant to take more pics but forgot and got tired. Check out the videos.

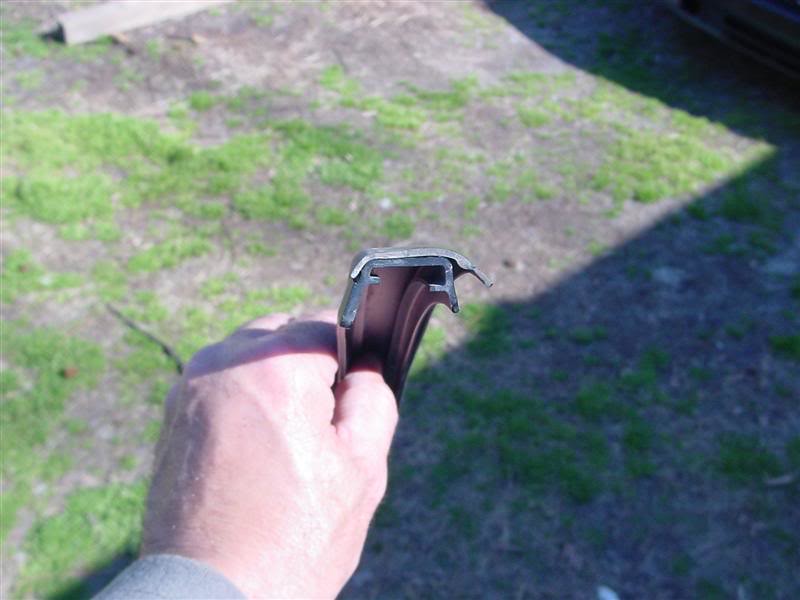
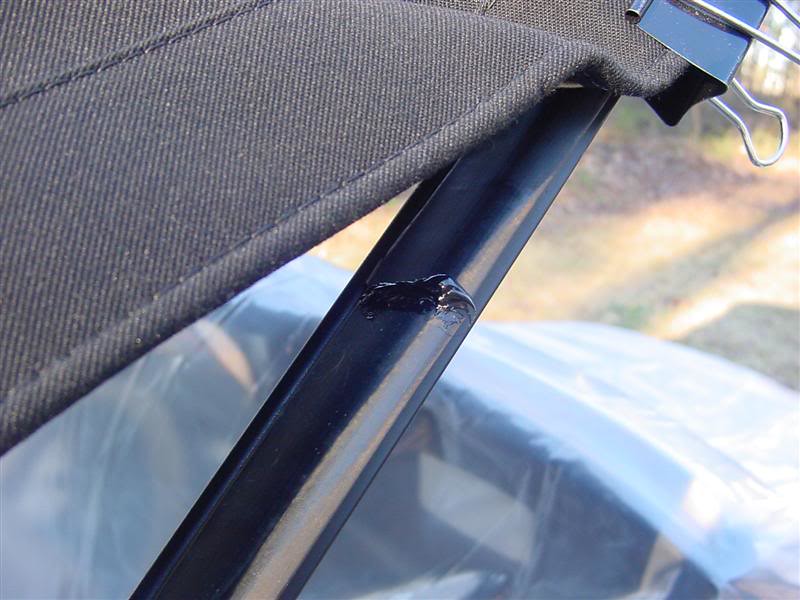
Here is another use for the urethane. This seal had a tear. I just applied some urethane and taped some tape down to flatten it.
Here it is with the front channels screwed back in.
Is it too late to mention that you need gloves with this urethane. Once this stuff gets on you hands it is on your hands. Takes a few days to wear off. Even paint thinner struggles to remove it.
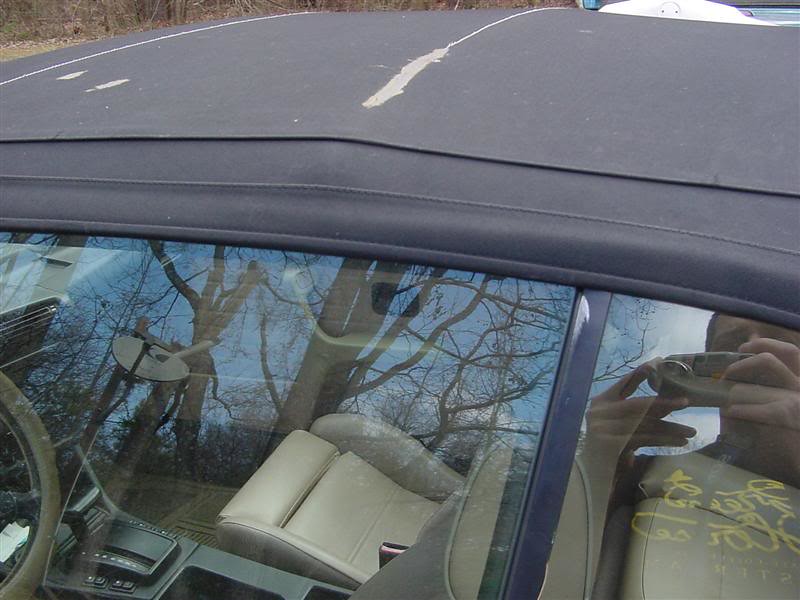
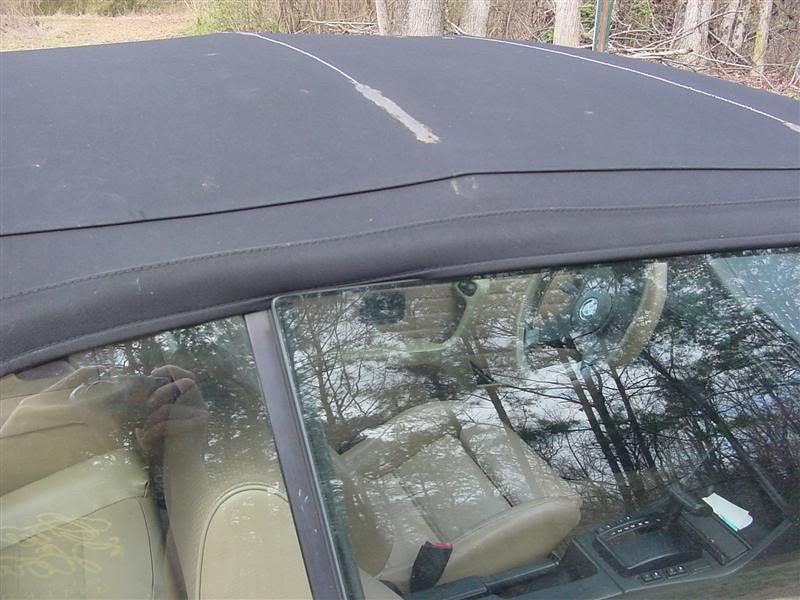
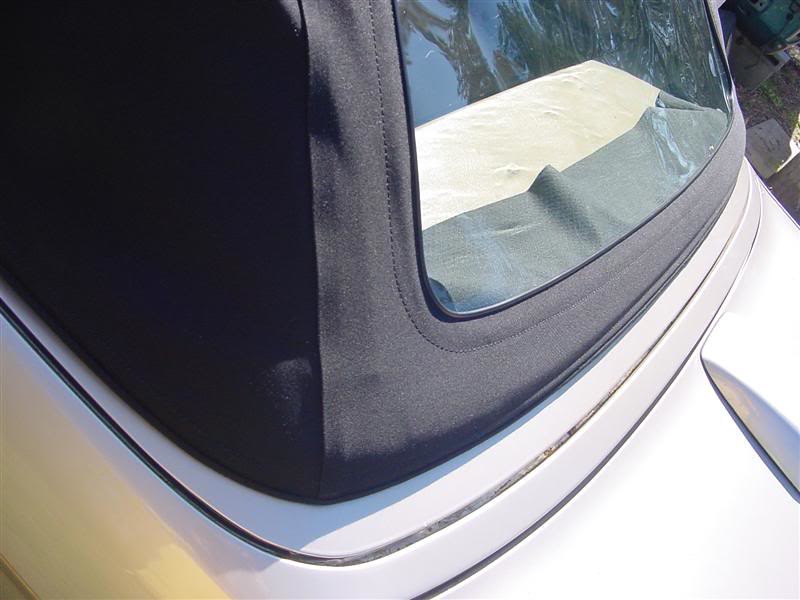
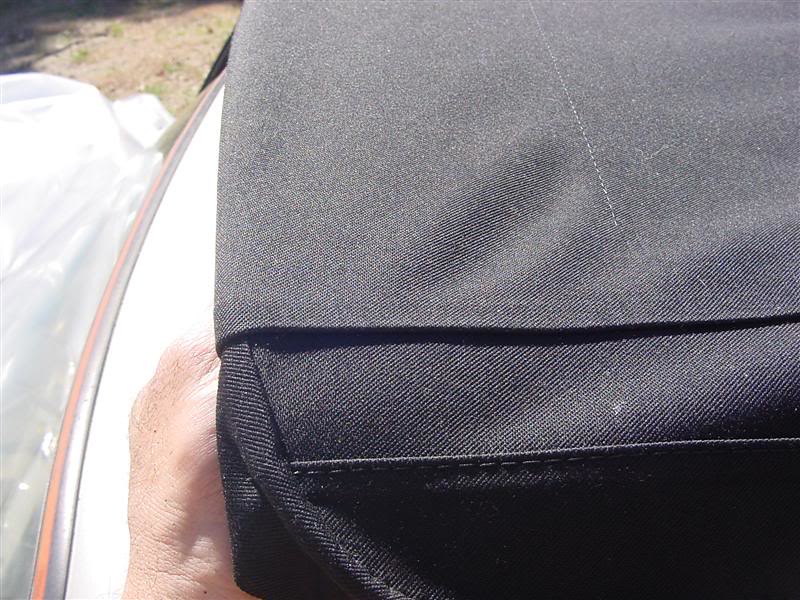
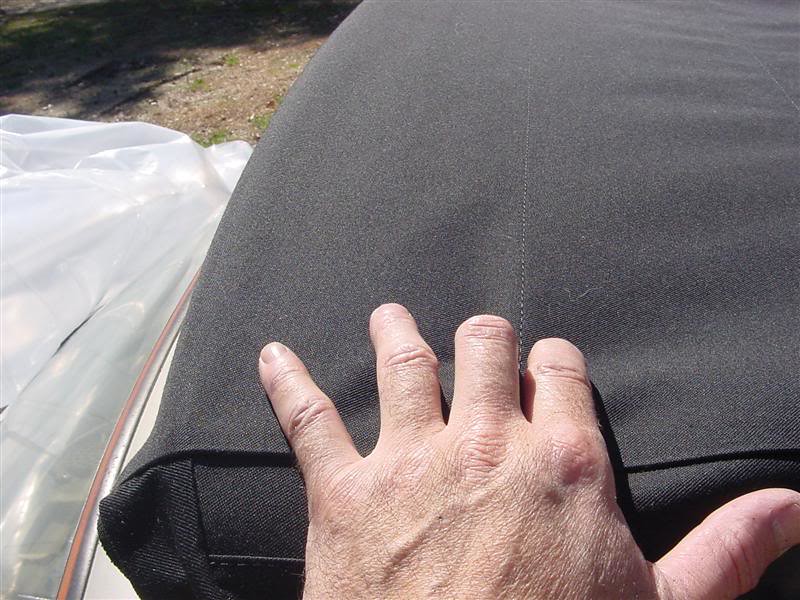
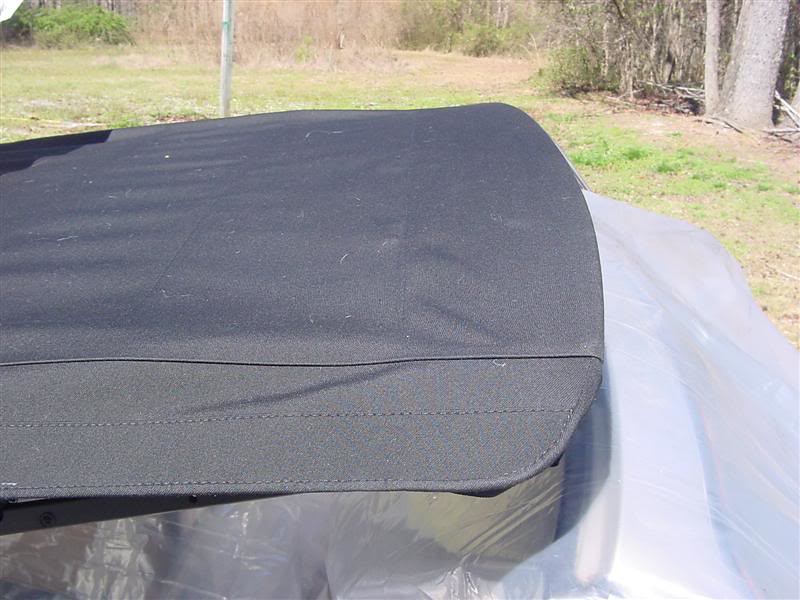
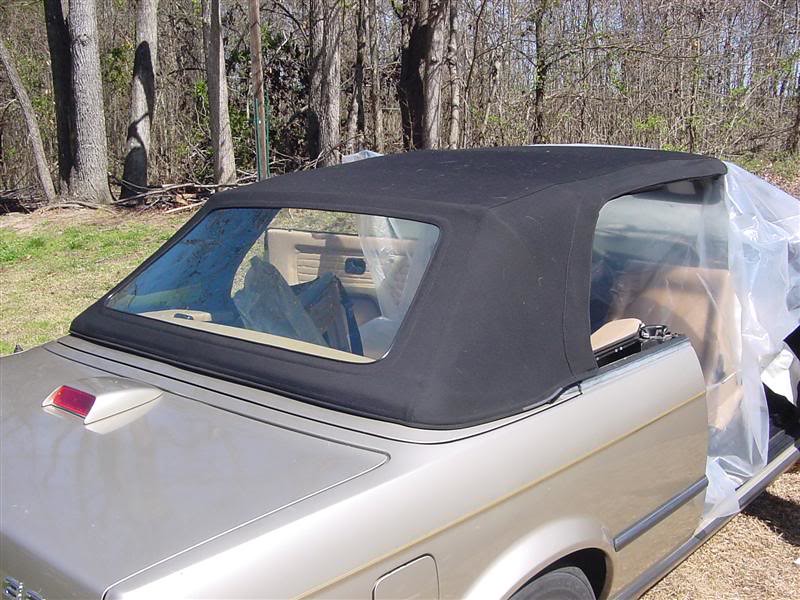
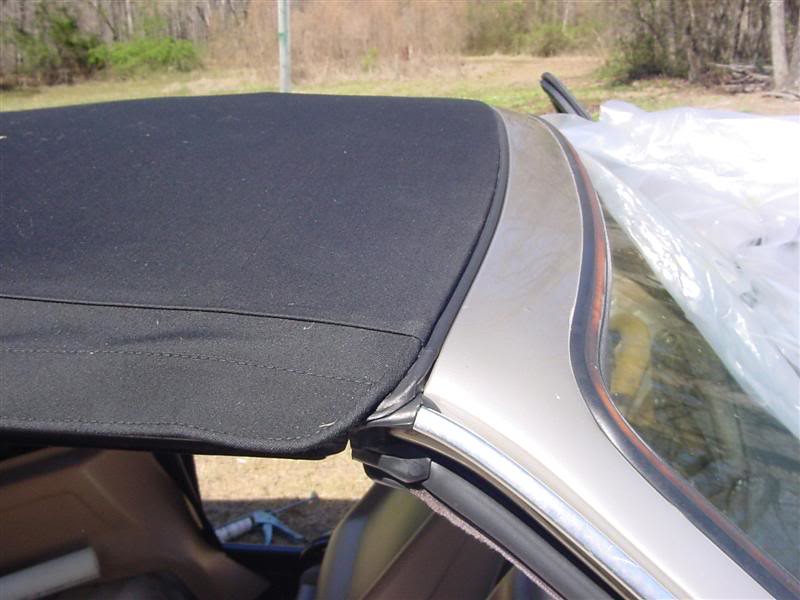
And so it sits for the night. It looks like these tops all have a good fit. This one looks as good as my 318.
Tommorow i will attach the second layer at the back and rivot on the rear window guide seal channels and install the channels. Then i can install the front seal and seal the ends with more urethane. Only thing left after that is gluing the crossbars... i think.... damn i'm tired.....Last edited by bradnic; 11-16-2018, 06:56 PM.I BUY/SELL REFURBISHED CM5907s & CM5908s
HOWTOs:
DB vert plastic bumpers
OEM Keys
MTech1 docs
88 ix Lach/Card
91 ic Calypso 3.1
86 Cosmo 2.7
OEM+ or bust!
reelizmpro: I will always be an e30 guy.. I still do all of my own labor
TrentW: There's just something so right about a well-built M20 in an E30
e30m3s54turbo: I save my money for tuner parts.Comment
-
BadCab content5
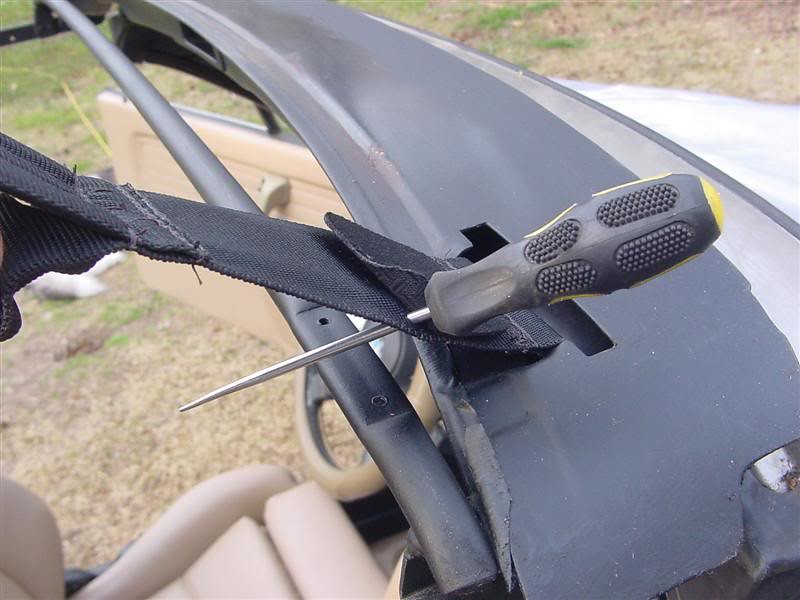
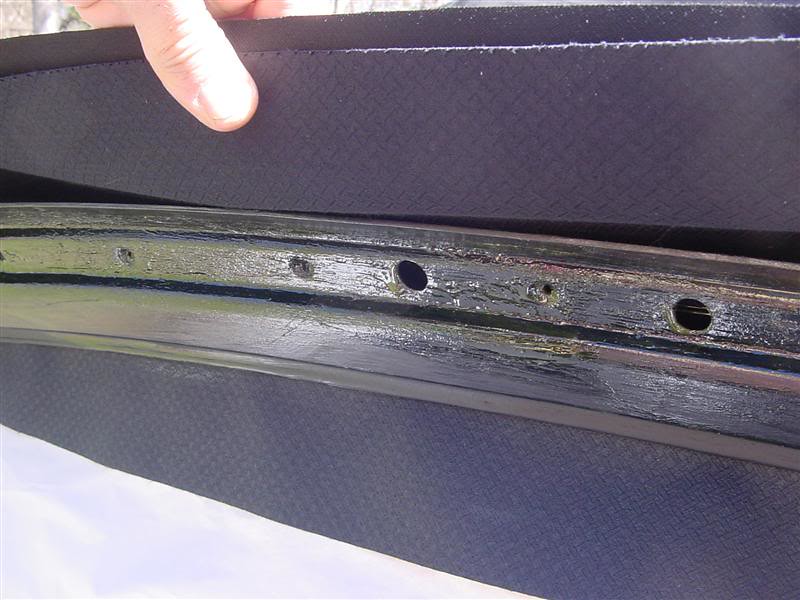
Ok so the next day comes and it's time to get this sucka finished. I start at the C pillars. Using the rear window guide/seal rail and an awl i probed around for the rivet hole. Once you find it poke a hole. You need to very carefull here or you could poke a hole through your new top. The top rivet isn't too bad because the plastic triangle is there to stop it but the 2 lower ones would be easy to poke a hole if you poke it crooked or too deep. Just easily poke it a little so you know where it is.
Then i used the T25 screwdriver again to ream the hole for the rivet
Now we can put the bead of urethane for the rail. Make sure you keep the bead towards the outside of the rivet holes.
Put your rail up and rivet it in.
Gave the seals a good wash with dish soap.
Go ahead and find your rivet hole for the seal and ream it.
Apply some more urethane to continue the seal. Again make sure the bead is on the outside of the rivet/screw hole,
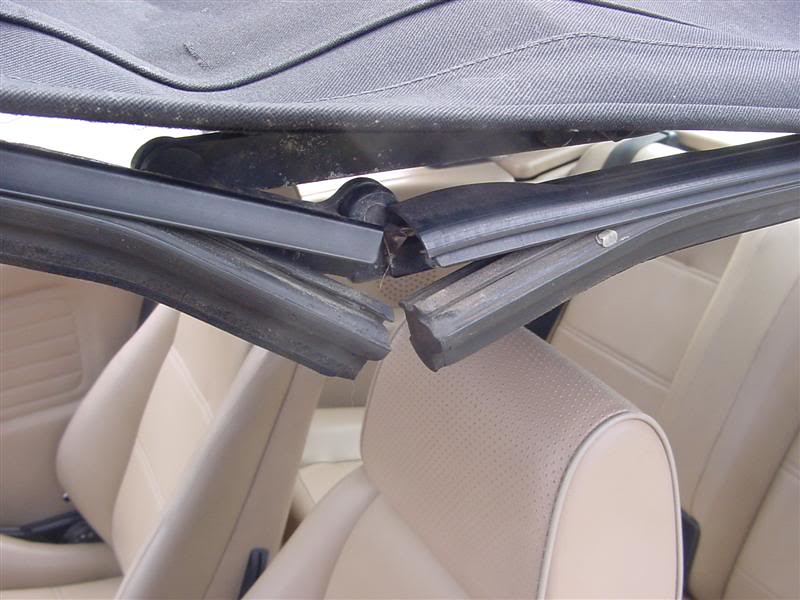
These seals suck to put in. I used a little soapy water on the seal to make it go a little easier but it only lasts until it drys. You have to use a screwdriver to push it down.
You need to first insert one side of the seal into the rail then push the other ridge under the rail. This is what you are trying to do......
Once you get the seal on you are going to want to slide it up until the rail stops on the seal indentation. Then find the rivot hole again with your awl.
Push twist rock, twist push rock, rock push twist rock until you drive the rivet home and rivet it in.
and put your screw if you have one.
Moving back to the rear
I'm going to do the sides first because they sit under the rear most piece. I go ahead and tape back the rear part so it is out of the way.
Then i apply tape to the edge on the outside so i don't get glue on it and it also gives you a little more edge to grab when you glue.
and glue.......we're walking.....we're walking........
Make sure you watch you edge position when you glue it. Then do the other side.
When you do the rear section hold the material down and put a piece of tape where it ends so you know where to stop gluing and it keeps it clean
I put a piece of tape in the middle and pull the cloth back and tape it to make it easier to apply glue to the rail. Then take it off and put your glue on the material. This material all has a middle layer of rubber so you don't have to worry about the glue soaking through. Well this top anyways.
Like before slide your fingers back and forth slowly moving back to stick the material together to avoid bunching up.
I again marked where to stop gluing the last piece of material.
 [
[
Apply the material
 [
[
Find your middle screw hole for mounting the seal rail. Poke through with your awl and put in a screw. Then do each end screw hole and the rest should all pretty much line up unless your rail is all bent up.
Back is done. Yay.
 Last edited by bradnic; 11-16-2018, 07:29 PM.I BUY/SELL REFURBISHED CM5907s & CM5908s
HOWTOs:
DB vert plastic bumpers
OEM Keys
MTech1 docs
88 ix Lach/Card
91 ic Calypso 3.1
86 Cosmo 2.7
OEM+ or bust!
reelizmpro: I will always be an e30 guy.. I still do all of my own labor
TrentW: There's just something so right about a well-built M20 in an E30
e30m3s54turbo: I save my money for tuner parts.Comment
-
BadCab content6
Last part.
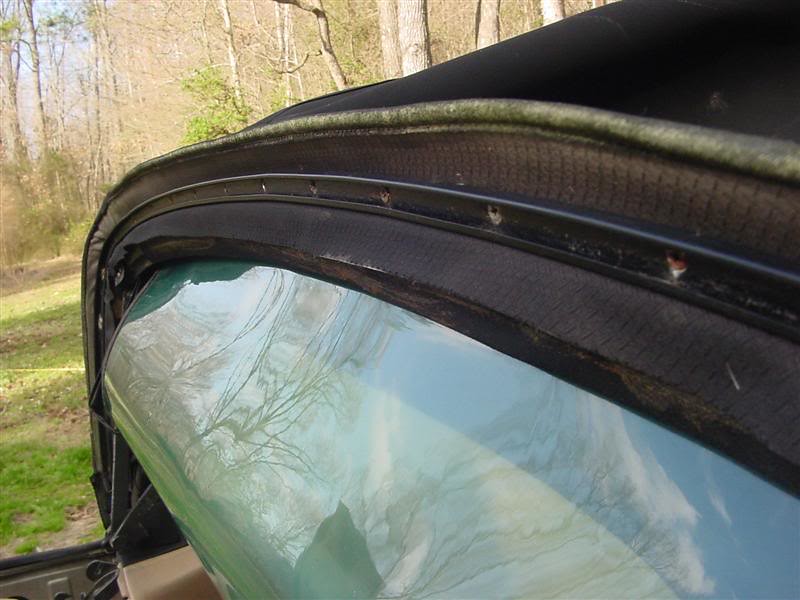
Next thing to do is install the middle seals. Start at the front part where the locating pin is and move back. It goes in the same way as the rear seal.
Once you get those in we are moving to the front. Your going to want to close up the hole above the rail and put a bunch around in this area. Don't go too nuts or the shit will be everywhere and this stuff goes along way when it comes to smudging.
Slide each end of the front seal onto their rails but not enough to touch the urethane yet. Then put in the center of the seal and insert it from the middle outward on each side.
Go ahead and slide the sides the rest of the way making sure the seal goes into the rail. My 318 had locating pins at the end of the rails i had to lift the seal with a screwdriver so it would go over it. This car does not have pins. Once you do that pull the edge of the seal open and put a little urethane so when you squeeze the seal it get a little bit closer to the edge. You can wipe off anything that seeps out. Take note of how my end pieces are a little crooked. Make sure you don't do it. I will fix it when i have some time because it bugs the shit out of me. Go ahead and close the top. Leave it for a couple days.
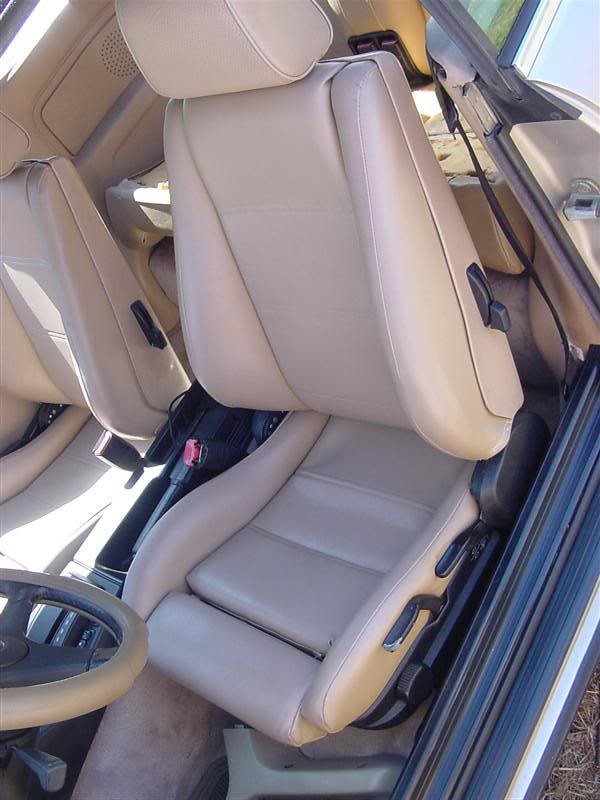
OK a little bragging....check out these seat covers i made when i built the car for the niece. Me and my dad had put quite a bit of money in this thing and we just couldn't swing another $600 in seat covers too so i bought 5 yards of vinyl, took the old seat covers apart for templates and with my first time at bat with a sewing machine made these. They are not perfect but alot better than i thought i would do.
The bottom is upside down to dry.
Ok back to work....next up are the crossbars, again i tape the edges to keep them clean.
OK, when you are sitting in the front seat there are 3 bars behind you and one in front. For the ones behind you, you want to apply the rear most piece first. This way the second piece ends towards the rear so you can't see it from the front seats. I do the opposite for the front one.
I put some glue in between the bar and top, first to glue them together but more to add an extra layer of sealing on the sewn seams.
Once you apply the first piece apply another peice of tape to the top so you don't make a mess.
Lick it like a stamp.....or put glue.
and roll....
Move back to the next bar. This bar is thicker so the material will not wrap all the way around so take note when you put on glue.
Go ahead and put the glue between the top and bar and then do your rear side then when you put tape on your top make sure you move it on to the bar where the material is going to end to keep you from making a mess.
It's like Butta
Do the rear most bar closest to the window. Carefull with the glue near the window.
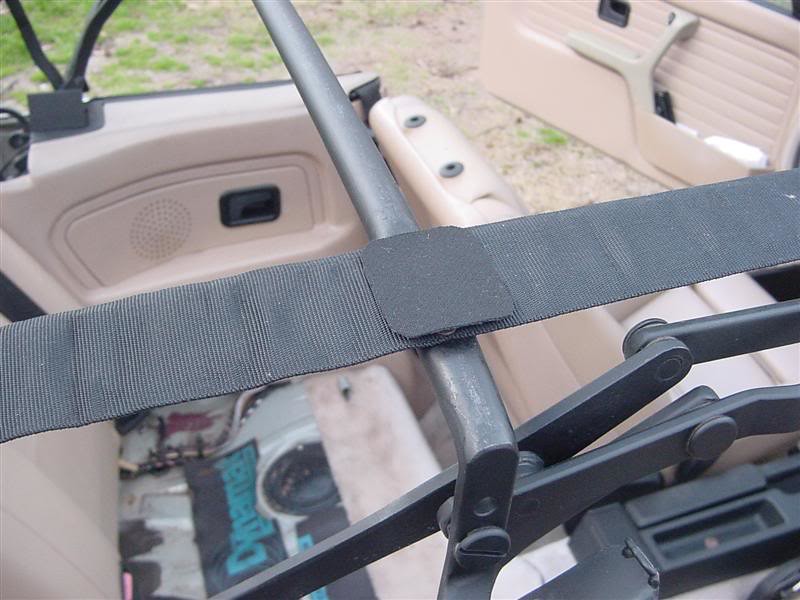
Remember these? Apply a bunch of glue to it and stick it over the backs of the rivets.
Last piece, this time do the front piece first then the rear so the edge is away from you.
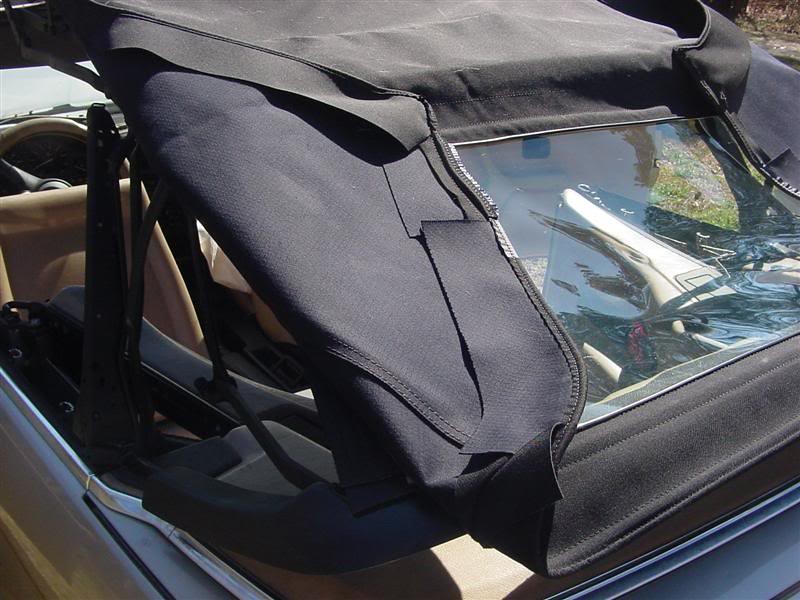
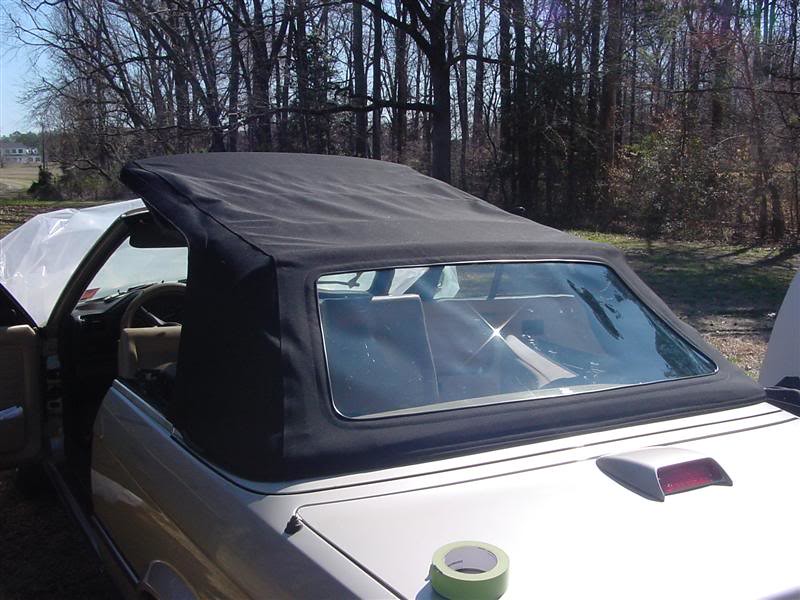
And so we have it done......I am really liking the fit and finish of these tops. I am super picky and super happy. Let the top sit for a week before you put it down. Then be very careful when you put it down for the first time to make sure the straps are not pinched or bound and the top is folding right.

The only thing i want to do is fix the crooked end piece at the front and also the sides where the brushes are. I did not get them tight enough and the edge points out a little. I did the same thing on my car and thought i made sure i had not made the same mistake but i ended up with the same result. It's something i can deal with later when i have more energy.
Hope this helps you guys out. It's some hard work but i just saved myself a fortune installing 2 tops in 2 weeks and it's not rocket science.Last edited by bradnic; 11-16-2018, 07:50 PM.I BUY/SELL REFURBISHED CM5907s & CM5908s
HOWTOs:
DB vert plastic bumpers
OEM Keys
MTech1 docs
88 ix Lach/Card
91 ic Calypso 3.1
86 Cosmo 2.7
OEM+ or bust!
reelizmpro: I will always be an e30 guy.. I still do all of my own labor
TrentW: There's just something so right about a well-built M20 in an E30
e30m3s54turbo: I save my money for tuner parts.Comment
-
BadCab top install thread pics restored
couldn't post the pics to the original BadCab posts, but they're all restored now. enjoyI BUY/SELL REFURBISHED CM5907s & CM5908s
HOWTOs:
DB vert plastic bumpers
OEM Keys
MTech1 docs
88 ix Lach/Card
91 ic Calypso 3.1
86 Cosmo 2.7
OEM+ or bust!
reelizmpro: I will always be an e30 guy.. I still do all of my own labor
TrentW: There's just something so right about a well-built M20 in an E30
e30m3s54turbo: I save my money for tuner parts.Comment
-
nice work!sigpic
Gigitty Gigitty!!!!
88 cabrio becoming alpina b6 3.5s transplanted s62
92 Mtech 2 cabrio alpinweiss 770 code
88 325ix coupe manual lachsilber/cardinal
88 325ix coupe manual diamondschwartz/natur
87 e30 m3 for parts lachsilber/cardinal(serial number 7)
12 135i M sport cabrio grey/blackComment
-
OK, nice job, now to find a shop that will do the kind of job that was done to this car.......yeah, good luck with that...BMWCCA 12660Comment
-
Great writeup!! I used this along with the factory install videos on YouTube and had no problem getting my top installed. Thanks a million!!sigpicComment


Comment