
Mods: Sorry if this needs to be moved.
Also, mirrored here if you want a print-in-one-shot view: http://www.subaruaudio.net/other-how...ow-rise-ramps/
So why ramps? Because I needed them to be able to park my WRX over my lift on a daily basis. The hydraulics woudl hit the bottom of the car if I parked over it, so I made ramps to make it easier to park in the garage with the lift in place.
I have had issues in the past with even the low-profile rhino ramps being too steep to park lowered vehicles without the lip rubbing, so I started looking to find plans for DIY ramps. All of the DIYs had dead pictures or looked like @$$ (sorry), so I did my own DIY.
Make them shorter if you just want them for service ramps.
I saw about 47 different threads discussing low ramps for clearing a mid-rise lift, but the how-tos were fairly basic. Since making such ramps is simple, that makes sense. But for novices, I thought that I'd put together a short how-to guide. I am sure that there are many improvements that could be made to my procedure, so feel free to post here for posterity.
I needed ramps because I want to be able to park over top of my Atlas TD6MR on a daily basis and my WRX is too low (despite only being 1/2" lower than stock) to clear the hydraulic assembly. I wanted wide ramps that would fit multiple vehicles, and I wanted them to be movable fo rtimes when I need a clear floor (or for when I am going to lift something taller like my truck).
For that reason, I went with a "ladder" configuration, and fo rease of assembly I used 5/4" decking boards for the parking surface or deck of the ramp. I am REALLY bad with a circular saw and my table saw is stored away, so I went with the 5/4" boards for ease. I like my choice, but feel free to go your own way.
I measured the wheelbase of pretty much every car that MIGHT park on the ramps and decided on a 10' length, though I could easily add an additional 1-2 feet to the front whether temporary or permanent) with almost no effort, should I need longer ramps for another vehicle.
Materials:
2x3 x 8': 15 (approximate)
5/4x6 decking material: 4 @ 10', 4 @ 8' (Should have been 6 @ 10' and 1 @ 8' but more on that later.)
2x4 x 8' pressure treated: 1
Exterior grade decking screws: 2", 3", 2.5" I went through about 1 lb. each. I should have used all 2.5" and 2" but look at the material and decide accordingly.
Misc 19/32" plywood
Note: In place of the 5/4" mateiral you can use PT plywoood, synbthetic decking, Advantax-type subflooring...pretty much anything. If yo uneed the ramps to be taller, you can use 2x4s or taller. Look at what you need and plan accordingly.
Additionally, I had some waste when I was finished. Better planning of my cuts might have saved me a couple of 2x3s. I also should have bought six 10' 5/4x6 decking boards, but I made a mental miscalculation and bought only four.
Tools:
Circular saw
Small miter saw (only because I am bad with a circular saw)
Drills- 2. Note that I have 2 of them. Drilling and screwing with the same drill is a royal PITA. I don't recommend it. Beg, buy, borrow, or steal a second drill if you don't have one.
Carpenter's square
Tape measure(s)
Material clamps
Pair of sawhorses
4' level (or other straightedge): I only used this as a fence for sawing the plywood.
The process:
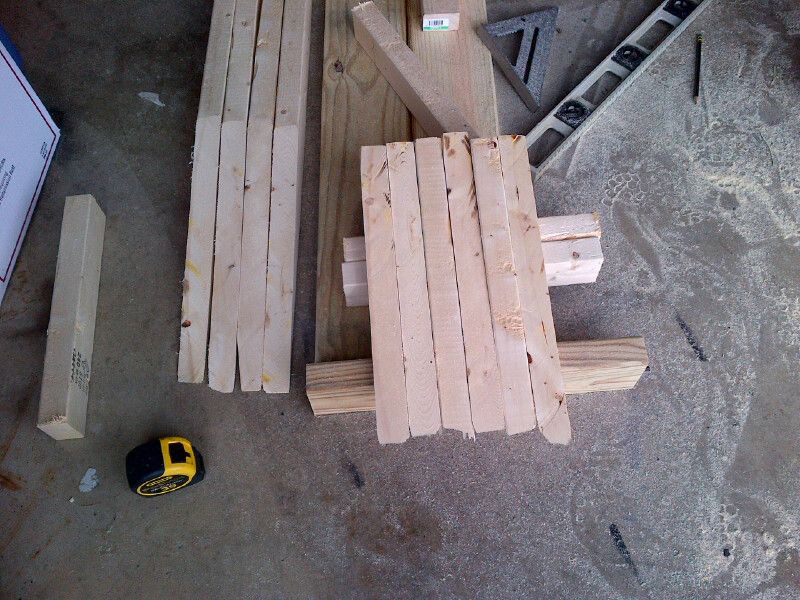
Materials all laid out:
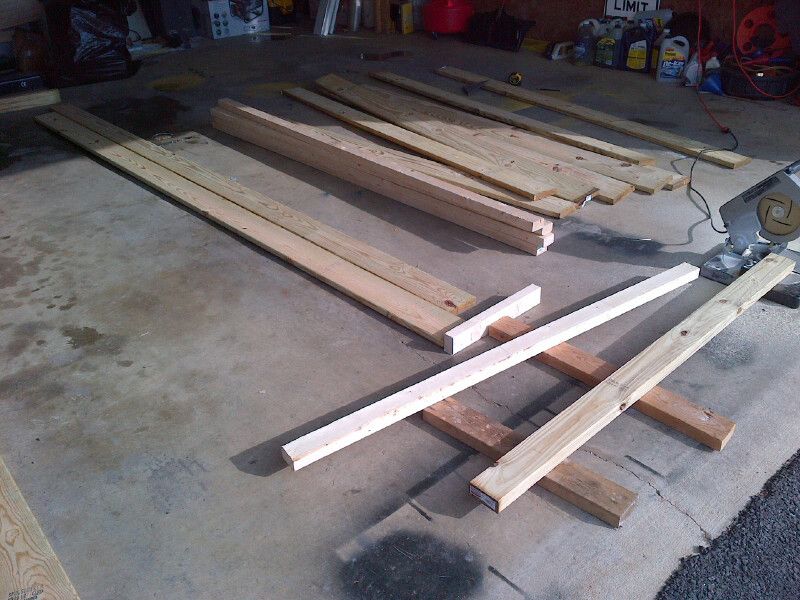
With me using (3) 5/4"x6" decking boards for the deck of the ramps, I laid them out and measured 17" for the width of the ends. Note: I forgot to allow for a nail spacing between boards. It did not matter in the end, but do a favor and add about 1/4"-3/8" for that when you cut your ends and ladder "rungs" for support.
I used a small mitre saw for these cuts, but a circular saw will do just fine.
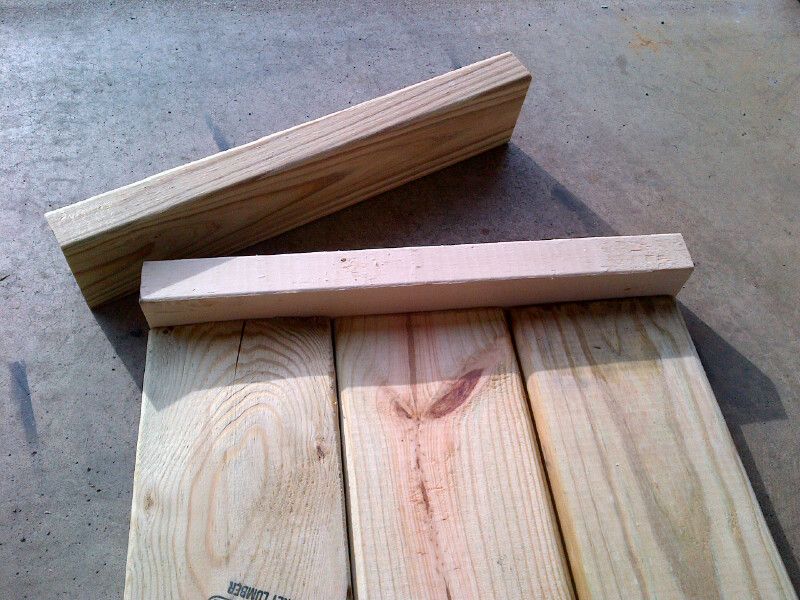
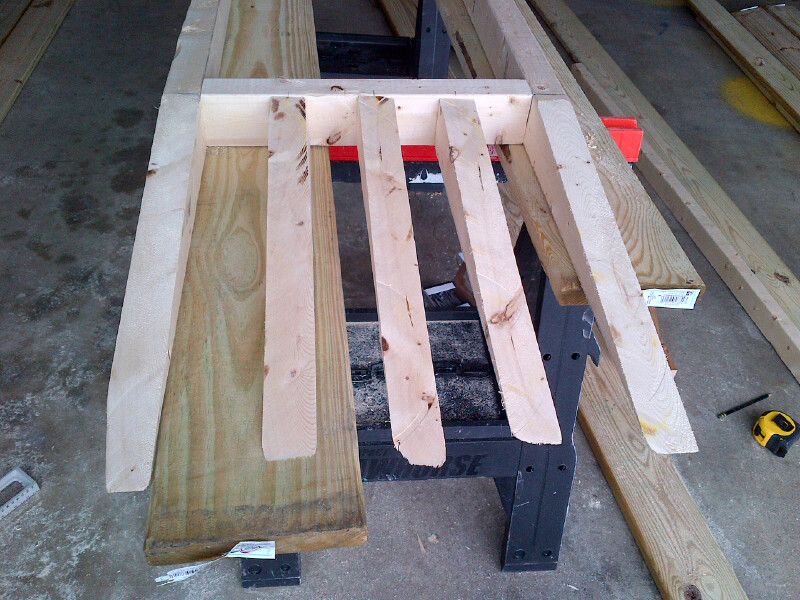
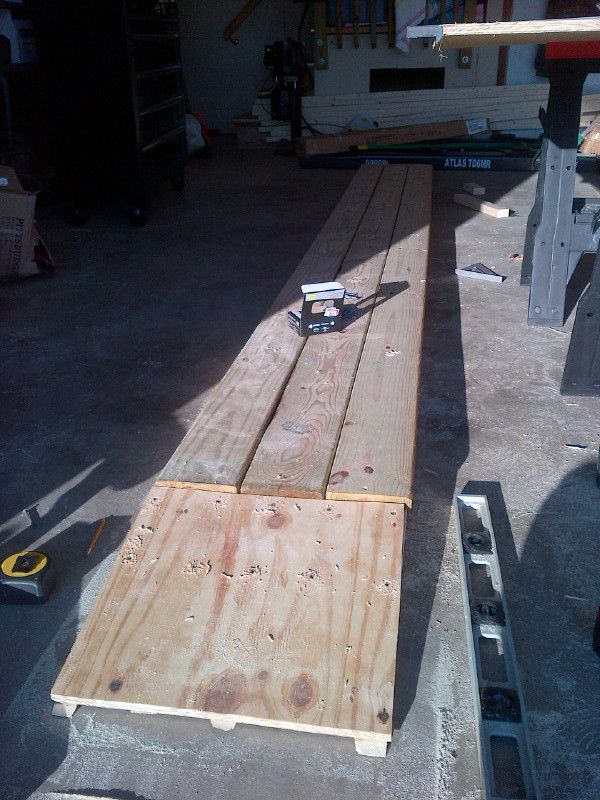
Lay out your side boards and measure for the width of crosspieces. Mine were 14" wide:
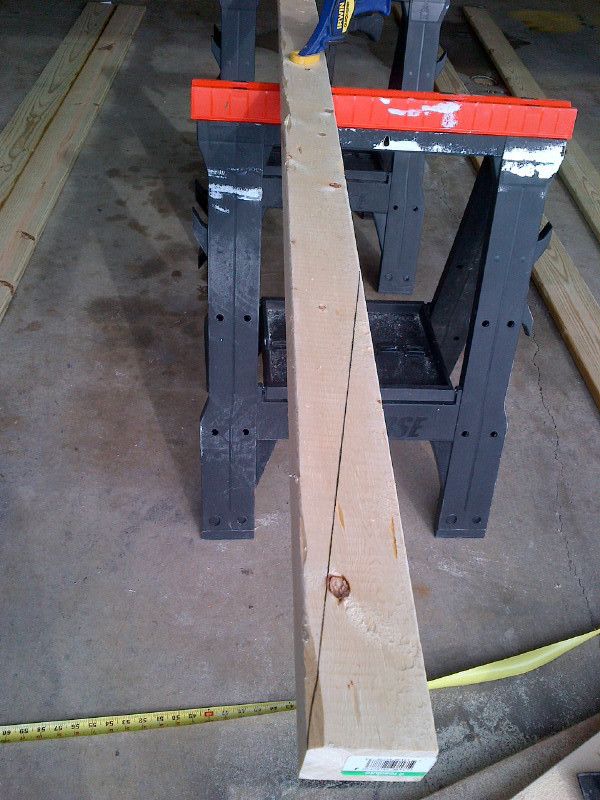
Now for the part that I dreaded...use of the circular saw. To make the sloped portion of the ramp, I measured 16" from the end of the board and made diagonal line to the opposite corner. This gentle slope was less than most commercial ramps, bu tthe majority of the ramped end is still under the WRX when the car is parked on them, minimizing the loss of floor space and the tripping hazard.
I clamped the material to a pair of sawhorses for stability.
At this point, I took a deep breath and cut the diagonal cuts as smoothly as possible. Overall, it went pretty well. I made 4 cuts in long pieces, resulting in 4 full length boards with angled ends and 4 angled sections fo runder the sloped board. For extra support for the angled part, I then made an additional couple of the wedges.
Assembly:
With the ends cut and wedges ready, I started assembly. All holes were drilled out and then screwed in with exterior grade screws. I had na assortment of screws from 2" to 3" and I used them somewhat interchangably. I would recommend 2.5" or 3" for building the "ladder" and then 2" for attaching the deck to the frame.
First assembly was to add "rung at the end of the angled long sections of the ladder. Next was to the wedges to the end rung. I placed one in the center (7") and then one on either side at the 1/4 and 3/4 positions.
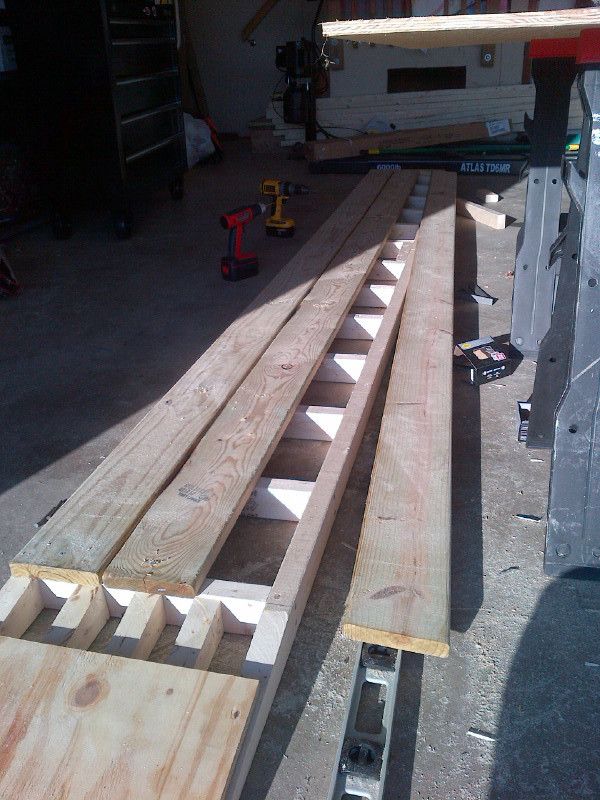
After that, I built the ladder with 12" centers on the rungs. Here is a detail of how I scabbed the 8' 2x3s together to make the full 10' length that I desired. Keep in mind that I had lost 16" to the angles at the end, so these add-ons were approximately 40" in length. To ge thtese exact, I laid out my 10' 5/4" boards beside the angles sides and then laid another 2x3 beside it, measured the difference, and cut the additional 2x3 to length. As I said- I ended up around 40" for the additional boards.
The back end of the ladder was made with a 2x4 that was cut to width. This gave me a "stop" for the decking boards. Had I thought it through, I would have used a 2x6 and that would have served as a "STOP" board when driving on the ramps, btu I can always add that later.
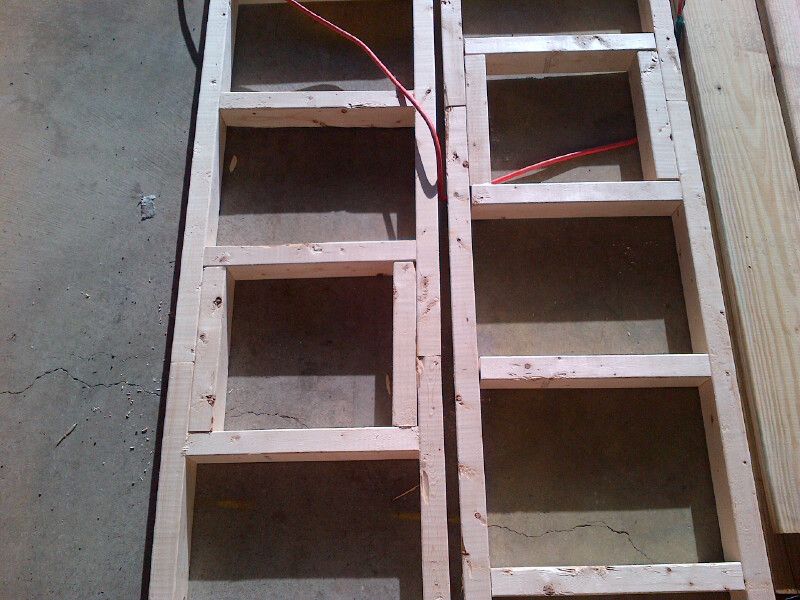
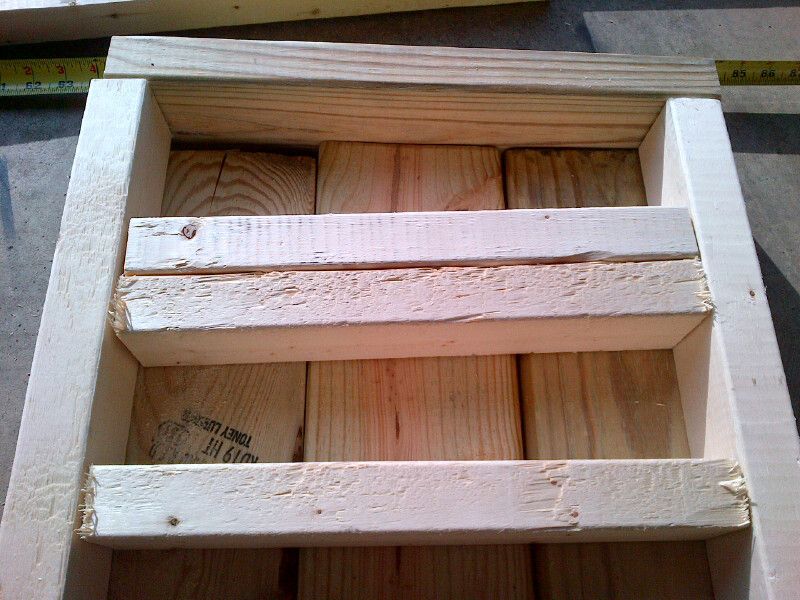
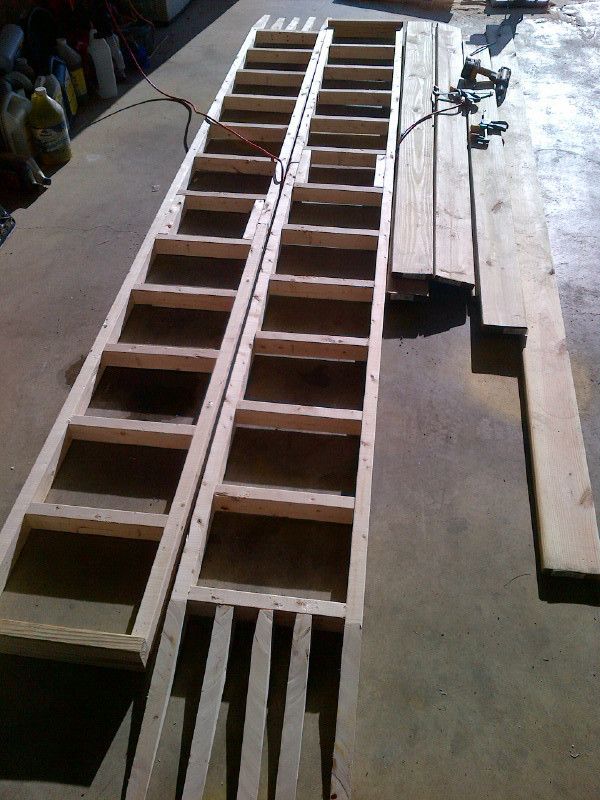
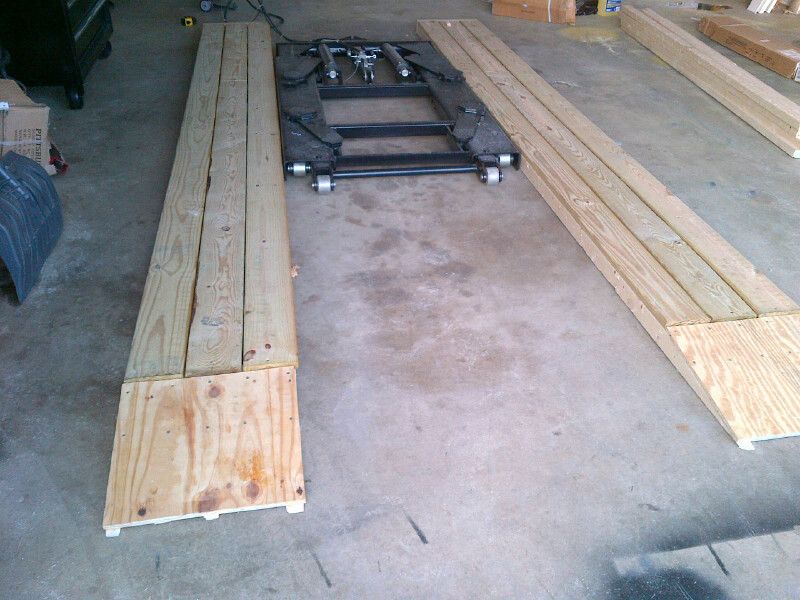
Here are the 2 laddres, mostly assembled:
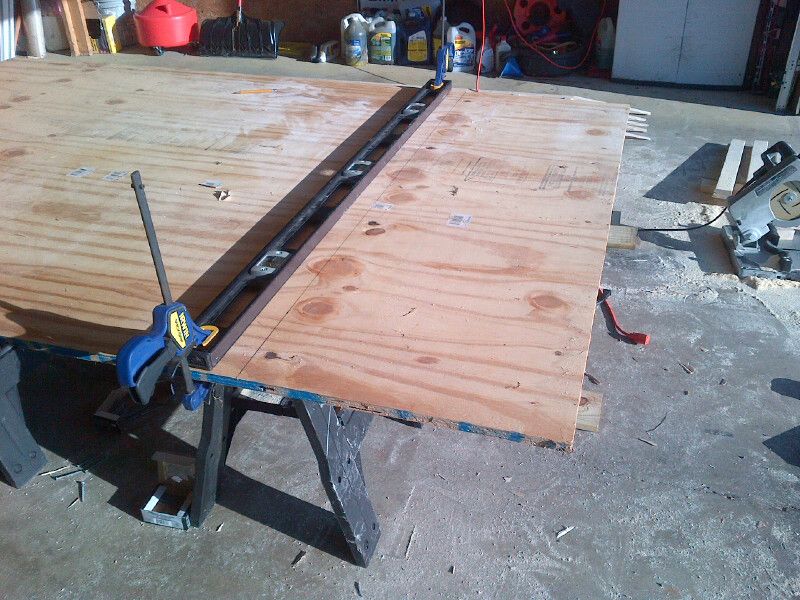
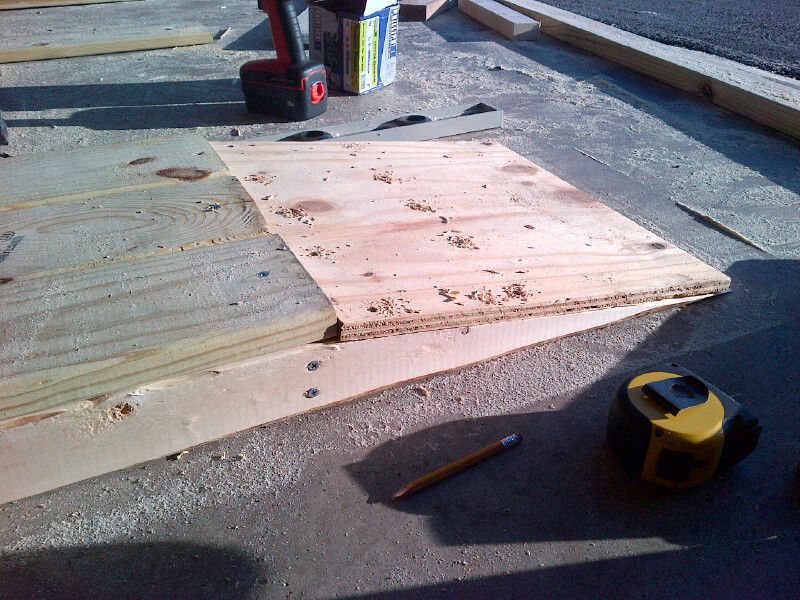
To make the ramp ends, I used some 19/32" plywood that I had around. I could have 45*'d the ends, I could have used diamond plate, I could have...whatever. I used plywood.
I determined the distance of the angled part of the wedges to be just over 16" (thank you, geometry class) and marked it off on the plywood, then used a 4' level as a fence for my circular saw.
After that, I laid out the decking and began the process of drilling out to attach the decking to the frame. Remember- this is just carrying weight, so no need to go nutso on the screws here. It isn't subject to wind, lift, adverse weather, etc. I did 1 screw every other board for now (also in case I screwed up and had to undo everything), btu will go back and fill in later.
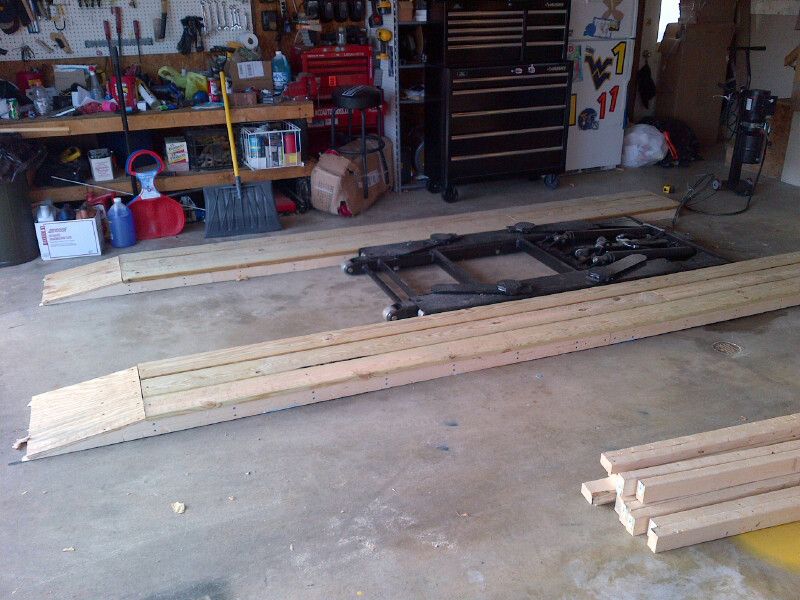
Another picture, mid-assembly:
I secured the plywood to the wedges with 10 screws per ramp.
The ends of the deck boards at the non-ramp end were attached to a ledger that I had initially forgot to include. I put the 2x3 between the side rails and allowed the decking to rest on there for a soild attachment point. Plus, the 2x3 then carries the load at the end of the assembly.
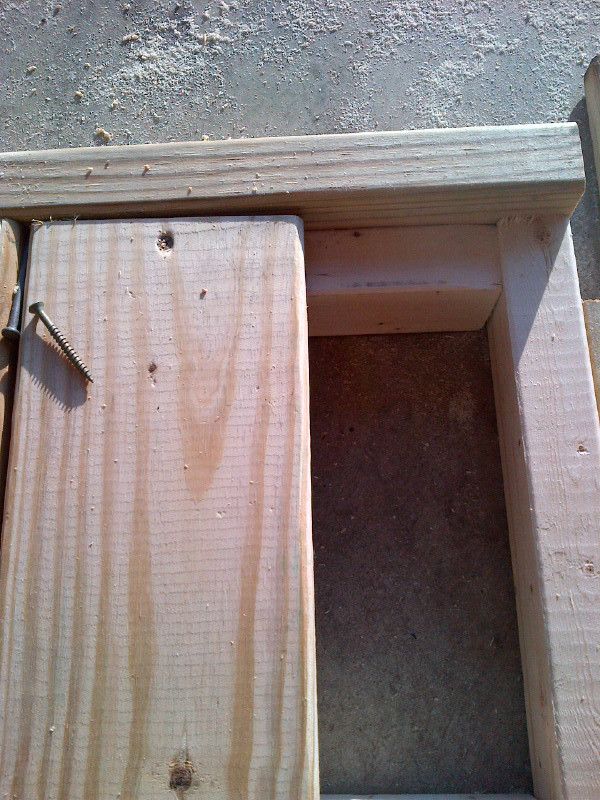
As you attach the decking, please be sure to use a nail or a spacer between the decking boards to allow for expansion and contraction. You can see the nail in the gap in the picture below.
All assembled, before use:
From about 8' off of the floor:
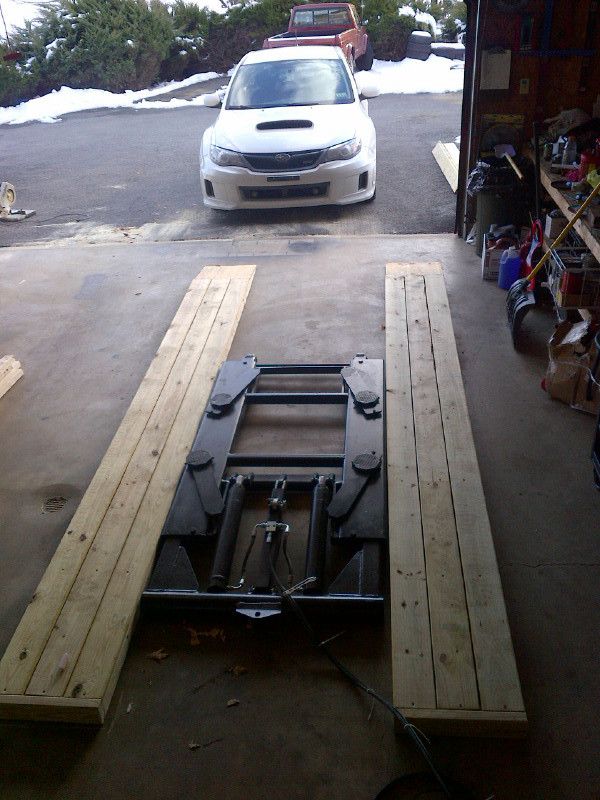
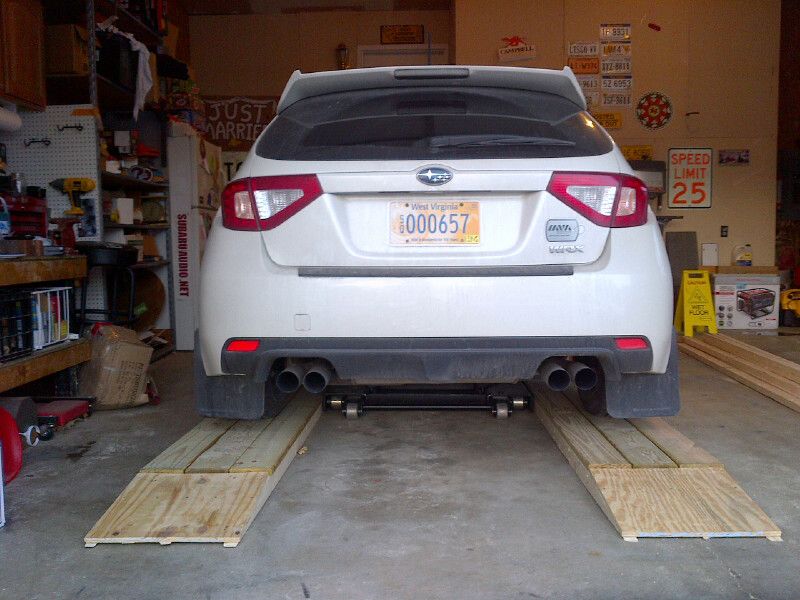
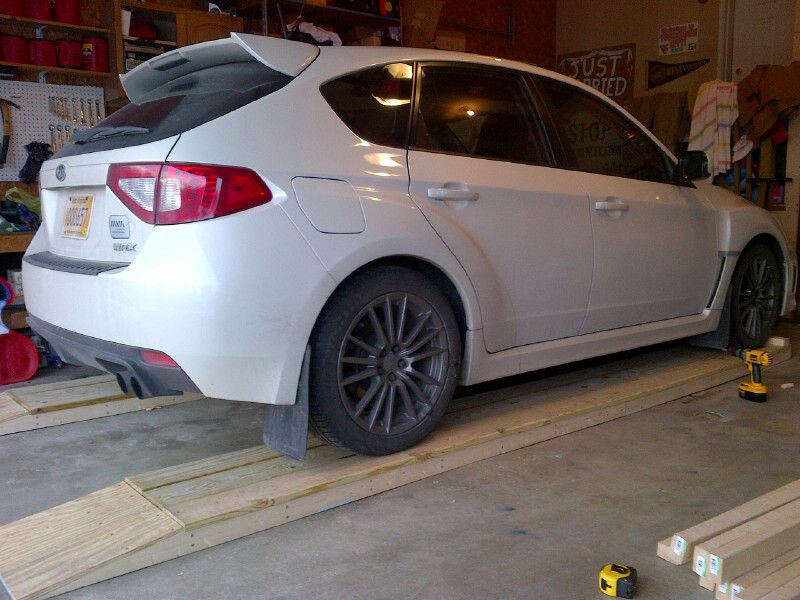
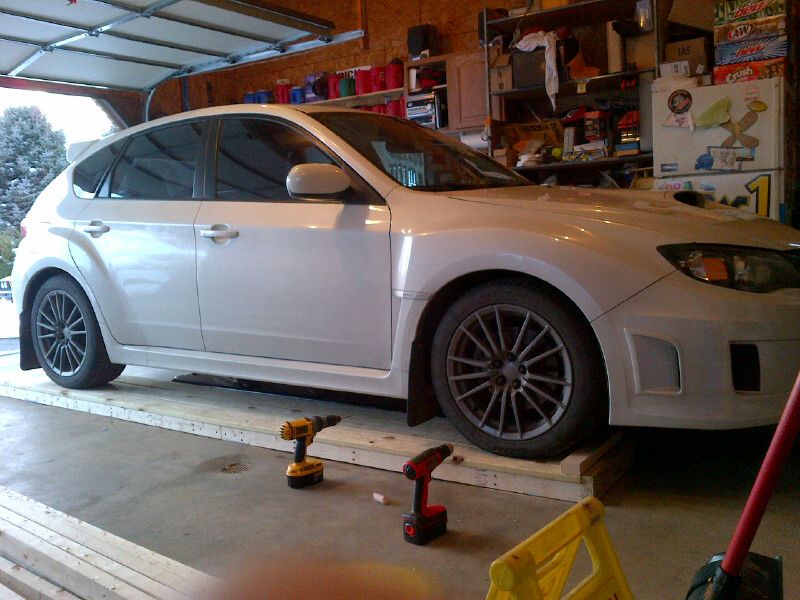
Car on the ramp:
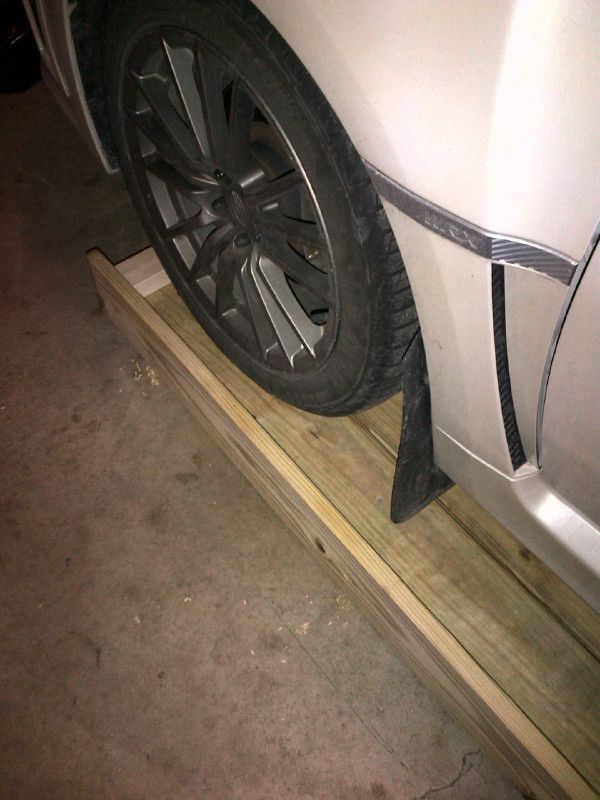
Because my garage is a side-load garage with a "J"-shaped driveway, I have to turn to get into the garage. I used a 5/4" board screwed to the side of the ramp to act as a curb to tell me that I am at/near the edge of the ramp deck. If you look at the front, I also added a short section of 2x3 to tell me where to stop the car as I pull onto the ramp.
A couple "in-use" pictures:
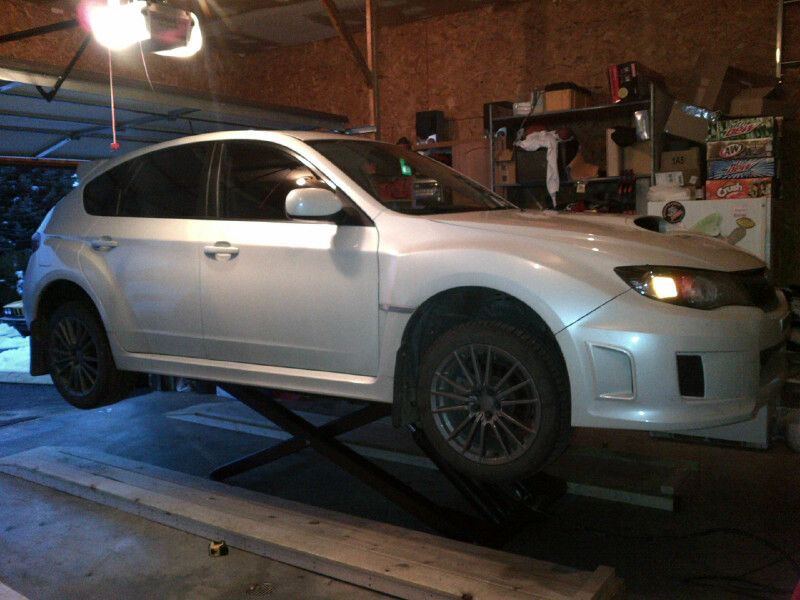
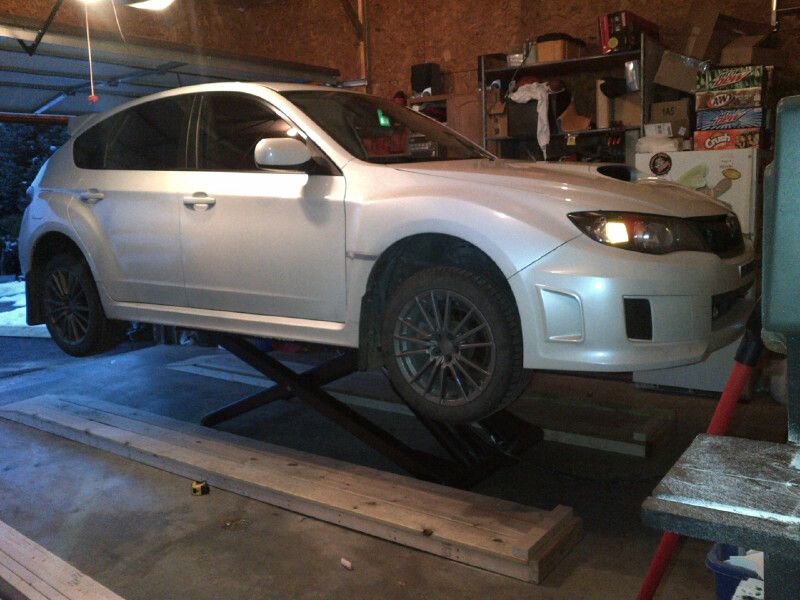
The lift goes MUCH higher than this- I had the garage door open and the roof of the car woudl have hit the door if I went up much more. I think it lifts to about 42" at max.
Also, mirrored here if you want a print-in-one-shot view: http://www.subaruaudio.net/other-how...ow-rise-ramps/
So why ramps? Because I needed them to be able to park my WRX over my lift on a daily basis. The hydraulics woudl hit the bottom of the car if I parked over it, so I made ramps to make it easier to park in the garage with the lift in place.
I have had issues in the past with even the low-profile rhino ramps being too steep to park lowered vehicles without the lip rubbing, so I started looking to find plans for DIY ramps. All of the DIYs had dead pictures or looked like @$$ (sorry), so I did my own DIY.
Make them shorter if you just want them for service ramps.
I saw about 47 different threads discussing low ramps for clearing a mid-rise lift, but the how-tos were fairly basic. Since making such ramps is simple, that makes sense. But for novices, I thought that I'd put together a short how-to guide. I am sure that there are many improvements that could be made to my procedure, so feel free to post here for posterity.
I needed ramps because I want to be able to park over top of my Atlas TD6MR on a daily basis and my WRX is too low (despite only being 1/2" lower than stock) to clear the hydraulic assembly. I wanted wide ramps that would fit multiple vehicles, and I wanted them to be movable fo rtimes when I need a clear floor (or for when I am going to lift something taller like my truck).
For that reason, I went with a "ladder" configuration, and fo rease of assembly I used 5/4" decking boards for the parking surface or deck of the ramp. I am REALLY bad with a circular saw and my table saw is stored away, so I went with the 5/4" boards for ease. I like my choice, but feel free to go your own way.
I measured the wheelbase of pretty much every car that MIGHT park on the ramps and decided on a 10' length, though I could easily add an additional 1-2 feet to the front whether temporary or permanent) with almost no effort, should I need longer ramps for another vehicle.
Materials:
2x3 x 8': 15 (approximate)
5/4x6 decking material: 4 @ 10', 4 @ 8' (Should have been 6 @ 10' and 1 @ 8' but more on that later.)
2x4 x 8' pressure treated: 1
Exterior grade decking screws: 2", 3", 2.5" I went through about 1 lb. each. I should have used all 2.5" and 2" but look at the material and decide accordingly.
Misc 19/32" plywood
Note: In place of the 5/4" mateiral you can use PT plywoood, synbthetic decking, Advantax-type subflooring...pretty much anything. If yo uneed the ramps to be taller, you can use 2x4s or taller. Look at what you need and plan accordingly.
Additionally, I had some waste when I was finished. Better planning of my cuts might have saved me a couple of 2x3s. I also should have bought six 10' 5/4x6 decking boards, but I made a mental miscalculation and bought only four.
Tools:
Circular saw
Small miter saw (only because I am bad with a circular saw)
Drills- 2. Note that I have 2 of them. Drilling and screwing with the same drill is a royal PITA. I don't recommend it. Beg, buy, borrow, or steal a second drill if you don't have one.
Carpenter's square
Tape measure(s)
Material clamps
Pair of sawhorses
4' level (or other straightedge): I only used this as a fence for sawing the plywood.
The process:
Materials all laid out:
With me using (3) 5/4"x6" decking boards for the deck of the ramps, I laid them out and measured 17" for the width of the ends. Note: I forgot to allow for a nail spacing between boards. It did not matter in the end, but do a favor and add about 1/4"-3/8" for that when you cut your ends and ladder "rungs" for support.
I used a small mitre saw for these cuts, but a circular saw will do just fine.
Lay out your side boards and measure for the width of crosspieces. Mine were 14" wide:
Now for the part that I dreaded...use of the circular saw. To make the sloped portion of the ramp, I measured 16" from the end of the board and made diagonal line to the opposite corner. This gentle slope was less than most commercial ramps, bu tthe majority of the ramped end is still under the WRX when the car is parked on them, minimizing the loss of floor space and the tripping hazard.
I clamped the material to a pair of sawhorses for stability.
At this point, I took a deep breath and cut the diagonal cuts as smoothly as possible. Overall, it went pretty well. I made 4 cuts in long pieces, resulting in 4 full length boards with angled ends and 4 angled sections fo runder the sloped board. For extra support for the angled part, I then made an additional couple of the wedges.
Assembly:
With the ends cut and wedges ready, I started assembly. All holes were drilled out and then screwed in with exterior grade screws. I had na assortment of screws from 2" to 3" and I used them somewhat interchangably. I would recommend 2.5" or 3" for building the "ladder" and then 2" for attaching the deck to the frame.
First assembly was to add "rung at the end of the angled long sections of the ladder. Next was to the wedges to the end rung. I placed one in the center (7") and then one on either side at the 1/4 and 3/4 positions.
After that, I built the ladder with 12" centers on the rungs. Here is a detail of how I scabbed the 8' 2x3s together to make the full 10' length that I desired. Keep in mind that I had lost 16" to the angles at the end, so these add-ons were approximately 40" in length. To ge thtese exact, I laid out my 10' 5/4" boards beside the angles sides and then laid another 2x3 beside it, measured the difference, and cut the additional 2x3 to length. As I said- I ended up around 40" for the additional boards.
The back end of the ladder was made with a 2x4 that was cut to width. This gave me a "stop" for the decking boards. Had I thought it through, I would have used a 2x6 and that would have served as a "STOP" board when driving on the ramps, btu I can always add that later.
Here are the 2 laddres, mostly assembled:
To make the ramp ends, I used some 19/32" plywood that I had around. I could have 45*'d the ends, I could have used diamond plate, I could have...whatever. I used plywood.
I determined the distance of the angled part of the wedges to be just over 16" (thank you, geometry class) and marked it off on the plywood, then used a 4' level as a fence for my circular saw.
After that, I laid out the decking and began the process of drilling out to attach the decking to the frame. Remember- this is just carrying weight, so no need to go nutso on the screws here. It isn't subject to wind, lift, adverse weather, etc. I did 1 screw every other board for now (also in case I screwed up and had to undo everything), btu will go back and fill in later.
Another picture, mid-assembly:
I secured the plywood to the wedges with 10 screws per ramp.
The ends of the deck boards at the non-ramp end were attached to a ledger that I had initially forgot to include. I put the 2x3 between the side rails and allowed the decking to rest on there for a soild attachment point. Plus, the 2x3 then carries the load at the end of the assembly.
As you attach the decking, please be sure to use a nail or a spacer between the decking boards to allow for expansion and contraction. You can see the nail in the gap in the picture below.
All assembled, before use:
From about 8' off of the floor:
Car on the ramp:
Because my garage is a side-load garage with a "J"-shaped driveway, I have to turn to get into the garage. I used a 5/4" board screwed to the side of the ramp to act as a curb to tell me that I am at/near the edge of the ramp deck. If you look at the front, I also added a short section of 2x3 to tell me where to stop the car as I pull onto the ramp.
A couple "in-use" pictures:
The lift goes MUCH higher than this- I had the garage door open and the roof of the car woudl have hit the door if I went up much more. I think it lifts to about 42" at max.


Comment