
The e30 is wrapped up in the garage for the winter, I decided to reupholster my seats since I had a nice size rip in the drivers side... This DIY will be a detailed explanation of how to disassemble e30 sport seats (I believe these are the sports seats, this is my first e30 so if I'm wrong please correct me in comments). I will show how to get the upholstery off, but finding someone to sew + fix them will be up to you. Okay lets begin!
First, whats needed:
Flat head screwdrivers - 1 really tiny one needed
Phillips Head screwdrivers
snap ring pliers
T25 torx
17mm socket/ratchet
Various pliers - for sure a needle nose
hog pliers / snips can be helpful
some Chinese food + beer of choice


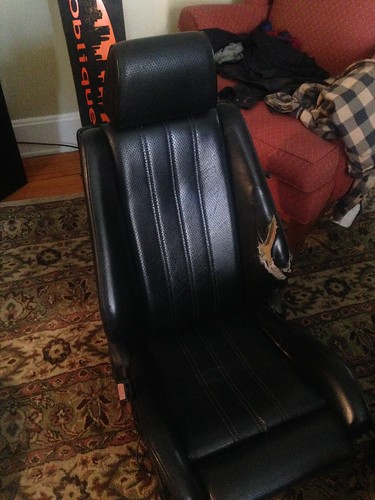
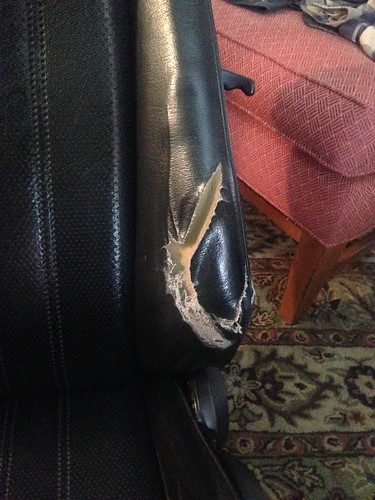
you also probably need a broken seats, heres my drivers side which was pestering me:
okay so lets start the disassembly. start with the tabs on the sides of the backrest. On the drivers seat there is only one! on the passenger seat there is one on each side.

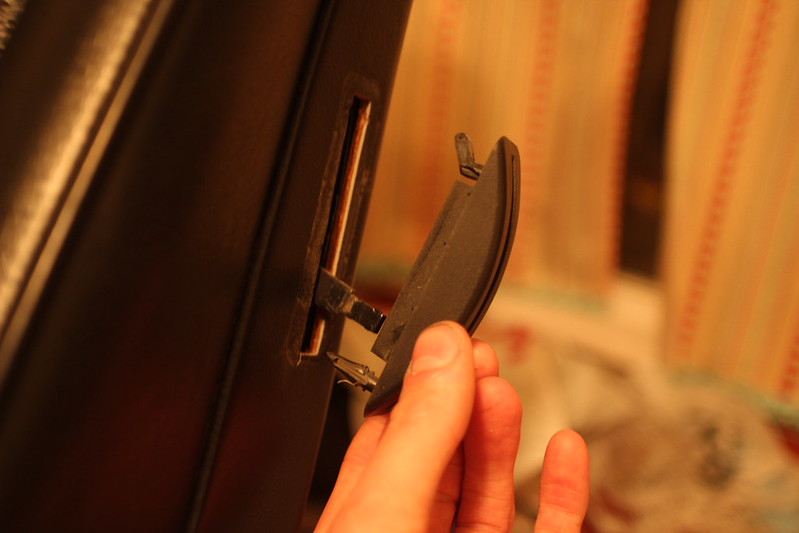
take your large flat head, and pry the handle off. it literally just pops right off with a little love

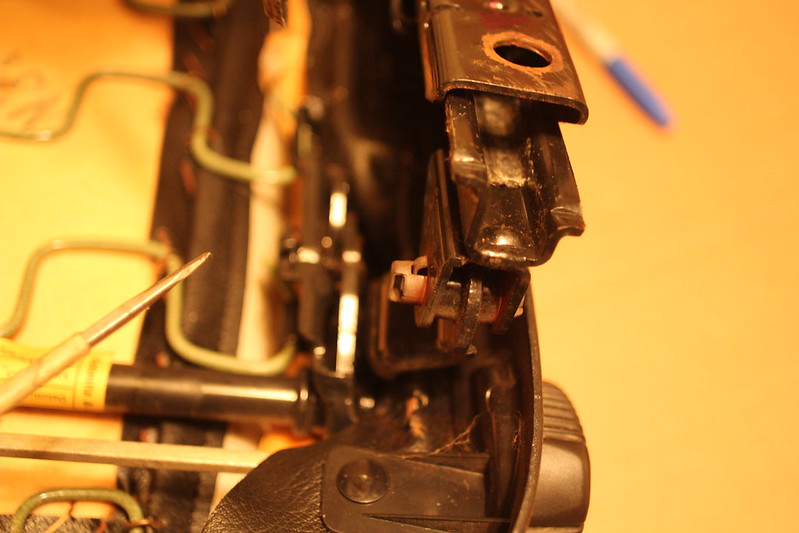
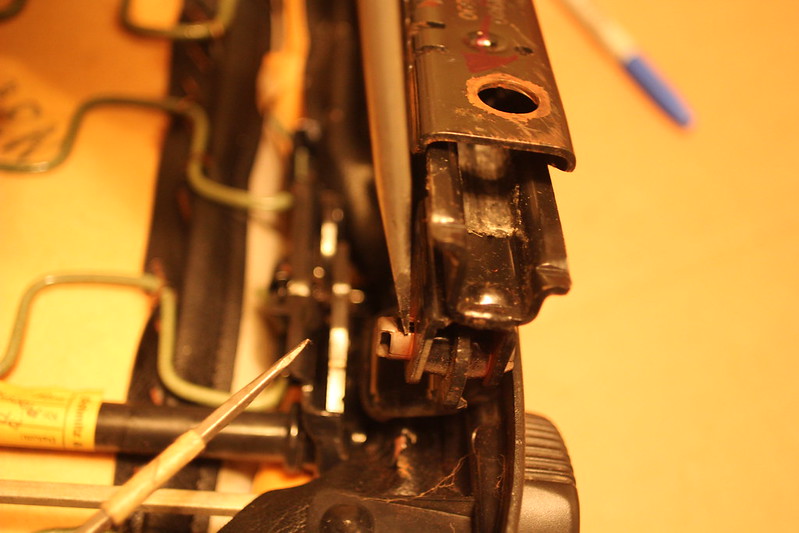
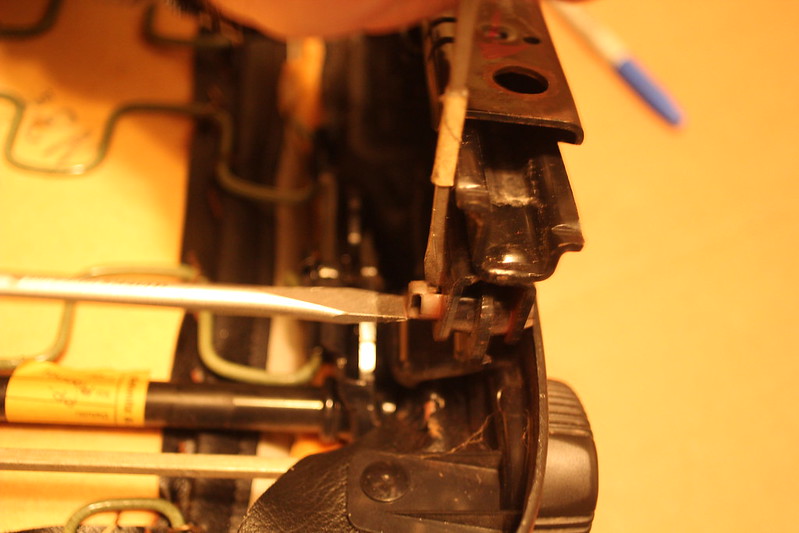
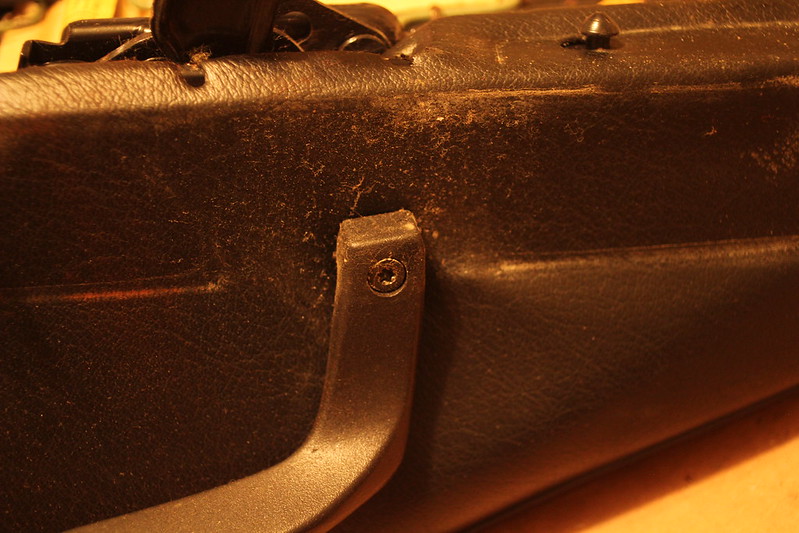
The next piece, use your flat head again and pop the bottom of it towards you! then the top will come out downward. see photo below
Now if your working on the passengers seat! there are two of these.. one of them is smaller than the other (I believe its the left side) this one has a screw hidden behind it. remove it with your phillips. see below

Next remove the two screws at at the backside bottom of the backrest
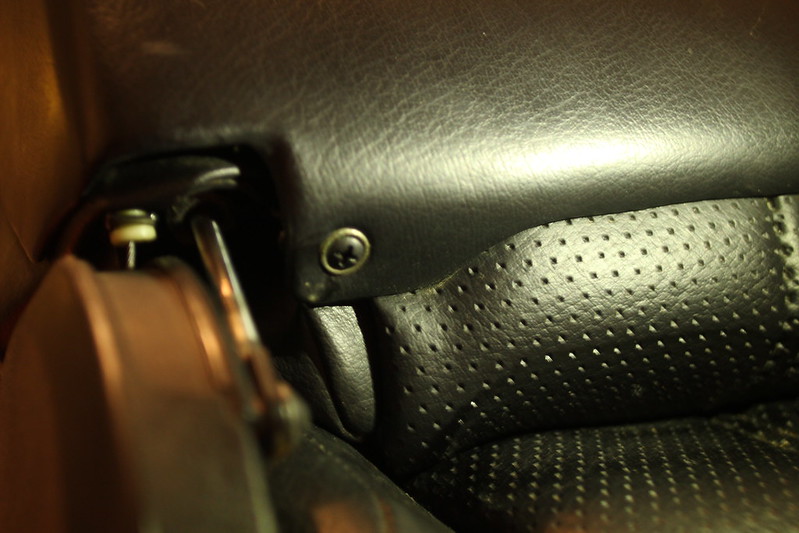
the backrest panel will now pull upward and off! there are two clips at the top that you can see below


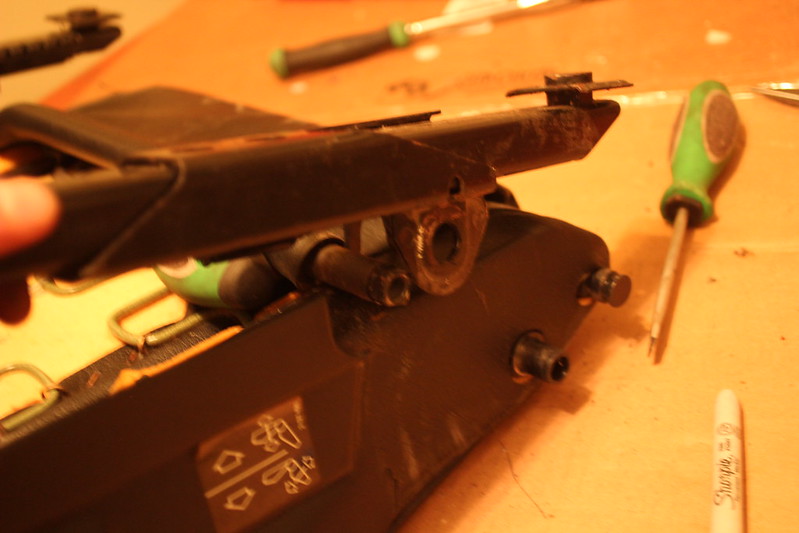
okay back panel is off.. lets move down to the mid piece that holds the backrest to the buttrest (technical term) remove the giant black plastic center screw and pull off the plastic. the plastic will come off from just pulling it, but it feels like your going to break it, just be careful

you should be looking at this... first look at that little bugger right in the center with the wire coming in from the backrest.. you want to disconnect that so it can go with the backrest when you remove it

pry the tab upward so you can remove it.. you may need pliers to wiggle it down far enough to release it
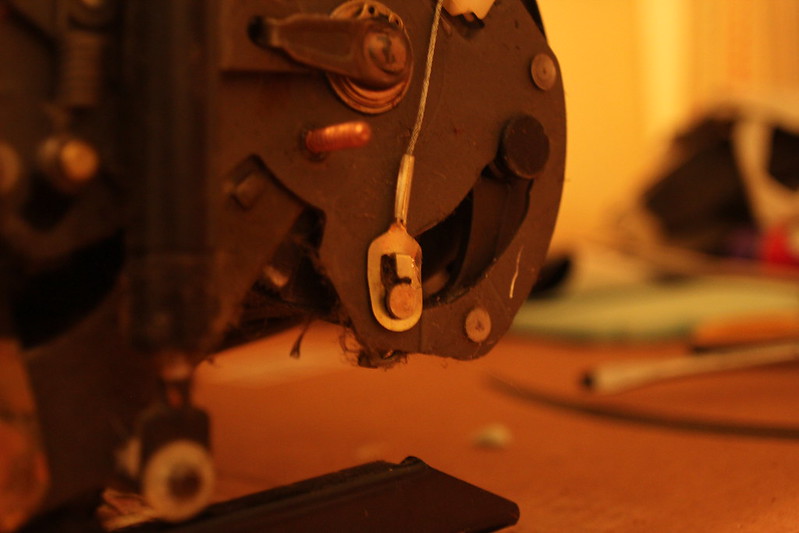
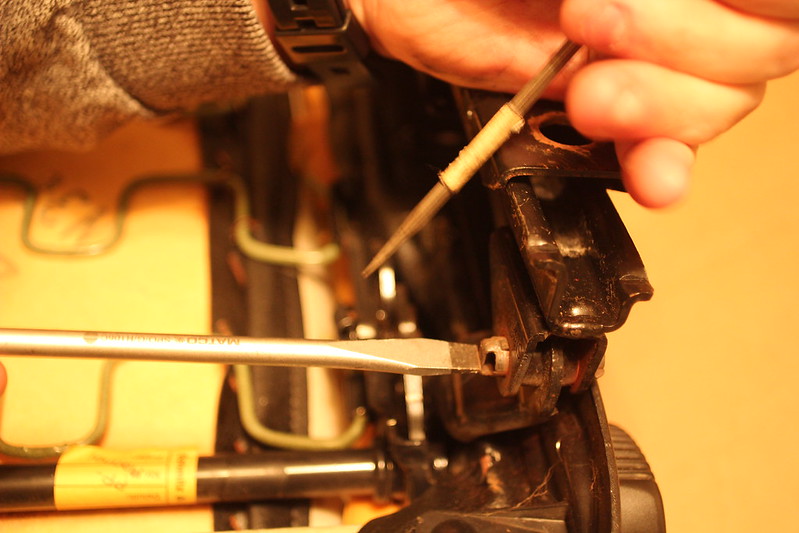
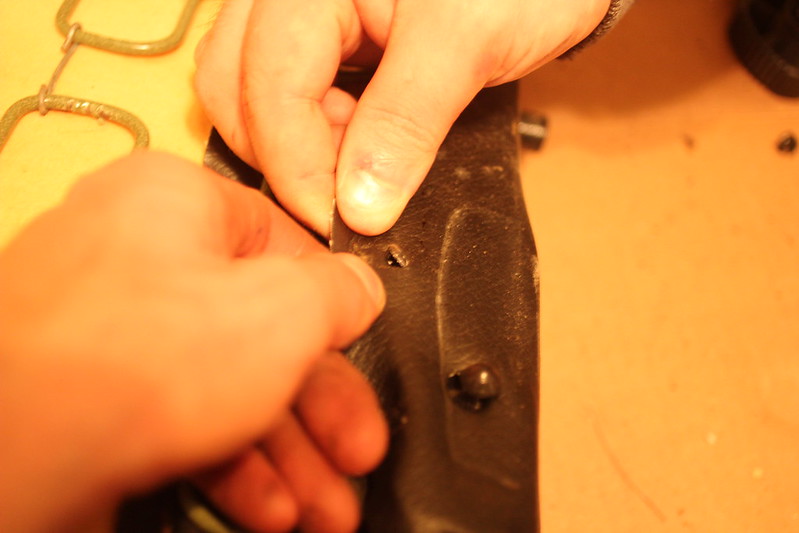
then disconnect the white plastic piece that acts as a track for the wire..... this plastic piece has a small clip on the backside thats not easily visible, if you just pry it upward you will break the small clip... This is where you need that "really tiny flathead" The trick is to pull it away at the top so it clears the clip and then slide it upward with a bigger flathead!

okay, do the same thing on both sides. then next move back to the back. there are two gold phillips head screws in the back (fairly large) remove them
now your backrest should be free to be lifted out!

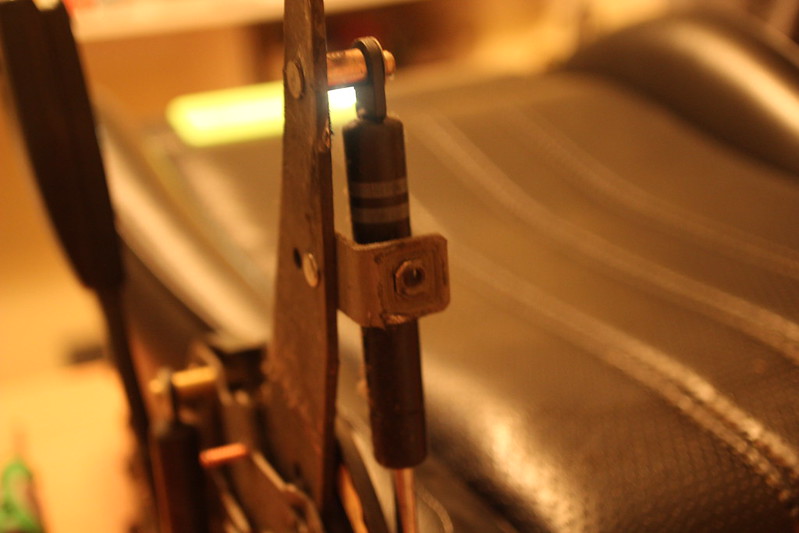
first things first! inspect the tabs that those gold screws came out of! its a common weak spot that breaks, also inspect your shocks and make sure they are functioning and not leaking!
my passenger seat was good:
Drivers seat was not, so I brought it to my shop and welded it:
Okay, to weld it, I had to remove the shock. my shock was fine so I put it back in but if for any reason you need to remove the shock, the little retaining clips that hold the shocks in will most likely not be savable... what I did is drilled a hole in it and used a cotter pin, took me 5 mins... but you may not have access to a drill press, in which case you just want to find a way to keep the shock from sliding off.

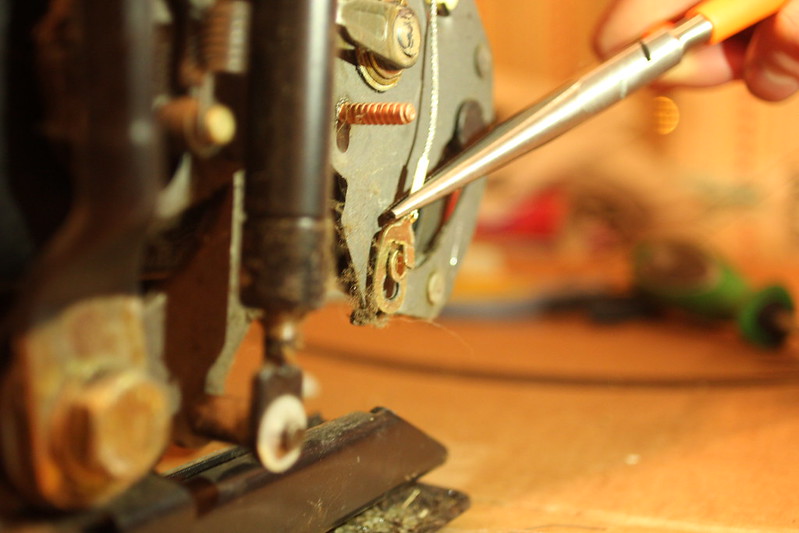
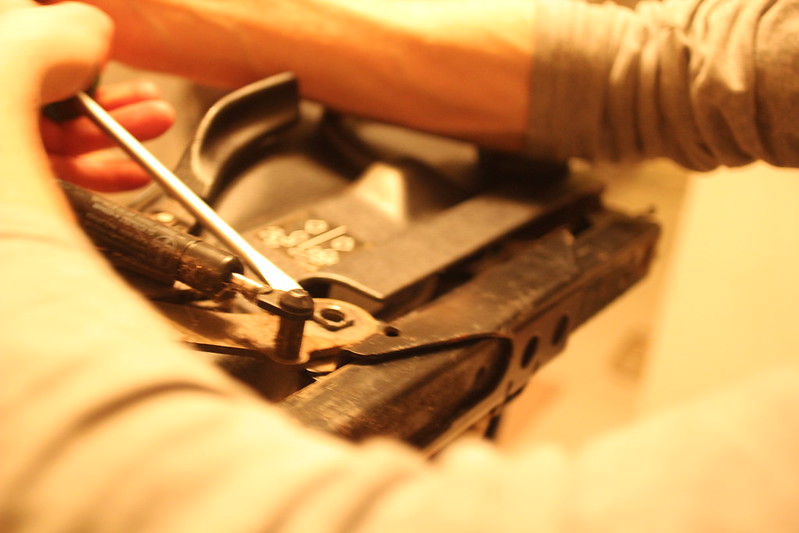
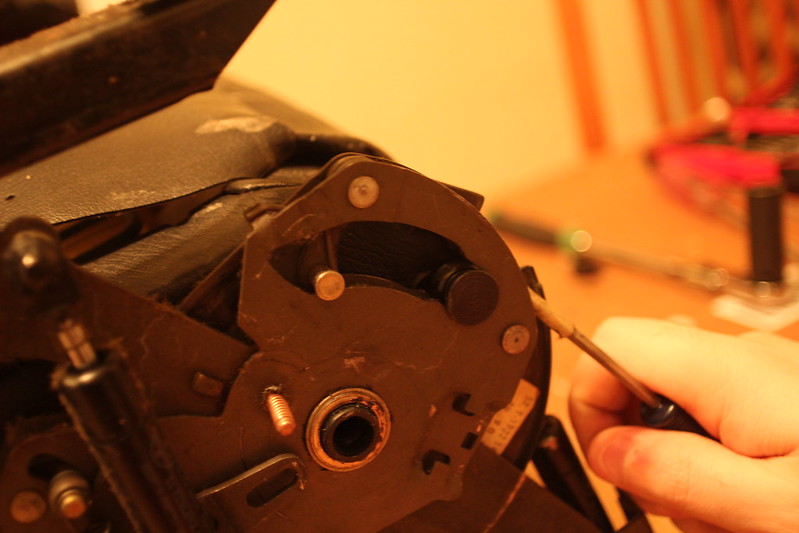
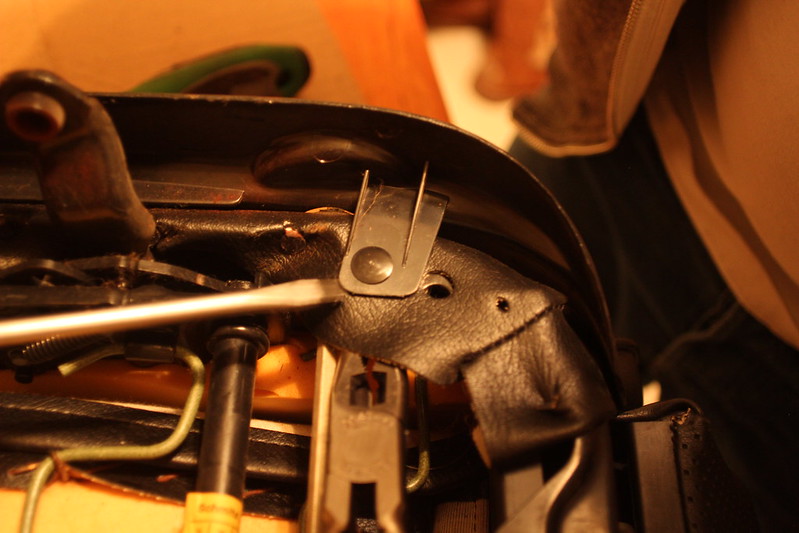
okay back to the project.. next step is going to be to remove this little tab right in the center! it literally just prys outward.

once it pops off.. you'll see a snap ring.. this is where you need your snap ring pliers. go ahead and pull that thing off.
now quickly flip the seat over so your looking at the bottomside, and pull off a a wire thats going across the center, its pretty self explanatory but I found it easier to take it off now because soon the two sides will be moving independently. heres some photos of the wire to remove


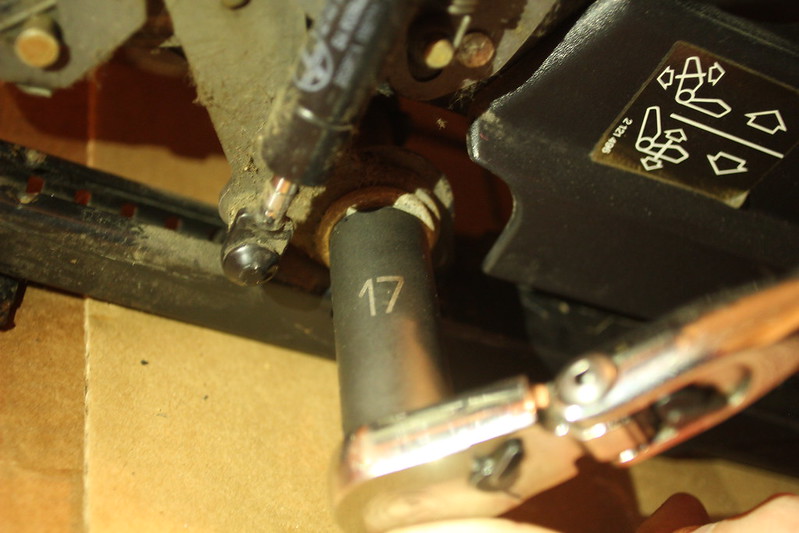
okay back to the sides. next you want to remove the 17mm bolts. on one side this bolt will hold in your seatbelt. the other side will have a square washer instead.
with the bolts out of the way.. you want to pry these two pieces away from each other.. this was really difficult on one seat, and really easy on another so just go at it, i promise it will come apart with enough determination.
this is what you want to happen!

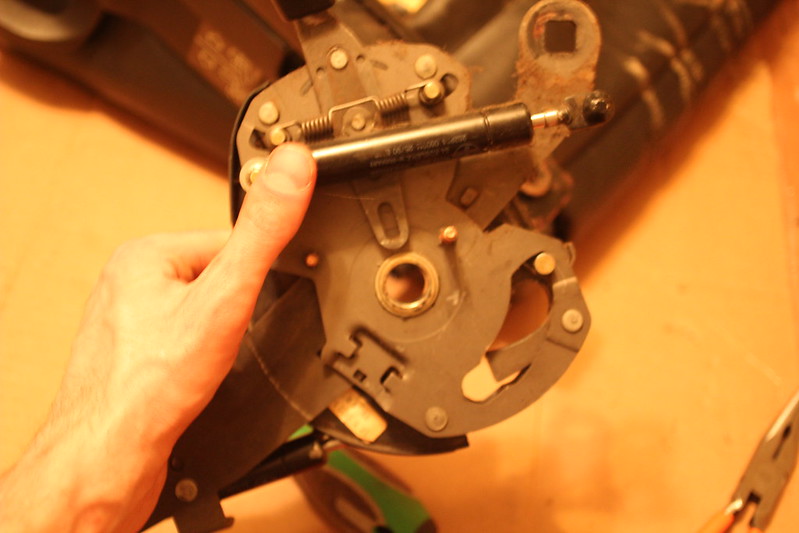
next.. you need to swivel the entire side assembly.. with the snap ring out and the 17mm gone.. this entire piece will come out once it swivels, to do so you need to lift up that little bar that locks it in place. shown below

once it swivels it will just pull right out.. might even fall right out
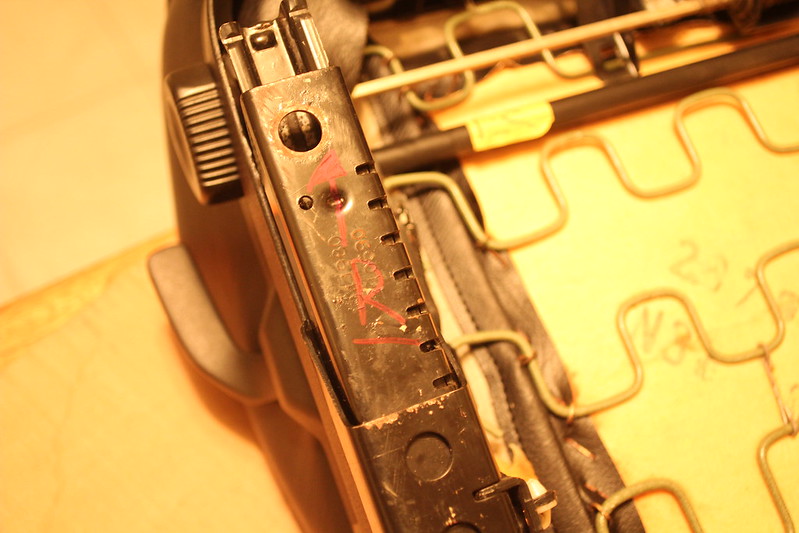
this is a great time to label stuff. make it easy on yourself. label anything that will make it easier for yourself when you put it back together

okay you should be looking at this now
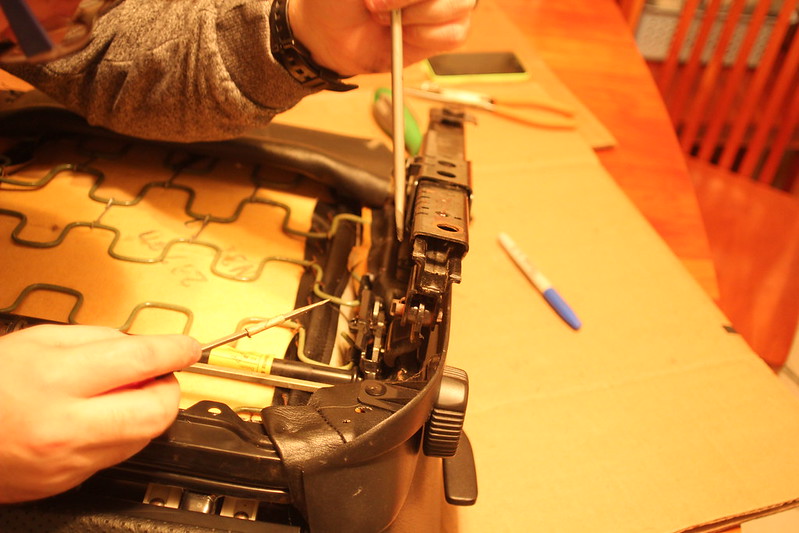
these little pins in the front are the next thing that need to come out... you need to press down on the lifter tab and push it inward at the same time. I found using a small flathead to push in the tab and a larger one to push in on the bar worked best for me see below

it will just push all the way through at this point. then the other side bar will just come out as well!
once both sides are out, you can slide that bar on the other side out of the the vinyl... then you should be looking at this!

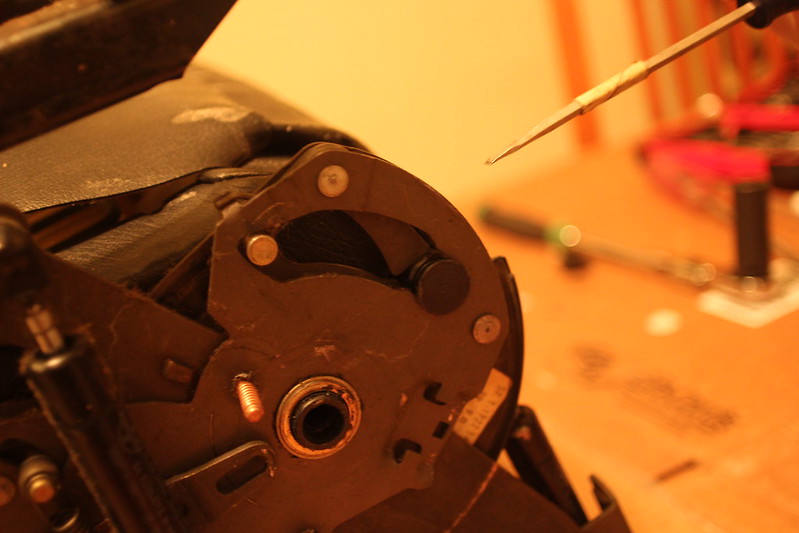
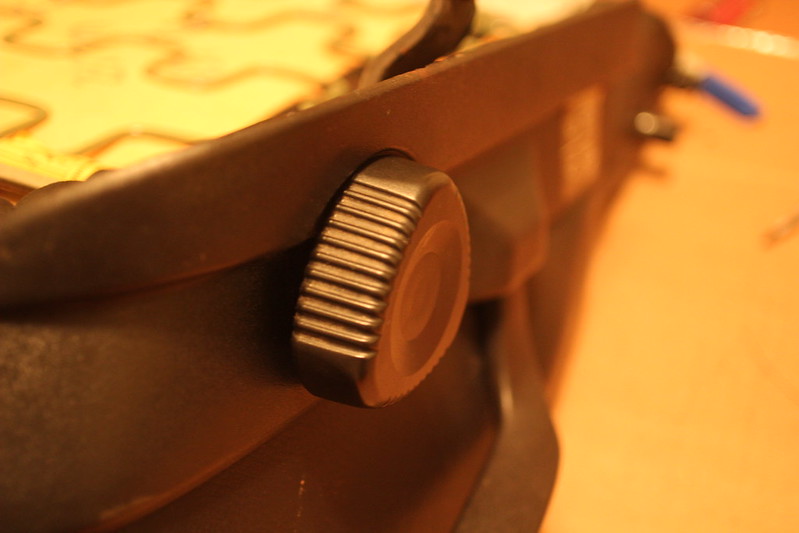
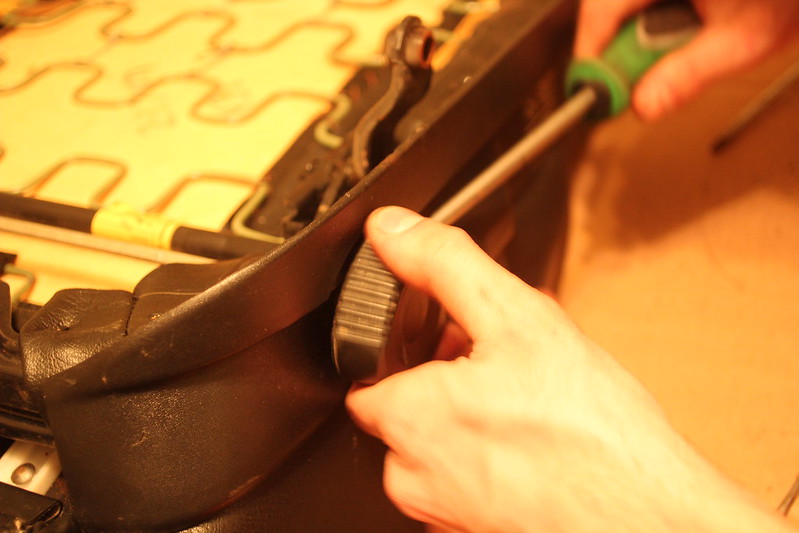
next pull the adjuster wheel off. it just pops off but it does put up a bit of a fight.
then you obviously want to get this plastic out of the way... theres a little plastic pop in clip on the bottom... you will break this to get it out, don't sweat it, just replace it with a zip tie when you reinstall it, no one will ever be able to see it and it will work perfect.
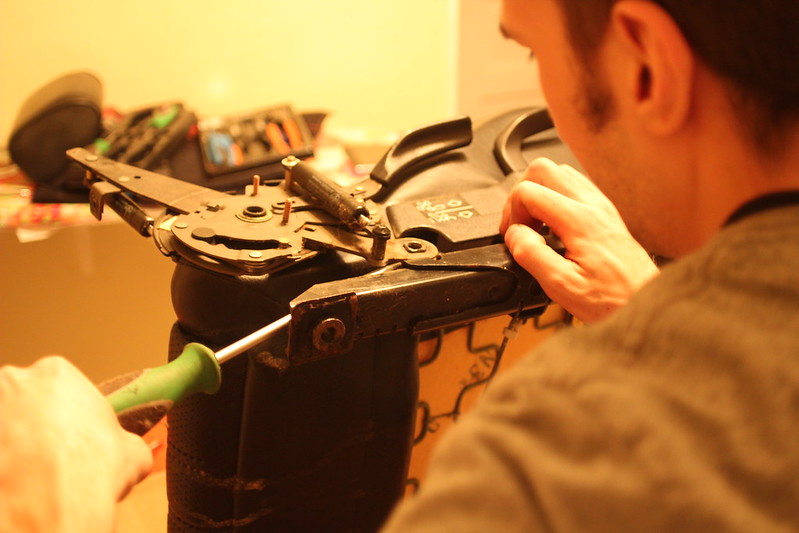
The last handle is still on. now is when you need your t25 torx. remove the bolt then pry the handle off! this one will again put up a fight but you can win if you keep at it.
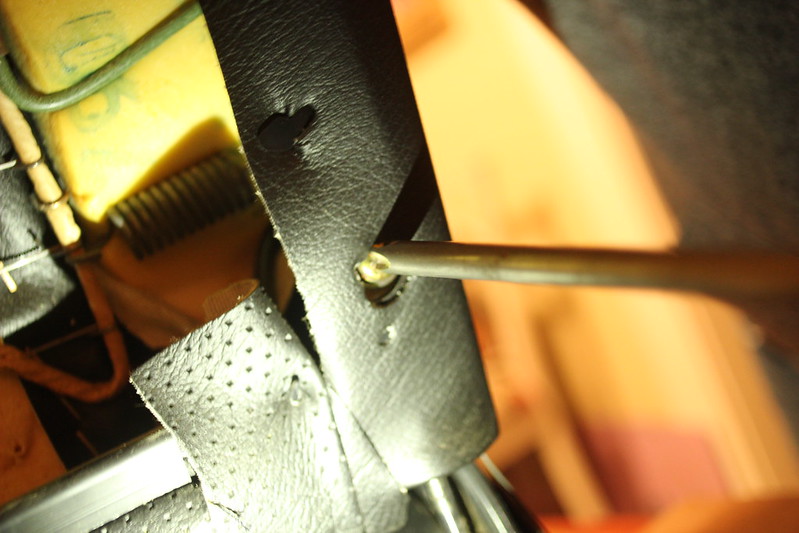
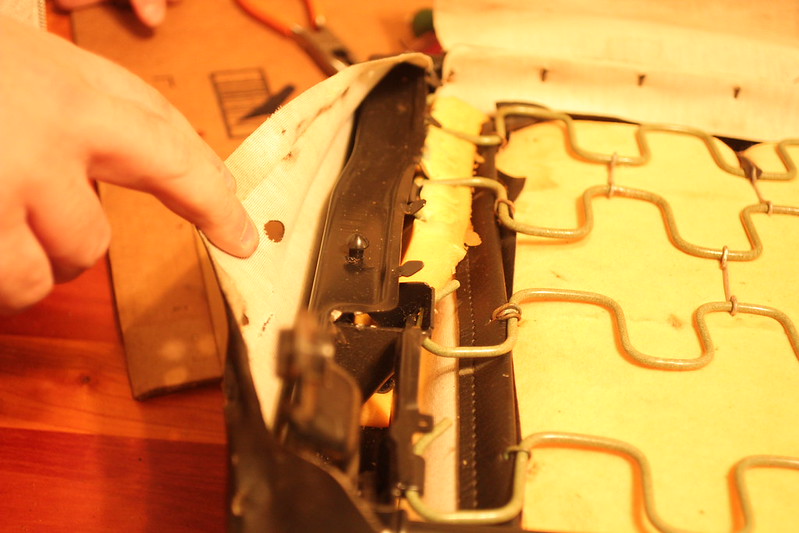
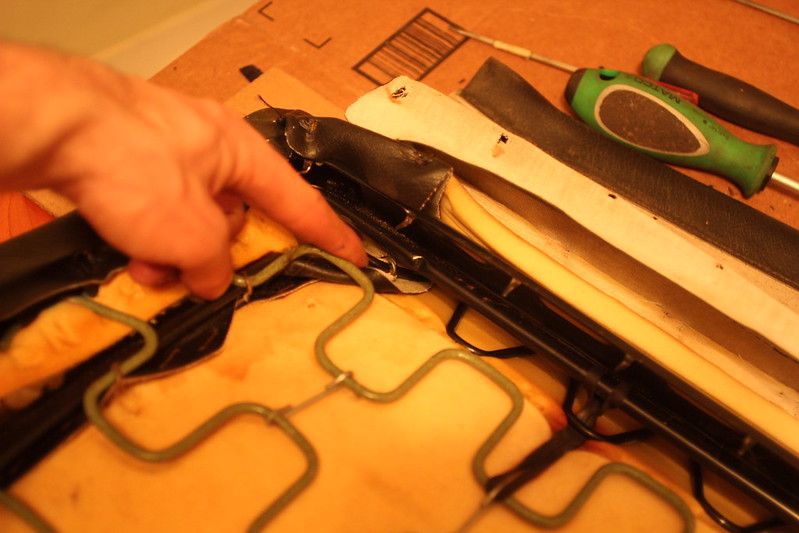
okay so you've gotten everything you need off! you should remove some of the upholstery! both the backrest and the buttrest come apart basically exactly the same. the sides have these little hooks in them.

easiest way is to bend them slightly upward, just be careful with them.

then pull your fabric up around it and free it
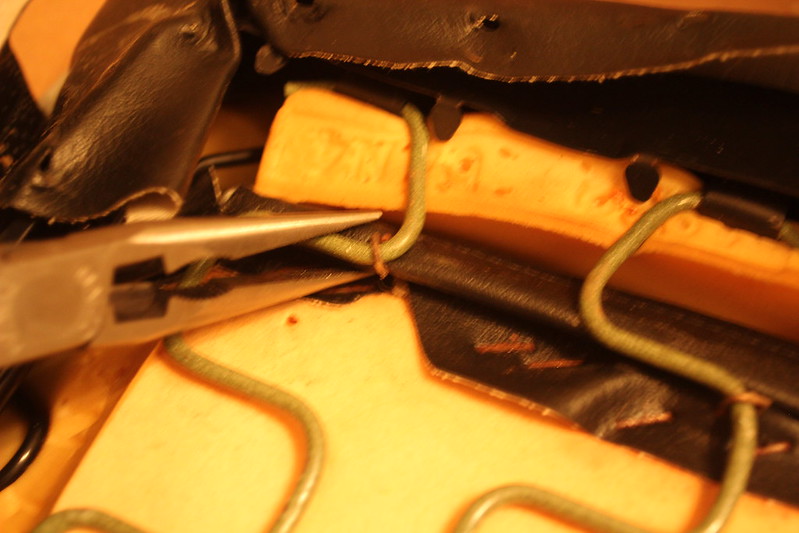
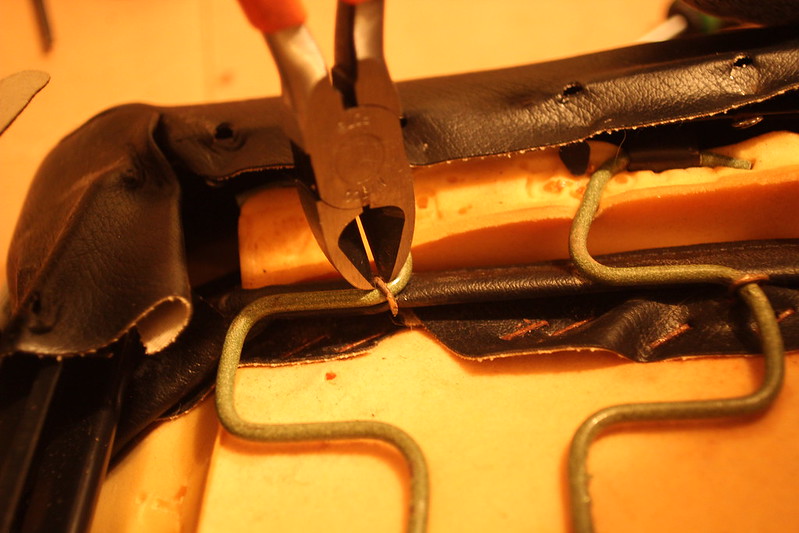
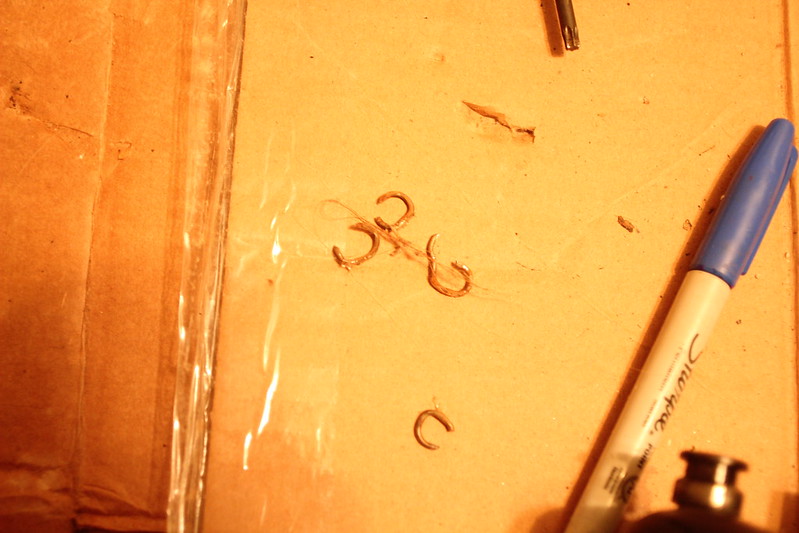
so do this all the way around and you free the outsides of it... the insides of the vinyl pieces are held to the foam + the bars with a little metal hook looped around... almost like an earring... these hooks you will have to either bend and straighten or cut them off if you have a nice strong set of snips.. either way your not gonna want to reuse them.. when you reinstall you can use basically any type of wire / or zip ties in replacement

During reinstallation i used zip ties, worked great and was easy

anyways, back at removing.. there are a few of these earrings tucked away on the inside corners. just look carefully around the whole thing.. remove all the outside style hooks and the inside style earrings and you should be free

once your free just pull em off
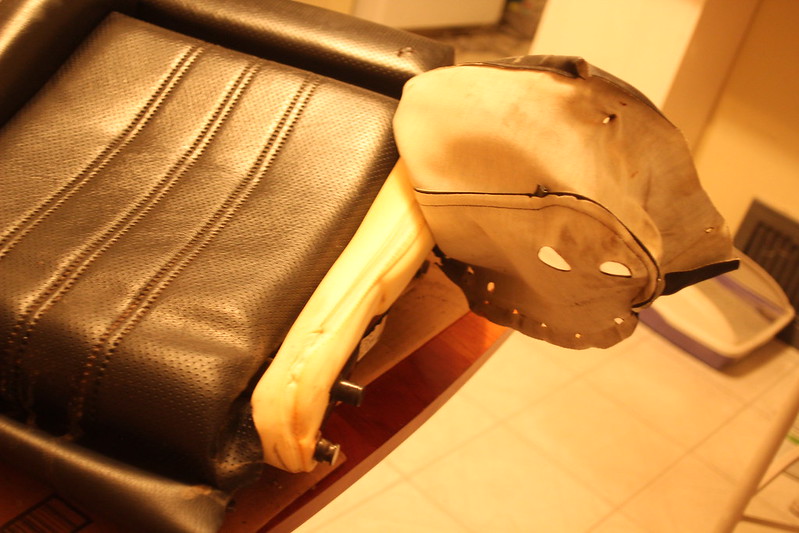

give your pieces to your sew master and have them do something with it.

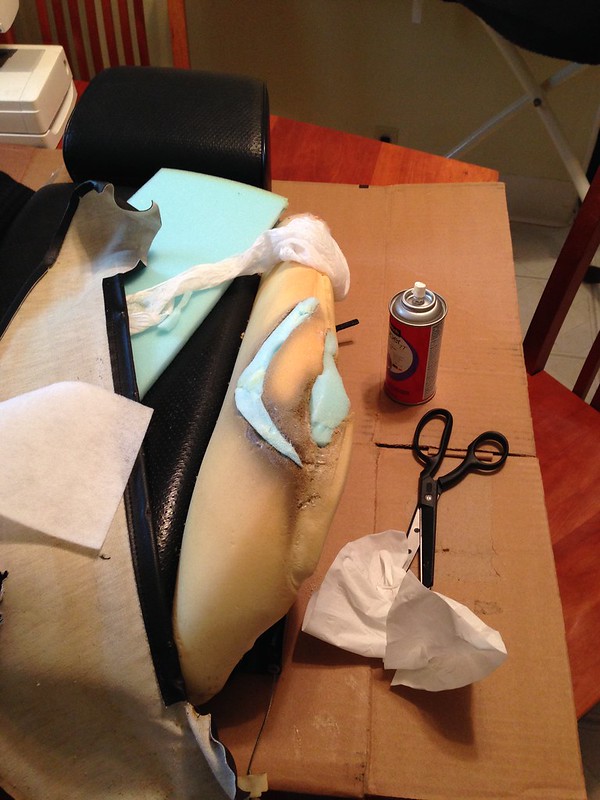
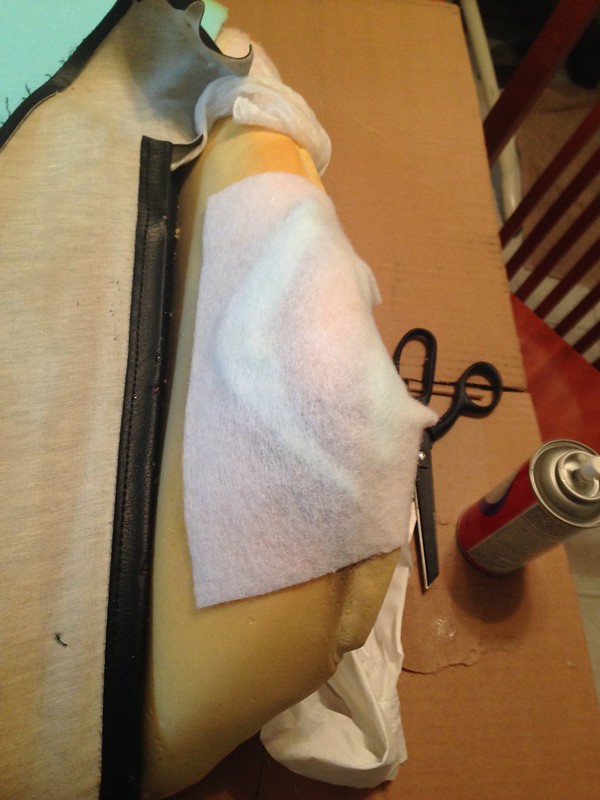
as for your foam.. I had a few spots to patch on mine.. I just went to a fabric store and picked out some fabric I wanted for the new pieces.. and while I was there I got some spare foam + spray adhesive...


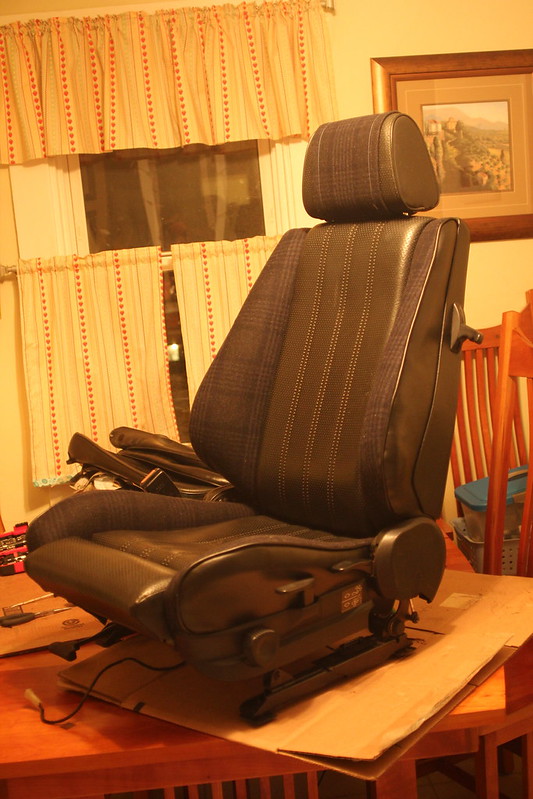
So this is what mine looked like when I was done. be smart when putting things back together, make sure and clean all your dirty parts and lubricate any moving parts.

Hope this helps, feel free to PM me with any questions!
First, whats needed:
Flat head screwdrivers - 1 really tiny one needed
Phillips Head screwdrivers
snap ring pliers
T25 torx
17mm socket/ratchet
Various pliers - for sure a needle nose
hog pliers / snips can be helpful
some Chinese food + beer of choice
you also probably need a broken seats, heres my drivers side which was pestering me:
okay so lets start the disassembly. start with the tabs on the sides of the backrest. On the drivers seat there is only one! on the passenger seat there is one on each side.
take your large flat head, and pry the handle off. it literally just pops right off with a little love
The next piece, use your flat head again and pop the bottom of it towards you! then the top will come out downward. see photo below
Now if your working on the passengers seat! there are two of these.. one of them is smaller than the other (I believe its the left side) this one has a screw hidden behind it. remove it with your phillips. see below
Next remove the two screws at at the backside bottom of the backrest
the backrest panel will now pull upward and off! there are two clips at the top that you can see below
okay back panel is off.. lets move down to the mid piece that holds the backrest to the buttrest (technical term) remove the giant black plastic center screw and pull off the plastic. the plastic will come off from just pulling it, but it feels like your going to break it, just be careful
you should be looking at this... first look at that little bugger right in the center with the wire coming in from the backrest.. you want to disconnect that so it can go with the backrest when you remove it
pry the tab upward so you can remove it.. you may need pliers to wiggle it down far enough to release it
then disconnect the white plastic piece that acts as a track for the wire..... this plastic piece has a small clip on the backside thats not easily visible, if you just pry it upward you will break the small clip... This is where you need that "really tiny flathead" The trick is to pull it away at the top so it clears the clip and then slide it upward with a bigger flathead!
okay, do the same thing on both sides. then next move back to the back. there are two gold phillips head screws in the back (fairly large) remove them
now your backrest should be free to be lifted out!
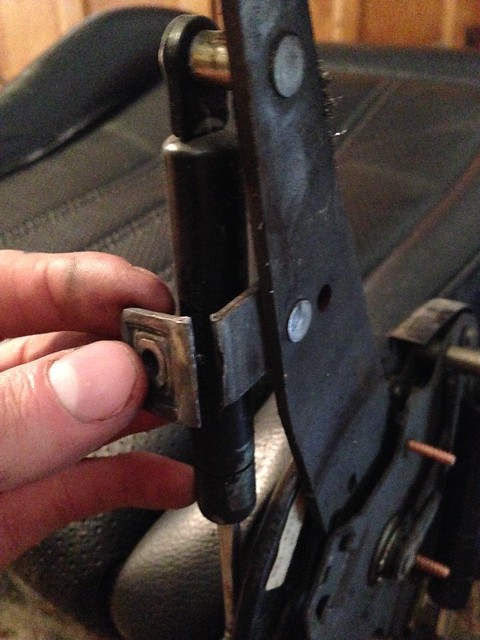
first things first! inspect the tabs that those gold screws came out of! its a common weak spot that breaks, also inspect your shocks and make sure they are functioning and not leaking!
my passenger seat was good:
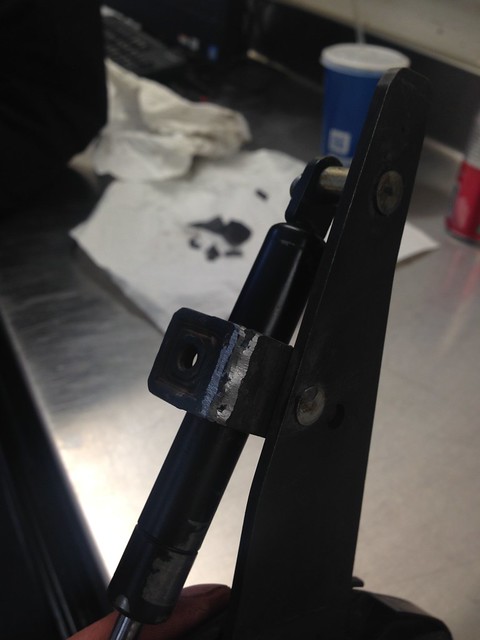
Drivers seat was not, so I brought it to my shop and welded it:
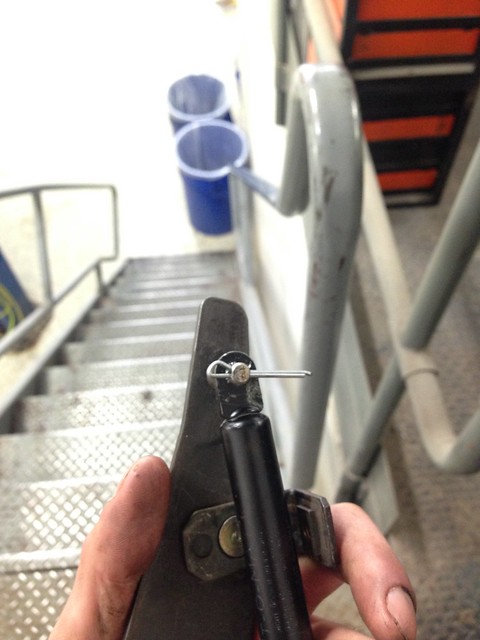
Okay, to weld it, I had to remove the shock. my shock was fine so I put it back in but if for any reason you need to remove the shock, the little retaining clips that hold the shocks in will most likely not be savable... what I did is drilled a hole in it and used a cotter pin, took me 5 mins... but you may not have access to a drill press, in which case you just want to find a way to keep the shock from sliding off.
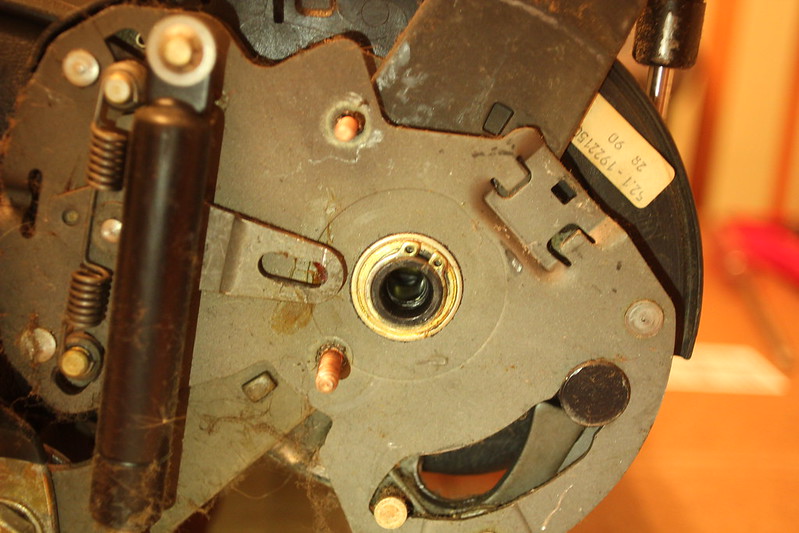
okay back to the project.. next step is going to be to remove this little tab right in the center! it literally just prys outward.
once it pops off.. you'll see a snap ring.. this is where you need your snap ring pliers. go ahead and pull that thing off.
now quickly flip the seat over so your looking at the bottomside, and pull off a a wire thats going across the center, its pretty self explanatory but I found it easier to take it off now because soon the two sides will be moving independently. heres some photos of the wire to remove
okay back to the sides. next you want to remove the 17mm bolts. on one side this bolt will hold in your seatbelt. the other side will have a square washer instead.
with the bolts out of the way.. you want to pry these two pieces away from each other.. this was really difficult on one seat, and really easy on another so just go at it, i promise it will come apart with enough determination.
this is what you want to happen!
next.. you need to swivel the entire side assembly.. with the snap ring out and the 17mm gone.. this entire piece will come out once it swivels, to do so you need to lift up that little bar that locks it in place. shown below
once it swivels it will just pull right out.. might even fall right out
this is a great time to label stuff. make it easy on yourself. label anything that will make it easier for yourself when you put it back together
okay you should be looking at this now
these little pins in the front are the next thing that need to come out... you need to press down on the lifter tab and push it inward at the same time. I found using a small flathead to push in the tab and a larger one to push in on the bar worked best for me see below
it will just push all the way through at this point. then the other side bar will just come out as well!
once both sides are out, you can slide that bar on the other side out of the the vinyl... then you should be looking at this!
next pull the adjuster wheel off. it just pops off but it does put up a bit of a fight.
then you obviously want to get this plastic out of the way... theres a little plastic pop in clip on the bottom... you will break this to get it out, don't sweat it, just replace it with a zip tie when you reinstall it, no one will ever be able to see it and it will work perfect.
The last handle is still on. now is when you need your t25 torx. remove the bolt then pry the handle off! this one will again put up a fight but you can win if you keep at it.
okay so you've gotten everything you need off! you should remove some of the upholstery! both the backrest and the buttrest come apart basically exactly the same. the sides have these little hooks in them.
easiest way is to bend them slightly upward, just be careful with them.
then pull your fabric up around it and free it
so do this all the way around and you free the outsides of it... the insides of the vinyl pieces are held to the foam + the bars with a little metal hook looped around... almost like an earring... these hooks you will have to either bend and straighten or cut them off if you have a nice strong set of snips.. either way your not gonna want to reuse them.. when you reinstall you can use basically any type of wire / or zip ties in replacement
During reinstallation i used zip ties, worked great and was easy
anyways, back at removing.. there are a few of these earrings tucked away on the inside corners. just look carefully around the whole thing.. remove all the outside style hooks and the inside style earrings and you should be free
once your free just pull em off
give your pieces to your sew master and have them do something with it.
as for your foam.. I had a few spots to patch on mine.. I just went to a fabric store and picked out some fabric I wanted for the new pieces.. and while I was there I got some spare foam + spray adhesive...
So this is what mine looked like when I was done. be smart when putting things back together, make sure and clean all your dirty parts and lubricate any moving parts.
Hope this helps, feel free to PM me with any questions!


Comment