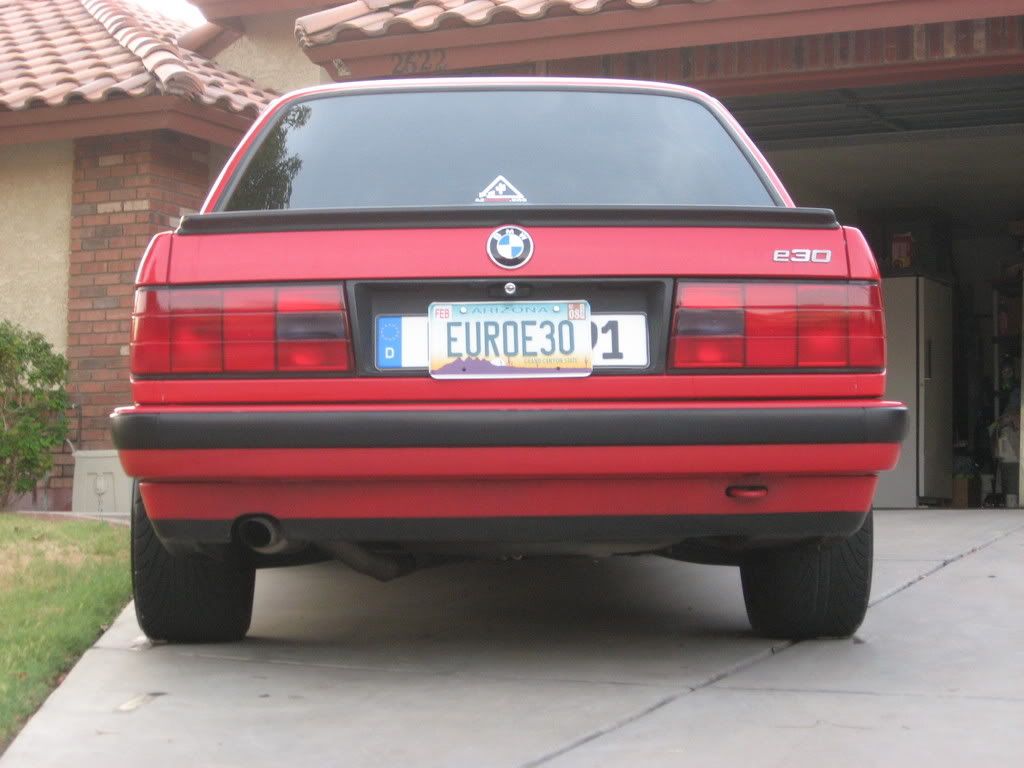
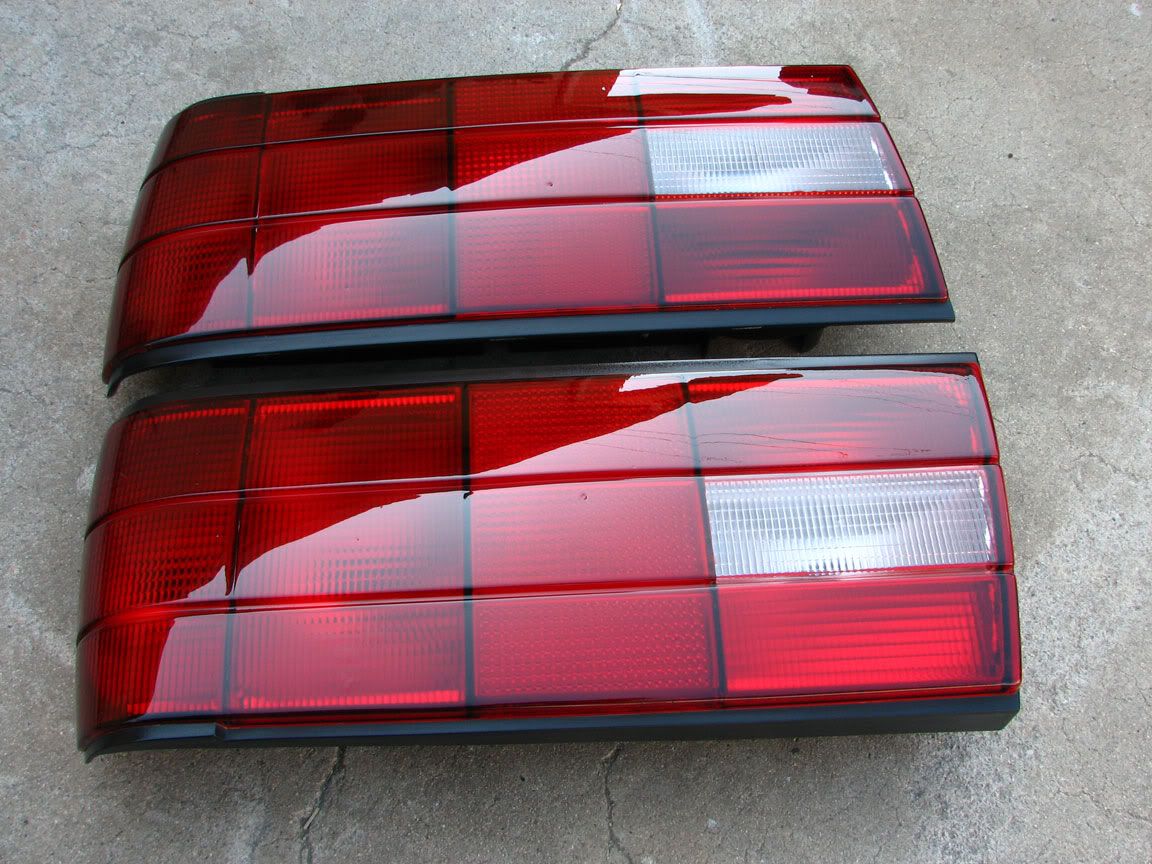
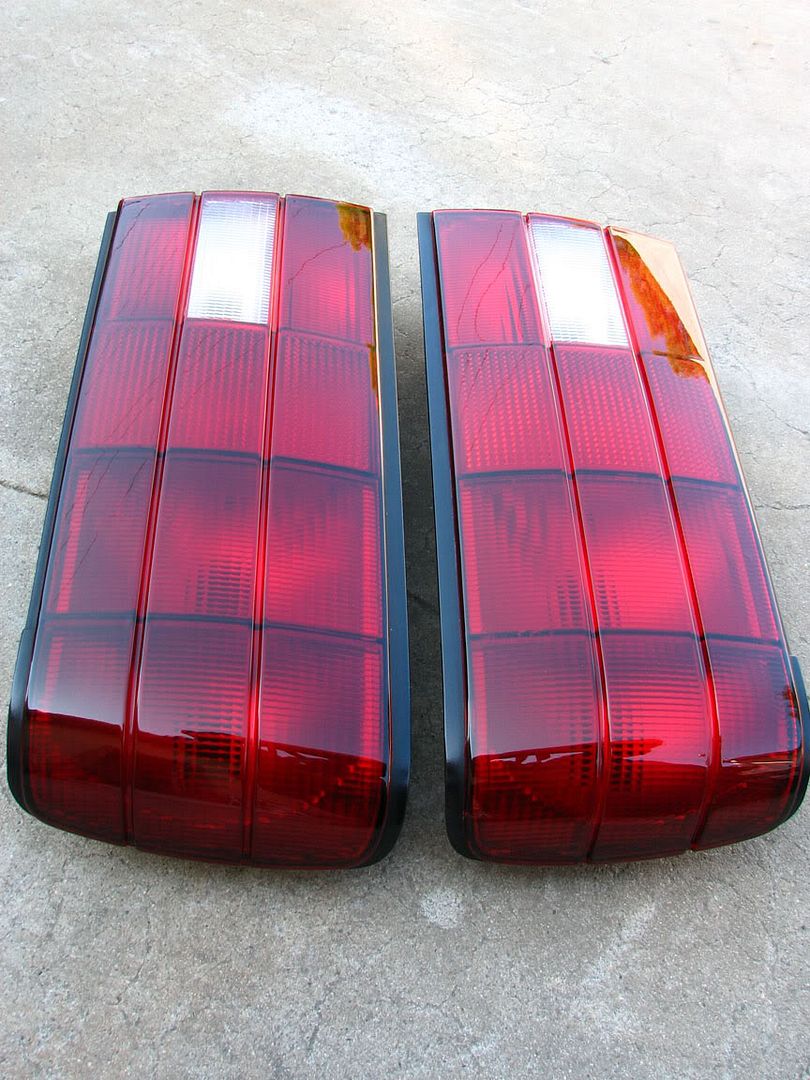
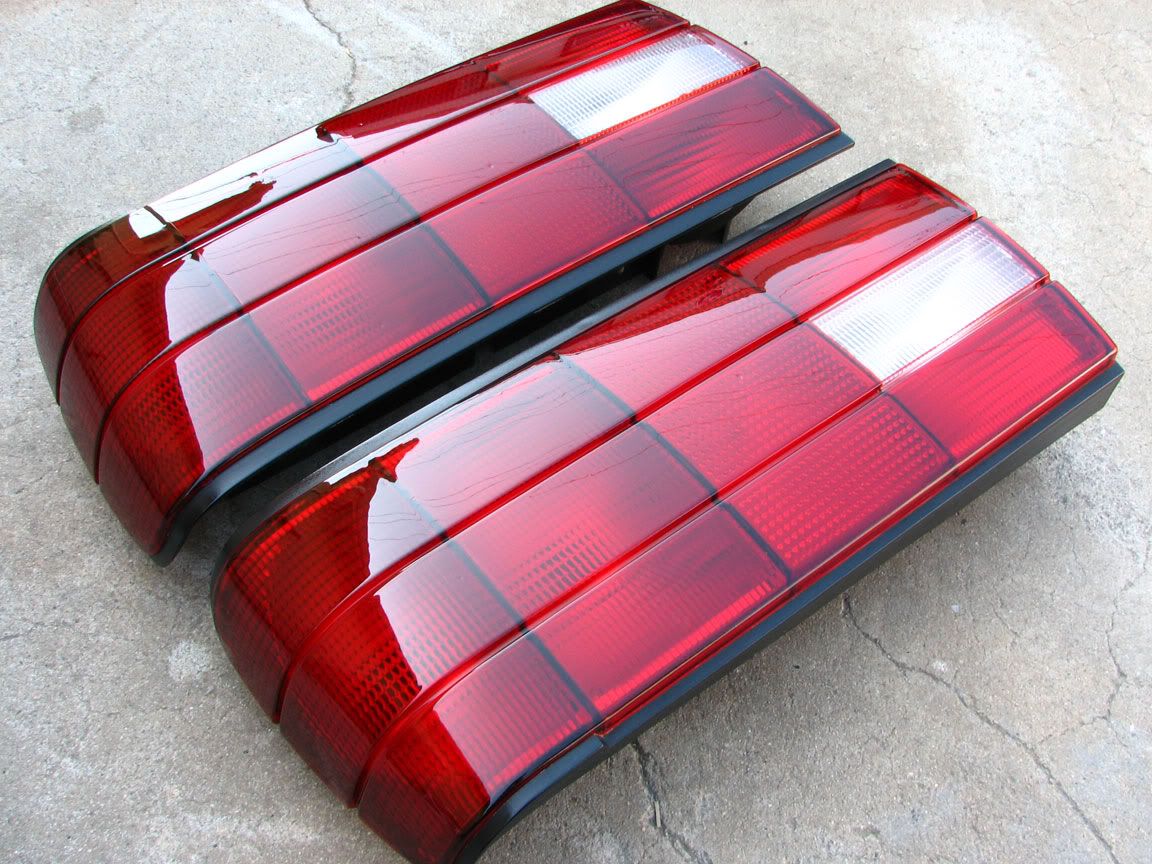
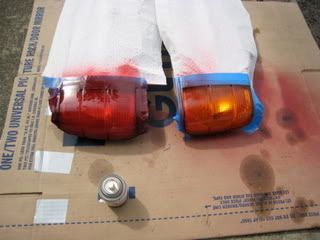
Announcement

Collapse
No announcement yet.

DIY - All Red Taillights

Collapse
X
 
  • Filter
  • Time
  • Show
Clear All
new posts

  • N2MYE30
    replied
    I have used Testors and Metalcast(MC). Metalcast came out much better.
    My steps:
    1: Cleaned lens
    2: Tape off amber and applied 2 coats of MC.
    3: Remove tape and wet sanded 1500 on all lens
    4: 1 coat MC on all lens
    5: wet sand 1500 on all lens
    6: 1 coat Duplicolor
    7: wet sand 1500
    8: 2 coat Duplicolor
    9: wet sand 1500, 2000
    10: Polished then buffed.

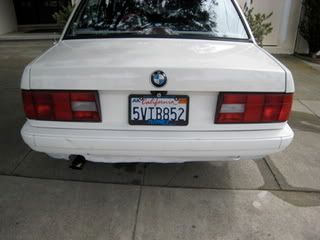
    Cure time is key. It took me about a week to do them and I think they came out great. My coupe has the budget testors spray on ambers only and I cringe everytime I see them. Ill do them over again one day. My cabrio...

    Leave a comment:


  • 5KWattson
    replied
    just bought the candy apple red testors paint and automotive clear, guna pull my tails out tonight clean them up and spray them in the garage. ill post pics tomorrow

    Leave a comment:


  • vr2jetta
    replied
    Originally posted by stevofthahill View Post


    All reds with smoked reverse.

    Are you kidding me?!?! That looks hawt! Mine is red too and the amber blinkers look way out of place. I coated the side markers in window tint and just need to get to the store for some paint now. I got some paint for the shadowline, grill and kidneys, and some weaves. Also replacing the jacked valance too. Lots of paint going around here!

    Leave a comment:


  • rneedham1979
    replied
    I just picked these up off of Ebay. The add said Euro lights. They say BMW on them even though people say BMW never made them.

    Who knows...

    Leave a comment:


  • 12XLR8
    replied
    I used Tamiya Transluscent black (model car spray paint) on my lights. How do you remove the paint from the tail lights. I want to change from black to red

    Leave a comment:


  • stevofthahill
    replied
    Originally posted by DuHast View Post
    Anyone have any pics of all red tails on a Brilliant?


    All reds with smoked reverse.

    Leave a comment:


  • tehwickerman
    replied
    td325 your lights are pure win.

    Leave a comment:


  • madformx5
    replied
    Josh your lights look really good. I had not seen this thread before but I like the all red look. What kind of wheels are you running these days? Your tires really fill up your wheel wells what size are they?

    Leave a comment:


  • Jand3rson
    replied
    When I did mine, I wetsanded them and polished them out, but not with a machine, I did it by hand. You can still see dimples in the paint up close.


    Leave a comment:


  • thereisnoyun
    replied
    Originally posted by Janderson View Post
    Those look amazing. Very professional looking. I might just have to do another set using the Metalcast and sell mine.
    it all comes down to dual action buffer with good compound. I did alot detailing work with my brother when he was doing it professionally. Light sand and polish can do wonders.

    most peoples that doesnt look as glossy all comes down to the quality of the machine you use to polish the paint. Just a fyi, for those wondering why thiers cant or doesnt look as good.

    Leave a comment:


  • DuHast
    replied
    Anyone have any pics of all red tails on a Brilliant?

    Leave a comment:


  • Asbradley21
    replied
    I used Rustoleum Stained Glass paint on mine, no clear. It's meant for outdoors, so it didn't need it.
    .

    Leave a comment:


  • Jand3rson
    replied
    Originally posted by td325ic View Post
    I think if you're going to spend all the time to redo them then you should spend the few extra bucks and spray them with urethane clear coat. Grab a can of Spraymax 2-part urethane clear coat, comes in a special spray can. It sells for $20 at automotive paint supply stores.


    Here's some tail lights I did last fall:

    They are done with Duplicolor MetalCast Red. First sprayed 3 light coats on the amber, then sprayed the whole light with 2 medium coats.

    Waited a few days for metalcast paint to cure

    Then sprayed with SprayMax 2-part Urethane Clear Coat Aerosol

    Let cure for a couple days then wetsanded with 1500 - 2000.

    Used Porter Cable 7424, polished out sanding scratches with 3M Rubbing Compound and orange foam pad. Finished off with Menzerna Micro Polish and Gray foam pad.

    YouTube Video


    Pictures not enhanced at all, that is exactly what they look like in person
    Those look amazing. Very professional looking. I might just have to do another set using the Metalcast and sell mine.

    Leave a comment:


  • deutschman
    replied


    i followed the diy article i posted above and they came out great!

    Leave a comment:


  • BTP325ic
    replied
    hey td325ic those look like after market lights great work.

    Leave a comment:

Working...
X