

Will you be adding a support bracket from the turbo flange to the valve cover? I have no experience with this, but I've heard that with the turbo up there and all its weight, the exhaust manifold can fatigue/crack if the turbo is not secured to the engine.
-
-
Thanks. I'll look into that."And then we broke the car. Again." Mark Donohue, "The Unfair Advantage"
1987 E30 3L Turbo Stroker Das Beast
2002 E39 M5Comment
-
Back from vacation
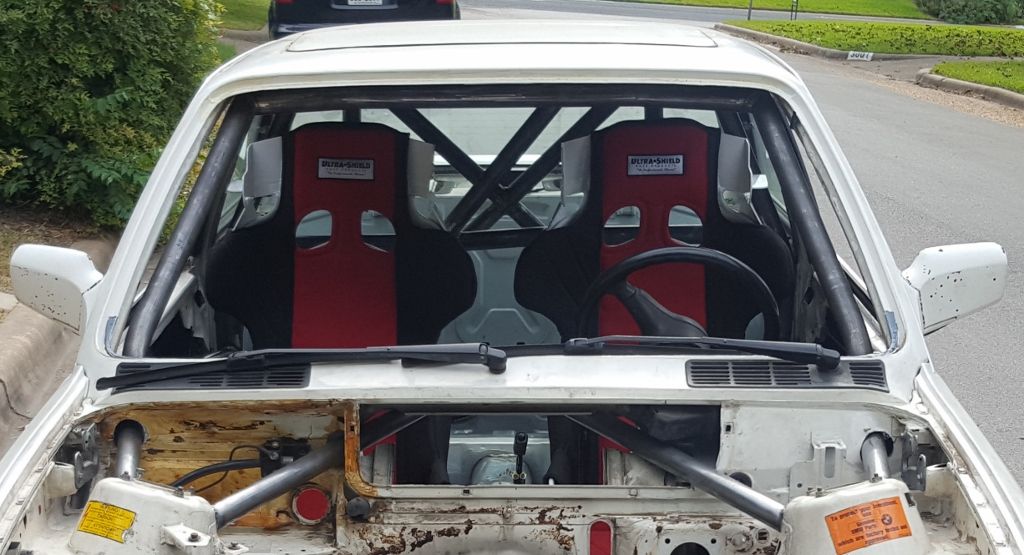
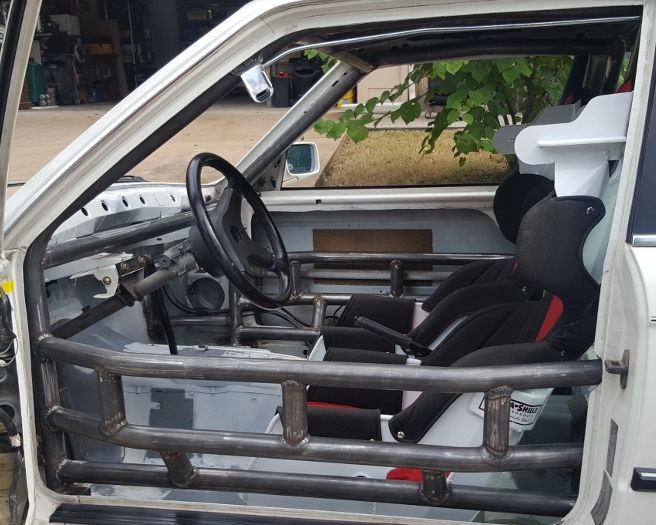
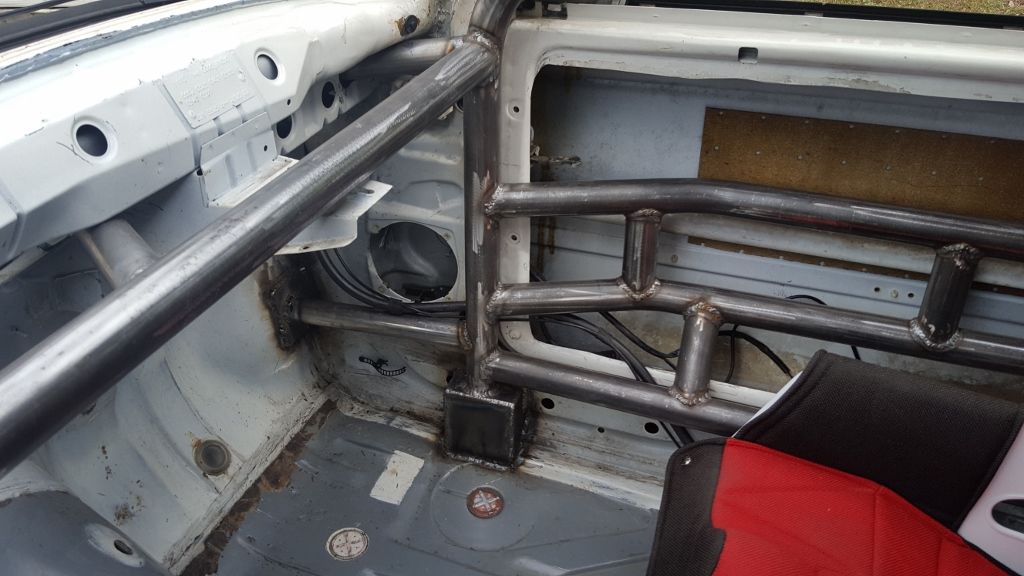
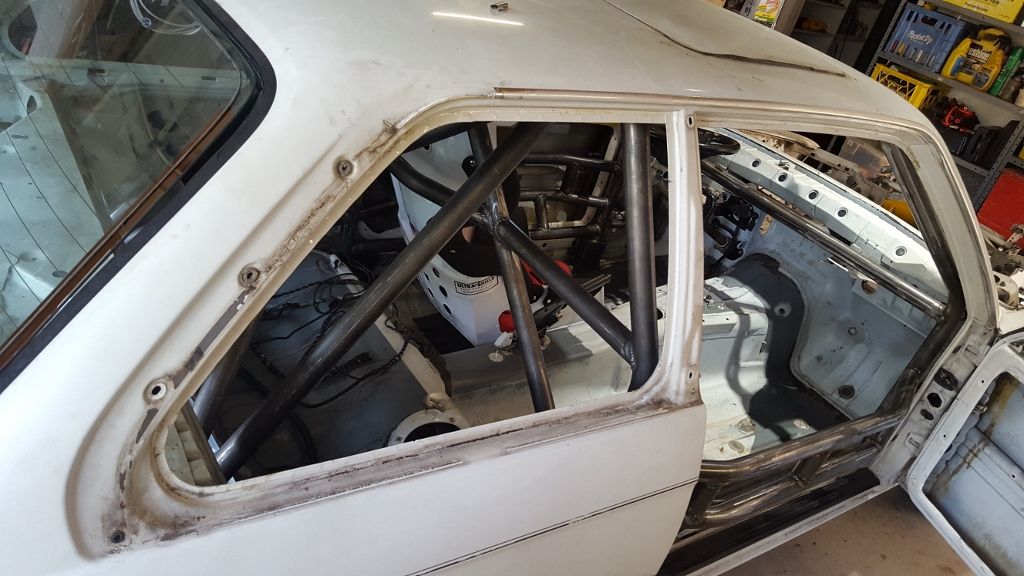
More roll cage progress. 99% of everything cut, sized and tack welded in place.
NASCAR style door bars. I like the side impact protection.
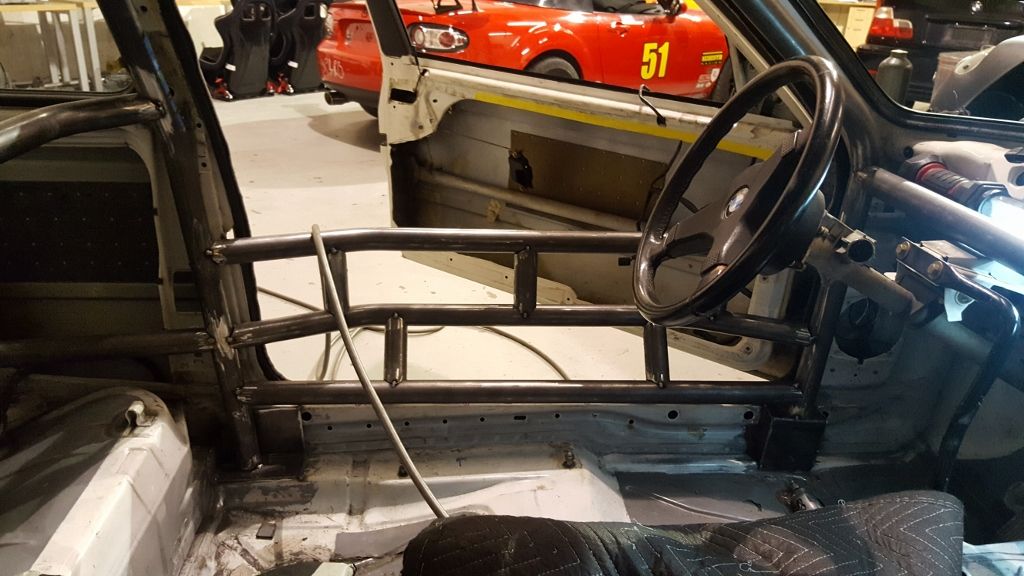
Main hoop diagonal and harness strap in place.
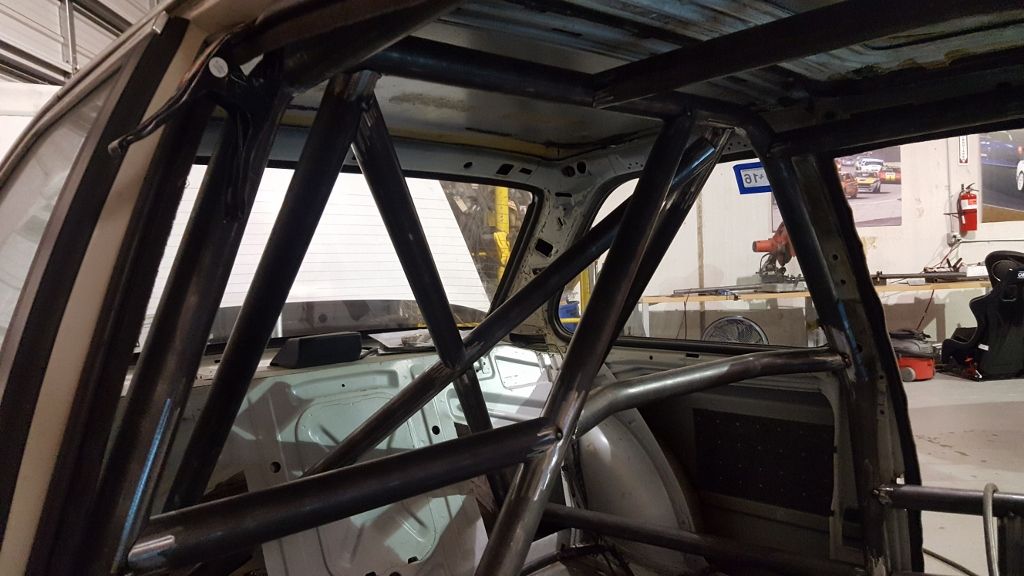
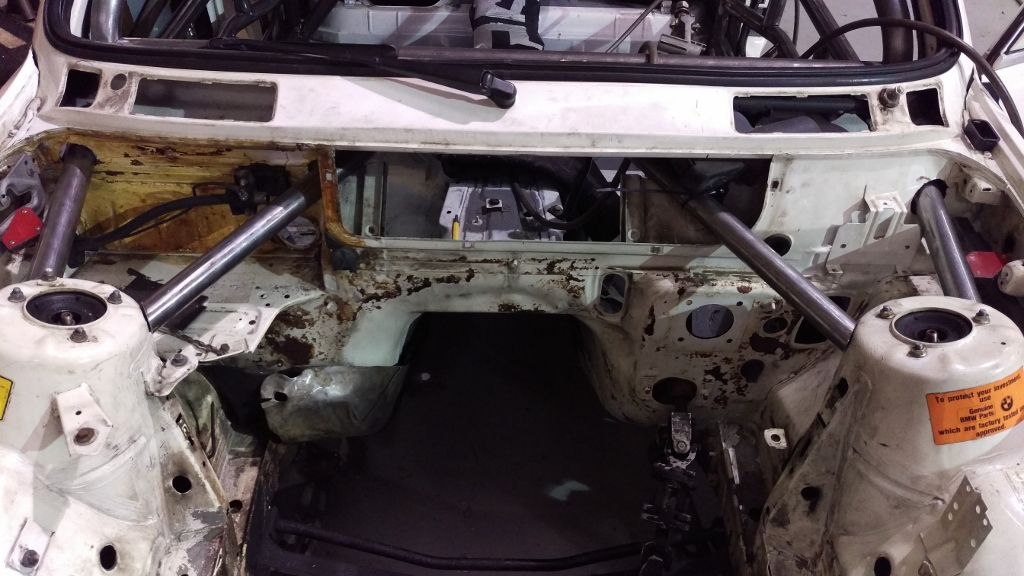
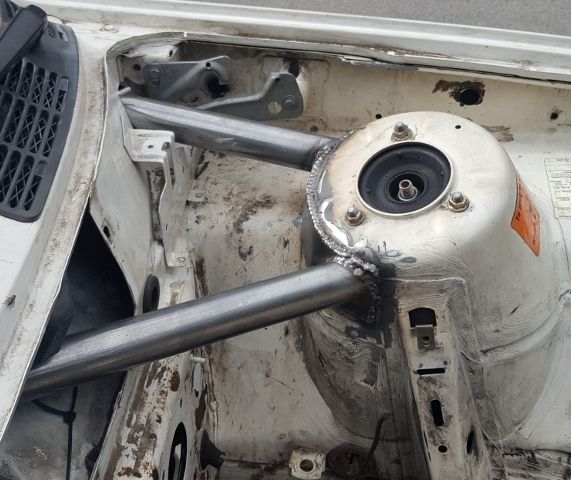
Front shock tower struts sized and in place. Landing plates still have to be shaped and attached.
 "And then we broke the car. Again." Mark Donohue, "The Unfair Advantage"
1987 E30 3L Turbo Stroker Das Beast
2002 E39 M5Comment
-
Cooling System
So, searched the heck out of this and there is no good diagram of an early E30 coolant system. Yes, I have all the manuals and their diagrams don't cut it. Things are omitted or ambiguous. So, here's a definitive system diagram for your early E30 cooling.

Now it's pretty clear how things work. Pump (P) pressurizes coolant and forces it into the block. Coolant flows up into the head through channels, then out into the thermostatic valve (T). If the engine is cold, coolant is routed out the front of the thermostat, back into the top of the pump. Once the engine reaches operating temperature, coolant will flow into the radiator inlet (top right), out the rad bottom (bottom left) and into the thermostat right side.
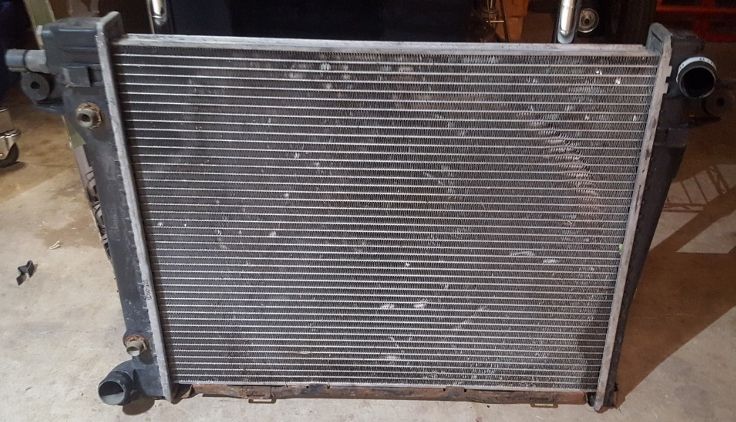
Here's a shot of the radiator, back side. Note the plastic end tanks which are a disaster waiting to happen. Nobody makes a direct fit replacement aluminum radiator for early E30s. However, we've got a solution. More on that later.
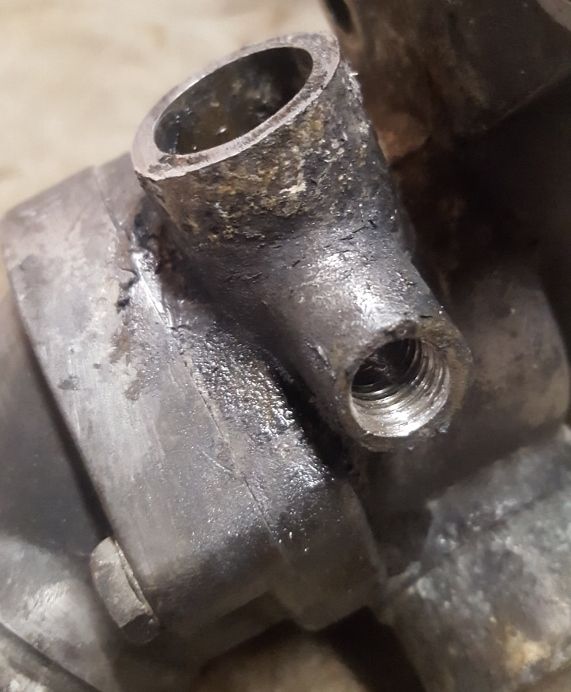
Referring back to the diagram, there are two inlets on the thermostat body which need to be plugged: throttle body heater inlet and heater core inlet. We removed the throttle body inlet 90 degree fitting (it just pulls out) and tapped it for a 3/8-16 thread. Will be plugged with a headless set screw and permatex. Heater core inlet was cut down, will be tapped for 5/8-18 and plugged with a set screw.
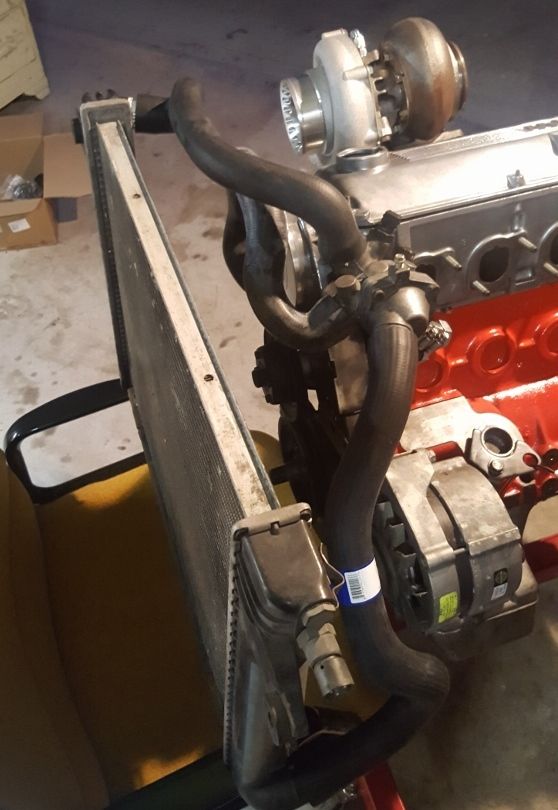
Here are a couple of shots test fitting the radiator hoses. You know, the cooling system when you can see it is really ugly. With the distributor cap delete, there's no reason for that nasty "Up and over" hose. Probably going to shorten that and convert to a hard hose.

Also, there's no real need for the radiator inlet to be passenger side top. That's the hot side of the engine for a turbo car. We'll be trying to keep things out of there as much as possible.
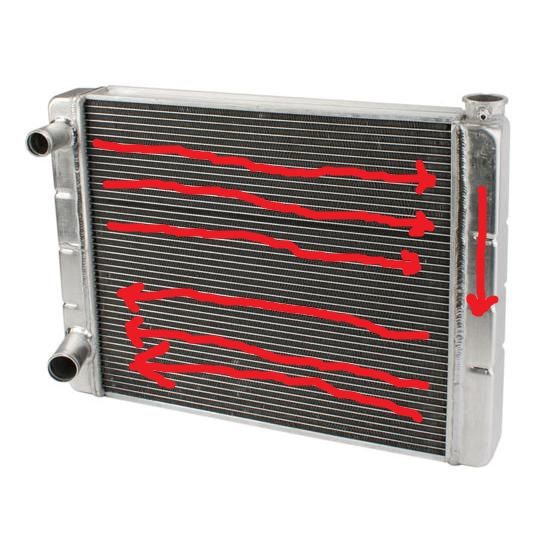
By switching the radiator inlet to a driver's side top, we can use any number of off-the-shelf dual pass 19" x 26" x 2.5" aluminum radiators. Coolant passes through the radiator in dual 1" tubes, twice, before going back to the pump. You get significantly better cooling than stock rad. Important here in Texas, especially on a track. Also keeps the inlet hose away from the engine turbo side. There is only 19" available height in the stock configuration. Filler neck adds 1" to rad height so we will need to fab new brackets and mount the rad lower.
 "And then we broke the car. Again." Mark Donohue, "The Unfair Advantage"
1987 E30 3L Turbo Stroker Das Beast
2002 E39 M5Comment
-
Oil System
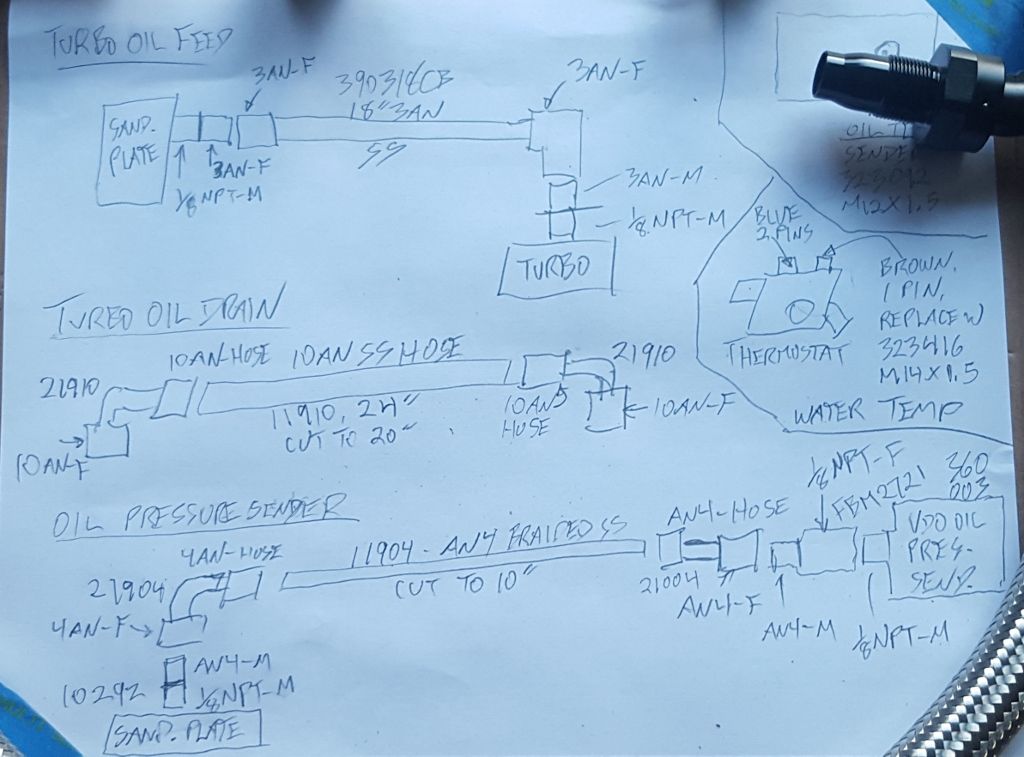
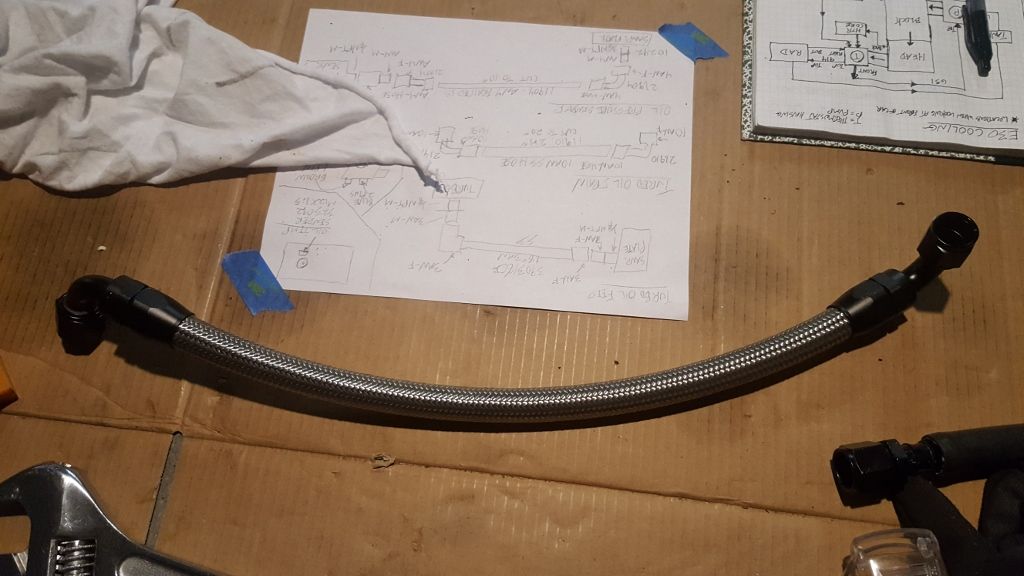
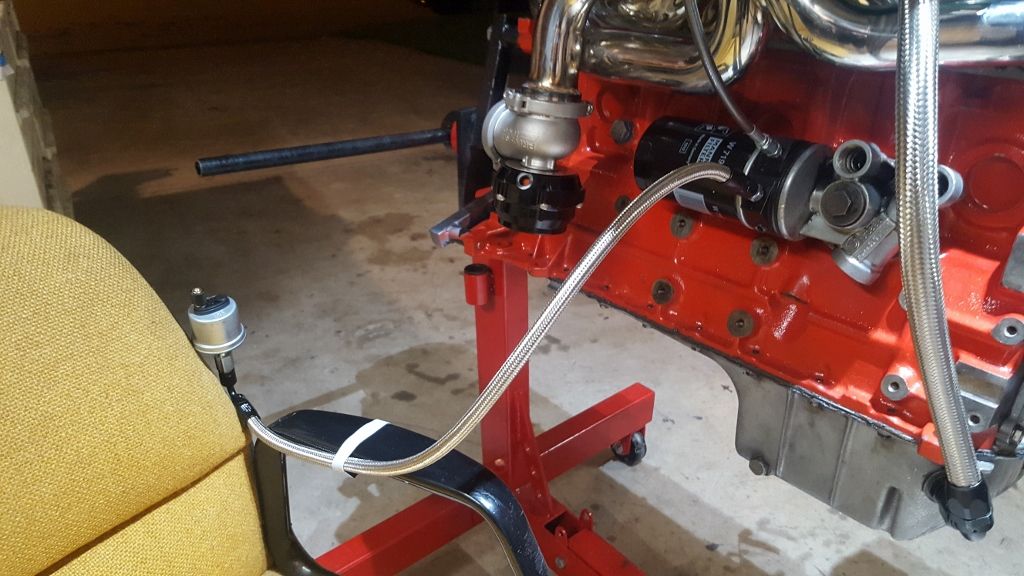
Back to the oil system. Here's the plan for turb0 oil feed, turbo oil drain, remote oil pressure and oil temperature.
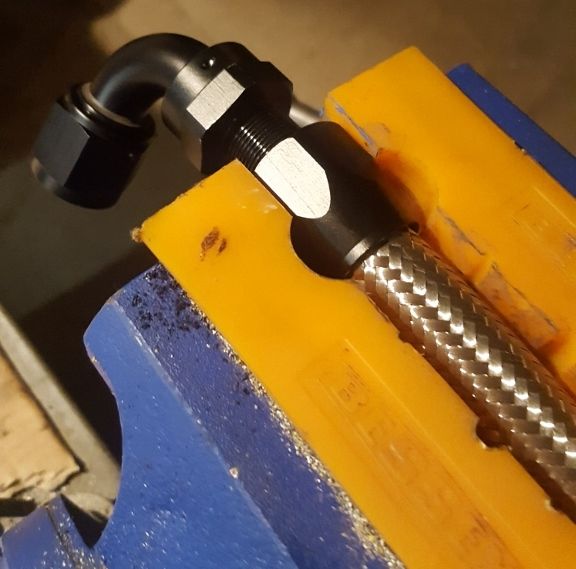
Building the oil drain hose. It's not expensive and you get a better fit than "off the shelf"
Completed drain hose.
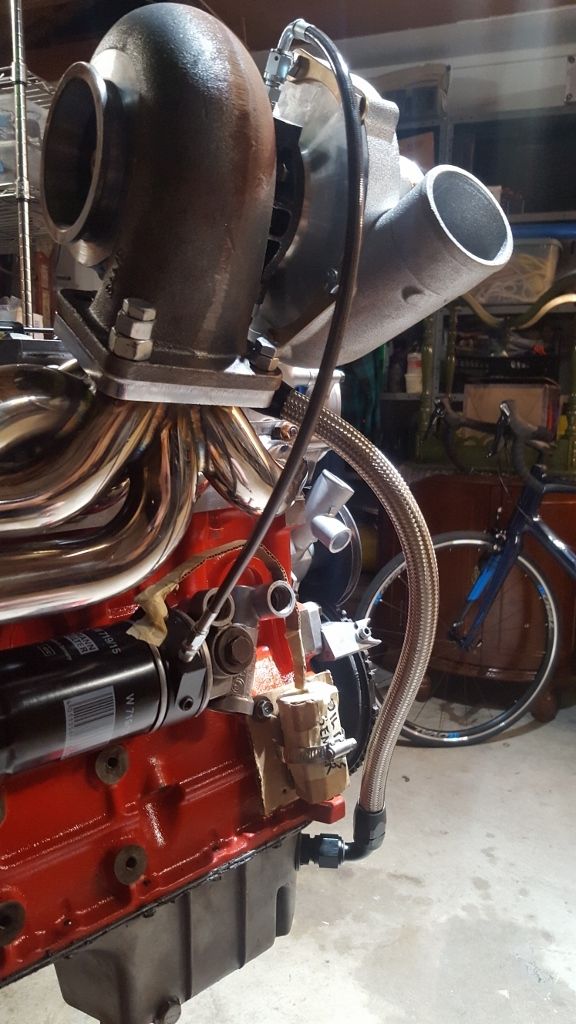
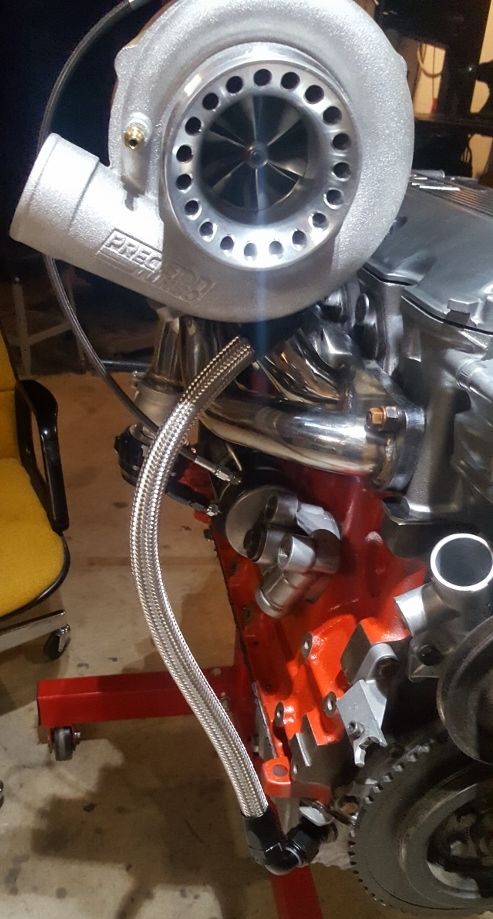
Turbo oil feed and drain hoses in place. Looks good. Great fit.
Remote oil pressure sensor built and fitted. We decided it made more sense not to bolt it to the engine. We'll secure the sensor to the engine bay with a bracket.
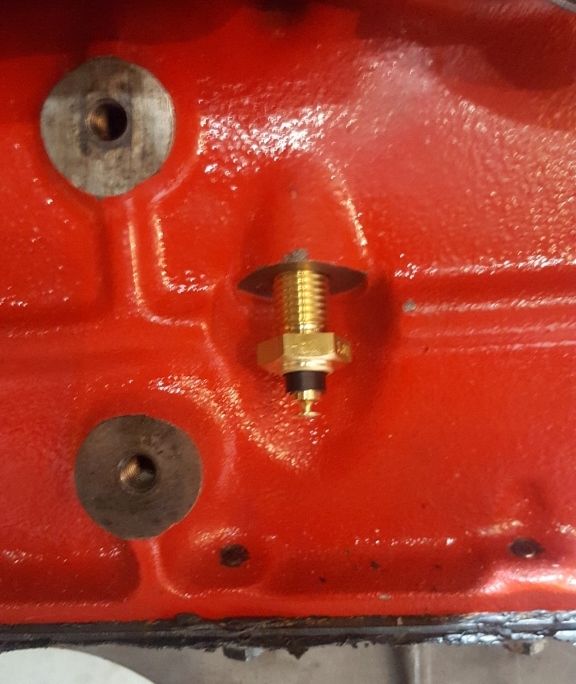
Engine oil temp sensor screws into the block (below oil filter) where oil pressure idiot light sensor used to go.
 "And then we broke the car. Again." Mark Donohue, "The Unfair Advantage"
1987 E30 3L Turbo Stroker Das Beast
2002 E39 M5Comment
-
Looking good
Sent from my E6633 using TapatalkComment
-
Das beast is back
The Beast is back from roll cage fab. Great fit and welding job. Now we have a ton of work to do before it can get painted.
 "And then we broke the car. Again." Mark Donohue, "The Unfair Advantage"
1987 E30 3L Turbo Stroker Das Beast
2002 E39 M5Comment
-
Make sure that the sensor does not screw in so far as to block the oil flow. if you look at the oil pressure sensor that you took out of there, you will notice it only had about 3 threads of engagement. I don't know what the passage way looks like in there, but you may have the potential to block a lot of fluid flow.
Looks great! keep it up!Comment
-
I just want that engine! :DEstoguy
1986 BMW 325, Alpenweiss ~ "Elsa"
Need a photographer, come visit my site: http://estoguy.wix.com/unique-perspectivesComment
-
Body, trim and getting rid of stuff
Time to start prepping the car for paint. First order of business is get rid of all the glass, trim and any remaining wiring harness.
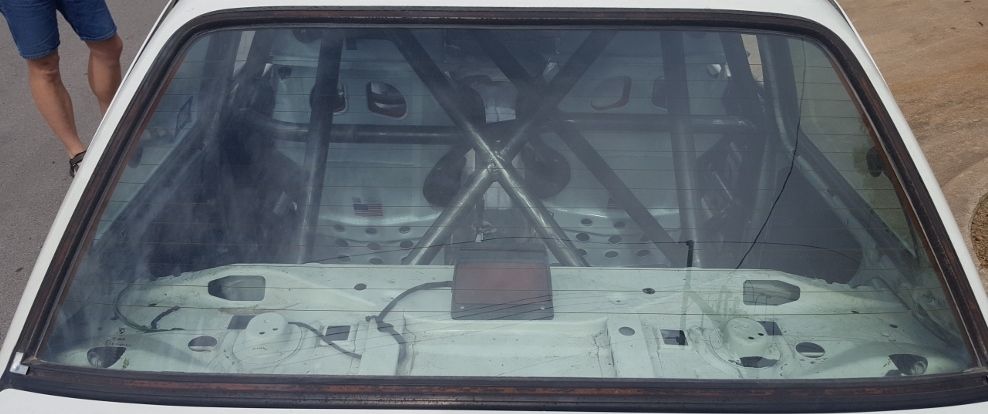
Side trim and window delete in progress. We're going with lightweight windows on the side and back
All done
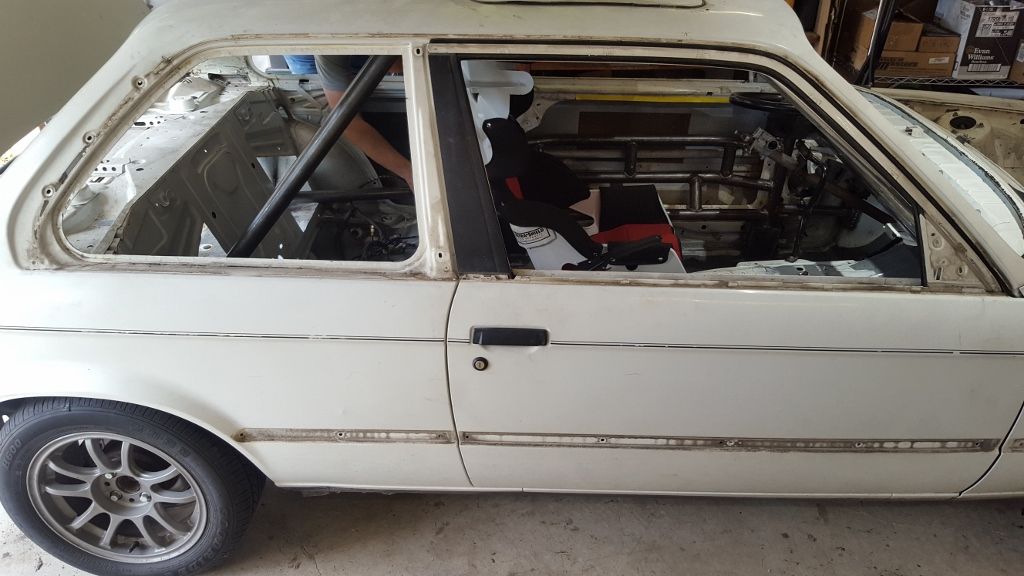
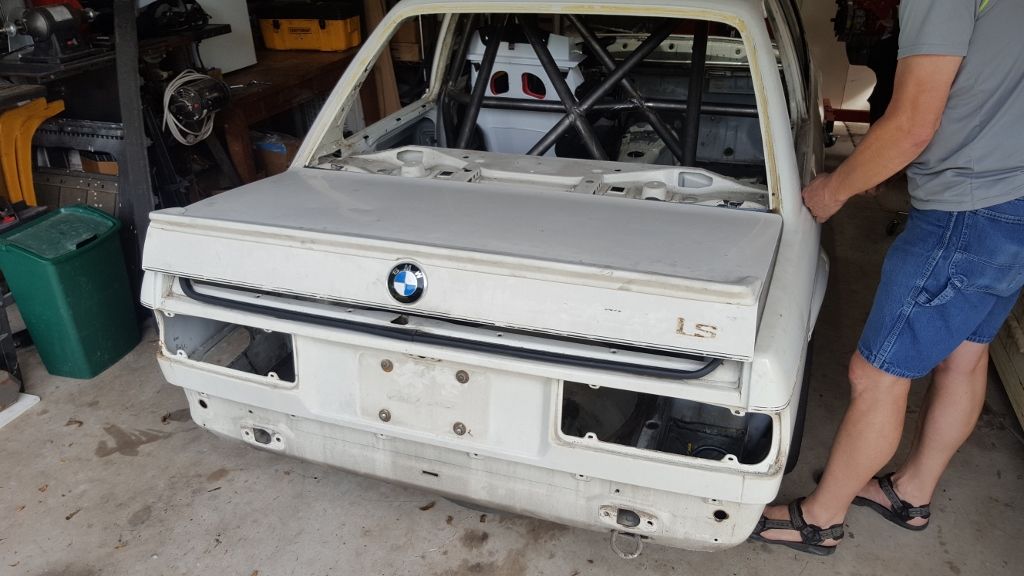
Rear glass, tail lights and massive chrome bumper gone. We also took off the trunk spoiler and BMW badge. Might go with a fiberglass deck lid. We'll see.
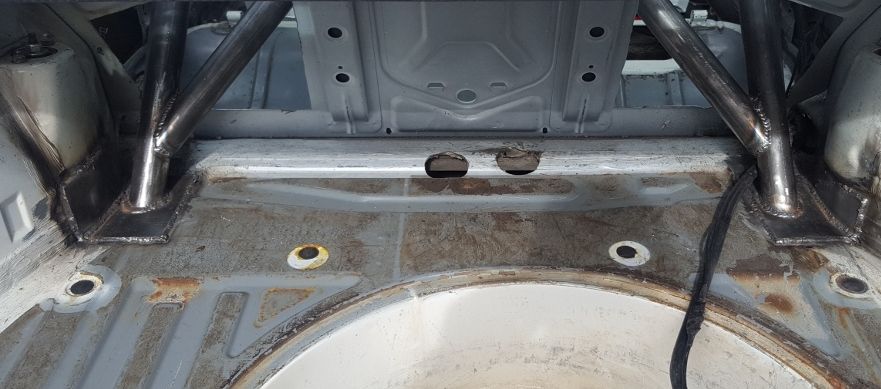
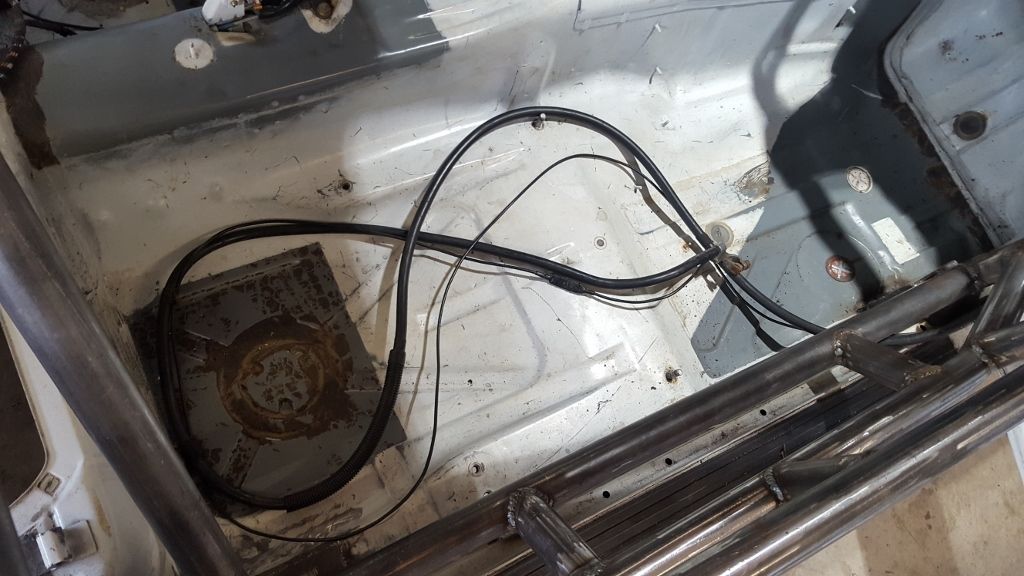
Wiring harness stripped out of the trunk. We're building a custom wiring harness in any case.
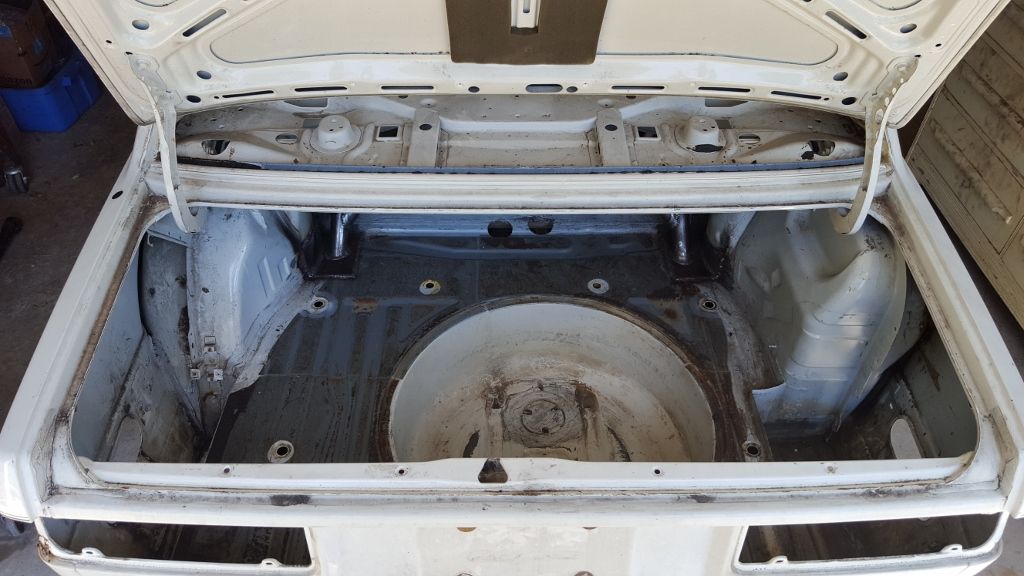
More wiring harness eliminated. It's basically all gone.

We'll keep the main battery conductor, but it has to come all the way out for paint. That sucker is some serious gauge wire.
75 lbs of whatnot removed today. :devil: By my calculations the car weighs approximately 1100 lbs as it sits. Will roll it onto a scale when we are done.

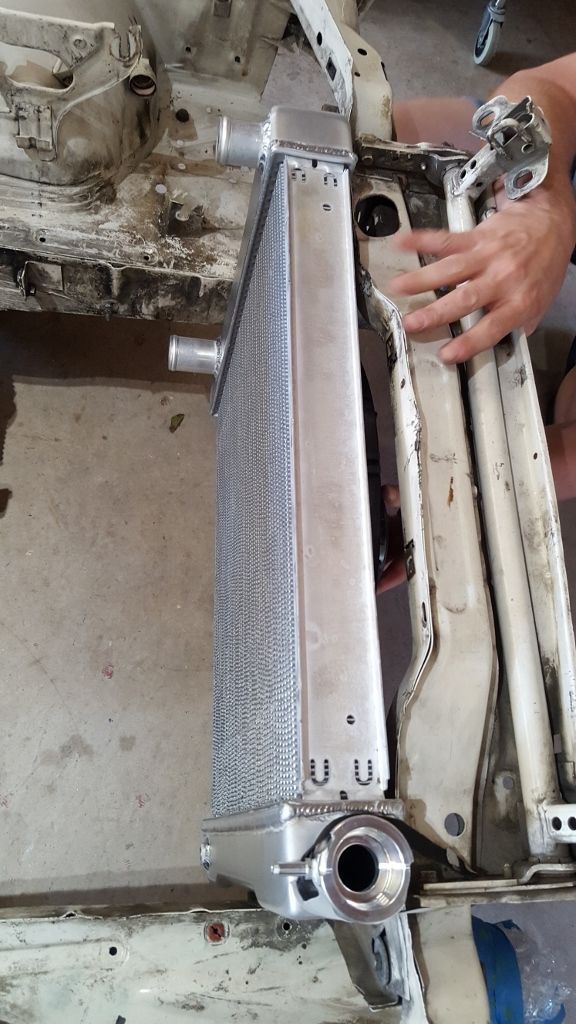
Jegs 26x19 dual pass 2.25" aluminum radiator. (555-52047) I like it. Fits great and will definitely keep the engine cool in whatever conditions. We'll need to fab custom brackets so it sit's about 1" lower. Filler neck is sitting too high.
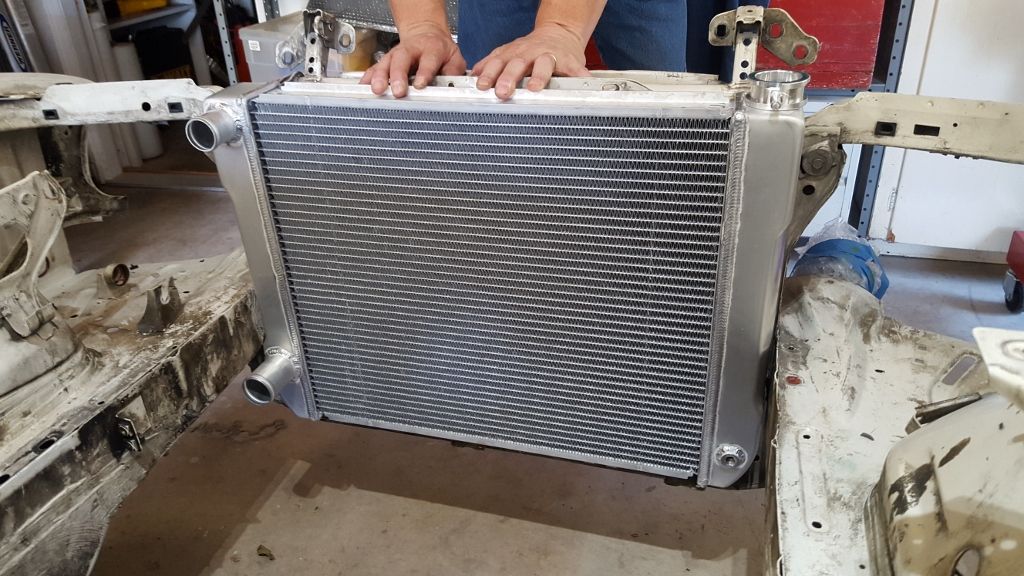
You can really see the radiator thickness in this shot. Uses dual 1" tubes.
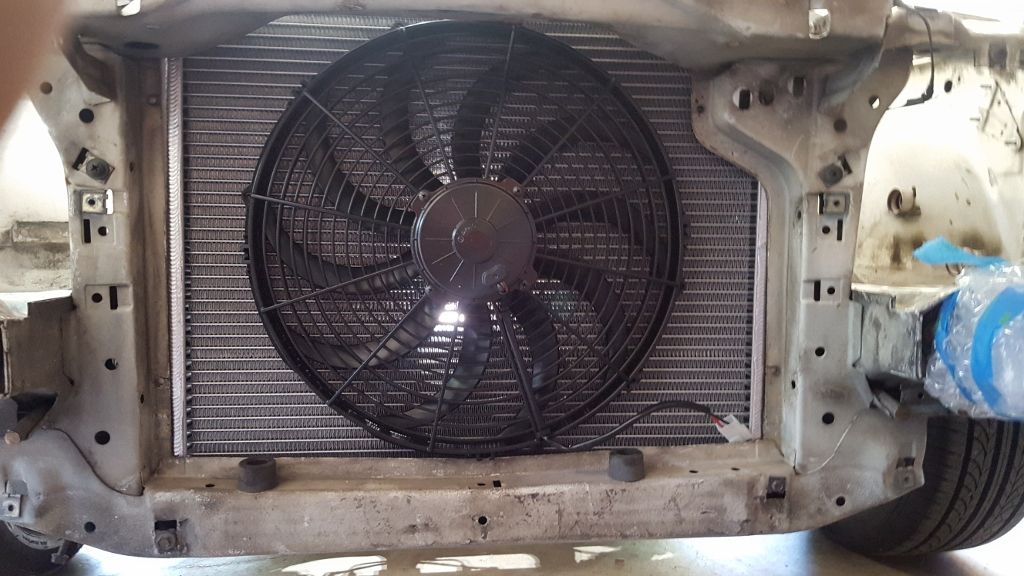
And finally, a 16" SPAL 2000 CFM pusher fan replaces the stock mechanical clutch fan. (30102048) Fits perfectly. Pulls ~25 amps at full honk. Will run this with stand-alone thermostatic controller and temp sensor connected directly into the radiator.
 "And then we broke the car. Again." Mark Donohue, "The Unfair Advantage"
1987 E30 3L Turbo Stroker Das Beast
2002 E39 M5Comment
-
Wow, it has been a while since I've checked your thread. Extremely detailed and lot of very good information here. This will definitely be a resource for me as my car continues to evolve.Comment
-
I wouldn't worry about the Goodntight manifold cracking. CX racing stuff, sure, but the GNT is much thicker.Originally posted by priapismOriginally posted by shamesonComment
-
Body and Paint Prep
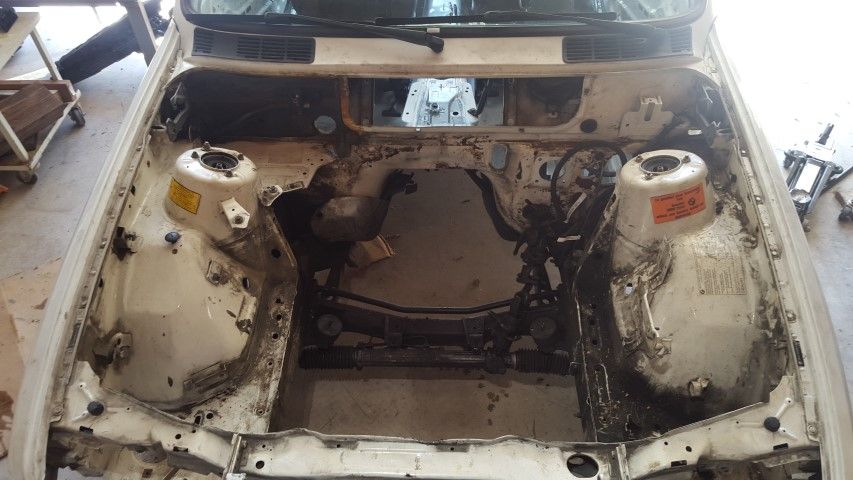
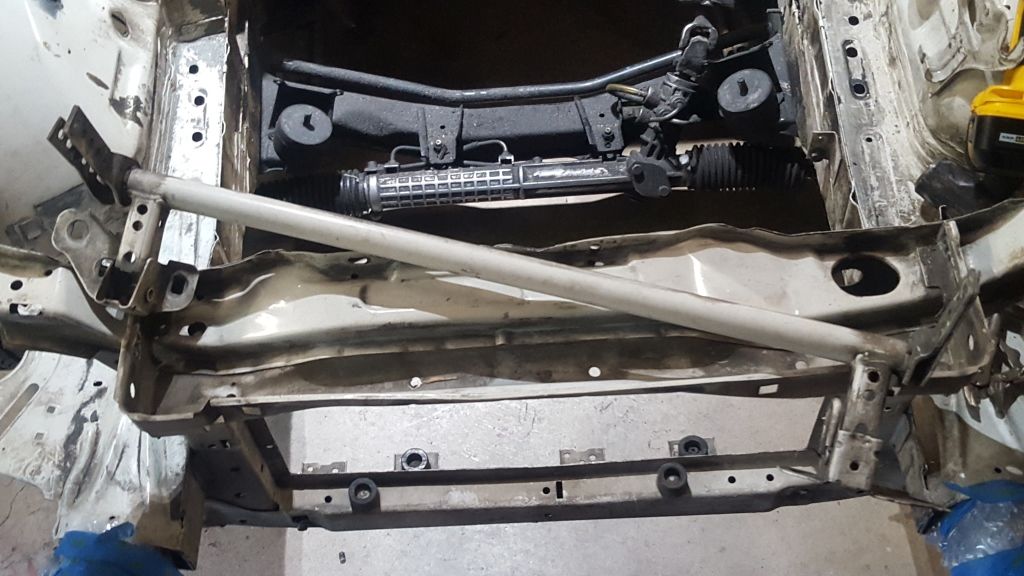
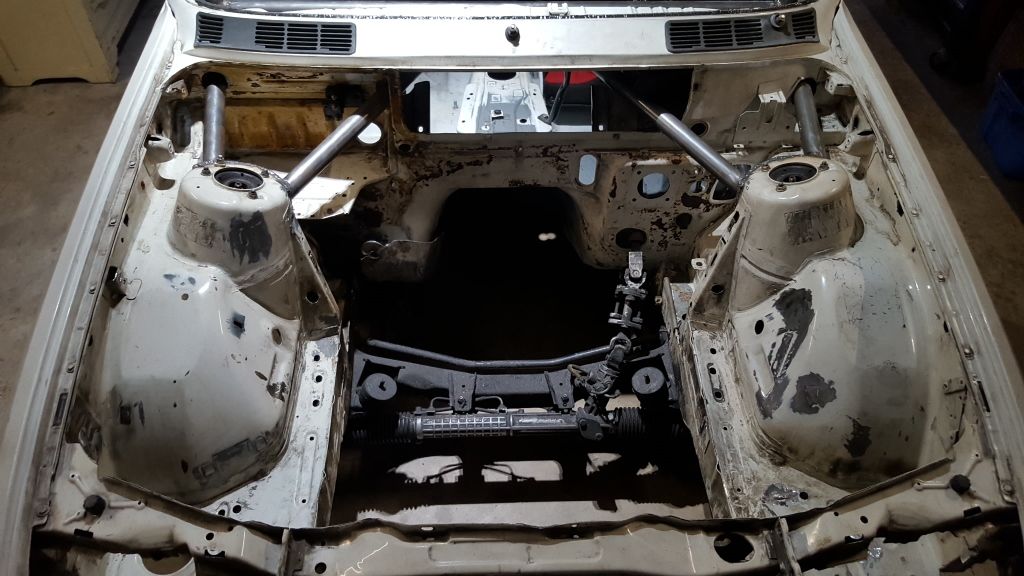
So, mostly done with the big mechanical stuff. More on that later. Now its time to prep the body for fiberglass and paint. First order of business is clean up the engine bay. We're going to get rid of all the random brackets. Go for a totally clean engine bay with only things we want bolted in there.
Here's the starting point
Starting to chop off brackets. Tools required: Angle grinder, file, sandpaper and big frigging wrench too beat on anything stubborn.
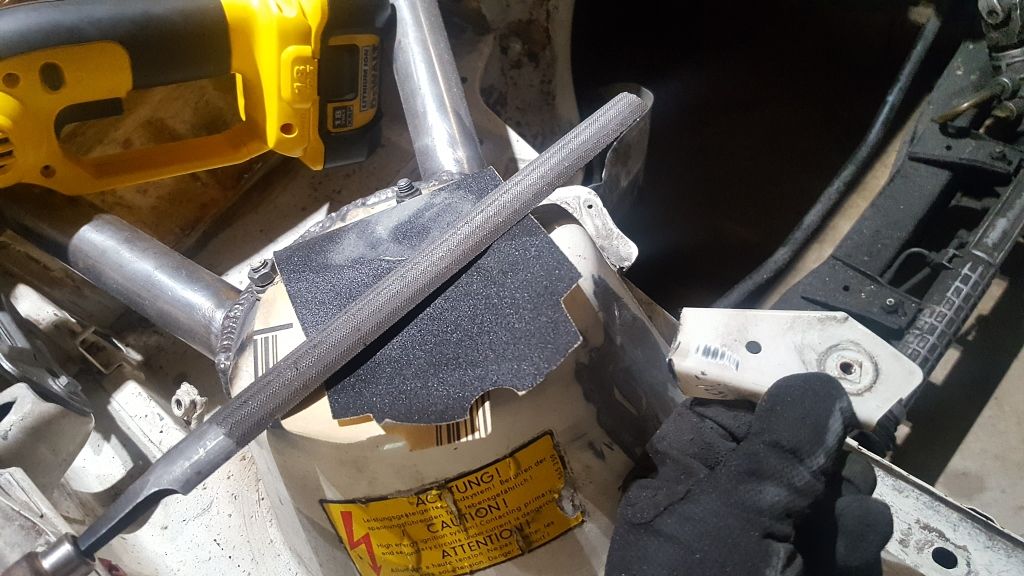
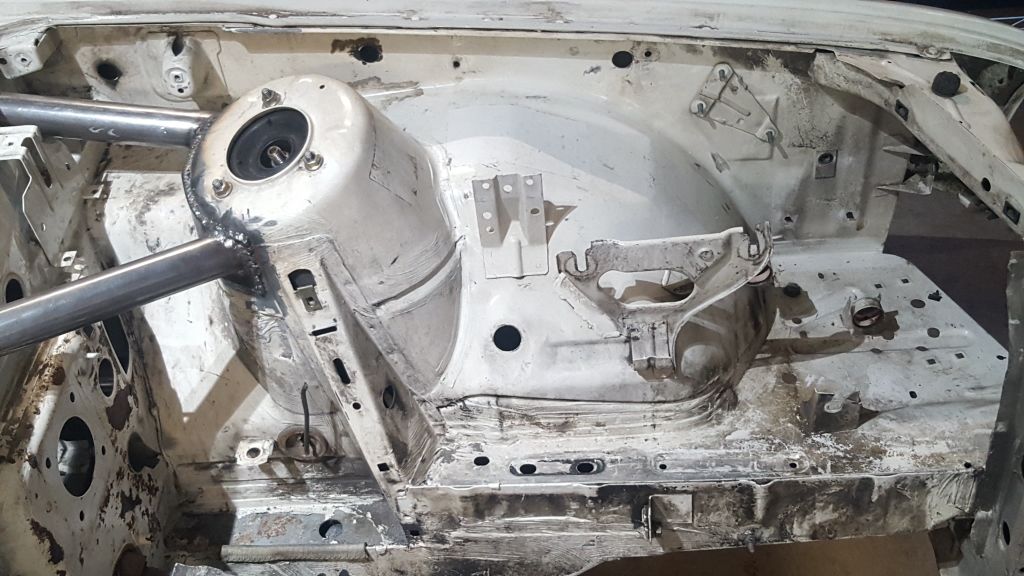
If you're careful, you can do some amazingly detailed metal work with an angle grinder. Just takes a lot of patience. Work slow, remove a little metal at a time.
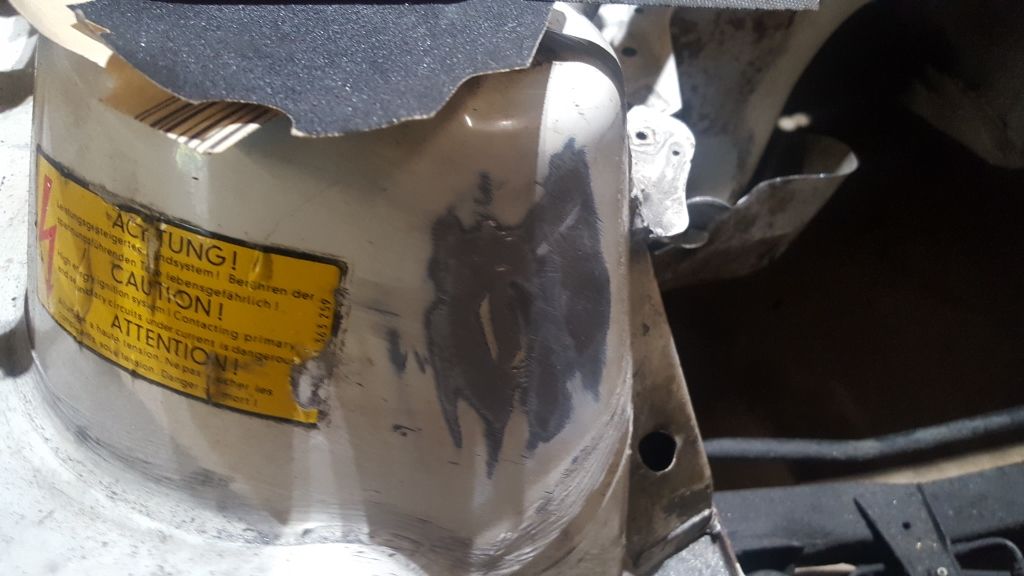
Passenger side done. Looking good. Body shop will fill the various holes.
Removed the hood mechanism while I was there. Hood will be pinned. More weight gone. :devil:
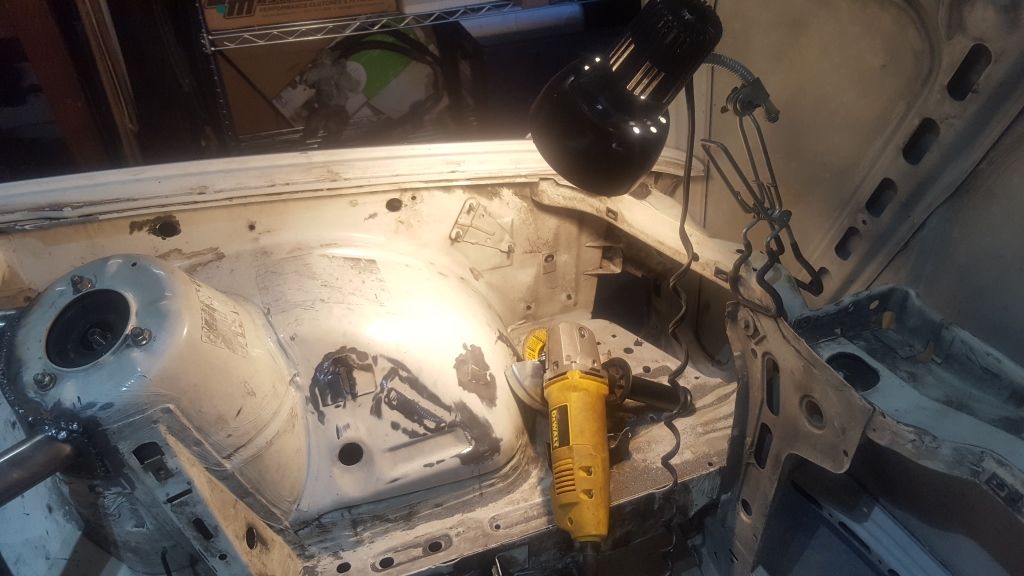
Drivers side before. Lots of brackets.
In progress. Notice my spark shield ... i.e. the old hood.
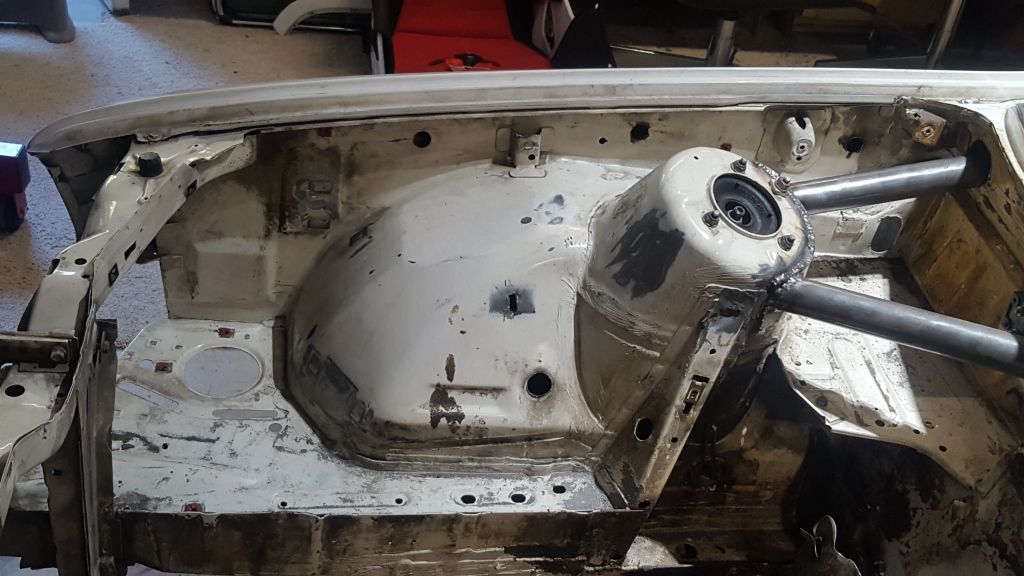
All done.
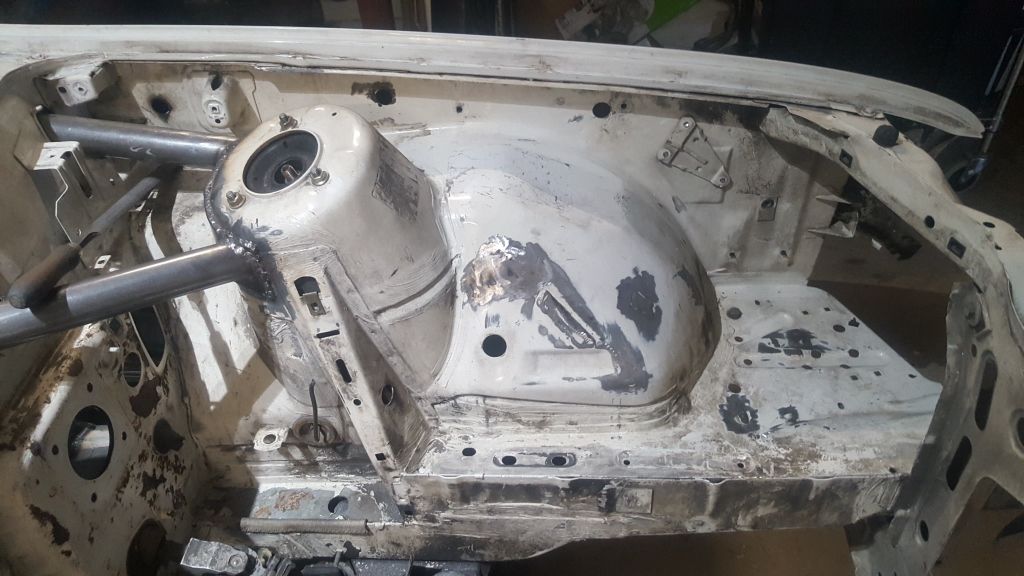
Finished product. Time to fabricate a metal patch for the firewall next.
 "And then we broke the car. Again." Mark Donohue, "The Unfair Advantage"
1987 E30 3L Turbo Stroker Das Beast
2002 E39 M5Comment
-
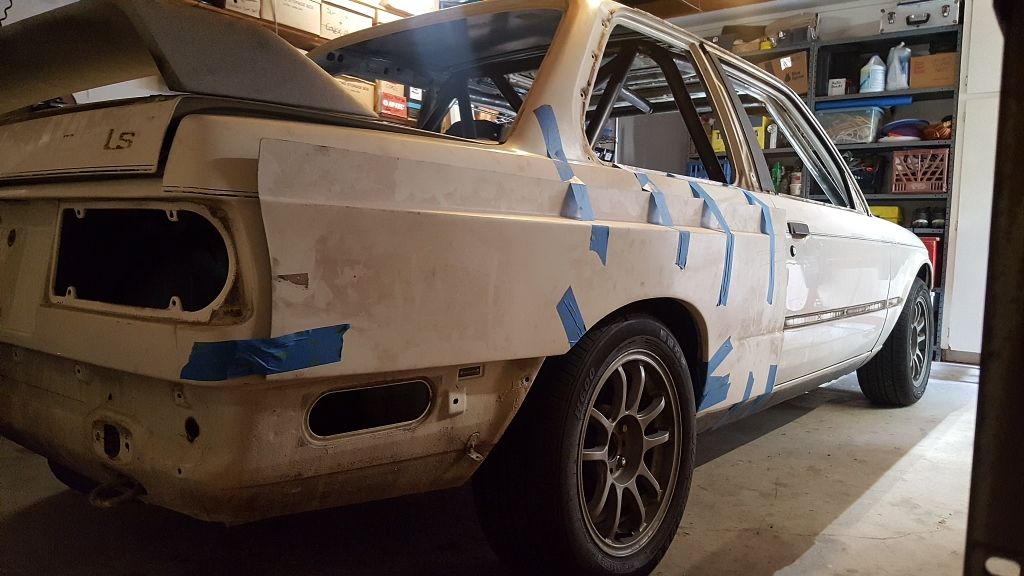
Das Beast Body Shop
So, the adventure continues. Working on fitting body panels today. Here's a rear quarter getting ready to be taped in place. Looking at this thing, I think we need to cut a groove in the body, parallel but under the pinstripe. Top of the body panel could slide into that and be glued on the inside. Anybody out there who works in a body shop or amateur expert in fiberglass? I could use your advice.
Here's the quarter panel taped in place. Fits pretty good. Clearly that top piece needs to be fitted inside the body. Lots of bondo and fiberglass work in my future.
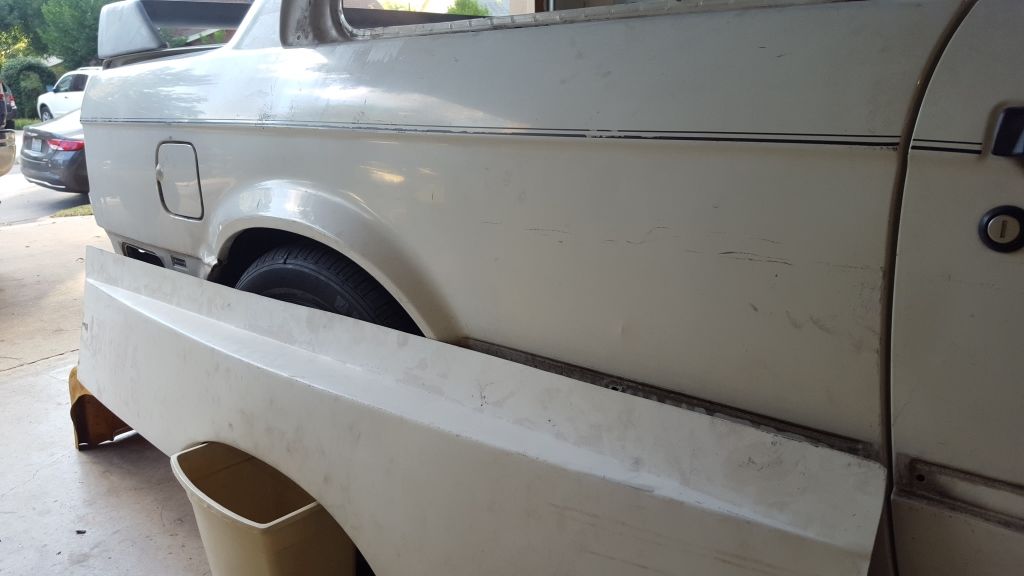
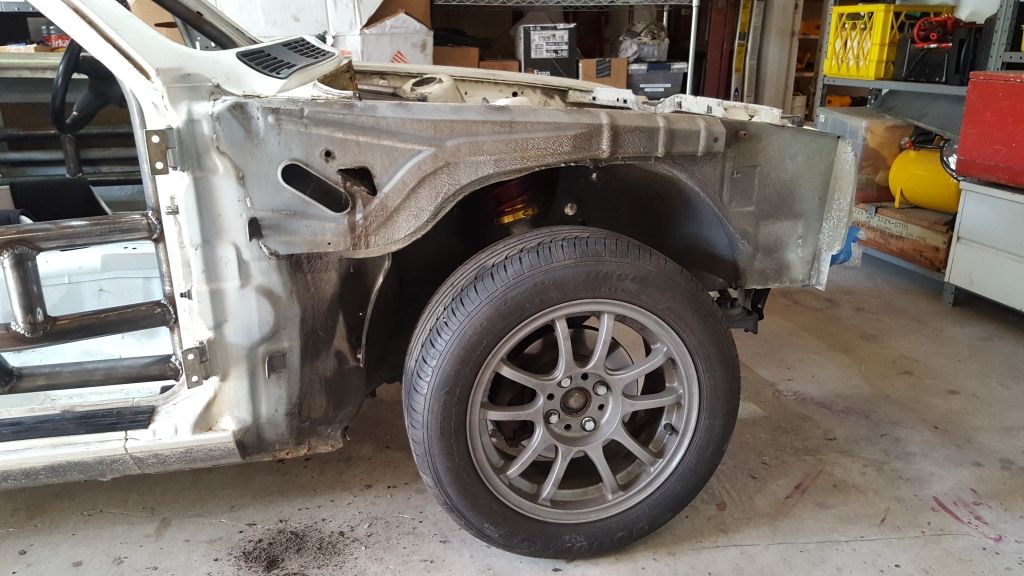
Front fender: before.
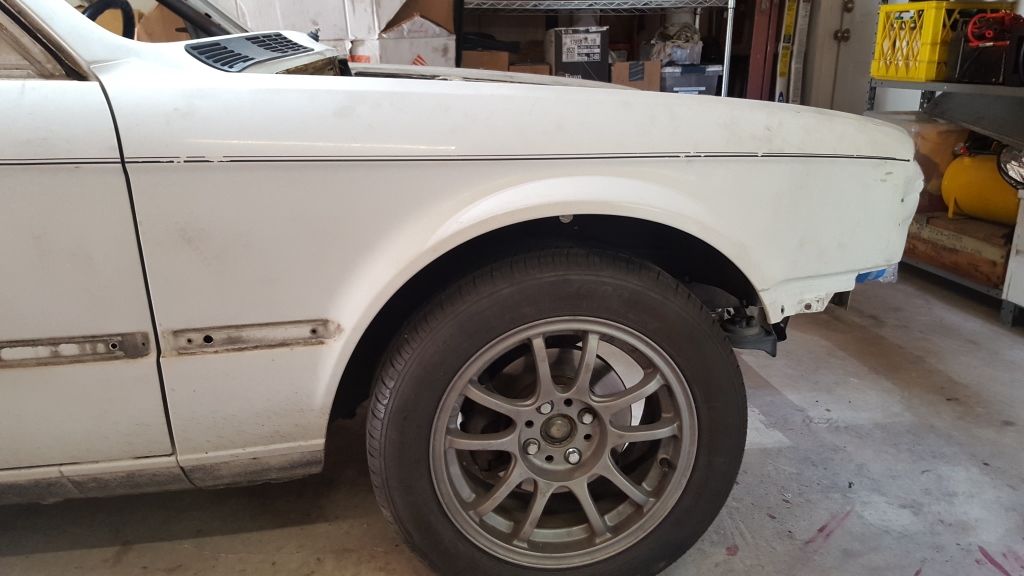
Fender gone. It's not too hard. Just remove all the metal screws, chip out the glue (near window) and it pops off. You will need to remove the fender liner to access two screws closest to the firewall. Best to remove the wheel, but Rob cleverly hid the floor jack. :devil: I learned you can remove the fender liner with wheel on the car, but its a pain in the A$$. Also, you don't have to remove the door.
Fiberglass fender in place. Looking pretty good. It actually does not give much more wheel clearance than stock, but since I'm doing the back (for wider rubber) have to do the front as well.
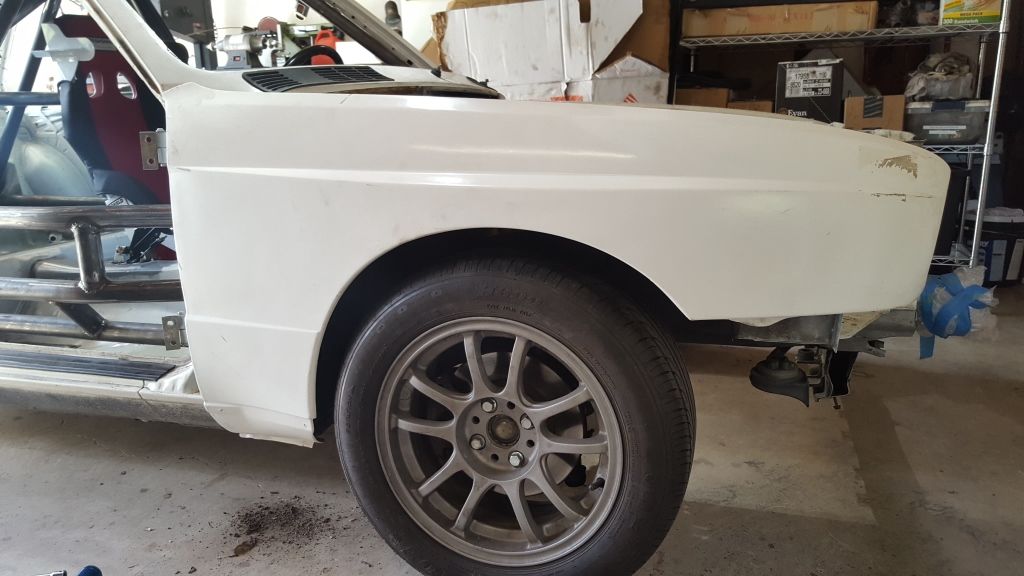
Ran out of cold beer so I called it a day :devil:"And then we broke the car. Again." Mark Donohue, "The Unfair Advantage"
1987 E30 3L Turbo Stroker Das Beast
2002 E39 M5Comment
-
Body and paint continued
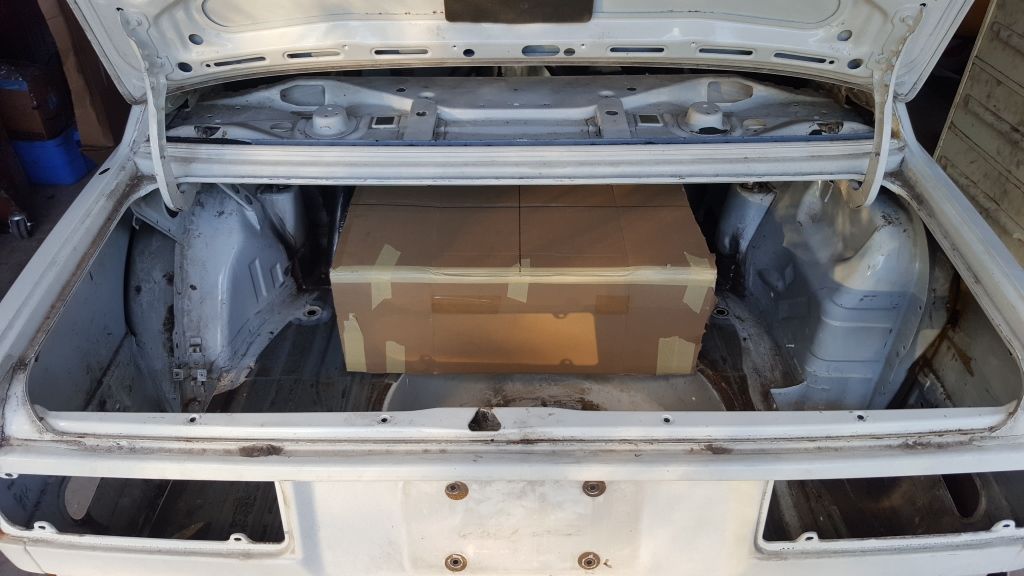
Mocking up the fuel cell today. Fuel Safe ED115, 15 gallons, 26 x 18 x 9.5
Going to mount it flat in the trunk as shown. Yes, I know, center of gravity will be better if we mount it lower. Fact is I don't like the fuel cell hanging out of the bottom of the car, or mounting it close to the bumper. Also, we need room underneath for the diffuser. NASA regulations even state "Installing a fuel cell that hangs significantly close to the ground or one that is mounted closest to the rear of the vehicle, even if the installation meets with these rules, may be deemed unsafe and therefore excluded from competition."
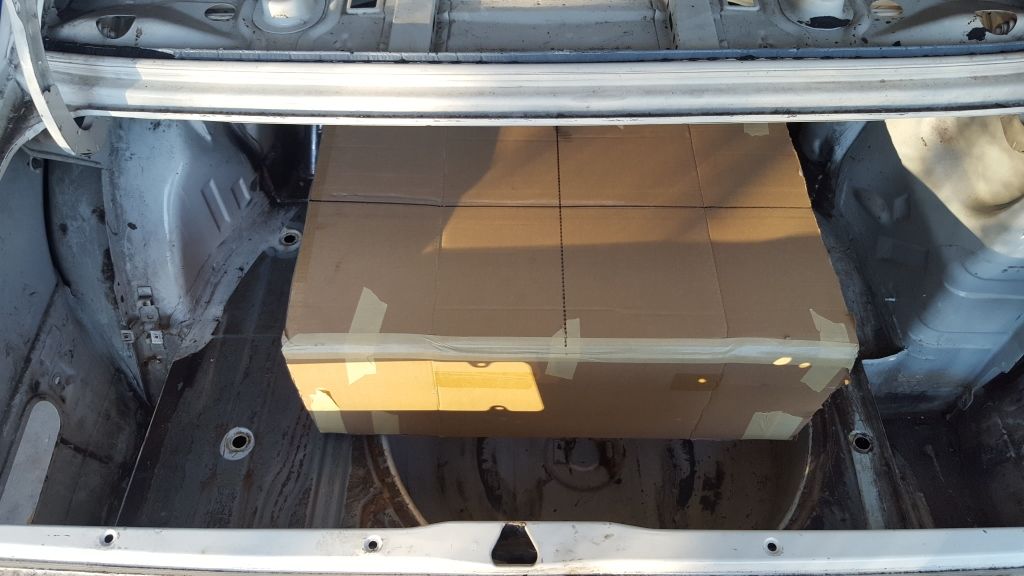
I'd like to get it this far forward, but fabricating the remote fill will be painful.
Probably going to end up with it mounted like this. Remote fill tube would be a vertical tube to the trunk lid, or 45 degrees at most.
 "And then we broke the car. Again." Mark Donohue, "The Unfair Advantage"
1987 E30 3L Turbo Stroker Das Beast
2002 E39 M5Comment


Comment