-
sigpic -
Thanks. It’s super durable and you can choose colors. Mine is Satin.
Sent from my iPhone using TapatalkComment
-
I have used Jet Hot on all my builds. They are great.
[IMG]https://cimg4.ibsrv.net/gimg/my350z.com-vbulletin/550x225/80-parkerbsig_5096690e71d912ec1addc4a84e99c374685fc03 8.jpg[/IMG
Comment
-
this is my first post,
wow......
just read this the whole way through......
:bow::bow::bow::bow:
awaiting the next chapter .......
ps.
My Zinner M3 is at home in my garage and at the beginning of a bare frame rebuild - your pics and info will be priceless ! Thank you so much for taking the time....Last edited by Andy the Aussie; 09-08-2018, 05:32 PM.Comment
-
Epic. Hey how do you like the garage flooring? I always wondered how things would roll on top of it. Also what do you do if you have a major spill?
Comment
-
Love this thread and your inspiring dedication to the restoration of your M3.Comment
-
Thanks guys.
On the flooring, its great. Easily my favorite "tool" in the garage. Things roll ok on it, not perfectly smooth, but I have no complaints. If you have a big spill, i guess it depends on what it is. I actually wash my car in my garage on occasion, and because the slab slants forward the water just drains out. I have had an oil spill where i had to use a screw driver to pop a few tiles loose, then replace them. Not a big deal.
I'll try to add some updates soon.Comment
-
If you could I bet you would have zinc"d the chassis tooComment
-
Hey Guys,
I’m way overdue for an update. Thinking things will pick up more after the new year, back end of 2018 has been very busy on other fronts.
Anyways, here are a few updates:
Steering Rack in Place
New vs Old End Links
Subframe bolts torques and marked
Front brake lines
Front strut assembly in place
Bolts on – I was very, very careful with these. Wanted to keep them perfect
Other side
End links connected (not torqued yet)
Control arms on (not connecting the back yet. You have to set the car down within 30 minutes of hooking up the back so it can settle).
Rotors
Yellow tool is there as a reminder because I have to bend the backing plate to keep it from rubbing
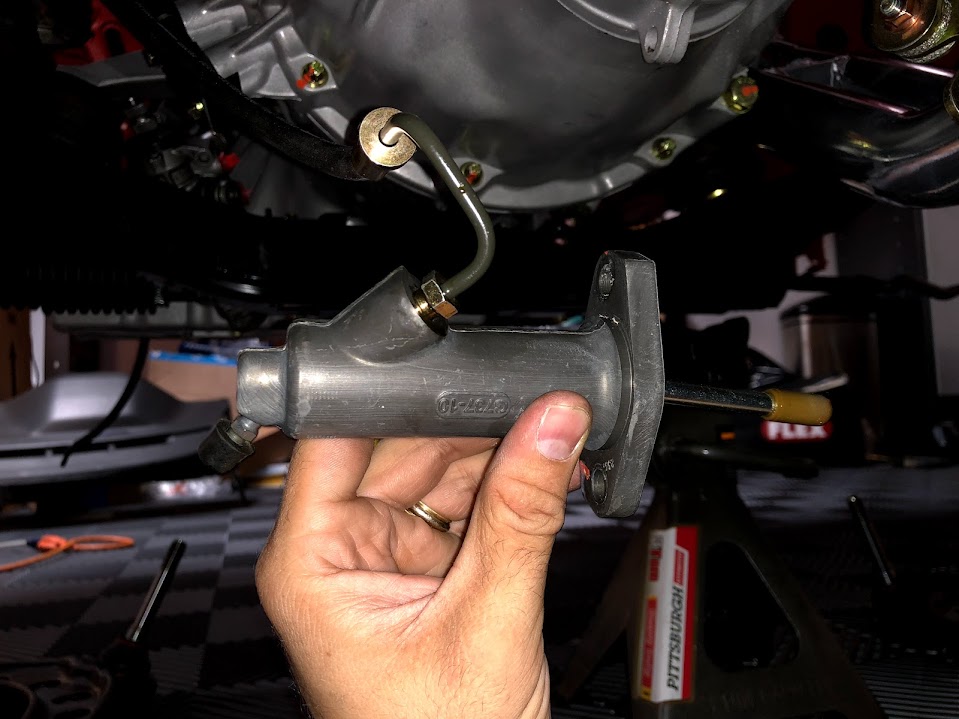
Slave cylinder hooked up
Time to sort this mess
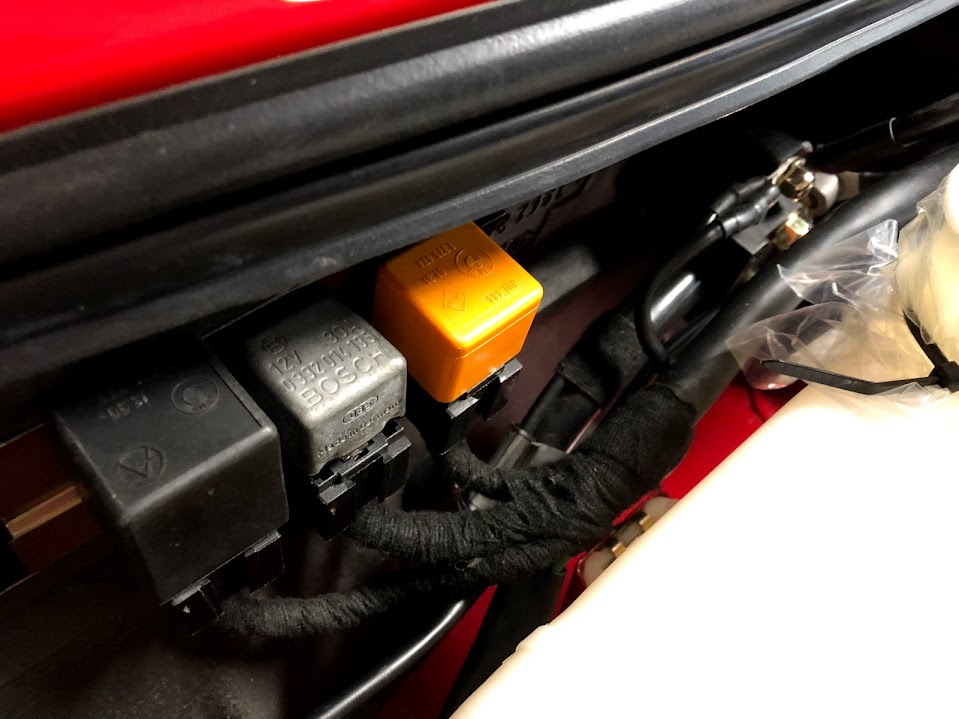
The brake fluid reservoir sensor cable insulation was rigid and brittle, so I removed it and wrapped with Tesa tape. Nice and flexible now.
Grounds, ECU, etc into the passenger footwell
Harness junction and grounds
Relays in place
Lotsa hoses
Fuel lines hooked up
Coolant line (feeds into heater core). I elected to not do the diverter valve retrofit because 1) it makes the back of the engine bay hose routing a mess, 2) I’ll hardly ever be using the heater
Hoses in place
You can see the one that runs down to the engine block and goes into the top part of the heater core. The one with the blue stripe runs out of the bottom and goes to the coolant rail which leads to the thermostat.
Brace that separates the fuel lines from the coolant hose
Looking cleaner
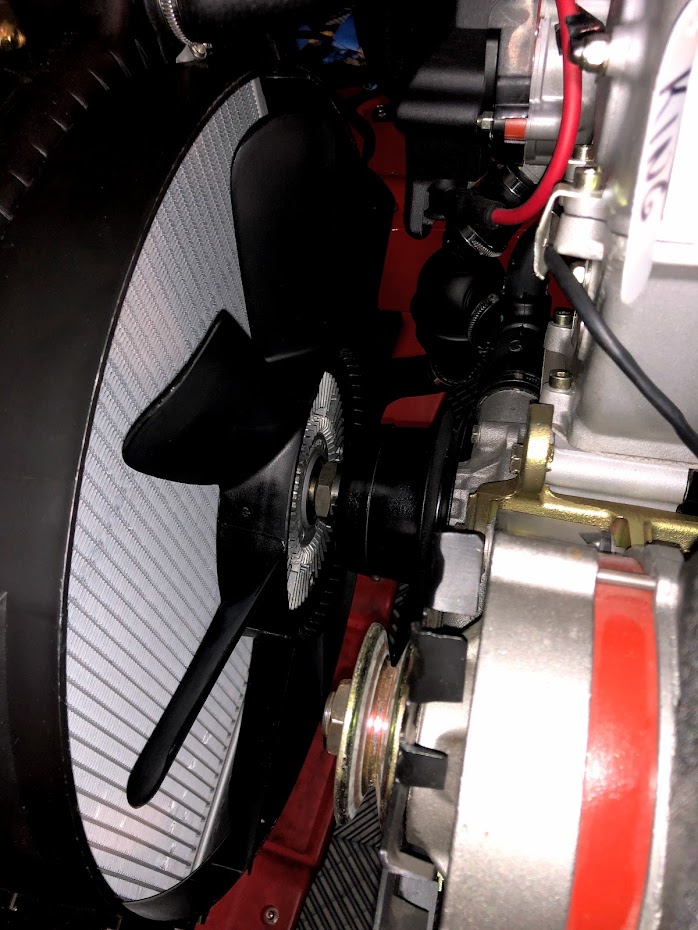
Fan shroud on
New fan
Fan clutch cleaned up and reinstalled
Fan on – not torqued yet
Some zinc
Underside
More hoses. Love this stuff coming together
Return hose
Overflow hose
Brake vacuum hose. Time to make a new one
Took a few tries to get the right fabric wrapped hose, but I found an identical one
Also sourced a new check valve. The one on the bottom is the new version – this is a part used across several models- Volvo and Audi use it as well
Hooked up to brake booster
Vent hose that connects from charcoal canister back into throttle body
Connected
Seal on trunk lid
Front valence/bumper carrier back on
Old version of the wire loom clips for the bumper carrier on the left, new version on the right. The old ones were nackered. The new ones are much smaller but sturdy and large enough to hold the loom that goes through.
Wires through
Driver side
ABS unit back in. I didn’t polish the little dome thing on the top because, well, I didn’t. Didn’t want to mess it up. Might do later.
Oil cooler.
New mounting bushings, re-zinced hardware
Test fit with bumper/vent
on
Old ones weren’t in great shape.
I thought about refurbishing these, but decided to get some new o-rings
Aaaand new hoses. Totally worth it.
And power steering lines.
Old ones were ok, but “ok” is not what this build is about
New hoses, o-rings, and reservoir
Getting these things on was not easy
Ignition coil
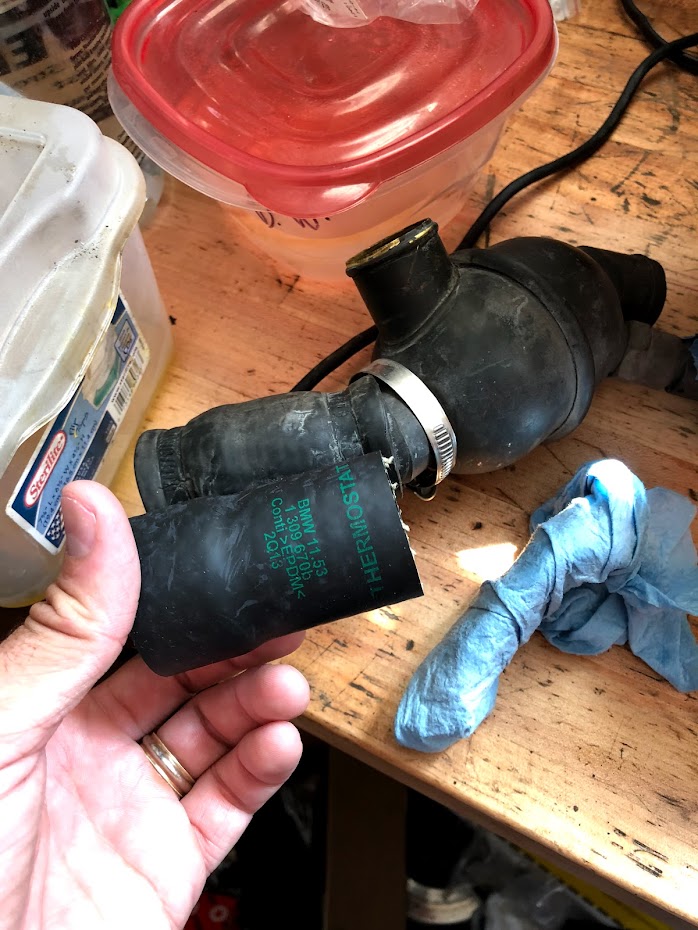
Thermostat in
Grounds
And guess what’s in the mail from Germany…
Next up: some wiring repairs, shifter/selector armLast edited by CurrusDei; 12-17-2018, 02:15 PM.Comment
-
Amazing update. My fave E30 M3 Build....EVER! Beautiful work bud.Comment
-
Please tell me where ever you ordered those lights from they have more! I’ve been looking for new euro lights!Comment
-
ebay. the seller says he has two sets left. not cheap, but for this kind of Euro NOS what else are you gonna do?
https://www.ebay.com/itm/BMW-E30-M3-...tZH:rk:50:pf:0Comment
-
Everything about this is superb. Can you share how many “man hours” you’ve estimated has gone into the build up to this point?
Sent from my iPhone using TapatalkJP
WTB: Z3 1.9 lever, plastic bumpers, 19# injectors, Anthracite Cloth Sport Seats
Current
88 325 super eta
00 528i/5 (daily)
02 530iA sport
Former
04 525iA sport
87 325is
91 325i
97 528iComment
-
oh man. i think about that sometimes. It would be a real shot in the dark. I'd say on average 3 hours/wk (sometimes I'll work on it all weekend, sometimes it goes untouched for weeks).
Over nearly 5 years, so 3x52x5=780. Said another way, this would be almost half a year of straight, full time 9-5 work. This seems in the ballpark if i started over and condensed all the time i've spent. Of course, if i started over i could do it much, much quicker. Plus thats just my time, not counting the paint/body guys, engine guys, and upholstery guys.
I'll round it off at 1,000 hours so far of just me.Comment
-
interested in how you obtained the headlamps.
amazing rebuild.
Comment


Comment