Announcement

Collapse
No announcement yet.

Mats stock with OEM+ mods - UK 1990 E30 320i Alpine white II

Collapse
X
 
  • Filter
  • Time
  • Show
Clear All
new posts

    Mats stock with OEM+ mods - UK 1990 E30 320i Alpine white II

    Click image for larger version  Name:	mat.troke-5.jpg Views:	330 Size:	155.7 KB ID:	10082492

    Hi all,

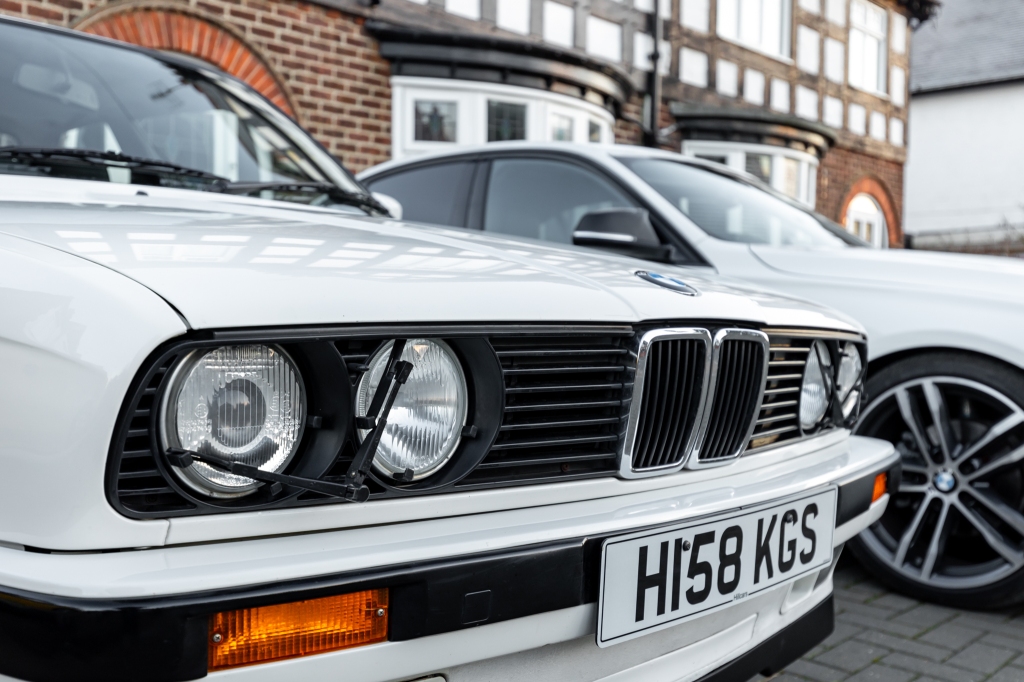
    Mat based in Mansfield, England and this is my 1990 E30 320i SE, 76k miles, no rust and still on its original exhaust :-) The car is completely stock apart from I have upgraded the alloys from 14 to 15 inch, a Blaupunkt CD player.

    I did an absolute ton of maintenance on the car over the three week Christmas holiday (and finally resolved a long standing hard start issue hurrah!) and took lots of pictures so thought I would pull them all together in the introduction post:-)

    So starting with some time of work, first up was a set of genuine 15inch Euroweave BBS alloys which have just had shot blasted and powder coated.

    The 14’s which were on the car had tyres which were all cracking and I prefer the wider 7j offset of the 15’s which also had new tyres on so decided to swap them over… hanging onto the 14’s though.

    Really pleased with how they look.


    Next up the bonnet sound insulation had perished and was falling off into the engine bay, I wanted to keep it original so managed to track down a new OEM set from a company in Germany, PartWorks GmbH.

    The old foam came off quite easy but the adhesive backing was a nightmare. I bought some Gtechniq Glue & Tar remover and it worked an absolute treat, taking it right back to shiny clean white paint.​


    New insulation installed, went on fantastic following all the contours.


    Windscreen and headlight washer bottles had 33 years of limescale and were looking very discoloured…

    ​​​a couple of hours of scrubbing, dishwasher tablets, bleach and soapy water and they were looking like new!


    Foolishly I didn’t take a before shot of the engine bay but I spent a full day cleaning, polishing, wiping and treating all the plastics. Looks much better but when it gets garaged again next winter I’m going to do a full engine bay detail.

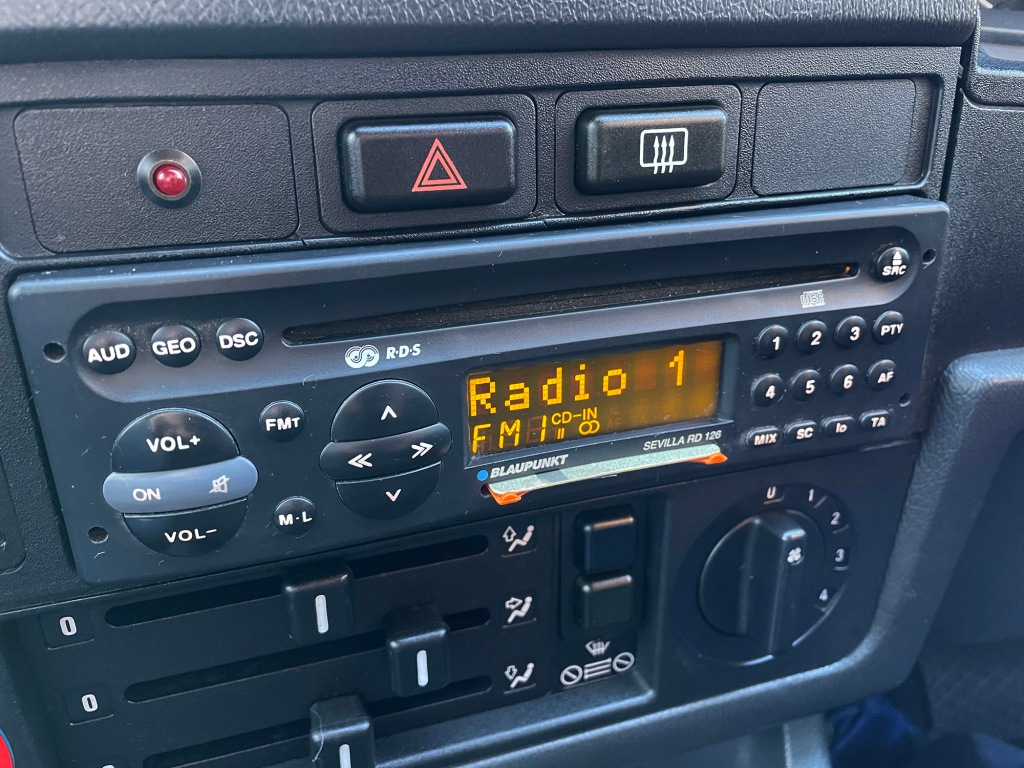
    Next up, the car came with a Sony pop off front stereo which didn’t really fit with the era of the car so I removed it.​

    After lots of Gumtree and EBay trawling I found this lovely Blaupunkt unit which has the classic removable credit card security system. Sounds fantastic!


    The car came with a 13 button computer installed but unfortunately it wasn’t working. A bit of research unveiled a common issue with the light bar behind the LCD screen which uses traditional bulbs which obviously 30 years down the line go pop.


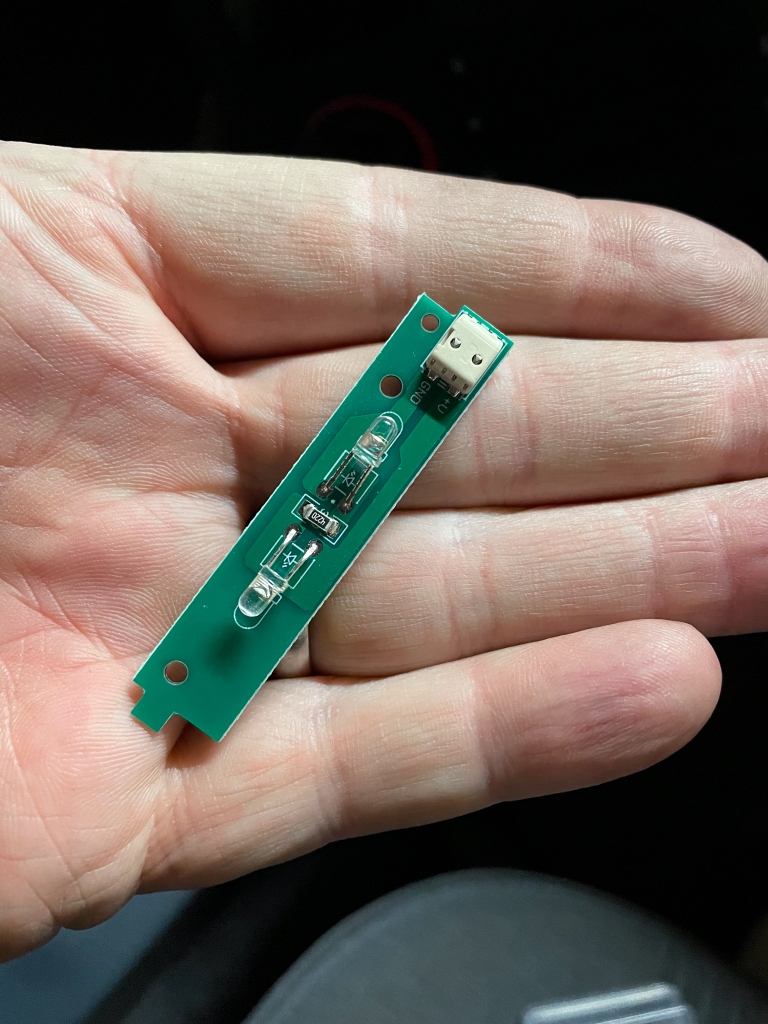
    Thankfully, some genius has developed an LED version which fits perfectly. Its a bit of a faff to get at the computer as I had to remove the full heater dash trim but I got there in the end and after swapping the light strip its all working like new!


    The central locking wasn’t working, more online research and it looked likely to be either a live red loop wire which runs through the door or water ingress in the door harness plug.

    I unscrewed the speaker and pulled the central locking harness from the space near the pedal footwell and everything looked perfect, no rust, no moisture, wiring like new so next step was the door plug, and what do you know!

    The only pin that had a tiny bit of green corrosion was the central locking red wire pin! Some WD40 white lightening, plugged the harness back in and the central locking sprang into life… hurrah!


    Next up some external cosmetics…

    The exterior trim was a little faded, not bad but not like new so I did a lot of research on some detailing forums and everyone was raving about C4, its a permanent trim restorer.

    Its certainly not cheap and comes in a tiny 15m vile but after trying it on the front grill I can see why its so popular with the professionals and went on to do the whole car… just so you can see, right side treated left side original!


    I wasn’t to keen on doing a full cut and polish as I don’t have a depth gauge but after asking a few detailers they recommended using some Bilt Hamber Polish which has a very gentle cut but is amazing for deoxidisation of old paint bringing back the colour.

    Amazing stuff, you could see it go from a slight yellow tint to bright Alpine white with barely any paint on the pad. The paintwork now looks fantastic, rich deep whites which I finished off with some Auto Finesse Polish.


    Onto the mechanics


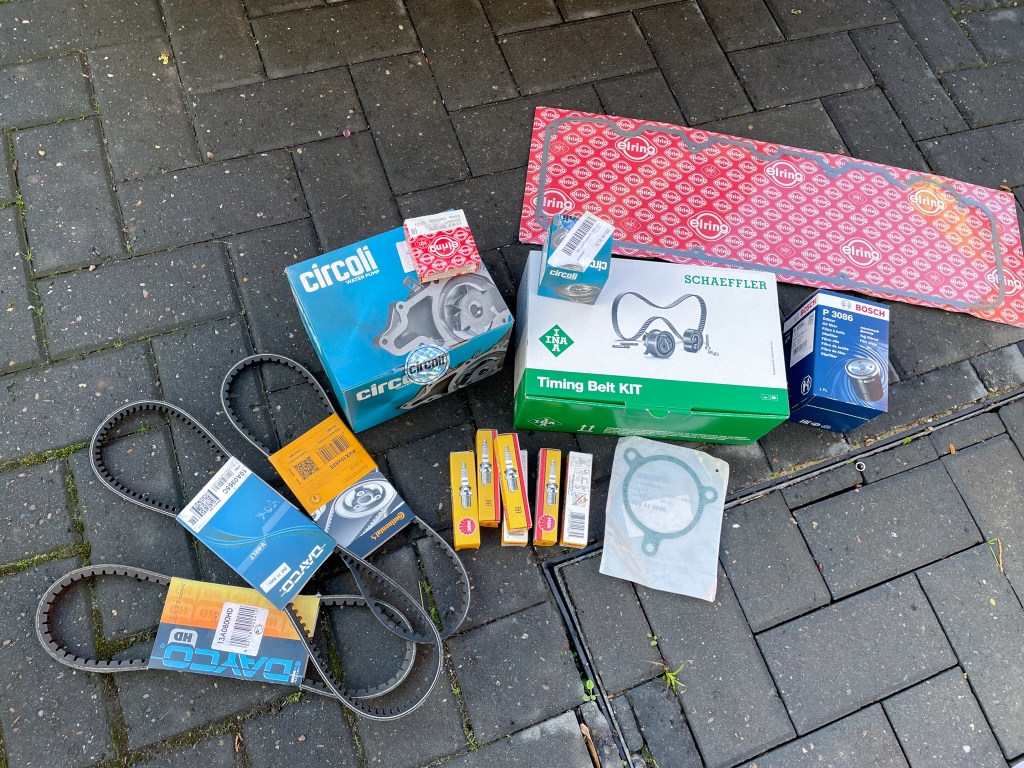
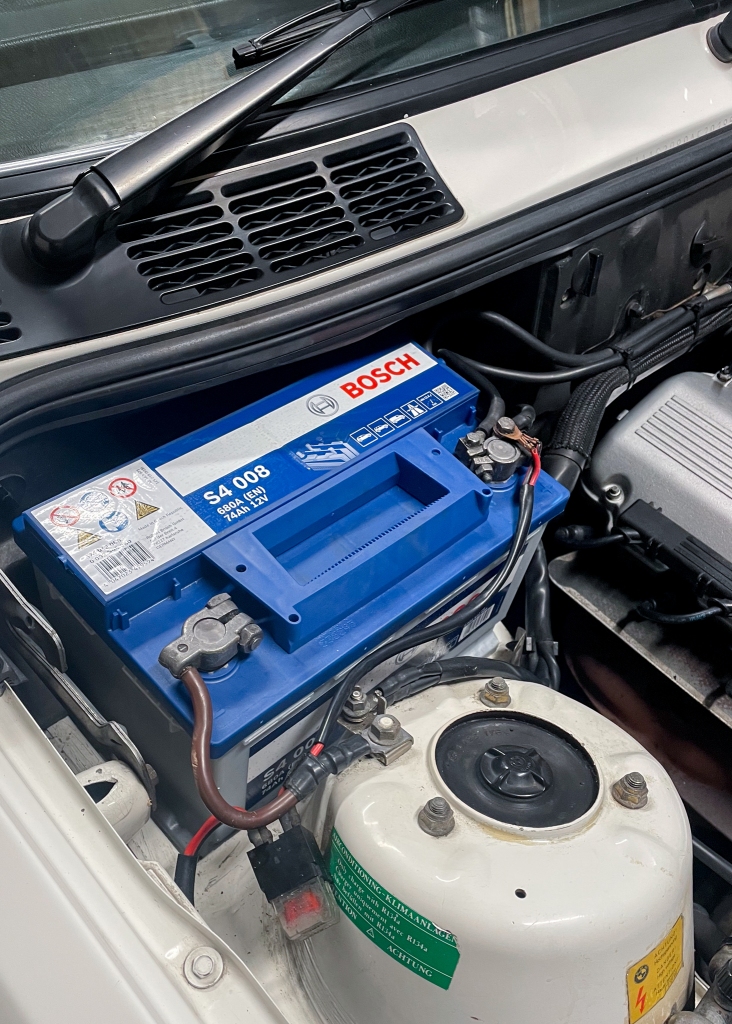
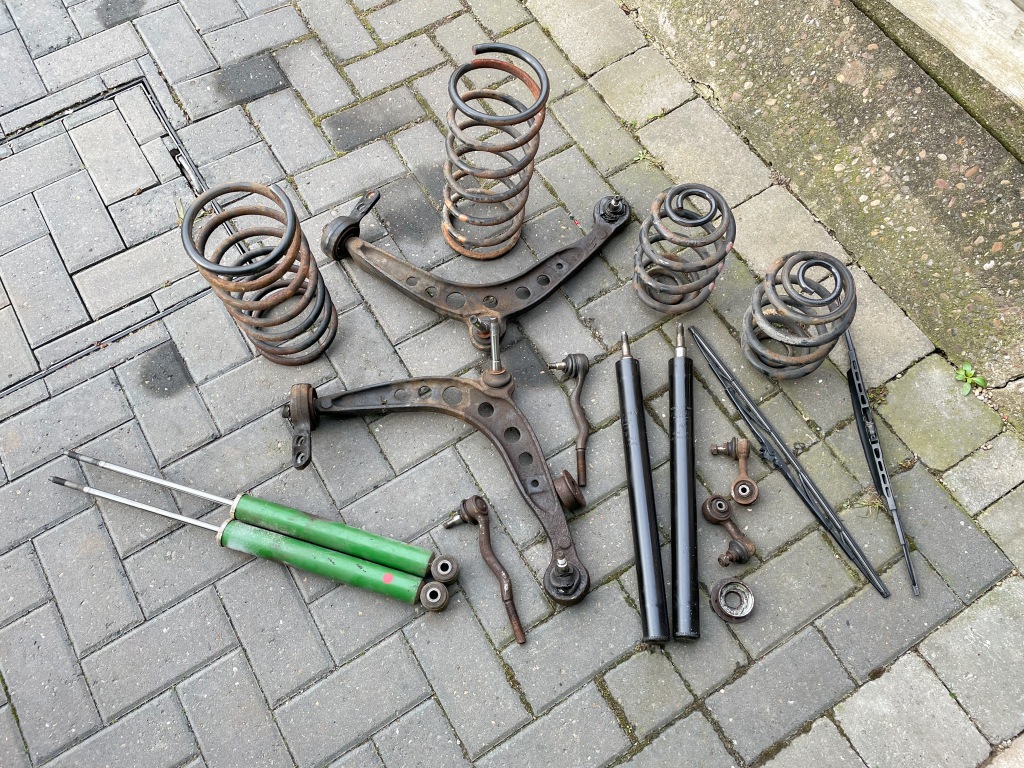
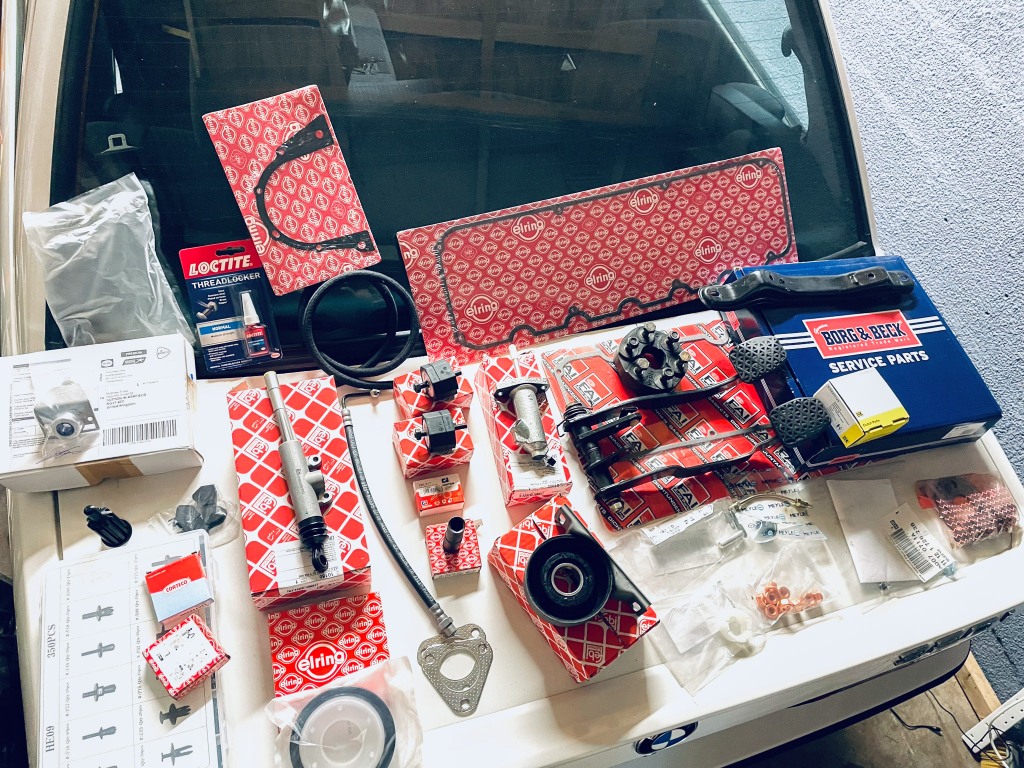
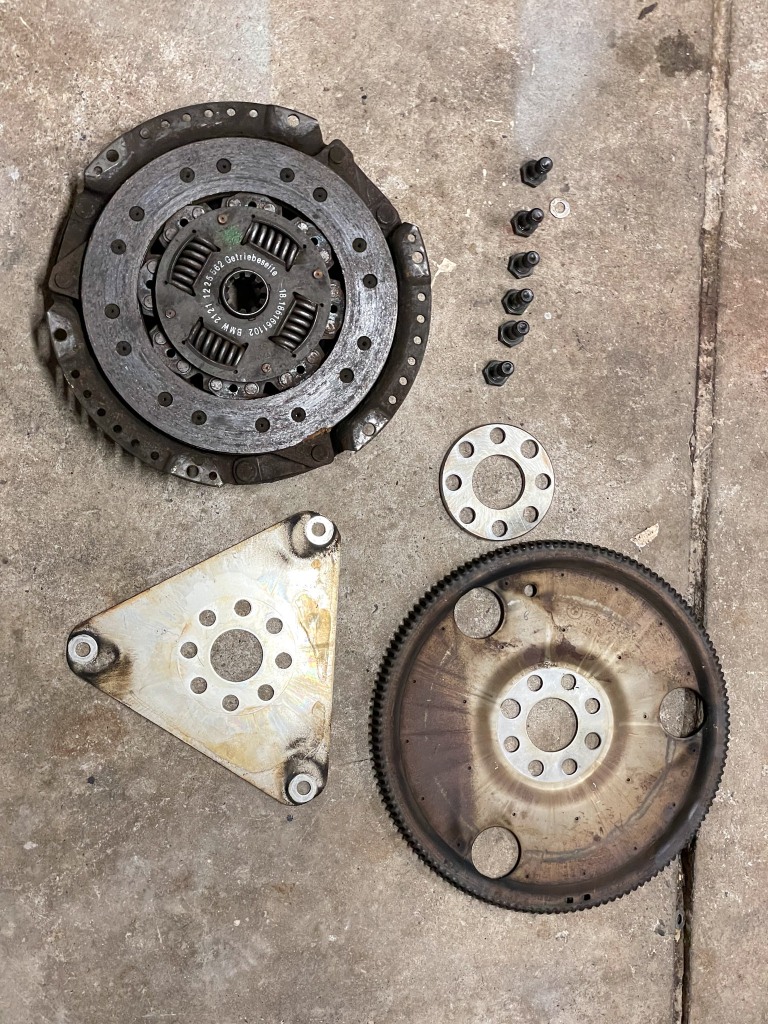
    I decided to dive in and fit a new timing belt, water pump, temp sensors and auxiliary belts, spark plugs, oil pressure sensor, oil and filter change, new Bosch battery and a coolant flush... amazingly Euro Carparts had it all in stock for next day collection!


    But before I started all that there were a few other issues I wanted to tackle.

    Main one I wanted to sort out was a hard start issue. When the engines cold it needed around 10 seconds of cranking and some accelerator pumping before its burst into life, it then ran rich. Once warm, restarts were quicker but still needed some accelerator action to get it going which is not how it should be.

    Second thing, oil leaks... The M20 engine is renown as a leaky unit but the block had what looked like 30 years of oil blown all around it and was a bit of a mess as well as giving me small but regular drips on the floor.


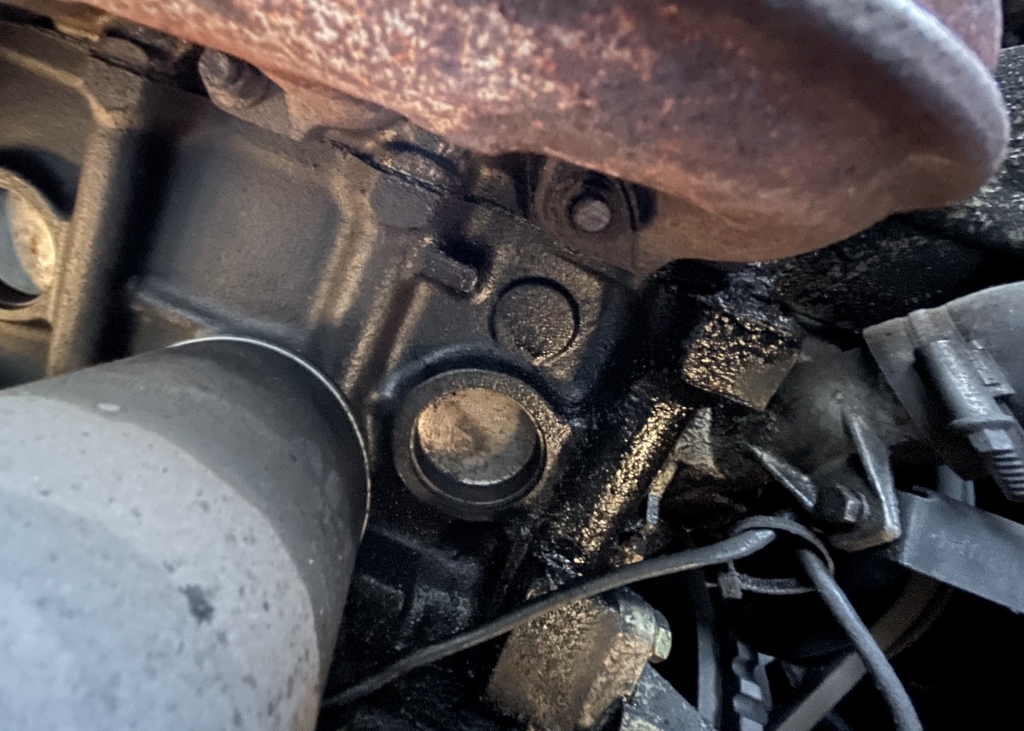
    I started by cleaning everything down, around 20 cans of brake cleaner and degreaser later it was looking much better, shiny and clean.

    I then added some UV oil dye and let the engine tick over for half an hour, turned the garage light off and the UV torch on and it was clear where the issues were... leaking from the rocker cover, front cam seal and the oil pressure sensor... so all three were added to the parts order.

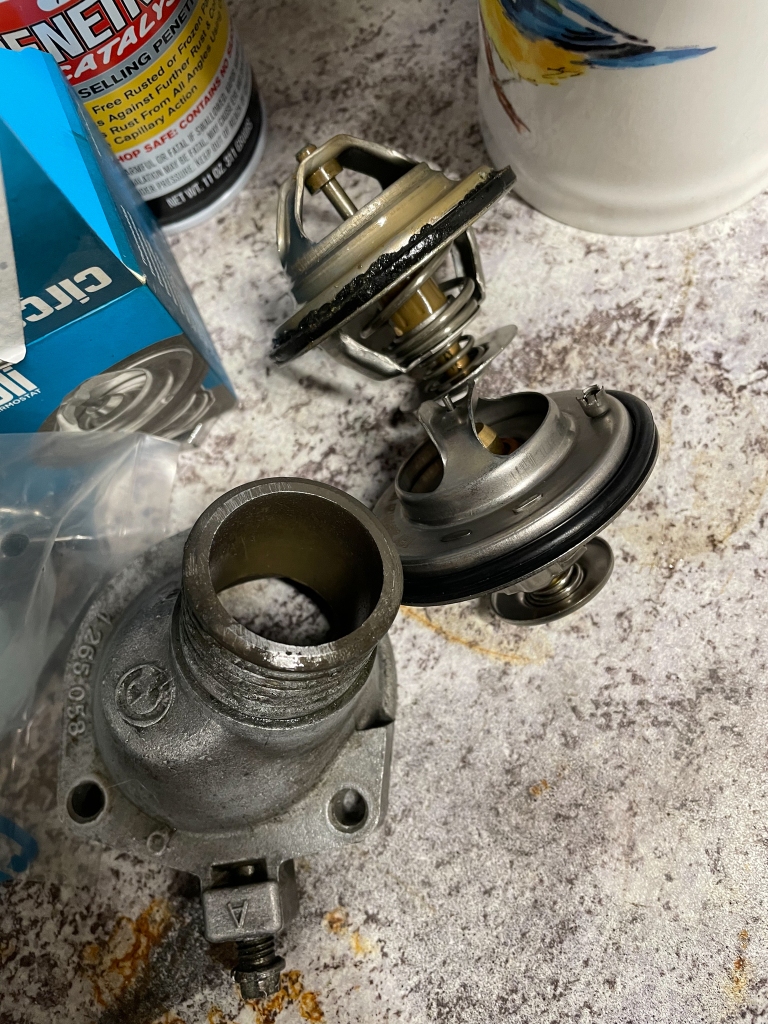
    Next issue, the temperature gauge barely got out of the blue even on long runs, it could be the thermostat or the brown temp sensor plug which feeds data to the cluster... added them both and the blue ECU temp sensor to the order as well.

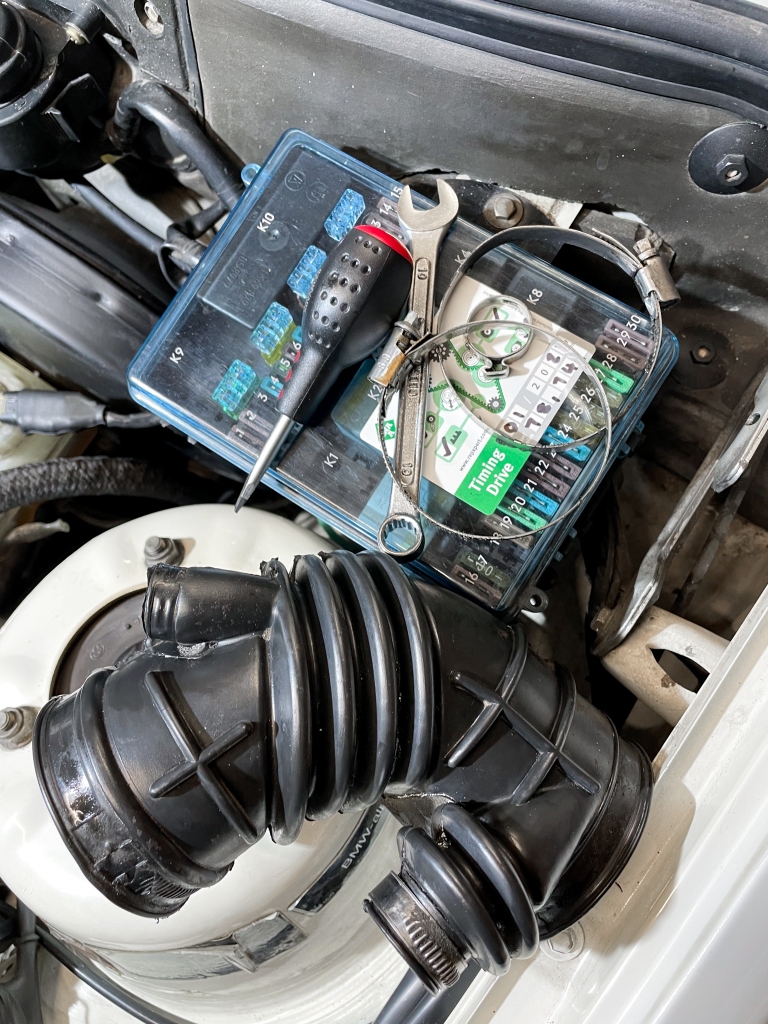
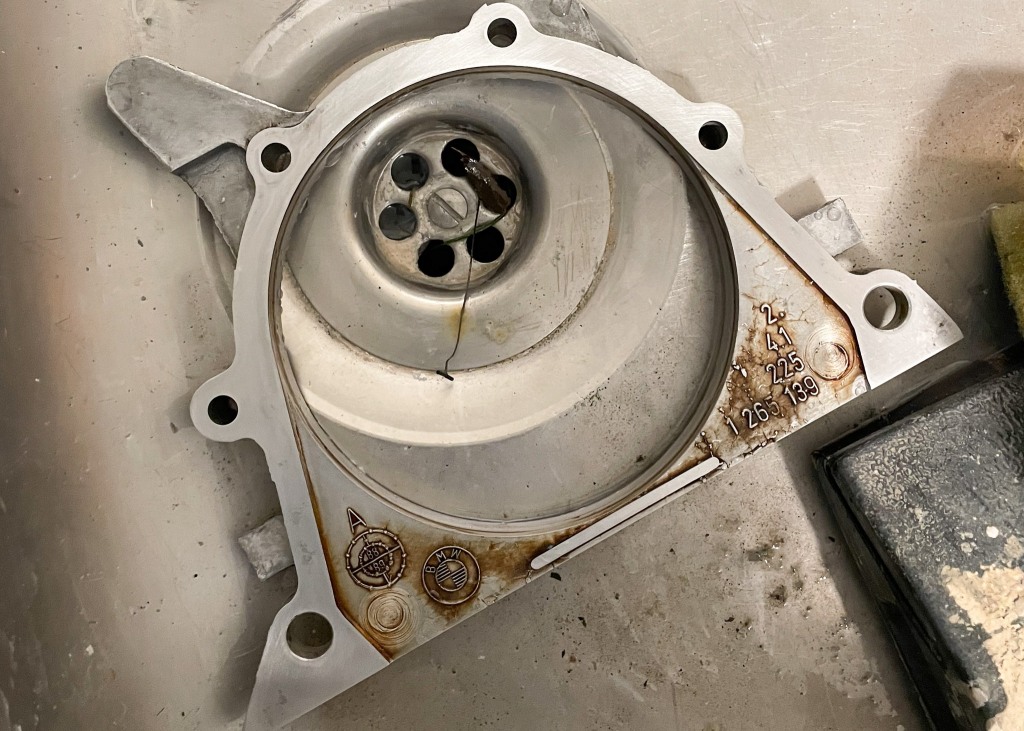
    So, first up, dismantle the front of the engine... distributor cap off, leads out, radiator out, fan off with the special clutch tools, power steering, air con and alternator dropped and belts removed. Timing covers taken off top and bottom, crank pulley (which needed some heat on the bolts to crack!) removed along with cam sensor and timing wheel followed by the old water pump taken and a flood of coolant.


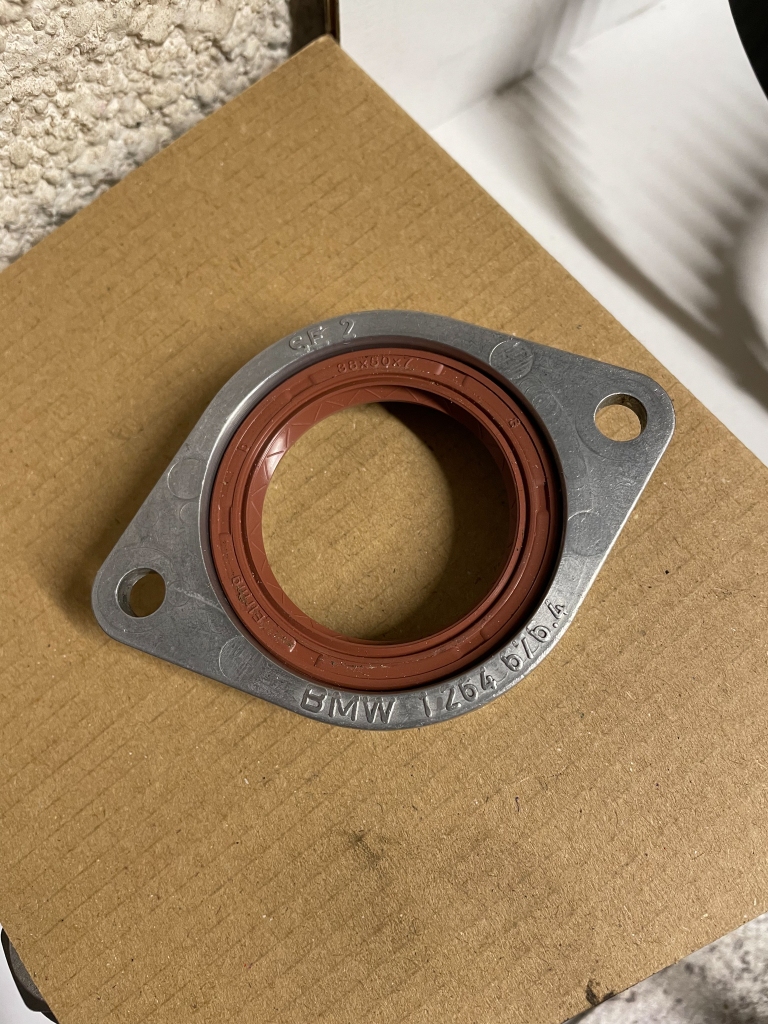
    I could then take off the old timing belt and tensioner, clean everything up, and fit a new front cam seal. The belt had only done 20,000 miles but was 10 years old so definitely ready!


    Perfect opportunity to get everything cleaned up


    Front cam gear removed, followed by cam seal which was replaced with a new one and refitted.


    New belt and tensioner on and manually crank the engine to check the TDC markings matched and tension the belt before locking the tensioner off... all good! It was just then a matter of re-assembling everything piece by piece, torquing it all up as per the Haynes guide and fitting the new aux belts.

    Then I replaced the oil pressure sensor, old sensor was a 22mm, new one a 24mm just to keep me on my toes haha!


    Both temp sensors replaced up top and then dismantled the thermostat housing and fitted a new one, old one seemed very stiff so had probably been stuck open causing the temperature gauge issue and the car to run a rich.


    Final job before refitting all the hoses was cleaning up all the connecting points to remove coolant corrosion and then onto the rocker cover gasket, replaced it along with the four rubber D plugs. So that was all the leaks addressed now!


    Ten litres of new BMW coolant added and then it was time to fire it up and see if everything worked. Doesn't matter how many times I do a new timing belt its still a nervous key turn haha! Thankfully it was perfect, no coolant leaks and no squeaky auxiliary belts but still the hard start issue persisted.

    Next up was an oil, filter and spark plugs change and left her ticking over for an hour... no oil leaks, no coolant leaks and sounds as sweet as a nut!


    Not sure if was the cold weather or the hard start issue draining it with the excessive cranking but the battery didn't seem to be too good. Replaced it with a new Bosh 096 whilst I was cleaning up the engine bay.


    After all of that the hard start issue still remained. Forums to the rescue, I replaced the fuel filter first... whether it was the problem or not it was definitely ready haha!


    Nice new Febi Bilstein filter installed but unfortunately did not fix the issue.


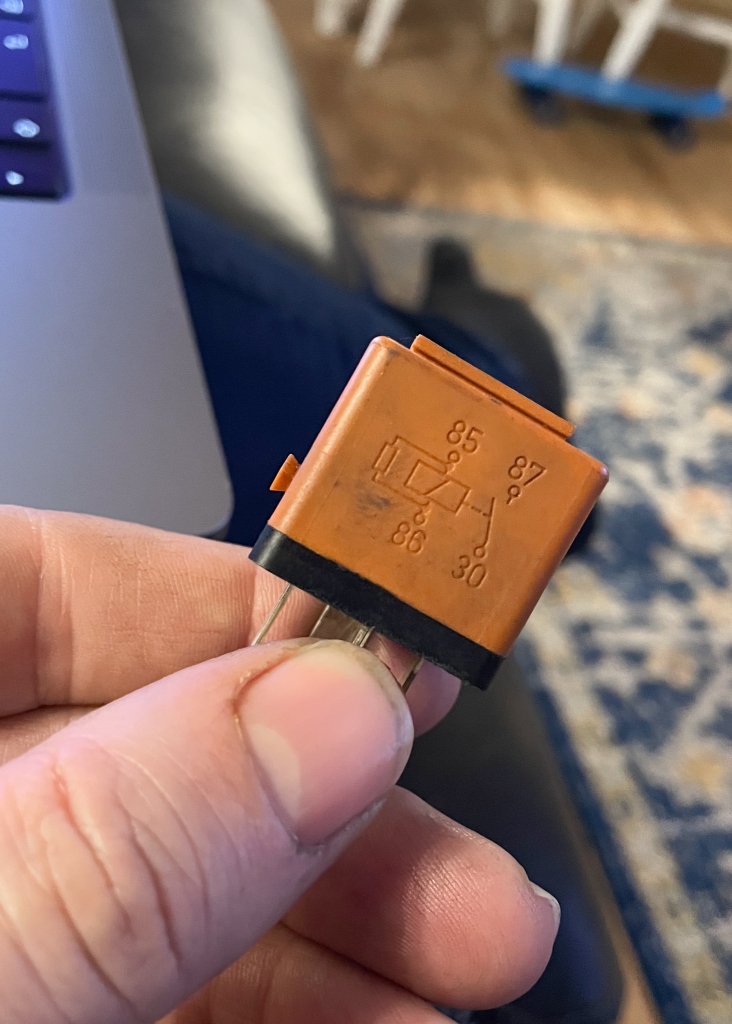
    Next I replaced the fuel pump under the back seat and also the fuel pump relay.


    Another try of the key and the problem remained. Sad times!

    Then I received a message on R3vLimited from a chap who said ''it will be the C191 plug under the intake manifold they ten to suffer from corrosion and its the main link between the injectors and the ECU so causes havoc and all the symptoms described''.

    So I removed the intake feed, the tick over valve and worked my way down the the infamous plug. I pulled it apart and whilst there was no obvious corrosion the female side did have a little green casting to the colour of the pin receivers.


    I bought a Burr kit and after a blasting of electrical cleaner and some gentle filing of the inside of each pin receiver I put everything back together after spraying some electrical grease inside to stop the problem occurring.


    The internals of the tick over valve didn't look like it was spinning easily so I also gave that and the throttle body a good clean with Carb cleaner.


    Reassembled everything and... key turn... YES!

    Fired right up in a split second with no throttle, no longer running rich and tick over was absolutely solid... I'm so happy!!!! Haha.

    Sot thats the car so far, I'll keep this up to date going forward :-)
    Last edited by MatBiscuits; 03-28-2023, 05:14 AM.

    #2
    what a gem you have.

    Comment


      #3
      Love the thread, good pictures and documentation and reads like a story! Subscribed.
      Car is a real survivor and looks like it's in good hands. Great work with the maintenance getting things up to snuff, it's a rewarding process.

      I can't believe how nicely the washer bottles came up with some TLC. If you hadn't said, I would have guessed they were replaced with new.

      I've never seen the Keycard system for the radio before, pretty neat vintage tech!

      Comment


        #4
        Wow!!! Car looks amazing. What process did you use to clean the Windscreen and headlight reservoirs?
        sigpic84 325e

        Comment


          #5
          Originally posted by 808ETA View Post
          Wow!!! Car looks amazing. What process did you use to clean the Windscreen and headlight reservoirs?
          Thank you, first step was plug the holes and fill them with hot water, then I popped a dishwasher tablet in each bottle and left them overnight. That seemed too loosen a lot of it up, then washed them out, refilled with a mixture of bleach and water and then added some rice to act as an abrasive. Lots of shaking later its came up really clean, it was then just lots of soap and water to finish off. Just make sure you get all the rice out so none gets sucked into a pump haha!

          Comment


            #6
            Originally posted by Panici View Post
            Love the thread, good pictures and documentation and reads like a story! Subscribed.
            Car is a real survivor and looks like it's in good hands. Great work with the maintenance getting things up to snuff, it's a rewarding process.

            I can't believe how nicely the washer bottles came up with some TLC. If you hadn't said, I would have guessed they were replaced with new.

            I've never seen the Keycard system for the radio before, pretty neat vintage tech!
            Thanks so much, yeah the radio cards are quite advanced for the time, much like todays chip and pin bank cards but long before they were a thing :-)

            Comment


              #7
              Great post and even better car!
              Nice tip on cleaning the washer reservoirs. might have to do this on my iX as well!
              1990 325iX Touring - November 2018 R3V Car Of The Month

              1980 Volkswagen Golf mk1 1.1
              1974 BMW 2002 Touring

              Instagram

              Comment


                #8
                so filthy clean

                Comment


                  #9

                  With the engine sorted and most of the cosmetic bits all sorted I wanted to give the suspension a big going over next. The car was on its original front struts so quite ''boat like' when cornering haha. Looking under the front, most of the bushes and ball joints looked fairly decent but a boot had split on the front left wishbone and and the drop links looked a little worse for wear so I decided to just do absolutely everything!


                  New Febi wishbones ordered, new drop links, new tie rod ends, new anti roll bar bushes, Febi control arm bushes, new Bilstein B4 OEM shocks and H&R sports springs which give a gentle 35mm drop. E30's ride very high with the stock setup so I wanted a slightly more aggressive stance but more OEM+ than slammed haha!


                  First up was to strip the old wishbones, tie rod ends, drop links, anti-rollbar bushes and control arm bushes. I had heard how hard it it is to remove control arm bushes from the mounts so I found some Febi Bilsten ones which cam as a complete unit. Cracking the control arms from the struts took some doing, I ended up getting a splitter tool which did the job after a lot of awkward angled hammer wanging!


                  Next up was remove the front struts, dismantle (it doesn't matter how many struts I dismantle I still feel like Im working on an unexploded bomb when Im taking the top hat off and the springs are compressed haha!.


                  With the struts in pieces I nipped them to a local motorbike restoration shop who shot blasted and powder coated them for me. A quick before and after shot with the first one done and rebuilt.


                  Struts back in and it was add the wishbones back in (I can not believe how had it was to fit the rear bushes, I had to build a clamp out of two 18 inch bolts and some plated steel driven by the impact gun!), tie rod ends bak in and the drop links then bolt everything up. Looks a lot better than the before picture further up.


                  The back was much easier thankfully, tricky to do on my own but with the help of the spring compressors and a couple of jacks I got it done.


                  I was very relieved when I dropped the car back down and it settled, it looked absolutely perfect, exactly the stance I wanted, not slammed, just filling the arches nicely and looking a little more aggressive.


                  I can't believe how fresh it felt on the test drive, I mean the shocks that were in had just celebrated their 33rd birthday so its no surprise really, but still... tight but still very comfortable. The parts bin is below!


                  Ohhh and just to finish off I gave the interior a hoover and popped some new Bosch wipers on with the go fast drivers side spoiler haha!

                  Comment


                    #10

                    So when I bought the E30 I was focussed on the condition, no rust, nice interior and lowish milage not so much whether it was auto or manual because I knew it was possible to swap them over. What I hadn't quite appreciated was how many parts that would take to do and the task of pulling them all together!

                    I found a nice clean low milage Getrag 240 5 speed overdrive box with warranty at Quarry Motors in Sheffield and got it pallet shipped and then sourced a mint flywheel, manual prop shaft (they are a different length to the auto) and transmission support crossmember through an E30 Facebook group and drove to Northampton to collect them.

                    However in addition to that, I also had to pull together:


                    Reconditioned manual pedal set and new Febi rubber pedal covers

                    New Febi Master and slave clutch cylinders, pipe for slave from BMW and pipe to fluid reservoir

                    New Febi prop centre support bearing

                    New rear Elring main seal and gasket

                    New three piece Borg & Beck clutch set with throw out bearing and alignment tool

                    New exhaust support brackets from BMW, copper nuts and Elring metal gasket

                    New Febi gearbox rubber mounts

                    New BMW prop to gearbox guibo

                    Gearbox to car brake light cable

                    New BMW gearbox reverse lights switch

                    Front, rear and selector Elring seals for the gearbox

                    Gear selector stick, shifter carrier and selector bar plus all new bushings for each

                    Delrin Rear Shifter Arm Bracket Assembly


                    Then, it was off to BMW in Chesterfield to order a ton of new gearbox to engine mounting torx bolts, new flywheel bolts, dowels, washers, clips!


                    So first tip if you are tackling this yourself on a RHD car is be aware that every guide I could find online is based on a LHD car so you are going to need to do some things differently.

                    Removing the auto wiring harness and over riding the neutral start inhibitor requires some different wiring to be done as you don't touch anything under the steering column on a UK car and also you will need one of these 1.2mtr long clutch master to slave pipes which runs across the firewall which is not needed on a LHD car.


                    A few other things, the starter is a nightmare to remove and re-install due to bolt access being almost impossible tied with a spinning nut on the other side in the engine bay. The pedals are also a pain in the arse due to access... Im 6ft3, yes they absolutely are... fiddly, awkward, worse bit for me of the whole project.

                    So, lets get started!

                    Get the car up on jack stands as high as you can. The higher you get it the less times you will bang your head lol!


                    Disconnect the battery

                    Remove the entire exhaust system in one piece

                    Remove the heat shields

                    Remove the automatic prop shaft and centre support bearing


                    Into the car, remove all the centre console trim, disconnect the electric window switches, breaker switch, put the car into neutral and remove the auto shifter (there is a 13mm nut holding the selector to the gearbox under the car)

                    Disconnect the auto harness (37) and brake light cable (C301). 34 years of biscuit crumbs and crisps that had gone through the trims haha!!!


                    Put a jack under the transmission and remove the three nuts holding the centre support crossmember in place, then the two bolts under the rubber mounts and remove it all.

                    Remove the oil drain in the gearbox and leave to empty. Remove the two oil coolant pipes which run from the gear box to the radiator, get ready for a little spill as they come out of the housings at each end. Once disconnected they pull through easiest from the gearbox side.

                    Then start with the easy bell housing bolts at the bottom, removing these and four bolts on the piece under the oil pan will allow you remove the access panel which will give you a view to the torque convertor bolts. There are three to remove and using a 22mm spanner on the front crank you can rotate the engine to access them all.


                    Next up, lower the gearbox on the jack and you will get a feel for the nightmare that lies ahead haha! Yes, you are going to have to remove those torx bolts that sit barely visible right at the top of the gearbox bell housing across about three foot of automatic gearbox with a few winches of access and the there on the left are dreaded starter bolts!

                    I decided to use four impact extensions giving me about three foot length with a wobble socket on the end and a 1/2in breaker bar and then used some electrical tape to just position the wobble socket at the right angle to guide it in. It worked (eventually after a lot of swearing).

                    For the starter bolts, the lower one I wedged the ratchet on the torx under the car then removed the nut in the engine bay (its awkward but doable) for the one thats barely visible attached the torx bar under the car, jacked the transmission up to give visibility of the nut in the engine bay, wedged in a tyre leaver and then removed the torx bolt. It was a struggle but it came out. At this point you can pull the engine and gearbox apart.re you do, back into the bonnet, remove the kickdown cable from the throttle body with a 10mm spanner and feed it down to the floor.

                    Flying visit from the boss


                    I pulled the gearbox away, this is great fun when your on you own with no one to help as it weighs an absolute ton! The torque convertor stayed behind. Lowered the gearbox and dragged it out. I then pried the torque convertor away leaving just the flywheel and clutch behind.


                    Look how clean that tunnel is!

                    Remove the flywheel bolts ( I used an impact gun to stop the wheel rotating) and remove the flywheel and clutch.

                    This will leave you looking at the rear main seal of the block. Its absolutely worth doing this seal whilst you are in there, remove and clean up the mounting bracket, insert the new seal, add the gasket and some RTV between the bottom of the bracket and the oil pan and replace.

                    I then spent an hour replacing the input shaft, output shaft and selector seals on the new manual gearbox.

                    At this point I moved onto the pedals. I managed to source a full pedal set in great condition from a 1992 318i. The pedal box is different but the brake, clutch and mounting bolt were identical and thats the only parts I need.

                    The auto and manual pedal boxes are the same so I will be leaving it in, using the same brake switch and just swapping out the pedals.

                    Remove the drivers seat so you have decent access, its only four bolts. Remove the main carrier bolt of the auto pedals and slide it out.

                    Disconnect the brake booster bracket and remove the auto brake pedal, install new longer carrier bolt through frame, new brake pedal and clutch pedal and bolt in. At this point you will also want to reset you brake light switch. Push the pedal all the way down, reach behind and pull the black switch top all the way out and then allow the brake pedal t slowly rise to meet the switch.

                    On the bulkhead you will see the car is already set up for manual install, a rubber grommet for the fluid feeder pipe to go through and a push out metal square to feed the bottom of the master cylinder through. Attach the feeder pipe to the clutch master before installing it as there no access to it afterwards.

                    Install the master cylinder to the clutch pedal and then the frame of the pedal box (two very awkward 10mm bolts, helps to prop the accelerator pedal down to move the cable out of the way) then attach the long hydraulic feed pipe from the base of the clutch master and feed it across the bulkhead to the passenger side and down towards the floor ready to connect the slave.

                    Next up build your shifter. The big crossmember I bought from BMW (£90 inc VAT) new bushings, new washers, new plastic seat. The rear carrier I had to get from Tims Classic Car Parts in Holland (£70 inc shipping), its a Delrin Rear Shifter Arm Bracket Assembly.

                    Once built up attach to the gearbox, I did this before installing the box as the is a clip that holds the carrier to the gearbox which would be impossible once installed (affectionately know as the bitch clip).

                    Install the slave cylinder to the gearbox and attach the flexible hose which will meet the metal pipe you installed from the master earlier.

                    At this point also install the reverse switch on the opposite side of the gearbox and the cable which runs from it and up into the cabin.

                    Install your shiny new manual flywheel and shim. Then install the pilot bearing, the automatic doesn't have one so make sure you don't miss this step. I used a 22mm socket to tap it in and it needs to sit about half an inch recessed to allow the manual gearbox input shaft to slot in.

                    Install your shiny new clutch and pressure plate, six torx bolts to hold it in place.

                    Its time to re-install the gearbox, and speaking from experience this is like wrestling a dolphin when you're doing it on your own. I had the gearbox balanced on a trolly jack, slowly raised it to where it was aligned and then slowly manoeuvred the jack forward to slot the input shaft into the clutch an pilot bearing. At this point you are trying to keep the gearbox balanced on the jack, guide the shifter through the hole and wobble the box to get the input shaft to align with the clutch... lets just say it took a lot of attempts and the neighbours all closed their windows haha!

                    Once its in and snug up to the engine its time to reinstall all those almost inaccessible top bolts, the starter and the lower access panel. I let the gearbox hang unsupported and gently jacked up the engine from the oil pan until it was just touching the firewall to give me maximum access to the upper bolts.

                    Once its all bolted up install your new rubber mountings, new guibo, manual support crossmember, manual driveshaft with new centre support bearing and you are then left with this! Hurrah, its in! This is a VERY nice feeling haha!

                    Looking up you can see the shifter and rear carrier installed

                    Connect the master and slave cylinder pipes down by the gearbox, then in the engine bay snip the end off the capped of output from the brake reservoir and attach your master feeder pipe. Top up the reservoir and then bleed the clutch by opening and closing the bleed nipple on the slave system until you have a nice firm pedal. Keep an eye on the reservoir level as you do this to ensure it doesn't drop below the feeder pipe level and introduce air to the system.

                    Back into the car for the wiring and I couldn't resist a quick gear change check, all five gears and reverse were there thankfully lol!

                    Forget everything you have seen online about the wiring if you are working on a UK car. Its simple and there is no cutting of wires or faffing under the steering column.

                    Firdstly connect the male plug on the cable that runs from the reverse switch on your gearbox to the old auto female reverse switch plug (C301).

                    Next, drop the glovebox and remove the trim covering the harness. Under here you will find two plugs after some searching. One is a yellow black came to yellow black cable. The other is a yellow black cable to black cable. Unplug these and connect the yellow/black to the yellow/black which had been connected to the black.

                    Thats it, neutral start inhibitor is over ridden and you can remove the entire auto harness shown below with the number 37 sticker. It runs under the carpet so is a bit of a faff, but once completed you have the wiring exactly as a manual would have come from the factory.

                    Fill the gearbox with some quality gear oil (took around 1.3 ltrs)

                    Its then time to rebuild all the centre console, attach the wires to the starter, put the drivers seat back in and reinstall the heat shields and exhaust system with a new carrier bracket (again this is great fun on your own haha!) Ohh and I added some shiny new Febi pedal rubbers.

                    Thats it, its key turn time.. everything crossed!

                    Everything was spot on, started perfectly, drove out of the garage and a spin up the bypass she was cruising along at 70mp like it had never been anything other than manual!

                    How long did it take me? Well, I was lucky, everything came apart nicely as there is no rust anywhere on the car, no snapped bolts or sheered nuts. I did a couple of hours a night over a week or so, I'd guess around 12-15hrs all in. You could reduce this by a few hours if you have an assistant to help lift and align the manual box in, help with the starter bolts and clutch bleeding and generally hold all the awkward bolts in place whilst you work on them. Also I renewed every seal, gasket and o-ring, if you're not doing that probably another couple of hours knocked off.

                    Hope this helps my fellow UK E30 owners!

                    Comment


                      #11
                      Stunning car! Congratulations on the swap.

                      Comment


                        #12
                        I love a manual swap! 😍
                        I swapped my E30 to a 5-speed by myself on my driveway. It was the first time I had ever pulled a transmission, and it was a huge job!
                        The feeling of shifting your own gears that first time makes it all worth it though.

                        Glad you removed the Auto harness instead of cutting up the wiring, much cleaner install that way.

                        Comment


                          #13
                          Originally posted by Panici View Post
                          I love a manual swap! 😍
                          I swapped my E30 to a 5-speed by myself on my driveway. It was the first time I had ever pulled a transmission, and it was a huge job!
                          The feeling of shifting your own gears that first time makes it all worth it though.

                          Glad you removed the Auto harness instead of cutting up the wiring, much cleaner install that way.
                          Thank you mate, and thanks for the post on my question about the wiring, you were the inspiration to do it properly lol! :-)

                          Comment


                            #14
                            looks like new!

                            Comment


                              #15
                              Originally posted by MatBiscuits View Post
                              Thank you mate, and thanks for the post on my question about the wiring, you were the inspiration to do it properly lol! :-)
                              Happy to help!

                              Comment

                              Working...
                              X