-
Enjoy.
Oh, the backs of the bumpers were sandblasted, primed, and painted black. I believe the guy who did it may have used some form of rust encapsulator somewhere along the way too, but being primed and painted should be all the rust prevention that is necessary.Leave a comment:
-
looks very nice.
i thought this was going to be a thread about how the dot made it so you had to remove your bumpers after getting them all installed and then you were mad, but i guess not.Leave a comment:
-
hey also by curiosity what did you coat the inside of your bumper with so it won't rust?Leave a comment:
-
thanks that words it up nicely:p I get my rear euro bumper in a couple of days to a week so I'll search for those holes later today and get back to you if I have any troublesLeave a comment:
-
I'll post the shots of what I did for the shroud holes and the other holes in Scabzzzz's thread. I highly recommend stocking up on rubber washers when doing this swap though. I had countless times where I noticed hardware that was sitting right on the body, and it's really only a matter of time before moisture gets between the two metal surfaces and creates rust.
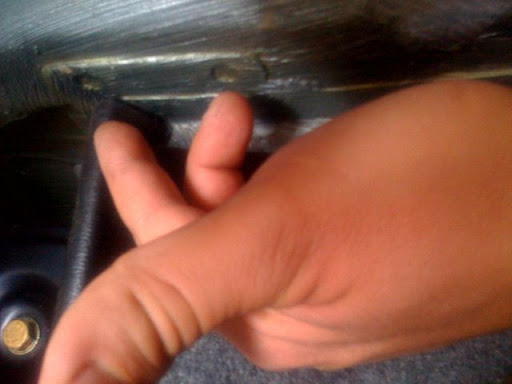
^ From the DiY thread. Remove the middle carpet panel (between the taillamps) to reveal these expoxied holes. Looking from the exterior of the car, you will drill the leftmost hole on each side. I hammered a light indention on the interior to see where I needed to drill, you really don't want to botch this up. One of the posts on the rear bracket will go through this hole you just drilled, and the other will use one of the holes used for the old bumper shock. Hope that helps.
Thanks for the kind words everyone.Leave a comment:
-
Nice! Your car looks like mine... well mine will look like yours in a few days.. but how was installing the rear? In scabzzz DIY thread he says there are those two holes inside the trunk and you drill into them, I can't find those on my car. Did you?Leave a comment:
-
About time :p
Looks good. What did you do for the extra holes in the rear?Leave a comment:
-
Thanks man. As far as exhaust goes, yours looks fine. I'm running supersprint (bought it 1 week after I got my car really really expensive....I was young and stupid) and I think it looks great w/ the slant tips. Not the best shot but you get the ideaAttached FilesLeave a comment:
-


Leave a comment: