

Do. Want.
-
-
must have been (likewise) a euro m635csi and not a US m6:
this stuff can get pretty confusing :)
E46tComment
-
The one I saw was Identical to this. http://www.bmwmregistry.com/detail.php?id=8889 so I guess it was a gray market car.Comment
-
WOW! i would love an e28! Looks greatComment
-
The M5 has received a bit of updating lately, back on the jacks she goes!
During my last big wrenching session before heading out to Oktoberfest in Monterey I didn't think I had time to do the stereo as well as the front suspension and the rear suspension. I'm glad I didn't dig into the rear suspension because it's a bit of a bigger job than I anticipated!
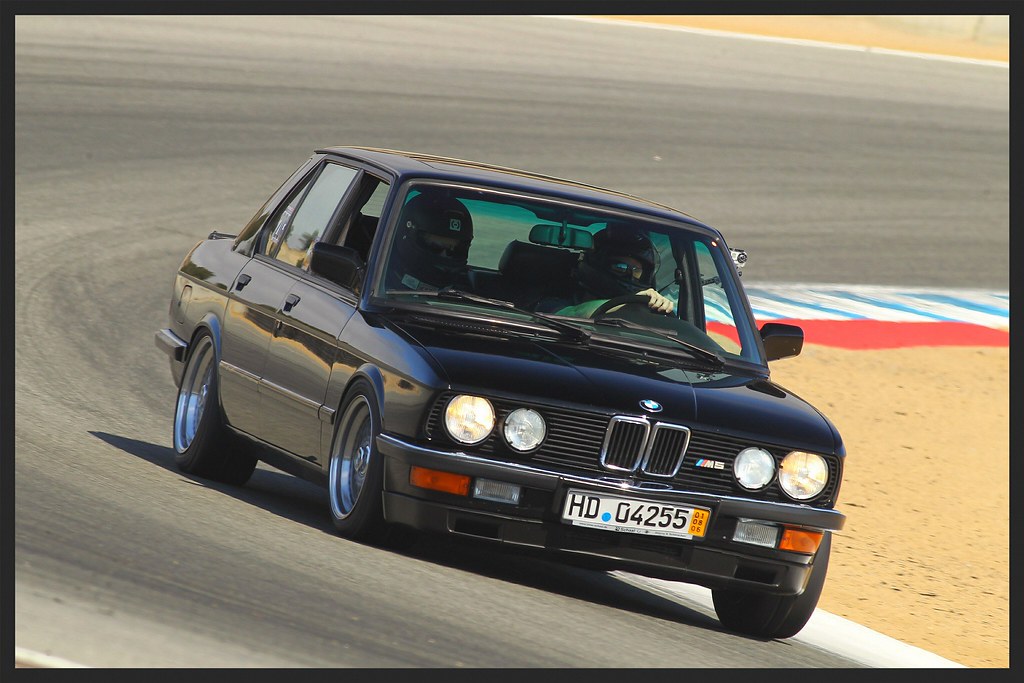
As mentioned in previous posts, the M5 performed superbly. Laguna Seca lives up to it's reputation, and the old E28 was a blast on track.
 IMG_7644 by ericandshovin, on Flickr
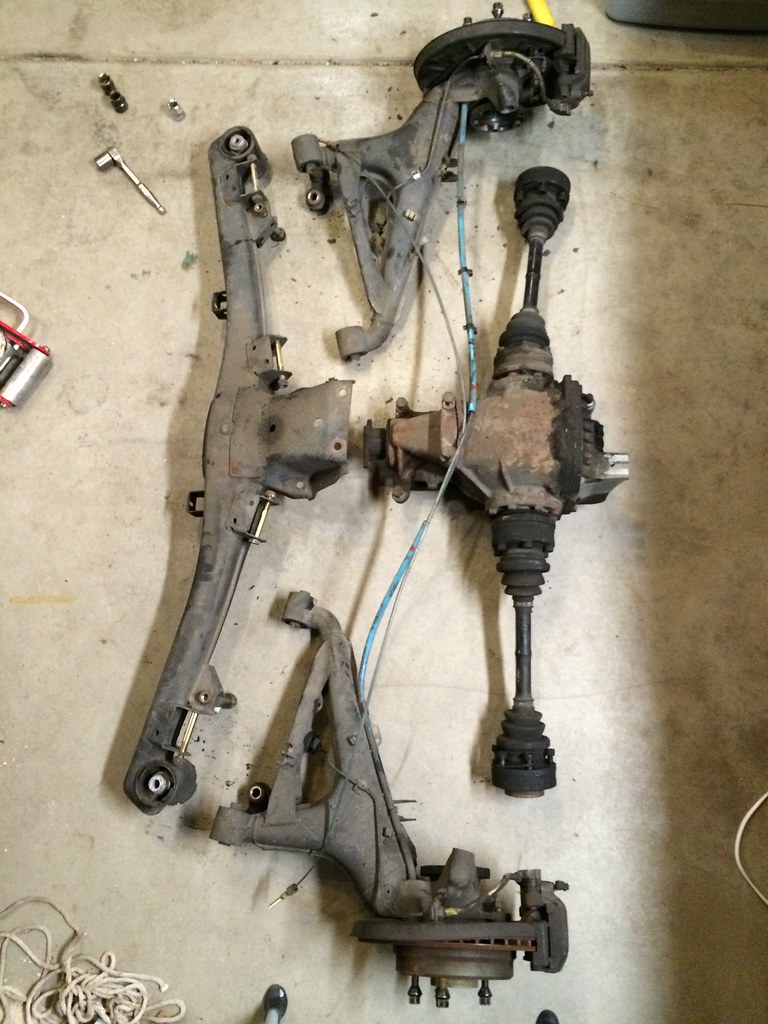
So now it's time to crack into the rear...:shock: The whole rear assembly came down one evening with my brother-in-law's help. The e-brake lines were fuzed to the channels's the lead into the car and were the only major hick-up, other than trying to muscle this monster of a subframe out from under the car!
 IMG_7637 by ericandshovin, on Flickr
The goal for removing the subframe was to replace:
- Subframe bushings with new OEM bushings
- Dogbones with new
- Rear Diff mount with new
- Roll bar bushings and end links with new bits
- Trailing arm bushings with AKG units. If I had known before purchasing the AKG ones, I would have bought E34 M5 bushings. Bummer.
I also wanted to fix the front seat frame, and try and diagnose the clunk on the front end that I'd been hearing for a while.
The subframe itself was separated and taken to the auto hobby shop on Ft. Carson to press out the old bushings and press in the new rubber. Being in the military definitely have a few perks!
 IMG_7642 by ericandshovin, on Flickr
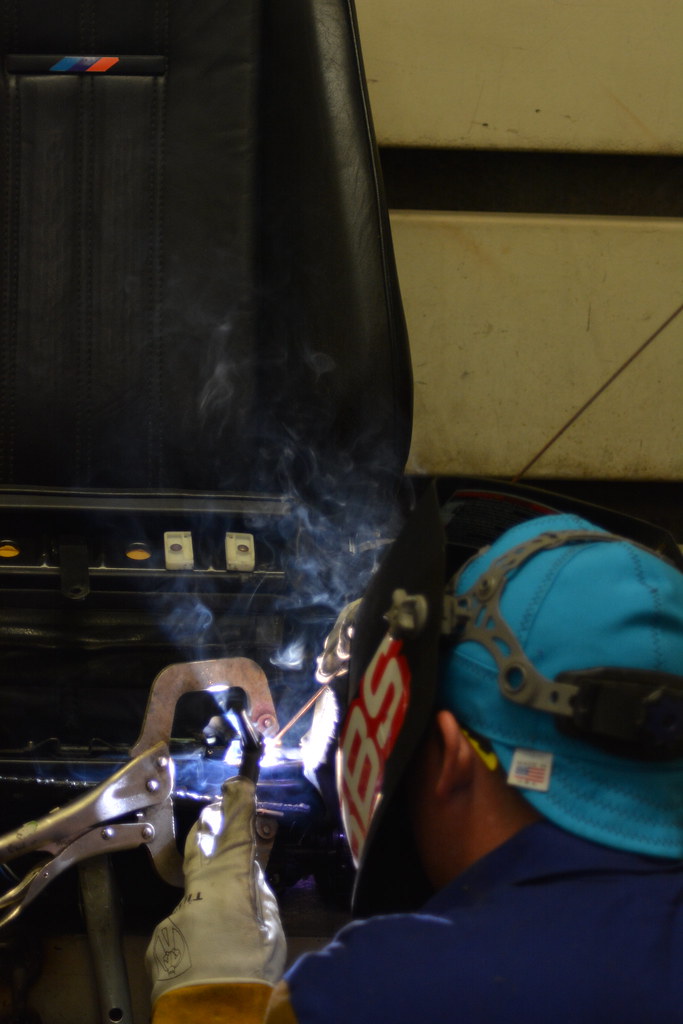
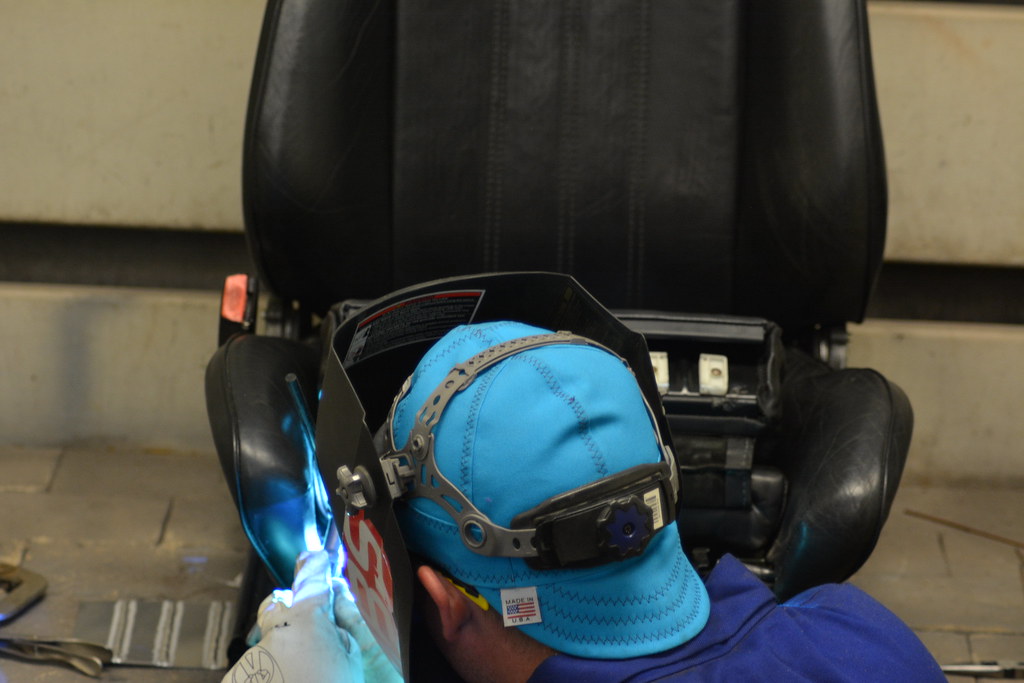
While at the hobby shop, I also welded the seat frame. I d0n't think E30 sport seats have the same problem as the E28 seats, I hadn't heard about it until doing a bit of interneting one day. The rod that provides support for the side bolster is welded from the factory to the base frame. This is great in theory, but the base metal is too thin, and the rod eventually tears the base metal apart from the weight of the driver pressing against the bolster over and over again. for the MIG would probably have been a better choice over TIG as the torch heat started burning the foam, but I wanted the practice on the more difficult discipline.
Broken:
 IMG_7706 by ericandshovin, on Flickr
fixing:
 DSC_3779 by ericandshovin, on Flickr
 DSC_3839 by ericandshovin, on Flickr
Fixed!
 IMG_7707 by ericandshovin, on Flickr
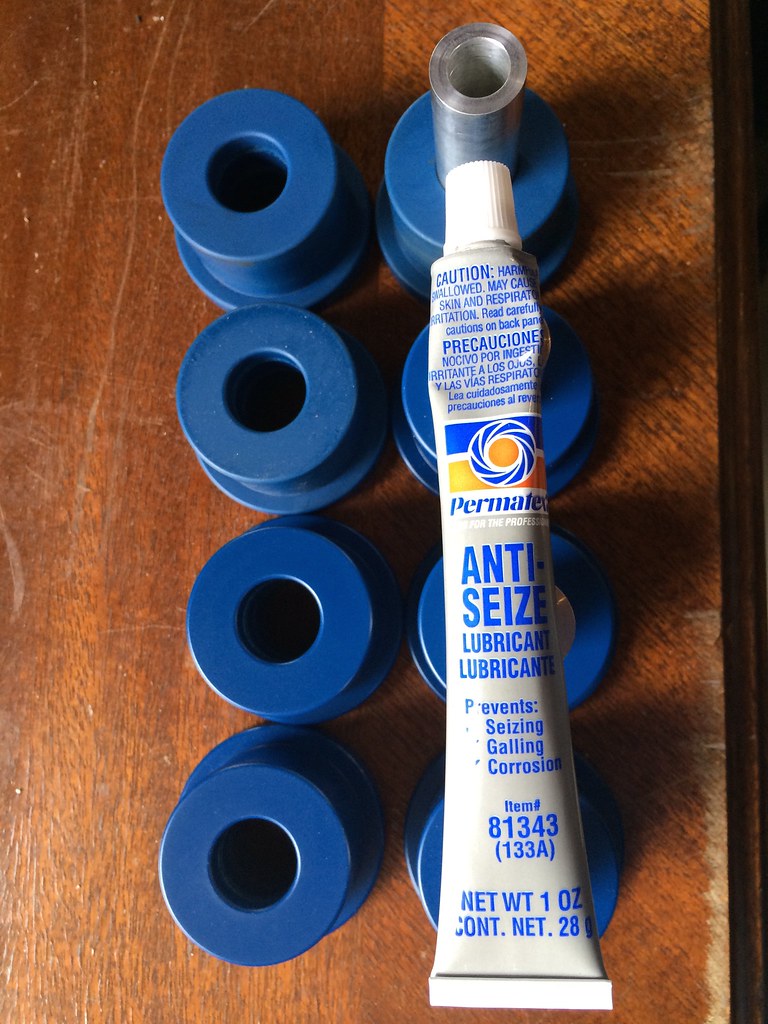
On to the RTAB's by AKG. A common complaint about poly bushings is the squeeking after a bit of use. AKG uses internal "grease grooves" to keep the bushings lubed and quiet. A phone call to AKG revealed that normal old grease is all that's needed, or anti-seize if you want to go a bit better.
Anti-seize it is!
 IMG_8040 by ericandshovin, on Flickr
Grease grooves:
 IMG_8041 by ericandshovin, on Flickr
Grease grooves greased:
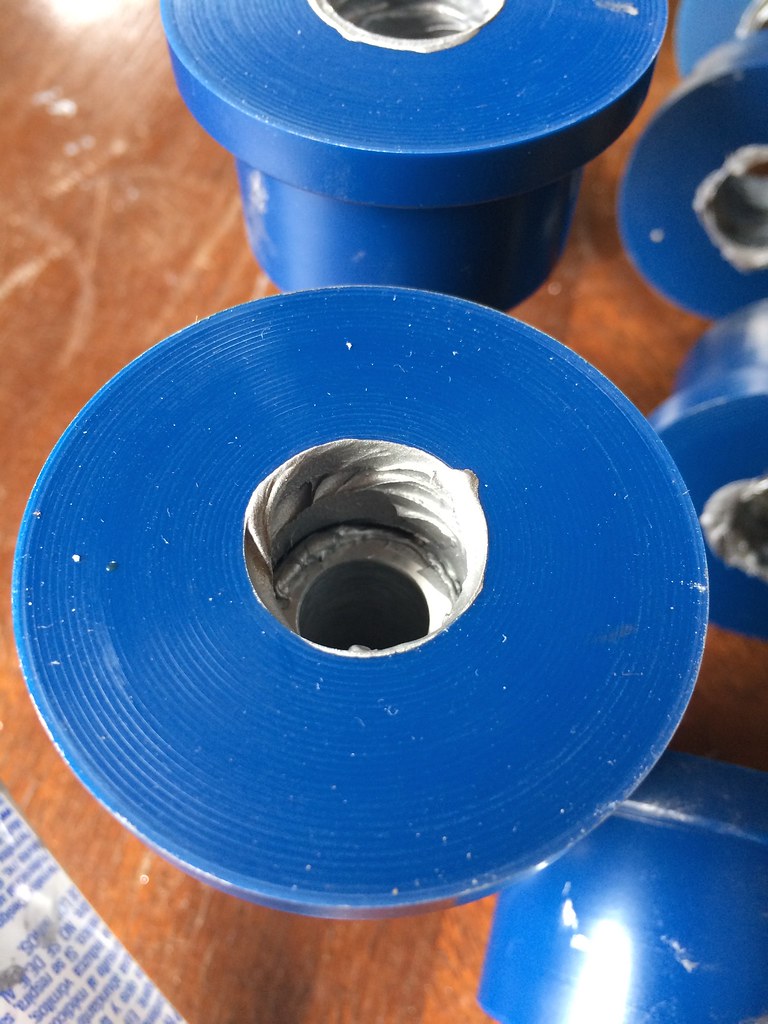 IMG_8042 by ericandshovin, on Flickr
I didn't take any pictures of marrying the trailing arms to the subframe mainly due to the anti-seize being nasty stuff that gets everywhere, but I do have some other random pictures from this evening's endeavor.
Rear diff bushing replaced. The old one's rubber was quite cracked and rotted.
 IMG_8587 by ericandshovin, on Flickr
Cracks:
 IMG_8566 by ericandshovin, on Flickr
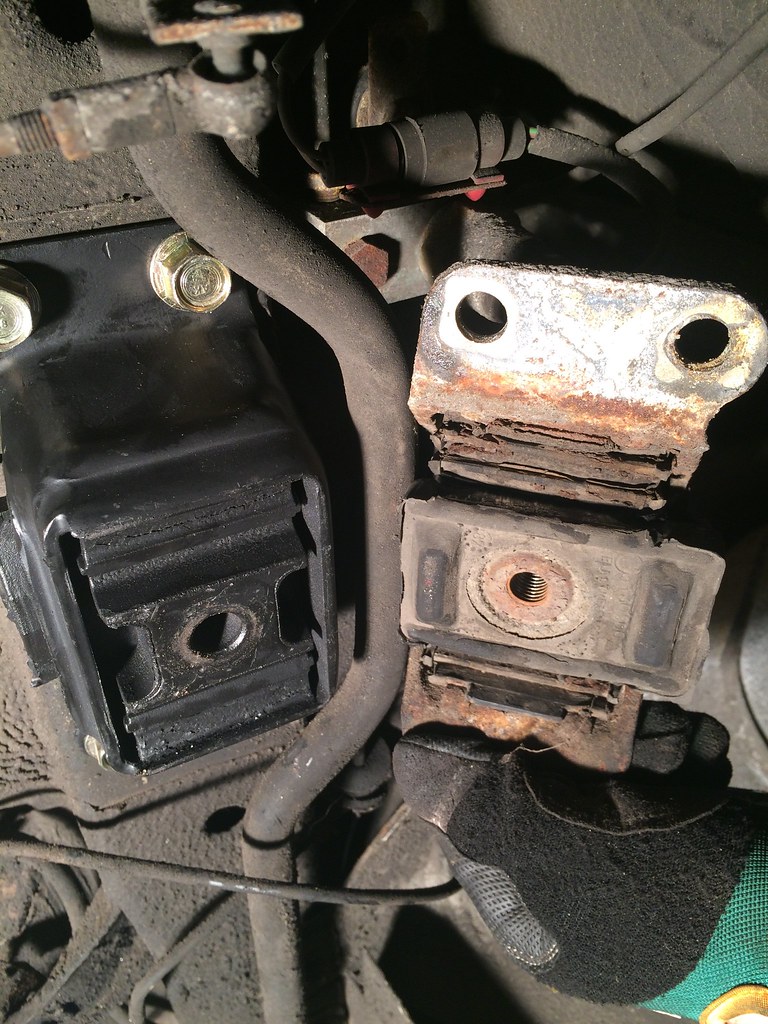
One of those "while your in there" items was to replace the fuel filter. This thing would be a knuckle busting cuss fest if the subframe was installed, I'm definitely glad we decided to replace it now!
 IMG_8573 by ericandshovin, on Flickr
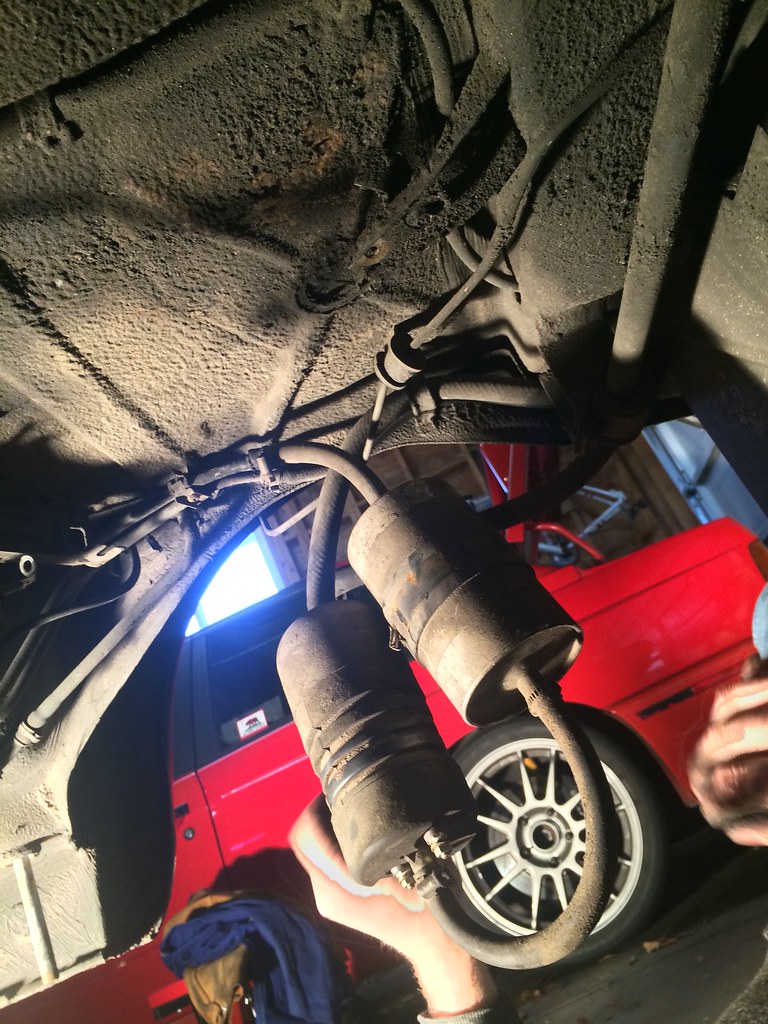
Replacing the sway bar end links, and bushings... This took quite a bit of muscle! Yes, I know my work bench is terribly messy.
 IMG_8590 by ericandshovin, on Flickr
On to the front.
In my ownership, I've noticed a clunk up front that is hard to pinpoint. From the drivers side it felt like it was coming from the passenger strut. From the passenger seat the clunk felt more central. I replaced every single suspension piece besides the shocks and top mounts, the springs, and the steering arm that connects the rolling ball steering box to the lateral link. Be glad the E30 has rack and pinion, so much easier!
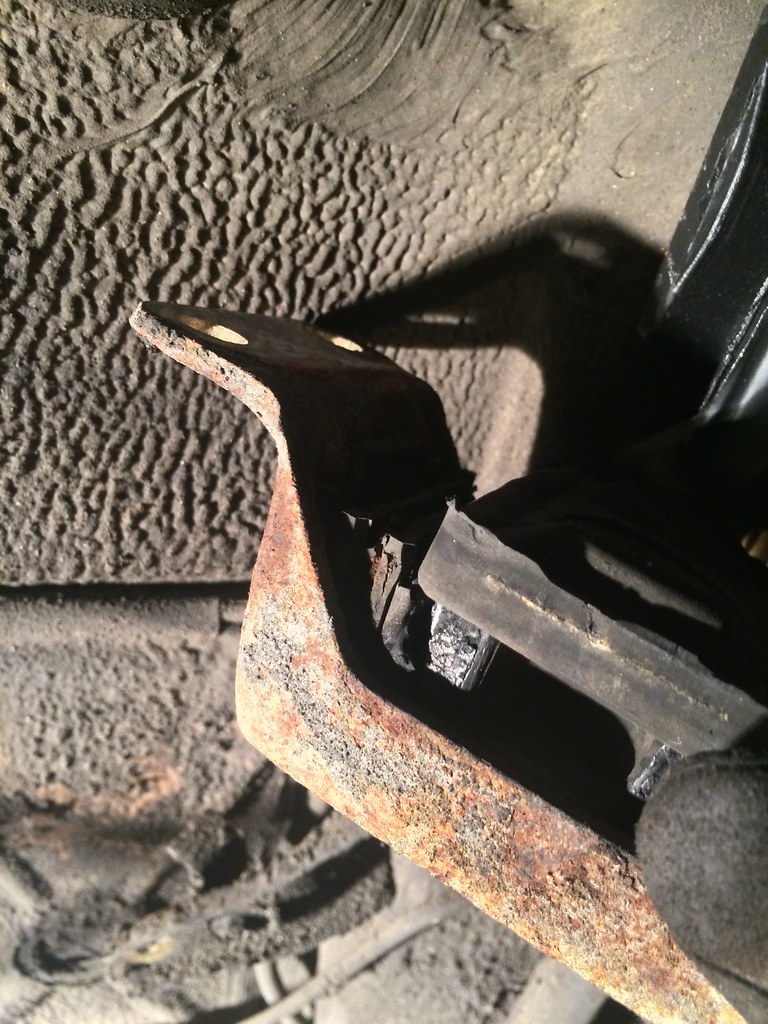
When I pulled the struts off the top mounts look to be in pretty good shape, I have new ones ready to go in, but these looked really usable. In an effort to eliminate the clunk, I decided to drop the subframe to replace the steering arm. Instead of a bad steering arm, I found a different surprise!
 IMG_8537 by ericandshovin, on Flickr
A bit more interneting revealed this to be a common failure on the E28/E24 chassis. Many times the weld just cracks on one side, but mine was completely cracked through on both sides.
 IMG_8540 by ericandshovin, on Flickr
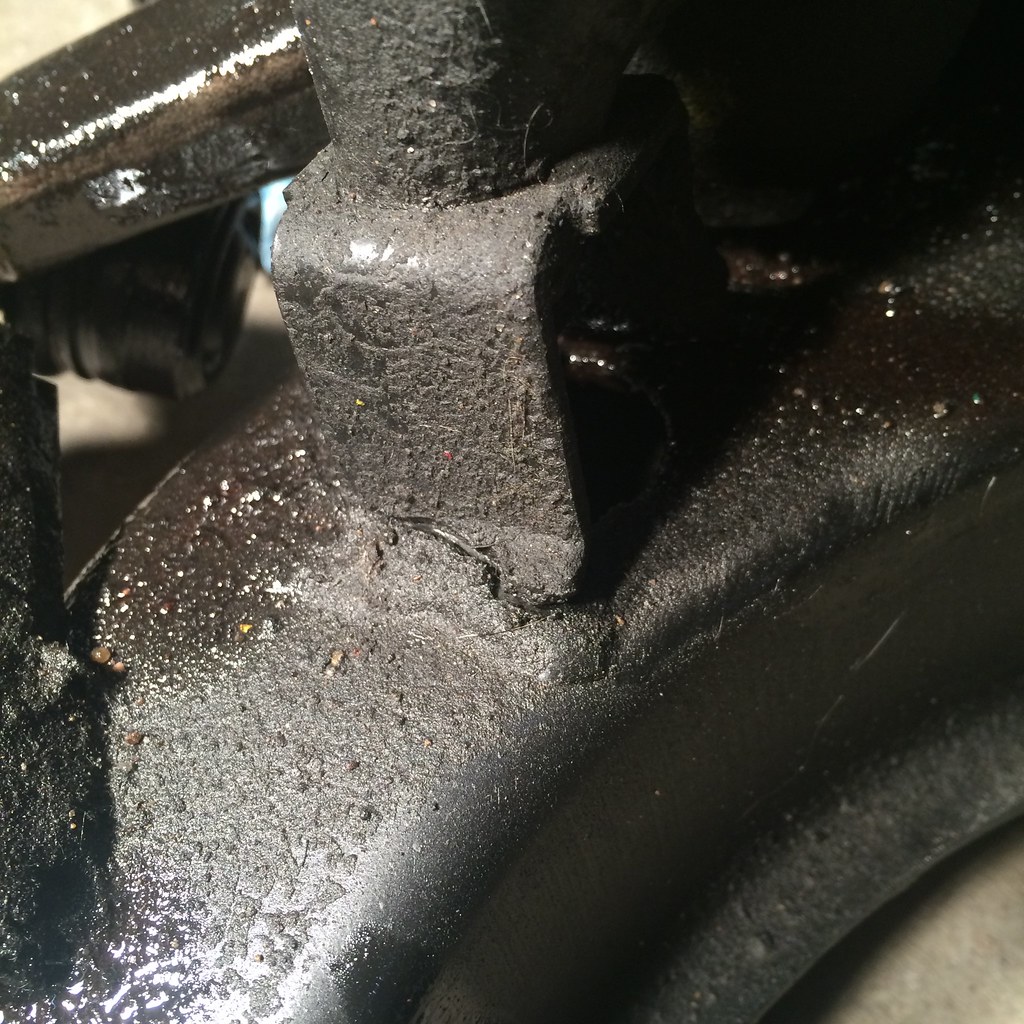
BMW usually does an excellent job playing into the German over-engineered stereotype, but this mount is just dumb. On the left of the steering box is a horizontal through bolt that runs front to back. on the right of the steering box is this mount that bolts vertically to the frame. Any time a load is placed on the steering box (any time your not parked) the steering box is rotating on the horizontal bolt, and pulling or pushing on the vertical bolt. Make sense?
What to do, what to do...
Luckily BMW provided nice access holes in the subframe to get to the nut on the bottom of my broken steering box mount. I decided to use my newly acquired welding skills to make something better utilizing those access holes. So I bought a rod.
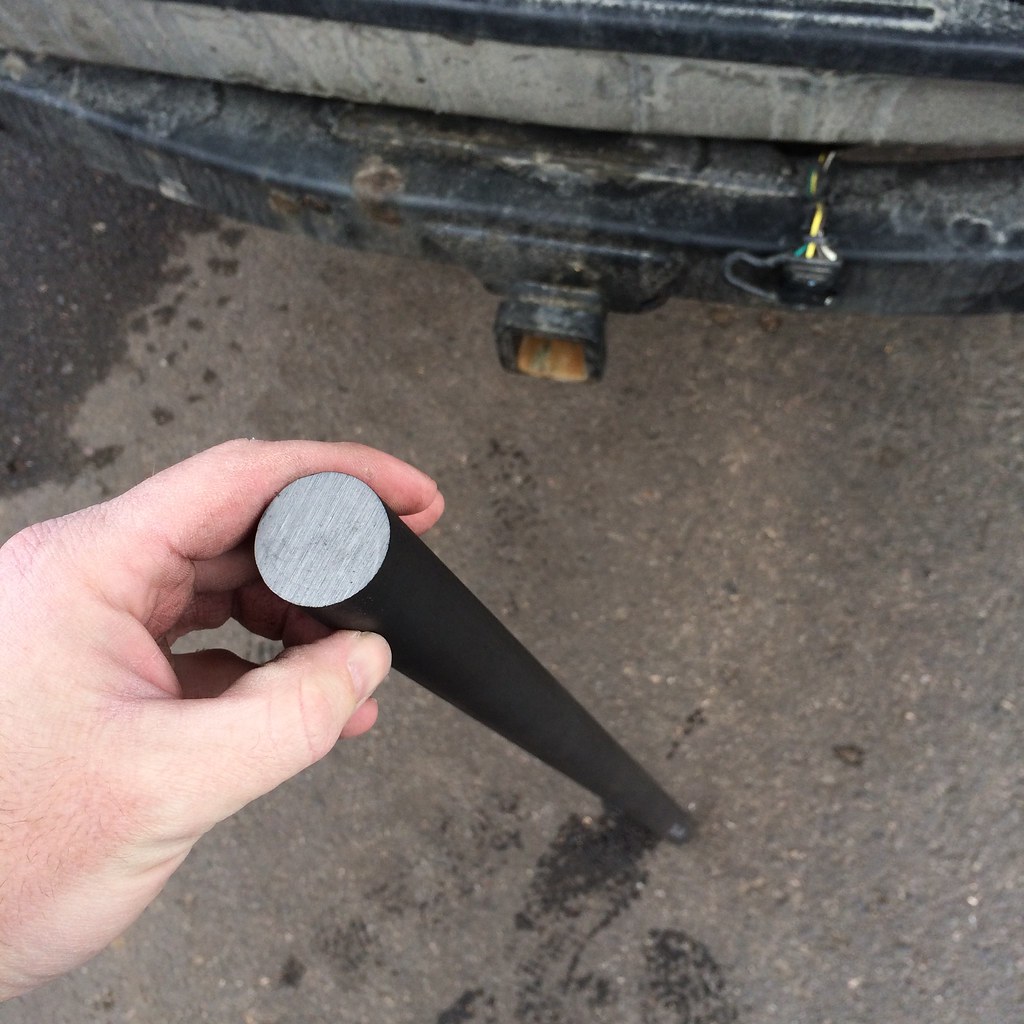 IMG_8546 by ericandshovin, on Flickr
Ground off the old, failed welds
 IMG_8560 by ericandshovin, on Flickr
Cut the rod to size.
 IMG_8588 by ericandshovin, on Flickr
Had the help of a co-worker who turned the rod.
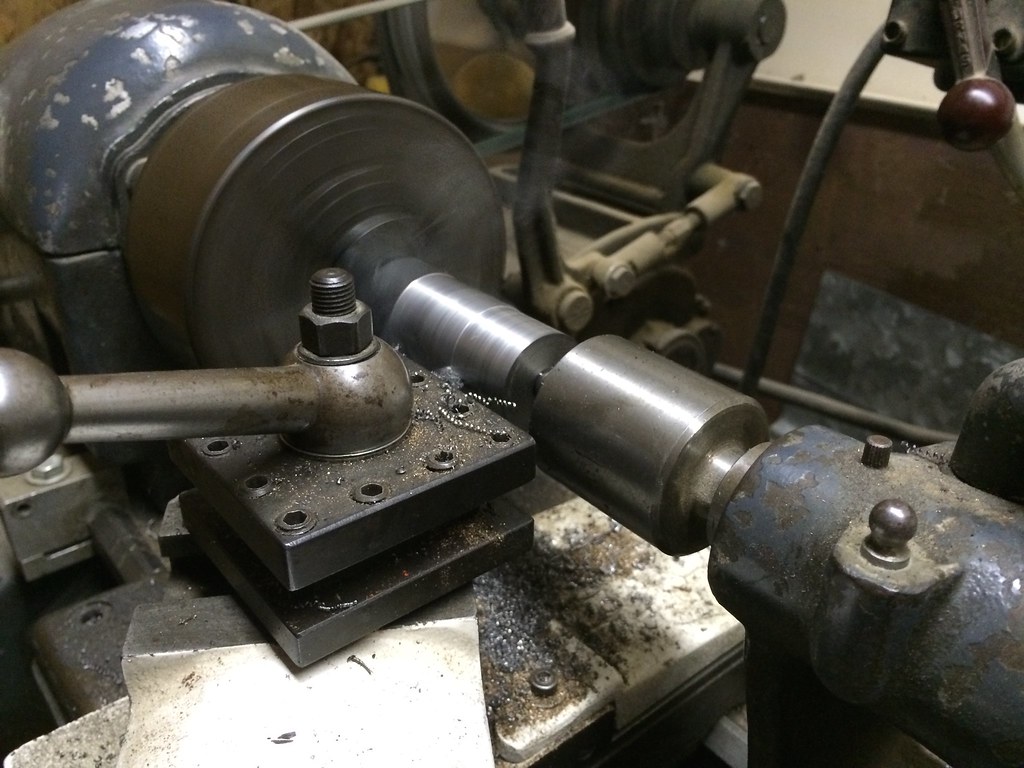 IMG_8594 by ericandshovin, on Flickr
And here is the finished product. Another trip to Ft. Carson is in order to weld these guys together.
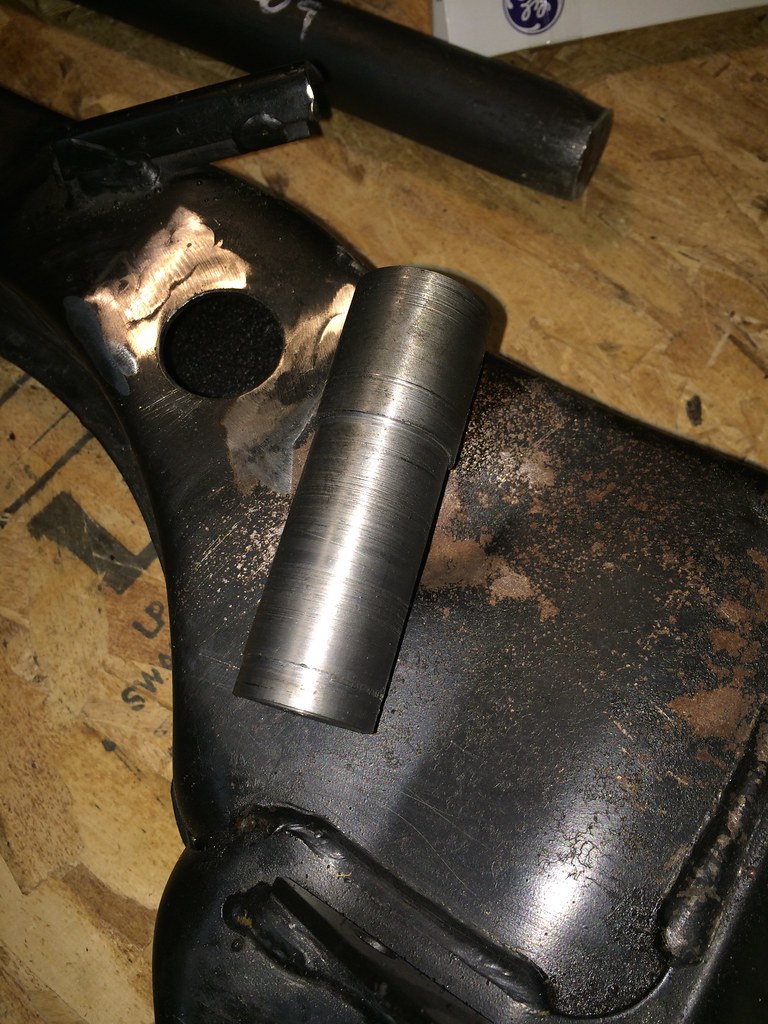 IMG_8597 by ericandshovin, on Flickr
Test fit.
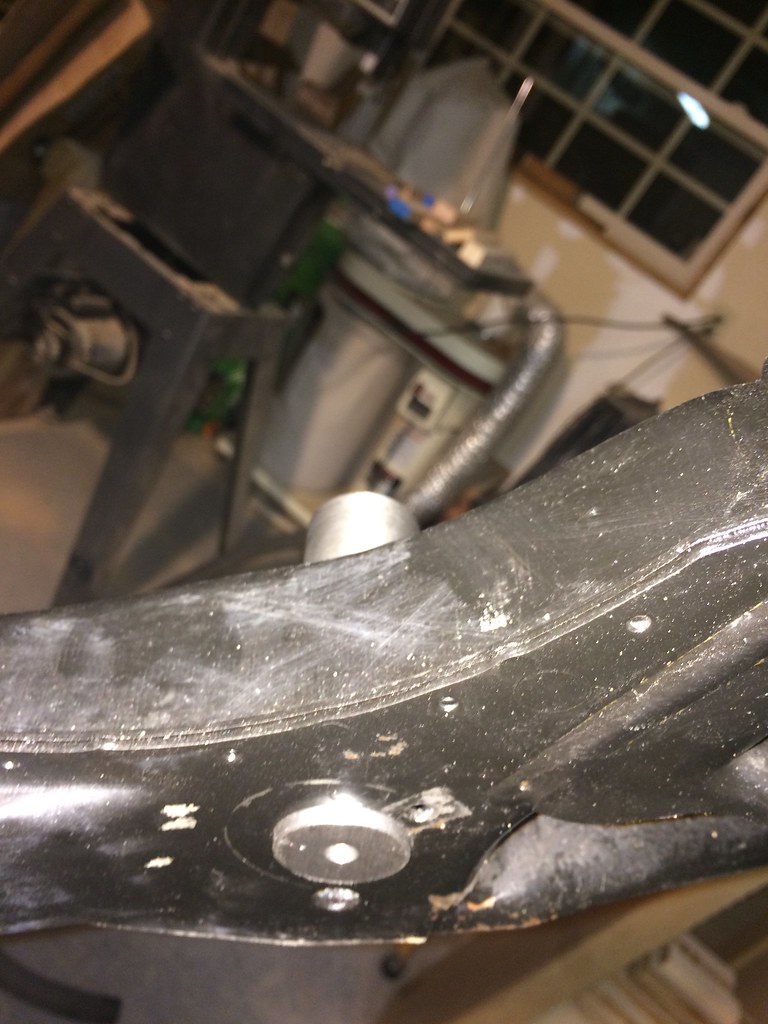 IMG_8599 by ericandshovin, on Flickr
As you might have guessed, it has been quite a productive couple of days! :fire hop:
 IMG_8601 by ericandshovin, on Flickr
Thanks for reading!Comment
-
-
Wish we still had an auto skills shop and a commissary.
How close to you was guy that wrecked that Hellcat?Comment
-
LOVE this car!Comment
-
I have no idea what a hellcat is.
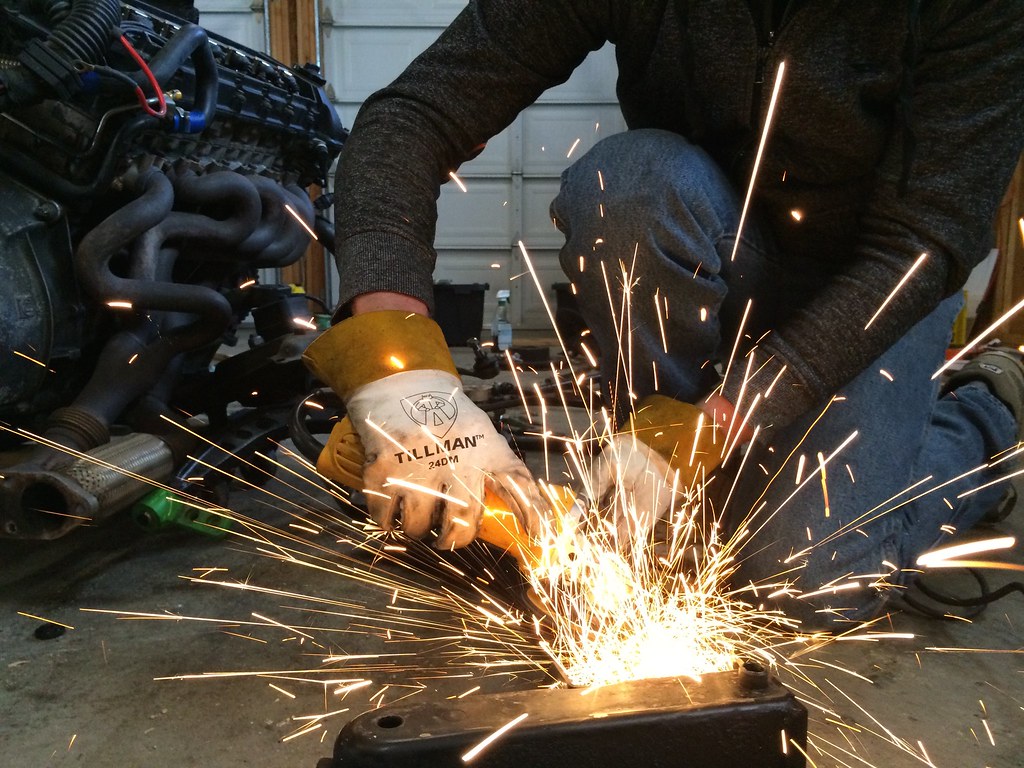
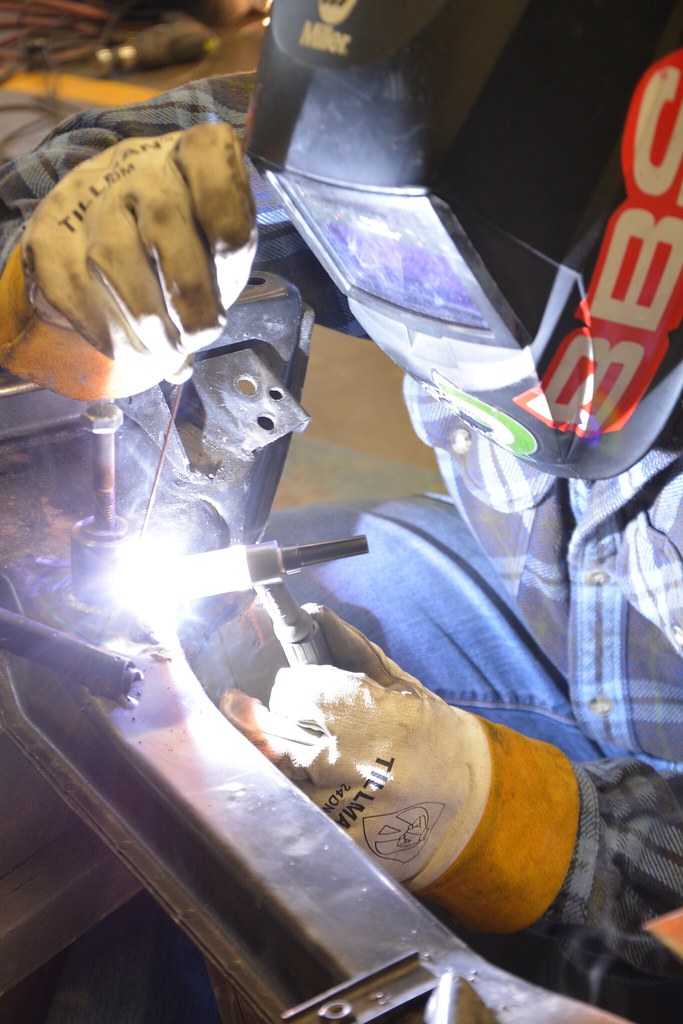
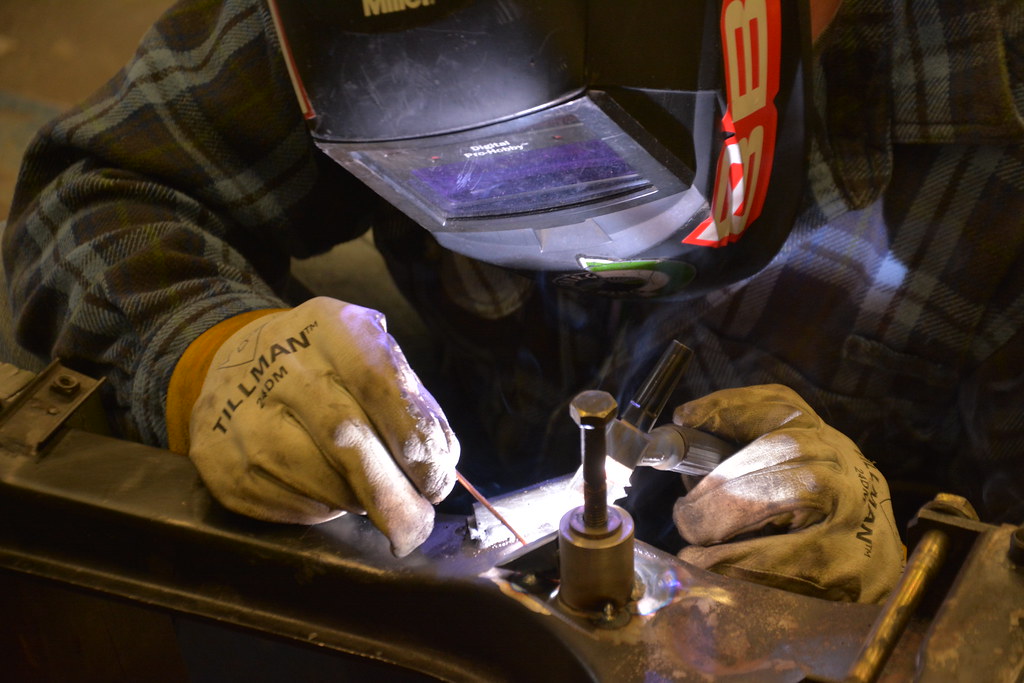
Today I had the chance to weld the dowel to the subframe. I made a little triangle for more support real quick too. Not super happy with the welds. I had to use a ton of current to penetrate the thick dowel, and the rod I had on hand was too thin and just burned up before I could dip it in the puddle. Turned into a bit of a fight with the weld puddle :hitler:
lighting up
 DSC_4381 by ericandshovin, on Flickr
 DSC_4357 by ericandshovin, on Flickr
 DSC_4332 by ericandshovin, on Flickr
bottom finished.
 Untitled by ericandshovin, on Flickr
Comment
-
Love this car good work man

1989 325is l 1984 euro 320i l 1970 2002 Racecar
1991 318i 4dr slick top
Euro spec 320i/Alpina B6 3.5 project(the never ending saga)
Vintage race car revival (2002 content)
Mtech 2 turbo restoration
Brilliantrot slick top "build"Comment
-
He's talking about this incident. It occurred more in the Brighton area (North Denver).

Originally posted by SpasticDwarf;n6449866Comment
-
^ Lololol only made in a hour.
1989 325is l 1984 euro 320i l 1970 2002 Racecar
1991 318i 4dr slick top
Euro spec 320i/Alpina B6 3.5 project(the never ending saga)
Vintage race car revival (2002 content)
Mtech 2 turbo restoration
Brilliantrot slick top "build"Comment
-
-
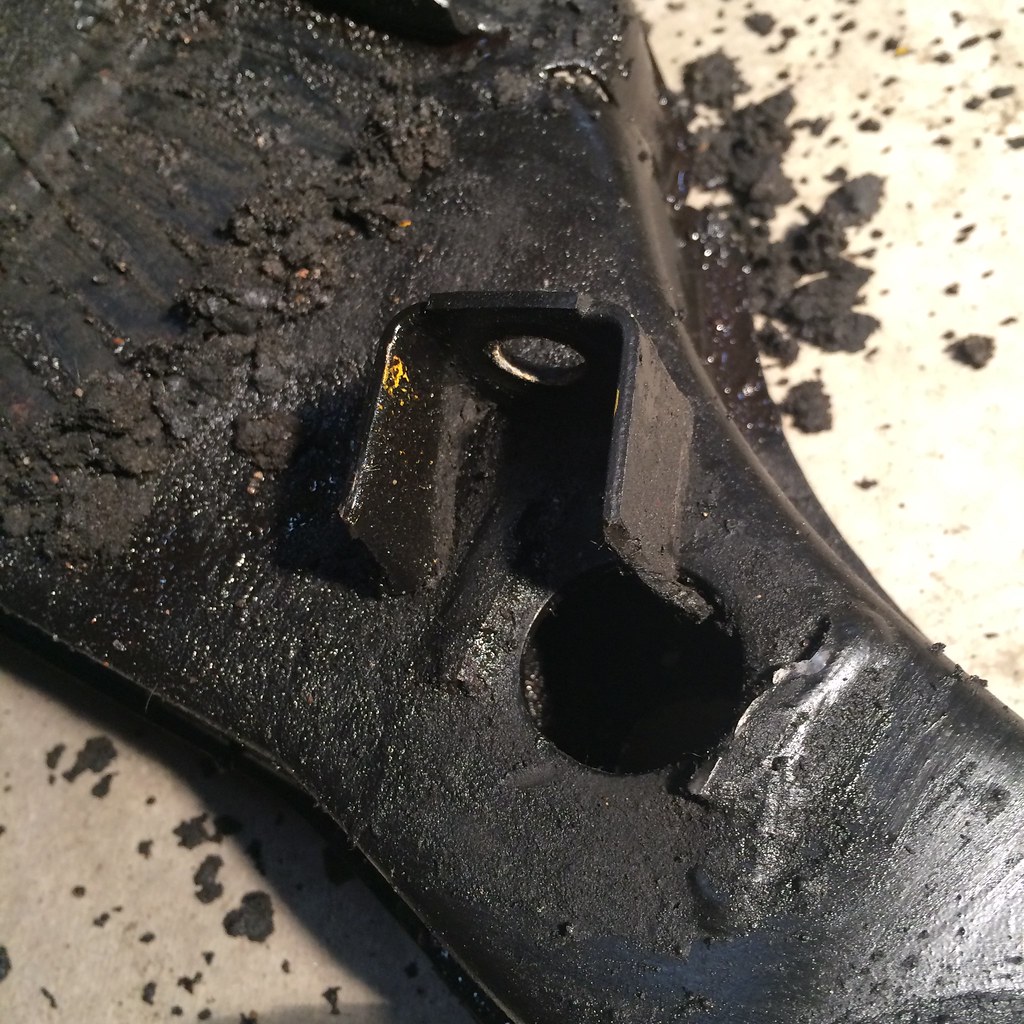
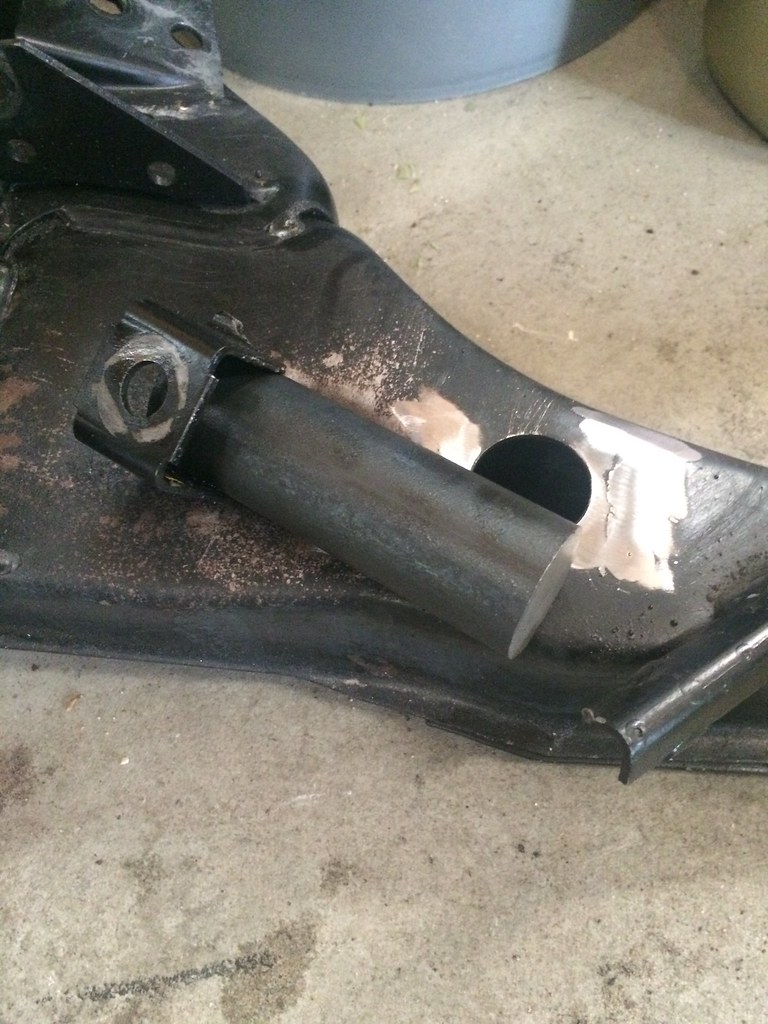
Cleaned up the welded area with a wire wheel just now, and did a quick test fit.
Here is the bottom of the subframe. Note the tinnerman nut can never be removed, but I still have it in place so the splash guard can be re-mounted. This was probably my best weld, even for the small bit I did with my non dominant hand.
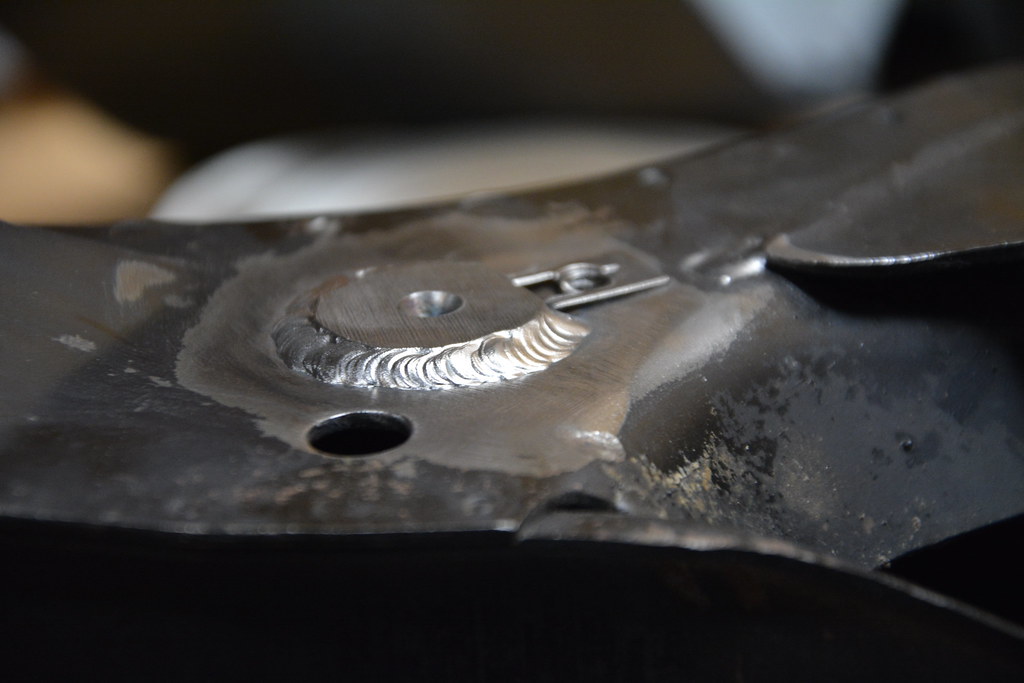 DSC_4421 by ericandshovin, on Flickr
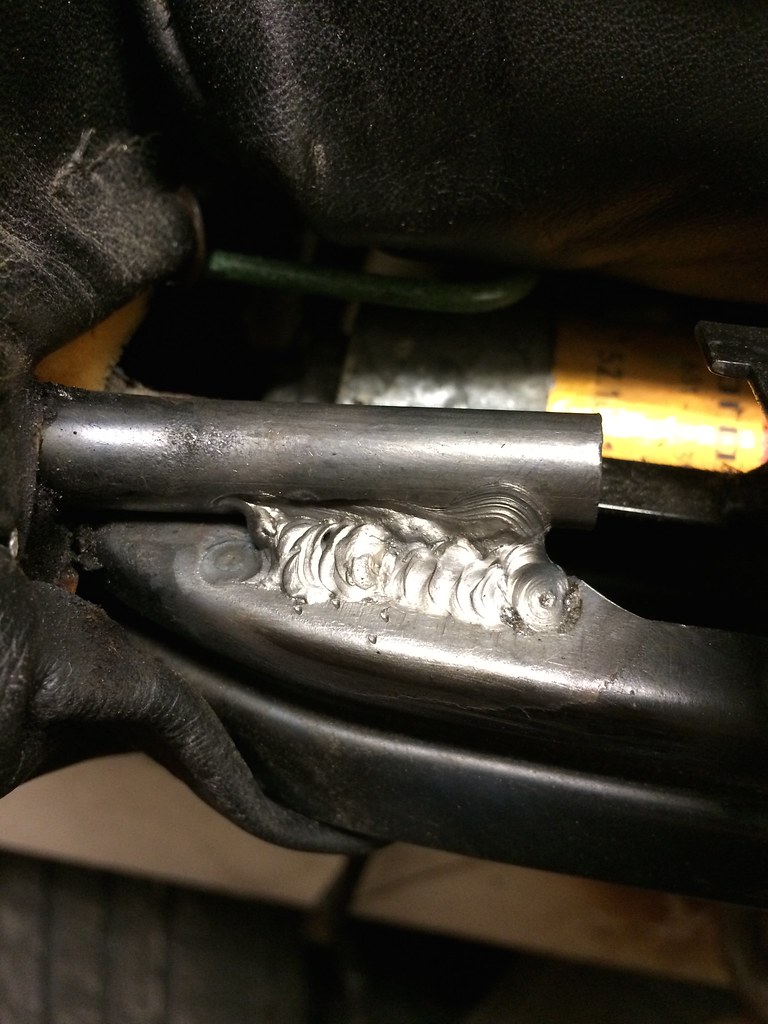
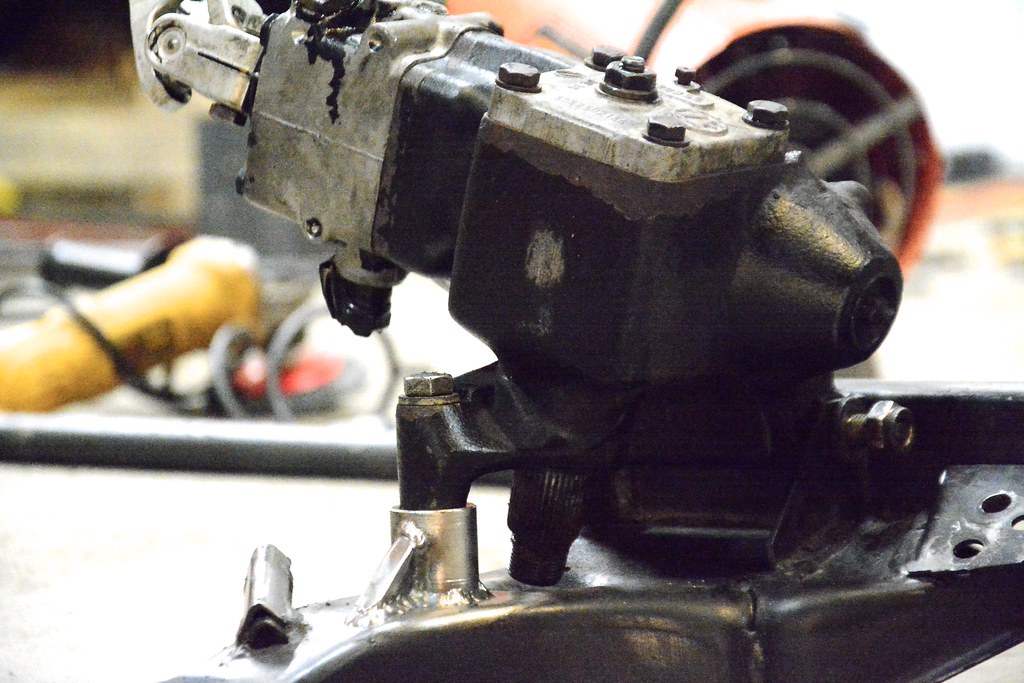
Here is the business end.
 DSC_4427 by ericandshovin, on Flickr
I could make a ton of excuses for the ugly welds... Not enough current to penetrate the thick dowel. Using filler rod that was too thin so it burned up before laying in the weld puddle nicely. Using filler rod for acetylene torch instead of proper rod. No experience welding hot rolled steel. Shitloads of smoke from oil/gunk/road grime inside the hollow subframe. Being rushed for time...yada yada. I know I have the ability to lay some decent bead, here is aluminum vertical up. Truth is, I just need more experience to deal with these variables!

Test fit... Fits perfect! This is also a good visual of what I was explaining a few posts above about the load placement on the two mounting points. I'm pretty sure my new mount will have less side to side flex compared to the OE mount.
 DSC_4443 by ericandshovin, on Flickr
From another angle.
 DSC_4450 by ericandshovin, on Flickr
Comment


Comment