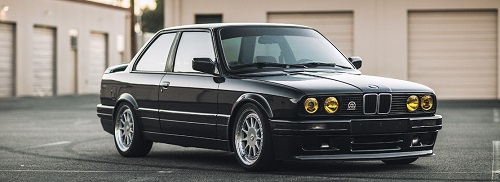
So Instead of taking over the gatherings thread about the e30 picnic I figure I would post my progress pictures in here.
Each day counts as a full day, instead of random little weeknight days.
Day 1
Started in the early morning, and removed the engine, transmission, driveline, exhaust, dash, and misc electrical, also dropped off 325i single mass flywheel at machine shop, and sent intake manifold and valve cover in to get powdercoated.
Engine Bay prior to cleaning, original 86 C101 Connector.

Once the engine was out I worked a little bit on the interior, yanked the old original cracked dash, as well as a few of the harness's I am removing (Cruise, OBC, etc), also note the original factory ugly ass blue carpet.

Quick Rattle-Can job on the engine block.. This is a 100% stock M20B25, nothing done to it except new gaskets, compression is 165 across the board and the engine has 120K miles on it. I realize the paint job is shit, however this motor is only temp seeing as my eta developed rodknock. I am still planning a Low Compression 2.8, and have another m20b25 which will be rebuilt for that purpose

Clutch Disc after 10K miles, needless to say I am reusing this with the new flywheel

DAY 2
Today was carpet yanking day, and rewiring C101 with a 1991 325iA Harness.
Working in a dirty engine bay sucks, so some scrub brushes and a pressure washer decided to attack my engine bay. Its a bit cleaner now.

First I yanked out the heater box/harness, and removed the rest of the old OEM harness's I won't be using (IE Stock Stereo, etc). Here I am locating the tachometer feed for the new C101 Connector.

Shot of the rear with no carpet, only one or two spots with surface rust.. did a quick sand and paint on those, should last awhile

Snipping out the old C101 Connector

Shot of the original C101 04/86 Connector

I don't have pictures of the rewire portion, however I spliced all the wires into the 1991 C101 325iA connector and eliminated C104 from the car, did a quick electrical test and eveything came out green, hopefully the car will start with the new engine :)
DAY 3
This was a very busy day, today the clutch master cylinder was replaced, as well as the clutch return spring which snapped in half when the master was removed. Today also included the integration of the check engine light, and the m3 oil temp monitoring into the factory harness's. It appears OEM when you remove the cluster, hopefully no tech ever shits a brick if he sees that.
Also on the pad was installing the carpet, heater box, dash, headunit, and center console, and test general electrical on the entire car. Minus engine of course.
Picture of the rewired C101, you can easily notice the addition pins that BMW added vs the 86 C101

Shot of the engine with head installed + accessories. Engine came out very well after a quick cleaning, other then the horrible block rattle can job nothing else has been repainted. Not too bad imho.

Shot of the interior with dash and center console installed. Also modified the e30 m3 cluster once again, and installed the 7k tachometer face and 325i coding chip for the engine. You can also notice the AC Deletion/Cruise Control Delection.. As well as the lack of OBC thanks to the 316i euro center console.

Closeup of the center console with headunit active.

Doing a quick interior electrical check, only had one failure, the replacement blower motor does not work, will have to remove the cover and check for power motor side.

Shot of the check computer freaking out with the lack of...everything. At least I know it works

and finally for this post, another shot of the new carpet/dash/everything form the passenger side of the car.

Tommorrow the rear amp rack gets built, the rest of the interior goes back together, and I troubleshoot the faulty blower motor.
Another update tommorrow =)
Each day counts as a full day, instead of random little weeknight days.
Day 1
Started in the early morning, and removed the engine, transmission, driveline, exhaust, dash, and misc electrical, also dropped off 325i single mass flywheel at machine shop, and sent intake manifold and valve cover in to get powdercoated.
Engine Bay prior to cleaning, original 86 C101 Connector.
Once the engine was out I worked a little bit on the interior, yanked the old original cracked dash, as well as a few of the harness's I am removing (Cruise, OBC, etc), also note the original factory ugly ass blue carpet.
Quick Rattle-Can job on the engine block.. This is a 100% stock M20B25, nothing done to it except new gaskets, compression is 165 across the board and the engine has 120K miles on it. I realize the paint job is shit, however this motor is only temp seeing as my eta developed rodknock. I am still planning a Low Compression 2.8, and have another m20b25 which will be rebuilt for that purpose
Clutch Disc after 10K miles, needless to say I am reusing this with the new flywheel
DAY 2
Today was carpet yanking day, and rewiring C101 with a 1991 325iA Harness.
Working in a dirty engine bay sucks, so some scrub brushes and a pressure washer decided to attack my engine bay. Its a bit cleaner now.
First I yanked out the heater box/harness, and removed the rest of the old OEM harness's I won't be using (IE Stock Stereo, etc). Here I am locating the tachometer feed for the new C101 Connector.
Shot of the rear with no carpet, only one or two spots with surface rust.. did a quick sand and paint on those, should last awhile
Snipping out the old C101 Connector
Shot of the original C101 04/86 Connector
I don't have pictures of the rewire portion, however I spliced all the wires into the 1991 C101 325iA connector and eliminated C104 from the car, did a quick electrical test and eveything came out green, hopefully the car will start with the new engine :)
DAY 3
This was a very busy day, today the clutch master cylinder was replaced, as well as the clutch return spring which snapped in half when the master was removed. Today also included the integration of the check engine light, and the m3 oil temp monitoring into the factory harness's. It appears OEM when you remove the cluster, hopefully no tech ever shits a brick if he sees that.
Also on the pad was installing the carpet, heater box, dash, headunit, and center console, and test general electrical on the entire car. Minus engine of course.
Picture of the rewired C101, you can easily notice the addition pins that BMW added vs the 86 C101
Shot of the engine with head installed + accessories. Engine came out very well after a quick cleaning, other then the horrible block rattle can job nothing else has been repainted. Not too bad imho.
Shot of the interior with dash and center console installed. Also modified the e30 m3 cluster once again, and installed the 7k tachometer face and 325i coding chip for the engine. You can also notice the AC Deletion/Cruise Control Delection.. As well as the lack of OBC thanks to the 316i euro center console.
Closeup of the center console with headunit active.
Doing a quick interior electrical check, only had one failure, the replacement blower motor does not work, will have to remove the cover and check for power motor side.
Shot of the check computer freaking out with the lack of...everything. At least I know it works
and finally for this post, another shot of the new carpet/dash/everything form the passenger side of the car.
Tommorrow the rear amp rack gets built, the rest of the interior goes back together, and I troubleshoot the faulty blower motor.
Another update tommorrow =)


Comment