SLC: 1989 Zinno coupe. Superlight, Super Functional *6spd swap inside*
Collapse
X
-
I used same intake off ebay. Paid like 38 or something shipped from China. It did work just great with my NA m52.
Sent from my SM-G925F using TapatalkLeave a comment:
-
Yeah it's eBay. The filter element inside on kamotors' website looks different but I'm not sure if that's an older version or something. He says his are of higher quality than other eBay ones so maybe they are better ones that look the same, I'm not really sure.Leave a comment:
-
Nice! That actually looks just like the KAMotors intake. Is that just an eBay piece or something? It honestly looks identical.Leave a comment:
-
worked on my intake today. it consists of a 3" enclosed filter just like the kamotors one comes with. it connects to the MAF via a 3" silicone coupler. after the maf it connects to the TB via a 3" to 2.75" elbow. i used pipe fittings to create my own barbs for the ICV and PCV connections. i couldn't stomach the ~$70 for an application specific elbow or $100+ for a kamotors intake i knew i could make myself if i did the legwork. nothing against kam for making and selling kits because the product is nice (probably nicer than mine), but if you want to put your own together and save some money it can be done. between the elbow, pipe fittings, intake, and 3" coupler i only spent about $60-$70 instead of $175-$200. i used the bracket included with the intake and some hardware i had around to fasten it to the original airbox mount thing. i had to bend the mount a little to make it work. the clearance from the upper radiator hose and the spider hose coming from the coolant tank is tight but i will keep an eye on it and adjust as necessary. here are some photos:
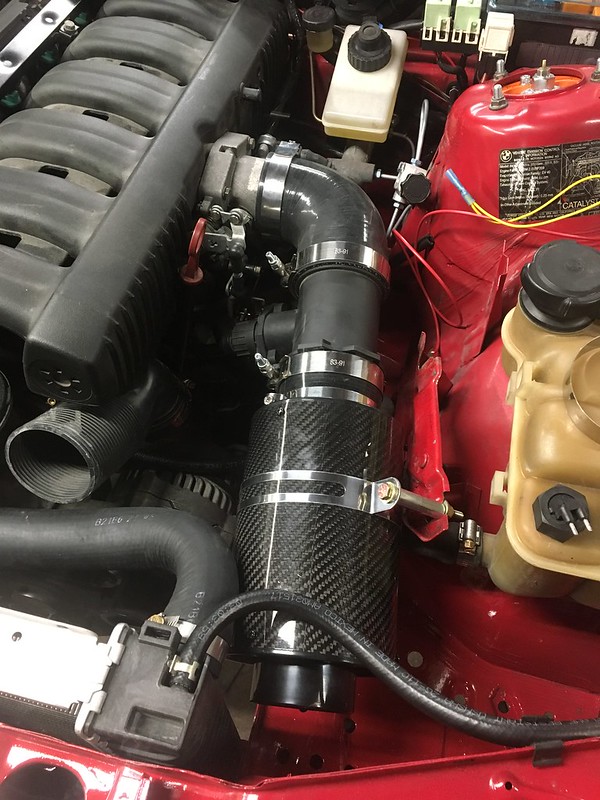
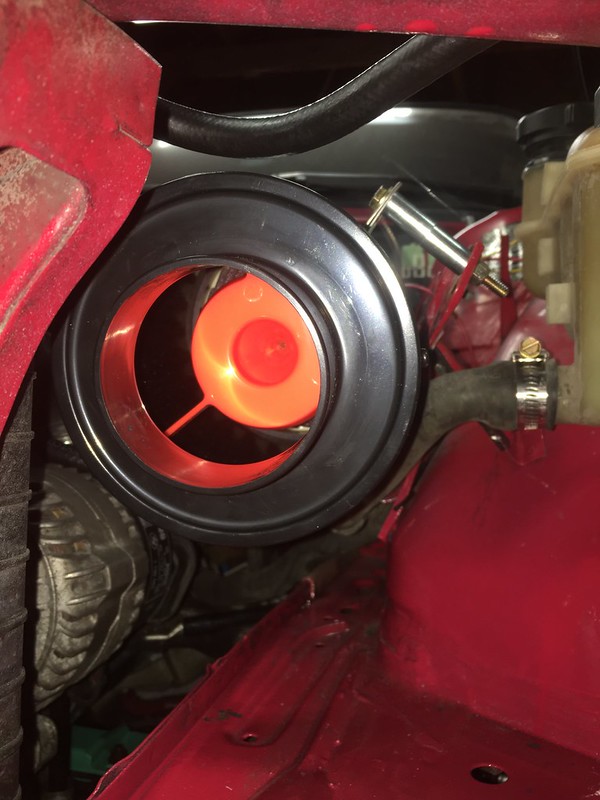
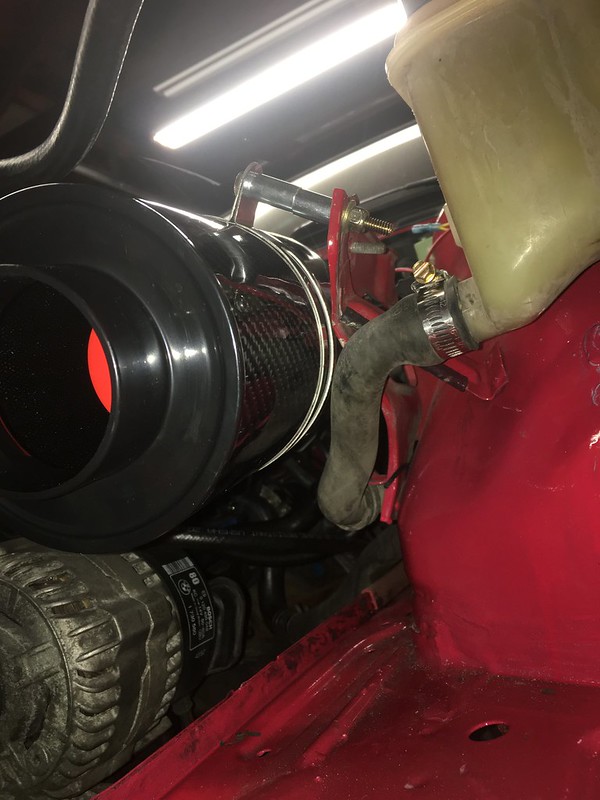
 Last edited by mitchlikesbikes; 02-26-2018, 09:36 PM.
Leave a comment:
-
Thanks mush!
The weather here went back to wintery garbage last week and has no intention of changing for the next 10 days or more so i haven't been doing much on the car. I did, however, send my mtech1 out to Jordan at stitched wheels for a rewrap. I've been rocking it bare with no leather for years and I finally decided I had enough. I also ordered a cheap NRG fixed back for the passenger side so I can finally ditch my god awful tan comfort seat that's been hanging out over there. i was really chugging along toward an early march drive but the weather isn't cooperating and I won't see my wheel for another 3 weeks or so anyway so I'm taking a little step back to regroup and when the weather improves I will knock out the last of the small stuff on the car. Stay tunedLeave a comment:
-
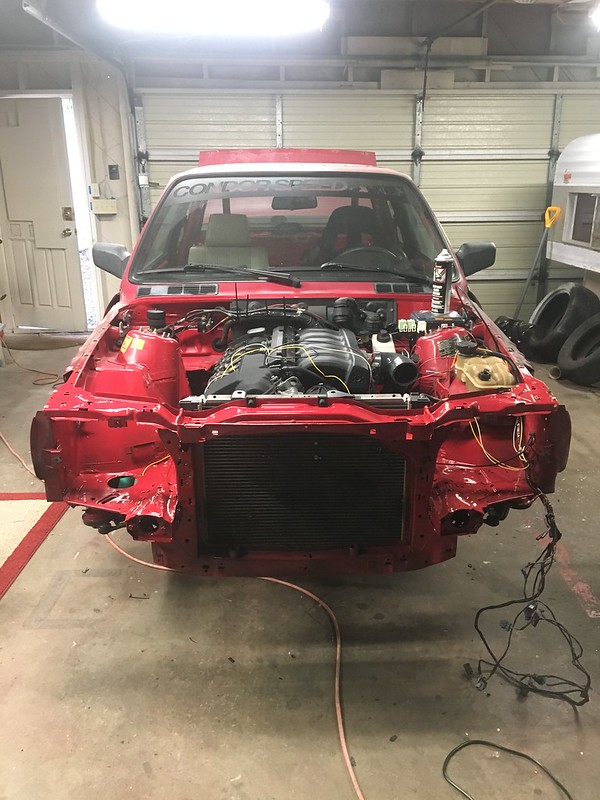
finished up the relay sockets after work friday. so the relays are now securely mounted right at the fuse box. i also built a little bracket for the diagnostic port so it could be neatly mounted on the firewall near the power distribution block. i used a bracket with a diagnostic port mount from a 7 series that i found at the junkyard. i chopped it up and added a leg to fasten it to the firewall using one of the factory studs and plastic nuts. i also started my electric fan wiring. i am setting it up to be ground triggered using a weatherproof relay. i'm using the older model temp switch from the markert thread, with a toggle switch on the dash for a manual override. this setup won't rely on any of the old/overcomplicated stock fan wiring so it should be pretty reliable i hope. i put the core support back on and installed the radiator as well, then fitted radiator hoses. i used two long hoses with 90 degree bends that i simply trimmed to fit. the engine also runs now so that's good. just a fair amount of small stuff and the exhaust to finish up now.
here is a photo of the engine with all of the wiring and intake manifold installed, then one with the core support and radiator installed. it's starting to look like an e30 again finally

Leave a comment:
-
Thanks!
Tonight I've been doing boring stuff and swapping out relay sockets. The 3 relays for the engine bay had broken clips from whoever pulled this engine, so I'm swapping to the good sockets from my spare harness so I can properly clip the relays up in the engine bay. It's a pain in the ass and probably not worth it but that's basically the way I do things lolLeave a comment:
-
i've been consumed by this thing over the past few days. the engine is now complete and runs. still have to put the front end back on, fit radiator hoses, install and wire the electric fan, and some other stuff. last pic is of the engine installed but before i installed the harness and intake manifold and what not


 Last edited by mitchlikesbikes; 02-14-2018, 10:33 PM.
Leave a comment:
-
I'd say that looks great! Good job!
You should just cover that whole trans tunnel with POR15 or rubberized paint, then some dynomat.Leave a comment:

Leave a comment: