If this is your first visit, be sure to
check out the FAQ by clicking the
link above. You may have to register
before you can post: click the register link above to proceed. To start viewing messages,
select the forum that you want to visit from the selection below.
Small side project I did a few weeks ago. I'm guessing someone was monkeying around with an aftermarket steering wheel that didn't quite fit right or didn't have the right spacers, and tightened it down hard enough to break the spring-loaded horn contact brush. It's the white busted plastic thing under the steering spindle. Without it, no horn.
How are you supposed to drive like an a-hole without a proper horn? Fortunately, replacement brushes are sold. You just have to drill out the stock rivets and use nuts and bolts to fasten on the replacement. Now I can inflame road range at the touch of an M-tech 1 horn button.
Here's that steering wheel. Bare rubber, needs to be recovered.
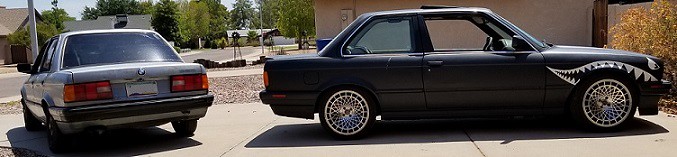
This is all I need to relive my youth when I drove my dad's then new '87 M3. His was Alpine White with a black interior. So now my view from the driver seat is the same as then. This car also has a 4.1 rear diff, hard suspension and Magnaflow exhaust, so the driving experience including feel and sound is quite similar as well.
Just got these IE long tube headers installed, along with a high flow cat to replace the IE shorties and original OEM (and failing) cat. I had a shop do it. They didn't go in easily, some exhaust studs had to be removed to snake them in. Also, undoing an engine mount and jacking up the engine helps.
They're ceramic coated in a black satin finish. I heat-cycled it a couple times for a few minutes at idle speed, then kept it under 2K rpm on the way home from the muffler shop to let the ceramic coating cure. Makes a big difference in the coating's longevity. I know because I had a freshly ceramic coated header on my Alfa race car go straight to the dyno without curing, and the coating didn't last at all. I had it recoated, then properly cured before going racing, and it's looking great.
So, since I've been driving slowly, I don't yet know if there's a noticeable performance improvement from the long tube headers over the shorties.
Finally got to drive the car harder. The long tube headers and high-flow cat give it more noise, I mean, glorious music, which again confuses the butt and mind dynos. I want to say it feels a little faster, but I'll know better when I eventually re-dyno this thing.
Side note, the engine now lacks the fluttering, clicking noise that had been present since I bought the car last December. I suspected an exhaust leak at the head, and sure enough, soot escaping the flanges on the old shorty headers confirms it. (Hank, are you following? ;D). The new headers fixed it. See the old shorty headers below.
I finally got around to installing a UUC DSSR (that's BMW nerd speak for an aftermarket shift rod) I bought some months back.
It took some doing because the shift coupler I have is an older one that was too wide. Also, its bushing was wallered out (that's Ozark speak because I'm originally from Missourah).
So I drilled out the old wallered bushing, and happened to have some very nice 'Murican-made Delrin rod. Shaved it down to size in the lathe, and drilled it for the 10mm pin. Pressed it in, cut it down to size, and walla! I can say "walla" because I'm not only from Missourah, but more precisely St. Louis, which had a lot of French influence back in the day. Hence, the frog-speak.
My "walla" was a bit premature. Remember how the coupler was too wide? I had to mill it down (no pic, sorry). I got a nice, toyt, precision fit in the DSSR. Ready for install!
So I did.
Man, this thing feels like it just took 20 years off the clock on this car. I knew the shifter was kind of sloppy, but I didn't realize what I was missing. Glad I did it. If you don't have access to machine tools and such, I'd suggest getting a new shift coupler, even if the old one is the right size, just to have a fresh, tight bushing in it.
As much as I admire the various and creative engine swaps I've seen on other threads, I don't think I'd ever get tired of seeing this big shiny aluminum bug errytime I pop the hood:
ditto.. i just need to get mine as shiny as your now.
I like the way you talk. I also like the way you work.
That is all.
You are obviously quite intelligent, and demonstrate excellent taste.
Originally posted by AwakenNoMore
Great work so far. Tasteful mods all around and best use of the Ski-pass I've seen yet.
You possess judgement beyond reproach, and are an asset to this community.
It's good to sometimes step back and take stock. These are really great cars, and I'm very pleased with the balance of performance and comfort in this build. Here are the details as I know them, some passed on from prior owners and builders:
1991 BMW 325i, originally automatic, tan interior
Mechanical modifications:
Metric Mechanics 2900 Sport/Rally engine (stroked, high-compression 2.9L), polished intake manifold and valve cover
Miller Performance MAF intake conversion with performance chip
Bosch Type II 19lb fuel injectors
TRE 255 fuel pump
Ireland Engineering long-tube headers, ceramic-coated
Magnaflow stainless steel cat-back muffler
5 Speed manual transmission swap
Z3 short shifter
UUC DSSR (dual shear selector rod)
4.10 rear differential
’95 e36 M3 steering rack
Ireland Engineering urethane steering coupler
Ground Control springs 400/650 lbs
Ground Control adjustable camber plates
Koni struts
Treehouse Racing solid control arm bushings
r134a A/C full retrofit
Stainless braided brake lines
Cosmetic modifications:
Full glass-out repaint in Alpine White II in ’14
OEM “Shadow line” black trim
Euro headlight surrounds
15x7” Euro basket weave BBS wheels
BMW Motorsport door handles
Front spoiler splitter
Reupholstered black leather sport seats and interior
Ski pass-through bag
Fresh powder coat on calipers and strut housings
Original “Premium Sound” radio
OBC fully functional
M-tech 1 steering wheel
M-tech 1 rear spoiler
Euro Hella smiley+crosshair smoked headlights with HID low beam conversion, LED city light
Car came to me with map lights on the rearview mirror. They never worked, and it's one of those small things that pisses me off. So I finally dug into it, not sure what I'd find since it's a bit of a Frankencar with very few original parts.
Looks like there is some wiring with (incorrect) bullet connectors, but nothing to plug into. Those connectors are fine by me, it's what was used on vintage motorcycles. Lucky for us, I used to restore and race (still do) motorcycles, so I have a bunch of those nice connectors. Nice to have errything on hand when you need it.
According to de interwebs, and confirmed with a multimeter, you need to unravel the check panel wiring and splice into wires 9 (brown for ground) and 23 (purple/green for switched power).
I hate those blue plastic splice nuggets, because I'm old and I like to do things the right way. Which is often the hard way. So I chose to solder in my splices. You can see how I cut away a bit of the wire casing. Then after twisting the wire and soldering, I coated them in liquid tape, and wrapped with electrical tape.
And now I have functional map lights. This picture came out awesome, BTW. I'm going to submit it to a photography contest, where I'm sure to win. The clueless judges will be mesmerized by the artistic juxtaposition of a mysterious dark yet lit object against beautiful skyscape.

 bacon by Jared Laabs, on Flickr
Comment