New owner, BMW 325iX Touring

Collapse
X
 
  • Time
  • Show
Clear All
new posts

  • D.Martijn
    replied
    Another update :)

    This week I received my rear differential from Hardeman. Looks a lot better than before!
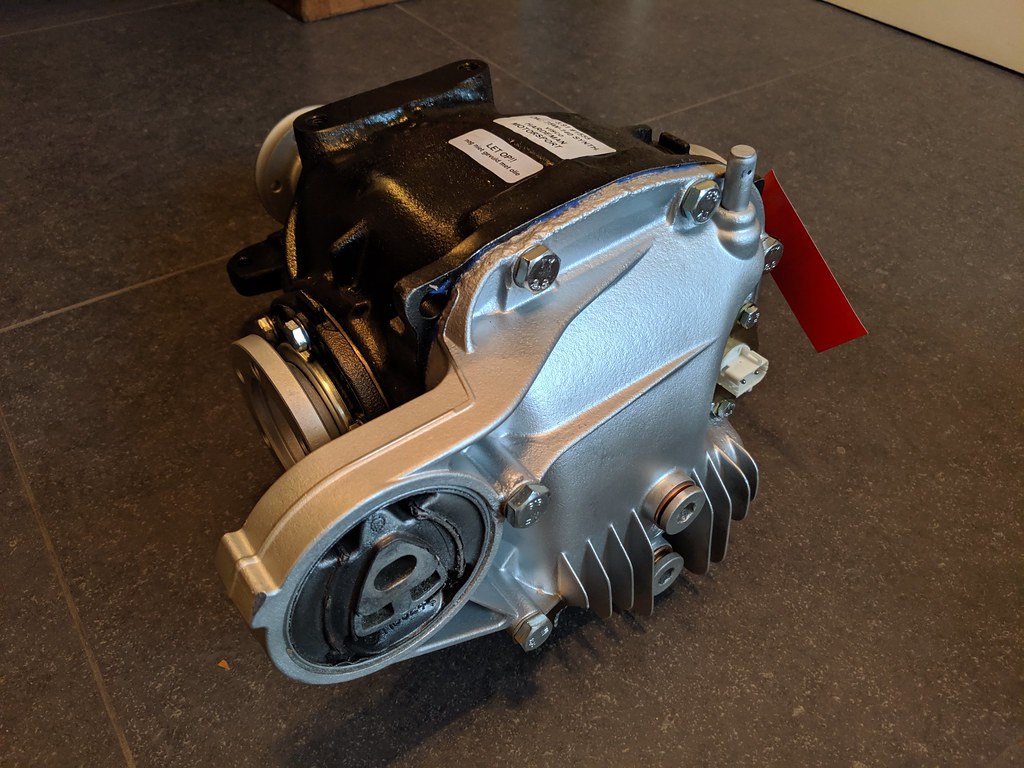


    Unfortunatly when removing the aluminium cover to remove the bushing, I noticed that it is cracked. Bummer.
    I'm pretty sure it's because of shipping as the cover has a little nick which is also present in the box that the diff came in..
    I already found an other diff locally for 50€, I'll probably pick that one up for it's cover. I did contact the company by mail, I'll call them again on Monday.
    Hopefully we can work something out.
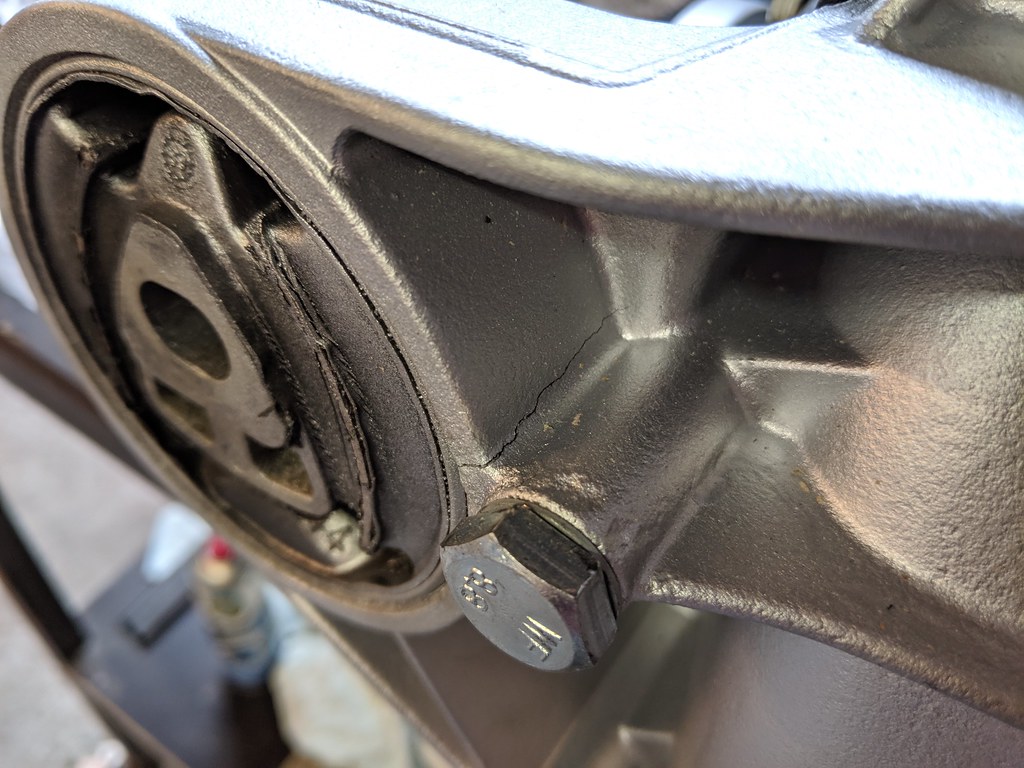


    There's no dirt or paint in the crack present. I'm sure it's because of shipping. :(


    This Friday I also went to my local plating company to pick up my parts. I had given them my two sets of rear brake rotors as they were a bit rusty + these are iX Touring specific as they are vented. The guy told me they couldn't plate them as it's cast iron. However they did put them in the acid bath so all of the heavy rust is gone, only some flash rust was present which cleaned up very easy with a wire wheel, I coated them in some zinc spray for now to keep them from rusting further. When the guy got my parts, he told me there was a internal misunderstanding and they plated everything white. He told me I could take out the white plated hardware and they'll will plate the rest again in yellow this Monday..

    So far the white plated stuff came out great!


    I also got the front brake shields plates to give them some extra protection as they were quite rusty - these will get painted later on


    I had my transfer case housing welded by a local machinist, today I went back to work and drill and tapped (M18x1.5) the drain hole again. After that I cleaned up the housing and coated it with a ceramic coating


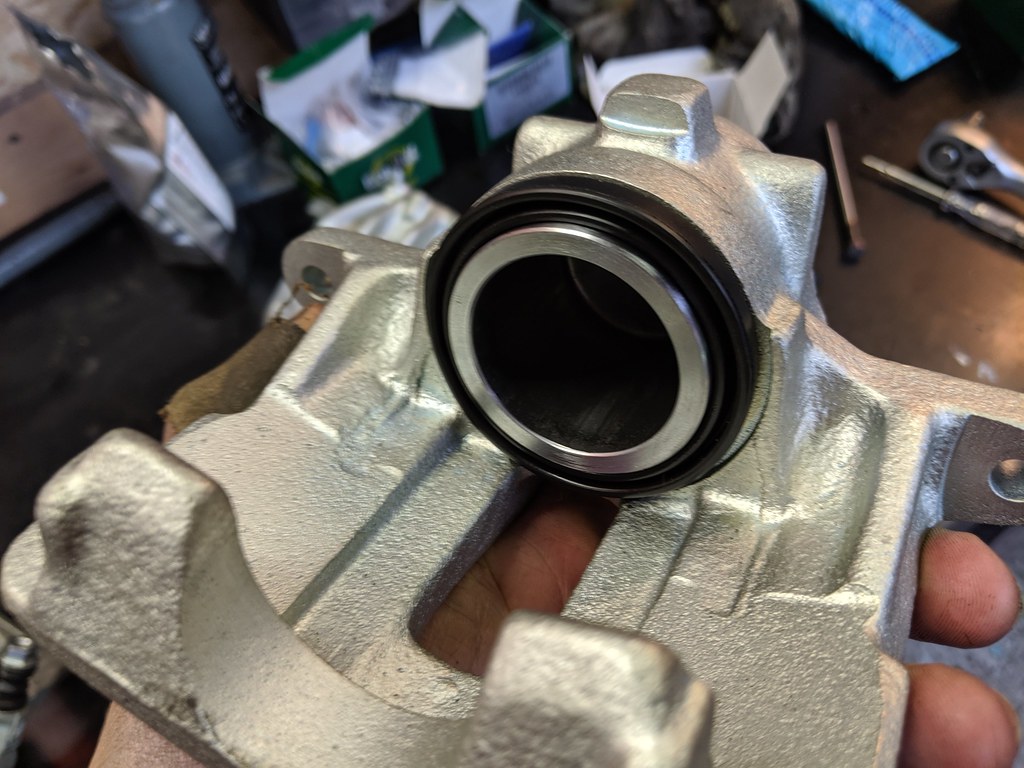
    Also started on the brake calipers, these got the same ceramic coating for some added protection.


    Again specific rear pistons for the Touring, these are 35mm as the normal sedan ones are 34mm


    Patiently waiting on getting reassembled :)

    Leave a comment:


  • D.Martijn
    replied
    Originally posted by mike.bmw
    Bravo! You make this stuff look easy. :D
    Thanks Mike! Just taking it step by step ;)

    Originally posted by jeenyus
    First chocolate shoes, now chocolate suspension parts.
    No for long!

    Originally posted by Cosk82
    how much did you pay for you 325ix
    Haha, a lot less than what I have currenly invested in it :)

    __

    I called the company that is rebuilding my rear differential and they told me they had a few busy weeks but mine should be done and get send out this week.
    I also contacted the local-ish plating business and my parts well be done on Thursday so I'll go get them on Friday after work.

    Leave a comment:


  • Cosk82
    replied
    how much did you pay for you 325ix

    Leave a comment:


  • jeenyus
    replied
    First chocolate shoes, now chocolate suspension parts.

    Leave a comment:


  • mike.bmw
    replied
    Bravo! You make this stuff look easy. :D

    Leave a comment:


  • D.Martijn
    replied
    Today I started on cleaning up the first haf of the transfer case, turned out pretty well


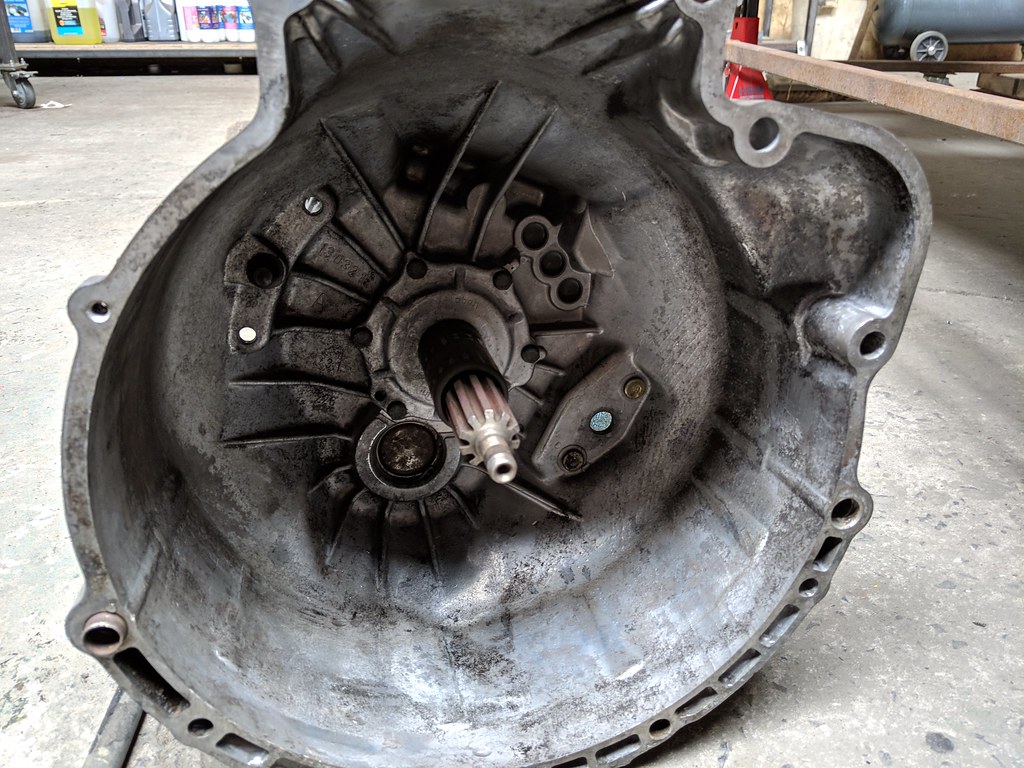
    After that I focused on the transmission, replacing all of the seals. The seal driver kit I bought recently made quick work fitting them.


    Condor brass clutch pivot vs the worn down plastic one


    I also resealed the little cap that holds the springs in place as there was some oil leaking when I degreased it.


    All of the suspension parts laid out on the floor, I'll get them finished up on Friday evening after work


    While sorting out the new parts - which one thaht have to ge pressed into parts, I discovered the brand new BMW bushing for the T case is already teared in two places.. Another trip to the dealership it is.


    Leave a comment:


  • D.Martijn
    replied
    Originally posted by mach schnell
    Just read this thread from beginning to end.

    .... wow. What incredible work. Fantastic.

    Can’t wait to see your updates!
    Thanks man! Can't wait to finally drive it again :)

    Leave a comment:


  • mach schnell
    replied
    Just read this thread from beginning to end.

    .... wow. What incredible work. Fantastic.

    Can’t wait to see your updates!

    Leave a comment:


  • D.Martijn
    replied
    Another update on the Touring.
    Last week I received my new Lemforder inner balljoints. Wow , these are stiff! ALthough I can't feel any play on my old ones, they wiggle back and forth very easily.


    Also this sleeved needle bearing came in the mail. When I first made an order of SKF bearings for the T-case, I ordered the wrong type of needle bearing - just a caged type.. I was able to find the INA part no and ordered it from Ebay as it's also NLA from BMW.


    As I didn't have enough time to finish sandblasting and primering the suspension parts, I got up pretty early this Saturday. I wanted to be sure I had enough time to complete the rear subframe and trailing arms since I had to got somewhere in the afternoon. After first having to remove the ruberized coating on the underside of te beam and arms, I was able to finally put them in the Corroless paint. I these also 2 coats, Sunday evening I'll go get them when they are completly dry.

    Happy with the results.


    The sandblasting cabinet at work was just big enough to fit the rear subframe. I had to put it in diagonal and rotate is a couple of times to get all of the nooks and crannies.


    I also got my flywheel back from my local machinist, as I do have a lathe at work, I decided to let him do the resurfacing as I din't know how much matarial I can take off. When getting my flywheel back, I gave him the other half of my transfer case to weld the drainhole close so I can put in some new threads.

    Hopefully, I can get the transfercase back together by the end of next week and start putting everything in 2k black epoxy on Friday evening. I'll also have to call the company where I sent my rear diff to to get an estimate on how much longer it will take.

    Leave a comment:


  • D.Martijn
    replied
    Originally posted by Aigar
    Sandblasting the springs is a risky business - the chance of creating micro cracks that create a big crack is high.

    I can bet most of the left side of the car is in worse condition than the right. In 30 years all the stuff that the forthcoming cars are throwing at you is captured by the left side of the vehicle. My left strut actually had holes in it already and yours isn't far from it as I can see. Still, could be worse: https://e30-talk.com/topic/104026-su...ouring/page-11

    Keep up the good work!
    Oh, you're te owner of the CalypsoiX Touring on Instagram right?
    Love your updates and of course that color! It looks great!

    I've never heard of that before. I've sandblasted several springs now and never had a problem. Both painting and powdercoating them afterwards.

    Yes, I was even thinking to myself I might have to pick up a second set for in the future. Why not get some new ones from BMW.. Although they are not cheap - they have no rust.. :p
    Getting the all of the rust out of the seam of the tube and spring cup is near impossible.

    Leave a comment:


  • Aigar
    replied
    Sandblasting the springs is a risky business - the chance of creating micro cracks that create a big crack is high.

    I can bet most of the left side of the car is in worse condition than the right. In 30 years all the stuff that the forthcoming cars are throwing at you is captured by the left side of the vehicle. My left strut actually had holes in it already and yours isn't far from it as I can see. Still, could be worse: https://e30-talk.com/topic/104026-su...ouring/page-11

    Keep up the good work!

    Leave a comment:


  • D.Martijn
    replied
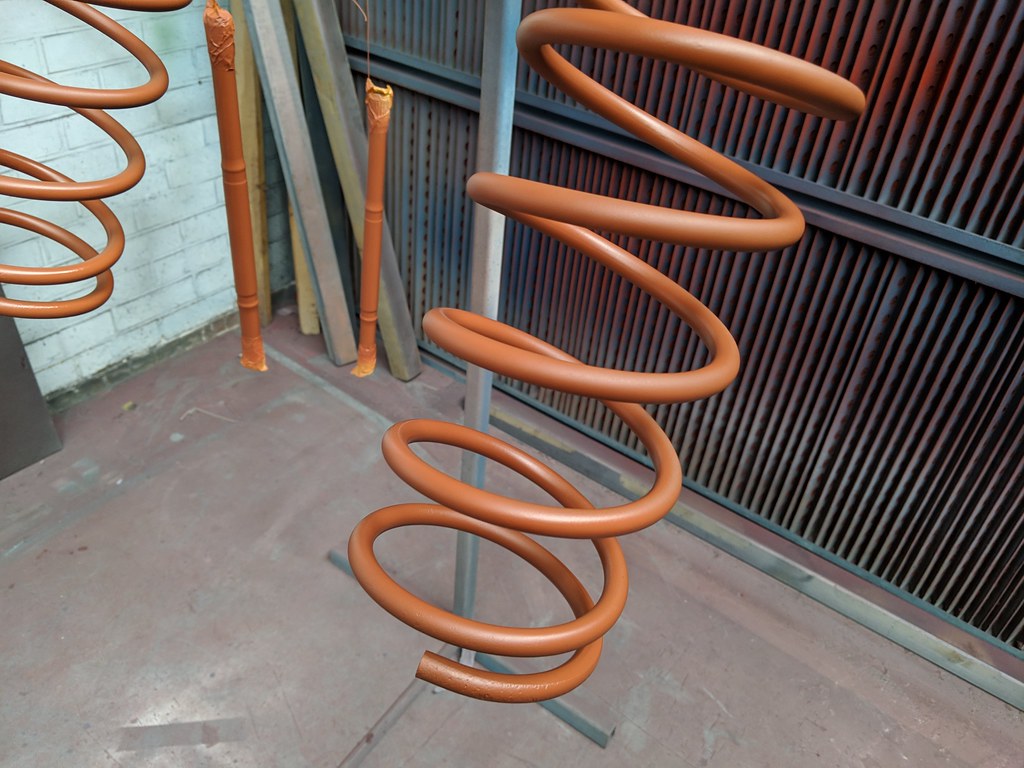
    Today was a holiday in Belgium so we had a day off from work. But I went anyway to get my parts sandblasted and put in anti corrosion primer (Corroless)

    I'm happy with the result, was able to give everything 2 layers. Still need to do the swaybars, rear trailing arms and rear subframe as I ran out of time.

    A couple of pictures


    Goddam. what a tedious work to sandblast a spring :p


    Very happy with the finish of the primer, it layed down nice and smooth


    Front struts, the right one is in pretty good shape. I'm guessing because of the oil that leaked out of the shock..

    Leave a comment:


  • D.Martijn
    replied
    Originally posted by jeenyus
    very nice! this is the most extensive preparation for a road trip I've ever seen.
    Thanks! Well, it was long overdue anyway so I prefer to have it all dailed before the roadtrip :)

    Leave a comment:


  • jeenyus
    replied
    very nice! this is the most extensive preparation for a road trip I've ever seen.

    Leave a comment:


  • D.Martijn
    replied
    On Sunday I went back to my work to use the steam pressure washer, to give the transmission & TC a clean. I got most of the dirt off of the housing, I'll go ahead and beadblast the housings as well, probably tomorrow.
    There's a holiday on Wednesday so I don't have to go to work, however. I'll probably go anyway to use the sandblaster and paint booth to finally start freshing up the trailing arms, strut housings etc..


    While I was at work, I milled the head off of the socket head screws that hold the vibration damper to the housing. I couldn't remove the bolts and they started to get stripped. Once the pressure was off by milling the head off, I was able to turn them out of the housing.


    I also used the press and removed the old ball joints from the LCAs

    Leave a comment:

Working...