

Cool, sounds straight forward enough!
Yes I agree, there's far too many variables for any one person or company to have a complete understanding of the issue. In fact, I ordered my ARPs from Andrew himself and talked with him about torque specs. He said the numbers ARP posted is pretty damn close, there was a variance of maybe 5lbs he would have suggested over ARP. But either way components should always be torqued and measured if possible. If I had to pick a culprit I would lean towards the fasteners. So who really knows! All I know is I wanted an engine that was completely gone through for the sake of reliability. It was wishful thinking on my behalf that I could just pop in coated bearings and ARPs and everything would be peachy. Cant complain at this point, fingers crossed, the engine should be phenomenal.
I appreciate your input and admire your build as well, very well sorted!
R3Z3N has already reached out to me and I have shot him some questions as well. I will try to post all of my questions here as well for all of R3V to see! I had my MSS54 tuned by TTFS so if Im not mistaken it should be plug and play ready to go.
That makes sense, wast sure about the resistor. Where would the three on the other side of the PWM controller go? I am just confused as to where the CAN controller comes in but I do need to take a look at Andrews wiring again anyway.
-
I plugged the vacuum rail where the booster line would connect since I have no booster. I think I still need to plug the intake manifold connection but I haven't done the final install on my manifold yet.
To clarify, the roundness of the rods was checked with the ARP bolts installed? I'd bet that was your problem. Andrew Lang tested the ARP bolts and found that the rod was out of round when tightened to their specified torque. Stock bolts did not exhibit this issue. I don't subscribe to the BE theory on the S65 rod bearings and I'd be hesitant to believe that 80% of rods with stock bolts are out of round to the point of needing machining. I certainly believe that the rods do experience some deformation over time, but I don't believe that BE or anyone else knows the factory tolerances to begin with. To accurately assess what's going on you'd have to measure an adequate sample of brand new rods, run them in an engine for an extensive period of time, and then remeasure.
While I appreciate the amount of effort BE has put into documenting the specs and measurements of the S65 bearings, his theory on clearances is still conjecture at this point. Only BMW has conducted any sort of controlled durability testing on their engines, and BE will never be able to replicate that. It will take years of collective data points for people to establish any sort of reliable trends with replacement bearings and or clearances. I don't mean to say that I think BE's findings are necessarily wrong, and I think many of his theories are reasonable, but at this point they are just theories. Sometimes people don't give the OE engineers enough credit on this sort of stuff, it's not like BMW just played 'pin the clearance on the bearing' and rolled with it. That's just not how things work.
That being said, it looks like you've done a nice job on the engine rebuild and I hope all goes well with it. I like seeing everyone's S54 builds, I need to start my own thread. I have lots of wiring work to do to clean everything up in the coming weeks.
BTW if you need any help with the DME stuff just get ahold of me or R3Z3N and we can help you out.
Also, with the fan I think you can remove the resistor and just run the PWM controller straight to the 2 wires on the fan motor.Leave a comment:
-
I wont be using a stock intake manifold, have one that has been modified to work with a booster. It appears the 944 will be small enough after a quick mock up, but we will see when the engine is at its final resting angle with the trans in.
So you ended up plugging any open vacuum holes then? Seems like that's my plan of attack and just keep the booster line with a one way valve and ditch the one going to the E46 ICV.
Well this is good news then! I haven't made a final decision on coolant tank but I do have the pill shaped one as I was leaning towards it aesthetically. Wouldnt be the first time it was used either.
Yes, after hearing that from the machinist I checked with my bearing supplier (BE bearings) and Achilles MS and they both claim the rods out of S54s/S65s are shit. BE who specialized in the S54/S65 rod bearing say they find 80% of the rods which have seen any sort of mileage are out of round. Just like you, I was skeptical because most E46 owners know the second they buy the car to install new rod bearings and typically that is done in car with no form of measurement. My oil clearance was around 0.003", so would I have been fine? Was it because of the ARP fasteners? Maybe, but thats not something that I wanted to risk.Leave a comment:
-
That booster is not going to clear the stock intake manifold. I ended up deleting the booster on mine so I didn't plumb any of those lines. I'm not sure exactly what the valve on the booster vacuum hose does. My thought was that it probably is used to regulate vacuum to the booster so that you have a constant pedal feel at all RPMs.
As for coolant bleeding, I have an e30 late model reservoir in the battery tray area and everything is plumbed just like the stock E46 M3. The only thing I don't have is the bleed screw on the radiator inlet side. I didn't seem to have a problem bleeding it just squeezing the hoses while the engine idled. Once the temp came up a bit I shut it down and opened the reservoir and it sucked in coolant. Just repeat that a couple times and you are probably fine. The nice thing about the standard 325i reservoir is that it is compatible with the E46 M3 coolant cap, so you can get higher coolant pressure.
You're saying the rods were out of round on a stock S54 with ~80k miles? Consider me skeptical. There should be no need to rebuild the whole engine at that mileage. Vanos and rod bearing replacement are standard procedures but other than that the engines are pretty bulletproof. What prompted you to check the bottom end specs and who did the measurements?Last edited by R3VM3UP; 12-13-2018, 06:36 AM.Leave a comment:
-
Here are some things I need help with:
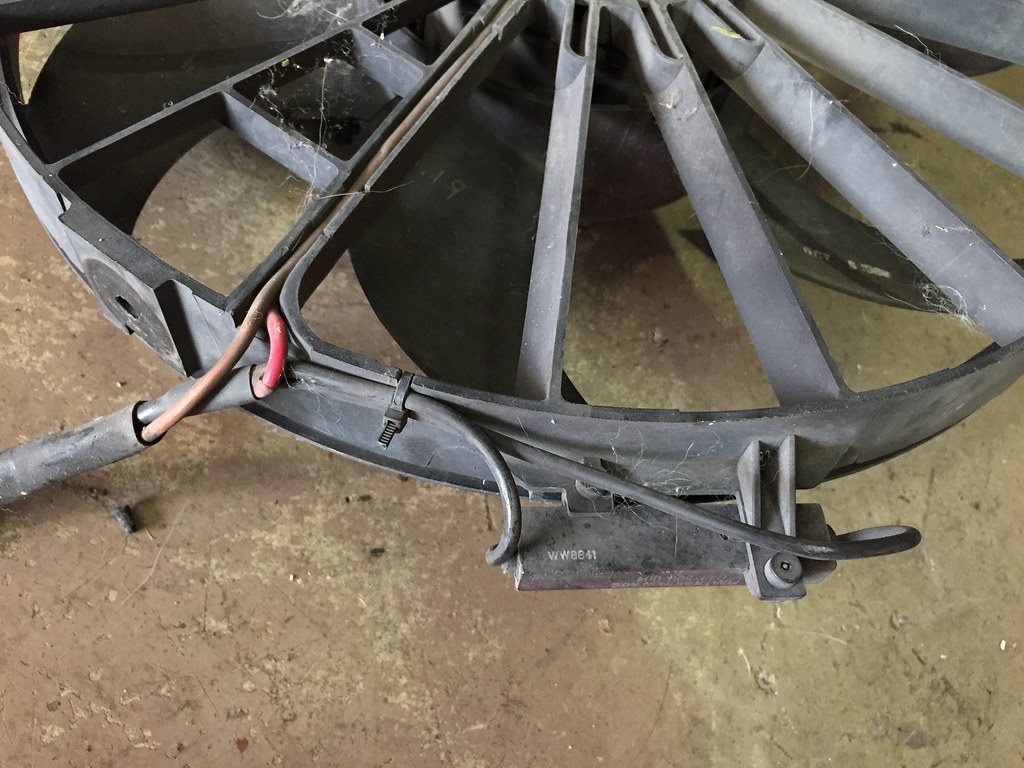
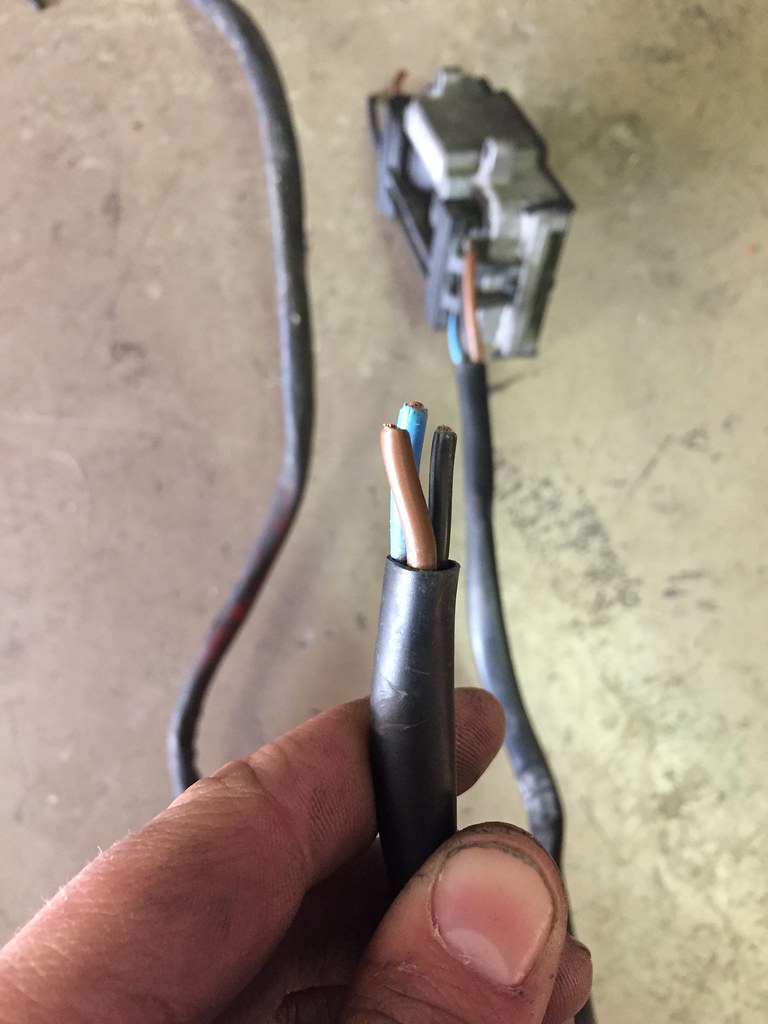
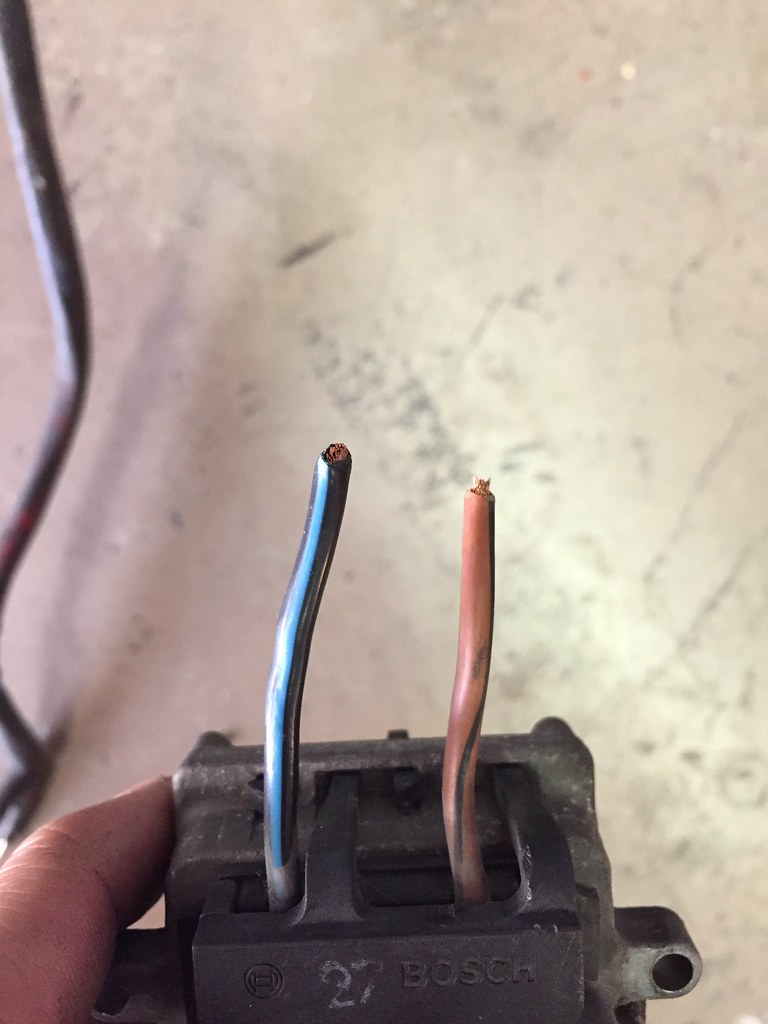
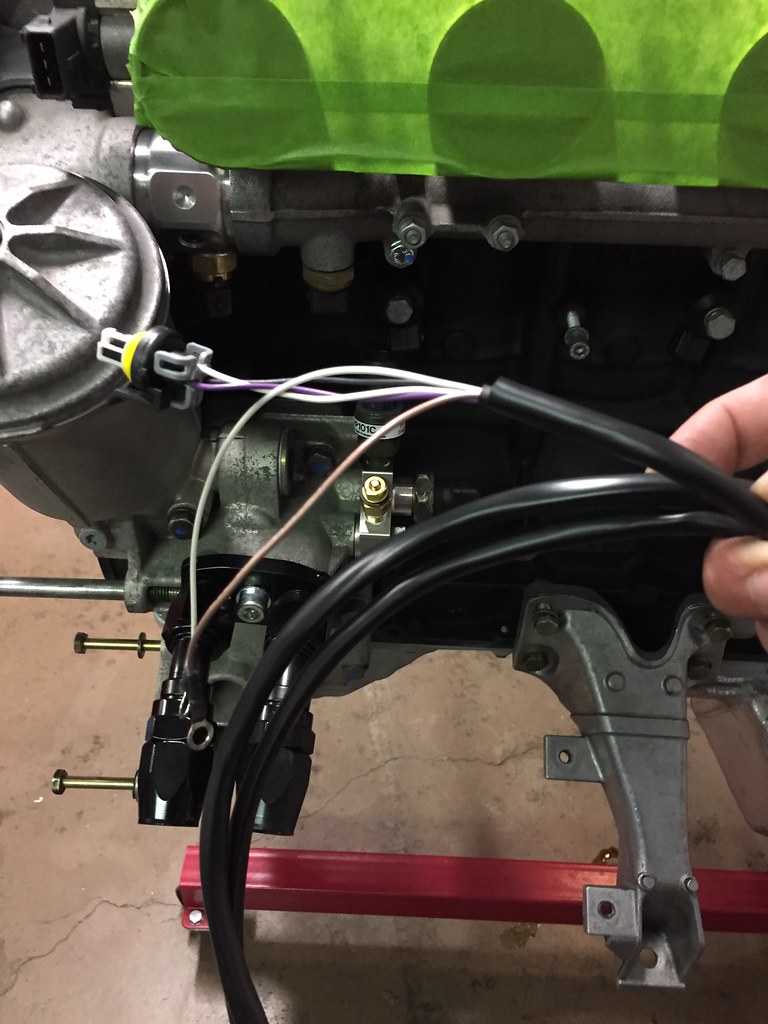
1) Those with S/M54 swaps or anyone running a PWM fan module how did you do the wiring? I would like to use the original E30 fan as it fits well over the A/C condenser. Here are pics for what would need to be wired.
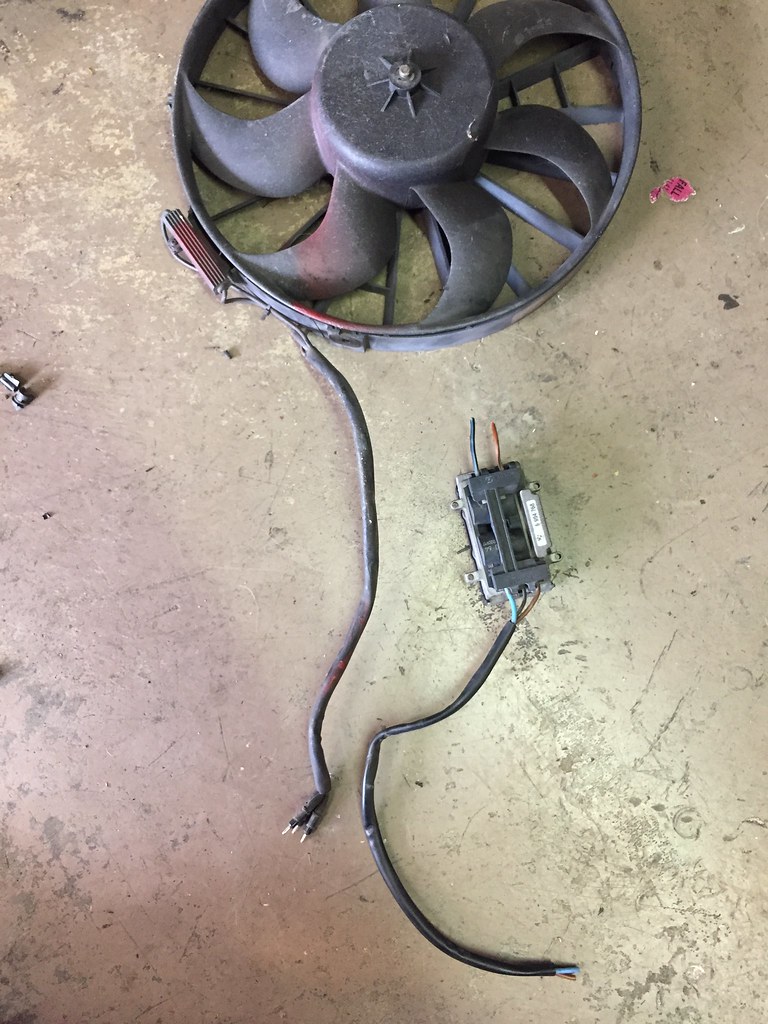 Untitled by Evan Nessim, on Flickr
 Untitled by Evan Nessim, on Flickr
 Untitled by Evan Nessim, on Flickr
 Untitled by Evan Nessim, on Flickr
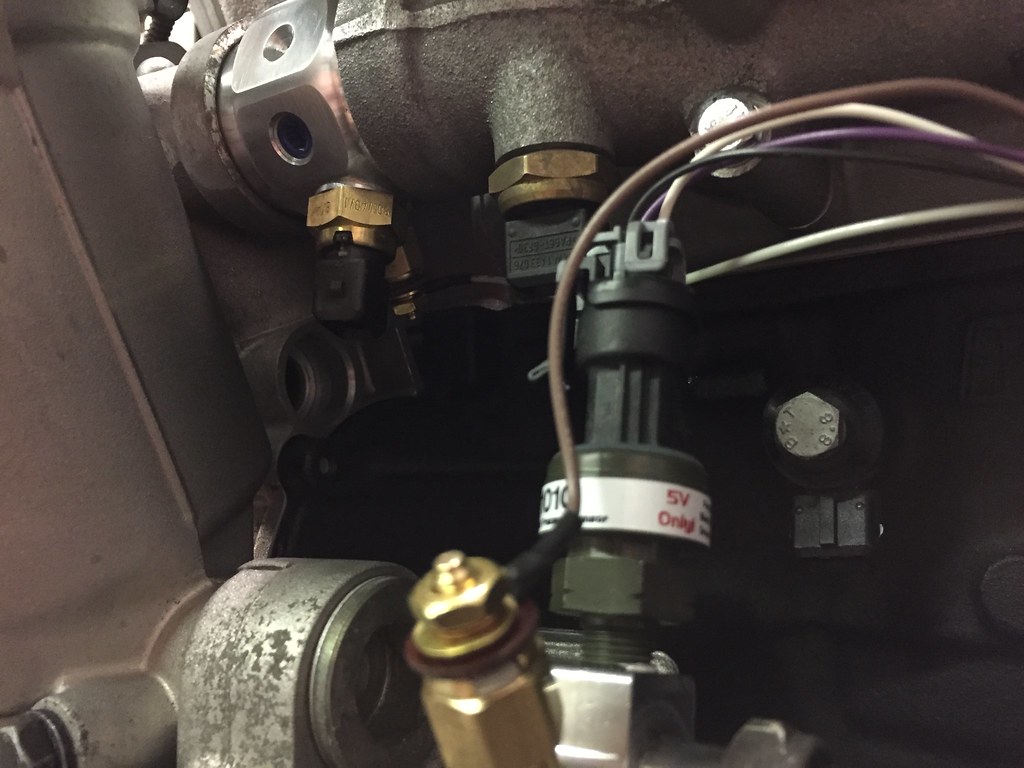
2) Similar to #1, using Andrew's CAN controller am I able to run a puller fan as well as have it control the E30 AUX fan? Again, what would the wiring consist of?
*Ill be upfront here, I dont really know half of what this CAN controller does or how it works but seems like I needed it for the AUX fan and A/C driveability. I would love to take full advantage of it though*
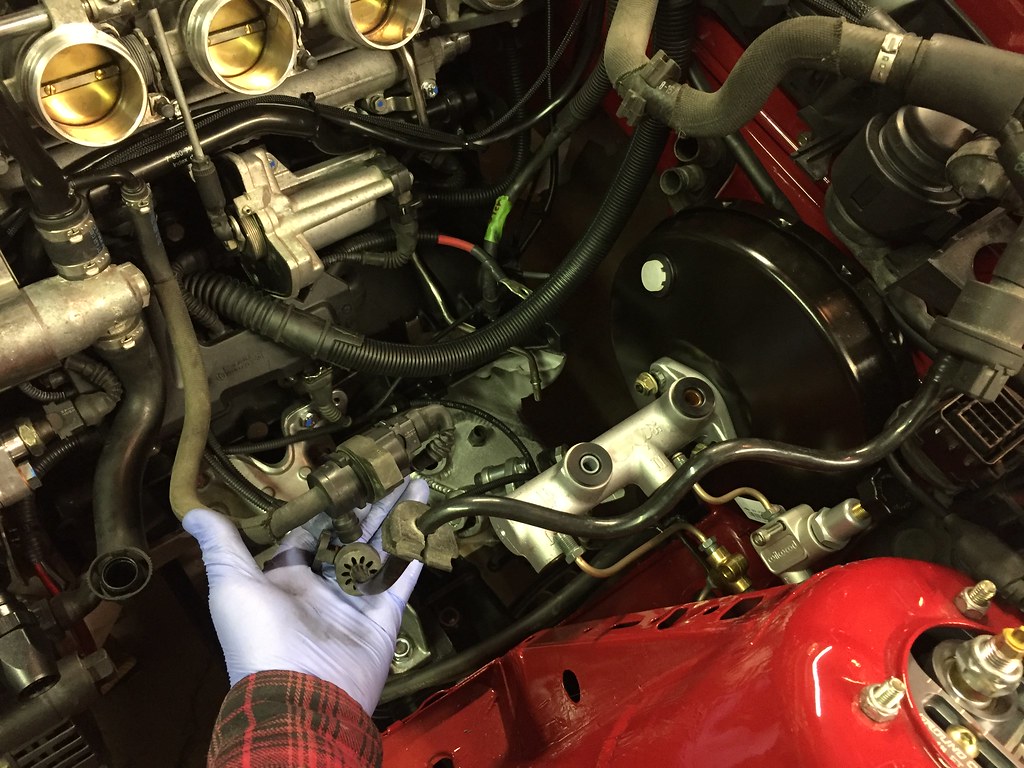
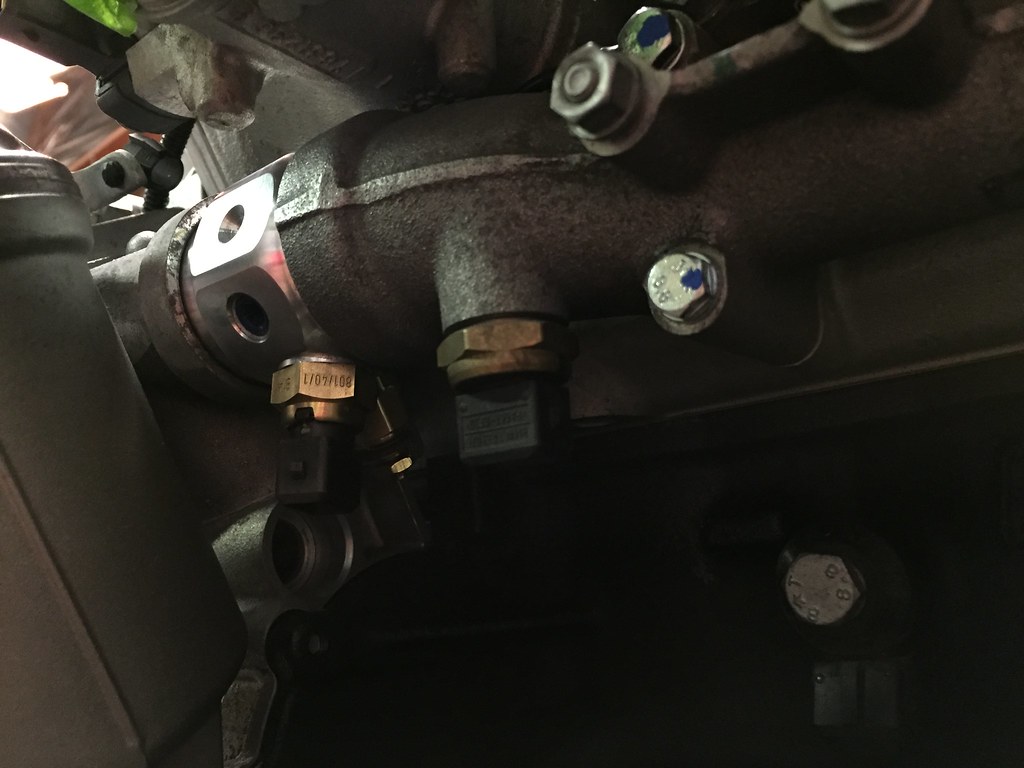
3) What is up with the E46 brake booster vaccum hose? Looks like it has two electronic valves and a line that goes to the ICV. Do I just make my own line from the vacuum rail to the brake booster and then plug the ICV line and forget about the sensors to the valves for that line?
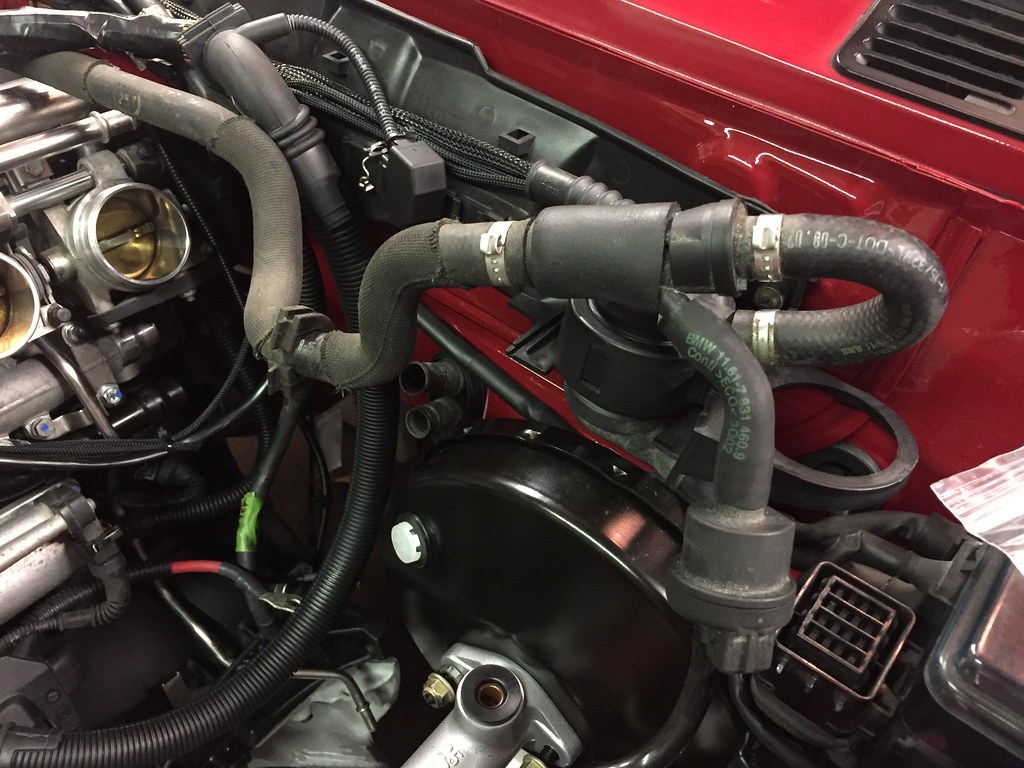 Untitled by Evan Nessim, on Flickr
 Untitled by Evan Nessim, on Flickr
4) Those with 24V swaps, using the E30M or pill style overflow how do you bleed your coolant? The M20 had a bleed screw on the thermostat, the E46 had a bleed screw on the top radiator line, but with the way my system is going to be put together there will be no bleed screw.
These are just a few off the top of my head, Im sure there will be more and appreciate any feedback and help!Leave a comment:
-
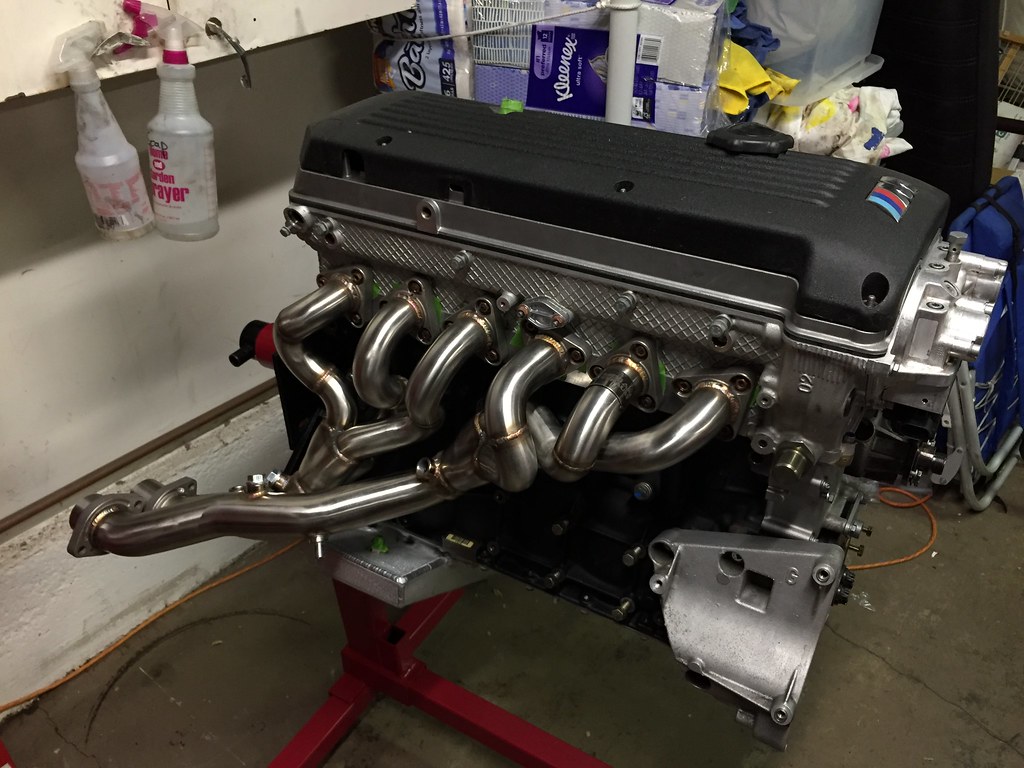
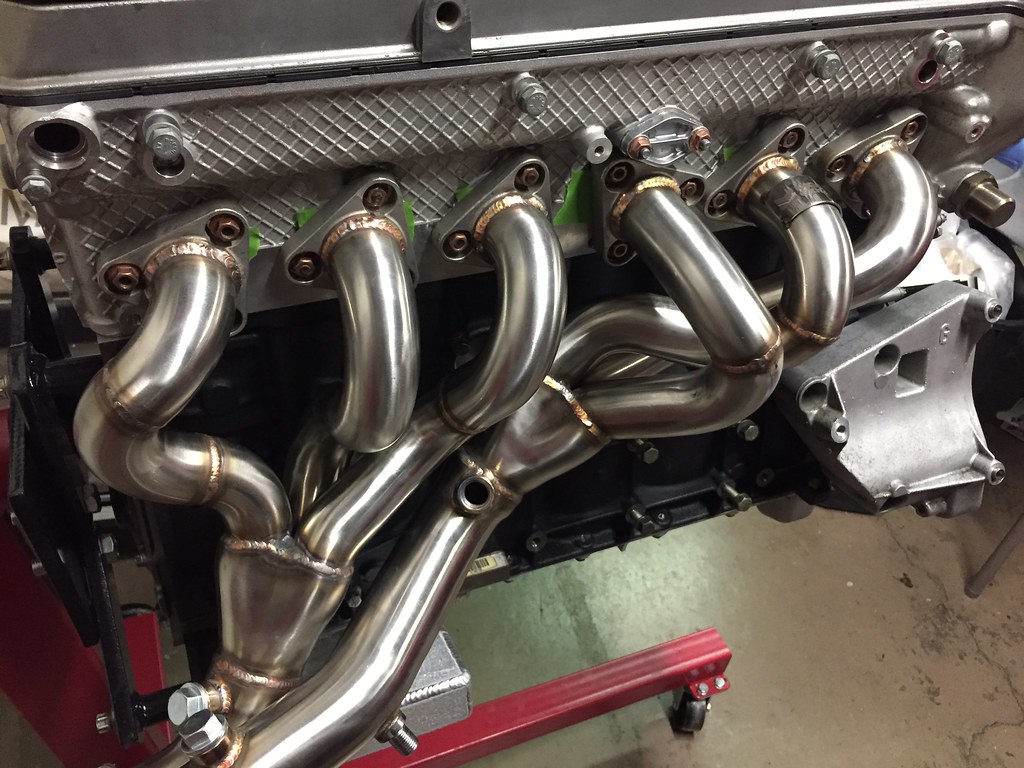
Test fit the the Megan headers I ordered off Ebay, lined up just fine on the head. Not to shabby for $300.
 Untitled by Evan Nessim, on Flickr
 Untitled by Evan Nessim, on Flickr
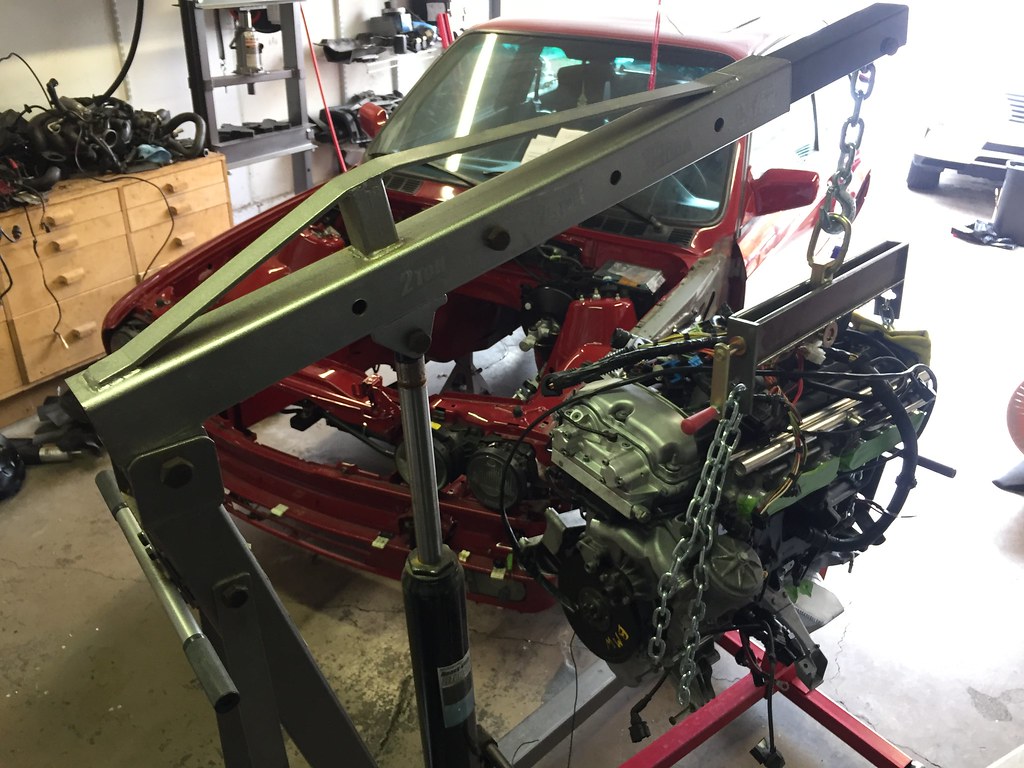
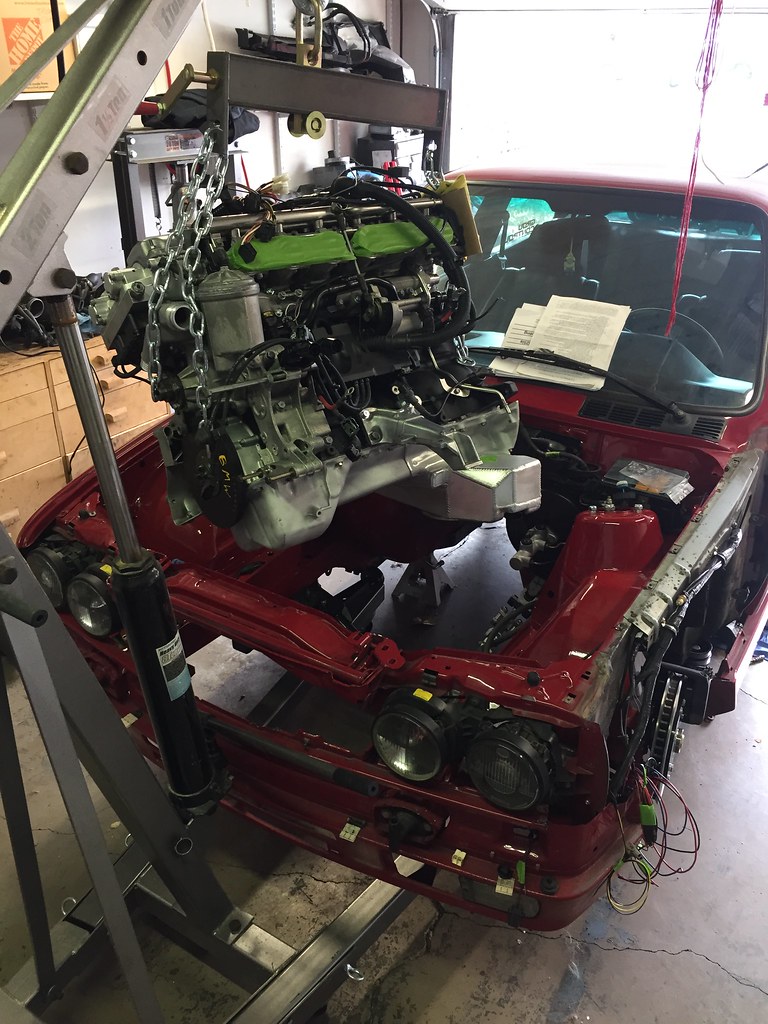
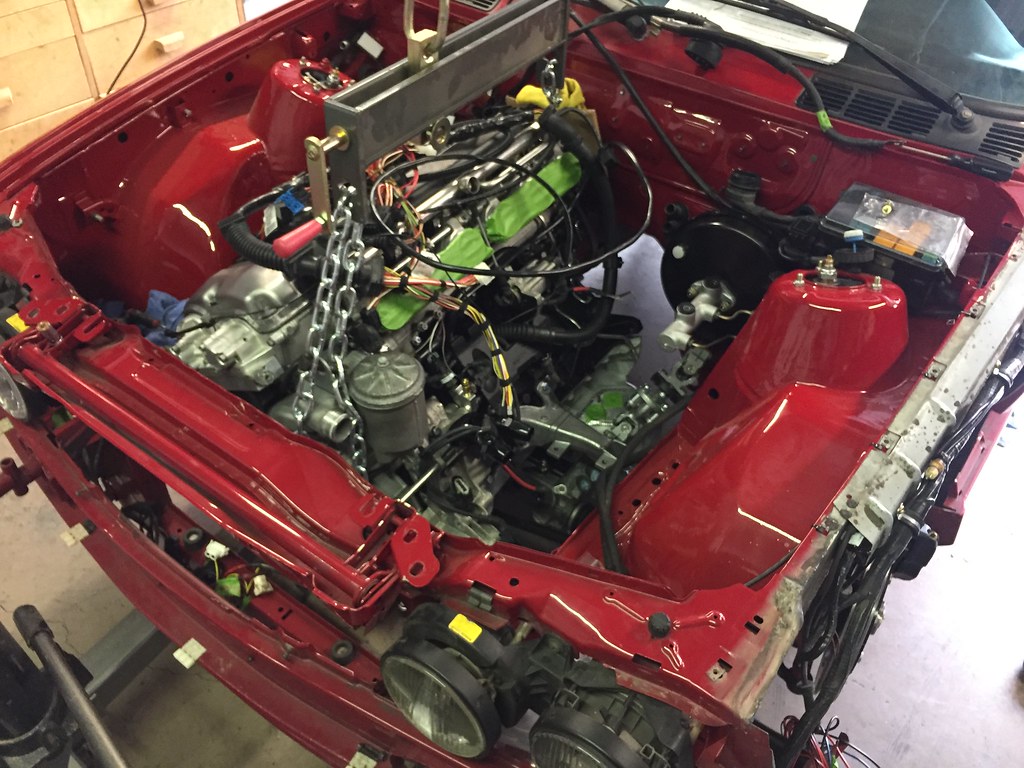
Last Sunday I had everything buttoned up on the motor. A friend came by to help me guide it in. Felt like Id never see the day!
 Untitled by Evan Nessim, on Flickr
 Untitled by Evan Nessim, on Flickr
 Untitled by Evan Nessim, on Flickr
 Untitled by Evan Nessim, on Flickr
And shes in! That's where I stand as of now. Onto wiring and pluming where I know I am going to have lots of questions, and already do.Leave a comment:
-
The bridge rests flat on the sides of the head and then the pin should be able to slide though a hole in the cam with either side of the bridge picking up less than 0.5mm. If the cam is off timing the hole, and therefor pin, would be at an angle resulting the the bridge lifting.Leave a comment:
-
Its been a while, but thats because Ive been working on the car! :)
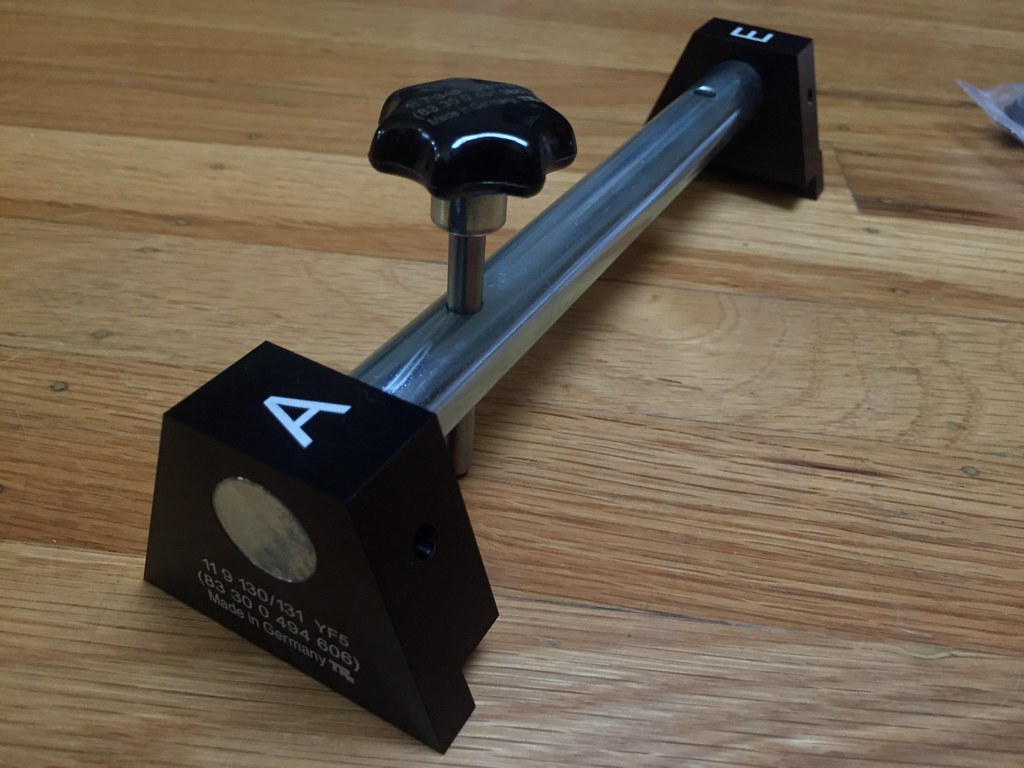
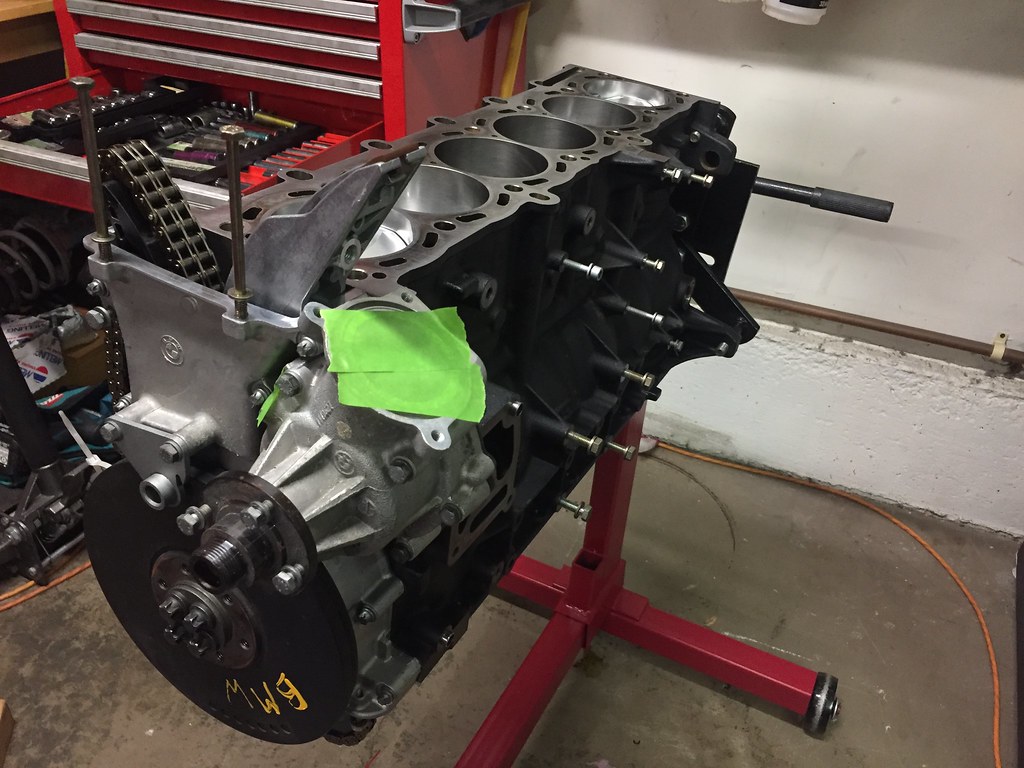
So, the Beisan was right. I ordered the OEM BMW cam timing bridge and the timing was indeed off. He said to follow his write up completely mentioning that there is no "special tooth" when it comes to inserting the pistons. Even then, the timing still wasnt within spec of less than 0.5mm gap. He said to offset the cams so the tool had the same gap but on the other side of the tool before tightening everything down. After following his directions and turning the crank over a couple times the cam locking pin slid right in without resistance and there was no gap on the bridge!
Here are pictures of the tool with P/N and how it lined up because of the generic timing bridge.
 Untitled by Evan Nessim, on Flickr
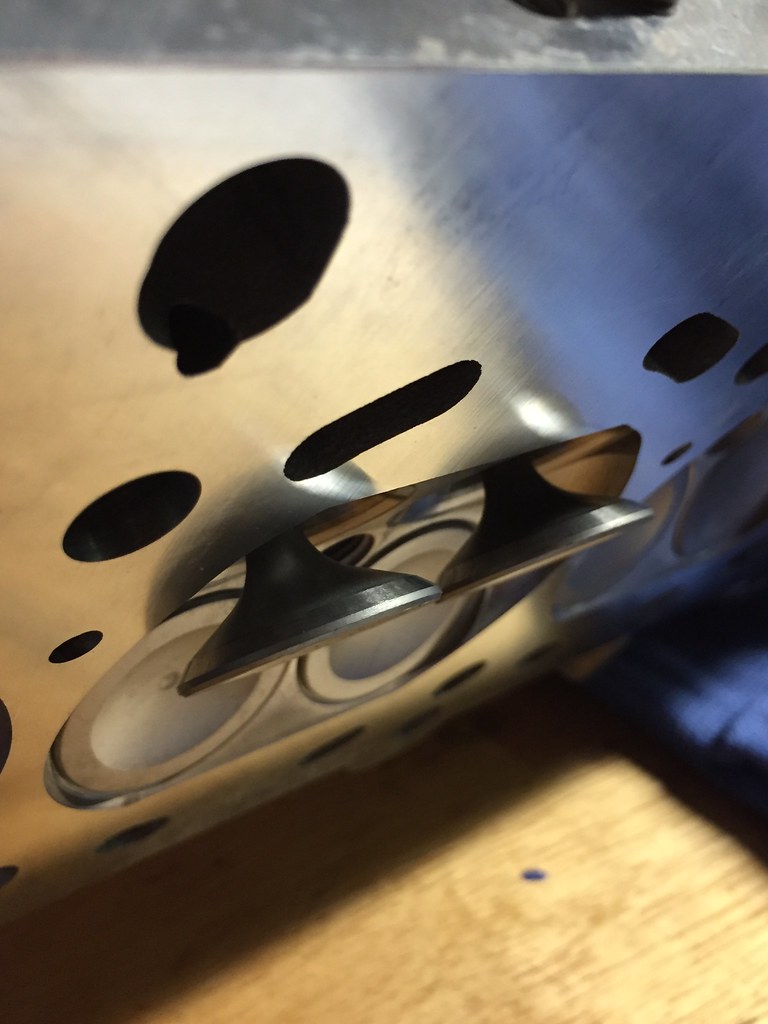
Intake cam gap:
 Untitled by Evan Nessim, on Flickr
Exhaust cam gap:
 Untitled by Evan Nessim, on Flickr
This is what I ended up with on both sides, nice and flush:
 Untitled by Evan Nessim, on Flickr
With the timing finally set it was back to the mission ahead! Full steam!
 Untitled by Evan Nessim, on Flickr
 Untitled by Evan Nessim, on Flickr
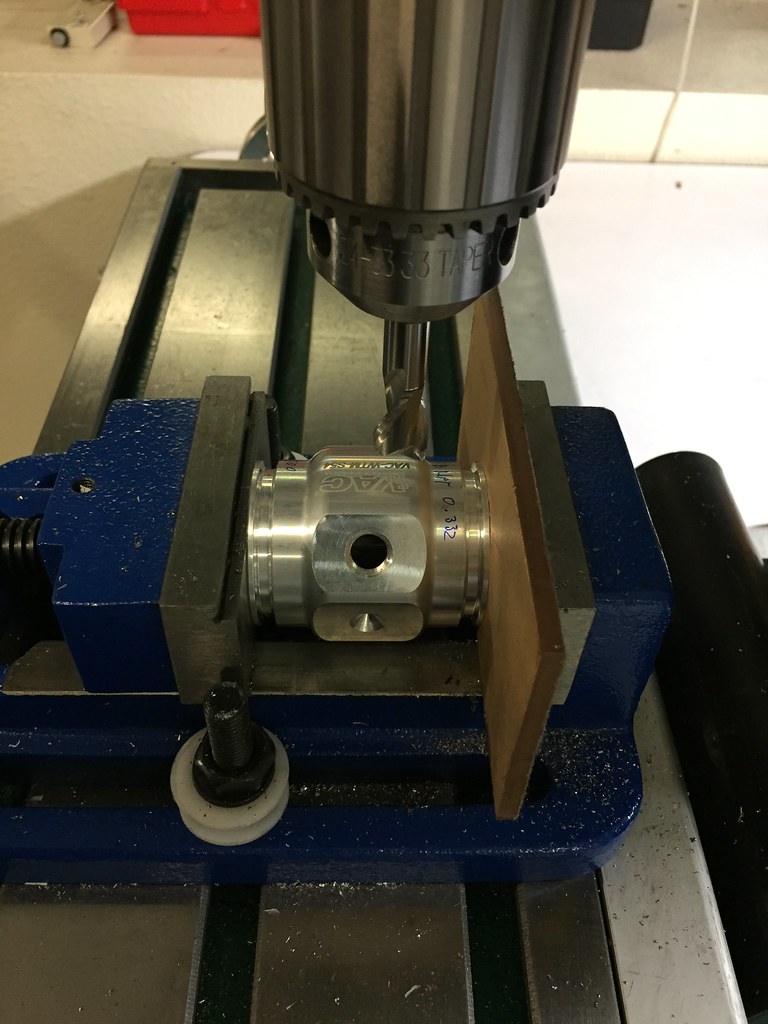
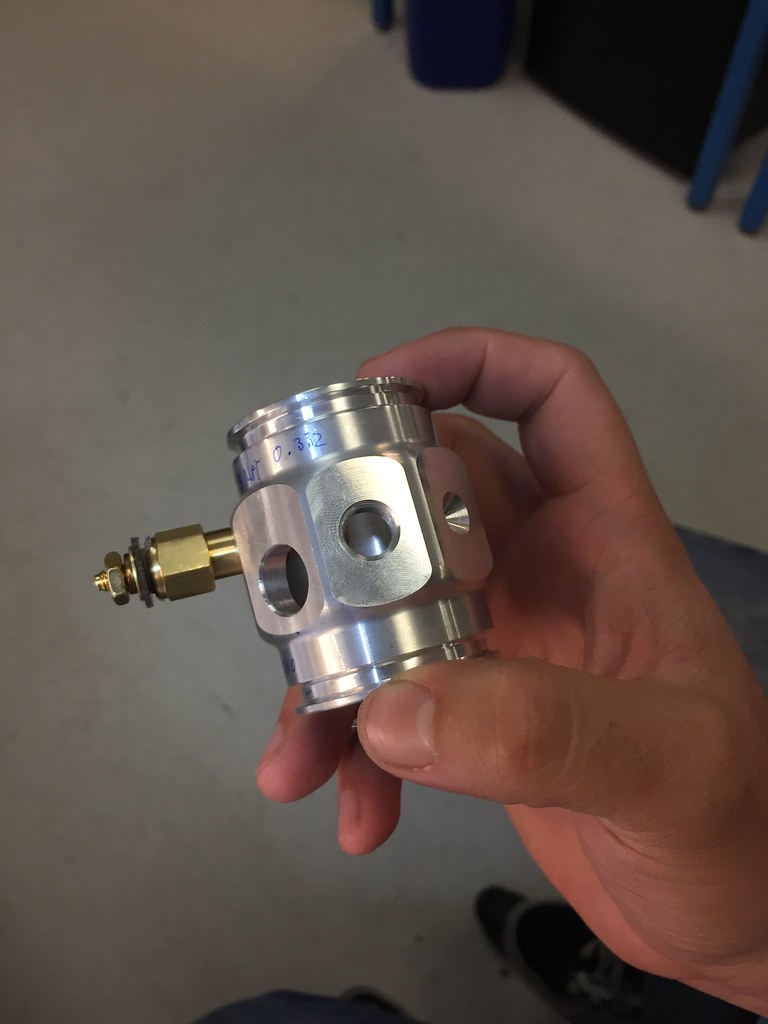
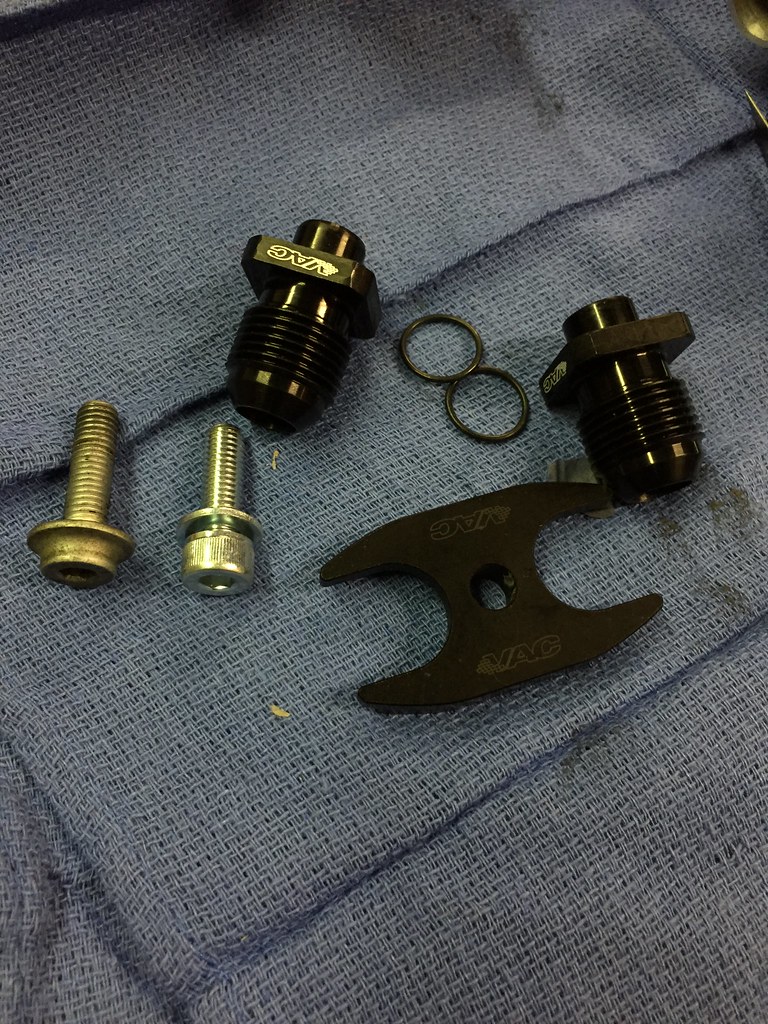
Had to modify VACs expensive for being not well thought out coolant sensor pipe. They "designed" it for two sensors but if I did end up tapping the second hole the two sensors would have collided since they were not offset... Had to mill two new flats and tap two offset holes. There was also no way this piece would have a reliable ground so I tapped it for a small bolt and ground wire. This is what I ended up with, aluminum swiss cheese.
 Untitled by Evan Nessim, on Flickr
 Untitled by Evan Nessim, on Flickr
 Untitled by Evan Nessim, on Flickr
 Untitled by Evan Nessim, on Flickr
 Untitled by Evan Nessim, on Flickr
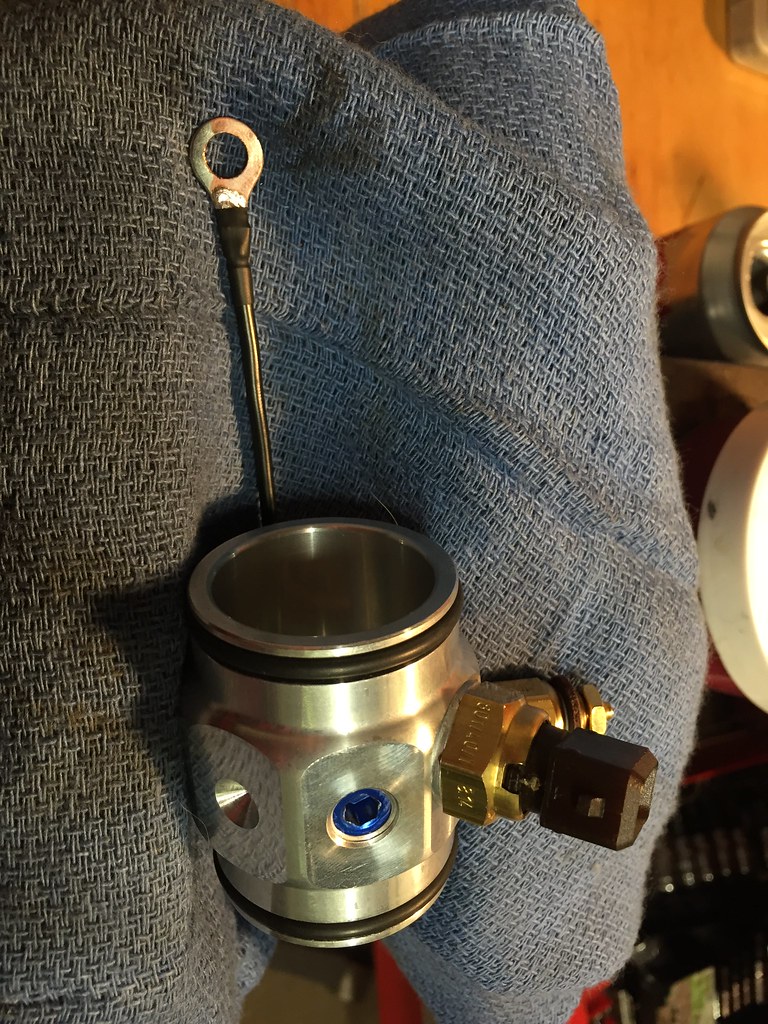
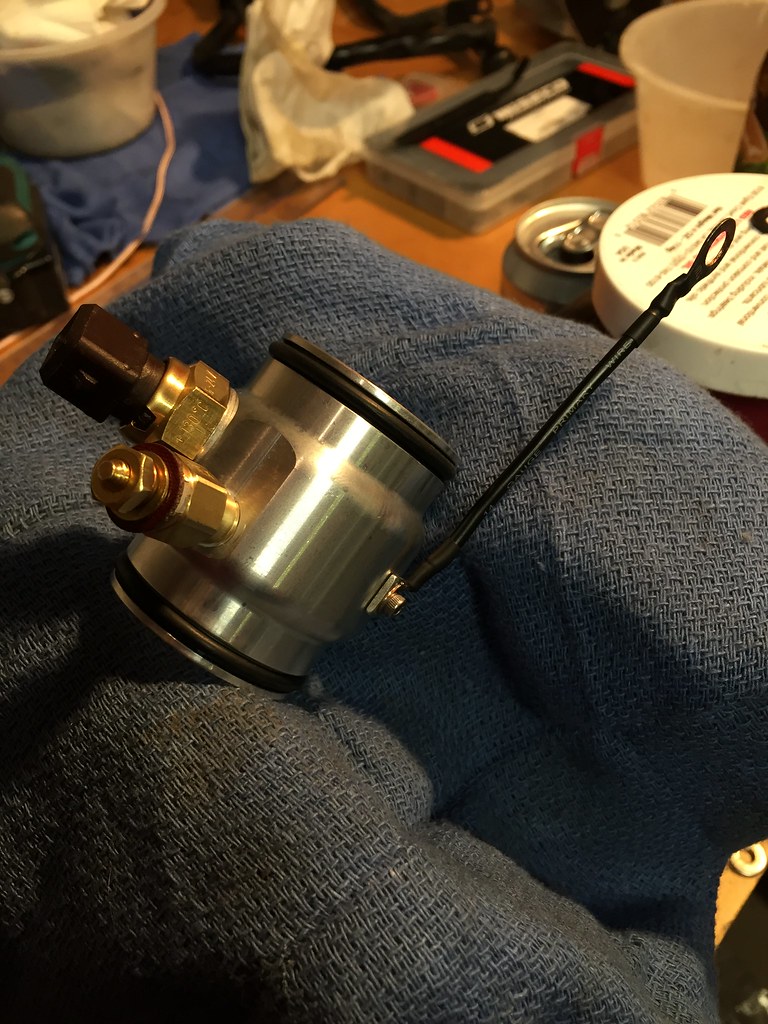
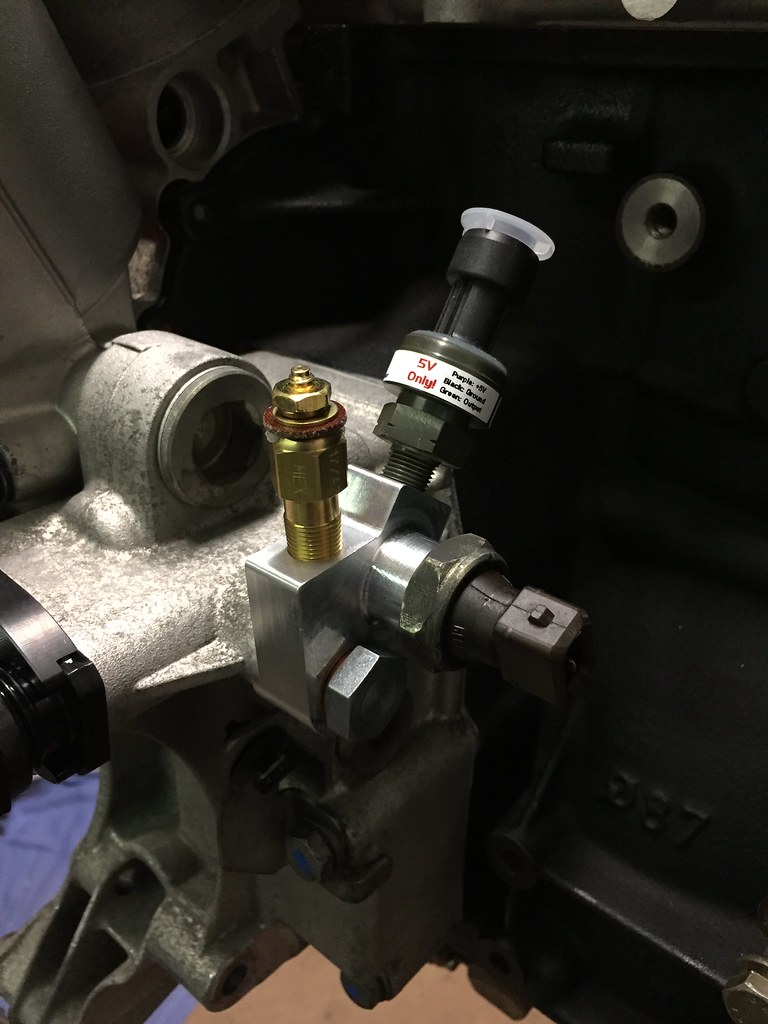
And here is my little nest of sensors: E30 Water Temp, Gauge Water Temp, E46 Water Temp in stock location, Oil Pressure and Temp for Gauge, and stock E46 Oil Temp. The coolant pipe ground is connected to the head of one of the larger coolant pipe bolts.
 Untitled by Evan Nessim, on Flickr
 Untitled by Evan Nessim, on Flickr
More to come later tonight! Need to get back to work
Leave a comment:
-
Shoot thanks econti, but if it wasn't for R3v I wouldn't know a fraction of the information I know now!
Time to bring this thread up to speed.
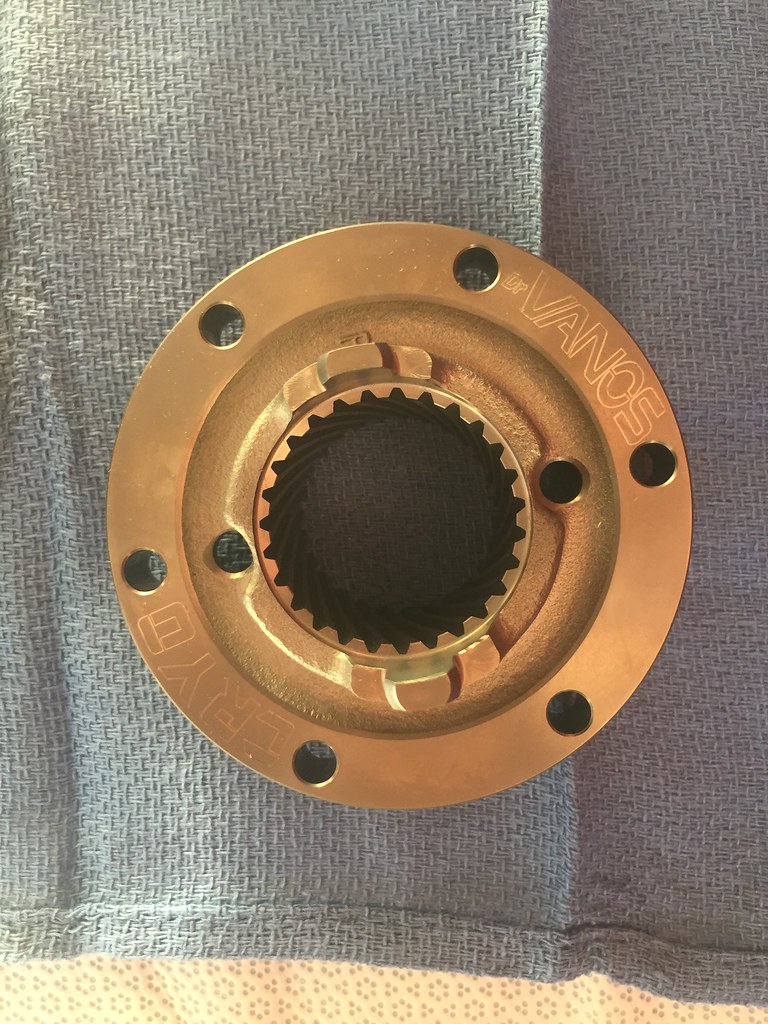
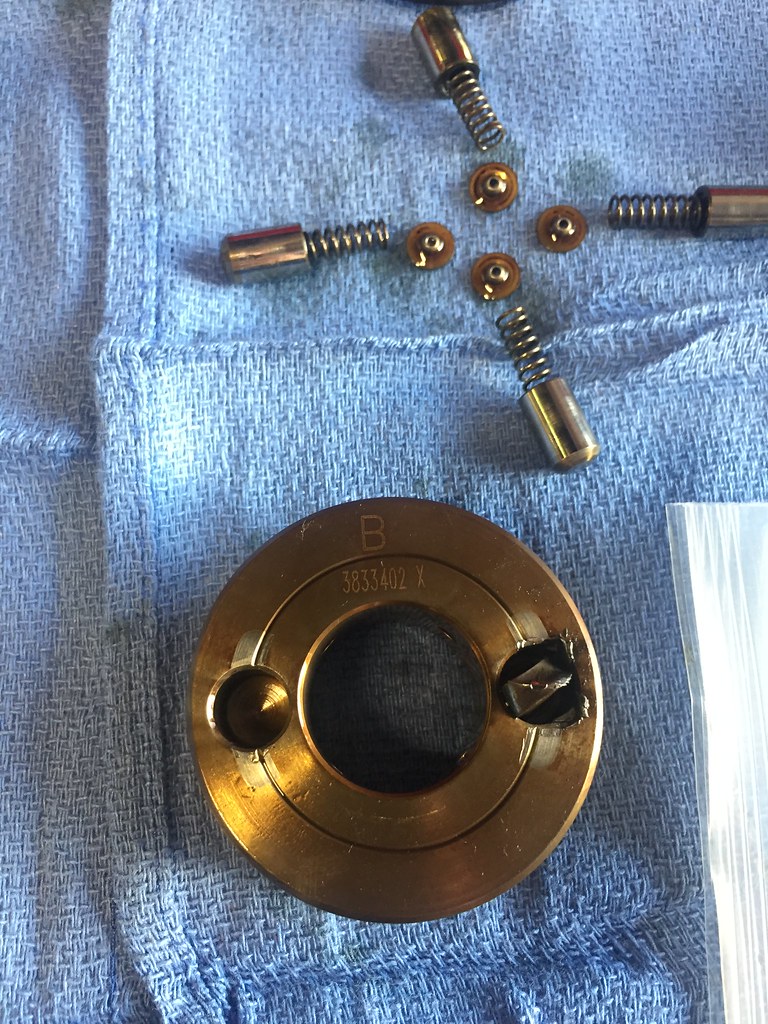
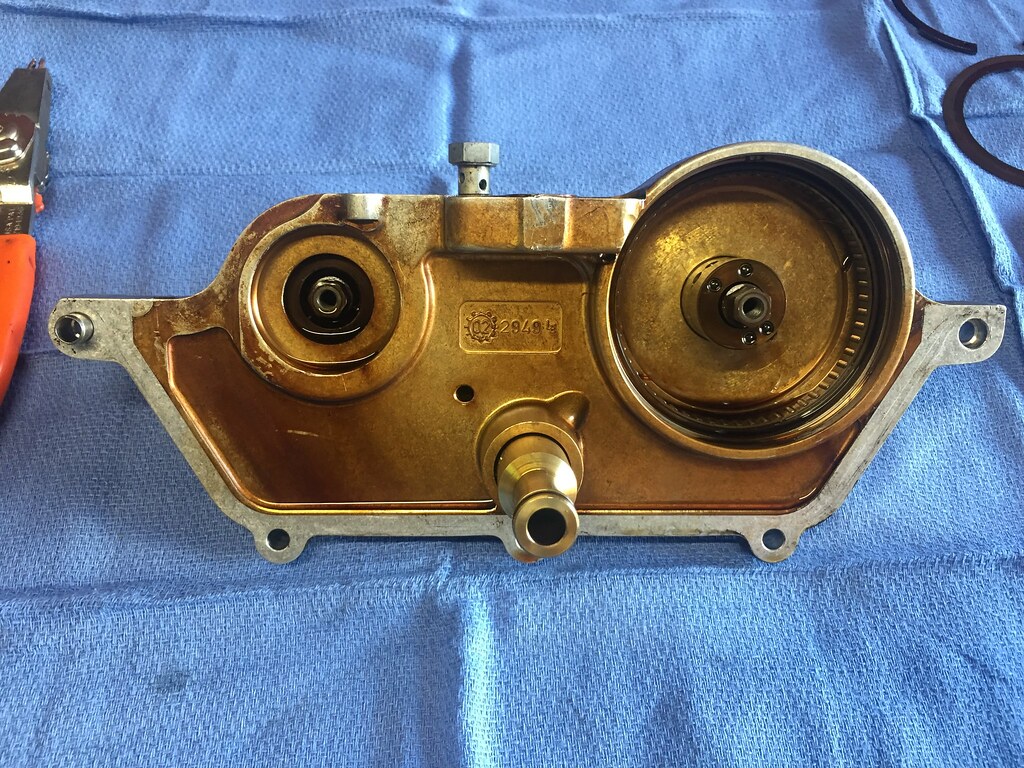
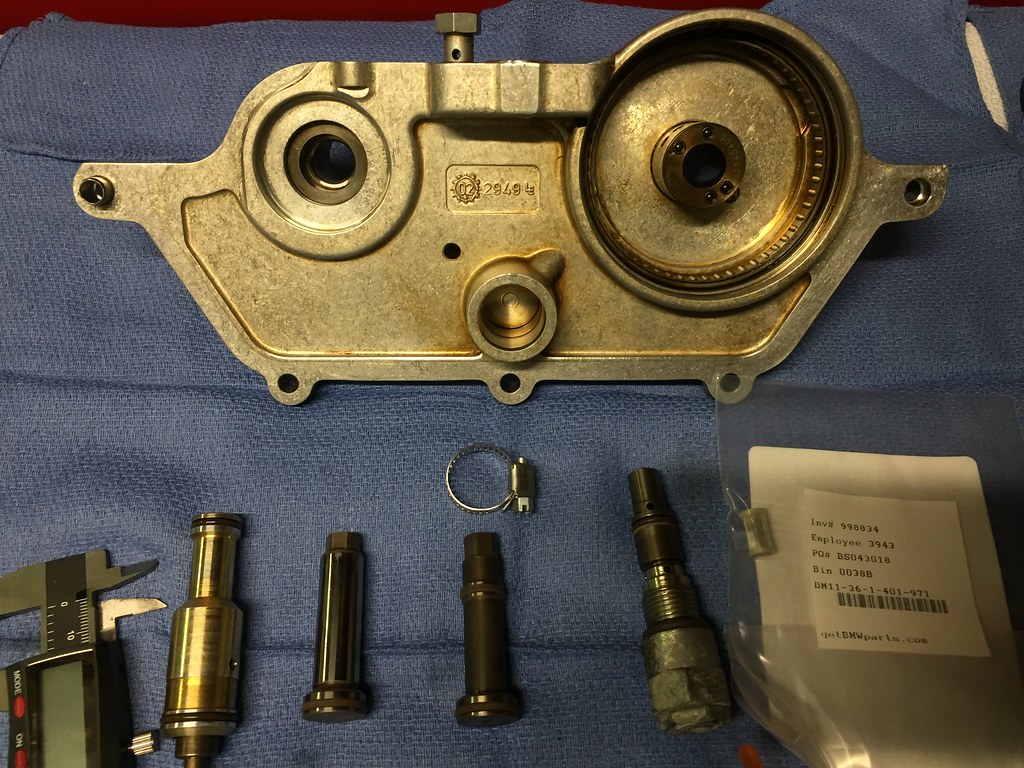
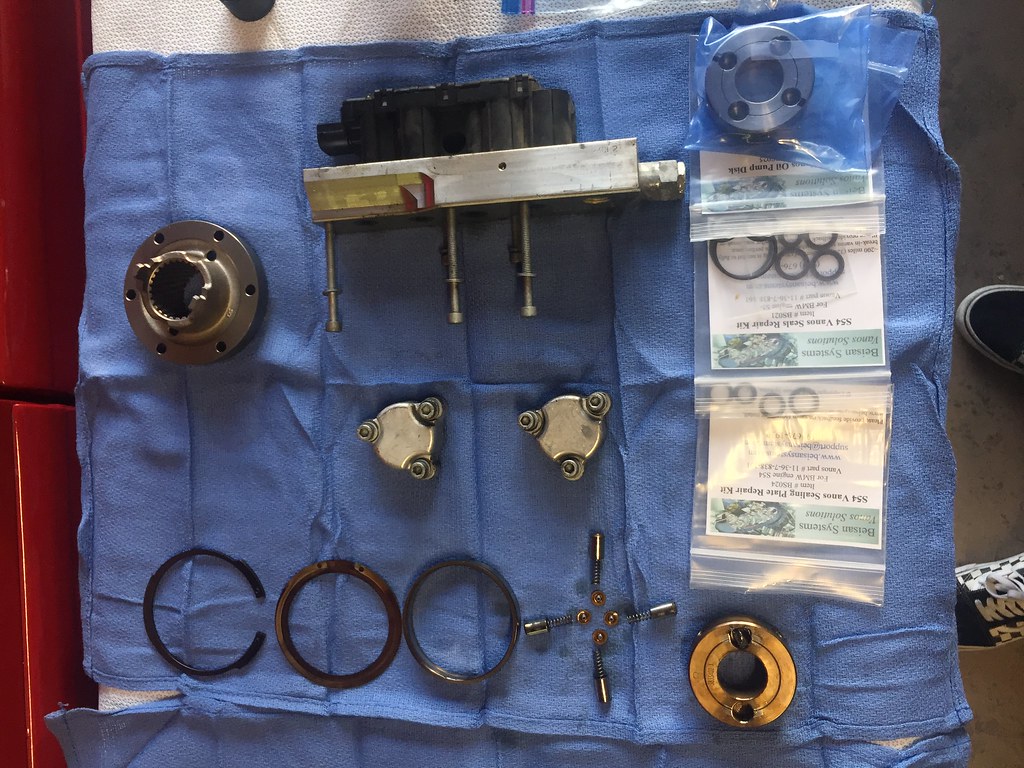
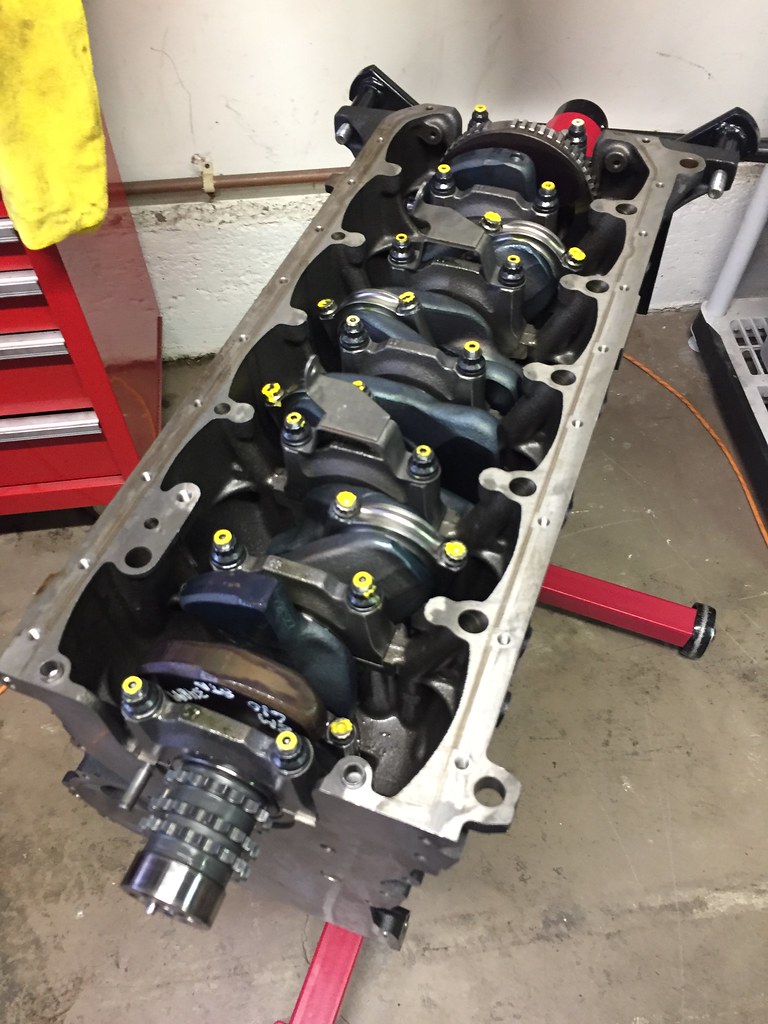
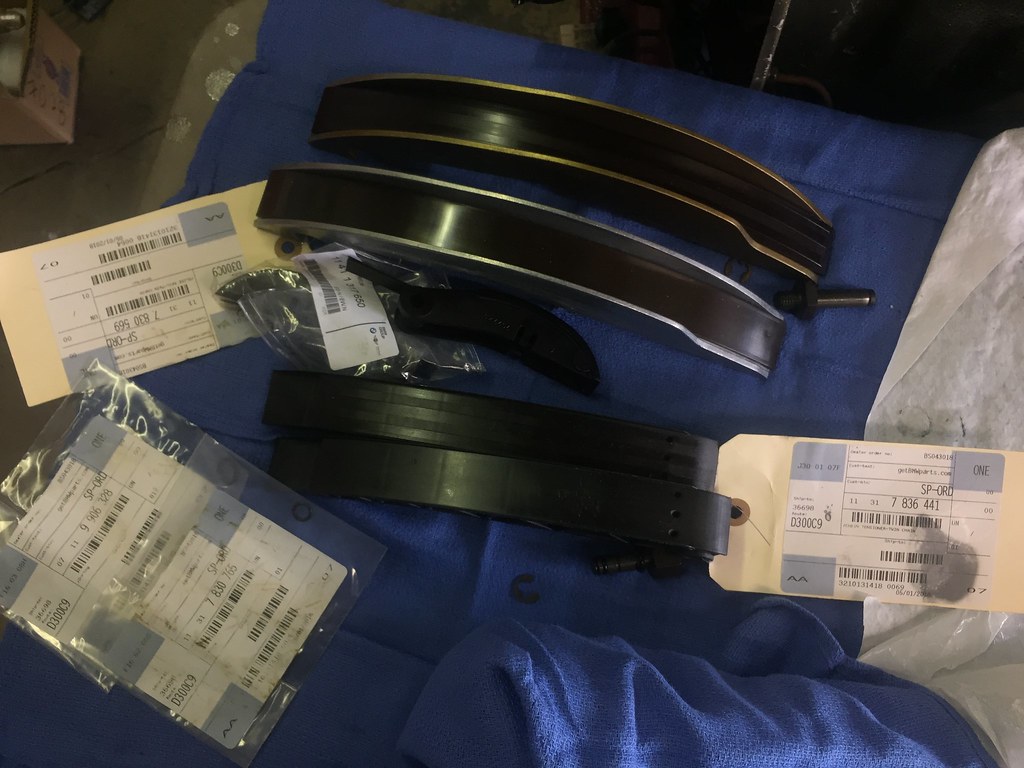
While waiting on the machine shop I worked the vanos. Used the Dr. V Cryo treated exhaust hub to replace mine with the broken tab and Beisan seal kits and oil pump disk.
 The Build by Evan Nessim, on Flickr
 The Build by Evan Nessim, on Flickr
 The Build by Evan Nessim, on Flickr
 The Build by Evan Nessim, on Flickr
 The Build by Evan Nessim, on Flickr
 The Build by Evan Nessim, on Flickr
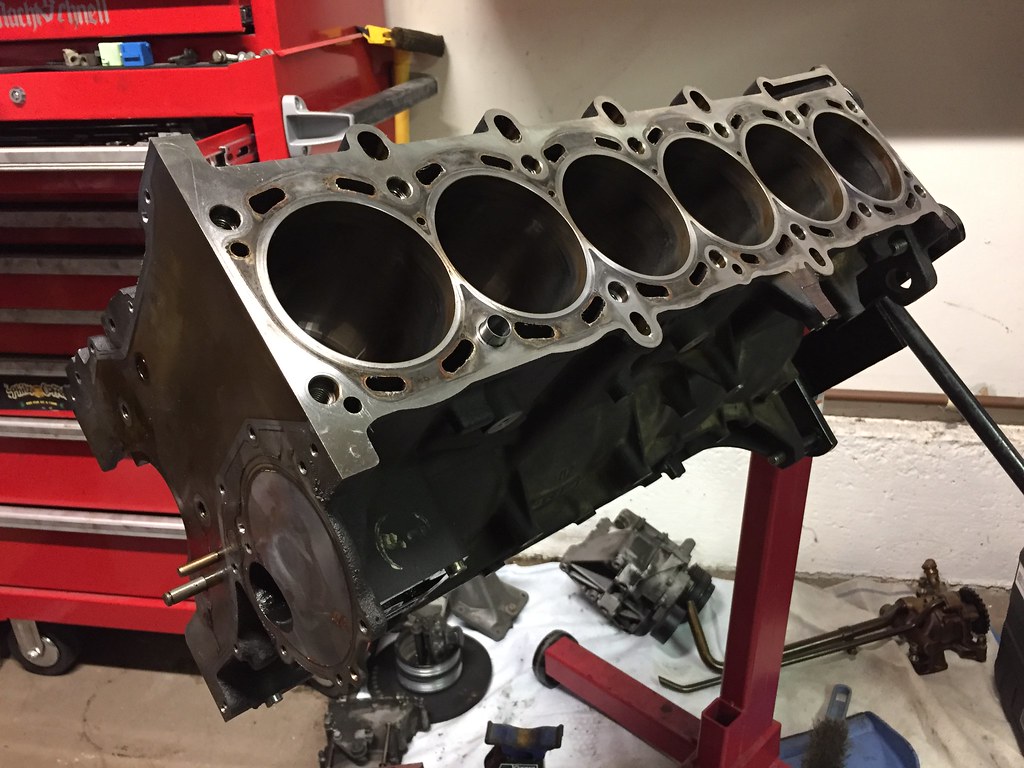
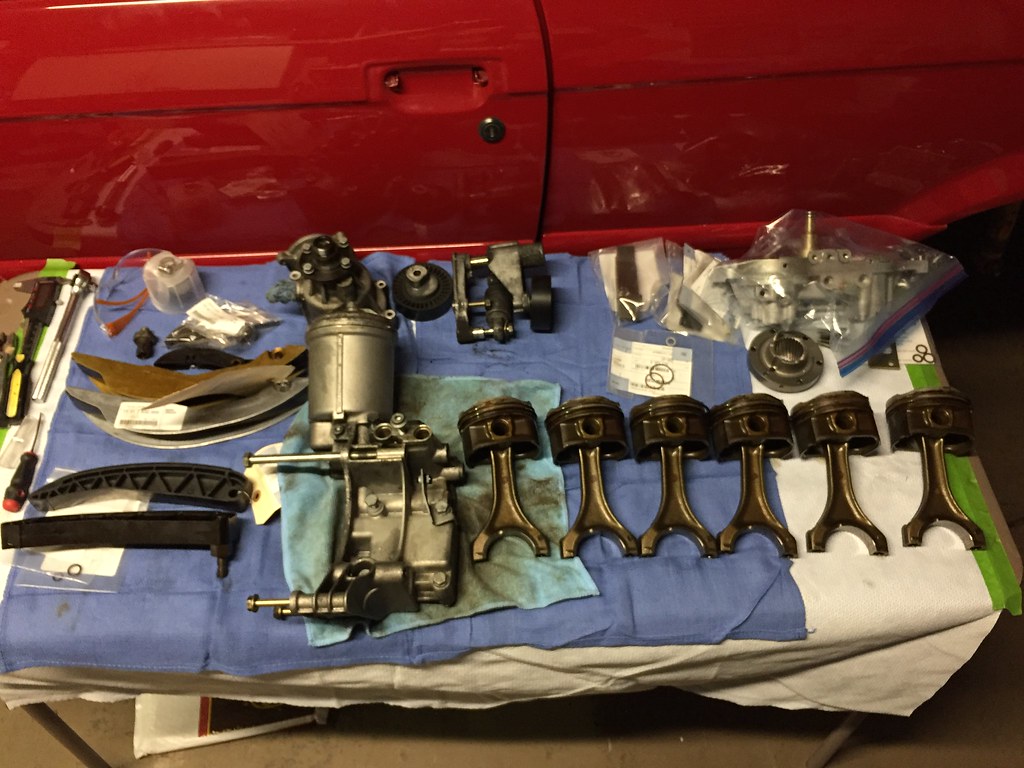
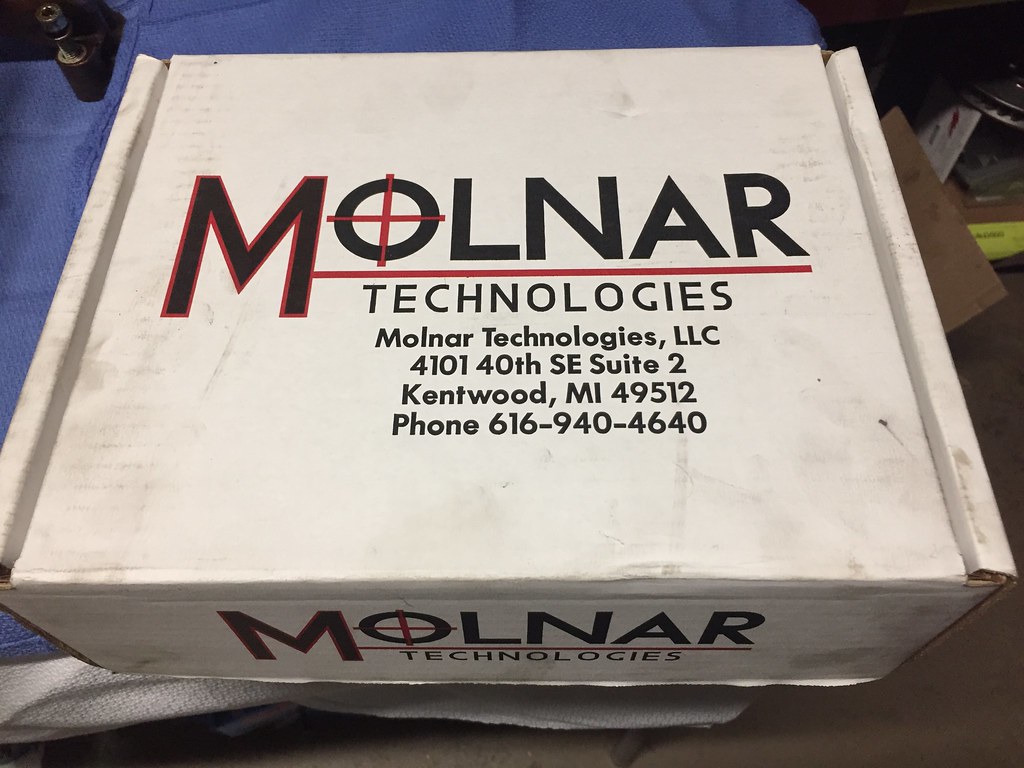
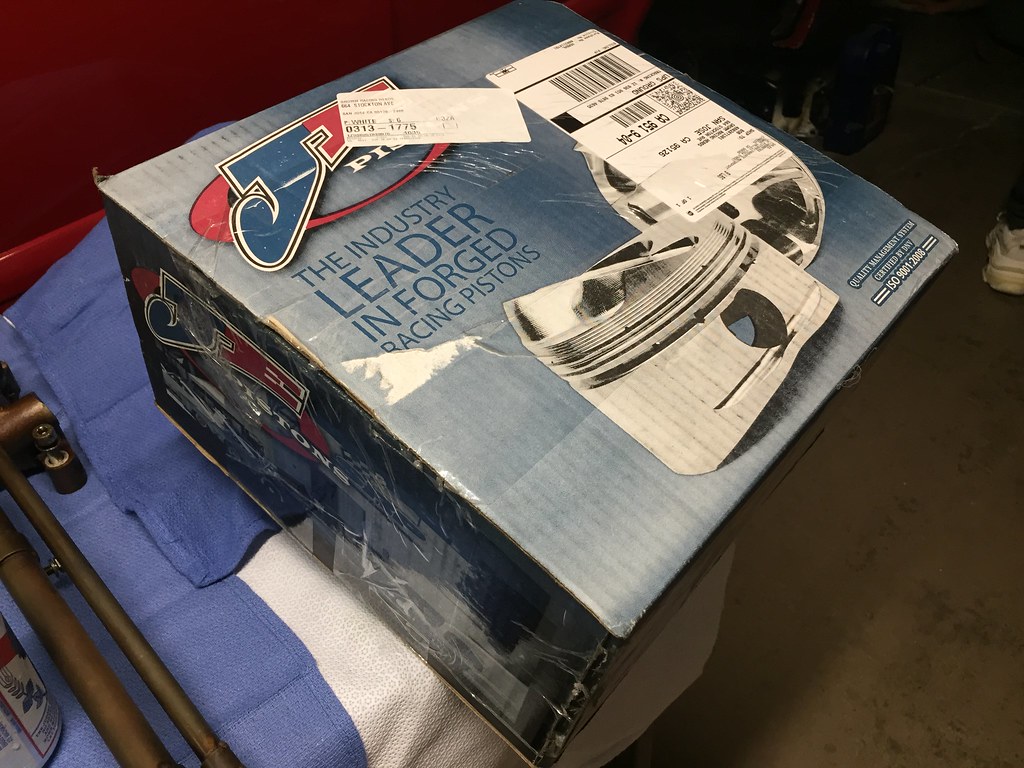
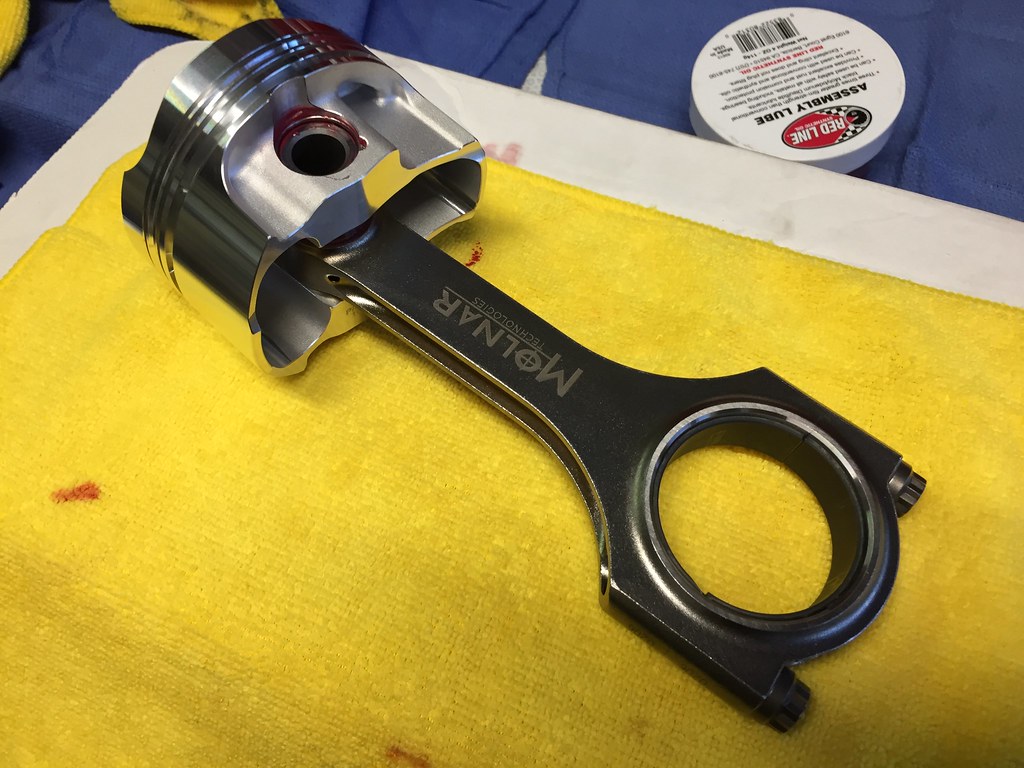
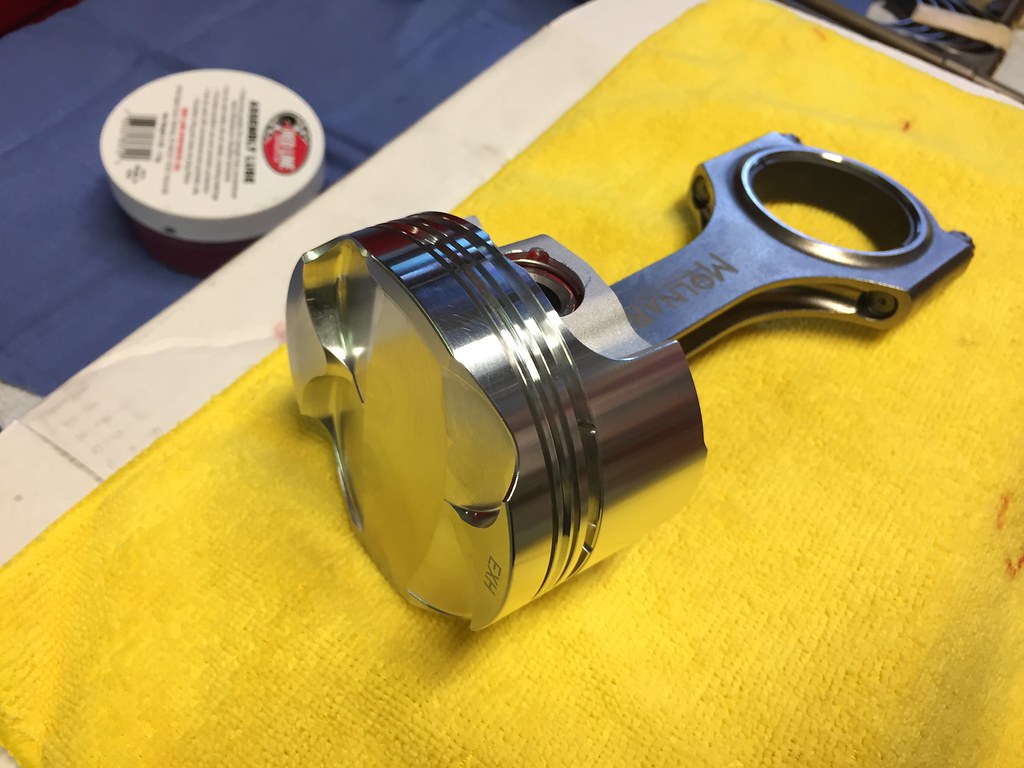
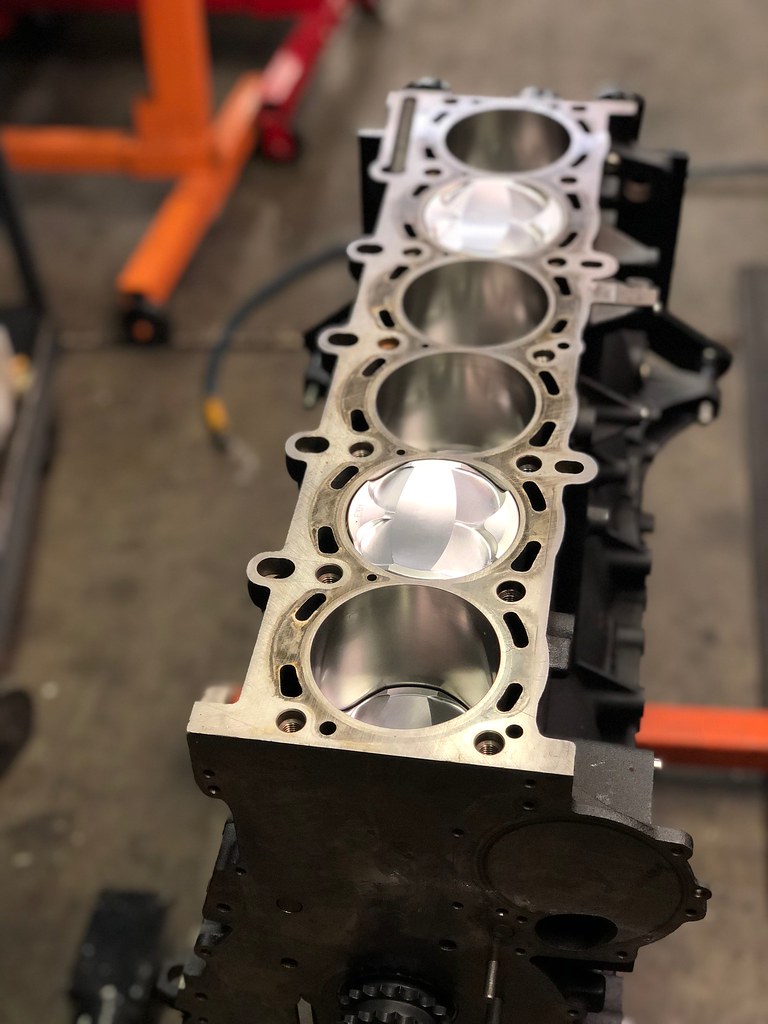
Engine stripped down and off to the machine shop! The rods were out of round so I needed new rods. I was recommended Molnar rods by a local (and member jph) with a turbo M52 E30 running 600hp so it was hard to argue, especially with the value. Because the rods were $600 vs $2k I was able to use the money saved for some standard compression JE pistons. The crank was checked for straightness and balanced, the head completely rebuilt and ground. ACL main bearings used with BE rod bearings and ARP hardware all around.
 The Build by Evan Nessim, on Flickr
 The Build by Evan Nessim, on Flickr
 The Build by Evan Nessim, on Flickr
 The Build by Evan Nessim, on Flickr
 The Build by Evan Nessim, on Flickr
 The Build by Evan Nessim, on Flickr
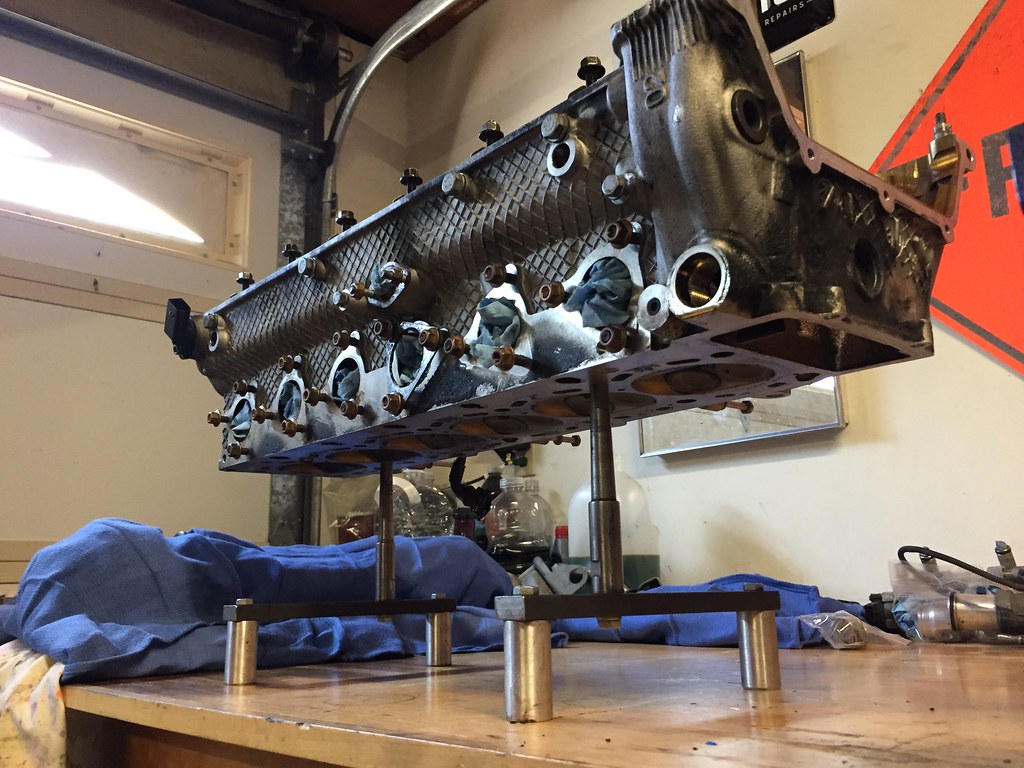
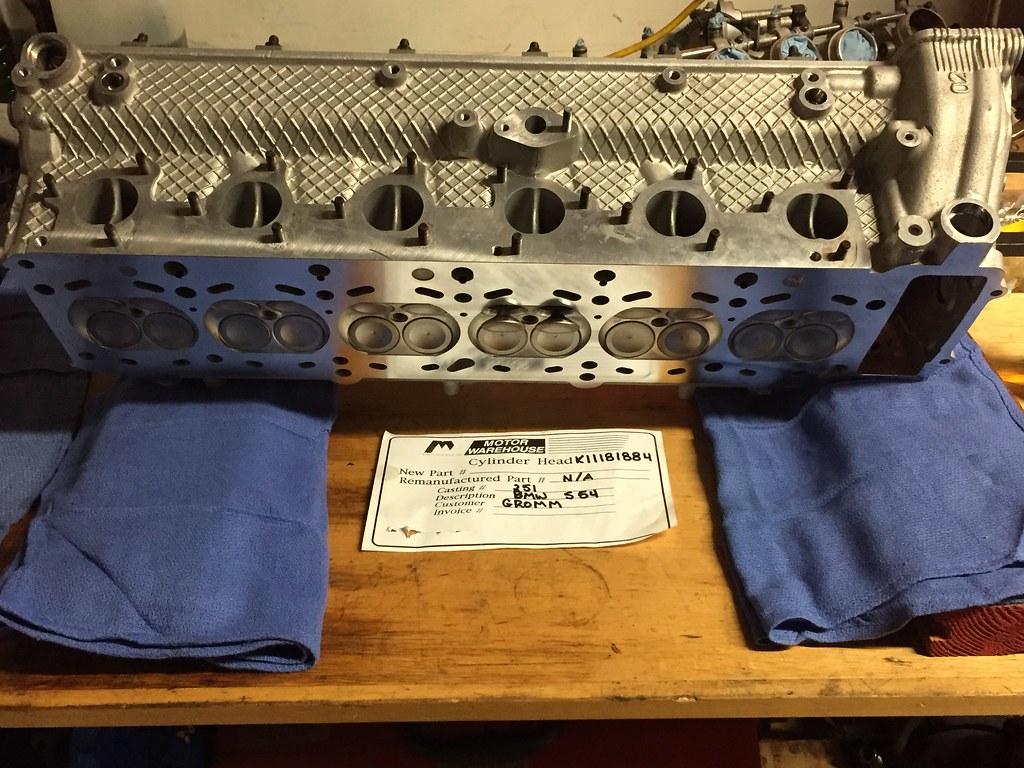
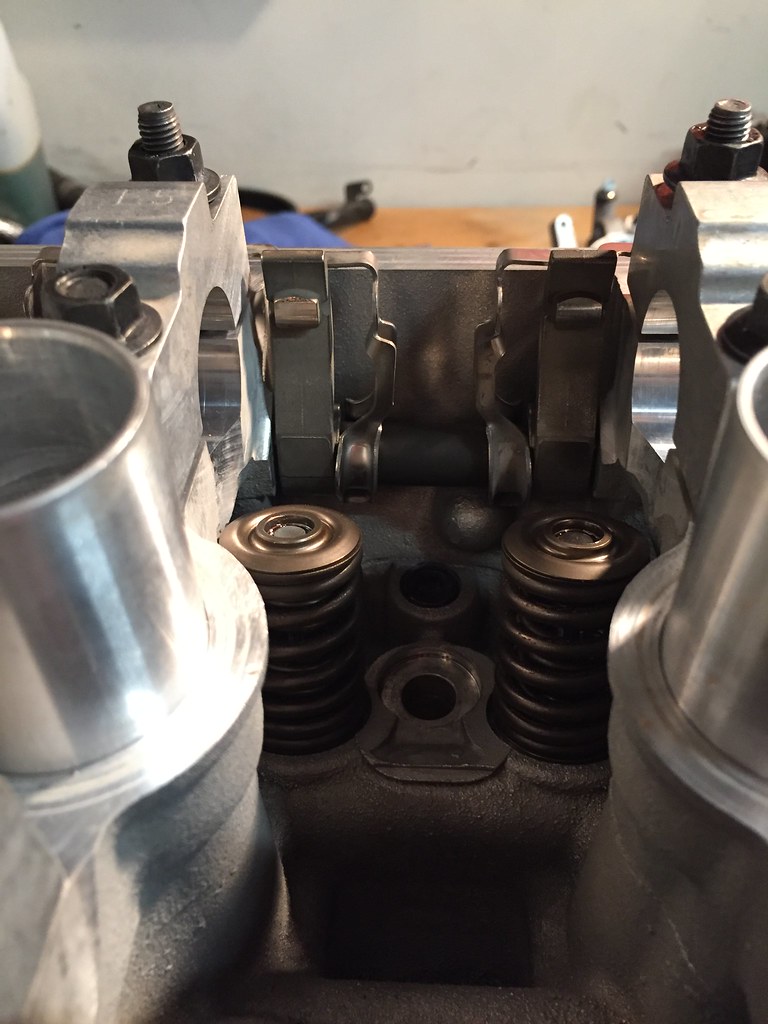
Got to use this sweet head stand my coworker let me borrow, great for pulling springs/valves. Originally I was just going to do the seals on the head but my gut was telling me Id regret it later. After tearing it down I packed it up and sent it to a shop for a complete head job. Turned out great! All stock internals.
 The Build by Evan Nessim, on Flickr
 Untitled by Evan Nessim, on Flickr
 Untitled by Evan Nessim, on Flickr
 Untitled by Evan Nessim, on Flickr
When I was on a business trip in China my machinist sent me this and a couple videos that I don't know how to post. I couldn't wait to get home.
Saw the wild yellow AMG something rather while I was there though, pretty crazy.
 Untitled by Evan Nessim, on Flickr
 Untitled by Evan Nessim, on Flickr
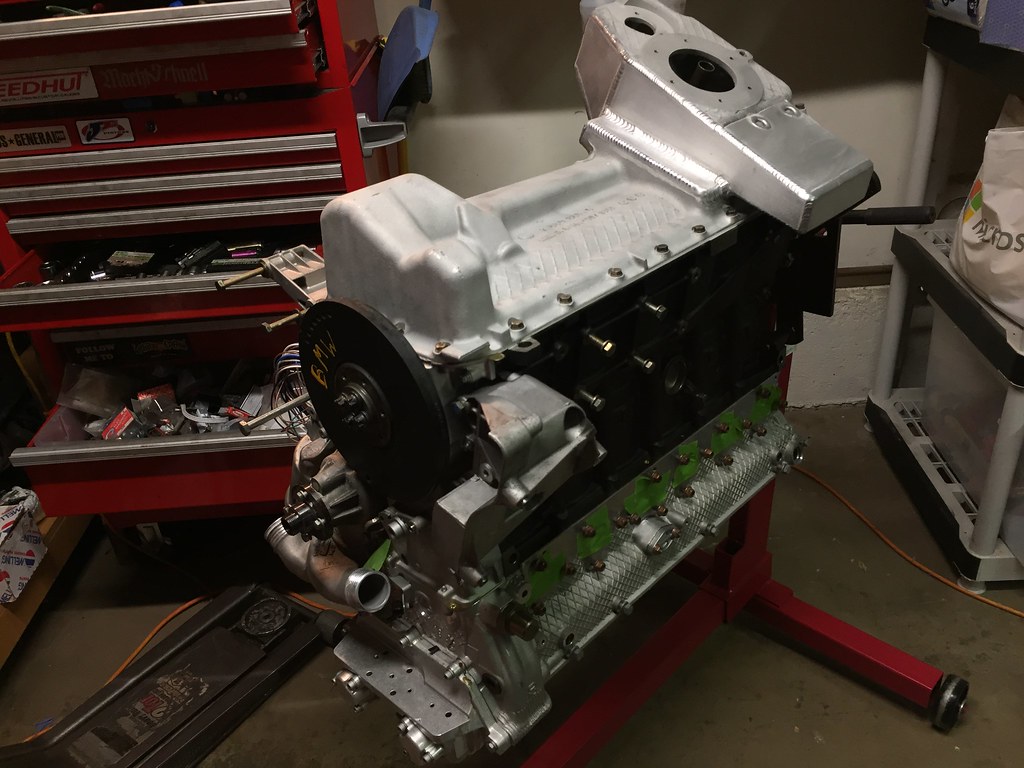
The day I landed I was able to pick up my engine, it was a great feeling after waiting months for parts and machining. I could finally start putting things together!
 Untitled by Evan Nessim, on Flickr
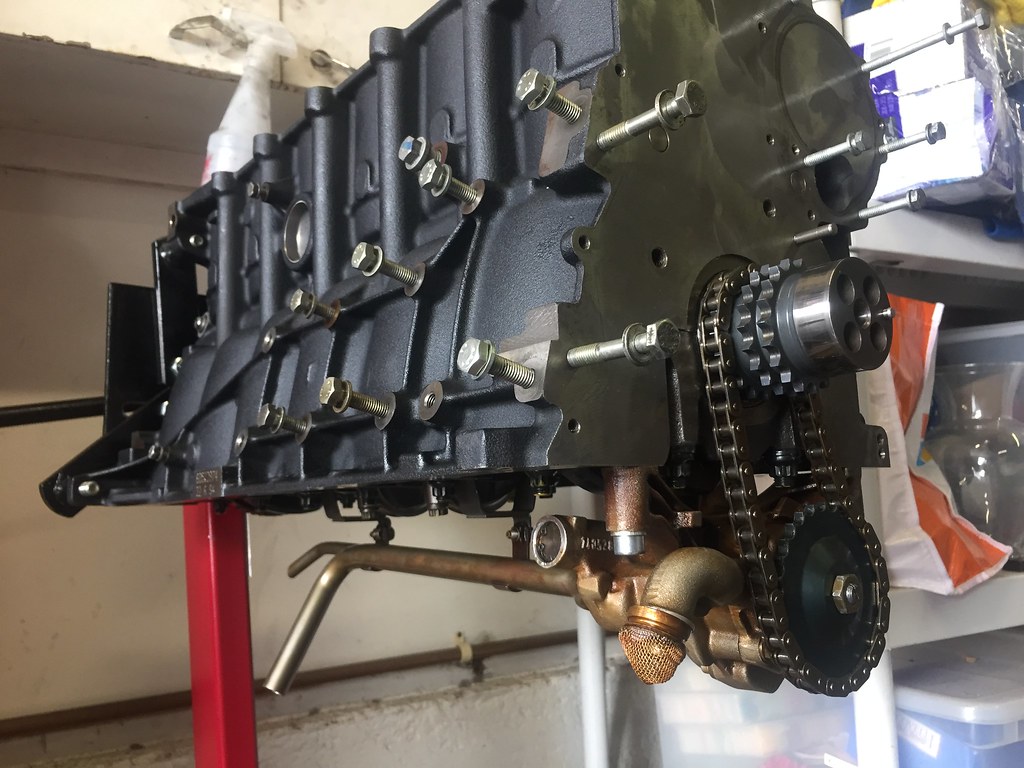 Untitled by Evan Nessim, on Flickr
 Untitled by Evan Nessim, on Flickr
 Untitled by Evan Nessim, on Flickr
 Untitled by Evan Nessim, on Flickr
 Untitled by Evan Nessim, on Flickr
 Untitled by Evan Nessim, on Flickr
 Untitled by Evan Nessim, on Flickr
 Untitled by Evan Nessim, on Flickr
 Untitled by Evan Nessim, on Flickr
 Untitled by Evan Nessim, on Flickr
 Untitled by Evan Nessim, on Flickr
Using AN lines for the CSF oil cooler. I love the look of machined parts, nice oil housing adapter from VAC. AN fittings from Fragola, oil PSI/Temp block from Bimmerworld.
 Untitled by Evan Nessim, on Flickr
 Untitled by Evan Nessim, on Flickr
 Untitled by Evan Nessim, on Flickr
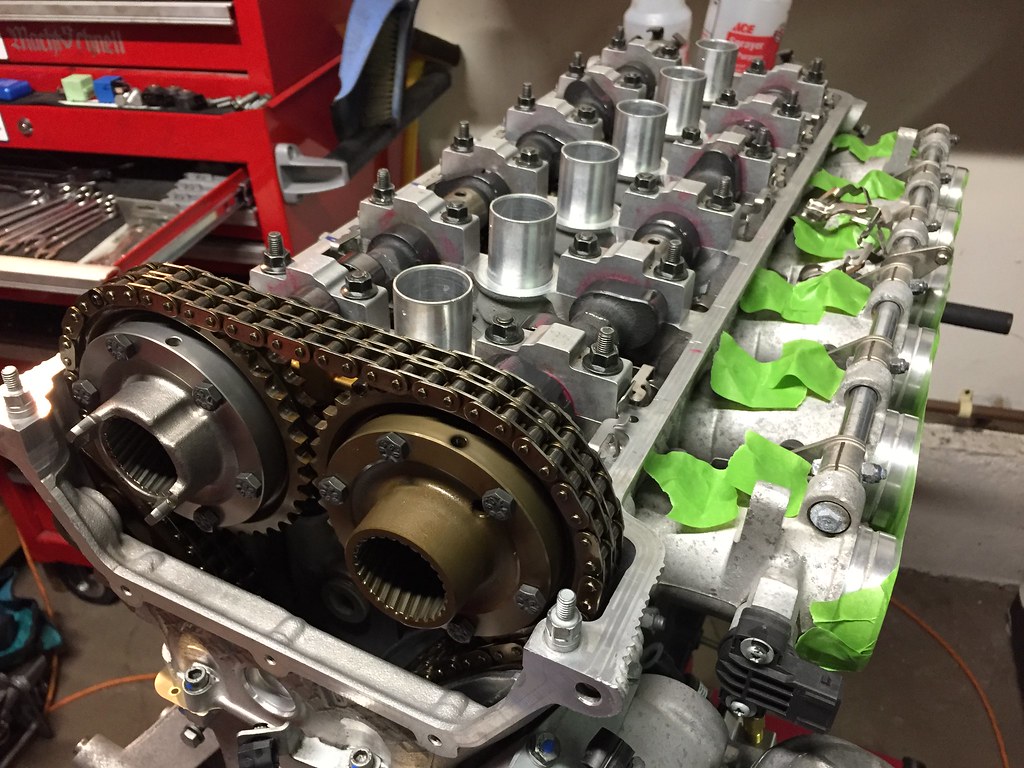
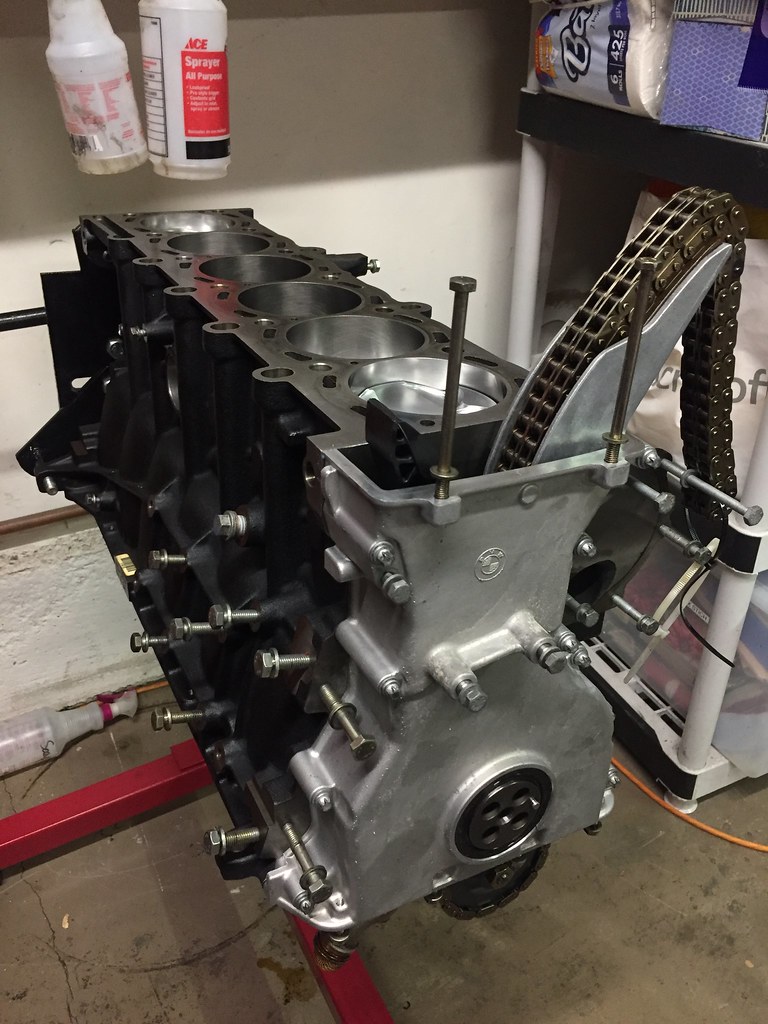
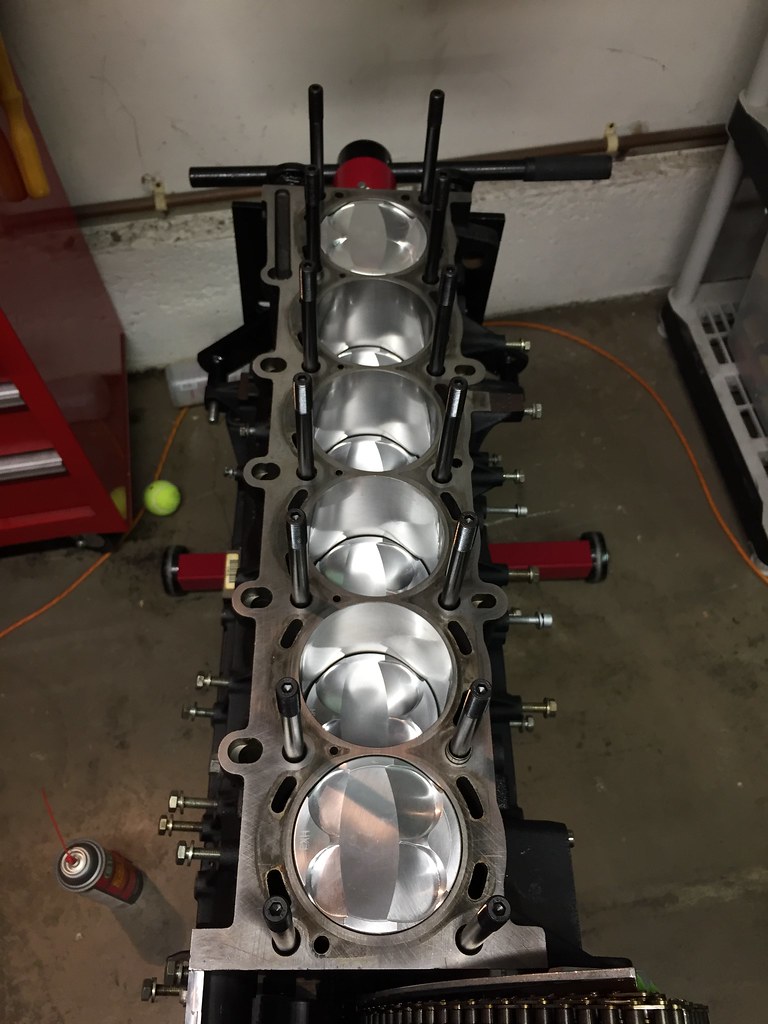
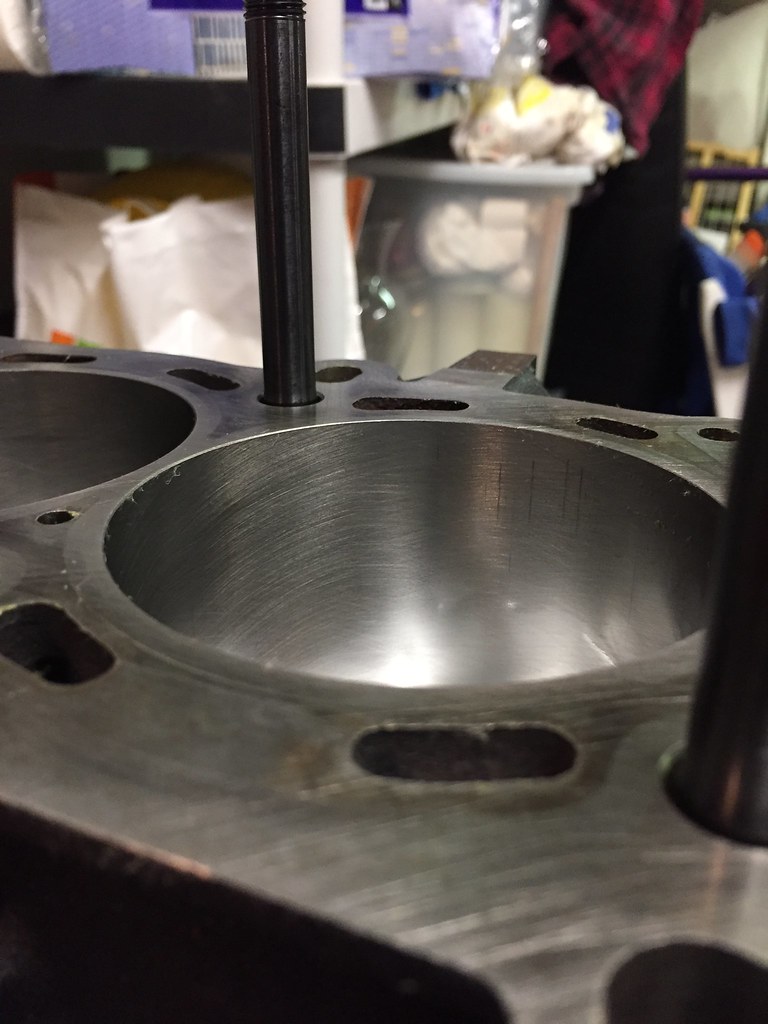
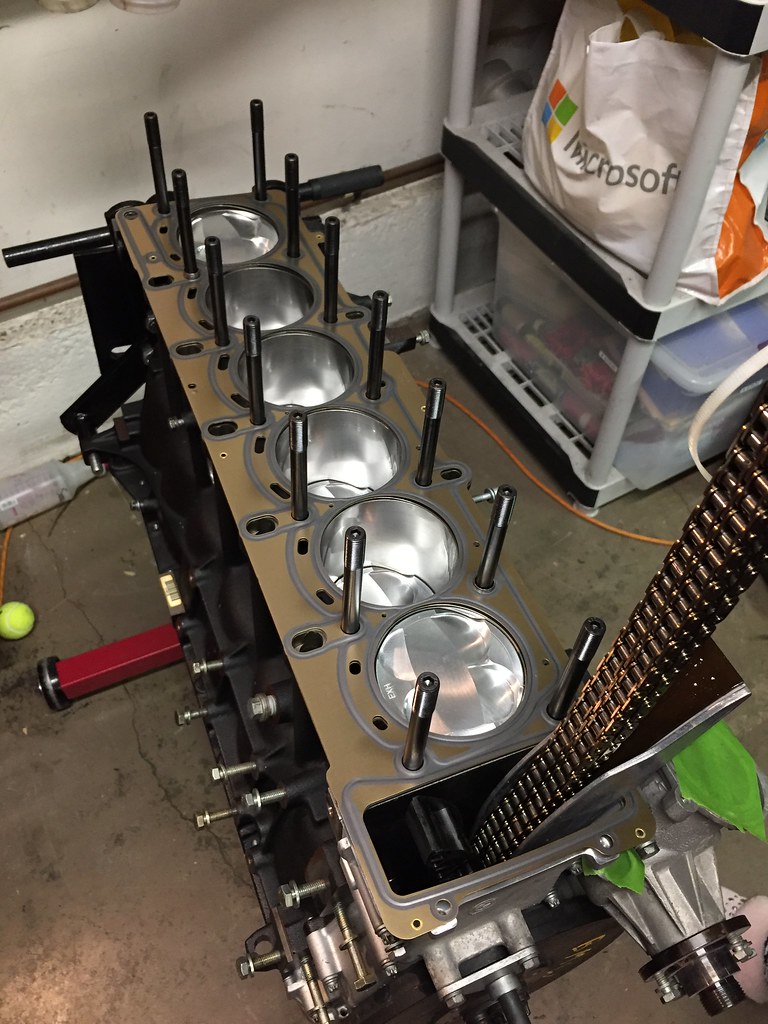
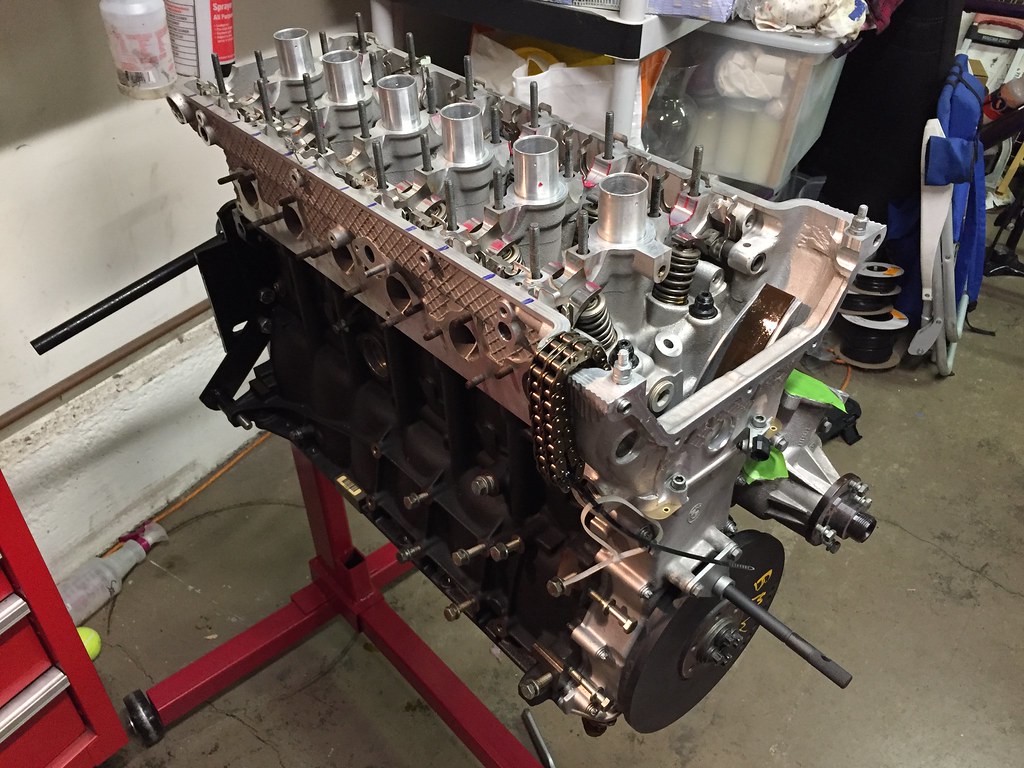
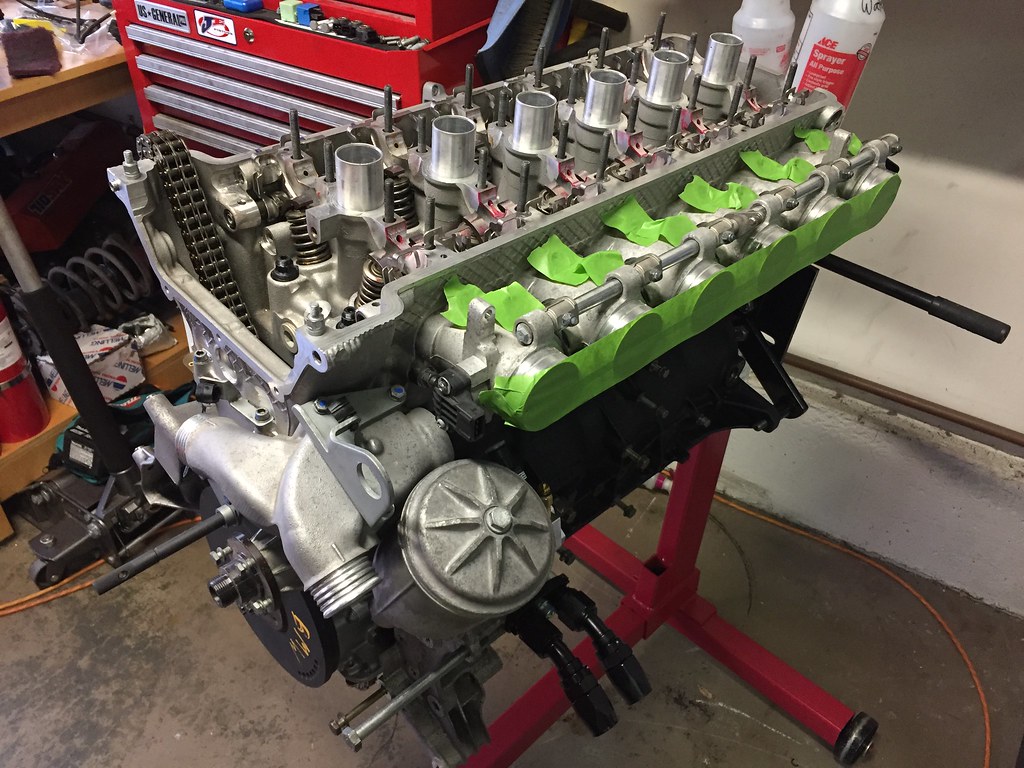
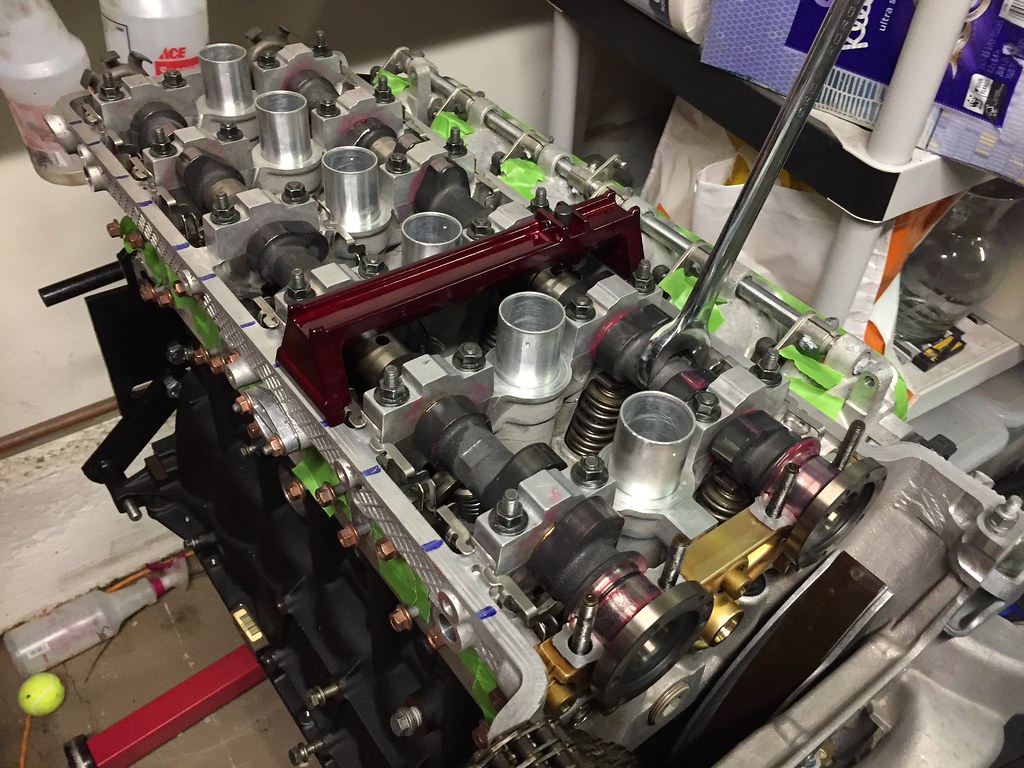
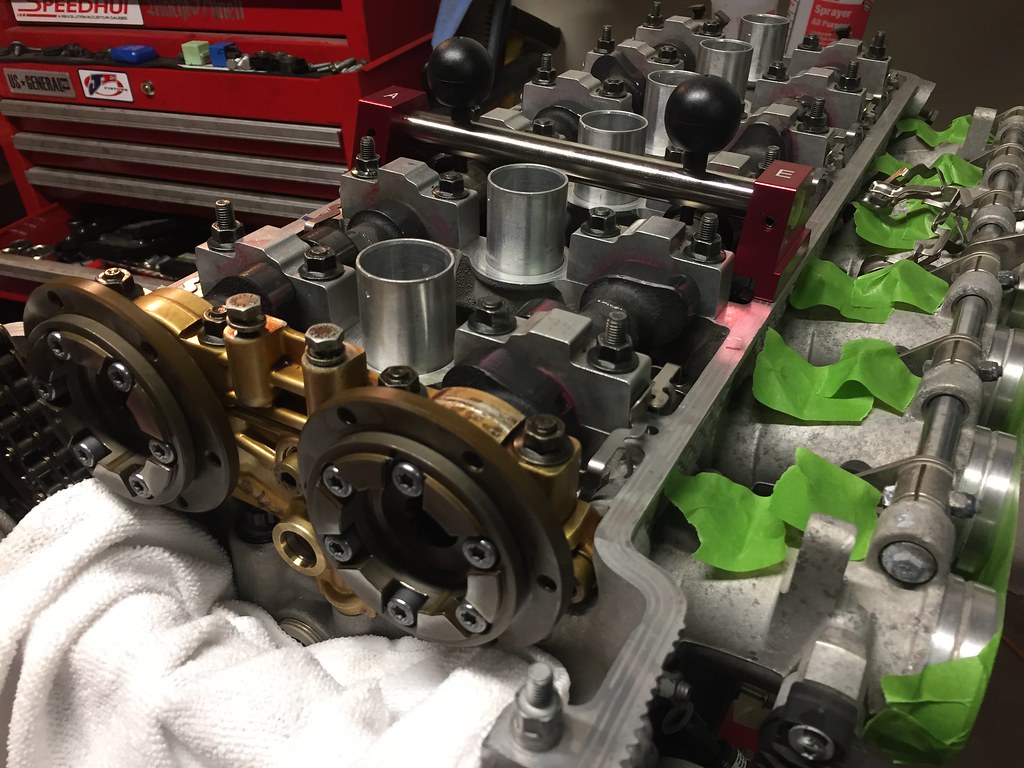
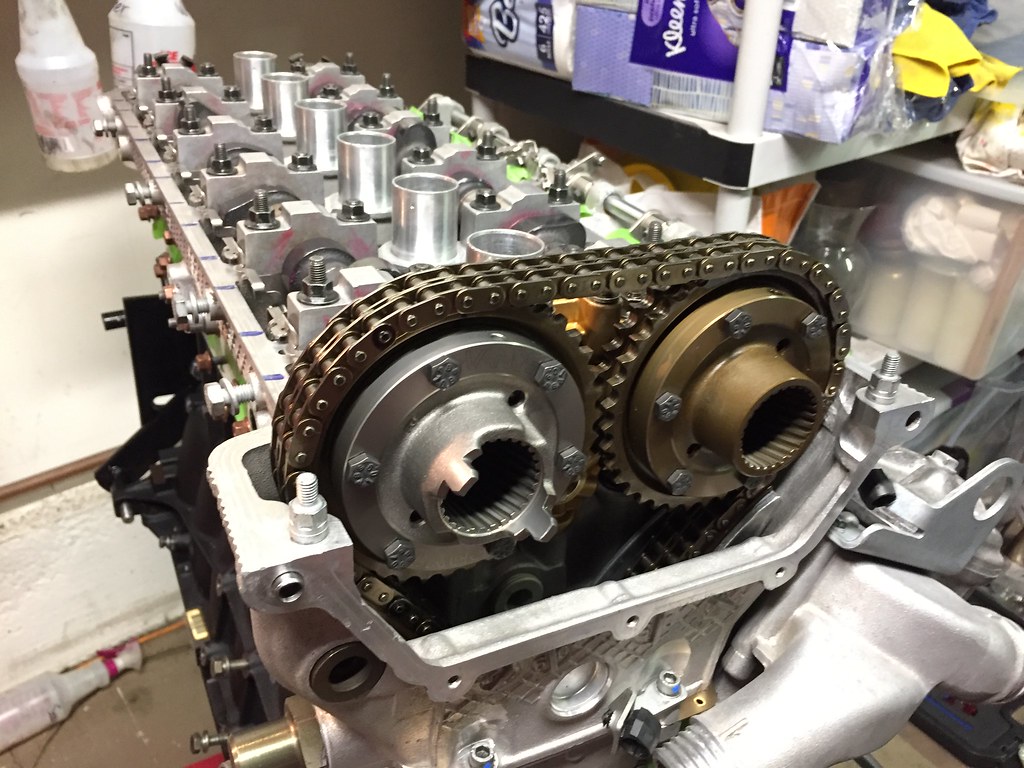
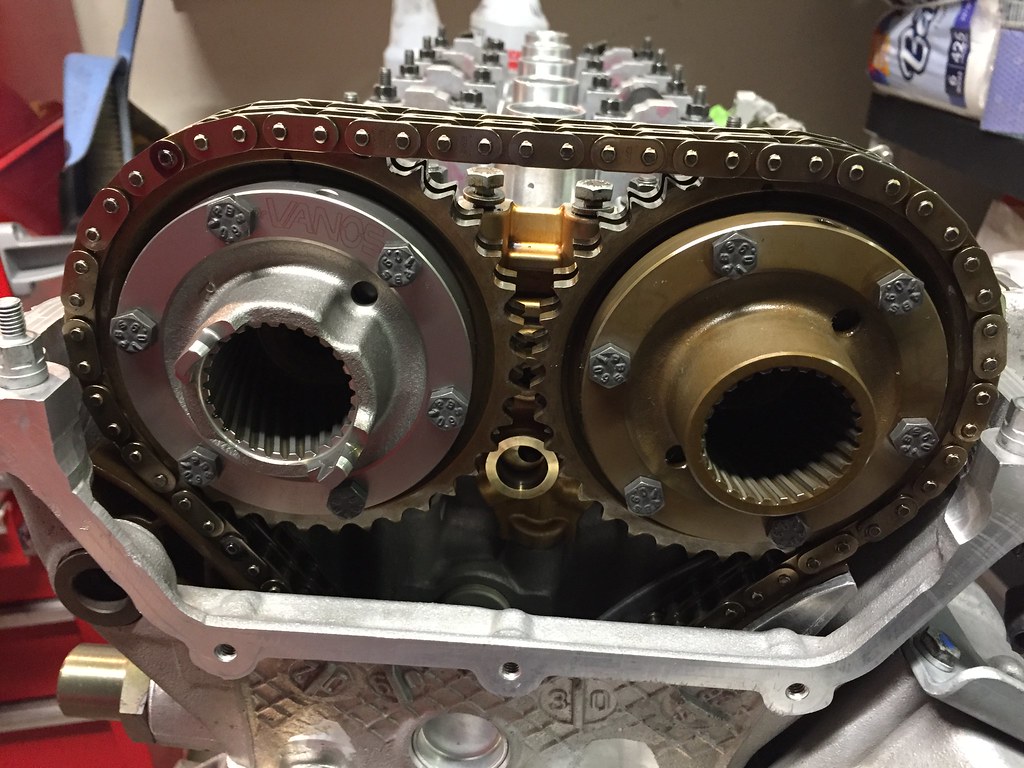
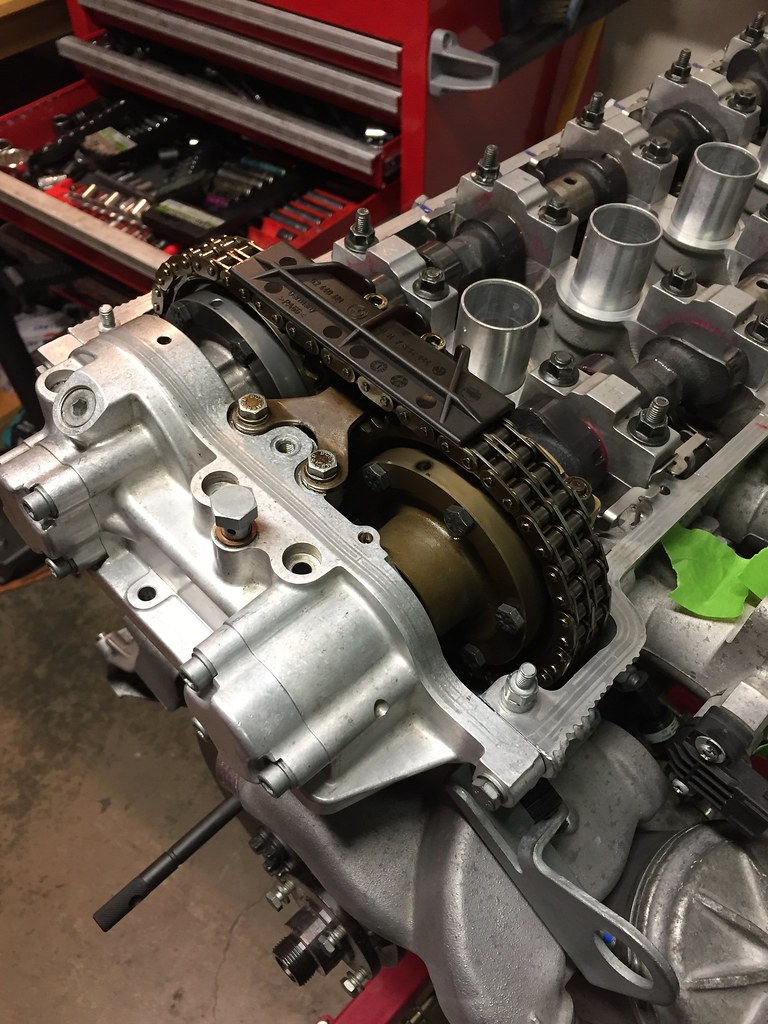
Cams in and vanos installed. I timed the engine using the basic online brand timing kit. The guy from Besian said that because I used that tool and not the OE BMW tool he can guarantee my timing is off. I don't like those odds so I ordered the OEM tool next day. We will see if my timing is indeed off like he says or if I just wasted another $150... I was able to turn the crank completely and easily.
 Untitled by Evan Nessim, on Flickr
 Untitled by Evan Nessim, on Flickr
 Untitled by Evan Nessim, on Flickr
 Untitled by Evan Nessim, on Flickr
 Untitled by Evan Nessim, on Flickr
 Untitled by Evan Nessim, on Flickr
Thats it for now! Working on a wiring harness for my gauges while waiting for the BMW timing bridge. Wanted to get the engine in this weekend but Id rather be confident its timed right before installing. Maybe see what other small things I can button up too.Leave a comment:
-
Does anyone know Tyler at The Arc Asylum personally or live in the 53066 area and can find out what’s going on?
I should have my engine built this weekend and ready for install but might need my headers (which he’s had for almost a year now) to install the engine.
I think it’s ridiculous that he vanished without word or completing outgoing orders before revamping his business, I’m assuming I’m not the only one with this situation.
Thanks.Leave a comment:
-
In 2 pages this thread shits on half of r3v and the other half better watch outLeave a comment:
-
Investigated a rattling coming from the exhaust on my bosses sweet LS Z3 coupe. Ended up having a beat up cat that needed to be replaced.
 The Build by Evan Nessim, on Flickr
 The Build by Evan Nessim, on Flickr
Winter is coming, so I bought boat loads of presents for myself. Unfortunately I can't open them until I get the engine back… :(
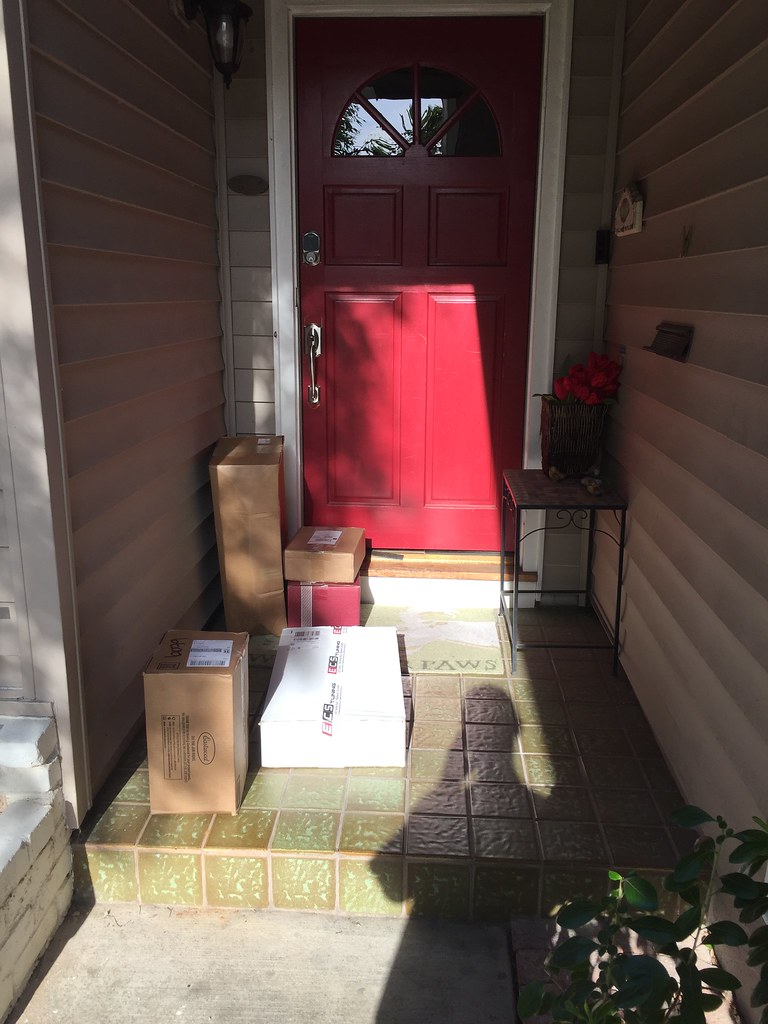 The Build by Evan Nessim, on Flickr
 The Build by Evan Nessim, on Flickr
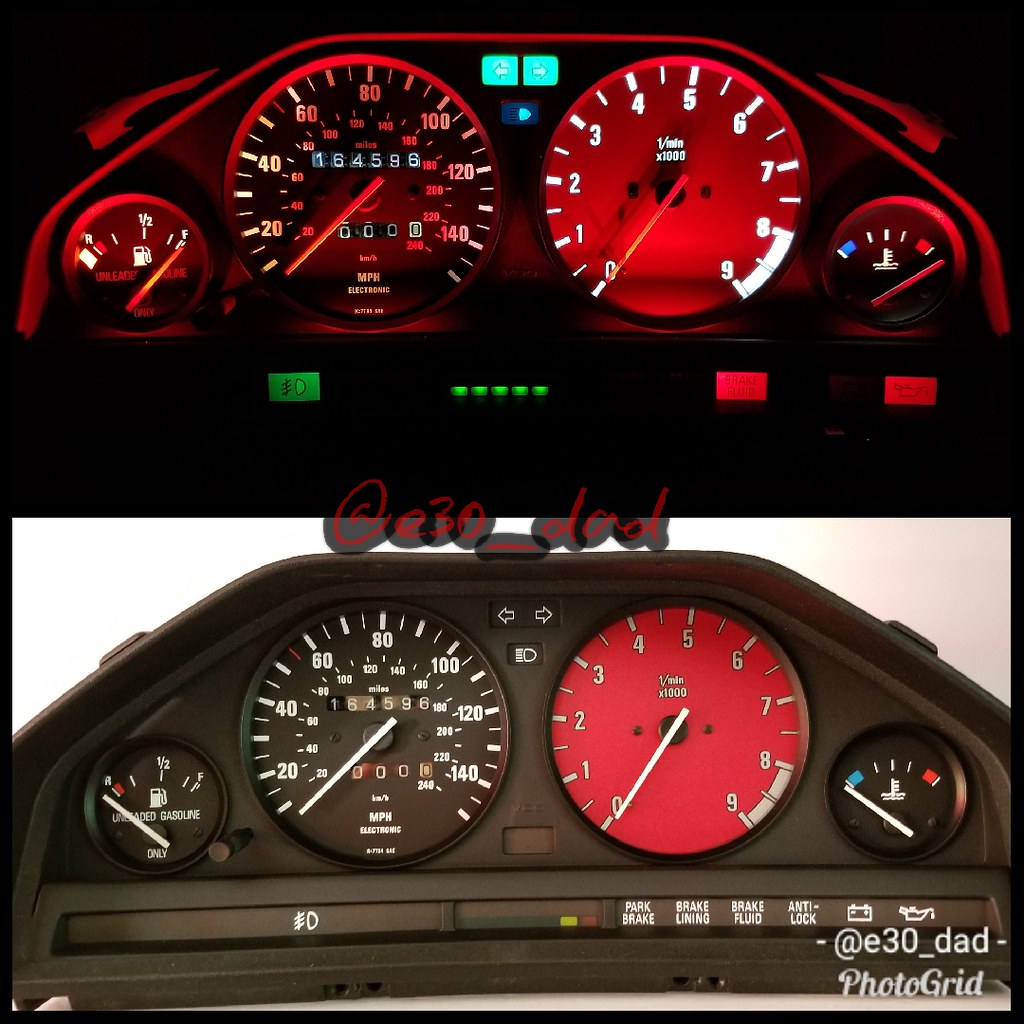
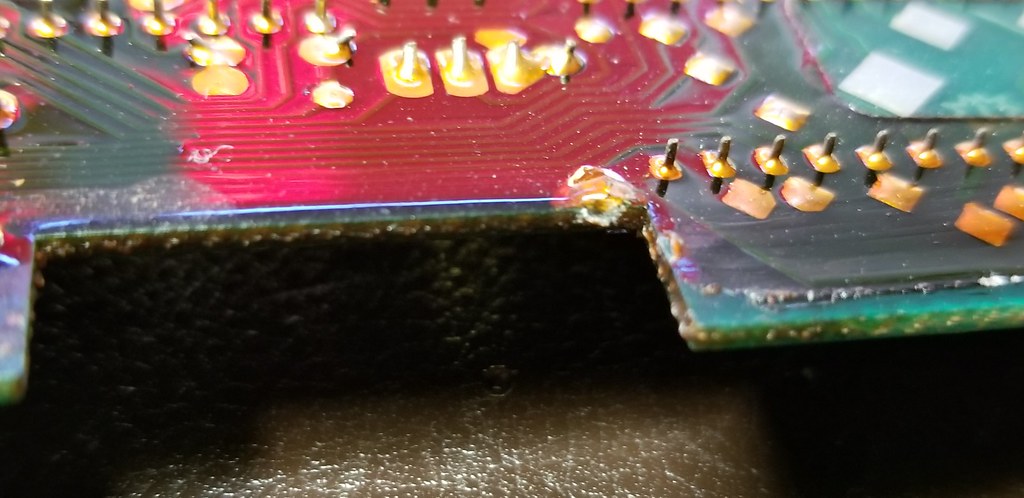
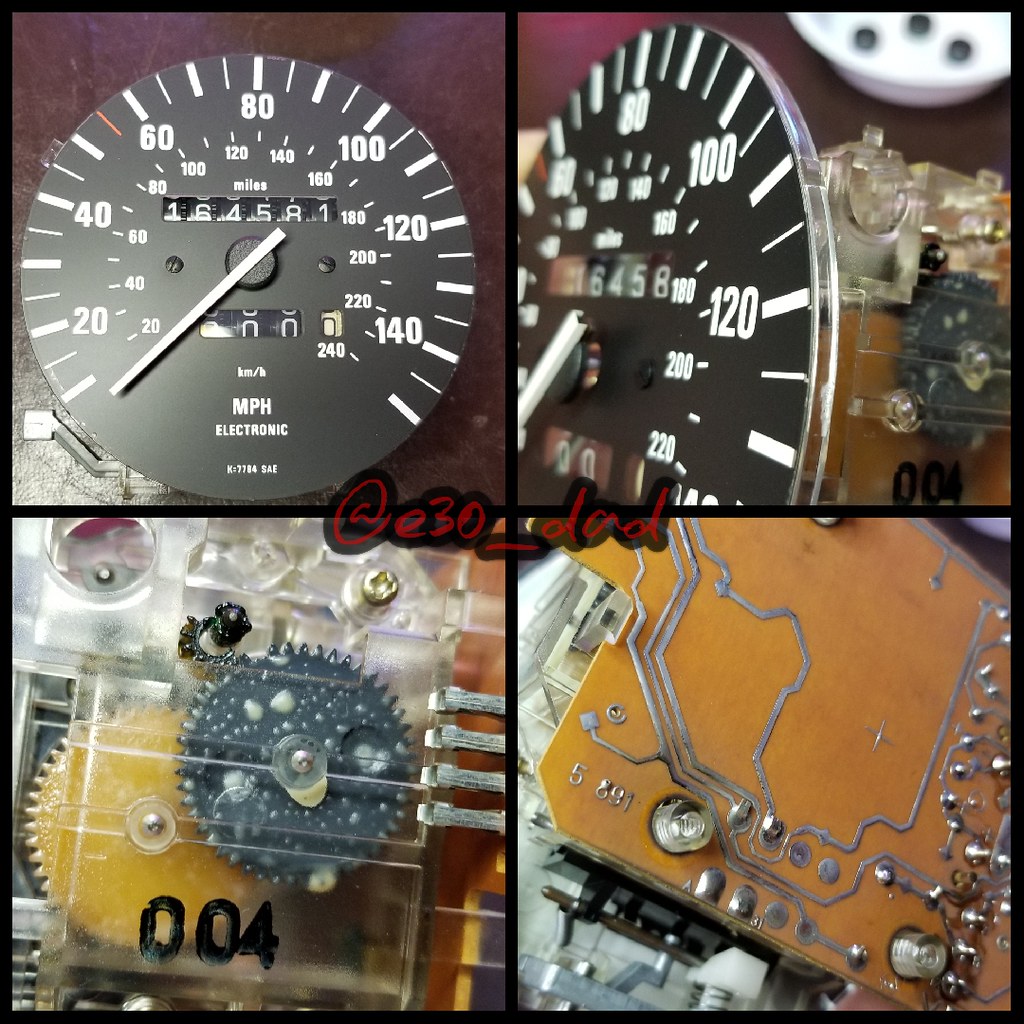
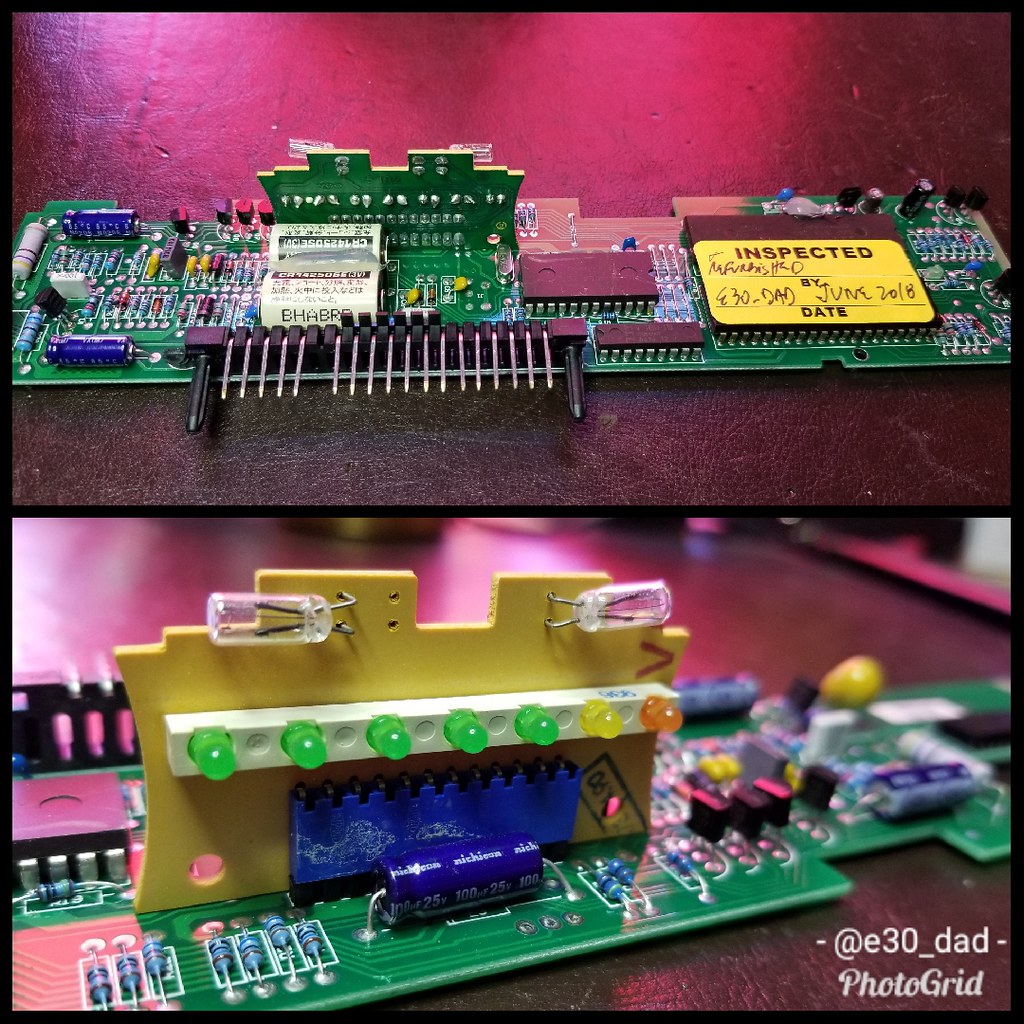
I got clustered by E30 Dad and boy am I stoked to see this thing! He has been extremely kind in holding the cluster for me in order to keep it charged while I get this car together. Gears were dead and one of the previous owners used the wrong screws to hold the cluster in so the board was beyond repair but Diego took care of me, a quality service.
 The Build by Evan Nessim, on Flickr
 The Build by Evan Nessim, on Flickr
 The Build by Evan Nessim, on Flickr
 The Build by Evan Nessim, on Flickr
Leave a comment:
-
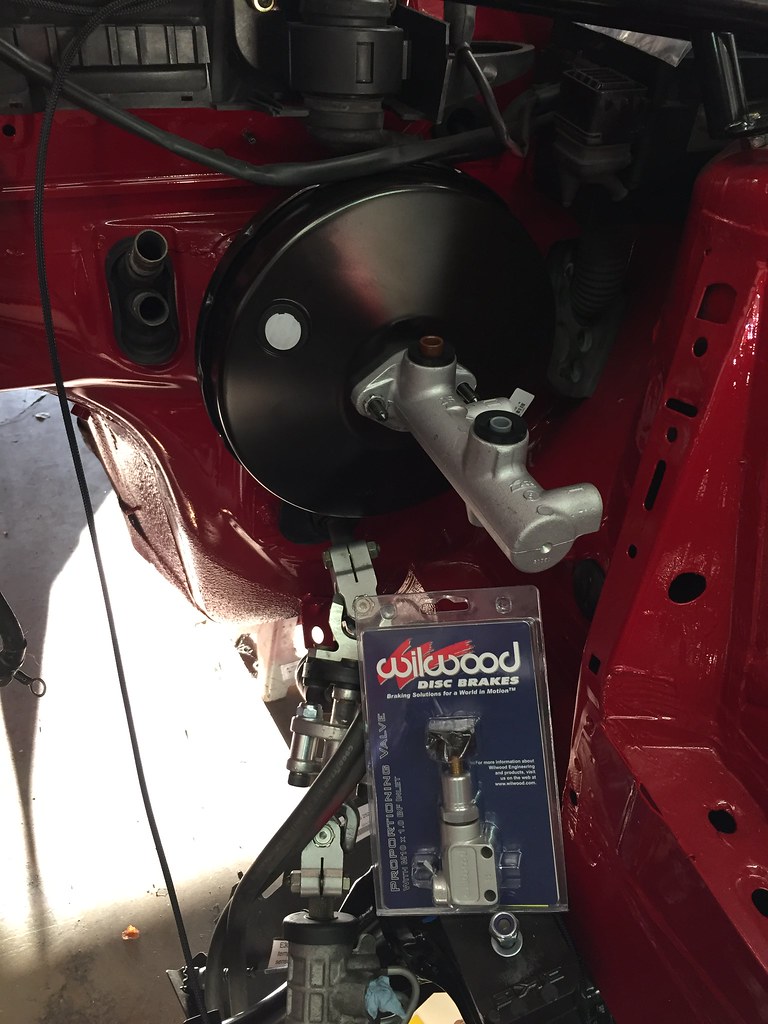
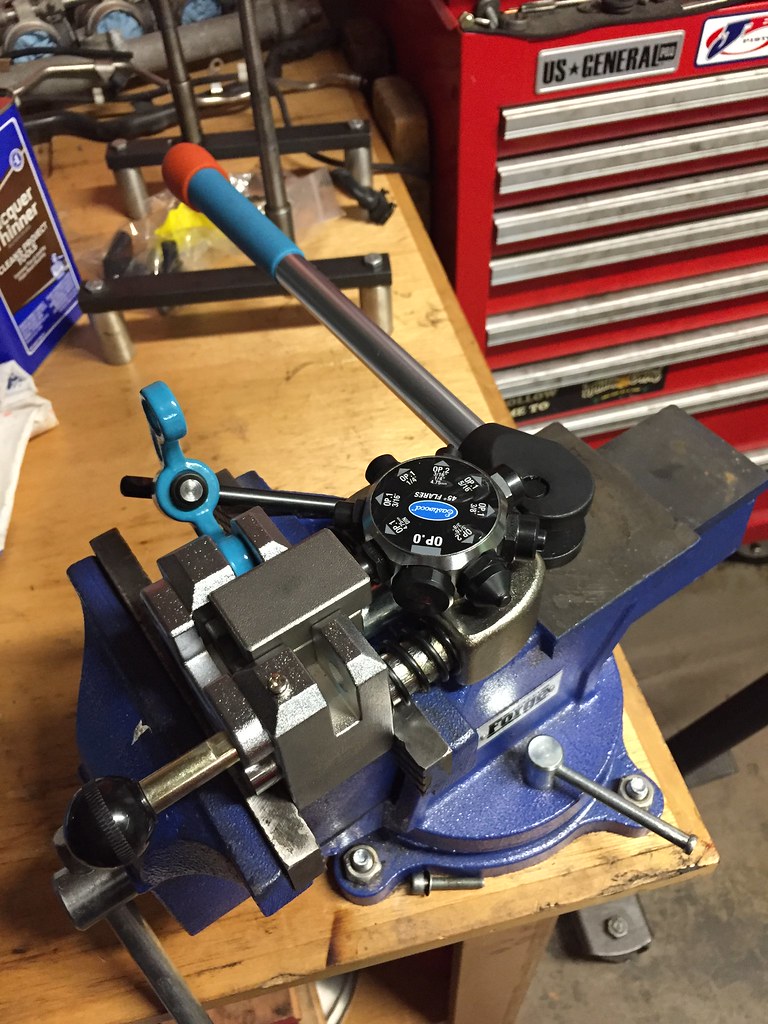
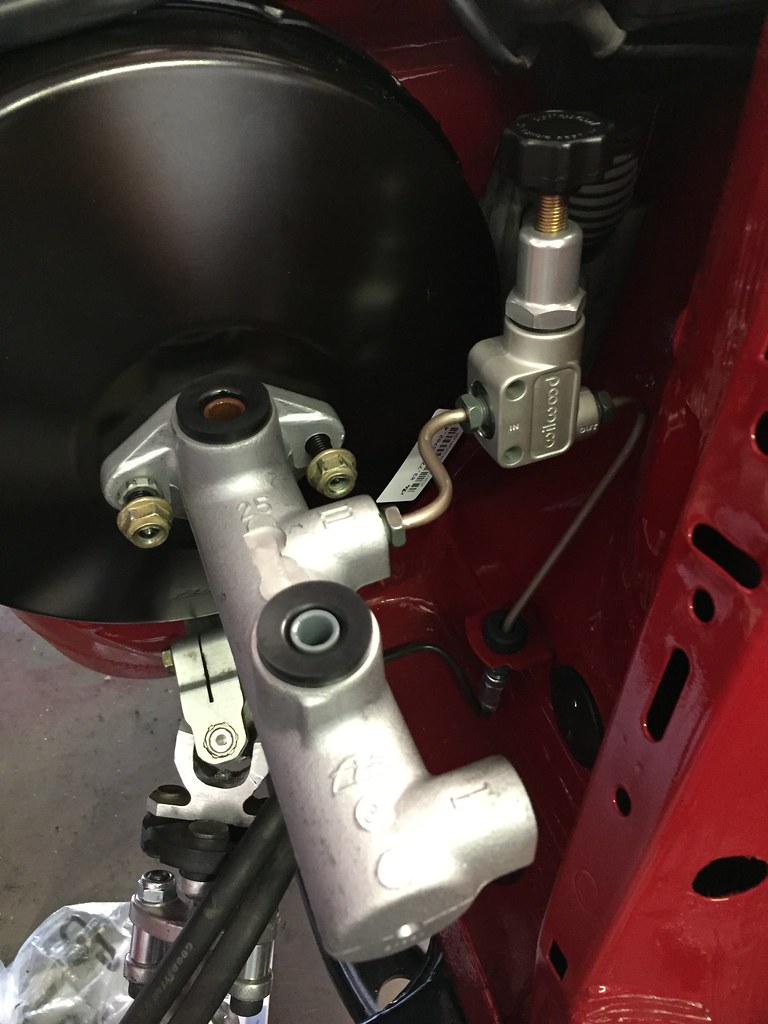
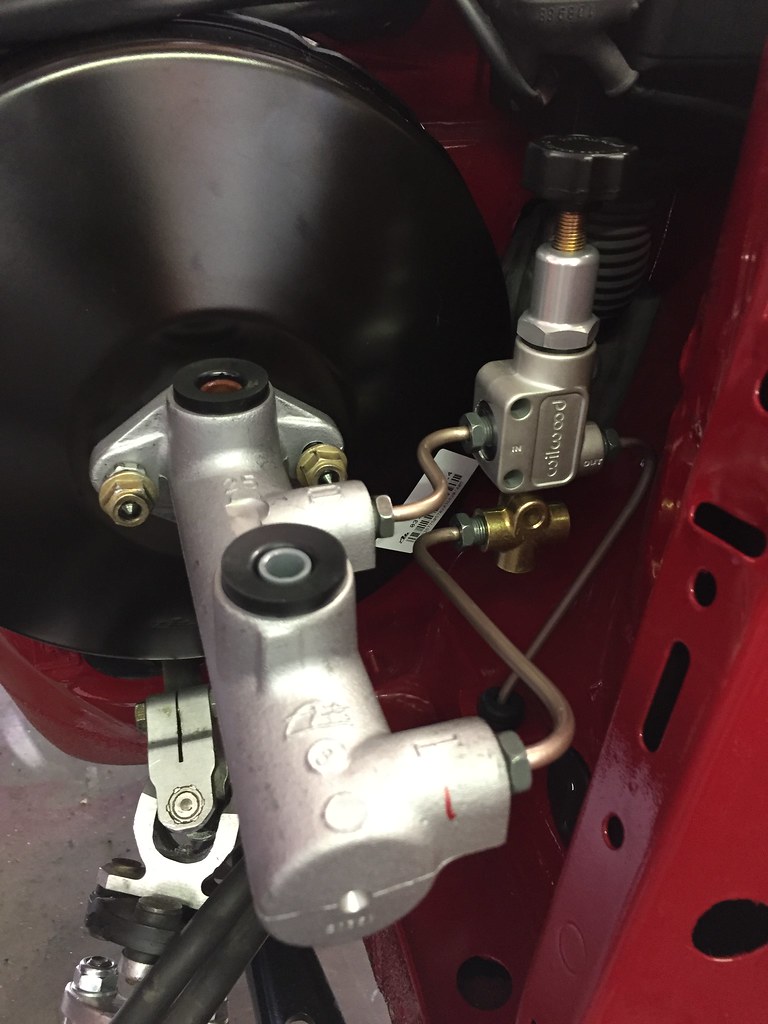
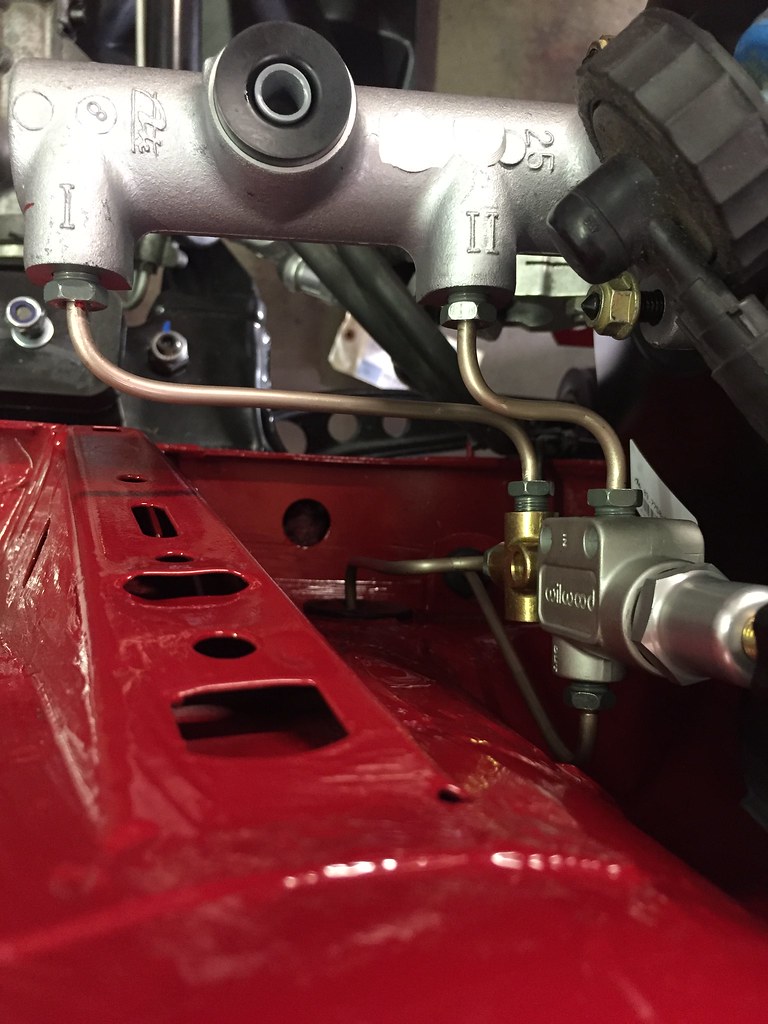
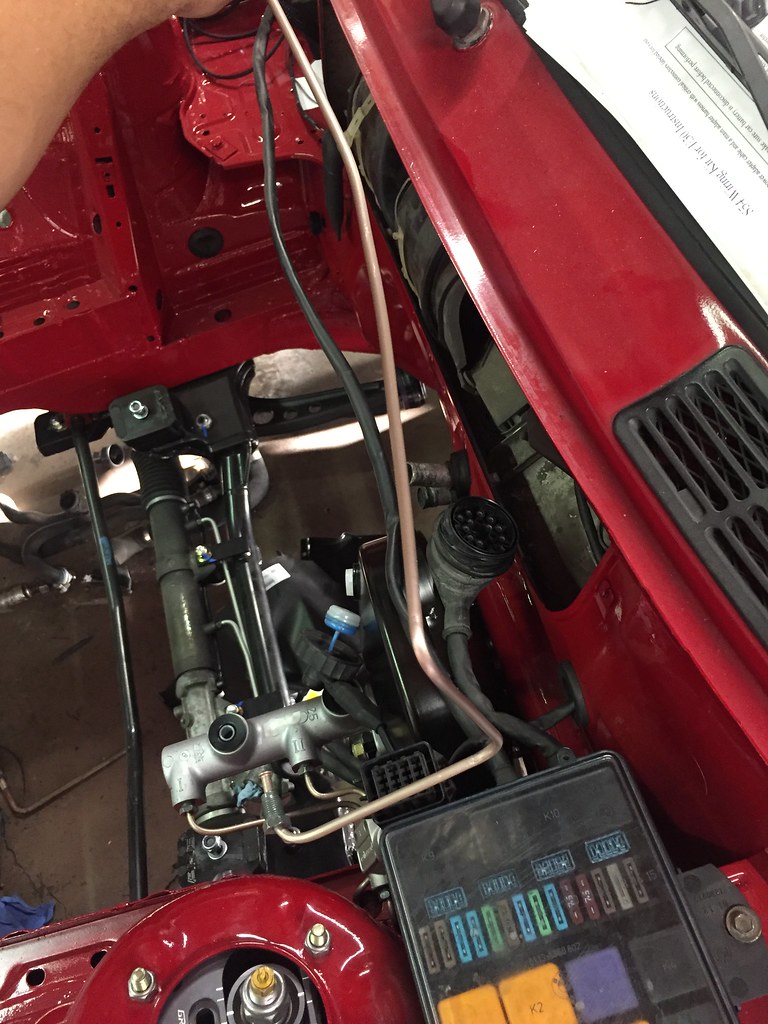
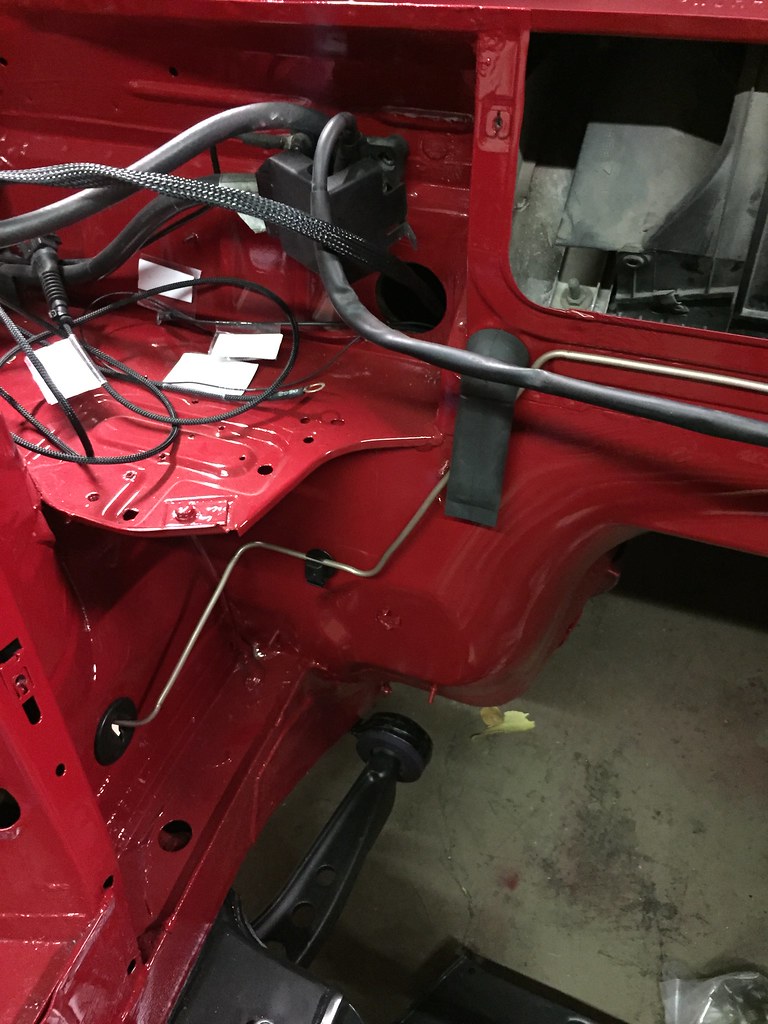
Here comes probably the most debated topic for E30 swaps. I ended up buying a Porsche ATE booster and E34 master. I was hoping I would do the booster and lines once the engine was in so I knew what would fit but waiting on parts and machining left me bored and itching for a project. So, we will see if it fits or if Im going to have to move the booster over a bit.
Since I deleted the ABS I had to flare and bend new hardlines. The tool from Eastwood was fantastic and produced a consistent flare every single time with ease.
 The Build by Evan Nessim, on Flickr
 The Build by Evan Nessim, on Flickr
 The Build by Evan Nessim, on Flickr
 The Build by Evan Nessim, on Flickr
 The Build by Evan Nessim, on Flickr
 The Build by Evan Nessim, on Flickr
 The Build by Evan Nessim, on Flickr
 The Build by Evan Nessim, on Flickr
Leave a comment:
-
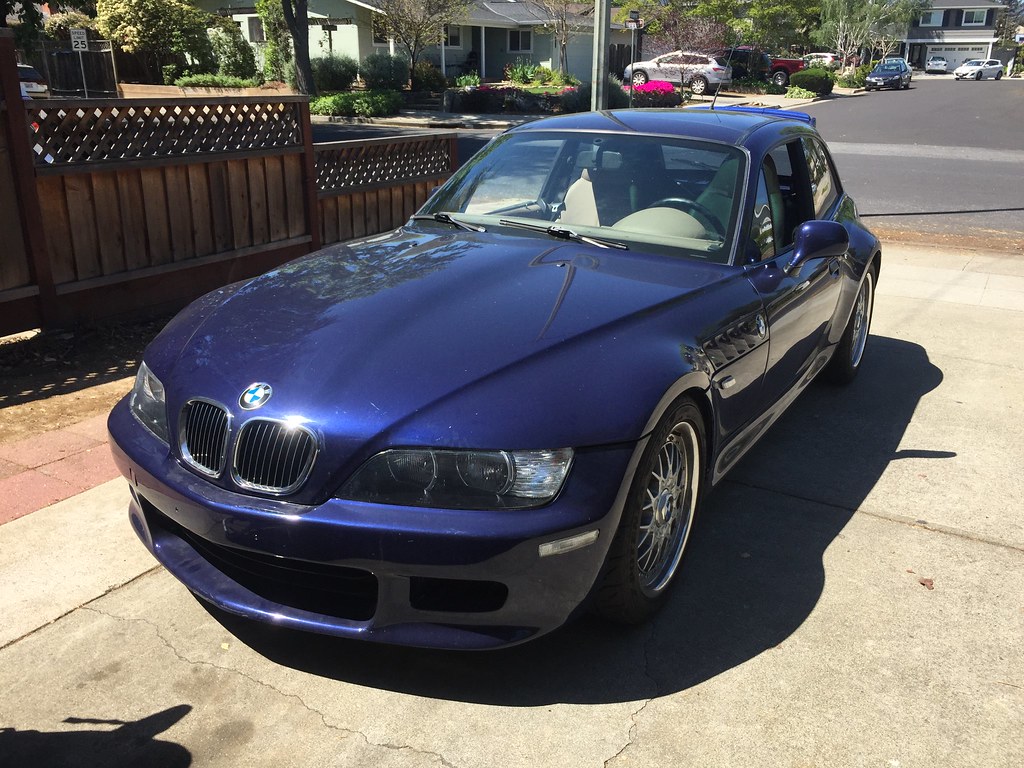
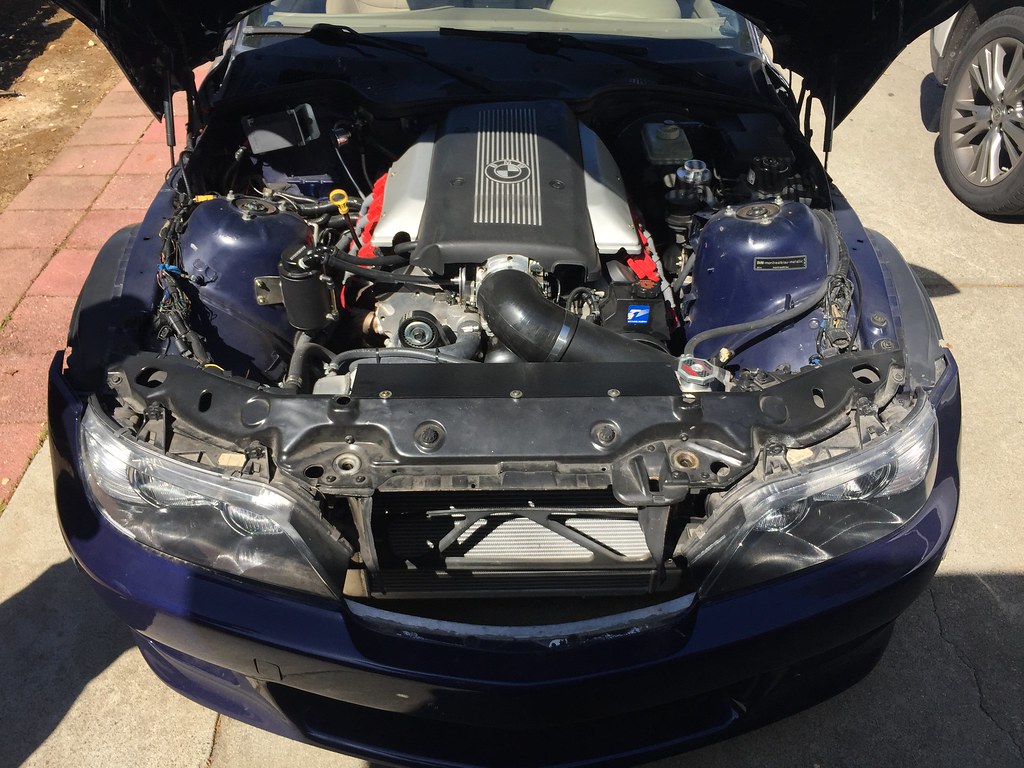
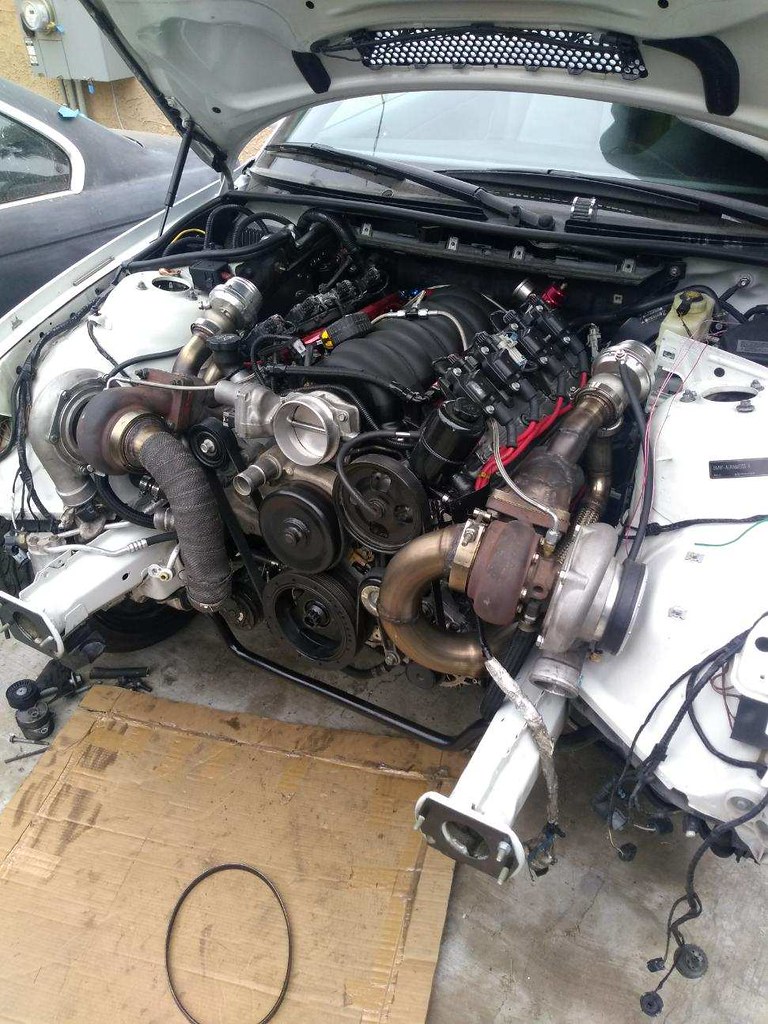
Meanwhile, this is what happened to the S54 donor vehicle!
 The Build by Evan Nessim, on Flickr
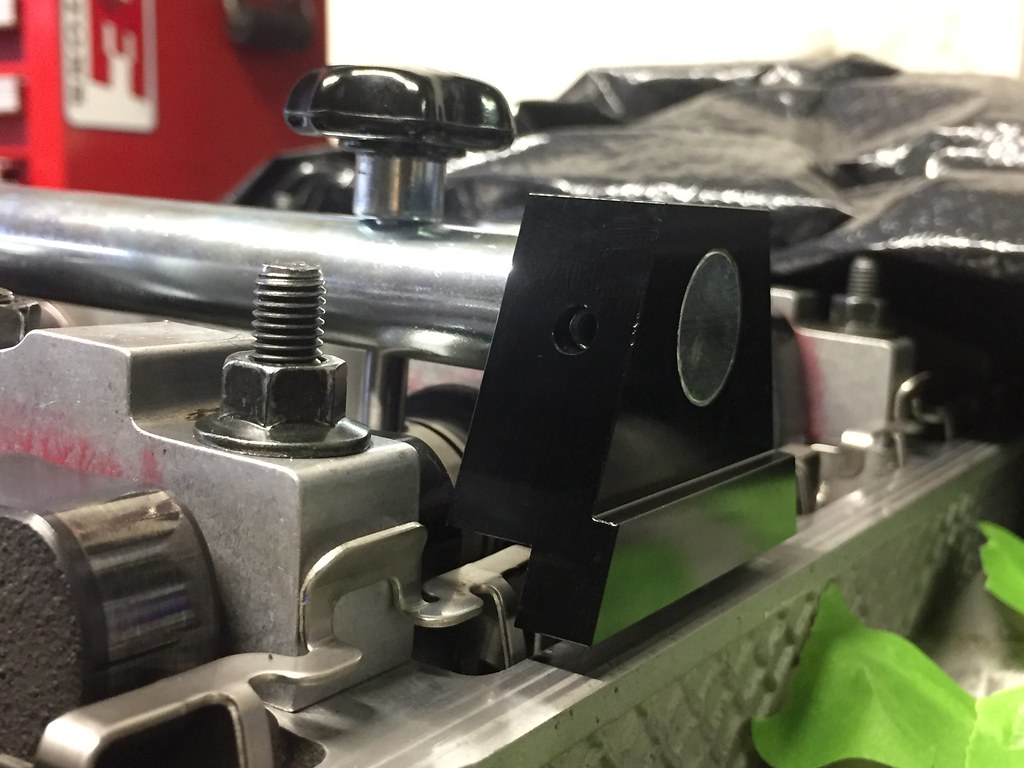
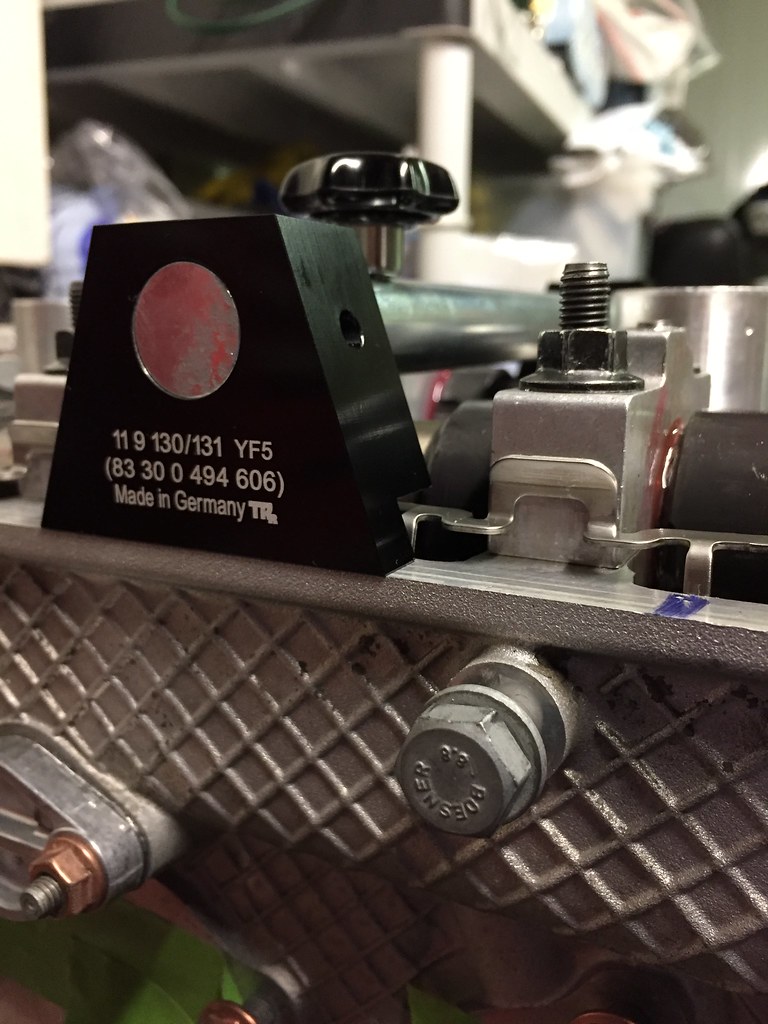
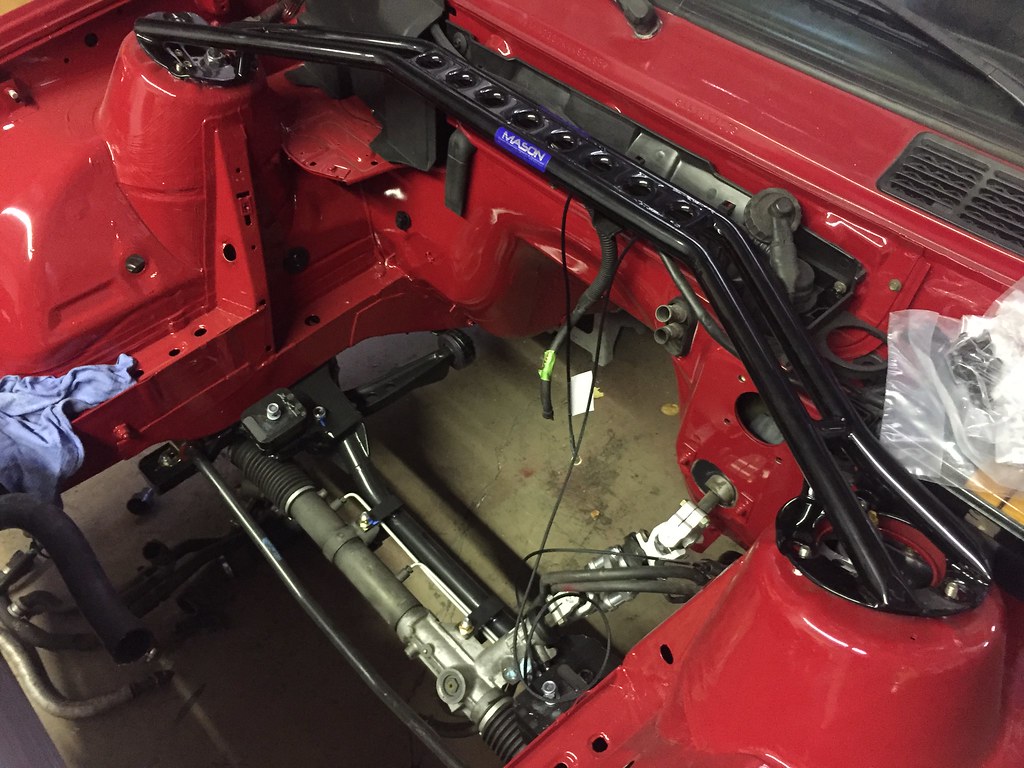
Picked up a Mason Engineering brace, super pretty piece.
 The Build by Evan Nessim, on Flickr
Also picked up a shop pup, she went straight to work inspecting my quality. Hopefully that's the look of approval and not disappointment! Her name is Seca.
 The Build by Evan Nessim, on Flickr
Leave a comment:


Leave a comment: