xLibelle's e30

Collapse
X
 
  • Time
  • Show
Clear All
new posts
  • xLibelle
    R3VLimited
    • Aug 2004
    • 2673

    #31
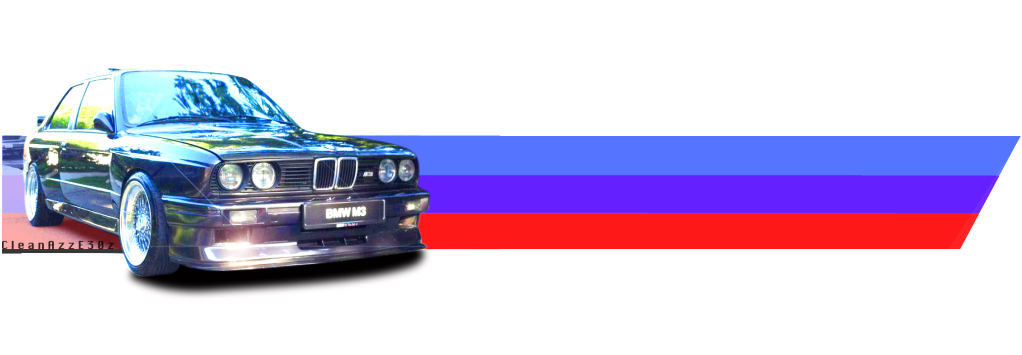
    Ok, last set of autocross pictures with a fucked up car in them.
    But these come after the next mod that was performed so you may notice a little difference. This was in Charleston in beginning of 2007... so yeah, the car looked like this for a long time. ....lame


    i will leave it at that before progressing into the rebuild stage :)

    Comment

    • CleanAzzE30z
      R3V OG
      • Jan 2004
      • 11794

      #32
      Dedication is the fucking key


      Mariano


      2001 Titaniumsilber 540i Sport 6-Speed
      1990 Diamantschwarz Alpha-N 2.5L ///M3
      1986 Alpinweiss 325e M50B25 (R.I.P.)

      -Talk to me when more sound comes from the induction than from the exhaust...

      -Argentina........lo mas grande que hay.

      Comment

      • ToplessE30
        R3V Elite
        • Oct 2003
        • 4791

        #33
        Man you should really get a new set of grills and a new valance. I can't believe you're still running around like that.


        lol jk... damn people need to READ the threads. I can't wait to see how she looks now. I saw a pic of it before, but I don't want to ruin the story.
        Estoril E36 M3/4/5 | Toledo E53 X5 3.0 | LeMans E90 335D M-Sport

        Comment

        • xLibelle
          R3VLimited
          • Aug 2004
          • 2673

          #34
          The interior was done in the mix of other work like suspension, I'll just cap the interor here.

          nasty floor... all because of food in car.


          how nice what a little steam cleaning will do :)

          Comment

          • xLibelle
            R3VLimited
            • Aug 2004
            • 2673

            #35
            The seats needed a rebuild or replace. I want to keep the car as original looking as possible so i went with the refinish route. I would have loved to do sports seats but i havent been successfull in finding what i was looking for to recover them in cloth. I refuse to have leather, as cloth feels 100 times better, sticky too.


            Needed some repairs. Various glues and foam does the trick here.


            Then to plump up the bolsters and such.


            left is first cut, right is before application, then shape again after glued to cusion.

            A bit of back support


            Then rebuild


            The top of the back is the hardest part, having to pull the cover down over the top of glued straw and getting the beads to lay down properly. clamp that shit down.

            The covers were perfect, except one place where they were cut wrong. At the bottom of the back, the material was well over an inch too long. I had to stretch it over, drill some holes and bolt it. Works great.


            End result


            I think it was about $150 per cusion. That being said, i know, it was expensive for non-is seats. But they are back to their original glory and i have no complaints while autocrossing, etc.
            I do NOT condone this job for the weak hearted. It was no easy task and took some time to complete but it can be done by the DIY'er.

            Comment

            • xLibelle
              R3VLimited
              • Aug 2004
              • 2673

              #36
              Before interior goes back in, new trimming foil installed. I have an extra roll for anyone that wants some.

              Clean the door up

              install


              I sprayed the with SEM dye... awesome finish!

              Comment

              • Joe318is
                R3V OG
                • Sep 2005
                • 6451

                #37
                seats look great!


                Originally posted by vlad
                Do you know anybody else who built that many bad ass E30s?

                Comment

                • nando
                  Moderator
                  • Nov 2003
                  • 34834

                  #38
                  Originally posted by xLibelle

                  Here are two different design assemblies... you can guess which i picked.


                  Here, we were presented with a problem. Late model airbag automatics didnt come with manual clutch pedal return accomdations... and to add to that, the peddal assembly is welded into the steering column mount assembly!!!

                  the weld is behind the brake light switch wires.

                  So here is what i made. Since the pedal assembly cannot be removed, this plate mounts between the master and pedal frame.

                  i made a bunch of these and advertised years ago... but it seemed no one was coming across this issue... i cant recall where they are now but if you know you could use one... maybe i can find em again.

                  just FYI, late model manuals don't have that either... there is no difference between the brackets at all, I got a pedal assembly from a 318is and it was exactly the same as my 91' automatic.
                  Build thread

                  Bimmerlabs

                  Comment

                  • xLibelle
                    R3VLimited
                    • Aug 2004
                    • 2673

                    #39
                    how do they accomodate for the lack of the clutch spring?

                    Comment

                    • nando
                      Moderator
                      • Nov 2003
                      • 34834

                      #40
                      there is a spring, it's just setup differently. the big huge one isn't really needed.
                      Build thread

                      Bimmerlabs

                      Comment

                      • arakele
                        Noobie
                        • Feb 2006
                        • 15

                        #41
                        pretty clean for 200k!
                        06 325i
                        92 525iM
                        90 M3
                        88 325is


                        Comment

                        • xLibelle
                          R3VLimited
                          • Aug 2004
                          • 2673

                          #42
                          Early 2007

                          Suspension includes IE stage 3 springs with single adjustable Koni shocks and 25mm front sway and 19mm rear.

                          before

                          after. you need to trim down the surfaces so the mounting plate sits flat.

                          and coat to keep rust away.

                          Mounted

                          done


                          not sure why i didnt take a shot of the front springs... i think they were the same height, only the IE has progressive coils.

                          the rear was a hell of a job!
                          trim the lip

                          trash the crap hardware IE sends you, ive got a lot of problems with their products and the little triangle bracket is in part, one of their worst components ever. i made my own

                          remove paint for good weld contact

                          remember to protect your brake lines. the slag will burn right through


                          mount up the block

                          cut out the area for plate... if youre keeping the tar

                          even their smallest bar is large compared to the stock sway. imagine having the 22 on there... really a stupid bar for the 25 hollow up front

                          clamp

                          a little close for comfort so setting up the linkage properly is very important.


                          The angle of the linkage is pretty bad. I'd like to move the collar back some more but the car is handling ok right now.

                          Comment

                          • xLibelle
                            R3VLimited
                            • Aug 2004
                            • 2673

                            #43
                            Sorry about the delay, i need to cap this build thread.

                            I seriously thought i took more pics of the teardown... here she is before going to the paint shop.


                            i found a bronsit valance that was in great condition. I preped the back with white so you'd never know it was a different color originally. The lower mounting tabs left and right of the oil cooler on the car's frame needed pulling out. Many do, as you can spot this by the looks of a drooping valance.

                            Comment

                            • xLibelle
                              R3VLimited
                              • Aug 2004
                              • 2673

                              #44
                              This is what i'm shooting for... somewhat like this, not exactly.


                              Comment

                              • xLibelle
                                R3VLimited
                                • Aug 2004
                                • 2673

                                #45
                                hmm, i know theres more than this but here's a few more.

                                preping for the iS skirts


                                Something that needs attention.


                                Hit with rust stopper and then structural adhesive... good enough for this job.

                                Comment

                                Working...