-
Ha, funny cars.
Is it me or you have even more restriction of air thru your euro trim? This may not help with air flow either.
Your time will come. This is my first and his second swap and although they are both 24v they are different. No matter what, we will be there for our neighbor...especially for one that has an e30. :up: The currency for the help is usually pizza.
So are you requesting a coupe instead of a cabrio. We'll see which makes the journey.Leave a comment:
-
We're all here for you, Patrick...
And Dan, I can't wait to see your coupe in person. September =-)Leave a comment:
-
I usually like to avoid internet speak...but I'm jelly. How am I supposed to keep up with my neighbors?Leave a comment:
-
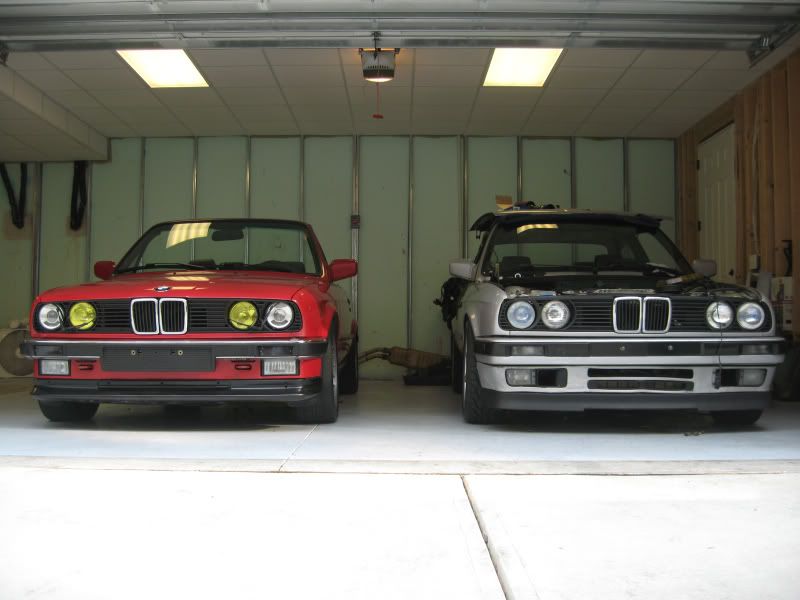
Dude - our cars were talking smack to each other this afternoon....so much so that I had to go down in the garage and unhook their batteries. lol
Leave a comment:
-
Updates!
Yesterday was used to still finish up loose and missing ends. It did move under its own power from the outside to the inside just to get away from the bugs.
As I think mentioned before, I was going to put a 80*C thermostat in so I popped off the tstat cover and noticed that there was no gasket. Its a good thing that I was changing it cause that would have been ugly. The one that was in the car was a 88*C and was brand new. I decided to keep the 88*C in there and keep the 80*C on standby. But it was 8pm and no parts store around had a gasket at that hour. So, I decided to try my hand at making one.
Off to Autozone I went and picked up this roll for $5, and gathered a few supplies to make this happen. This was my first attempt at making one.

I traced out the tstat cover.

And, about 15 minutes later, poof...ME HAVE GASKET!

Most everything is done. It was late till we got to this point so we couldnt fire it up as it would wake the county up with only manifolds!
As my coupe sleeps...


Next is a trip to the exhaust shop.
Cheers!
edit: after seeing the pix on the big screen, my engine bay look filthy. You know ill get to that!Leave a comment:
-
Well then, we need to talk about that painter of yours! I'm gonna need the trunk lid redone.
& thanks for heads up, but actually heading over to WS after work; however, if that changes, I'll let you know.Leave a comment:
-
Thanks!
1. hindsight is always 20/20 and the battery is kinda old anyway. Im sure ill get a new one before the year is up.
2. Its gonna get painted one my painter moves to raleigh...you hear that boxdriver30! lol
BTW, nceuro is having a meet in raleigh if you wanna come on ova tonight.Leave a comment:
-
Enjoy reading your little updates. You, sir, are da man!
FWIW, two things:
1. Battery Tender
2. Fender Protection Pads!Leave a comment:
-
Its alive...ALIVE!!!

Im uber excited now that it runs! No video yet but once I get the exhaust installed, I will post it up.

A side note to cars that sit too long...make sure that the battery has the proper voltage going to the starter. It will save you a lot of head scratching.
During the weekend I went to 2 different pnp for the little things and like screws, hoses, nuts, and a score aNV MAF!!! This was a big relief.
The evening started out with most things plugged in but I tidied up some wiring and plumbing under the manifold. Most things are loose as we just wanted to see if the car will start. It took a minute for it to fire just cause it needed to get gas in the system. Next will be replacing the thermostat with a 80*, putting the rad back on and adding water. Then there is the cleanup. Ill do the M3/318is wire cover after I know all running good for a while.
One thing I havent addressed in this thread was the brake booster. I did not move it. when I test fitted the manifold, it was snug...well more like wedged! A little persuasion and I got it out. It was so close fitting that I decided to trim the manifold but I trimmed too much.

No worries as I wanted to try my fiberglassing skills. I bought this kit.

came with this...

I cut about a 2" square out...

and soaked it...

I think I applied too much. lol oh, well, ive got some sanding to do.

It does look like arse now but it will be cleaned up. If nothing else, ill get a newish mani and try again if this one is fubared. I figured dealing with this clearance issue this was worth it too me. I could have just sanded a couple of the fins down and it would have fit but the mani would be resting on the booster.
I must not have put enough hardener in it cause it took way too long to dry. I installed it for the startup but will take it out and finish the job.
Cheers!Leave a comment:
-
-
Lol, if you showed me a pic of your egine bay by itself, I would swear it was bronzitbeige!
Think you'll go with a Castros intake box?Leave a comment:
-
Another evening...
I put most of it together just to make me feel like im getting somewhere. Im pretty sure that I have most of the wiring sorted. Off to the pnp for some little parts here and there. NV MAF, some water hoses, PS pulley, and a couple nuts and bolts. Water and oil is ready to go in.

Its getting there!Leave a comment:
-
-


Leave a comment: