Announcement

Collapse
No announcement yet.

2011-2012 Project: Get an S54 running in an E30 using a stock MSS54 DME

Collapse
X
 
  • Filter
  • Time
  • Show
Clear All
new posts

    2011-2012 Project: Get an S54 running in an E30 using a stock MSS54 DME


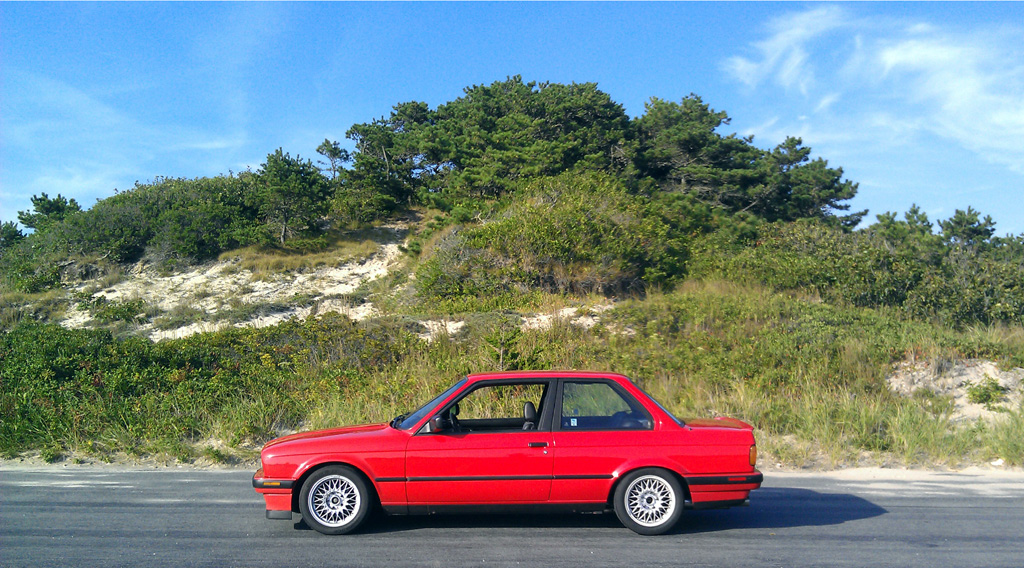
    Picture taken August 2012 of completed swap.


    This thread documents the installation of an S54B32 into an E30 318is.

    Hopefully by the end of 2011 I will have a running S54 in my car, using the stock MSS54 with a reflash that deletes EWS and the requisite for DSC over CAN. I'm giving myself plenty of time, in case I run into snags or just want to put the project down for a while.

    The reflash is available through a guy in Germany. I don't think he wants to be identified right now, because he's pretty busy and his friend told me that he doesn't want to deal with a bazillion questions. With a walk through like this, it will probably be easier for people to scope the job out and reduce the repetitive questions out there.

    This exact project has been done before, but the details floating around the internet are a bit sparse or purposely omitted.

    Hopefully by creating this thread, we can create a meaningful dialogue, and help seed the knowledge base, so that many more people can do this swap by themselves.

    I hope this project will require a minimum of fabrication, and a minimum of pricey add ons which would just make most people say, screw it, I'm just going to buy an E46 M3, which is easily bought for around $15 to 16K right now.

    Brief History
    I originally bought my 318is from txleadfoot a few years ago with the intent of moving an S50US from a rusty E30 to one without any rust.

    I finished the engine swap in September 2008 and used the car to do a couple HPDEs and a ton of autocrosses in 2009. Earlier this year, I pulled the engine in preparation for the next powerplant.

    I will retain the transmission (ZF320), driveshaft (E36 M3) from the S50US swap. I picked up a 3.25 differential, because the 3.46 I was using was sort of driving me nuts on the highway and most autocross courses I drove this past season would have needed a lot less shifting with a 3.25.

    Motivation
    The S54 will be the engine to swap into I6 BMWs for the near future. There is good availability of "junkyard" engines with low mileage, and most consumables, while expensive, are not outrageously priced.

    I don't need any more power. In fact I probably need less to develop my autocrossing skills. But, whatever.

    Final Words
    This will just be the way I solve the engine swap equation. There will be many other ways to skin a cat. For example, I don't plan on retaining the S54 oil pan; instead I'll use an E34 pan and VAC E34 oil pan baffle. Using this oiling solution could result in oil starvation in long corners, which I hope the potential of this happening is reduced using a trapdoor baffle.

    If you've made it this far, congratulations! You have a decent attention span or you've already scrolled to post #2 to see if there are any pictures. :razz:

    This is merely my gun. There are many like it. This one is mine.
    Last edited by FredK; 04-29-2019, 02:49 PM. Reason: Added some front material

    Originally posted by whysimon
    WTF is hello Kitty (I'm 28 with no kids and I don't have cable)

    #2
    Engine Preparation
    I installed the E34 525i oilpan with a new oil pan gasket. Prior to installing the new pan, I removed and replaced the rod bearings, and installed new main cap bolts where rear sump bracketry was removed. The rod bolts were replaced with ARP fasteners, only because I did not trust my torque angle measurements on the stock rod bolts.

    I installed a new E34 525i oil pump, and after removing the stock oil pan baffle, I installed a VAC 525i oilpan baffle. It places a trapdoor baffle in the sump to keep oil near the pickup tube on right hand turns.


    Here is a shot of my bottom end after replacing the rod bearings. ARP's torque value is 70 lbs-ft on their new spec sheet. The main cap bolts are 20 Nm + 50 degrees.

    I'm reusing the Z3M flywheel. I got a new clutch kit, which consisted of a new pressure plate, friction disc, throwout bearing, and pilot bearing. After installing the transmission and starter motor, I dropped the assembly into the engine bay (sans headers and power steering pump for clearance reasons).


    Here's the engine sitting in the engine bay. It is sitting on AKG solid aluminum engine mounts. The front subframe has weld-in engine mount ear reinforcements installed, as well as swaybar tab reinforcements. The AKG mounts have the lower studs in the "proper" orientation, so you can weld in reinforcement tabs without having to excessively clearance the lower weld-in plates.

    What you can't see is that I've installed the clutch slave cylinder and the shifter.

    2/12/11
    I installed the power steering pump, pulley, and main drive belt. I sat the Z3M S54 radiator to check fit. It fits fine, and the stock E36 M50 radiator hoses fit pretty well. I checked intake plenum clearance with the brake master cylinder delete plate and heater core hoses installed, and it appears to be fine. I need to find another appropriate hose to fit the heater core inlet.

    3/30/11
    I installed the heater core hoses. I used two heater core hoses from the E39 528i, PN 64218367930. I removed the hoses from the stock fittings, then slipped the E39 hoses on, after trimming the shorter of the two elbows off.

    10/24/11 Update
    The stock oil cooler won't work that well. It is blocked by the radiator support when it is installed onto the Z3M S54 radiator, and the stock hoses are slightly too long. So, the plan is to use an aftermarket oil cooler, AN-10 S54 oil filter housing adapters (I got these from VAC Motorsports), and AN-10 hoses. I will mount a Setrab 915 near where the stock oil cooler goes.


    The power steering hoses require some monkeying around as well. The stock power steering pump uses a cooling pipe on the rack to reservoir return line, which I guess will need to be duplicated. The pressure line is different from the E30 and E36 in that it is M16, not M14, on the pump pressure side.

    12/17/11
    Installed some new spark plugs.

    1/7/12
    Installed a Setrab 915 oil cooler with custom brackets. I bent some 16 gauge sheetmetal to match up with the oil cooler's mounting holes, and used some M6 rivet nuts installed in some 10 mm holes that were already in the stock radiator support. I had to drill two 10 mm holes in the bottom of the radiator support to install 2 additional M6 rivet nuts.


    I also installed stock E30 oil cooler to cool the power steering fluid. Both the Z3 and M3 have a cooler line for the power steering. I had a lightly used E30 oil cooler, so I figured I'd just reuse it rather than buy another expensive oil cooler, or source a used one.

    To do this, I chopped the softlines off a set of used S14 oil cooler lines that I had, and welded on some 1/2" barb fittings onto the end.


    4/2/12
    I bent a stock E36 M50 dipstick and welded a small bracket to it so that it'd mount to the rubber standoff on the S54 manifold. Fits great. Needs a nipple welded on for the intake manifold CCV drain.


    4/8/12
    I wired the engine up yesterday, and filled the cooling system with straight distilled water. I hooked up my DME and test fired the engine. After priming the fuel pump, I cranked the car a few times and it fired right up. No matter how many times you swap an engine, hearing an engine sing for the first time always brings a tear to my hick sensibilities. I need to go through the fault codes and reset them. I guess the pedal travel sensor needs to be reset, or something like that.

    8/5/12
    I decided upon an intake setup. It relies on a K&N RU-3530 air filter and 3.75" OD Bosch MAF-compatible air tube that I sourced from a vendor on Ebay. Pictures to follow.

    Here are the remaining steps:
    18. Install wiring harness bracketry
    22. Install CCV system
    23. Install charcoal canister
    Last edited by FredK; 08-05-2012, 01:14 PM.

    Originally posted by whysimon
    WTF is hello Kitty (I'm 28 with no kids and I don't have cable)

    Comment


      #3
      Fueling System
      The S54 (as well as the S50B32) runs at 5 bar. This is a bit higher than the earlier incarnations of BMW inline sixes.

      I will retrofit the stock E46 M3 pump in the E30 location for a first pass. Later I will upgrade to a dual pump system to avoid fuel starvation in long sweepers.

      1. Retrofit E46 M3 fuel pump into E30 stock location
      2. Secure stock FPR to somewhere on chassis

      As you can see, the 318is fuel pump looks just like the E46 M3 fuel pump. There are at least two different designs of the 318is pump. I've disassembled them both. One is easier to use as-is, and that will be the one that I will document. The biggest difference between the two is the size of the bottom sheetmetal bracket. One you have to grind out, and one you can use with minor modifications. The one you have to grind out is pictured below, alongside a stock E46 M3 pump.


      The 318is pump, beside an E46 M3 pump extracted from its chassis:


      Cut 5 mm or so off the top supply tube on the pump frame:


      Cut the two top ears off the stock fuel sock, and cut the top nubs off the vibration isolator:


      Now for the E46 pump:

      There are three of these rubber isolators holding the pump to the plastic chassis.


      Remove them and pull the pump out:


      Insert the E46 pump into the E30 fuel pump bracket. Connect a short piece of SAE 30R10 5/16" fuel tubing to the pump frame and pump, and secure it with hose clamps. Attach the fuel sock.


      Solder the electrical connections and install into the car with new fuel injection hose.


      The pump doesn't actually fit with the large diameter hose clamp, so I had to remove it.

      3/11/12
      I ran new all new fuel injection hose, which required partially dropping the tank to access the fuel feed line. I had replaced the return line a couple years ago but the fuel feed lines were in OK shape at the time. They were in bad shape when I pulled them!

      4/2/12
      Fabbed a sheetmetal bracket to hold the fuel pressure regulator assembly. It is sandwiched between an M12 to AN-6 fitting. I used an AN-6 to 8mm hose barb fitting to plumb to the E30's fuel feed line. The FPR return also is attached to the E30's fuel return line. The FPR outlet is plumbed directly to the S54 fuel rail, using the stock fuel rail supply hose, which is the new-style quick disconnect on both sides.
      [Picture of setup here]
      Last edited by FredK; 04-02-2012, 02:12 PM.

      Originally posted by whysimon
      WTF is hello Kitty (I'm 28 with no kids and I don't have cable)

      Comment


        #4
        Cooling System
        8/22/11
        In order to mount the 16" Spal pusher fan that I bought, I decided to reuse the bottom portion of the aux fan bracket. I welded two of the standoffs that hold the rubber doughnuts in place onto the bottom of the aux fan bracket. For the top, I used stock Spal mounting straps that I bent so that they were offset around 5mm.

        The aux fan bracket had to have a chunk taken out of the center of it in order to have the fan sitting low enough.

        A picture is worth a thousand words here:


        Sitting in front of the radiator:


        4/2/12
        I used the stock E36 top radiator hose. The bottom hose requires trimming to fit. Since the genuine E36 bottom hose tapers in the center, it will NOT fit after you trim it to the proper length. As such, I bought a non-tapered hose, Gates PN 22440 and chopped off a few inches.

        I used a barb fitting to adapt the stock S54 Z3M expansion tank hose to the E30 expansion tank.
        [Insert picture here]
        Last edited by FredK; 04-02-2012, 02:12 PM.

        Originally posted by whysimon
        WTF is hello Kitty (I'm 28 with no kids and I don't have cable)

        Comment


          #5
          Electrical System
          This is my first pass at a wiring diagram. This will likely be the section that changes the most. The E46 M3 S54 has slightly different power connectors than the Z3M S54 harness. However, it's a matter of sitting down with the WDS and identifying connectors and components using their wire colors and position.

          1. Requisite connectors on Z3 S54 wiring harness


          2. E30 coolant temperature sensor
          You will have to install an E30 temperature sensor somewhere in the cooling system. I will install a radiator hose temperature sender fitting with the E30 temperature sender. I will likely thread it down to M12x1.5, because I don't want to buy an M14x1.5 tap to tap the sender.

          This will need to go to the C101 pin 4, and the sensor body must be grounded somewhere.
          Last edited by FredK; 10-26-2012, 08:18 AM. Reason: Updated wiring chart

          Originally posted by whysimon
          WTF is hello Kitty (I'm 28 with no kids and I don't have cable)

          Comment


            #6
            Braking
            With the S50US, I used a 320i booster with stock E30 master cylinder. I preferred the braking modulation with the stock 22.2mm MC, as I had the "upgraded" 735i 25mm MC, which is actually 23.8mm. I also preferred the longer pedal throw with the smaller MC, as it made it easier to heel-toe.

            I plan on using a manual setup to minimize cost at first. The first pass will be to use a blockoff plate on the firewall, matched to the hole pattern of the brake booster, with the master cylinder mounted 1" higher. The brake pedal will be modified such that a pushrod attached to the pedal will be horizontal to the master cylinder input shaft. This will require a little cutting and welding.

            Now, if 2002maniac's brother found the pedal effort a little on the high side, I might have to go one size down on the MC to 20.6mm, from a non-ABS 325e.

            Here's a handy breakdown of MC sizing:
            19.1mm = 3/4"
            20.6mm = 13/16"
            22.2mm = 7/8"
            23.8mm = 15/16"

            The pushrod will be fabricated from an M10 grade 12.9 socket head cap screw (SHCS). I got a 200mm long screw from McMaster (91290A564), and I'll just chop it to the appropriate length.

            Blockoff plate fabrication
            So... this is my first pass at fabricating a blockoff plate.


            It's a sandwich of 1/2" plate salvaged from a project at work, and a 1/4" plate that I used as a spacer. It looked rather ugly, so I had a nicely machined piece made:


            Installed, including newly bent and flared lines that somehow took an entire Saturday to bend. :loco:


            Brake pedal modification / pushrod fab
            5/6/12
            I bought a 180 mm socket head cap screw and cut off around 3 inches off it. I tapered the end with a grinder. I moved the brake pivot 1" higher and MIG welded it. I bled the brakes and installed race pads.

            8/5/12
            I thought I'd update the thread on how the brakes feel. Overall I have no problem with braking power. Because of the increased pedal force, however, brake modulation isn't as easy as a power-assisted setup. It is not an issue while driving down the street but I feel like it could make a difference on the track. The pedal height is excellent for heel-toe downshifting.

            2/14/15
            Last we left it, I was running a manual braking setup with a stock Girling 22/17 stepped bore master cylinder, paired with E30 M3 brakes. The brake balance is not good at all. I went to Watkins Glen in September 2012, and braking made the rear of the car squirm heavily. A balance calculator shows that the brake bias was roughly 54/46, with a required pedal effort of around 96 lbs to reach 1.0G, assuming the use of the high torque brake pads.

            Around March 2014 I decided to upgrade to a dual master cylinder setup with a balance bar. I sourced one from Massive Brakes. At the time, I decided to use a .625 inch master cylinder in the front and a .700 in the rear. The pedal effort was reduced to around 70 lbs with this setup. This is still fairly difficult to modulate extremely hard braking, so this winter's project is to further reduce pedal effort.

            My first pass attempt is to use .625 inch master cylinders for both front and rear brake circuits, and use brake calipers with larger pistons. The stock E30 M3 brake piston sizes are 54mm front, 38mm rear. By researching Rock Auto's catalog in a brute force manner, I've found that E28 535i front brakes fit on the E30 carriers, and use the same pad shape, but have a slightly larger 57mm piston. I also found that E34 525iT rear brakes share the same pad shape as the E30 M3, and have a 40mm piston. By combining these parts, the calculated brake effort is 55 lbs, a reduction of around 15 lbs, or around 21%. The balance is also very neutral, at 67/33 F/R.

            4/27/15
            I've just finished installing the .625 masters and the braking modulation is great, with a sufficiently short travel that makes me confident that I shouldn't run into any "code brown" brake-related moments on track.
            Last edited by FredK; 04-27-2015, 10:00 AM. Reason: braking system updates

            Originally posted by whysimon
            WTF is hello Kitty (I'm 28 with no kids and I don't have cable)

            Comment


              #7
              Exhaust
              My original plan was to source some Ebay headers. I've found a dyno chart on the internet that indicate installing BMW Euro S54 headers in the place of stock US headers results in a 10-15 whp gain, which is on the same order of the gains with Ebay headers. So, I will just make my own "Euro" headers. The US headers place the catalytic converters right after the primaries' merge collectors, where the European headers place them further downstream. It is most likely an emissions testing thing.

              The primaries appear to have the same diameter for US and Euro headers, so I will chop off the catalytic converters off my US headers and reuse the BMW 3 into 1 merge and weld on stainless piping. To the merge, I will weld 2.125" tubing leading to a dual 2.125 into 3.5 merge collector.

              From the merge, 3.5" tubing will go through a flex pipe, then go to a Magnaflow 14909 offset center 5x11x22 muffler.

              2/27/11
              Hey look, a picture! I chopped the cats off the headers. It turns out the collector is a tad larger than 2.25" OD, so I'll probably stuff a 2.25" pipe up there and weld it in place.


              I also started to practice welding. I just got a TIG welder. Here are my shameful welds so far on 409 practice scrap.


              I need to stop dipping the tungsten into the weld pool. My hand-eye coordination is getting better, and I'm beginning to see how I can see move the weld pool. The left side is where I left off today.

              4/9/11
              After mitering some pipes last week and tacking them in place, I welded them together. It is pretty tight to the subframe and should offer pretty decent ground clearance, especially because my car isn't very low.


              Random up close shot of the rear muffler:


              I still need to work on the headers.

              10/22/2011
              I installed Ebay headers. All in all the installation was pretty easy. I had to space the passenger side engine mount up 3/8" so that the front header would clear the subframe.


              4/29/2012
              I fabbed up an intermediate pipe to connect the headers to the rest of the exhaust system. It adapts a stock E46 M3 Section 1 to a Burns slip-fit merge collector, dual 2.125" to megaphone to 3.5" out. As you can see in the pictures below, I haven't installed the tabs for the beehive springs I will be using to keep the slip fit tight.


              5/13/2012
              I welded on spring tabs onto the collector and intermediate pipe and installed beehive springs.

              I will need to space the swaybar down to clear the headers.

              5/19/2012
              I made a swaybar spacer from 1/2" aluminum.
              Last edited by FredK; 05-24-2012, 10:19 AM.

              Originally posted by whysimon
              WTF is hello Kitty (I'm 28 with no kids and I don't have cable)

              Comment


                #8
                Drivetrain
                I bought a S3.25 from BenM with a noisy pinion bearing on the cheap. I opened it up and everything was pretty clean, except the torque wasn't set correctly on the pinion gear. The washer got crushed down but somehow the bearings ate themselves up. So, I'm rebuilding it.


                The friction plates looked OK, so I'm just going to reuse them for the time being. This is my first diff rebuild so I'd rather not dump $250 into machining, an extra dog plate and 3 new friction discs.

                Hopefully this section has a few more pictures, but PiercedGuy had a pretty good rundown on what's necessary to swap an LSD in. The pinion setup is just a few more steps, but like an idiot I didn't take any pictures of that.

                Today I set the pinion drag torque. I used a Park TW-1 torque wrench to get to 16 in-lb with the front seal in place. It's the cheapest 0-60 in-lb torque wrench out there, probably, at around $35. I used an E36 fan clutch tool as a counter holder and a long breaker bar to crush the sleeve down.

                4/30/11
                I installed the diff after installing the LSD pumpkin. Just need to put new dustcover plates on the output shafts and install the halfshafts.

                3/11/12
                I installed a low mileage E36 328i manual driveshaft with a new Lemfoerder E36 M3 flex disc. This required using different flex disc bolts. They were PN 26112283795, and are 4mm longer than the 328i bolts.

                8/5/12
                If I'm to believe my tachometer and speedometer, the diff I bought and rebuilt is actually a 2.93. :/ I'll confirm the ring to pinion ratio when I pull it to install another diff.

                I am going to rebuild my 3.46 from my other car with three clutches, and this time around, I hope to document the process a little better. Haha.

                I will be using three stock BMW friction discs and three 2.0mm dog ear plates. The 2.0mm dog ear plates are available from Auto Atlanta. They are available from Auto Atlanta under PN G91733255211.

                At the same time, I'll be replacing the pinion gear bearings, side bearings, front and side seals.

                33141210626 Friction Disc 2.0mm
                33121744368 Crush Sleeve for Differential Pinion Shaft
                23211490120 Lock Plate Differential Input Flange Nut
                33107505602 Seal, Differential Drive Flange
                33101214099 Seal, Differential Pinion Shaft
                33111214144 O-Ring for Differential Side Covers
                33131213893 Output Shaft Carrier Bearing
                33121468893 Pinion Shaft Rear Bearing
                33121468892 Pinion Shaft Front Bearing

                Optional parts replaced due to rusty appearance:
                33131208006 Output flange dustcovers
                33121200284 Input shaft dustcover
                33111206076 Speed sensor bracket (mine was rusty)

                9/24/12
                I rebuilt the S3.46 with new pinion bearings and three clutches. Acceleration and lock feel great so far. There's quite a bit of chatter, so I might add some LS additive if it doesn't go away after a little while.
                Last edited by FredK; 09-24-2012, 07:27 AM.

                Originally posted by whysimon
                WTF is hello Kitty (I'm 28 with no kids and I don't have cable)

                Comment


                  #9
                  first, pics, soupscribed, etc

                  Where are you getting the ECU reflashed?
                  cars beep boop

                  Comment


                    #10
                    Originally posted by FredK
                    Cooling System
                    1. Install radiator
                    2. Install coolant expansion tank of some sort
                    m42 rad?

                    (subscribed)
                    -----Zen and the Art of e30 Maintenance - / - Zen TOC - / - Zen Summary

                    Comment


                      #11
                      Oh snap! An armed Azn!

                      E30 M3 / E30 325is / E34 525iT / E34 535i

                      Comment


                        #12
                        Where does MikeK fit into all this?
                        Originally posted by LJ851
                        I programmed my oven to turn off when my pizza was done, should i start a build thread?

                        Feedback

                        Comment


                          #13
                          pics or ban :hitler:
                          -FREEDOM- is cruisin at 80, windows down and listening to the perfect song-thinking "this is it"
                          -The Beauty in the Tragedy-
                          MECHANIC SMASH!!- (you all know you do it)
                          Got Drop?? ;-)
                          Originally posted by JinormusJ
                          But of course
                          E30s are know to be notoriously really really really ridiculously good looking

                          Comment


                            #14
                            Hopefully I've answered your questions thus far--I updated my posts, which I'll continue to do as I make more progress. Yes, I will take pictures. I took a blurry picture of some ARP rod bolts, but am too lazy to upload them.

                            Originally posted by Teaguer View Post
                            Oh snap! An armed Azn!

                            Originally posted by chadthestampede View Post
                            Where does MikeK fit into all this?
                            I'm sure I'll visit NYC to harass him later this winter. I might need need to go fistpump with him to get motivated.

                            Originally posted by whysimon
                            WTF is hello Kitty (I'm 28 with no kids and I don't have cable)

                            Comment


                              #15
                              I know in the car recently featured on here with the alpinas had a functiouning M button. Will you be doing this?

                              Comment

                              Working...
                              X