-
Huh? Do some more research because from that statement I can tell you don't know much about detailing. Polish is but a step in the process. Rubbing compound doesn't get your car shiny. If you do the proper steps starting with polish and eventually finish with sealant you could go for 6 months before applying again. It's not like the shine just dies. With polish you are getting rid of swirls and creating a base for the shine to come through once you do the next steps. As long as you keep it up a little it will never go away. There is also products like Smartwax that will allow you to do in two steps what normally takes four. That would be the easiest way to go for someone wanting a nice shine that doesn't have experience or doesn't want to spend tons of time. -
Very easy, just remove top and bottom rear seat. Unbolt seatbelt from bottom and remove plastic from shelf where the seatbelt comes out and then just pull on the shelf out towards front of car. It is not fastened to anything, just held in place by rear seat and c-pillars.Leave a comment:
-
love this attention to detail - i always try to do things like this and get annoyed as i end up breaking clips etc as it is such an old car so i leave it alone haha
i have a question though- how do you remove the rear shelf? i know how to remove the rear seats easily enough but then cannot work out how to remove the shelf?Leave a comment:
-
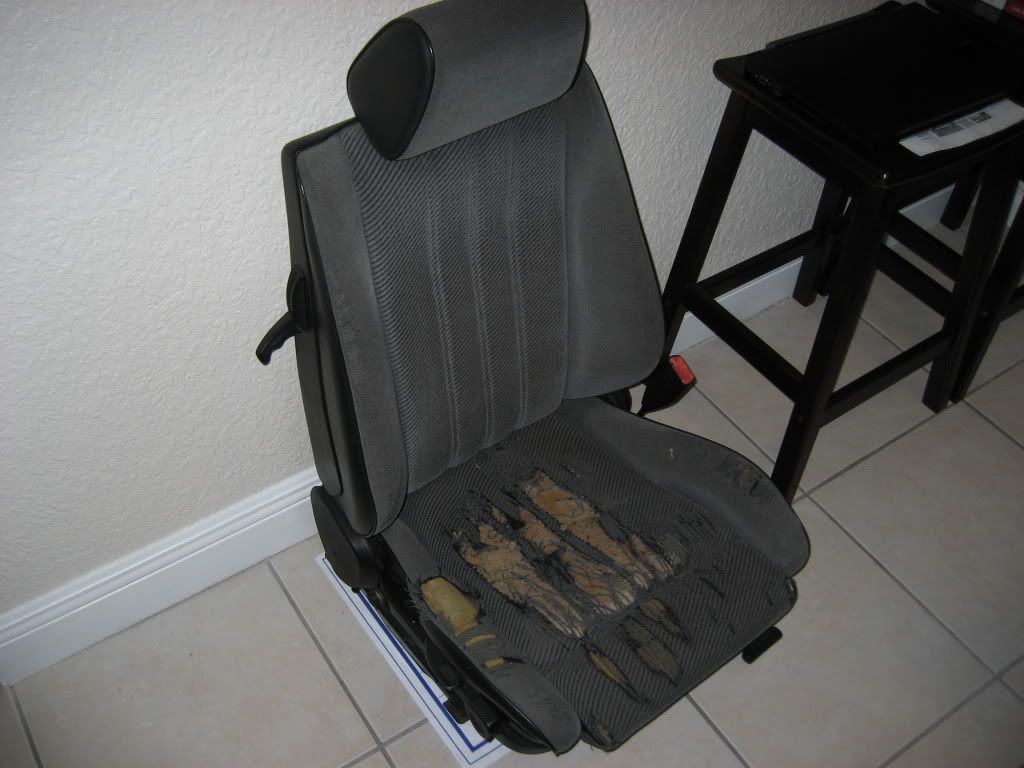
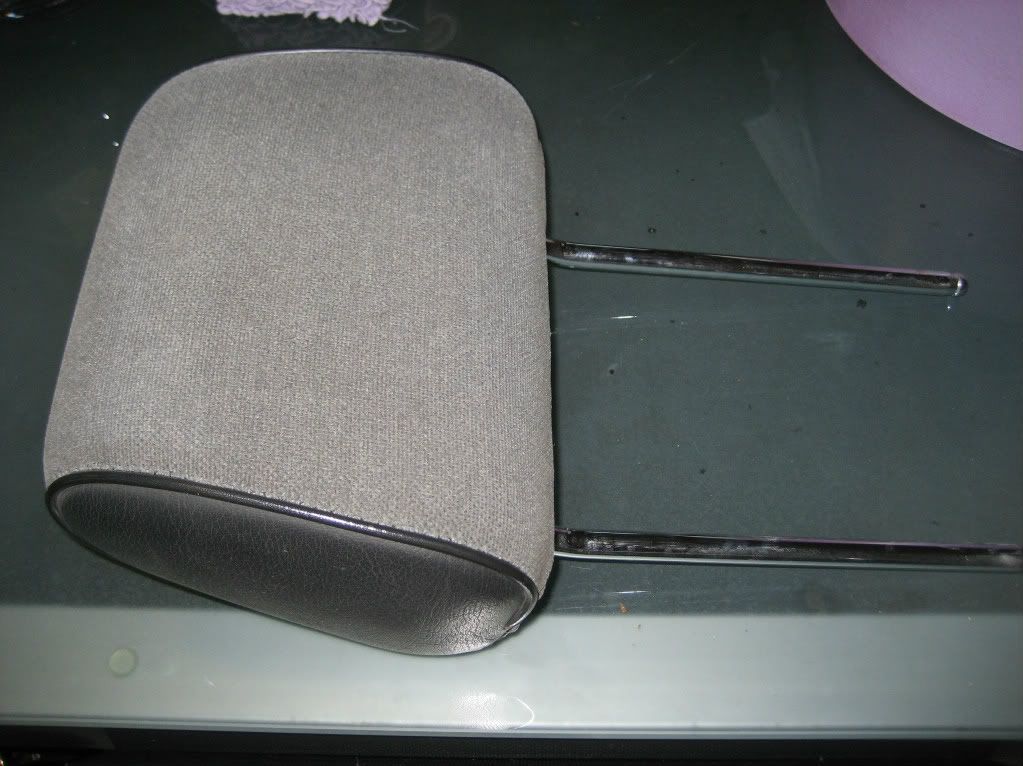
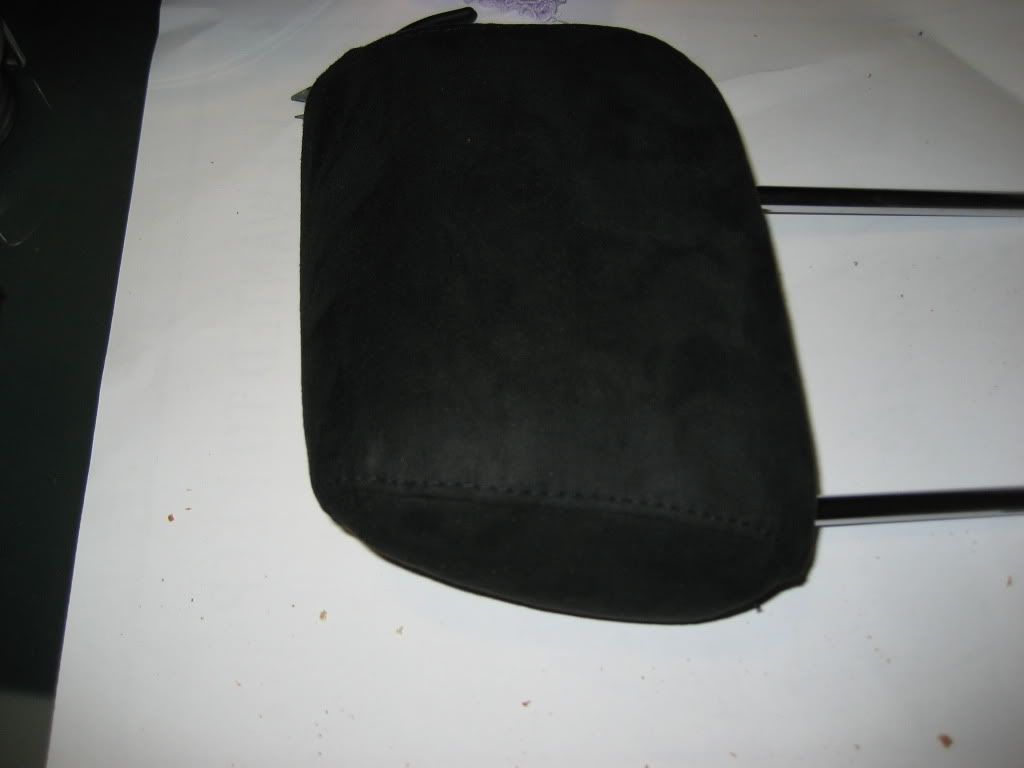
Here is another update from over the last 3 weeks. First I started on my front passenger seat. Here is a pic of the old seat. Sure needs to be recovered. I will recondition the shocks, metal base and wasted foam pieces. Here is the headrest before and after in the black micro suede. Matches nice with the rear ones and very modern with no piping and french seams.
New one:
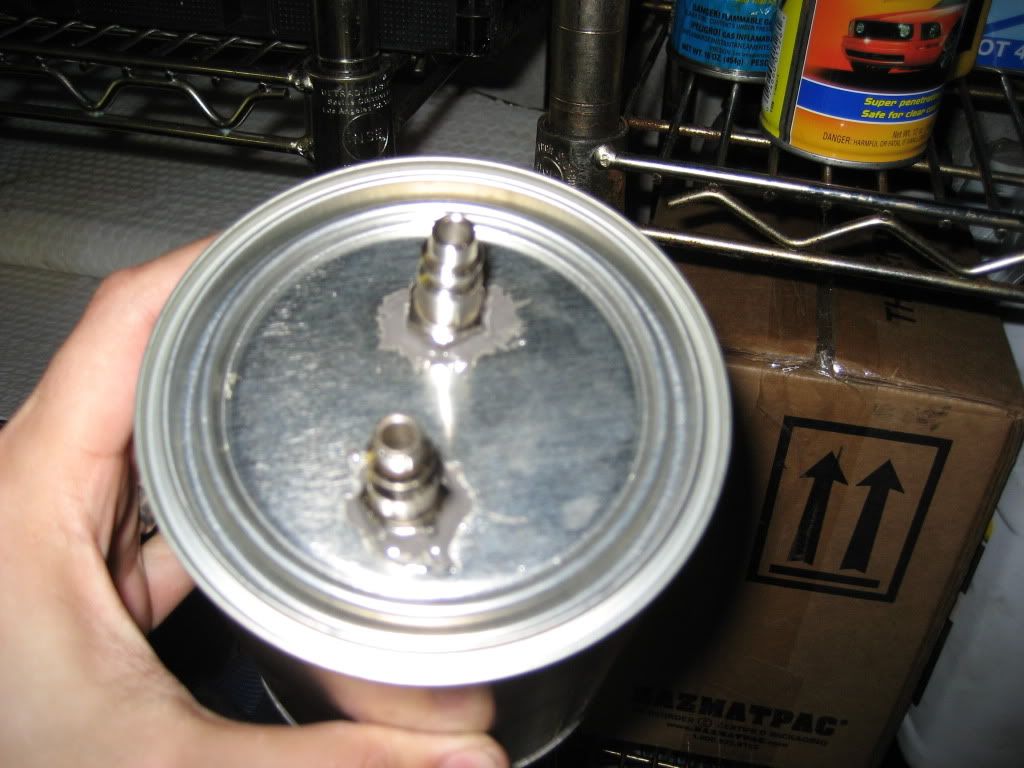
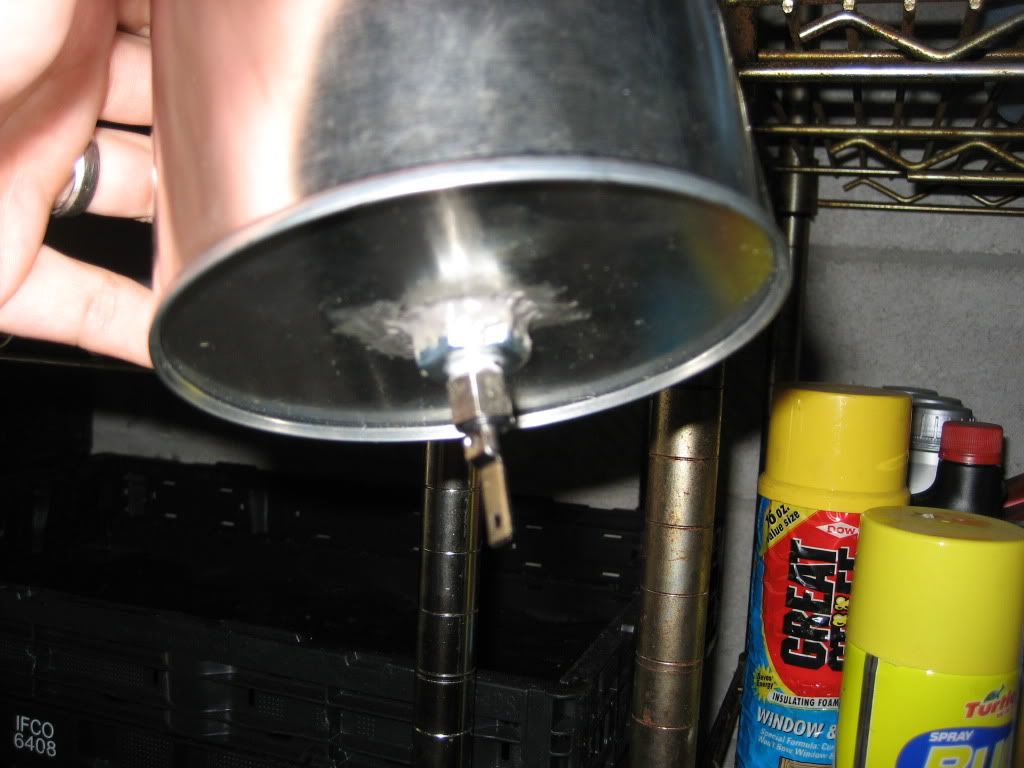
Here are a few pics of my homemade DIY smoke detector machine, and workd pretty well, from searching the web on how to make it. Found some on e46fanatics.com and composed my version.
Get a quart metal paint can, ~$2 at Lowes/Home depot. Then drilled a hole at bottom wide enought to fit the AC Delco glowing plug ~$9 at Autozone. Then bought a nut at Home Depot to fit threads on plug, metric size ~$1. Then JB weld it to the can. Used teflon pipe tape and screwed the plug in. I need to add more tape as I got some of the oil to leak, very little but still leaked. The plug uses batter charger, 12v 10amps to power it on. Use the postive on the lead and the negative on the base. Used alligator clips to be able to easily disconnect on of the leads to turn it off. I have to build legs for it but if you hang it or use 2 2x4 pieces on the edge, you dont disrupt the electrical connections. Fill can with unscented baby oil until half the plug is exposed. I then drilled 2 holes on the lid and JB Weld to air compressor hose fitting to it to easily attach a rubber hose to shoot the smoke and the other for the air compressor hose fitting which is my air source. Turn it on, regulater compressor to 2-3 psi and you have a smoke machine. Mineral oil or hobby train might work better to give a darker smoke but baby oil worked just fine. The using a funnel on one end of the rubber intake elbow you fire the smoke in. You can use the hose off the valve cover by the oil cap to see it. I have small leaks due cracked hoses by the couplers. Sure way better than paying a shop to do it or $1K for the machine. If anyone has questions, let me know.
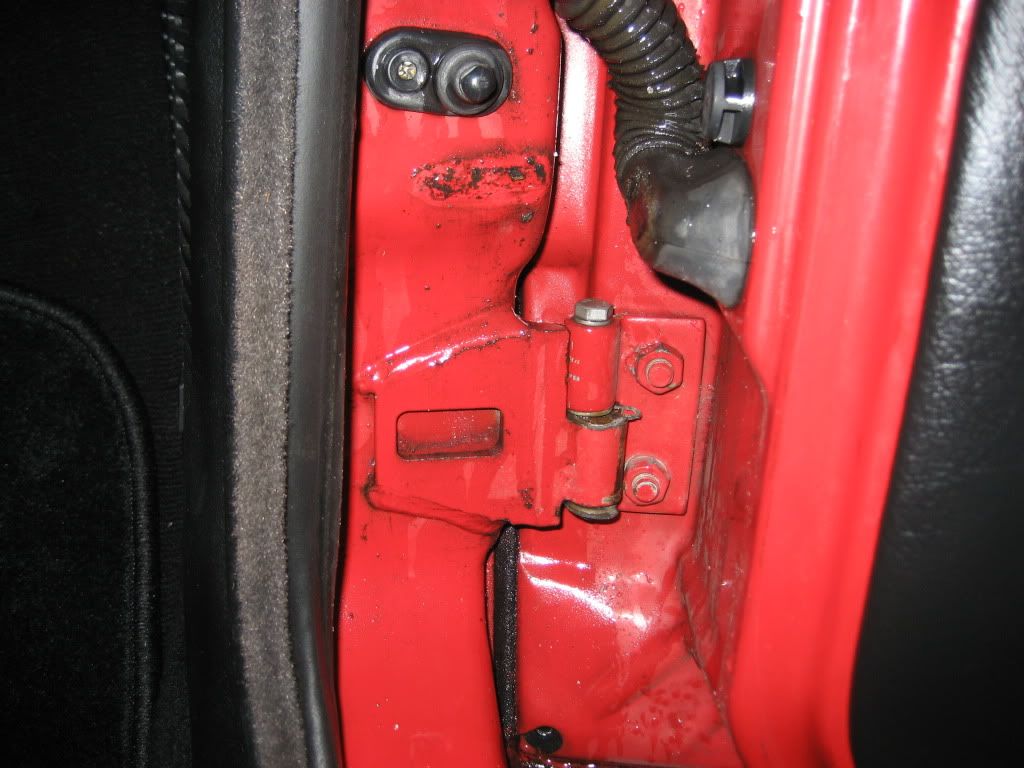
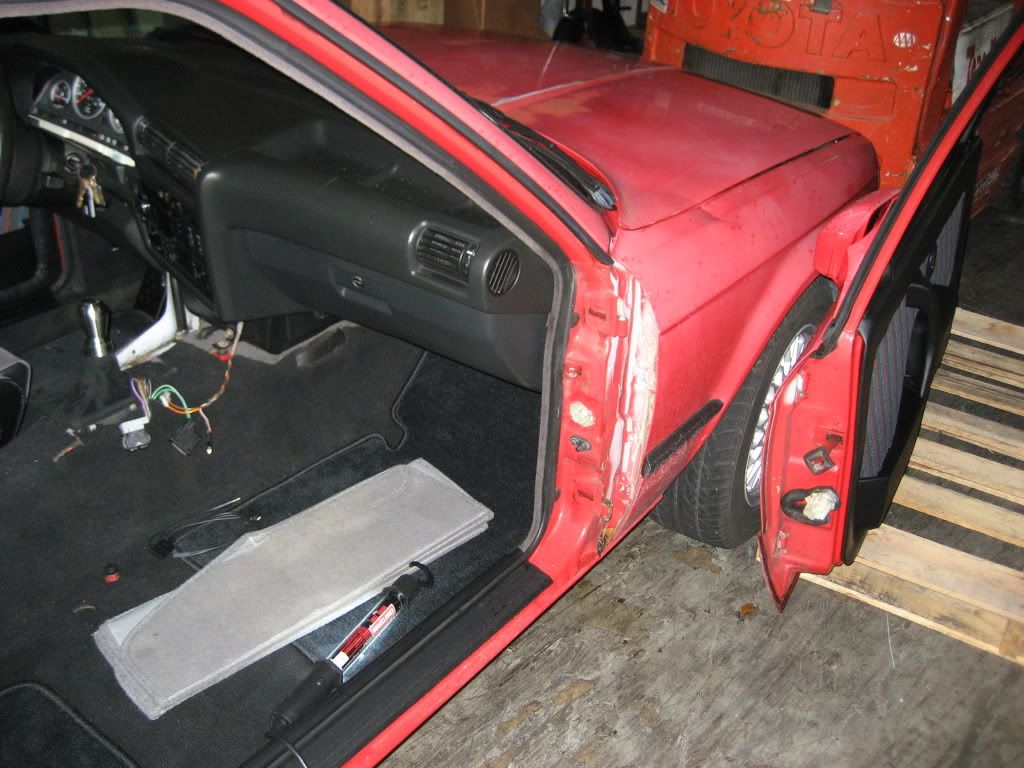
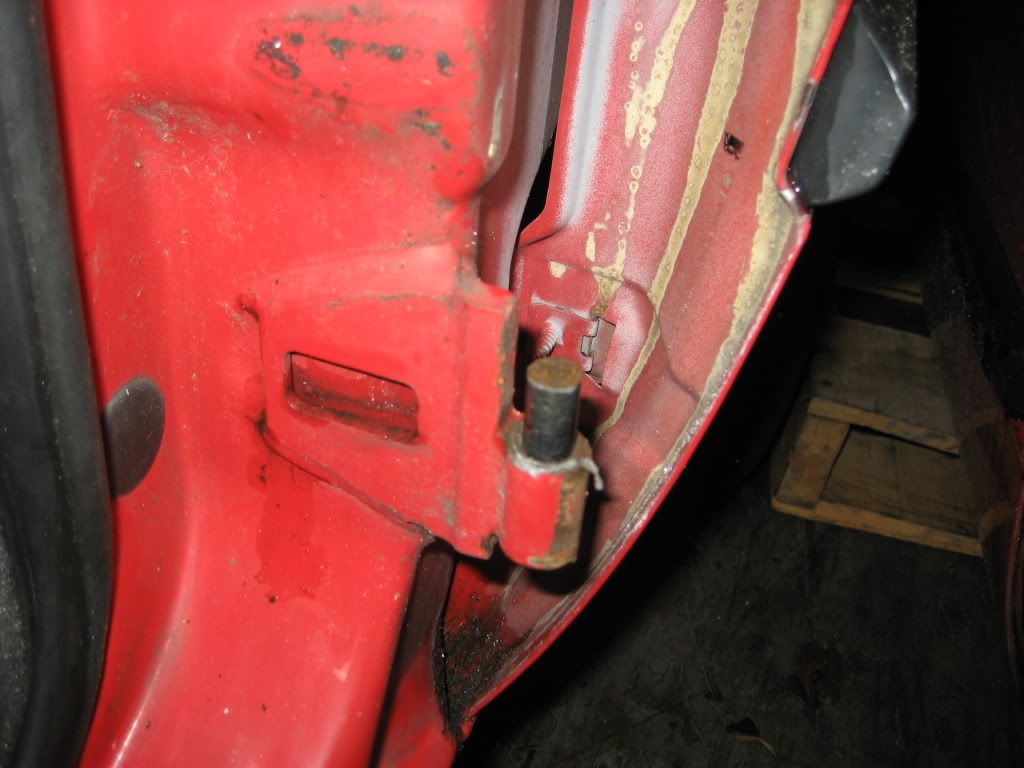
Last week, closing the passenger door, I heard a clunk and door didnt close. The bottom hinge pin broke in half and now the door was not aligned to close. I order the BMW repair pin that comes with new pin, sleeve, washer, clip and bolt. Today I replaced it, took about an hour. I wanted to do it with the door on but being in the bottom, I couldnt get to it. If it was the top one, you can easily do it with door on. I had to take the door off and it was pretty simple. Did it by myselft but if you ahve another set of hands, the removing of the door and returning it on the pins makes it easier. No need to realign as the hinge on the chasis was not touched. Here are a few pics of process:
Here is pic of the pin broken:
Here is door removed:
Here is the broken piece coming out, used punch and hammer:
Here it all back together and good as new:
Leave a comment:
-
-
nice build!!!
but for the love of good polish the car, im getting thirsty just looking at the pictures.hahaLeave a comment:
-
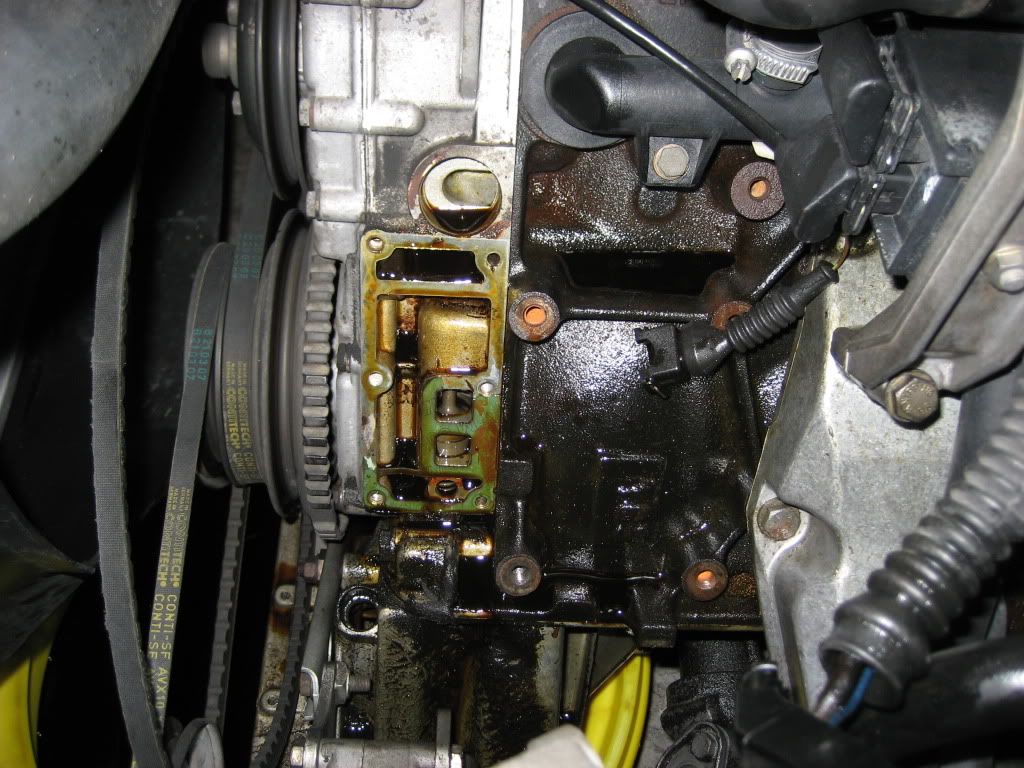
Tackled the oil filter housing leak this past weeked. It looks like the top right hand corner of the paper gasket gave out and was leaking. You can see the pool of oil it would accumulate. Even more dripping to the top of the bottom oil pan. I now have a small leak and pretty sure it is the oil pressure switch. The washer didnt look good but didnt have one. So waiting on a new one.
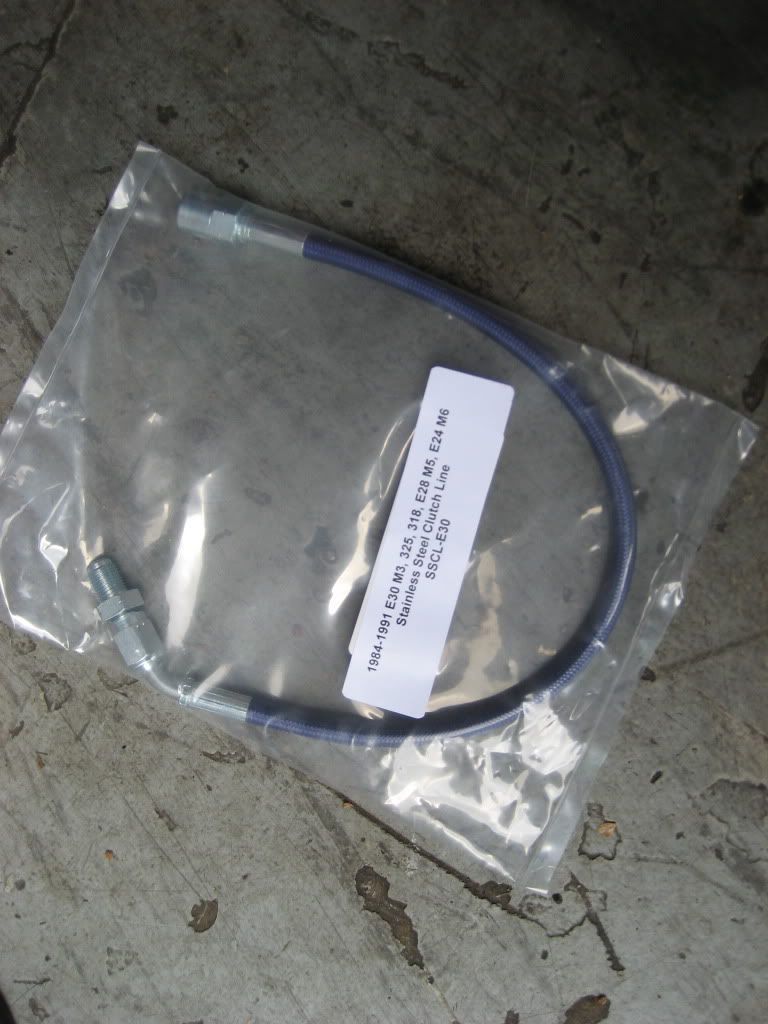
I also became pro-active for the first time. Replaced the master clutch cylinder as it was getting notchy. I replaced the slave a few months ago. I also decide to replace the rubber clutch line with the UUC SS verison plus the bushings for the pedal itself to remove the sloppyness. Mine didnt squeak but hear this also resolves that issue.
Here are a few pics as I ordered a new return spring and rubber grommets like I did with the gas pedal.
Leave a comment:
-
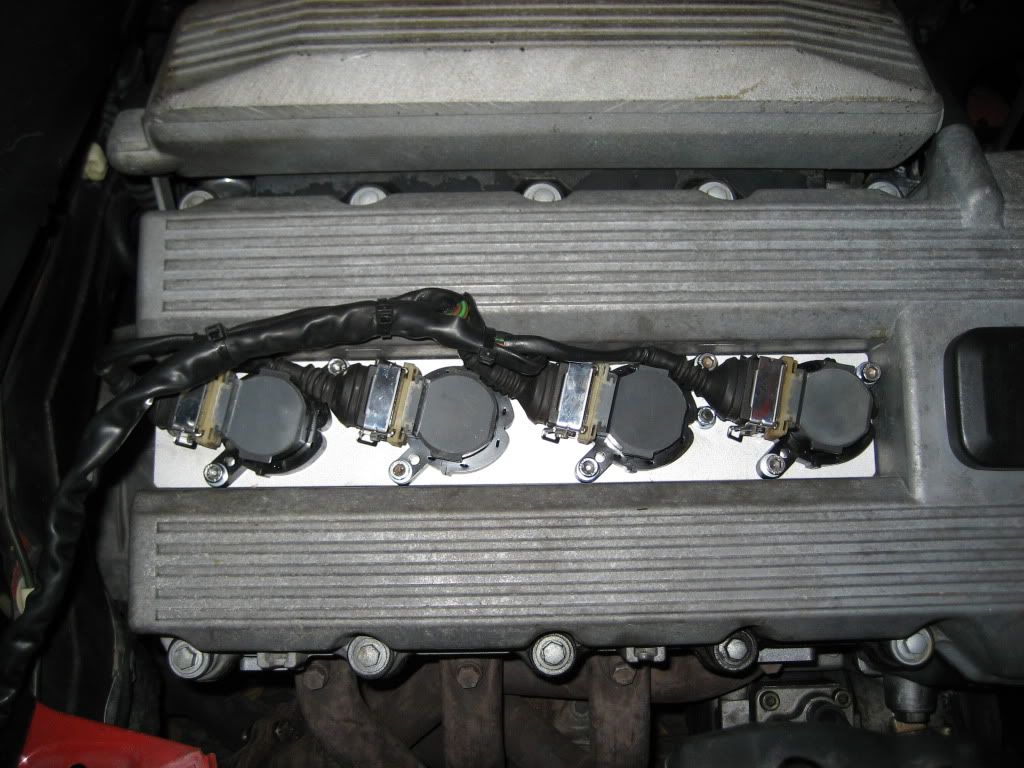
Today I added the COP kit. Car revs much smoother. I still have small misfire at idle so next is to check for vacuum leaks with homemade smoke machine. If no leaks will replace ICV a spare I have but not sure of its conidtion. I have already cleaned mine 2 times and now everytime I hit the AC button, the car revs great and smooth. Its only with the AC off that I get this misfire idle. I doubt it is the ICV, but checking everything. Next weekend I will remove the old coil packs, bracket and clean up the cabling. Not a fan of how it looks as I like it to look OEM. Will even try to get BMW plastic cover to work like Simon S on r3v did. Not sure how I will do it yet.
I also fixed my power antenna. I found a old one from an e24 in my dad's parts. They use the same part numbers for antenna. I opened his, and swapped motor. Now I have smooth and quiet antenna. Here is a picture of the new with the guid on the shaft and mine with it missing. Sorry for the bad pics.

Leave a comment:
-
Added the door sill on the outside part of the door. They look very nice and clean brand new from BMW. On to front passenger seat.
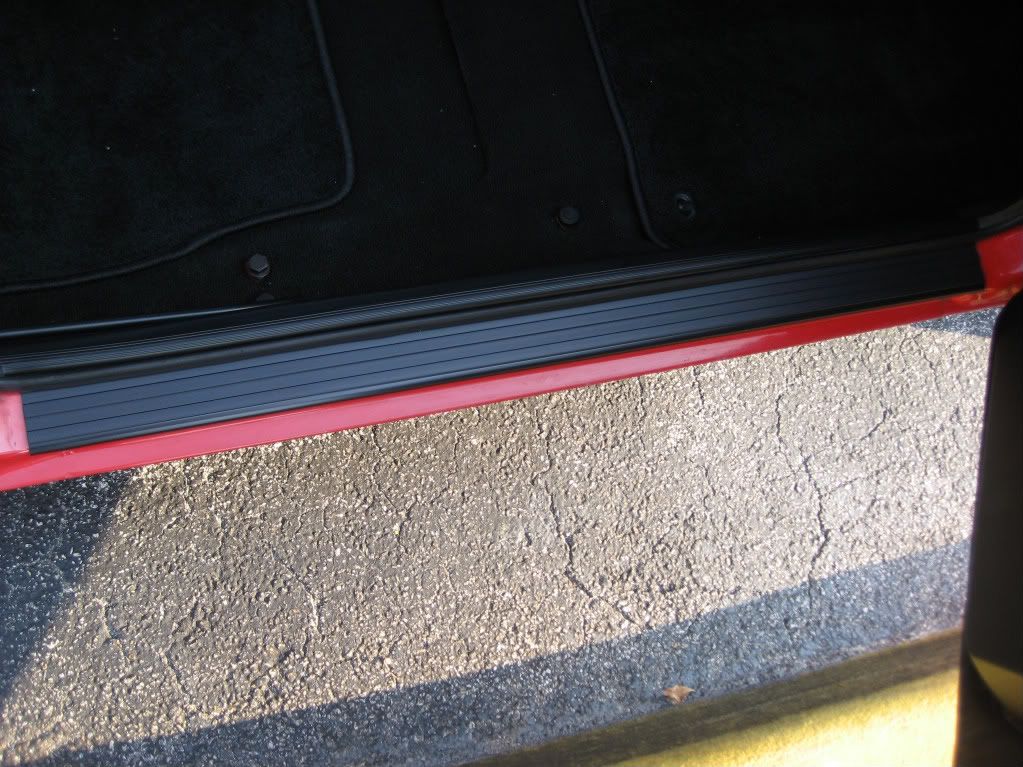
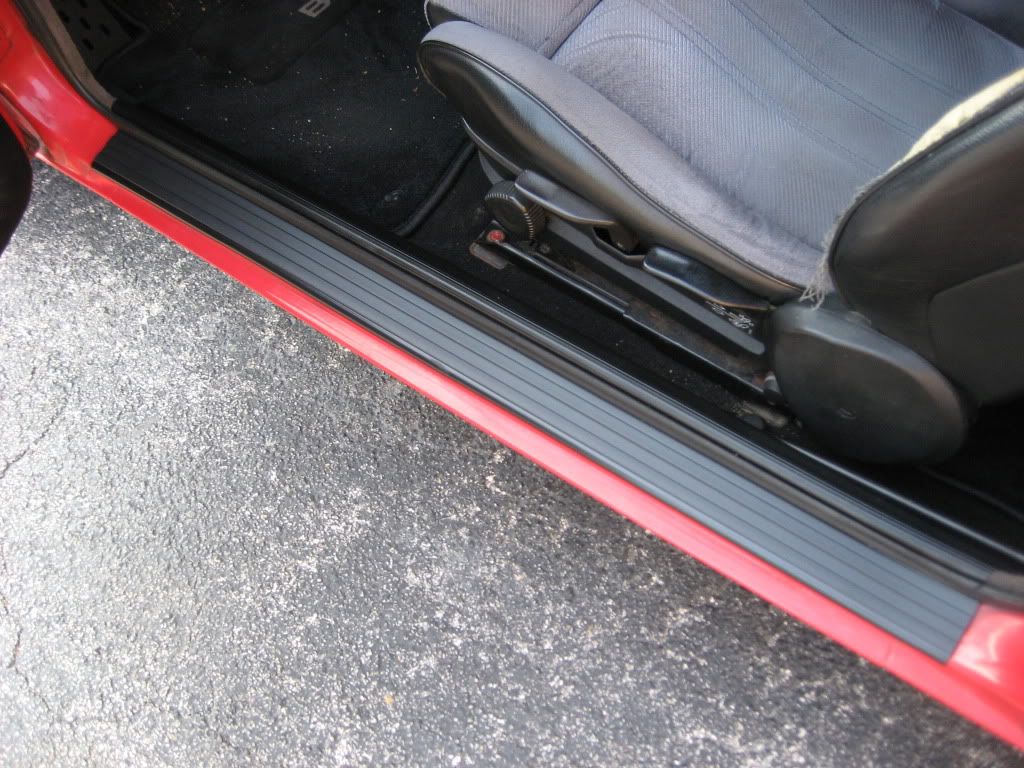
Leave a comment:
-
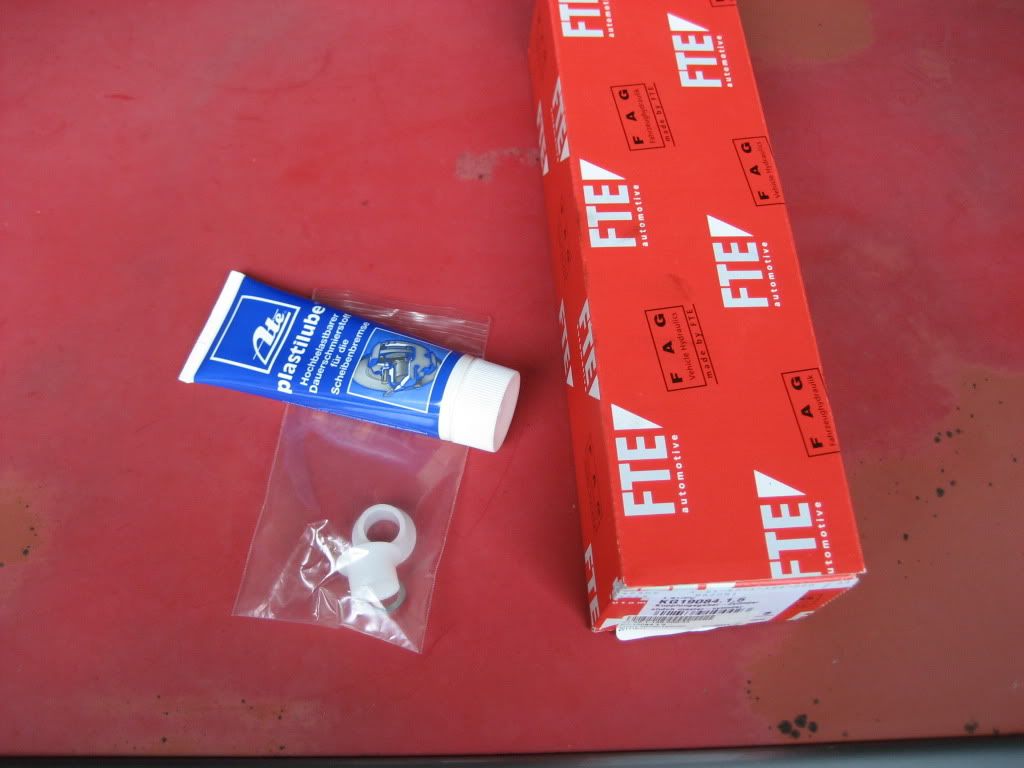
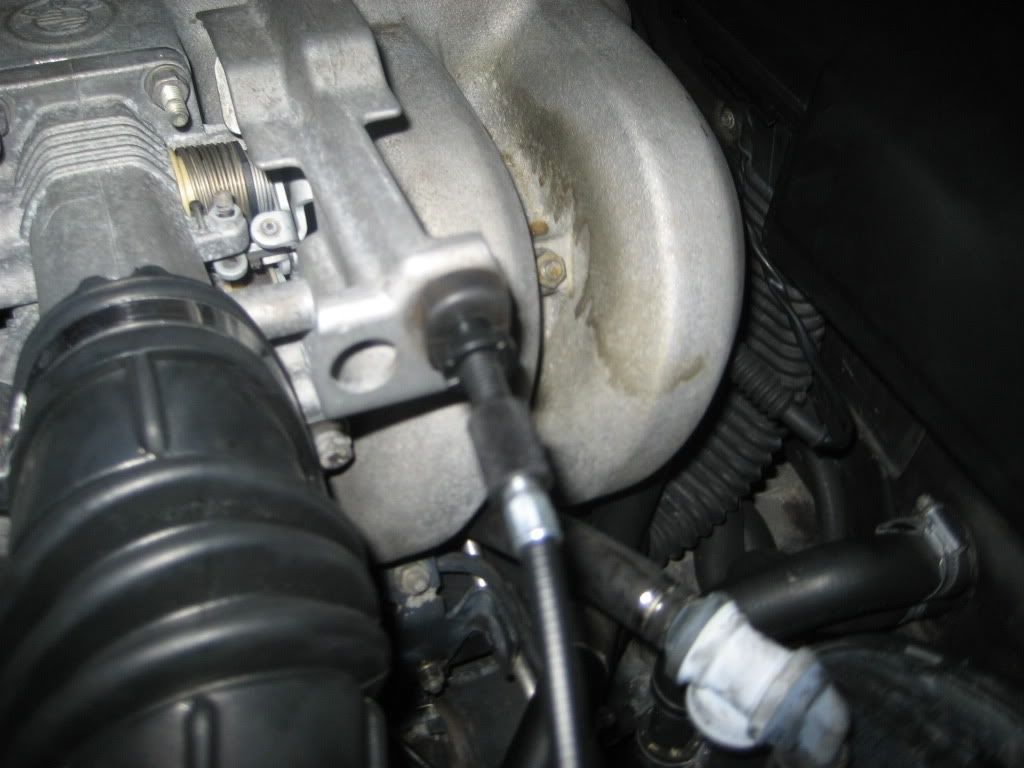
I finally received my parts for all the bushings/grommets for the gas pedal area. All went in smooth and now the pedal is smooth on the return. Also had to give more slack on cable to bring revs down. Next is to remove intake boot to make sure throttle plate is only opened about .015mm at idle. Then I test the TPS as I am troubleshooting the rough idle. I have the COP on the way. Then on to 4-pintle injectors.
Here is a pic of the left side with the new bushing installed on the gas pedal shaft.
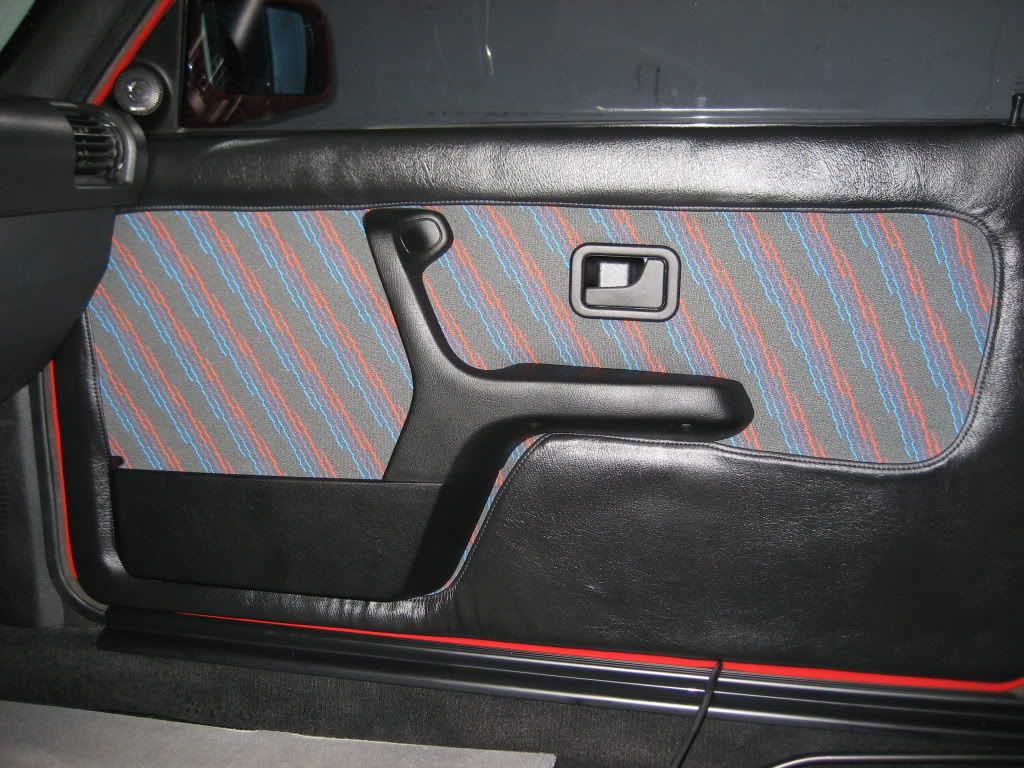
Here is the passenger door. The pic is no the best and looks weird. I did it quick so have to take better ones. Now detailing the interior and then starting on door sills for the exteriror side, as they came in yesterday from BMW. Then I move to passenger front seat.
Today I replace the antenna mast as it is getting stuck.Leave a comment:
-
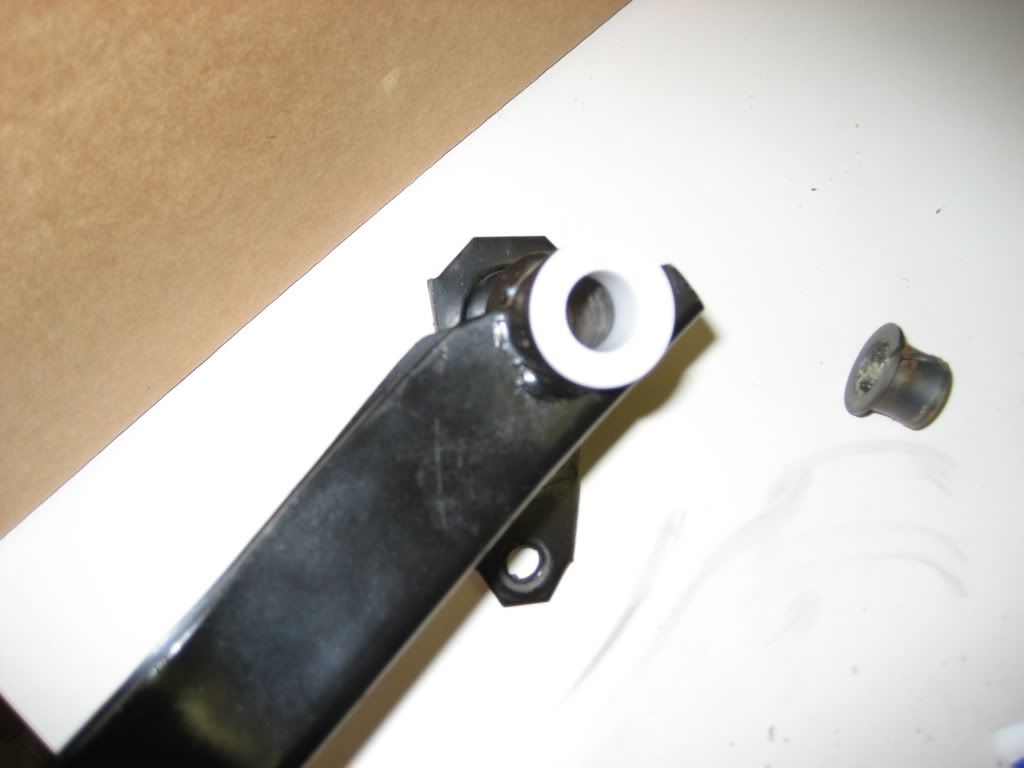
Here is a pic of the new throttle cable. The design has changed and hard to tell in the picture. You don't need 2 wrenches anymore to adjust, just spind the finger grip to tighten or loosen cable. Also found out issue with stuck throttle, the shaft that connects the bracket to the pedal and bracket to the cable, has has the bushing bearing break off. It cause the shaft to move freeling and the clip to get got. Order the $1.50 grommets and bushing to fix the part of the car for the pedal area.
Leave a comment:
-
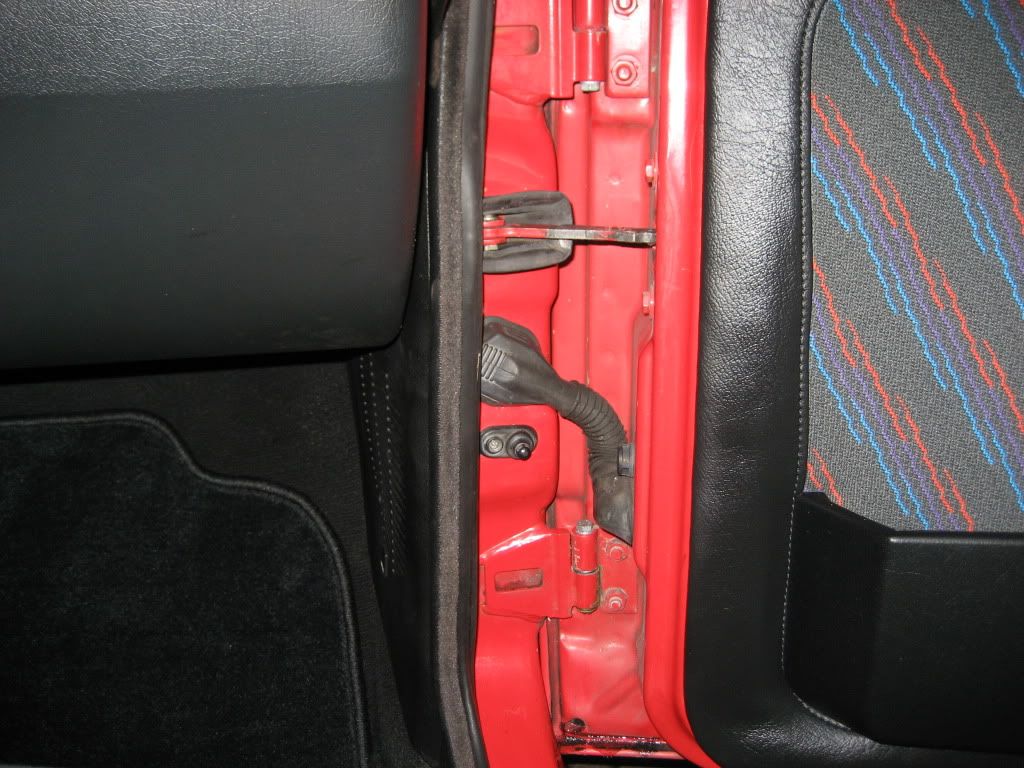
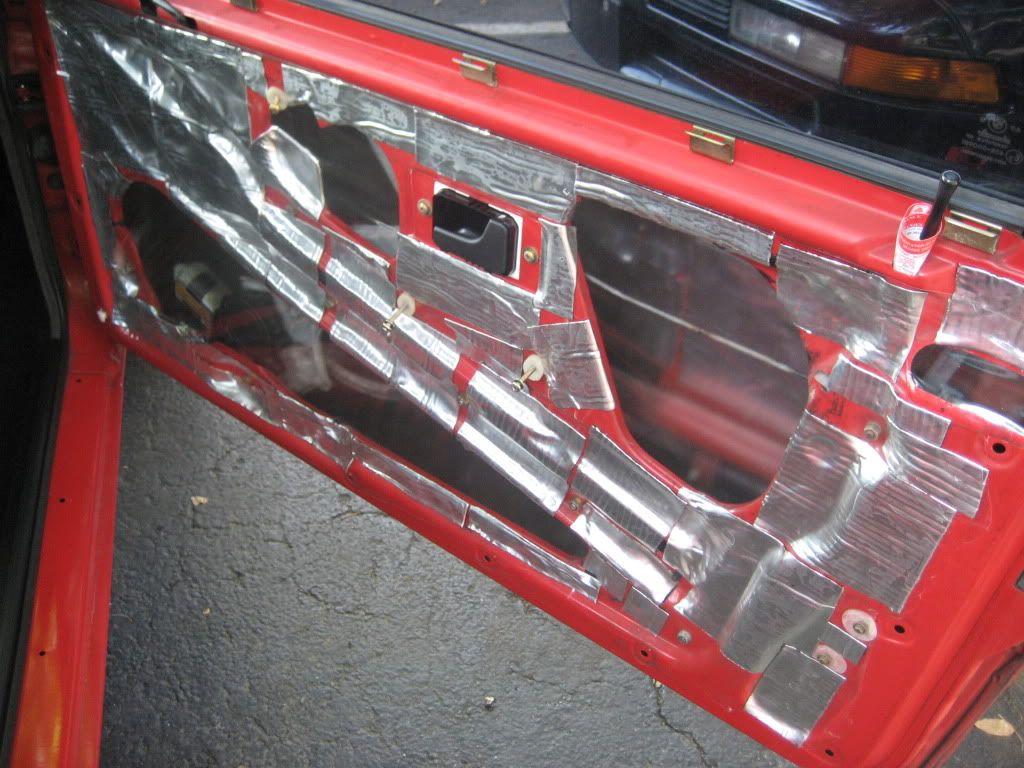
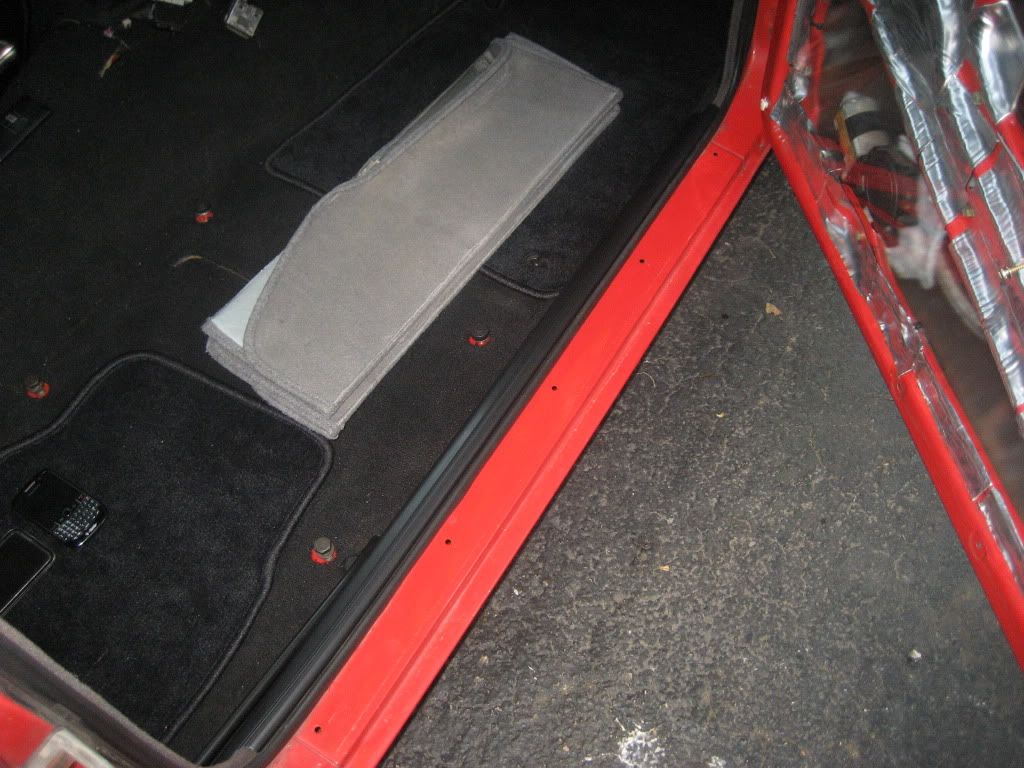
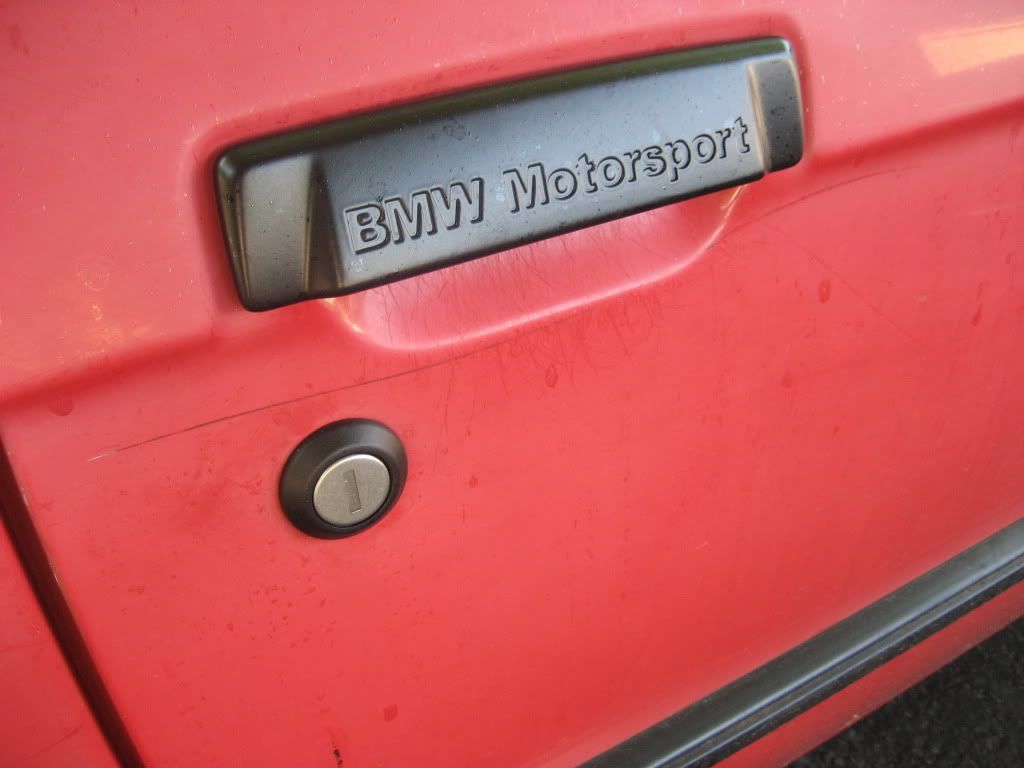
Did the passenger side moisture block paper from BMW. The roll can easily do a 4 car and maybe 2 more doors. Here are a few pics. You can see the insulation and the block in the first pick. The second is the interior bottom door sill like the driver side. Last is the new passenger door lock and the bezel is nice a deep black to match new handle. Now need to paint car to match all these new parts. Soon. I have to wash my car as I have this weird film all over. Like little sparkles. The door handle has these and looks like it is messed up but in reality it is this stick film.
Leave a comment:


Leave a comment: