
I didn't know Bav Rest made a speedo calibration tool. That's really cool. Does it plug into the stock cluster or are there other modifications to be made?
Hopefully I'll see you and your car at The Vintage! I've registered mine but I need to fix a few things before I trust it to make the drive there and back.
-
I decided to change my spare tire as I needed a 6.5 wide rim so that the tire did not bump up the trunk carpet. I found out that the e34 spare tire, is a steelie with the right width. I found one pretty much never used and swapped the tire.

Leave a comment:
-
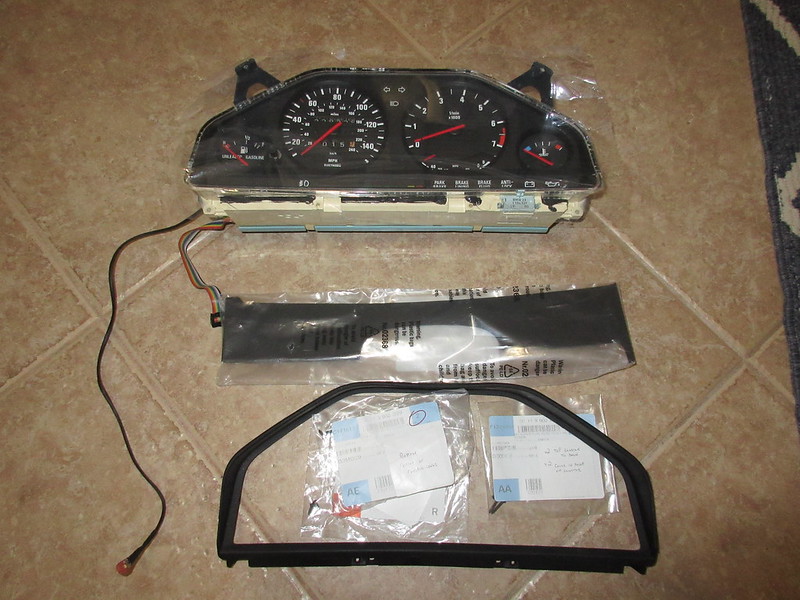
Hey everyone, been awhile. Since my last update, our 3rd child was born so car has just been sitting there with minor use or work. In preparation for the 2019 Vintage, I am starting up again. I sent in cluster to Bavarian Restoration to restore the instrument cluster as my SI board is bad, and I have a battery drain. I also have a sporadic speedo/mpg gauge and it all points to the instrument cluster. I got it back and here is a picture of it. I also has order some years ago a new trim piece that goes below and new screws from BMW. I painted the bezel when I painted the cluster face. Bavarian also added a speedo calibration tool, which is the cable you see at the bottom. I will use my phone's GPS to calibrate the speed.
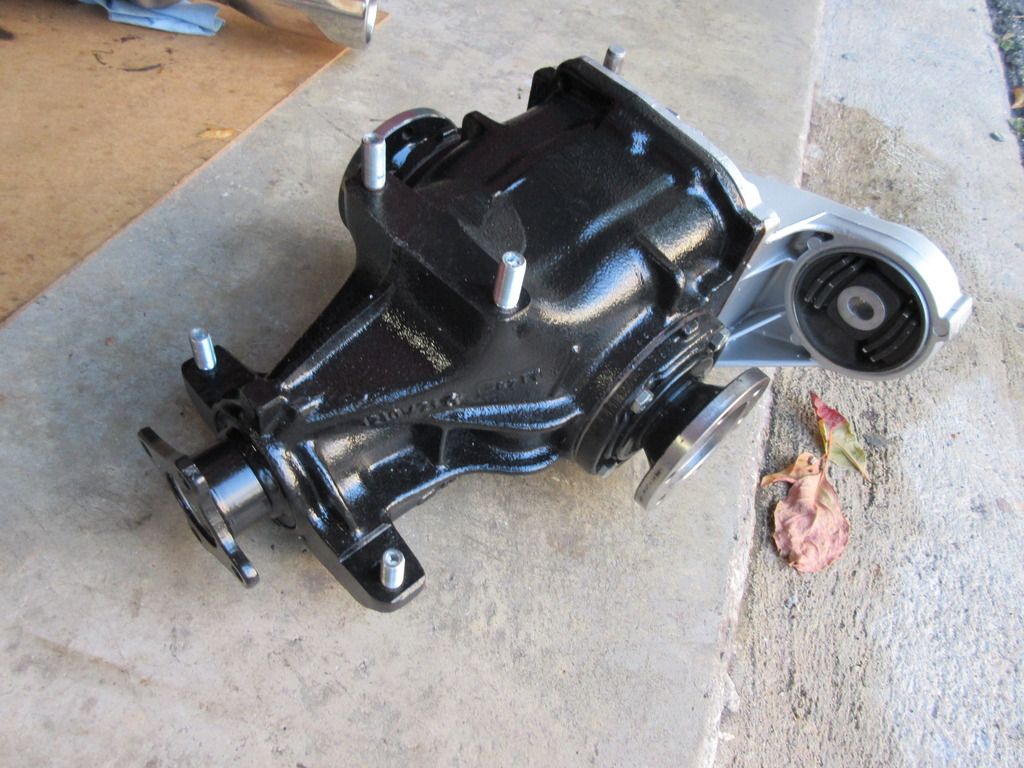
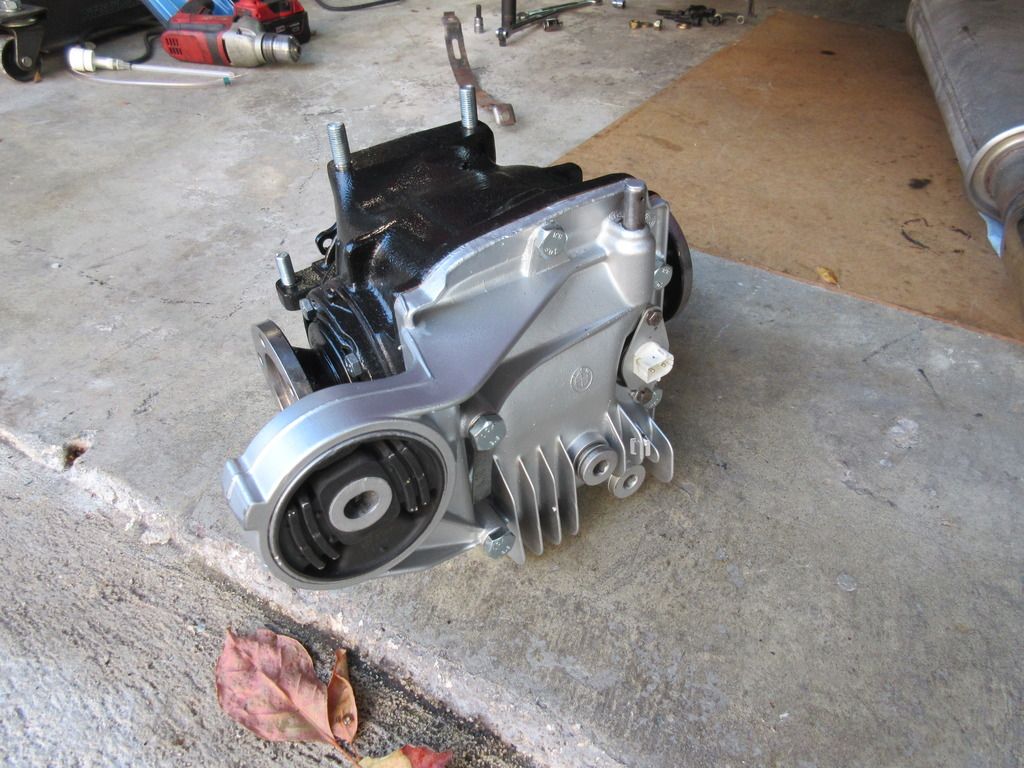
The car is on jack stands, as I am also upgrading my diff to a 3.73 LSD. Agent, on this board, is helping me with it. They rebuilt my 4.10 open diff.Last edited by monty23psk; 04-14-2019, 07:27 AM.Leave a comment:
-
-
Nice fathers day read. Went through your whole thread, great work.!!Leave a comment:
-
So after driving a bunch of miles with the new rear end, it am still getting a small clunk when I put it in gear from the rear. The only thing I didn't replace was the diff mount. I have a BMW made mz3 solid rubber one but it has 12 years and ~120k miles on it. Since I went the AKG path, I got one for for the diff. I just to the old one pressed out and new one in. I also got the rear aligned at a shop to get it back in spec as much as possible with the adjustable TABs.

Leave a comment:
-
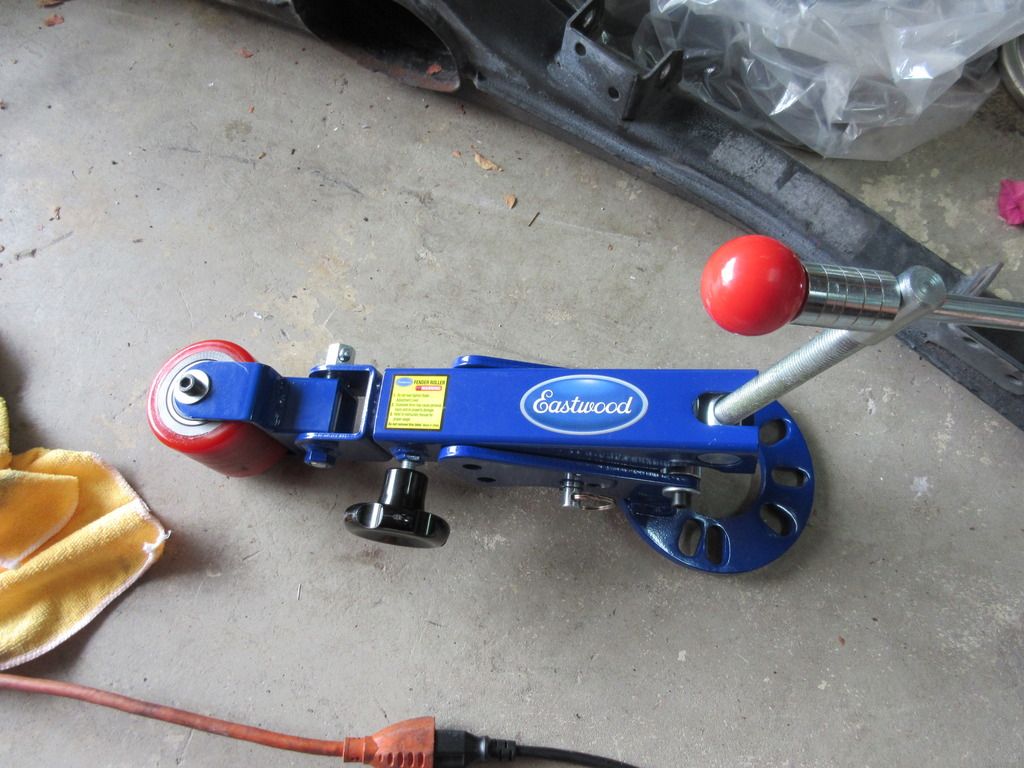
After my 2k mile trip for the vintage, I notice with the extra weight in the trunk and bumps on the road, I was getting a little rubbing at the rear fenders with the 215 tires. Not sure why BMW did this, but the rear fenders are rolled only half the way and the front half is at 90 degrees. On the trip, I ordered the Eastwood fender roller as for its price, had the best review. I received it and just today after 2 hours with a heat gun, the full arch is rolled and no more rubbing over bumps. Here is a picture of the machine. I will be renting it out through my rental website to fellow enthusiasts.
Leave a comment:
-
Took the DA and some extra rubbing compound to shine her up before leaving to the Vintage. Better that the current hazy red look.
Leave a comment:
-
Whine is GONE!!!!! So good to drive a quiet car inside the cabin. Dealt with it for about 2 years. Even the exhaust is on the quiet side. Here is a quick (and bad) shot of it installed.

I also finished the plastic treatment for the jack holder knob. Here are the 3 items installed.
Leave a comment:
-
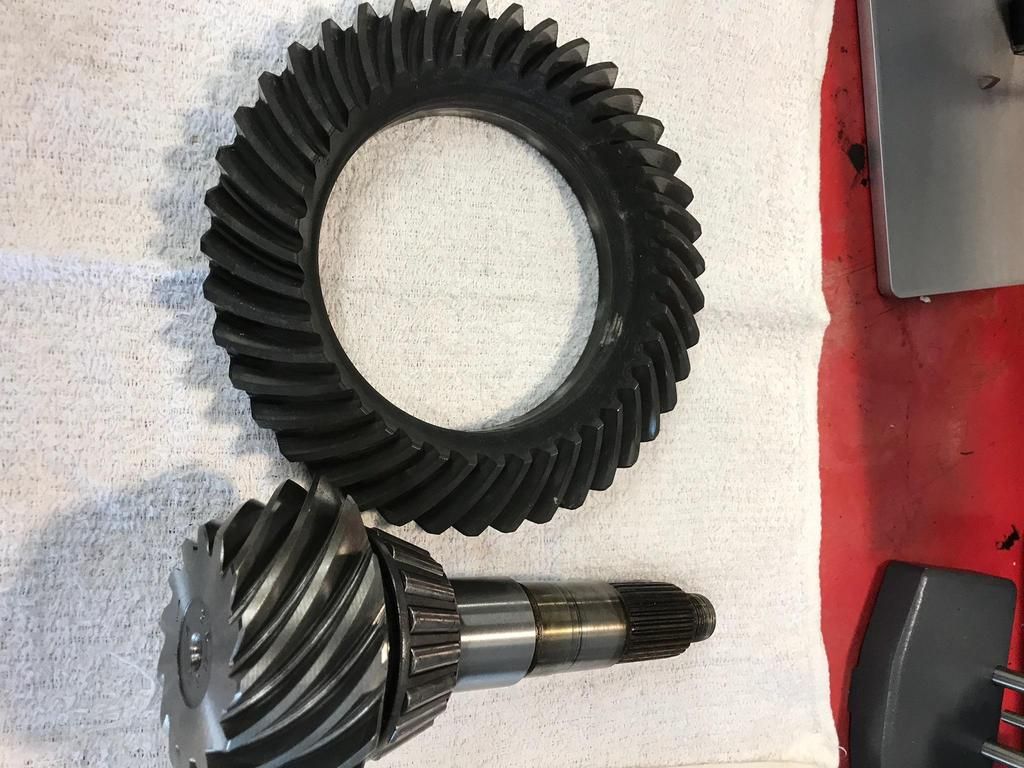
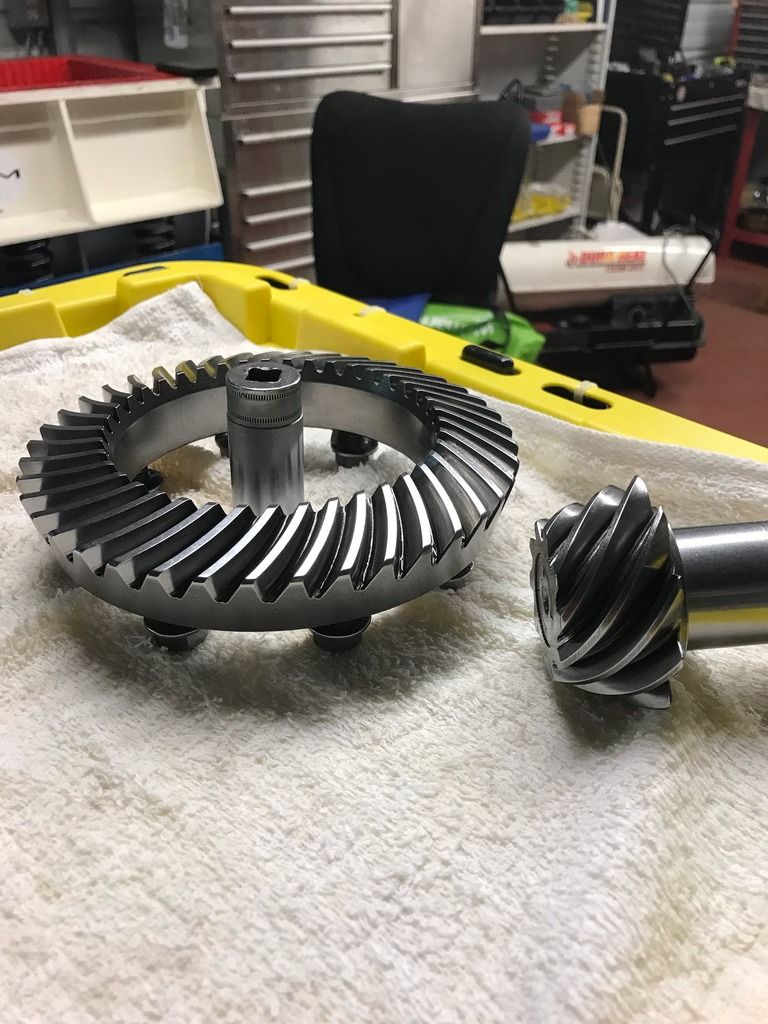
Got the diff back from Agent and his father in law Mark. Things a beauty. It got a rebuild including the REM polishing. Here is the diff returned with a nice fresh paint coat. You can also see the Condor stud kit as well. Hope to have the car on the road Wed night. Just need to install it and add a quart of Redline oil.
Here is picture of the internals as is and then after the REM polish.
Leave a comment:
-
Man, oh man... what a turn-around. Well done indeed. You really pay attention to details and I love that. I also like that you don't take any shortcuts as so many do nowadays... "get them coilovers on, slap in that big engine, stance/poke/fitment/thing and go do some donuts while filming for Instagram..." -type of jobs, and that's cool too, but there's nothing like a thorough project like this one.
Now I sounded very old (I'm not... I am.. well, I'm not :p).
You gave me several good ideas for my own build, and quite a lot of tips. Thanks.
Can't wait to see the final product when it's painted etc...
Good luck with the rest of your restoration.
Stay with it!!Leave a comment:
-
Just reading all 22 pages of this ... you're a special kind of patient person. You've sat on some really high quality parts for years at a time! Very inspirational build, keep it up.Leave a comment:
-
A few quick updates. After getting it all back on the road, the diff whine did not go away and requires a rebuild. I was going to venture on this myself as a kit is ~$500, but with the limited time to make it to the Vintage, I decided to have someone else do it, for a few hundred dollars more for the labor with years of experience. It will be total rebuild and I am slated to receive it for the install about 8 days before I take off for NC. I should get a few hundred break-in miles before the long trip.
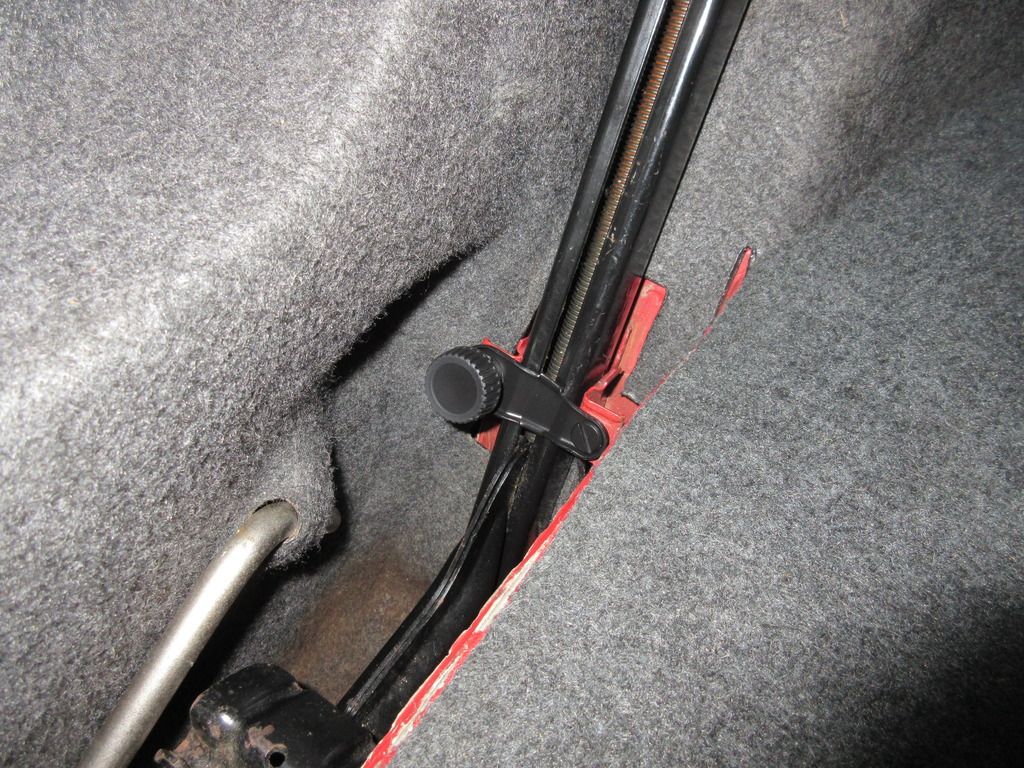
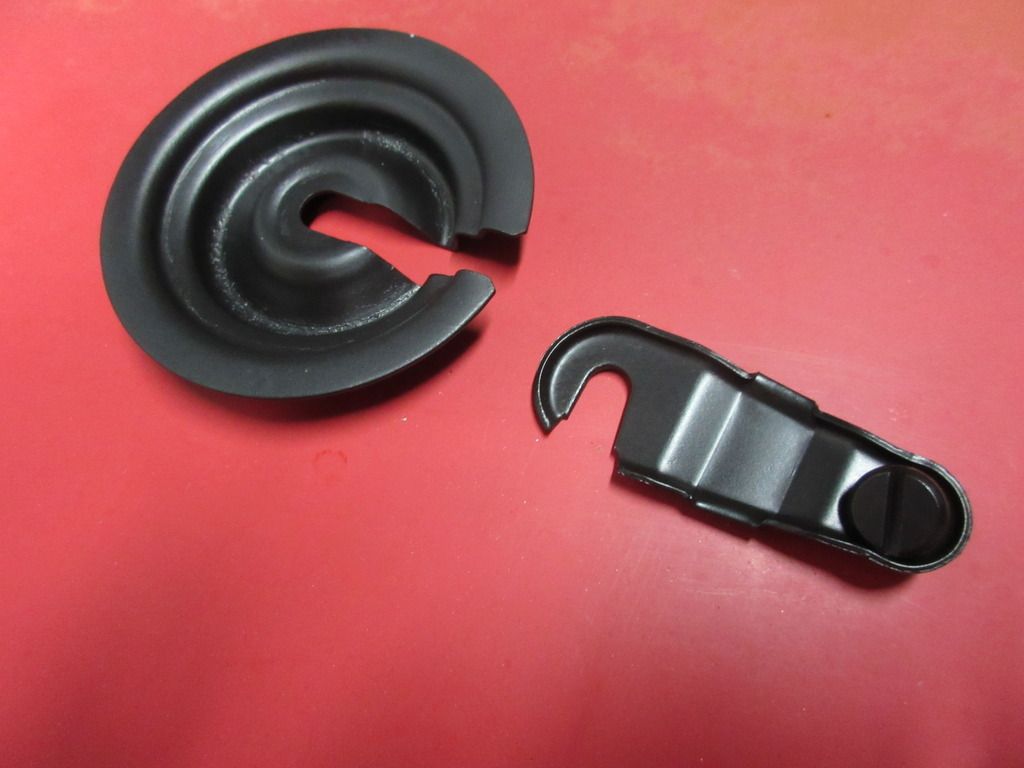
In the meantime, doing some buffing of the single stage red for a little shine for the show. Will post a picture when done. Literally like putting lipstick on a pig but its better than the faded pink color. I also decided to clean one more thing in the trunk. The clasp that holds the car jack is all metal in the zinc plating is no more. The same with the the large washer that holds the spare tire. Here is a picture of it after some fast etch, SEM Prep, and SEM trim paint. I am waiting for gray scuff pads to do the same on the plastic knob with SEM Soap.
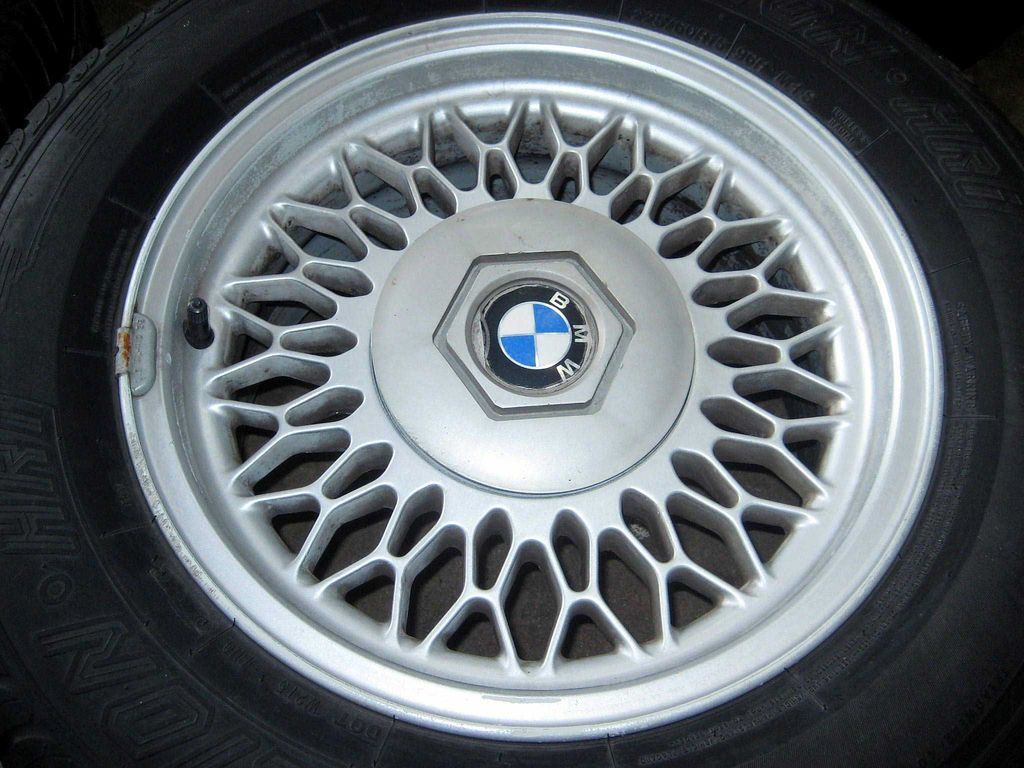
One thing that came up is that I need a spare tire, now that I only have the 5-lug setup. The e30 doesn't have a big opening in the trunk, so I need to find something that is narrow. I took measurements and will need to go with a 195 tire, like stock. The 205 tire will cut it too close. I don't want the rug to bulge. Luckily my dad has a spare 15x7 from an e32, style 7 with the cap. Its width is 7" and I can go with a 195/60 or 195/55 tire. I will be going with the /60 so that the height of the tire is the same as my current setup, just won't be as wide. Who cares, its a spare. The style also comes in the same vicinity as with the current euro weave pattern. Center cap is hideous.
Leave a comment:
-


Leave a comment: