

No biggie, I was in a rush to get back home anyways. I had to meet the INS adjuster at 3.
-
-
Looking good so far. That V8 has really got my gears turning. I would hate to bastardize my 325is considering its all original and everything works, but damn thats tempting.......very tempting. I think I have enough parts laying around to just about fund that whole projectComment
-
Comment
-
4cams 32v FTW!Mtech1 v8 build thread - https://www.r3vlimited.com/board/sho...d.php?t=413205
OEM v8 manual chip or dme - https://www.r3vlimited.com/board/sho....php?p=4938827Comment
-
your cars come a long way def more of a project than i wouldve tackled, v8 will be wickedComment
-
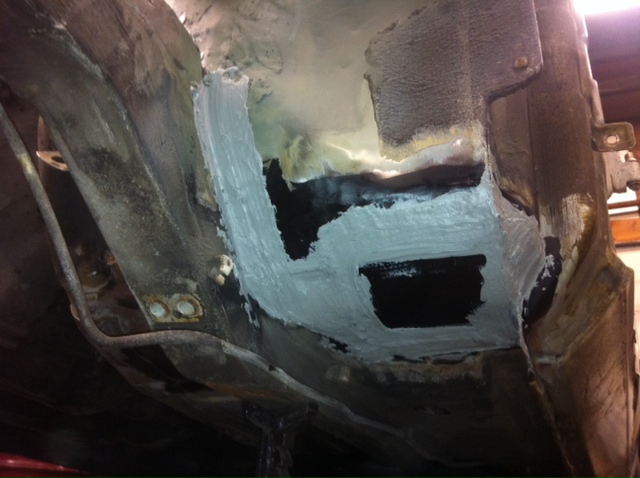
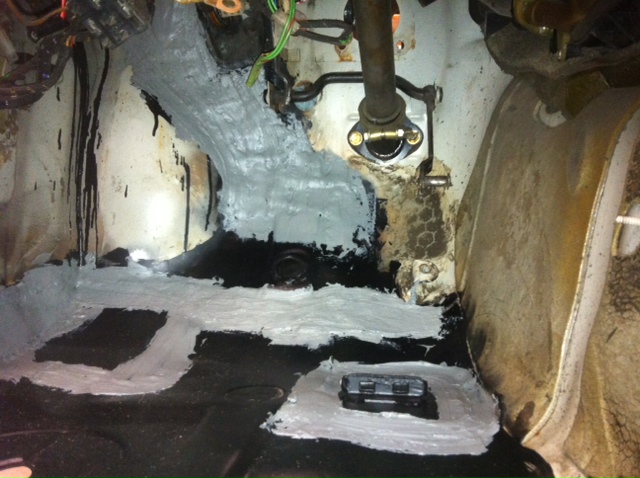
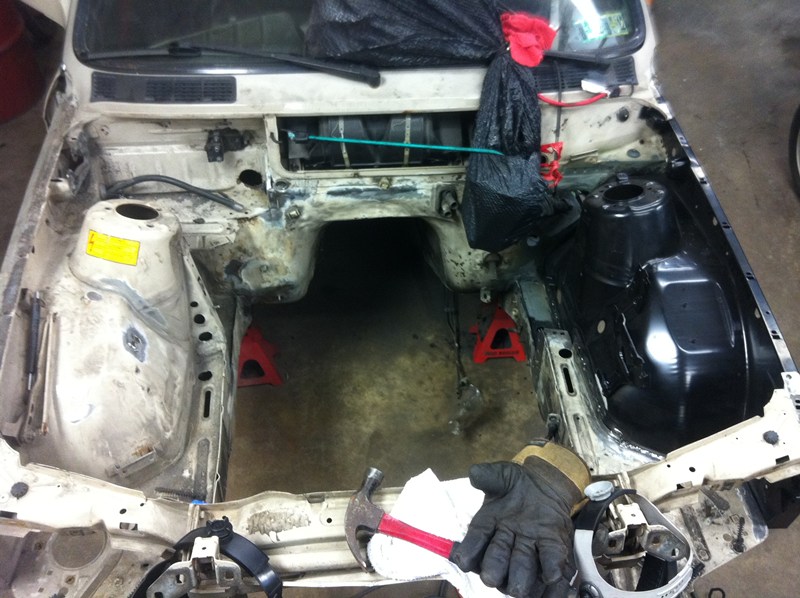
Progress has been slow lately, I got a few more patches welded in around the front of the car, laid down another coat of Rust Encapsulator, then threw down some seam sealer. I'll probably do some light sanding, depending on how hard the seam sealer gets, then paint everything.
Any suggestions on what paint to use for the interior floor, for good sealing? It won't be visible, so color/texture/finish doesn't matter.

Comment
-
This thread is moving along, I thought you were insane when I first saw the tin worm damage. Still think you are touched though, when done this will need a Haggerty policy.Comment
-
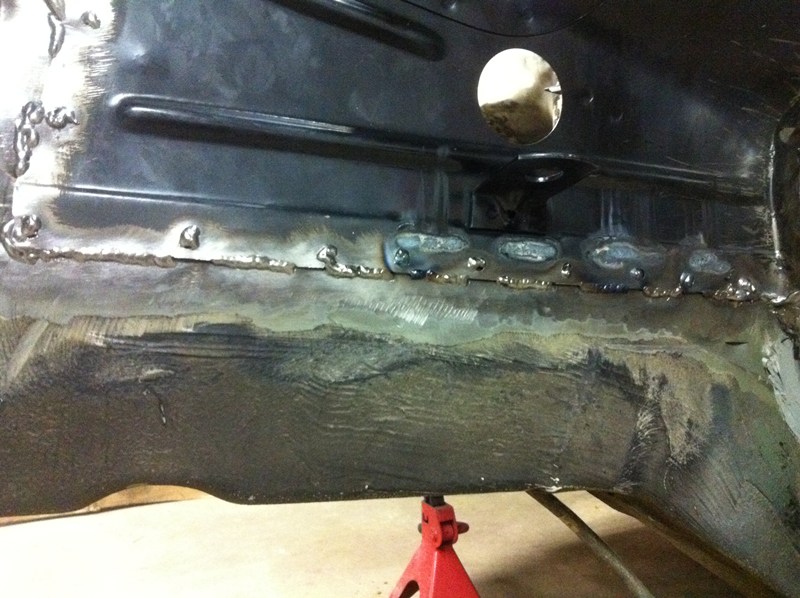
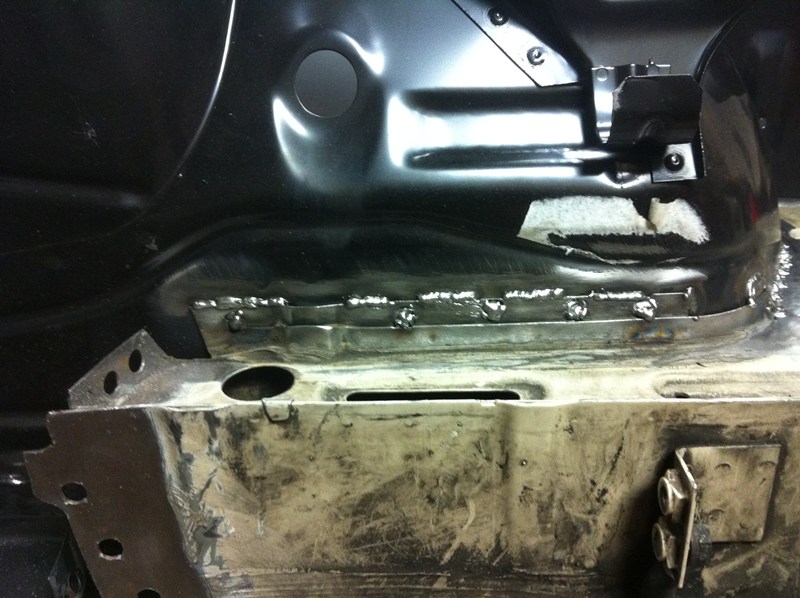
Dude, you weren't shy with the seam sealer, were you? I wish I owned stock in the company that makes the stuff you used, lol! Honestly, though, your rust encapsulator is all the sealer you should need on the interior. Now just prime and paint. Don't worry about sanding the seam sealer, especially on the underside. I would hit the underside with some 3M Rocker Schutz undercoating and then prime and paint. That's all they do from the factory... dip, seam seal, schutz, paint, then cavity wax and that process lasts 30 years, lol! I do hope you don't have any bubbling in the encapsulator/seam sealer when you weld on the wheelhouse. It looks like where the new panel is spotwelded is directly over where you seam sealed.
Jason's coming up tomorrow to pick up some E38 parts from me... anything you need sent back down with him? LMK...
Garey

Comment
-
Lol, It's actually pretty thin coats, I just used a wide brush.
I didn't even think about the effects of welding that panel on. That will surely melt all the rust encapsulator and seam sealer in that area.
Crap...
Invest in the seam sealer company now, because I'll need to redo it all. And might as well invest in wire wheels while you're at it.Comment
-
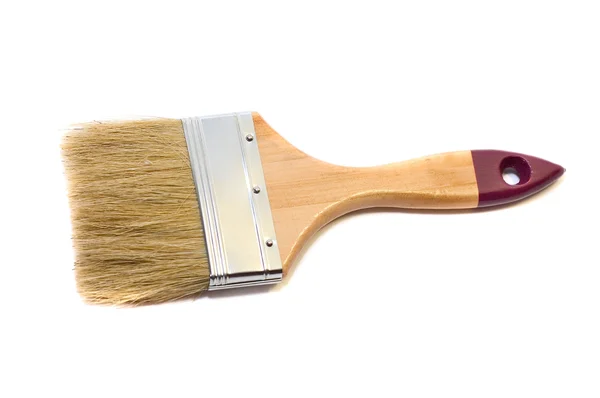
How would you recommend applying the seam sealer? I just have a quart of Transtar brushable seam sealer, and am using this to smear it around like an idiot:
The seam sealer I'm using is about 3 years old, I got it to touch up the shock tower a while ago. Does this stuff have a short shelf life? It seems REALLY thick, I looked at some of the pics of the work you did on your car, there's no way I could spread mine like that.
I honestly have no idea what I'm doing, I have no prior training or experience in body work, ever. hahaLast edited by JGood; 12-14-2011, 08:25 PM.Comment
-
Man, I have to say I am crying, laughing right now! I'm watching Dumbest Stuff on Wheels, so I'm laughing already, but those last 2 posts have me crying, literally... my wife thinks I've lost it!
Transtar's the same stuff I use but get the cheapy 1" wide nylon paint brushes and cut off all but 3/4" of the bristles. It's still flexible, to a point, but it's stiff enough to move the seam sealer around and push it into the seams. You only need to cover the seam itself, which saves on having to buy gallons of product. I honestly used 2 quarts to do my whole car... every seam. And you should get some new stuff. It should be fairly smooth, a little stiffer than pudding.
I'm glad you were good humored about my post, I wasn't trying to be a dick, I just thought is was crazy how much you were using and tried to be funny about it. Your posts were actually waaay funnier than mine was, I was dying laughing... if you weren't trying to be funny, then that's even better, haha!!!
You can always call me if you get stuck on something, no problem... You're doing a good job, man... so what if you have to re-do a couple of spots...
Garey
Comment
-
LOL, once I looked at your pics and how it's supposed to be done, then went back and looked at mine, I was laughing a good bit too. I probably won't be laughing when I swing by the auto body store to pick up another 55 gallon drum of the stuff.
Mine didn't spread like pudding. It spread like... granite.
I'm going to get rid of that crap and redo it with new sealer... AFTER I weld the panel in.
Thanks for the tips. I never really get completely stuck, I just don't know how to do things properly. So instead of getting stuck on one single thing, I just do 10 consecutive things incorrectly, then find out, and have to go back and start over. That's how this project has gone since day one. Lol
p.s. The firewall was completely covered in the seam sealer because it was completely covered in seams. Since I suck so bad at metal working, I used about 10 pieces of metal to fill the hole in the firewall. It alleviated the need for bending weird curves in a bigger piece of metal, which I failed at. But, it left about a millions weld lines, so instead of trying to hit each one, I just covered the whole area. Looking back, it's probably the most haggard repair possible, probably about 2 steps above using fiberglass filler to cover the hole...Comment
-
Its under consideration. Coming from the world of classic cars and motorcycles, I just have a REALLY hard time breaking up a 100% original vehicle. If it was my old yellow hoopty, then no problem, but I don't know about the '88. My other thoughts are to sell the '88 to a good home and start looking for a ragged out E30 convertable for the V8 swap.
I'll sleep on it for awhile and keep an eye out on CL to see what pops up. Thats usually how my projects begin.Comment
-
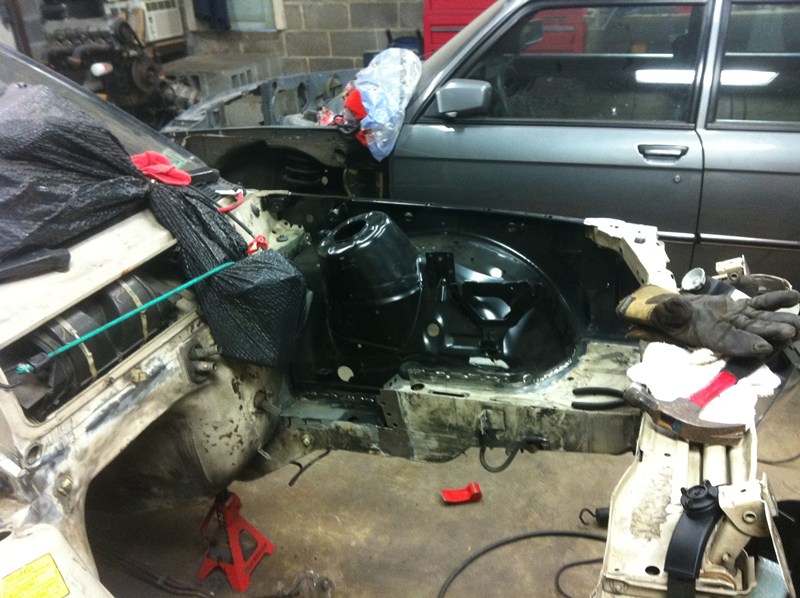
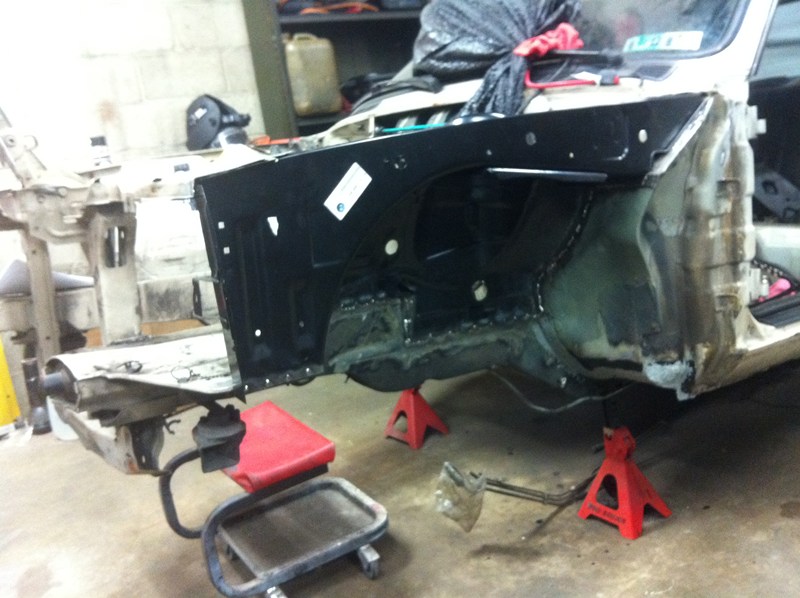
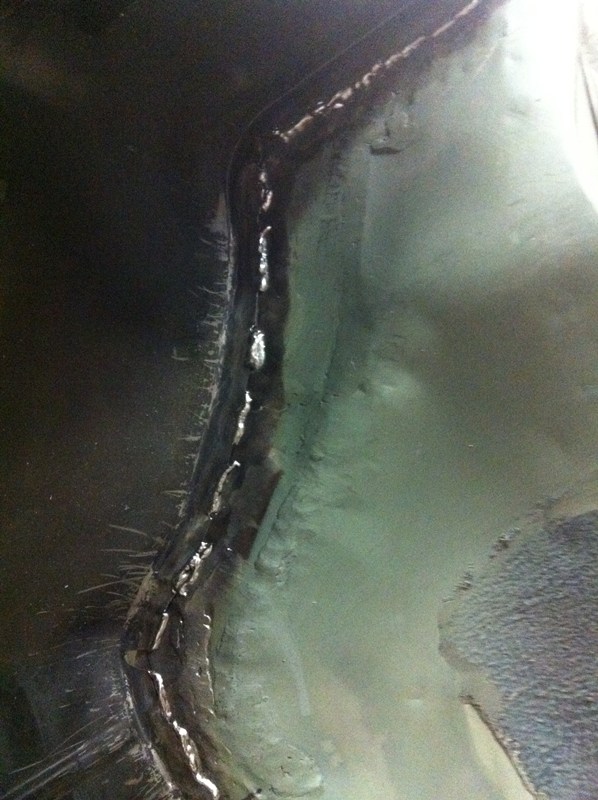
New strut tower is on! I'm so happy! I know it probably doesn't look like much to anyone else, but to me this was by far the craziest thing I've ever tackled, and I was scared when I made the last cut on the old one and it fell to the floor. Part of me thought I wouldn't be able to get it back together. Well, here it is. The measurements are good, the welds are solid, and its ready to go! I'm pumped!
I plug welded the entire thing on, then stitch welded it between the plug welds.
Any constructive criticism of the welding is welcome. I'm just kinda winging it, and am eager to learn the proper ways! Obviously it's a little ugly, but I *think* I had good penetration on each side (har har...) and it seems very solid.
Comment
-
Considering your lack of previous welding experience, I wouldn't be embarrassed about those welds. As I'm sure you have read before, on the job training is the best way to learn. Screwing around with scrap pieces is effective to learn the basics, but doing something like you are right now is what allows you to develop some skill.
Looks great so farComment


Comment