
Wow, just went through this whole thread and this build is amazing! Awesome what you have accomplished so far and I'm sure there is ton more. I'm sub'd for sure. Good job man.
-
'91 318is
-
Don't mind me just subbing...
Very nice work. Can't wait for more progress."A good memory for quotes combined with a poor memory for attribution can lead to a false sense of originality."
-----------------------------------------
91 318is Turbo Sold
87 325 Daily driver Sold
06 4.8is X5
06 Mtec X3
05 4.4i X5 Sold
92 325ic Sold & Re-purchased
90 325i Sold
97 328is Sold
01 323ci Sold
92 325i Sold
83 528e Totaled
98 328i Sold
93 325i SoldComment
-
Thanks guys!
Time for some updates.
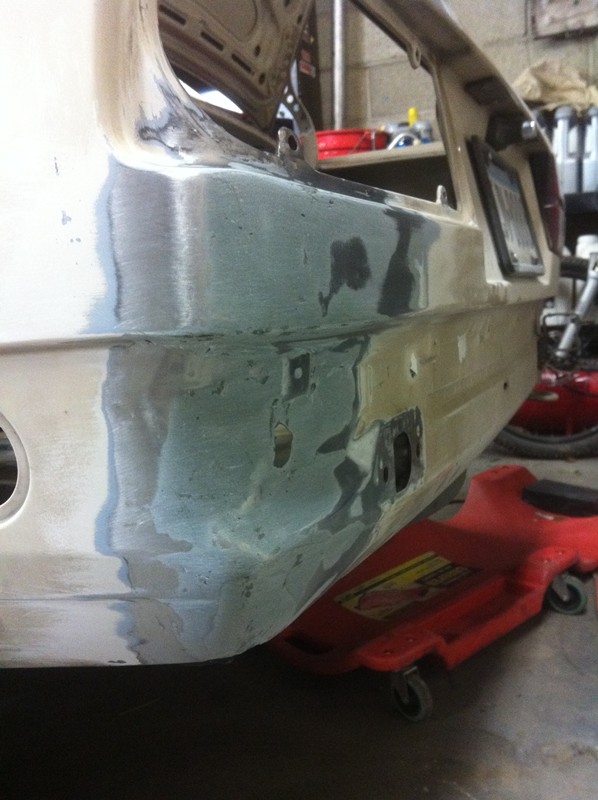
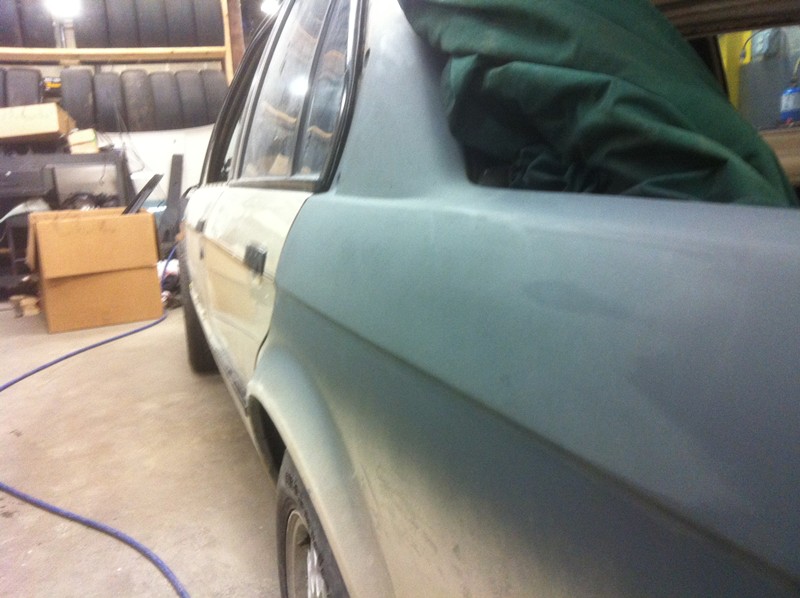
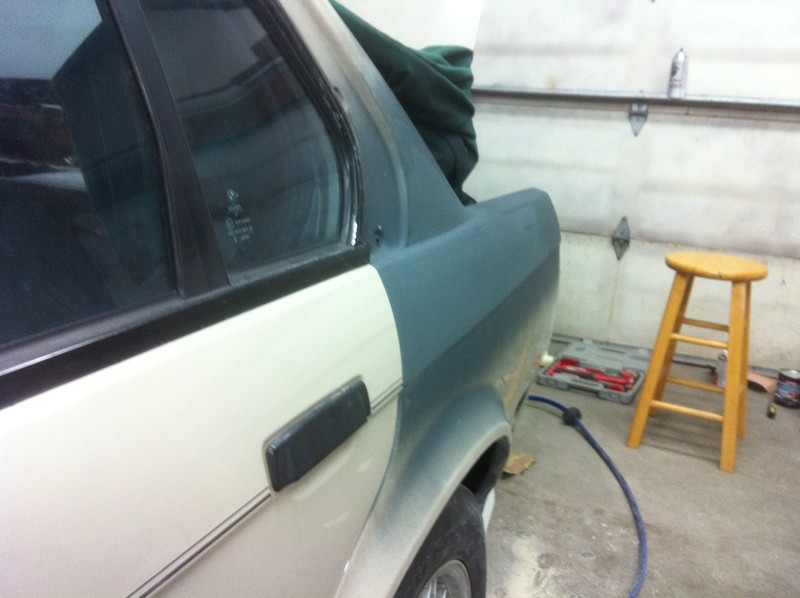
Started filling the area below the tail light. Will hopefully get this and the C-pillar finished tonight, thanks to my long time friend and bodywork genius, Walt. I don't have the hand-eye coordination, patience, vision, skill, talent, or any other of the basic things required for final layers of filler. Just so happens he does. So I get him beers and he makes my car look nice.
This is where I got it:
So, back to the good stuff, the m60 swap. First of all, I need to thank Garey (bmwmech1). He has been an inspiration, a source of knowledge, a source of parts (including custom stuff that he spent his time making, which he could have spent finishing up his own project). I doubt I would have started this swap without his help... and if I did, I certainly wouldn't have been able to finish it.
Anyway, now that I'm done kissing ass, some pics:
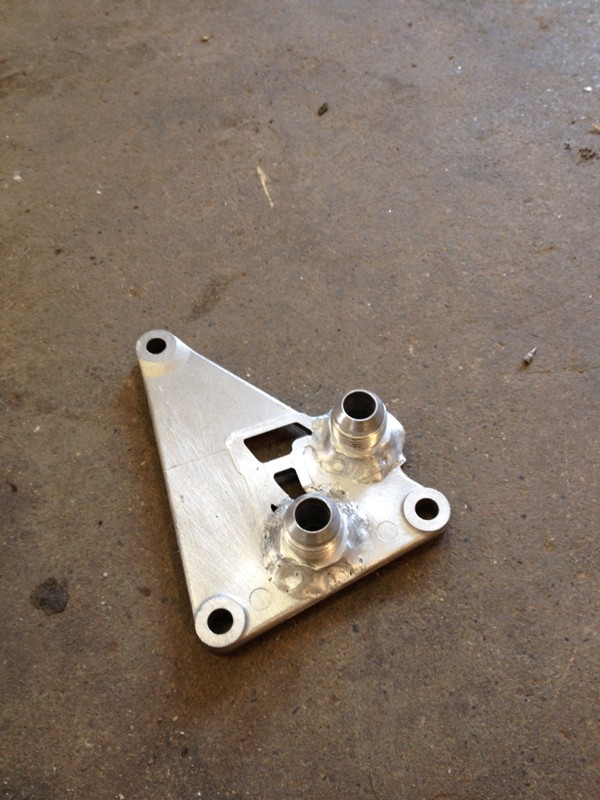
Stock X5 oil filter hose flange. This mounts to the side of the block on 4.4 X5's, the oil filter housing lines connect to it.
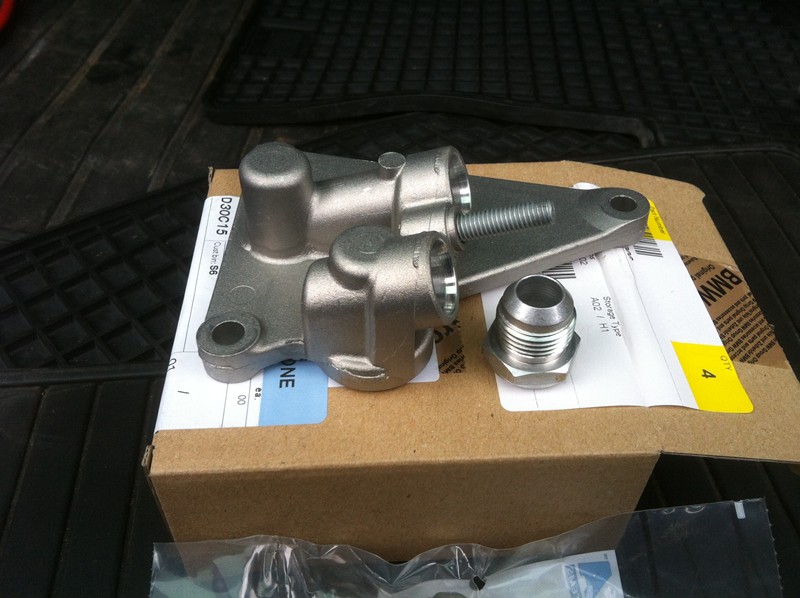
Modified X5 flange. Garey chopped it down, and welded on some aluminum -10 AN bungs for me, so I can run a remote oil filter setup. Cheap, light weight, common & cheap oil filter, and allows room to run a normal upper radiator hose instead of the clusterfuck of metal pipes that some people do.
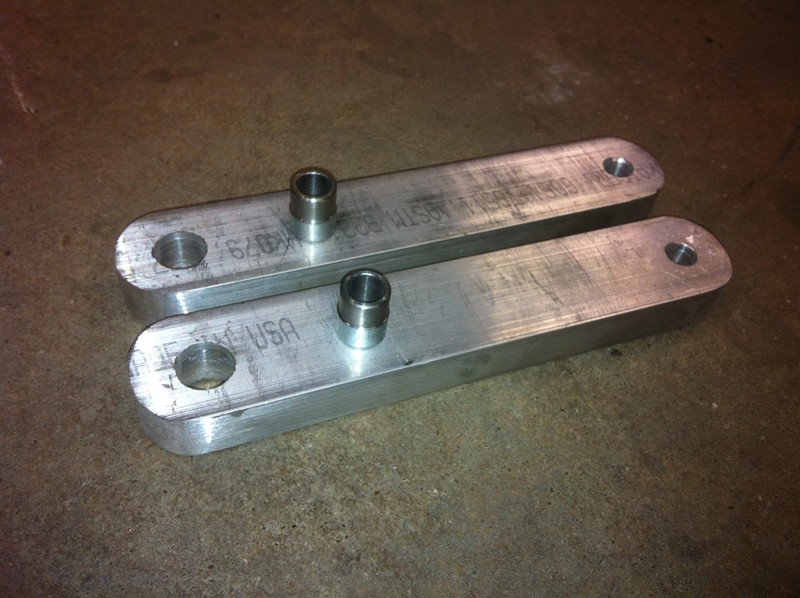
Aluminum subframe spacers. Garey made these as well. They are neat.
300mm.de engine mounts. I'm running out of time, so I caved and bought a set. They fit perfect. Not a single issue with them. For the price, it's really not a bad option.
Hell yeah!
It's close. Really close.
Check out all the room I have to make the headers fit!
This looks like it's going to be a pain in the ass. Garey is going to come over, wave his magic wand, and make things all better for me.
That's all for now. Hopefully I'll have more later tonight.Comment
-
Oh my, great progress! What's your plan for the steering linkage again?Mtech1 v8 build thread - https://www.r3vlimited.com/board/sho...d.php?t=413205
OEM v8 manual chip or dme - https://www.r3vlimited.com/board/sho....php?p=4938827Comment
-
Flaming River stuff, same as mine... I just had to re-make my drivers side exhaust manifold, since I used an E30 rack to mock it up initially and the car now has an E36 rack in it... duh! The shaft angle is completely different, which I didn't even think about when I made them originally. Not a big deal, but now that I've gone through mine again, Justin's will be easier. I'll get some new pics tomorrow night, so you can see that there really is a fair amount of space to work with, Jean. It's not that bad...
Looks good Justin! Now comes the fun stuff... re-packaging everything to get it all to fit and look good!
Thanks for the kudos, too! My pleasure to help out. These things will be a blast to drive... should be a good summer!:D:D:D
Garey
EDIT: Justin, it may take you longer to clean off the grime from the motor than it does for you to finish the swap, lol! Did Bob Ballard bring that M60 back up from the Titanic site at the bottom of the Atlantic, Lol? JK, but it looks pretty crusty... too crusty to go into your "new" engine bay...
DOUBLE EDIT: I found some pictures Jean...


 Last edited by bmwmech1; 02-10-2012, 05:35 PM.

Comment
-
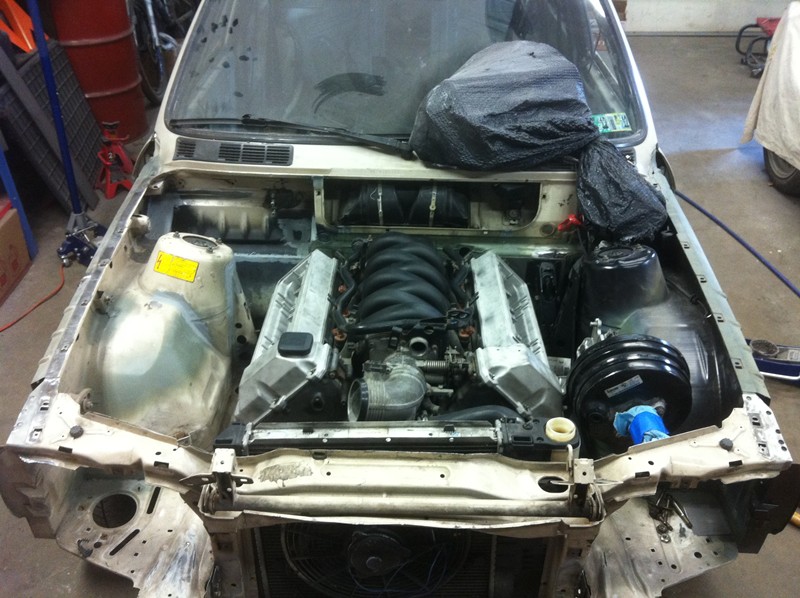
I can't even contain my excitement. I stood there and stared at my engine bay for a solid 30 minutes tonight, daydreaming about how awesome it's going to be to drive these things.
Dude, don't even get me started. I don't know WTF happened to this engine. I had to use a screwdriver and shop vac to clean out the outside of the valley pan cover before removing it. There was this sand caked on and stuck everywhere, I don't even know how it possibly got there. You may be right, this thing was pulled straight from the ocean. It's probably hydrolocked knowing my luck.
In any case, it will be cleaned before final installation. I figure there's no sense in making it pretty now, just to bang it up during engine bay test fitting. I still want to do a leak down test before doing any work to it as well.Comment
-
looking really good man!! I cant give you enough props for doing all this. keep it up! and i cant wait for the next updateComment
-
Incredible work again and again you did to your car.
I did not even care for the V8, but what you did to the body of the car, totaly speechless for your skills and all the work.
Keep it up.Comment
-
Thanks guys!
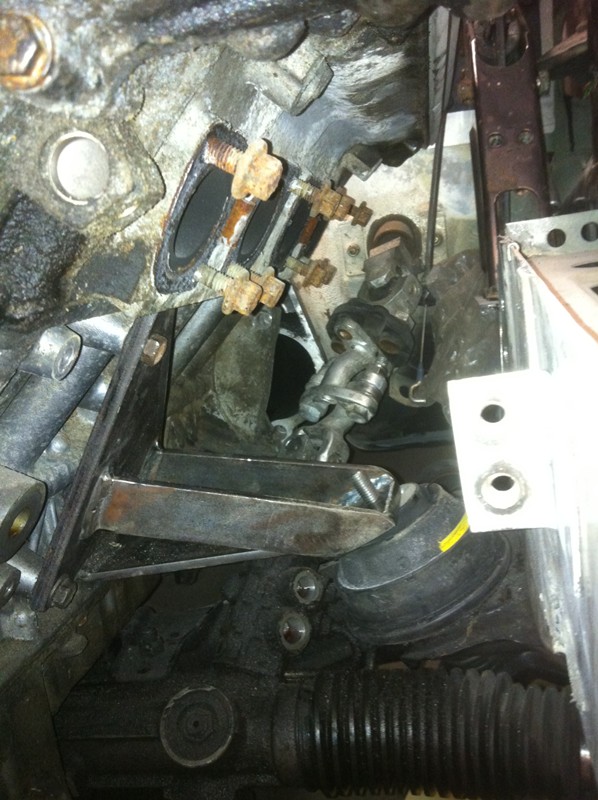
Garey, thanks for those exhaust pics, they will be handy. I'm REALLY not looking forward to modding those manifolds. It's going to be quite a chore without a lift. Any tips or advice?
Also, speaking of the manifolds, have you looked at the pipe diameter for the rear 2 drivers side cylinders? It's right where the pipe looks like it's smashed (from the factory, for clearance I guess)... Where the 2 rear cylinders merge and go into the Y, I can't even fit 2 fingers in there. It has to be the biggest exhaust restriction I've ever seen. I guess since they are consecutive cylinders, the exhaust pulses will not be going through that merge point at the same time, so technically only one cylinder worth of exhaust gas flows through that point at a time, but still...
And Jean, yes, I'm using the Flaming River stuff.Comment
-
Loving it, nice work fellas.Comment
-
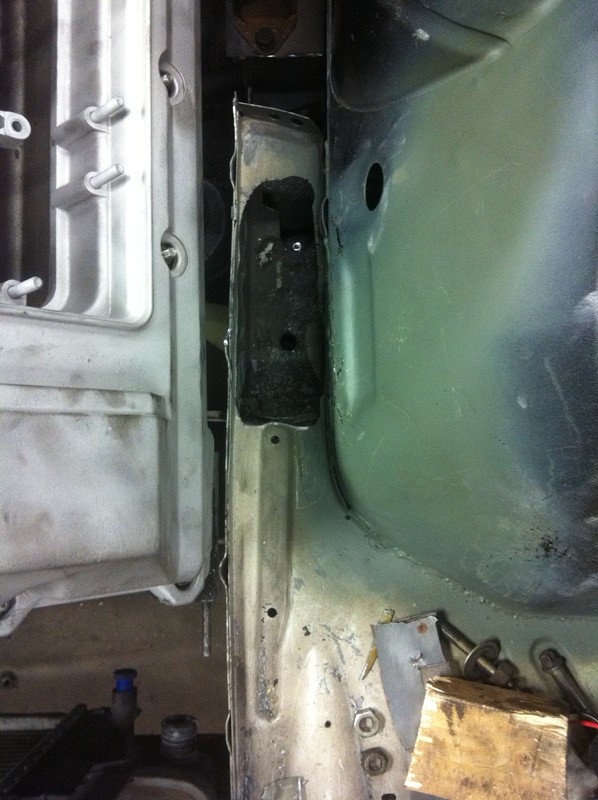
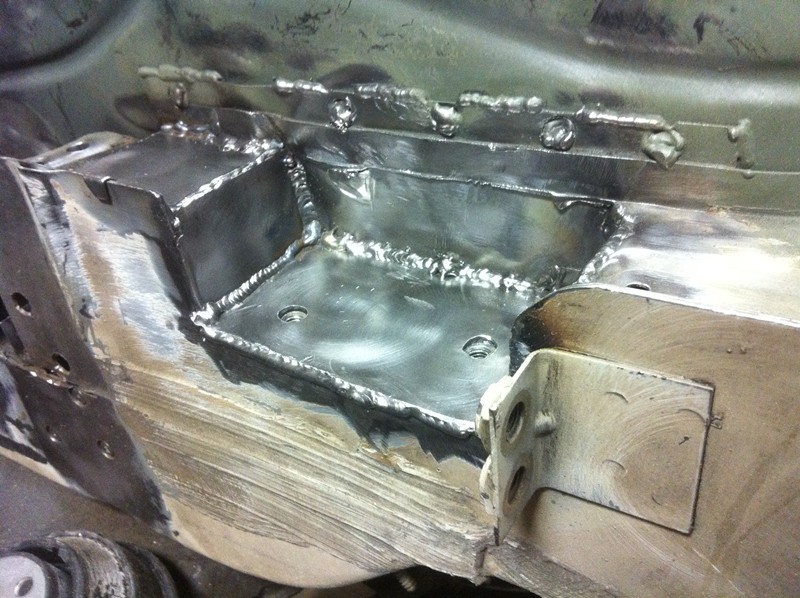
Here's what we got done on the C-pillar last night. It's getting very close to being finished.

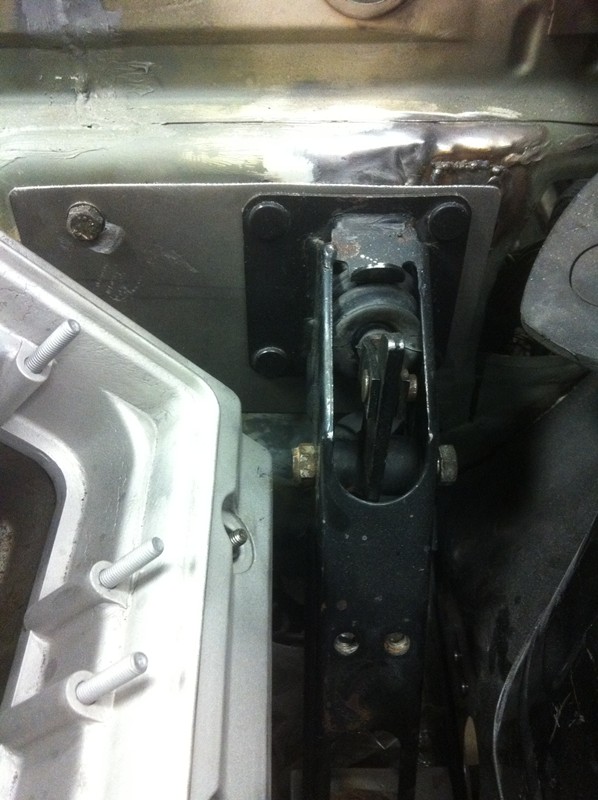
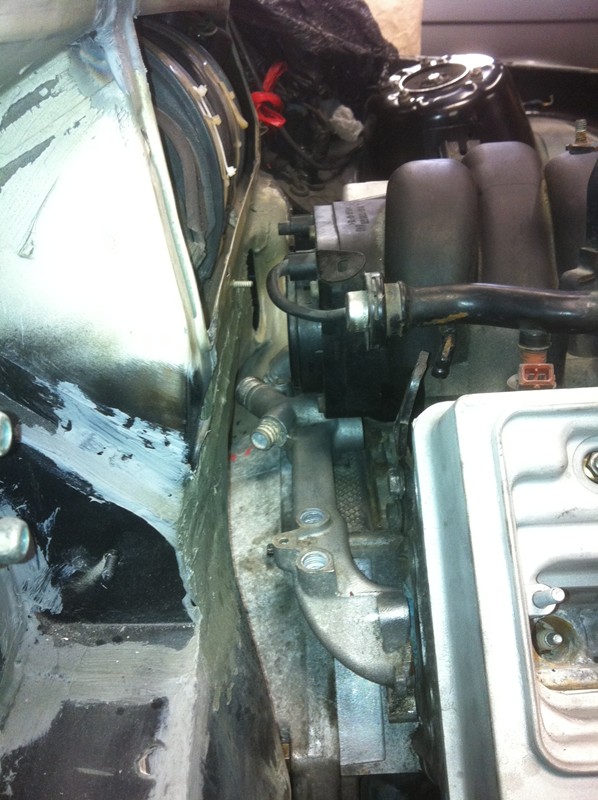
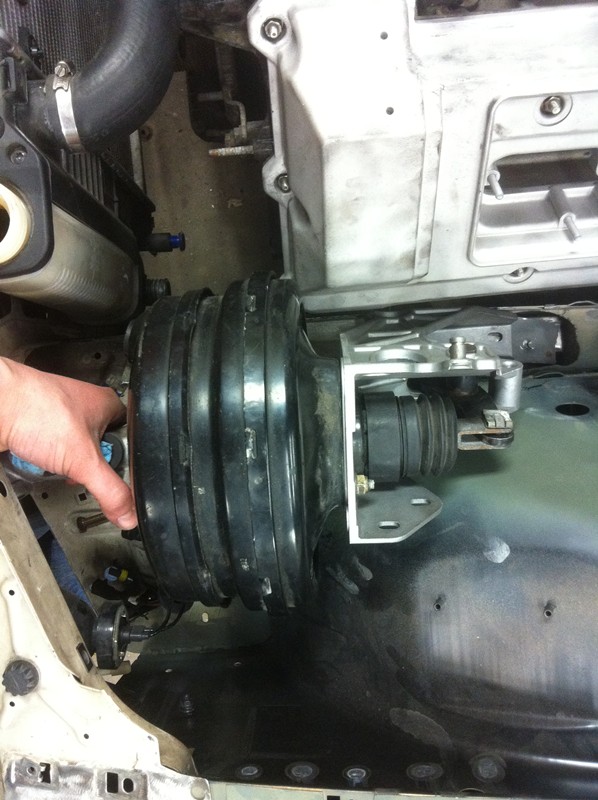
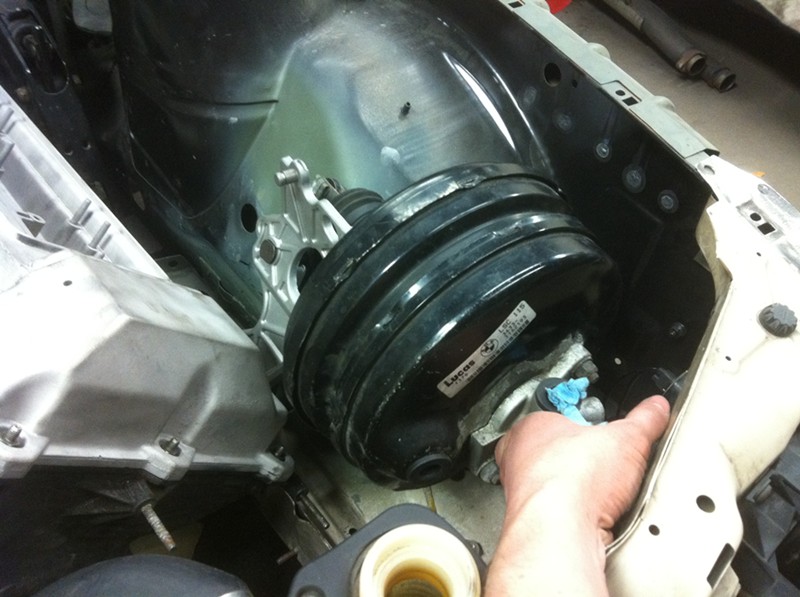
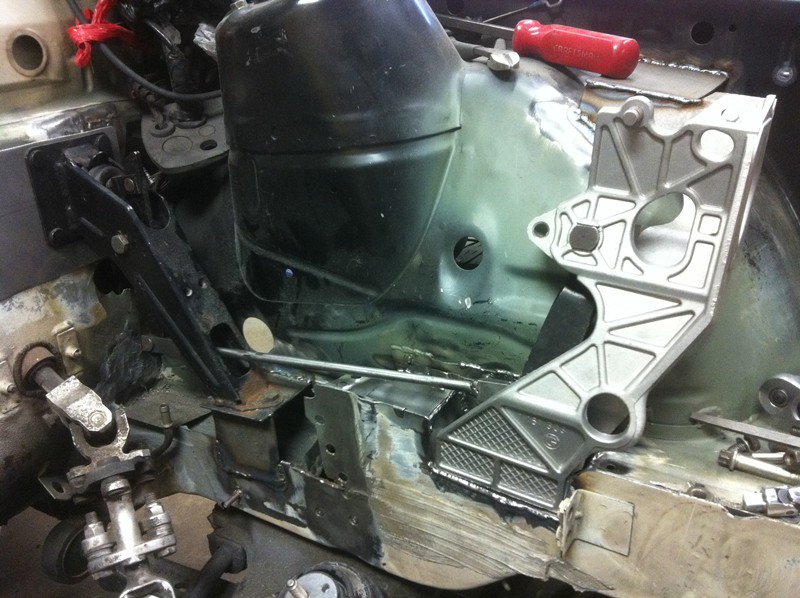
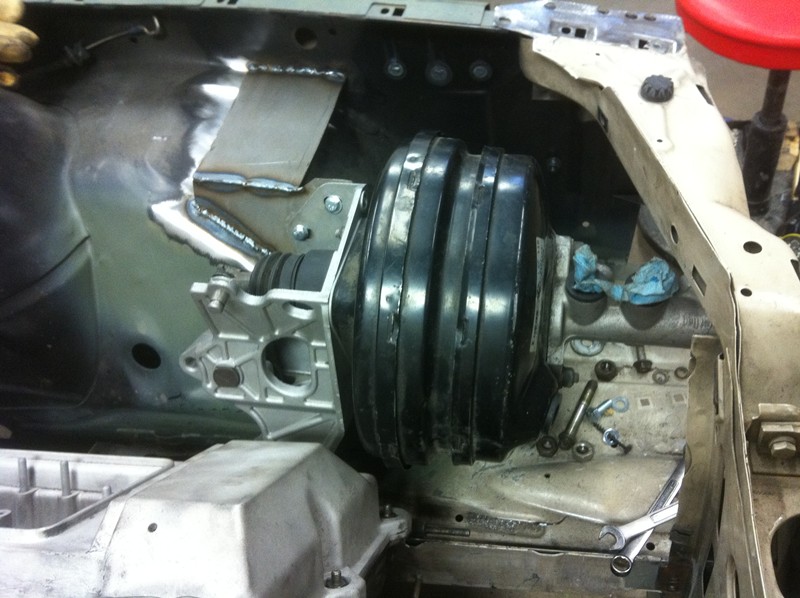
Also started trying to fit the booster and bracket in. This is going to be interesting and challenging. There isn't much room to work with. Luckily the wheel housing can be 'dented' for clearance. One little hit with a ball peen and the whole area caved in, it was awesome!
Now I just got figure out my angles and make sure everything will have enough clearance. It's not easy to do anything with the engine right there, but it needs to be there or else I won't know where the booster needs to be.
Comment
-
Should be pretty quick, just don't ruin it with a tree or guard rail.
Comment
-
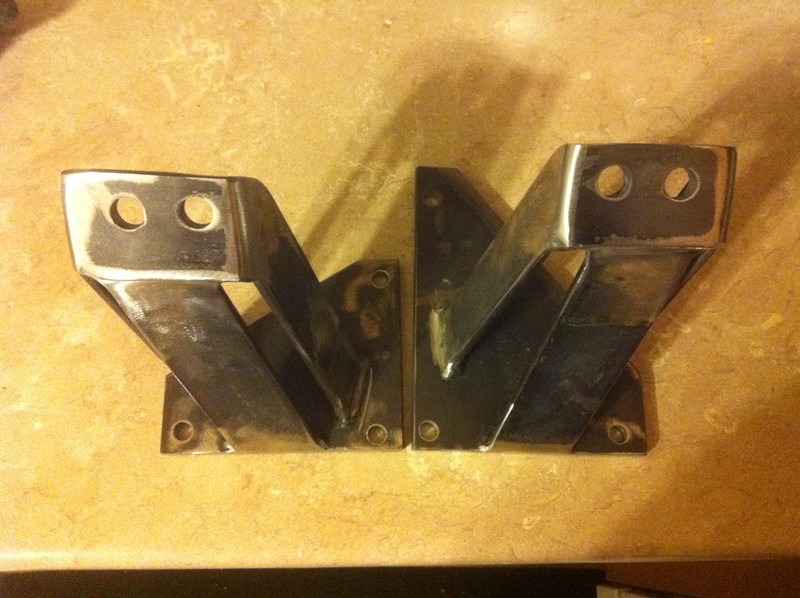
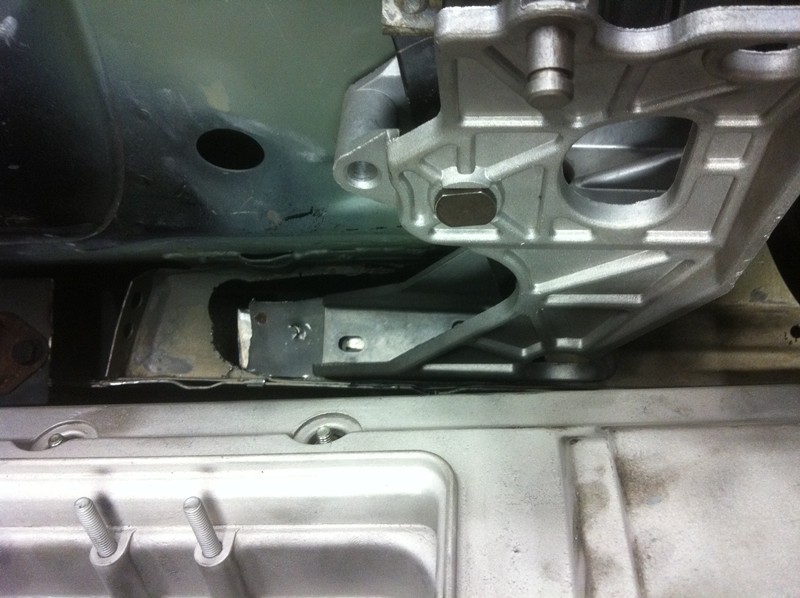
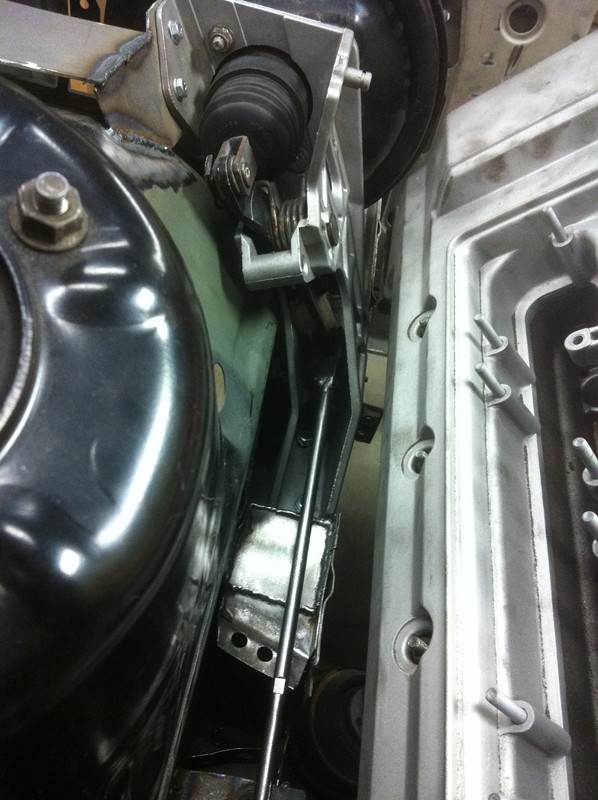
Got the booster bracket installed. Check the v8 swap forum for more details of that.
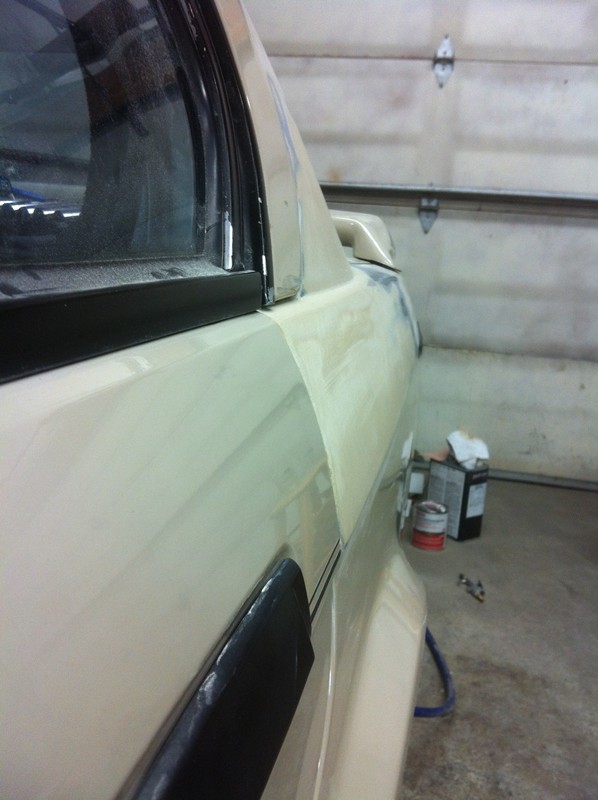
Also got some more done on the 1/4 panel. Still a bit to do yet. Can't thank my good friend Walt enough for his help on this panel. I keep telling him "it's good enough"... he keeps saying no, and continues striving for perfection. Not bad for a couple of IT guys who only do this stuff as a hobby
Comment
-
Nice work on that booster setup!Comment


Comment