If this is your first visit, be sure to
check out the FAQ by clicking the
link above. You may have to register
before you can post: click the register link above to proceed. To start viewing messages,
select the forum that you want to visit from the selection below.
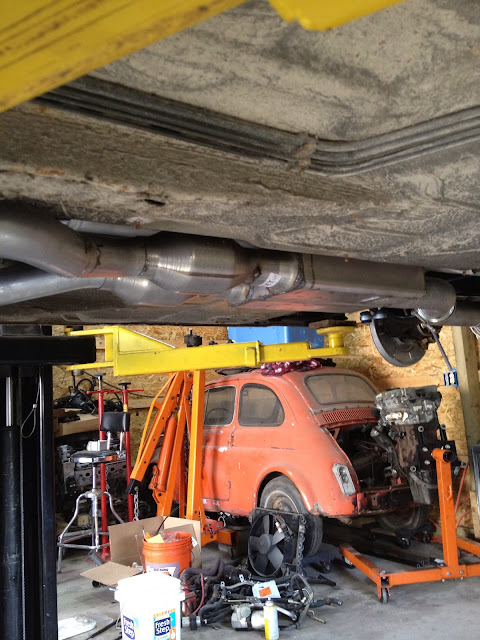
New muffler came yesterday....I was able to gain 2" of ground clearance. There is about 3/8" between the driveshaft and the muffler. Debating dropping it down a little bit...The driveshaft can't really move tho...
What do you all think?
Here is the clearance to the drive shaft. Sorta hard to see but there is about 3/8"
I got the centers back from the powder coater. I am very happy with the color choice.
There is about 1/4 - 1/2" of space between the shroud and the fan. I will have it spaced up top and then sealed with foam around the edges. Good idea to check with a laser temp gun....I will be sure to do that.
haha, once I got the wires all apart I was a little concerned but it really isn't any big deal.
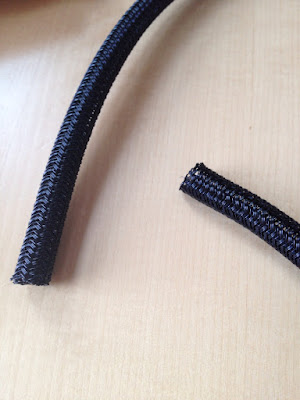
Ordered some mesh wire wrap and moisture resistant heat shrink from mcmaster today.
I got my brazed AC lines back yesterday but had to send them back for a slight adjustment. AC will be good to go then. The new muffler will be here tomorrow and I will make a slightly different exhaust on Friday so I can gain some added ground clearance.
I was wondering how much space did you leave between the fan shroud and the radiator core? It looks like its right up against each other leaving little to no room for air flow? I ask because we built a similar offset dual fan setup on my buddys drift car car and it ran a bit hot sometimes.
I used a laser temp gun and verified noticeable hot spots where the shroud was covered. We ended up using quarter inch spacer along with some adhesive back weather moulding around the edges to form the best seal we could. It ended up dropping the coolant temp about 13 degrees if I can recall correctly.
Awesome build by the way, cant wait to see it finished.
thanks! For the PCM pins I just used a little screw driver and my finger to pop the pin out. For the fuse box I bought a depinning tool...pretty much just a flat screwdriver.
I will have two or 3 weatherpack connectors that will connect the engine harness to the chassis harness. It looks like there will be 16 pins from the GM to the BMW stuff. A few more than others do but I am integrating everything so make it factory like. ie. PCM controls the AC, BMW fuel econ gauge will work, etc etc
that harness is going to look great when its all done. do you have a tool to de-pin everything? im going to be doing something similar on a swap im working on and theres a ton of extra wires id like to remove.
keep up the good work. its going to be awesome when its done
Progress is moving along. I should be starting it next weekend if all goes well.
Driveshaft is in and fits really nice.
I might trim a little off the CSB mount as the shaft is about 1/4" away. It would probably be fine as is but a little extra clearance would give me a little piece of mind.
Rear brakes are all done...new parking brake cables, brakes, lines, etc
[img]https://lh3.googleusercontent.com/-OSFsdNtMK-c/T4N9-xhcEwI/AAAAAAAAAlM/LBlirMIbTQE/s640/IMAGE_47583C0E-784B-4FE7-A41D-5E4060DA29BD.JPG[/img
Power steering hoses are all figured out.
Russel adapter fitting in the GM pump to adapt to an -AN6
Banjo fitting to an -AN6 at the bottom of the steering box
I had a high pressure line made up at the local hydraulic shop
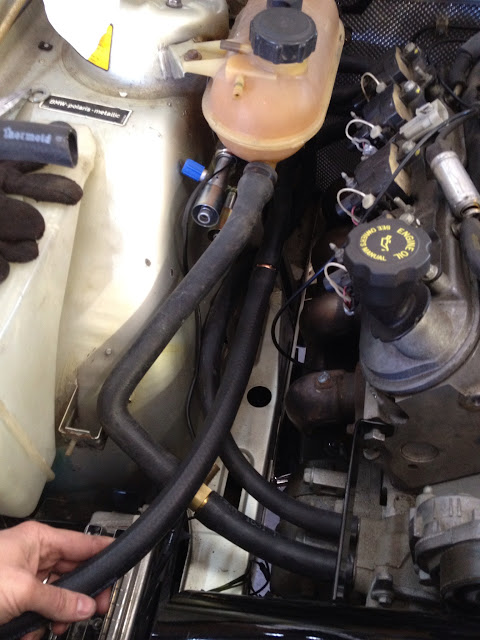
Heater valve and hoses are worked out.
Started on the wiring....
I had to change the routing of the wires to reach the PCM. A handful of wires will have the be lengthened and some were removed.
First step was to remove all the tape from the harness. This step was not very fun....
Harness laid out and ready to pull unneeded circuits and depin the PCM connectors.
One connector depinned
Both depinned....that's a lot of wires.
I then pulled each connector and circuit out of the bundle, cut any commons (pwr/gnd) and coiled each wire up and put it aside. Sorry no picture of this.
Then I started plugging the connectors back in on the engine and routing the wires. Injector and coils were first as they were pretty much still all in one big bundle.
You can see here that the harness will come out the front right of the engine. The PCM is down by the AC drier.
Once all the wires are where they need to go I'll bundle them all together with tape where ever wires enter and exit the harness. The entire thing will then either get covered in split loom or split mesh....still unsure which to go with at this point.
I had to have some lines brazed for the AC system so those should be here today and I can get that wrapped up. Lines crimped, etc.
I have a smaller spintech muffler in route that will be here Thursday so I can tuck the exhaust up a bit more. I wasn't happy with 4" or less of ground clearance. I should be able to get about 6" with the new muffler. That should be fine.
The entire exhaust is mocked up....not fully welded yet. I have it tucked up as close as I could get it. I am hoping I don't have any clearance issues....if so I will have to redo the center section.


Leave a comment: