If this is your first visit, be sure to
check out the FAQ by clicking the
link above. You may have to register
before you can post: click the register link above to proceed. To start viewing messages,
select the forum that you want to visit from the selection below.
Nice, good to see some progress. Got a sticker going out to you next week....finally.
Lol, thanks. And for the record I haven't forgotten about the front roll bar stuff we talked about, I just still need to refit the engine.
Originally posted by thirdlobe
This looks amazing man. The level of detail, craftsmanship and creativity is impressive.
Best of luck!
Thanks :up:
Originally posted by MaxBell
I look at your garage/workshop and I would like to know...
WHO IS YOUR DADDY AND WHAT DOES HE DOO??
Seriously, where/what is this place?
It's a small manufacturing company I've worked at for a few years. We make sand processing equipment for the foundry industry. We had a spare room in the back so I took over it and started acquiring the stuff I needed to do this project.
Tinker Engineering - 2014
Mica - 2000 BMW 323i - The one that started it all Fiona - 1975 BMW 2002 - The Definition of Project Creep Heidi - 1988 BMW M5 - The piece of BMW history Silvia - 2013 Subaru WRX - Stock, for now
Got some more done today. First thing first, I needed to decide how high up to place the gas tank. It's a delicate balance of ground clearance vs. a low center of gravity.
Checking out different heights using the floor jack:
I ended up with the fuel cell sitting ~5.5 below the top of the frame that was already fab'd. The next step was to start cutting the tubing to size. Here are the down tubes that connect the top frame to the lower section:
Then I cut out a bunch of other tubes and threw them together like so:
The largest tubes in the above picture are 2" x 2" x 0.125" wall. Then the outer fuel cell frame is 1" x 1" x 0.125" wall, and the smaller bracing a triangulation bars are 0.75" x 0.75" x 0.0625" wall. It may be a bit overkill, but it will be very secure.
Side View:
View from Underneath:
Shot from a couple steps back. The framework shouldn't be visible except from very far away:
It's hard to see clearly in the picture below, but the fuel cell is about 1" higher than the floor pan at the lowest point. So while I don't have a very big departure angle, clearance shouldn't be to bad:
Fuel Cell in place:
Top Shot:
Bottom View:
Then the last thing I did for the day was to remove the rubber bits from the bumper, which makes the lines much cleaner. Then test fit it to see how it looked. Overall I'm much happier with the change:
Next up on the list is to start fitting the sheet metal for the trunk floor as well as the fuel cell hold down and the rear suspension reinforcements.
Go Bucks!
Tinker Engineering - 2014
Mica - 2000 BMW 323i - The one that started it all Fiona - 1975 BMW 2002 - The Definition of Project Creep Heidi - 1988 BMW M5 - The piece of BMW history Silvia - 2013 Subaru WRX - Stock, for now
In a shop environment, 'Shovel' = 'Big Ass Dustpan'
Tinker Engineering - 2014
Mica - 2000 BMW 323i - The one that started it all Fiona - 1975 BMW 2002 - The Definition of Project Creep Heidi - 1988 BMW M5 - The piece of BMW history Silvia - 2013 Subaru WRX - Stock, for now
Progress from tonight. Started off with some exploratory surgery on the rear driver side fender lip. Before making up the trunk floor, I want to use the extra space and access the void gives me to make the necessary cuts for the fender flares. This involves taking out ~2 inches of the outer fender lip and then splicing the new edge into the inner fender. This will also let me see if there is any rust hiding in the inner body that I couldn't see before.
First I transferred the mounting holes for the fender flare so I knew where the cut would go. I left ~ 3/4" of material from the mounting holes, which should be plenty.
Then I trimmed out the lip. Here you can see the inner fender material and the edge that will be spliced into it.
With the fender trimmed, I am happy to say that the rusty parts of the inner fender lip were on the parts I cut out, so after some final trimming the splices should go fairly easily. With that done I decided to move away from the chassis work for a little bit.
Tis the season:
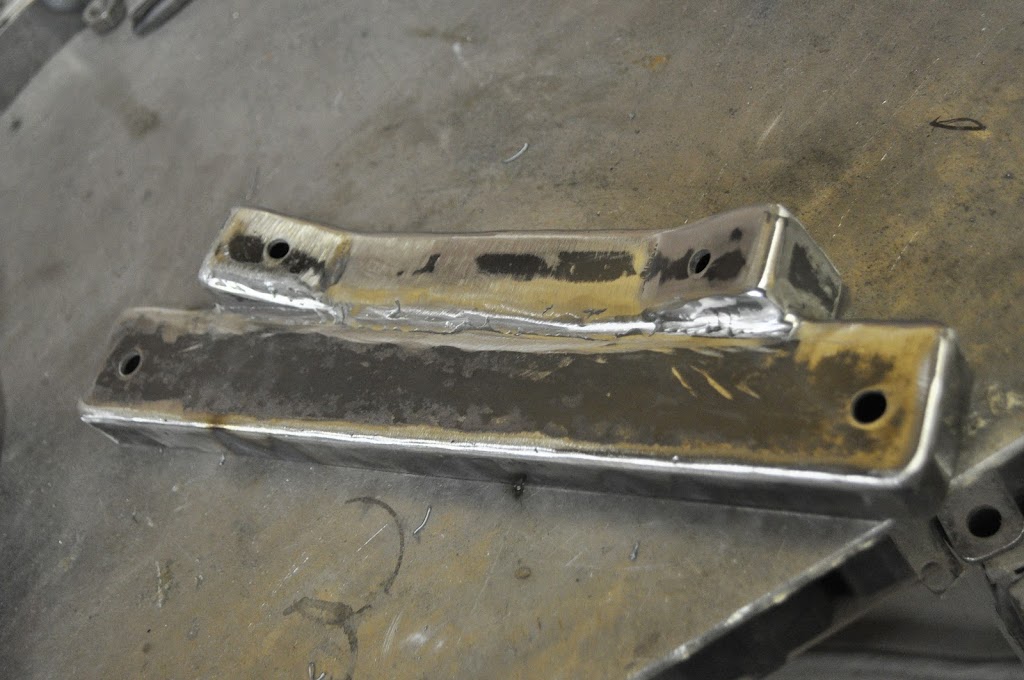
Next I moved to reinforcing the transmission and engine mounts I made earlier. First up was the transmission mount.
Here's the top side after cleaning up all the welds. Once it's powdercoated it will resemble a stock stamped piece:
And this is the underside as I left it before:
While this would be fine for a stock M10 setup, I wasn't really happy with it for my goals. Likewise, I wanted to avoid partially boxing it due to the possibility of trapping water on the inside. So I decided to use some of my 0.75" tubing and triangulate the inner walls. This should add the needed rigidity while letting it dry easily.
Moving on to the engine mounts, I wanted to add some internal bracing before fully boxing them in. To keep weight down I made them out of a thinner gauge, so the bracing will let me keep the strength while having a lower weight of a similar piece made from heavier material (such as my first generation of mounts).
Here's how they looked from earlier:
Some flat stock later and this is how they looked when I finished tonight:
Tomorrow I'll finish boxing the engine mounts, once done they will look like a solid piece of tubing with the bracing completely hidden. Then it's on to the other fender lip and more bodywork.
Thanks for looking.
Tinker Engineering - 2014
Mica - 2000 BMW 323i - The one that started it all Fiona - 1975 BMW 2002 - The Definition of Project Creep Heidi - 1988 BMW M5 - The piece of BMW history Silvia - 2013 Subaru WRX - Stock, for now
Quick update for the day's progress, I only had a few hours to work on her but I got the Engine and Trans mounts finished up.
For the engine mounts, I wanted to fully box them, both for strength and because I think they look much better that way. But I still needed to have clearance around the nut for securing the rubber mount. So I took some 1" I.D. pipe and welded it around the stud hole.
With it welded in place, I cut the pipe at an angle so that I could weld it flush with the rest of the mount. Then I proceeded to cut out the rest of the top pieces for the mount using my normal paper template method. With all of them cut out and tacked in place, your left with this:
With everything in place it could be fully welded:
Then ground flush on all sides:
With these finished up I'm going to put the engine and trans back in the car. That will let me work on some of the other things up front while I finalize my rear suspension set up and keep knocking out the body work.
Thanks for looking.
Tinker Engineering - 2014
Mica - 2000 BMW 323i - The one that started it all Fiona - 1975 BMW 2002 - The Definition of Project Creep Heidi - 1988 BMW M5 - The piece of BMW history Silvia - 2013 Subaru WRX - Stock, for now
Sweet mother of Jesus, this gives me all kinds of inspiration for my rust bucket! Excellent work, I hope to follow in your foot steps as soon as my E30 is (relatively) finished up.
those mounts would be good for the weight of 3 m20's. wow!
Originally posted by asuj158
sick as always
:up:
Originally posted by chondamx
Sweet mother of Jesus, this gives me all kinds of inspiration for my rust bucket! Excellent work, I hope to follow in your foot steps as soon as my E30 is (relatively) finished up.
Haha, thanks man. I might recommend replacing that hood though, that looks pretty rough!
Tinker Engineering - 2014
Mica - 2000 BMW 323i - The one that started it all Fiona - 1975 BMW 2002 - The Definition of Project Creep Heidi - 1988 BMW M5 - The piece of BMW history Silvia - 2013 Subaru WRX - Stock, for now
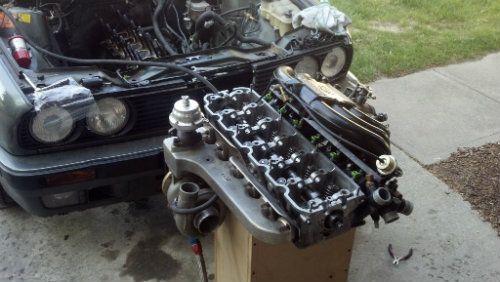
aw man - after seeing all the work put into this car, I feel bad admitting I'd rather see an s14, or a hopped up m42, or a stupidly turbo'd m10 in it. Something about a sixer in an 02 seems weird to me. Respect earned on the ITB/m20 though.. just thinking out loud.
Wow, nice work... Maybe following this build can help get me and the team motivated to put the turbo m20 back in our e30/2002 Frankenstein car... We have a full e30 front and rear suspension swap.


Comment