If this is your first visit, be sure to
check out the FAQ by clicking the
link above. You may have to register
before you can post: click the register link above to proceed. To start viewing messages,
select the forum that you want to visit from the selection below.
With the subframe stiffened up I needed to make up some mounts for the steering rack. After taking many measurements to double check the placement and trying to keep it centered and squared, I tacked the tabs in place. After a final measurement everything was welded in place. I originally wanted to TIG the mounts, but I ran out of argon gas so I had to bust out the MIG. Got the job done just fine, but had to spend some time cleaning up the splatter.
You know TIG = Tungsten Inactive(Argon) Gas and MIG = Metal Inactive(Argon) Gas :p So if you ran out of argon MIGing wouldnt be possible, but instead MAG = Metal Active(Carbondioxide) Gas. Sorry for schooling a bit in your own thread, but i couldnt help myself ;)
Originally posted by tinkwithanr
Worked on the control arms tonight. Didn't like the flimsy stamped design, so I started by stitch welding the seams. I also picked up more argon so I could TIG them. This helped keep the head more controlled, gave me more practice TIGing, and made the clean up easier because there's no splatter. I've still got a long way to go before I try and tackle the stainless exhaust, but I am getting better with it.
If youre able to TIG normal "black" steel up this way, stainless should be absolutely no problem for you, since its easier to weld than normal steel.
Anyways i just spend the last couple of days reading through your whole project, and im simply amazed! Everything youre doing is so nicely done, and im very jealous on your workshop, wish i had all that you have :o
Thanks, glad to hear I should be able to handle the exhaust.
. As for the welding gas, your right, both MIG and TIG gases are mostly argon. However, my TIG gas is 100% pure Argon, while my MIG gas is 75% Argon and 25% C02. While you CAN use the 75% mix for TIG welding, it's not ideal. Both Miller and Lincoln suggest pure argon or and argon/helium mixture for TIG welding. Overall, the arc is more stable with pure argon and it's just much easier to lay down a nice bead.
Mica - 2000 BMW 323i - The one that started it all Fiona - 1975 BMW 2002 - The Definition of Project Creep Heidi - 1988 BMW M5 - The piece of BMW history Silvia - 2013 Subaru WRX - Stock, for now
The next order of business was to fabricate the new mounts for the rear subframe. After taking some measurements I made a quick sketch of what I needed to turn and got to work.
The Sketch:
Shown in the sketch is the 'bottom plug'. This is what will hold the mounting studs for the two forward mounts on the rear subframe. The bottom plugs will be welded to a piece of 1.5"-0.120 wall DOM tubing, which will then allow me to tie the mounts into the roll cage and unibody very easily. Also, by leaving the top of the tubing open, the studs will be able to be removed/replaced if necessary. This could come in handy if the threads get stripped or rusty over time.
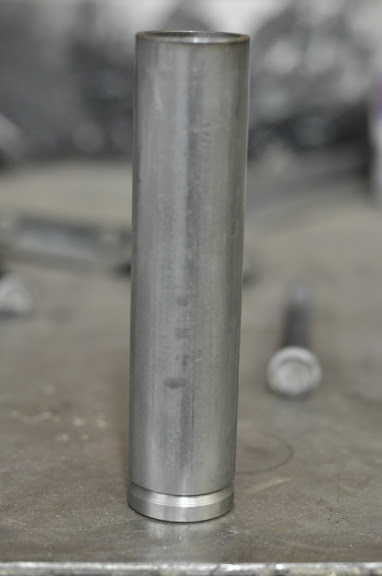
The material I used for the bottom plugs was 416 Stainless, which has good machinability while being very corrosion and wear-resistant. Starting with 1.5" bar stock, a couple hours later I had these:
And here are all the parts of the subframe mount in an exploded view. From left to right: DOM Tubing, Mounting Stud, Bottom Plug, Subframe Bushing, Lower bracing Plate.
This is how the plugs slide into the DOM tubing. The chamfered edge is to help the weld penetrate better, as well as give the filler material somewhere to go.
And here is how the plug fits onto the subframe bushing. The aluminum insert in the bushing fits up into the plug, and when bolted in the aluminum is tight up against the counter bore in the plug.
Everything put together to double check before welding:
Next it was time to press in the mounting studs. For this I used the stock e30 studs pulled from the parts car. The studs themselves have a knurled shoulder right under the head. This is press fit into the plug to hold the stud in place.
The stud loose in the plug, before being pressed in:
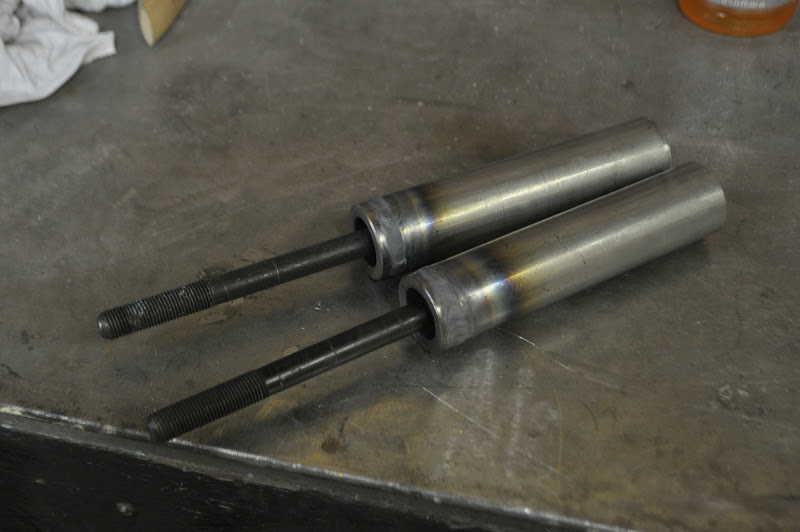
After being pressed into the plugs:
After welding the plugs into the tubes:
The two assemblies installed onto the subframe. Here you can also see the jig I made up to help position the subframe under the car:
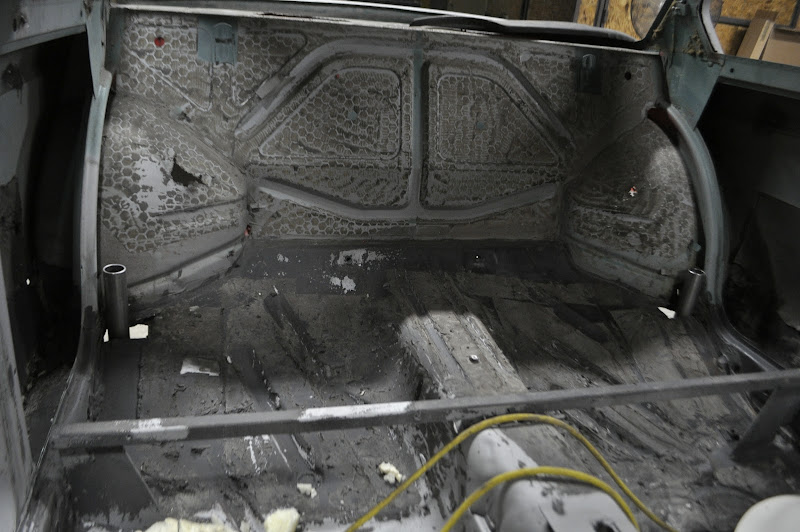
Finally, with the subframe roughly in position, you can see the DOM tubing sticking up into the cabin area. I'll need to trim the top of the tube down to be even with the floor, I left it extra long since I didn't know how much I would need.
Hoping to get the subframe squared up and welded in place along with the diff mounts tomorrow. Then it's on to the trunk floor!
Tinker Engineering - 2014
Mica - 2000 BMW 323i - The one that started it all Fiona - 1975 BMW 2002 - The Definition of Project Creep Heidi - 1988 BMW M5 - The piece of BMW history Silvia - 2013 Subaru WRX - Stock, for now
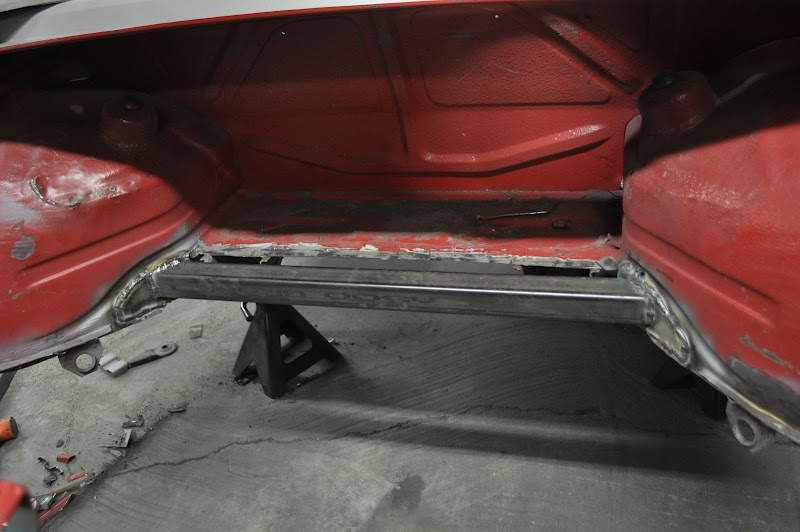
With the front mounts made up it was time to get the subframe square with the car and figure out how high I wanted to tuck it up into the body. Luckily I was able to talk my friend into helping me during the measuring and finessing the assembly into position. After about an hour of tweaking and adjusting I was happy with where it was sitting, and I tacked the front mounts in place. This then allowed me to figure out the correct placement of the rear cross member, which would hold the rear mounts for the diff cover.
Here's the front subframe mounts tacked in place. The bolts are a little long, but I don't think it will hurt anything. Worst case scenario I'll just trim them down a bit:
Here you can see the area cleaned up and ready for the new material to be welded in:
Next we cut and measured the cross member piece along with the extra side panel reinforcements. Here are both welded in place:
Close up of the driver side. The plate that the cross member is welded to is to help reinforce the inner wheel well. The weld-thru primer made my welds a bit crappier than I would have liked, but they will definitely hold.
With the cross member in we put the subframe back in place so we could measure for the diff ear mounts.
Front face of the mounts cut out:
Due to the way the bushings on the diff cover are, the ear mounts need to have a small, circular offset to them. So I TIG'd some washers onto the back of the ear mounts. This allows the inner portion of the bushing to be held rigid to the mount without rubbing on the outer portion of bushing and diff cover.
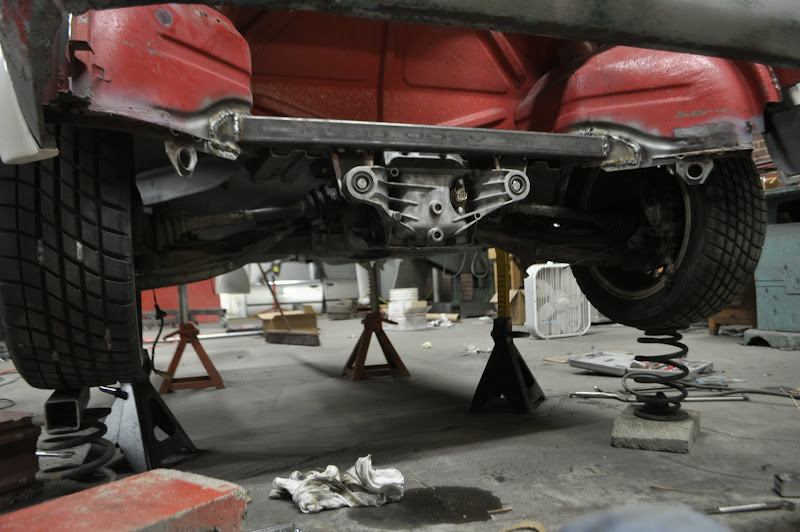
I then gusseted the ear mounts to add some rigidity and welded them in place on the cross member under the car. This let me remove the jack and see the subframe held in place on it's own for the first time.
Nother Diff Shot:
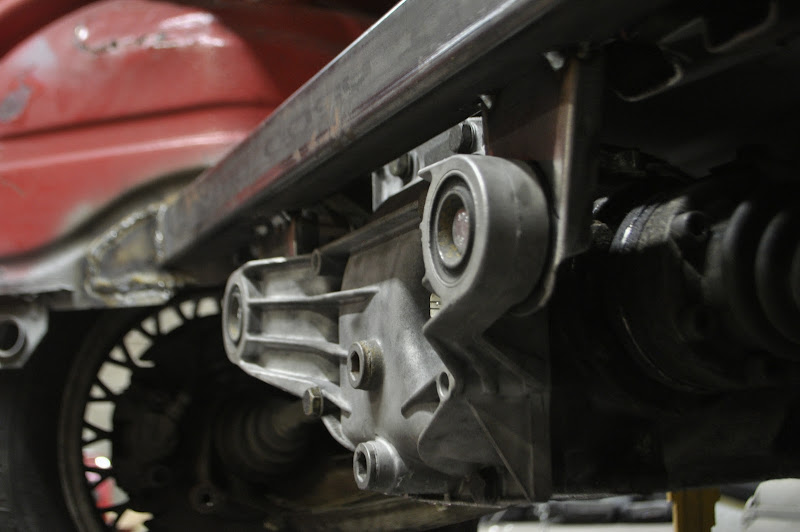
Here you can kind of see the gussets I added to the diff mounts. Essentially the cross section is a 'C' shape, except at the bottom where there isn't a worry of it flexing (it's lower than the bolt hole). I'm also going to add a gusset above where the ears sit once I take the subframe back out.
Last but not least here is a side view of the diff. You can see how it sits up against the body of the trunk floor. The cover has a clearance of about 1" between the top of it and the front of the cross member, which will be plenty of room.
Next up will be framing out the trunk floor and fit the fuel cell into postion. Then I can repair/brace the inner wheel wells and measure for my rear coilovers.
Tinker Engineering - 2014
Mica - 2000 BMW 323i - The one that started it all Fiona - 1975 BMW 2002 - The Definition of Project Creep Heidi - 1988 BMW M5 - The piece of BMW history Silvia - 2013 Subaru WRX - Stock, for now
I genuinely feel bad for myself right now.
I've read this thread shaking my head in amazement. You have some serious talent and work ethic. This is truly an inspiration.
Just spent like 2 hours going through this thread from start to finish, and I'm completely impressed! Pure quality, this puts my '02 build to shame haha. Keep it up dude!


Comment