Announcement

Collapse
No announcement yet.

phenryiv1's Rally Cross 87 325- Caged, B25 Swapped, Rear suspension refresh Last Page

Collapse
X
 
  • Filter
  • Time
  • Show
Clear All
new posts

    Subframe and RTAB removal to facilitate busing replacement. Other things will be done while the subframe is out.

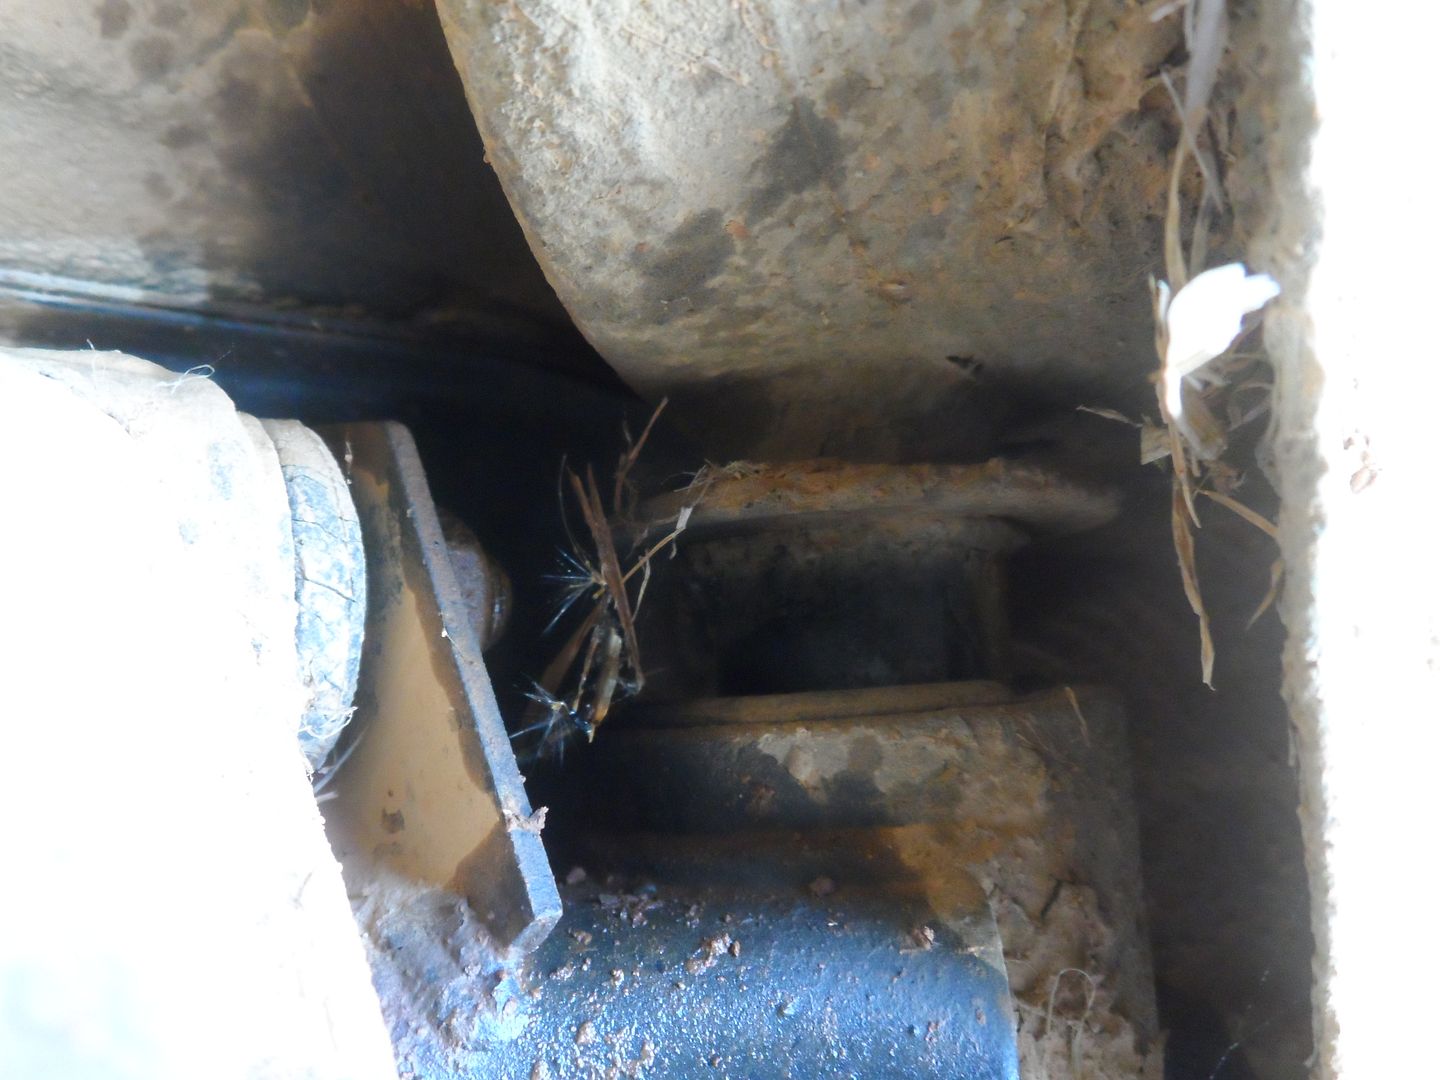
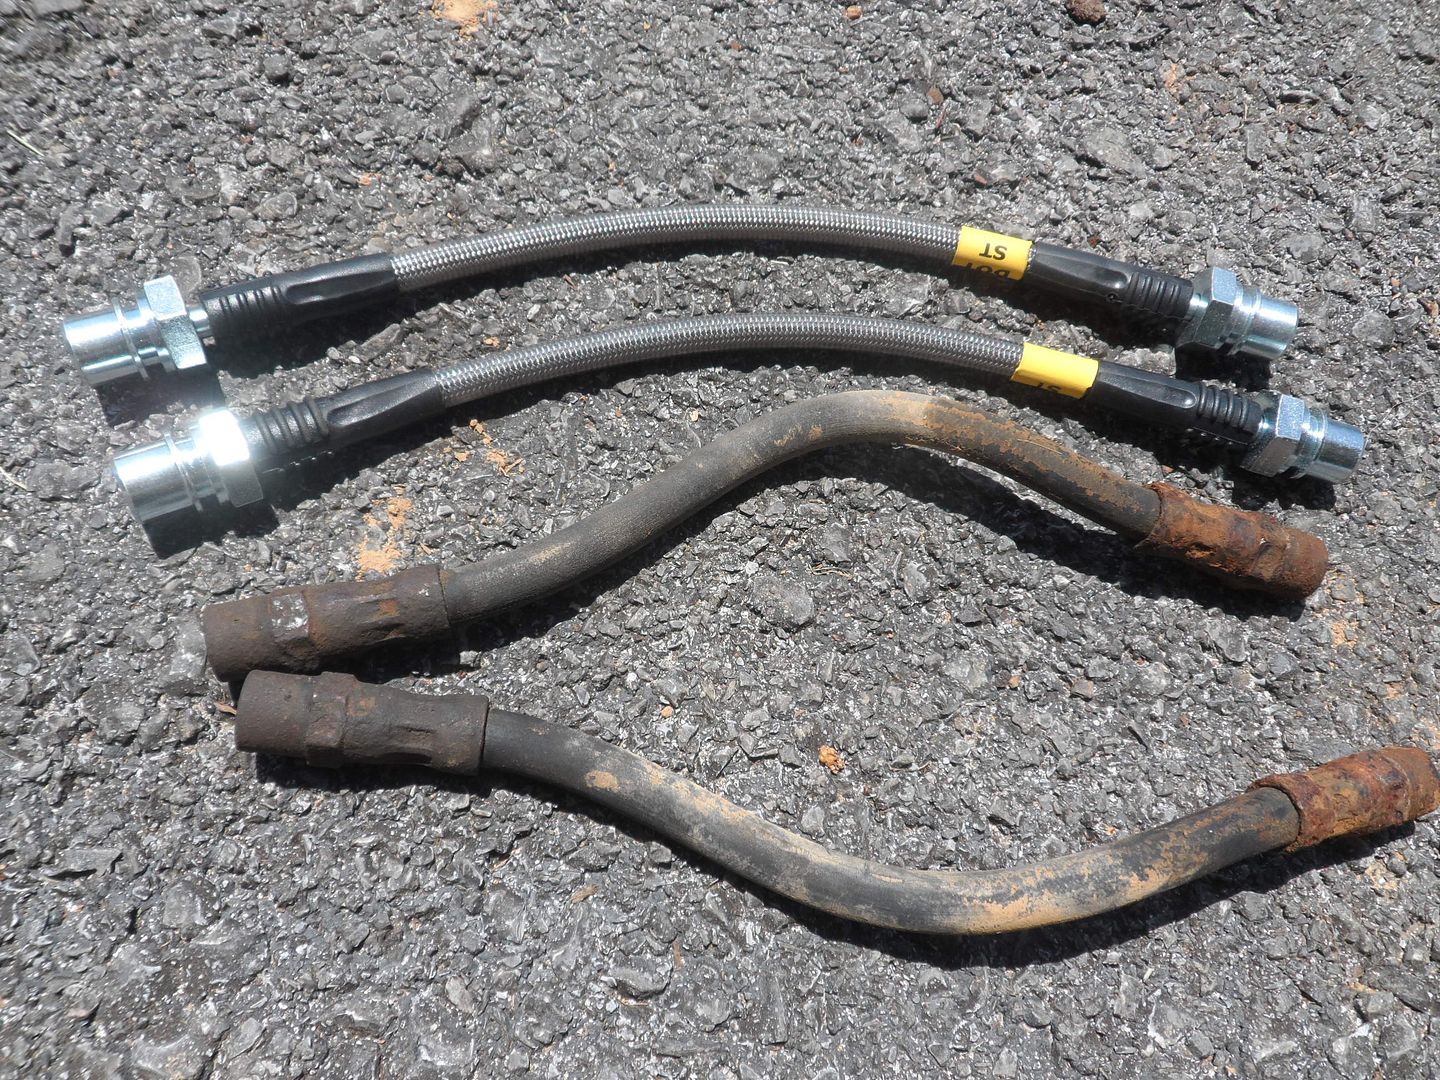
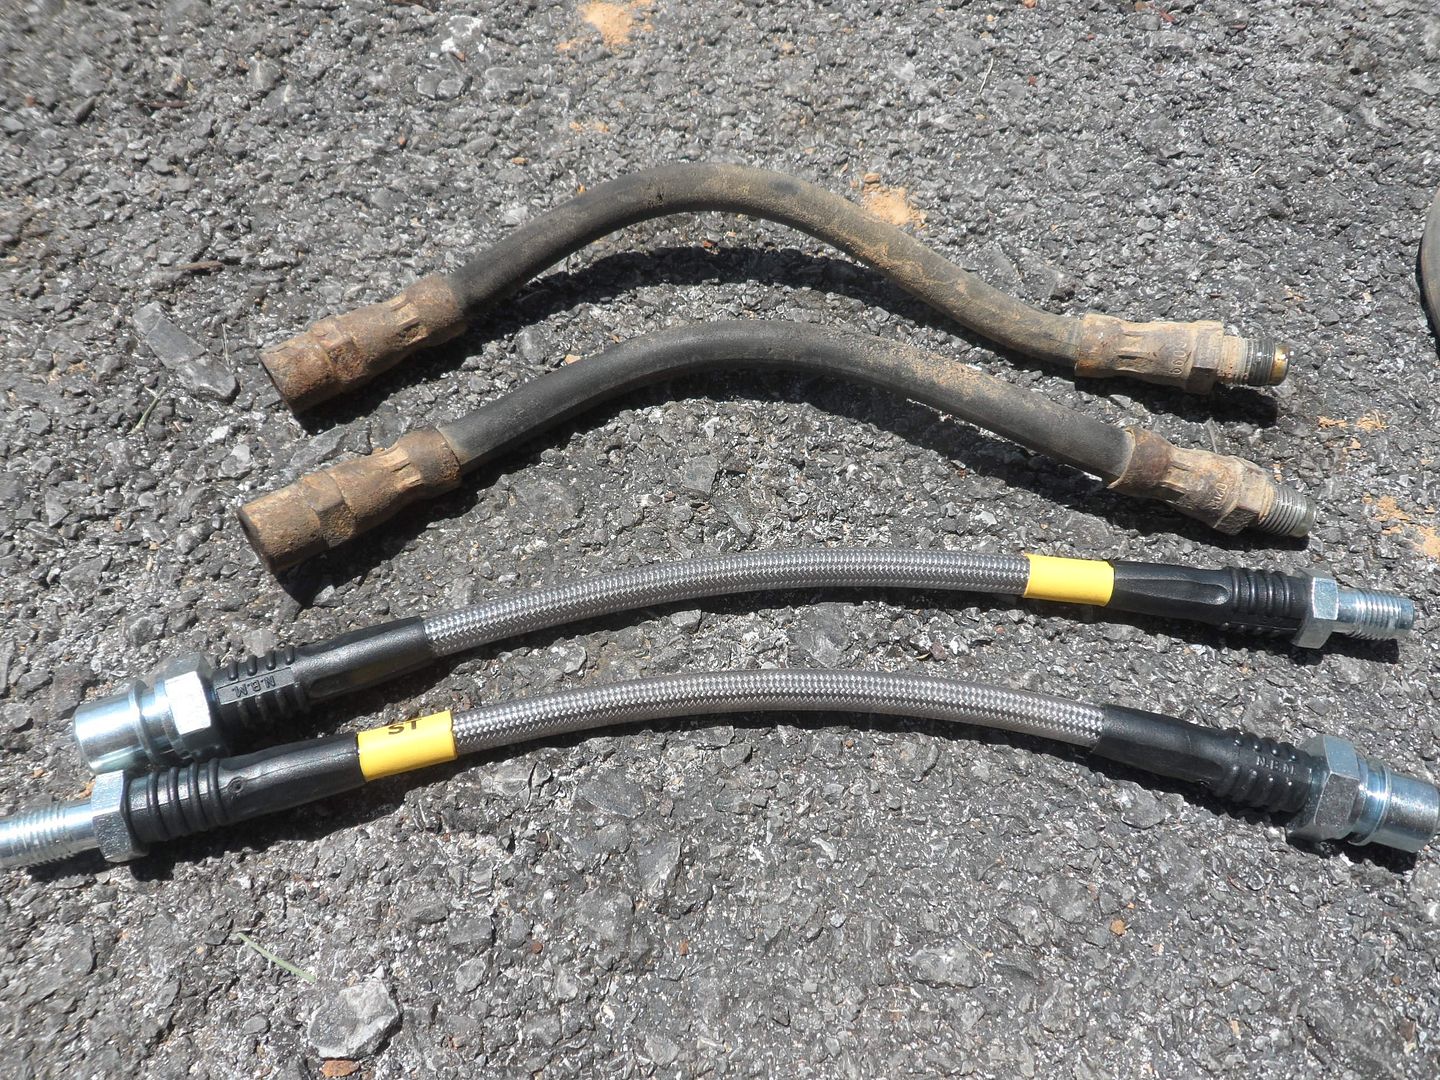
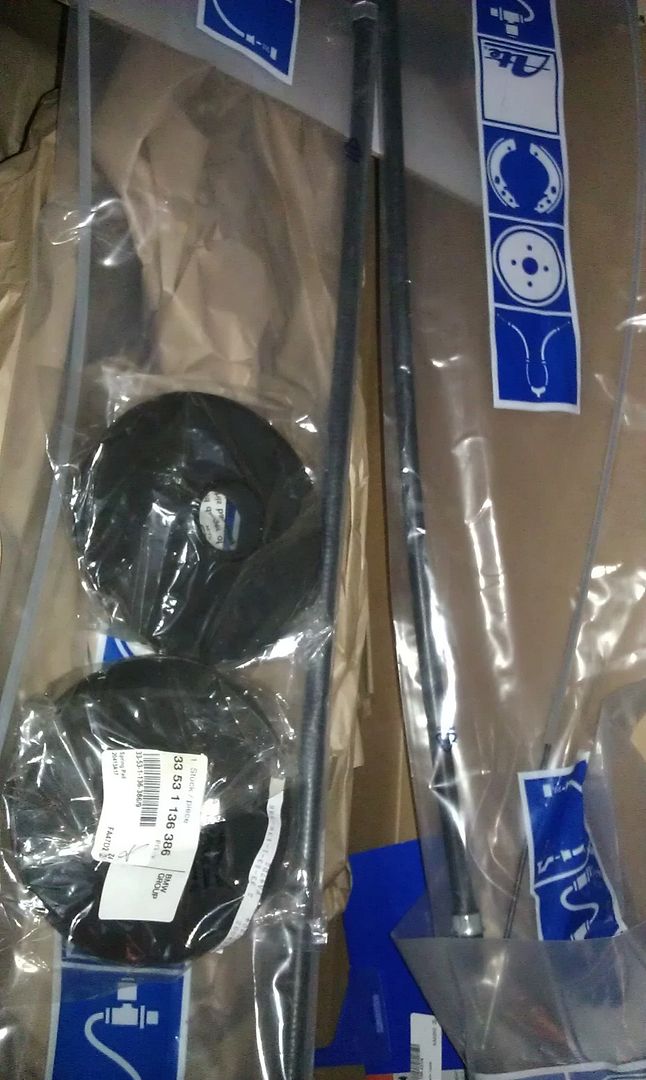
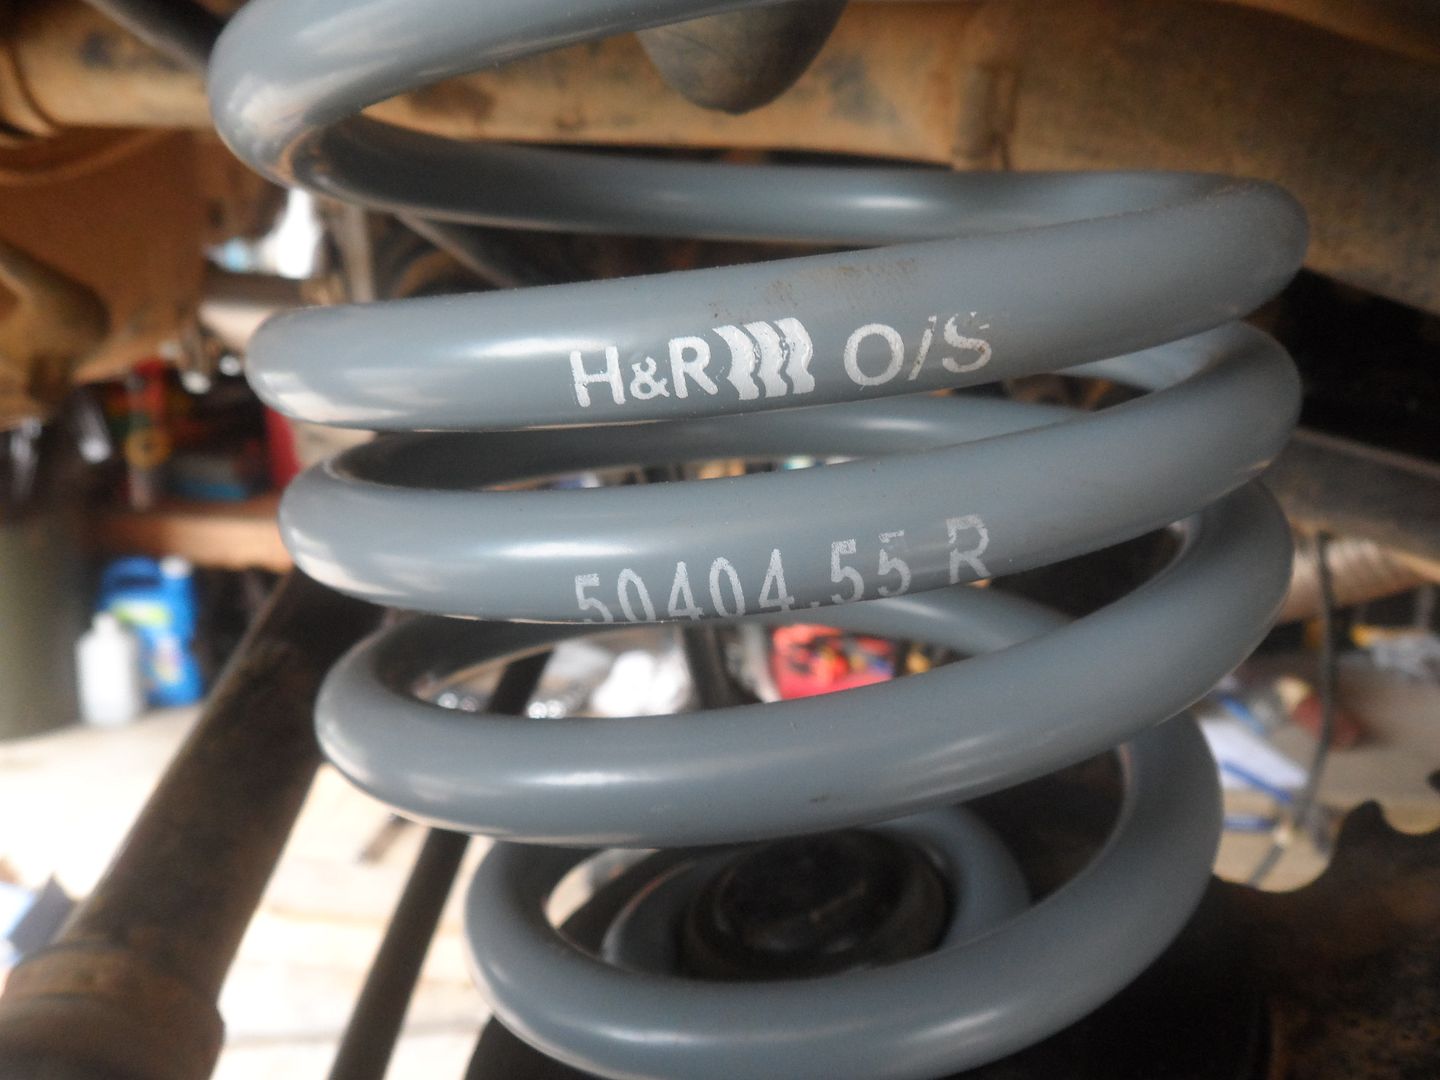
    So these might have been a bit used up:


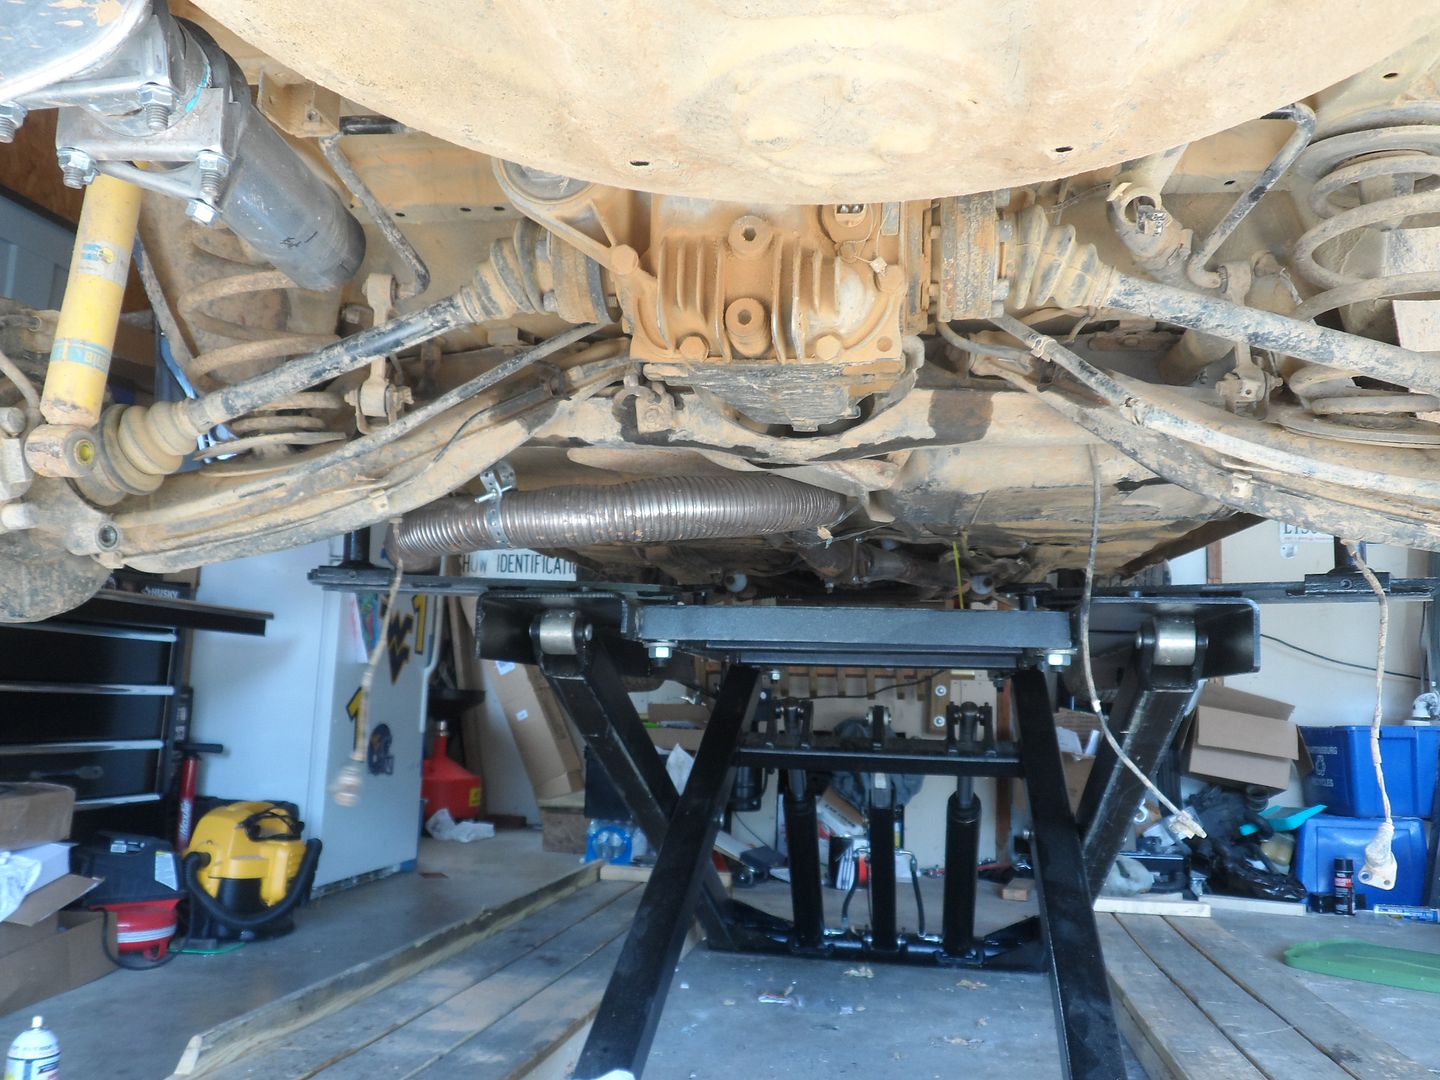
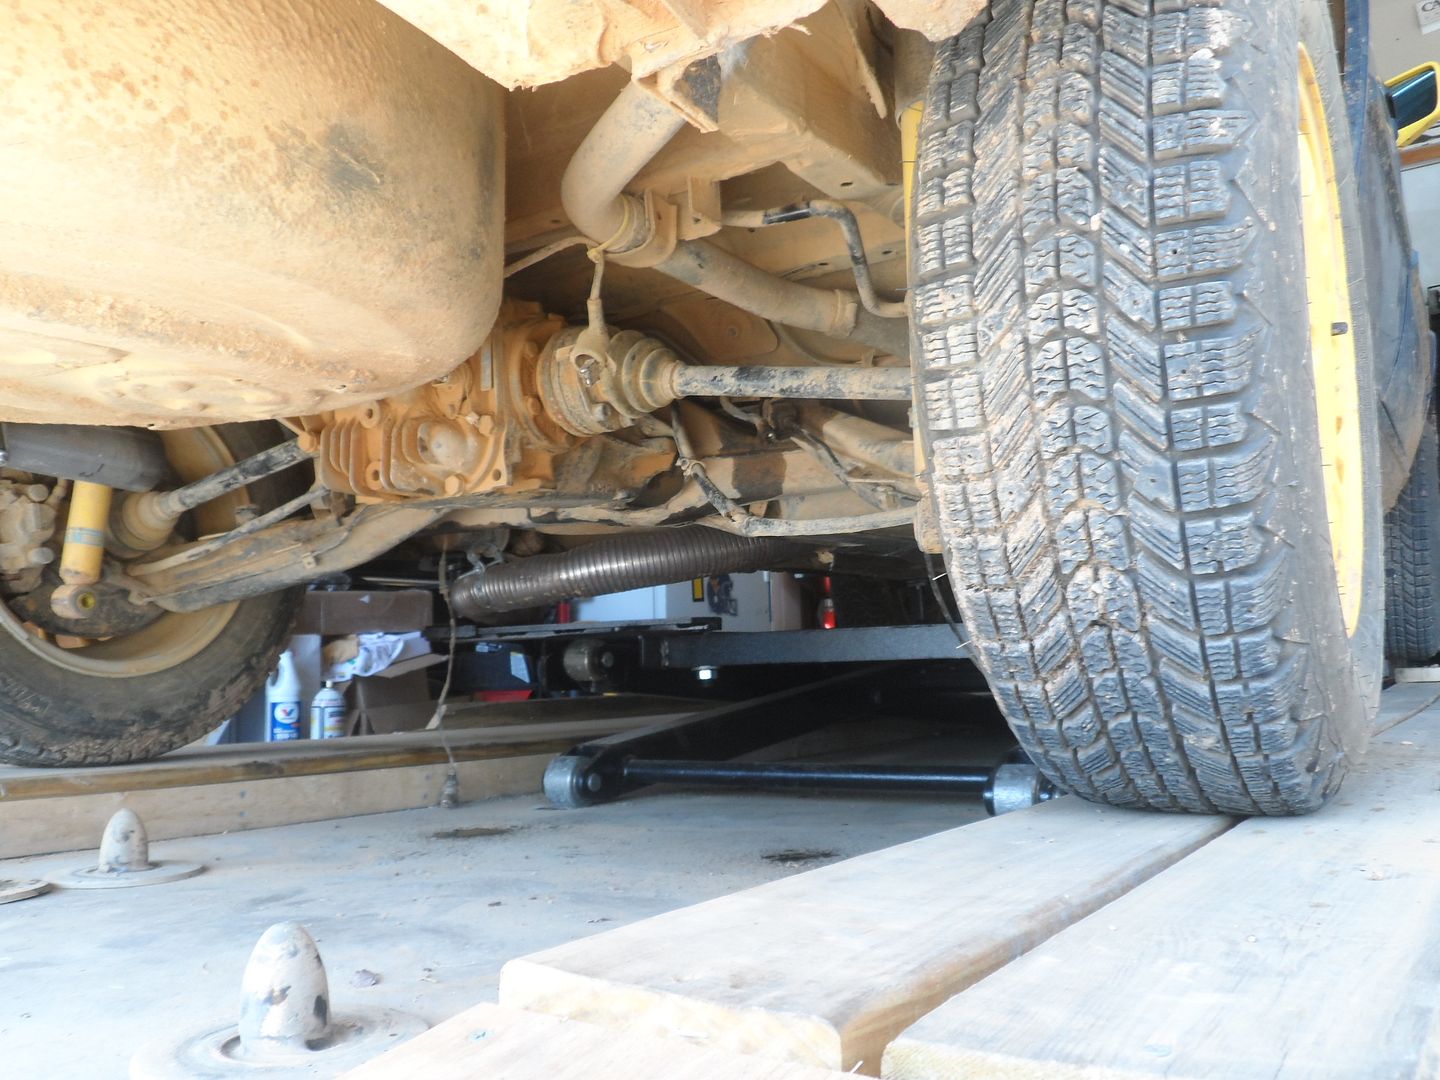
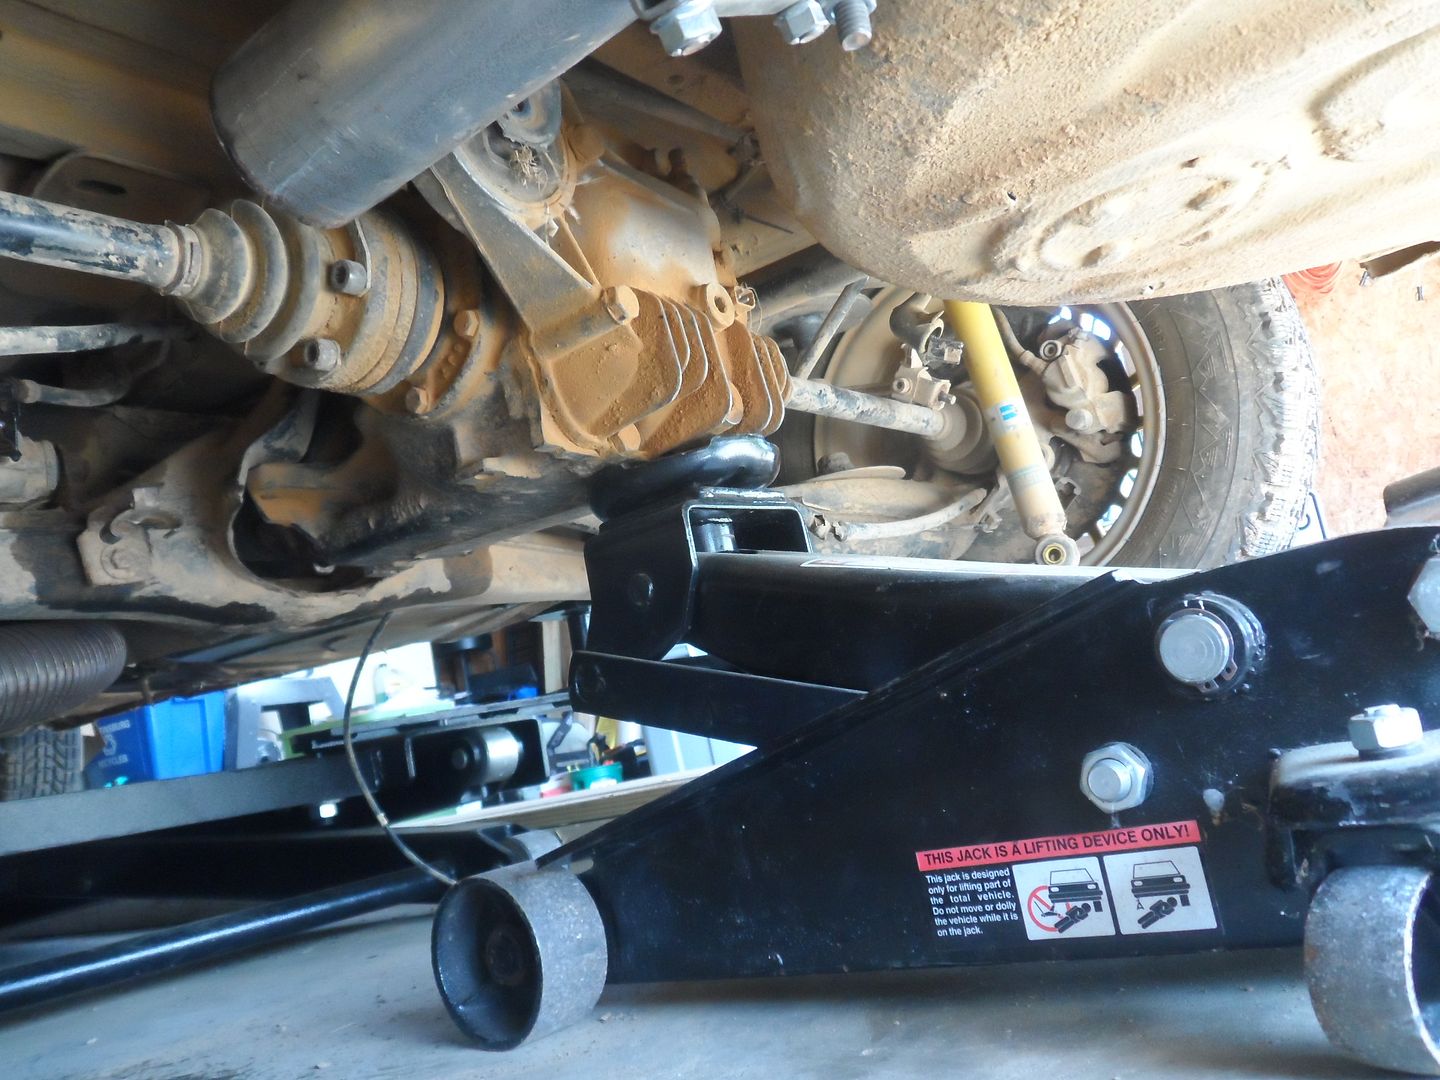
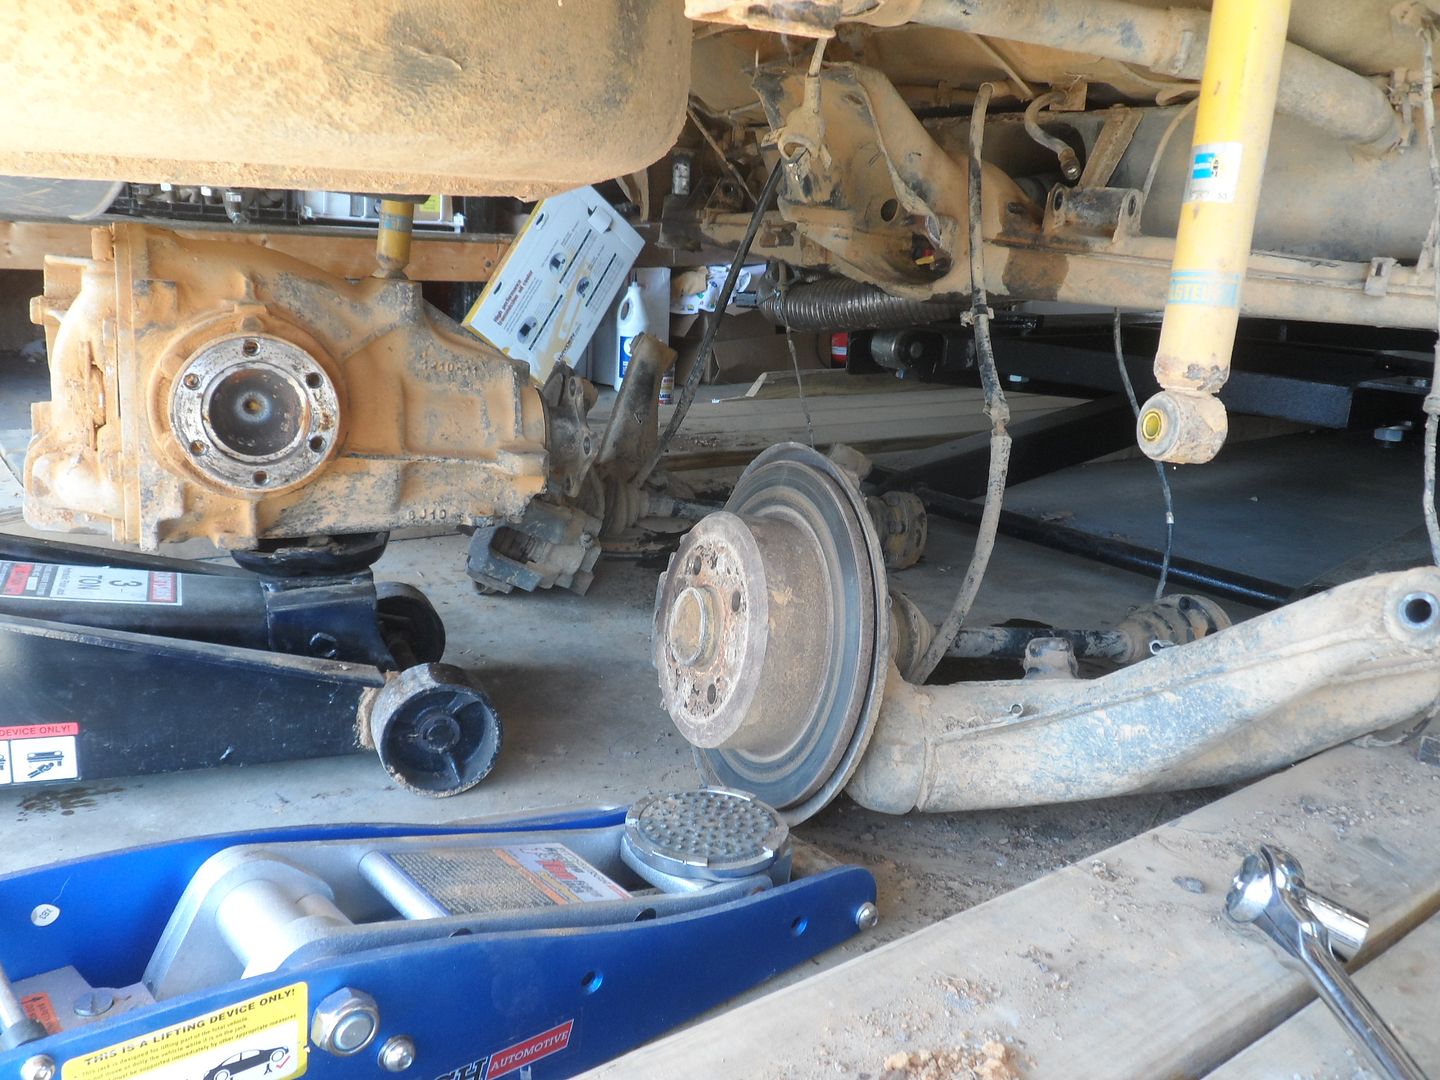
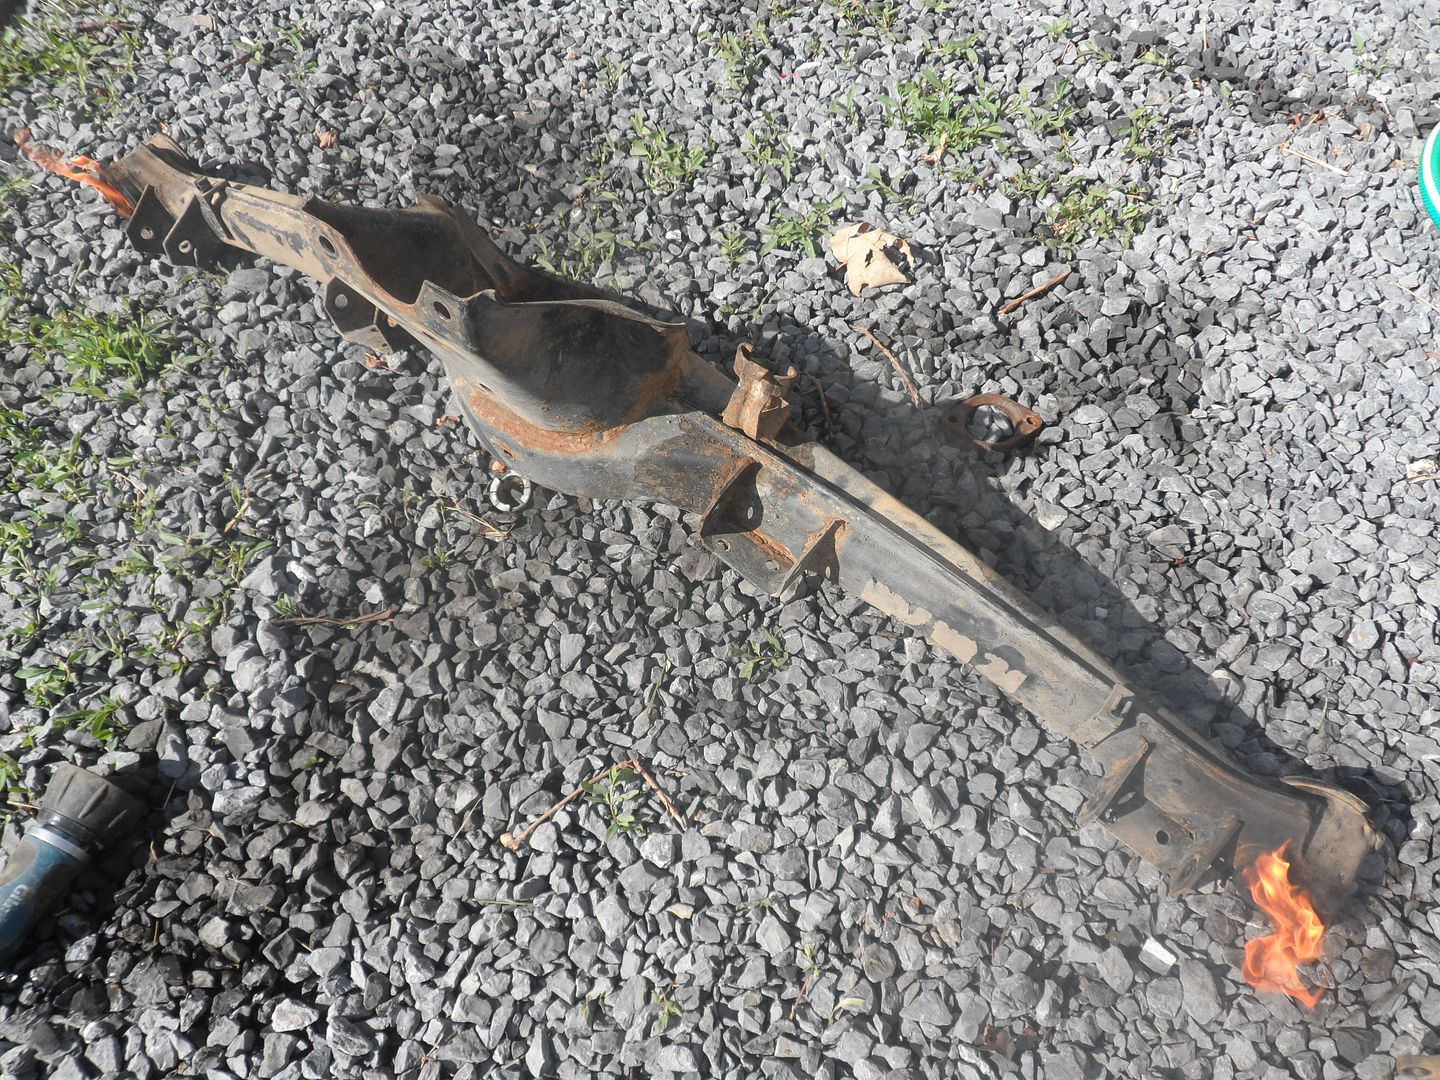
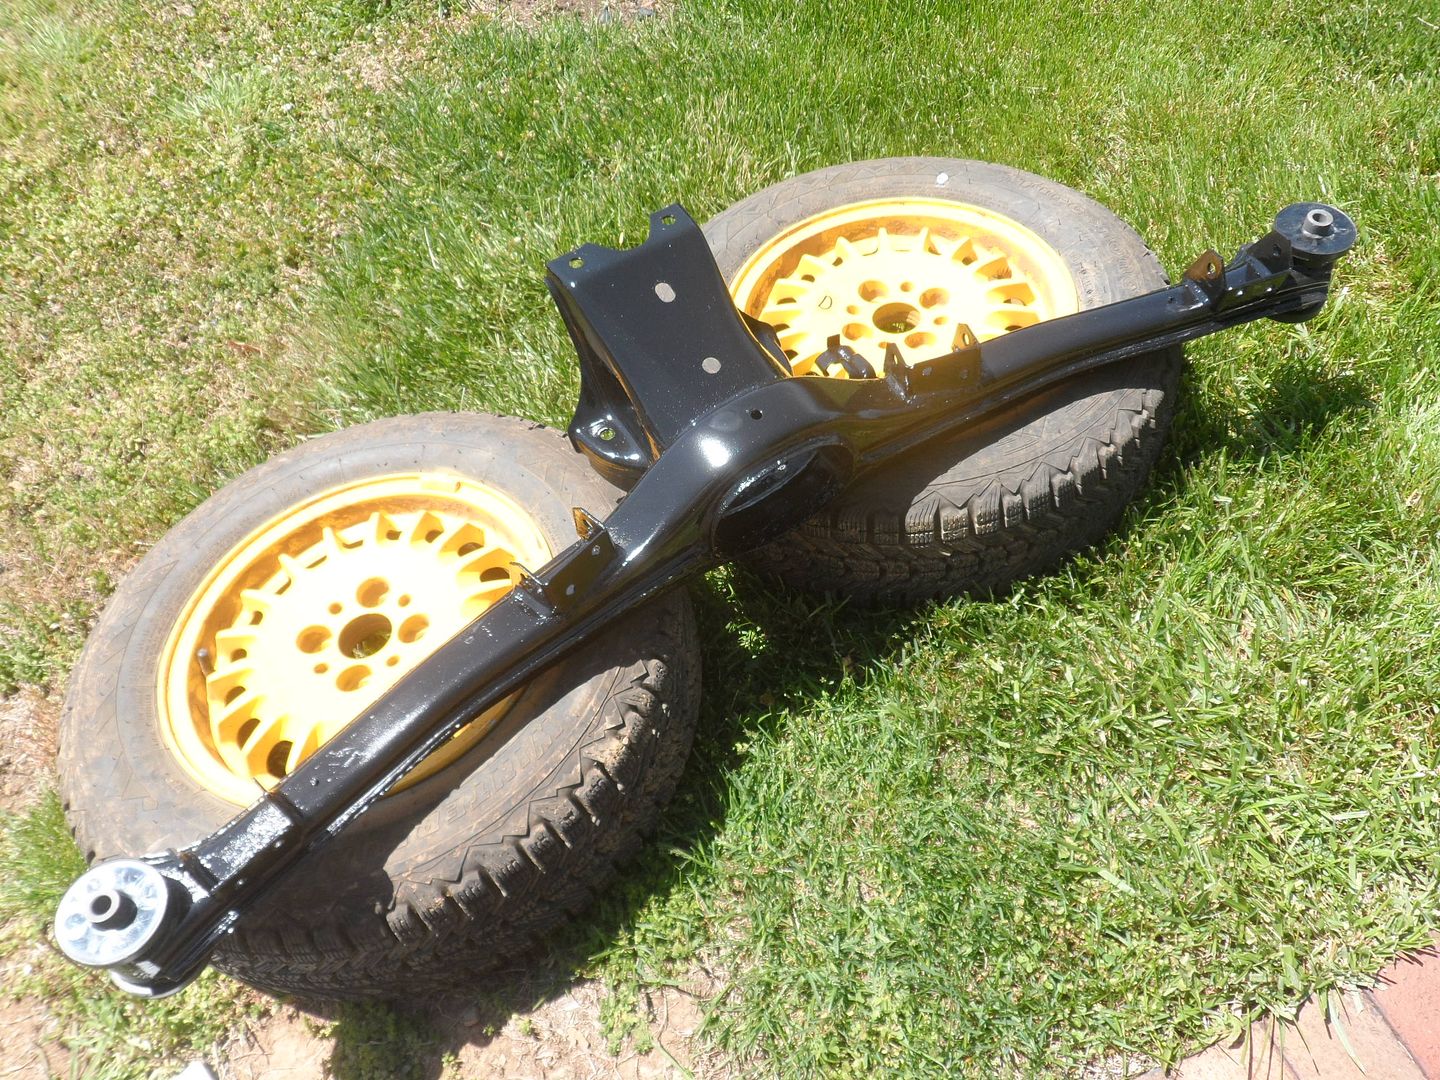
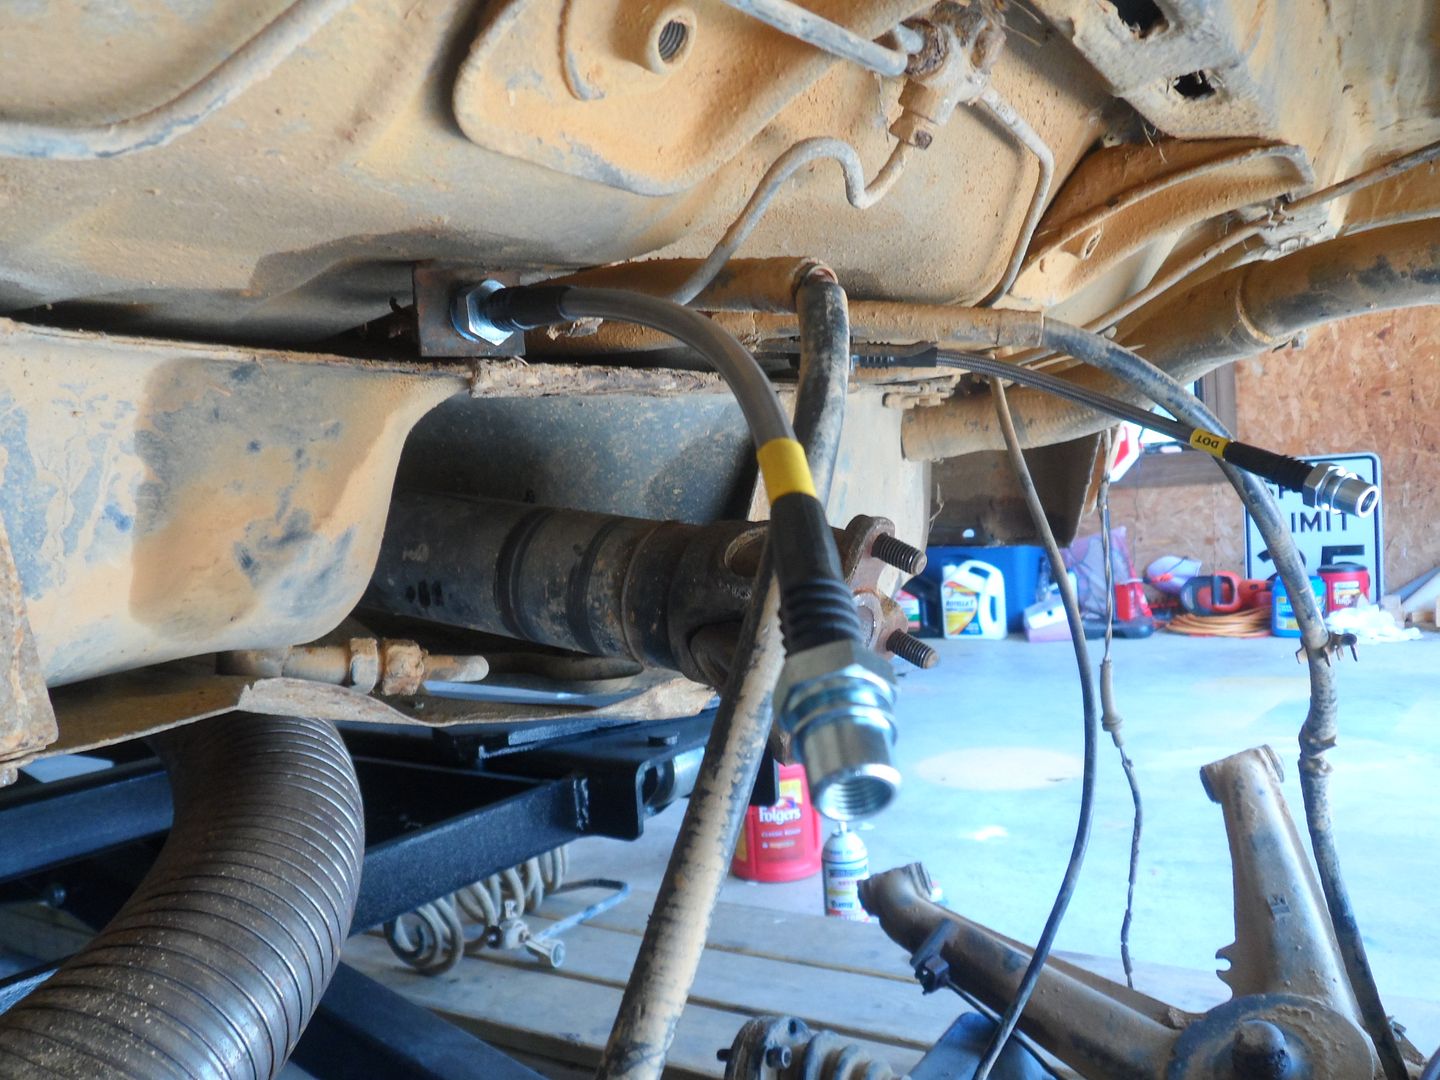
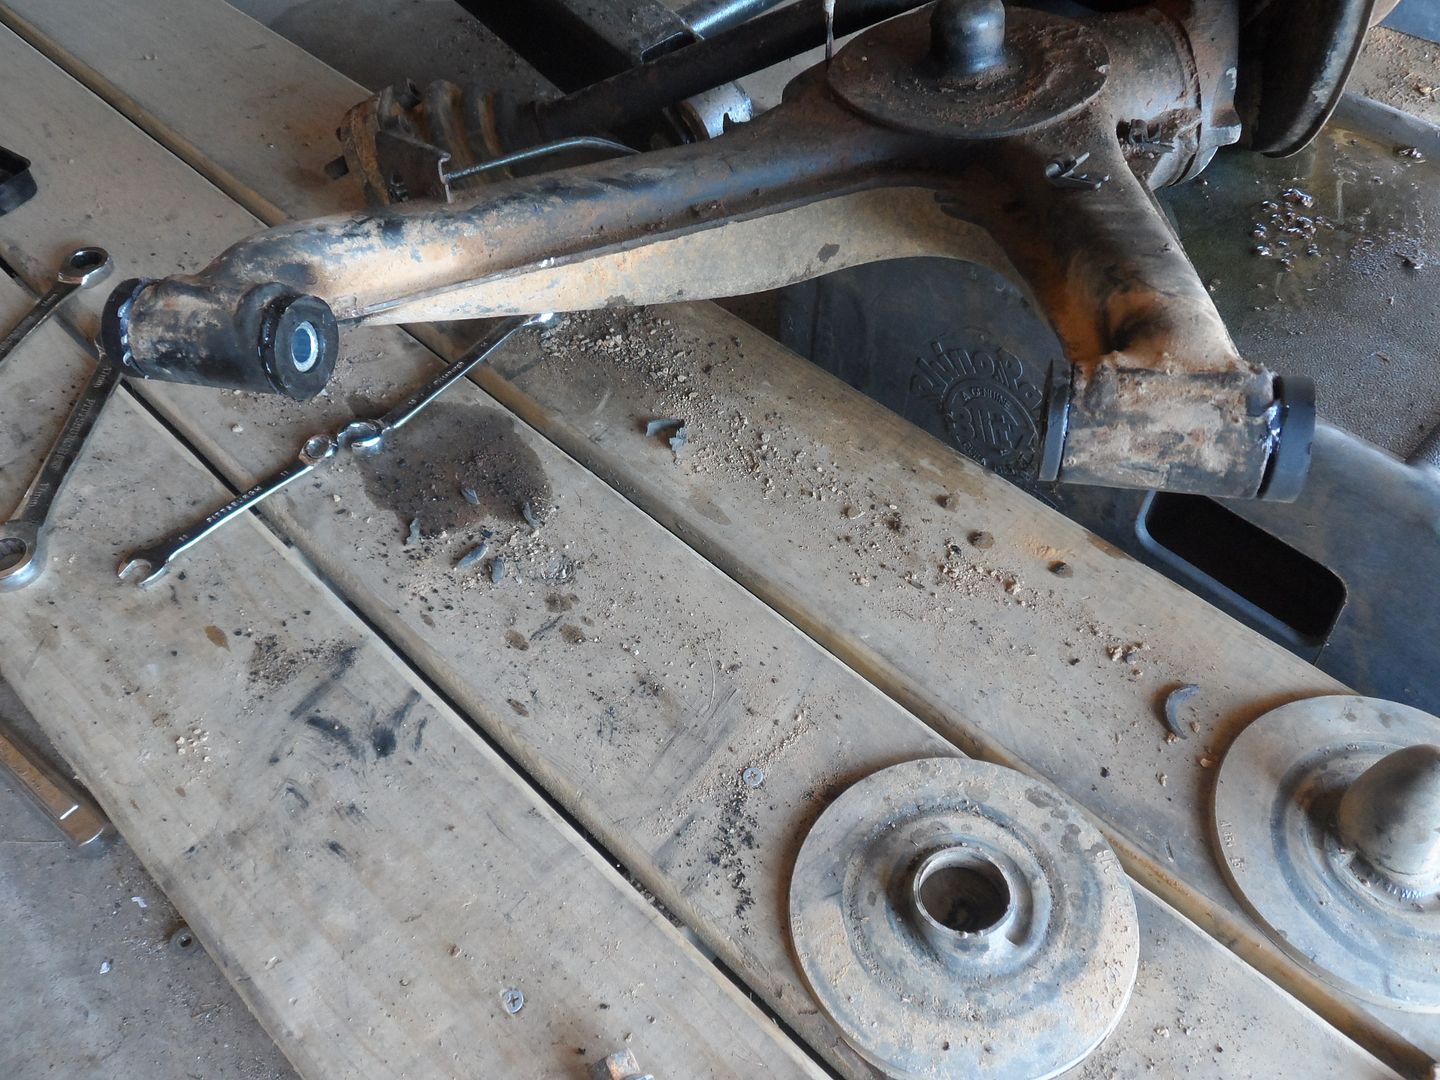
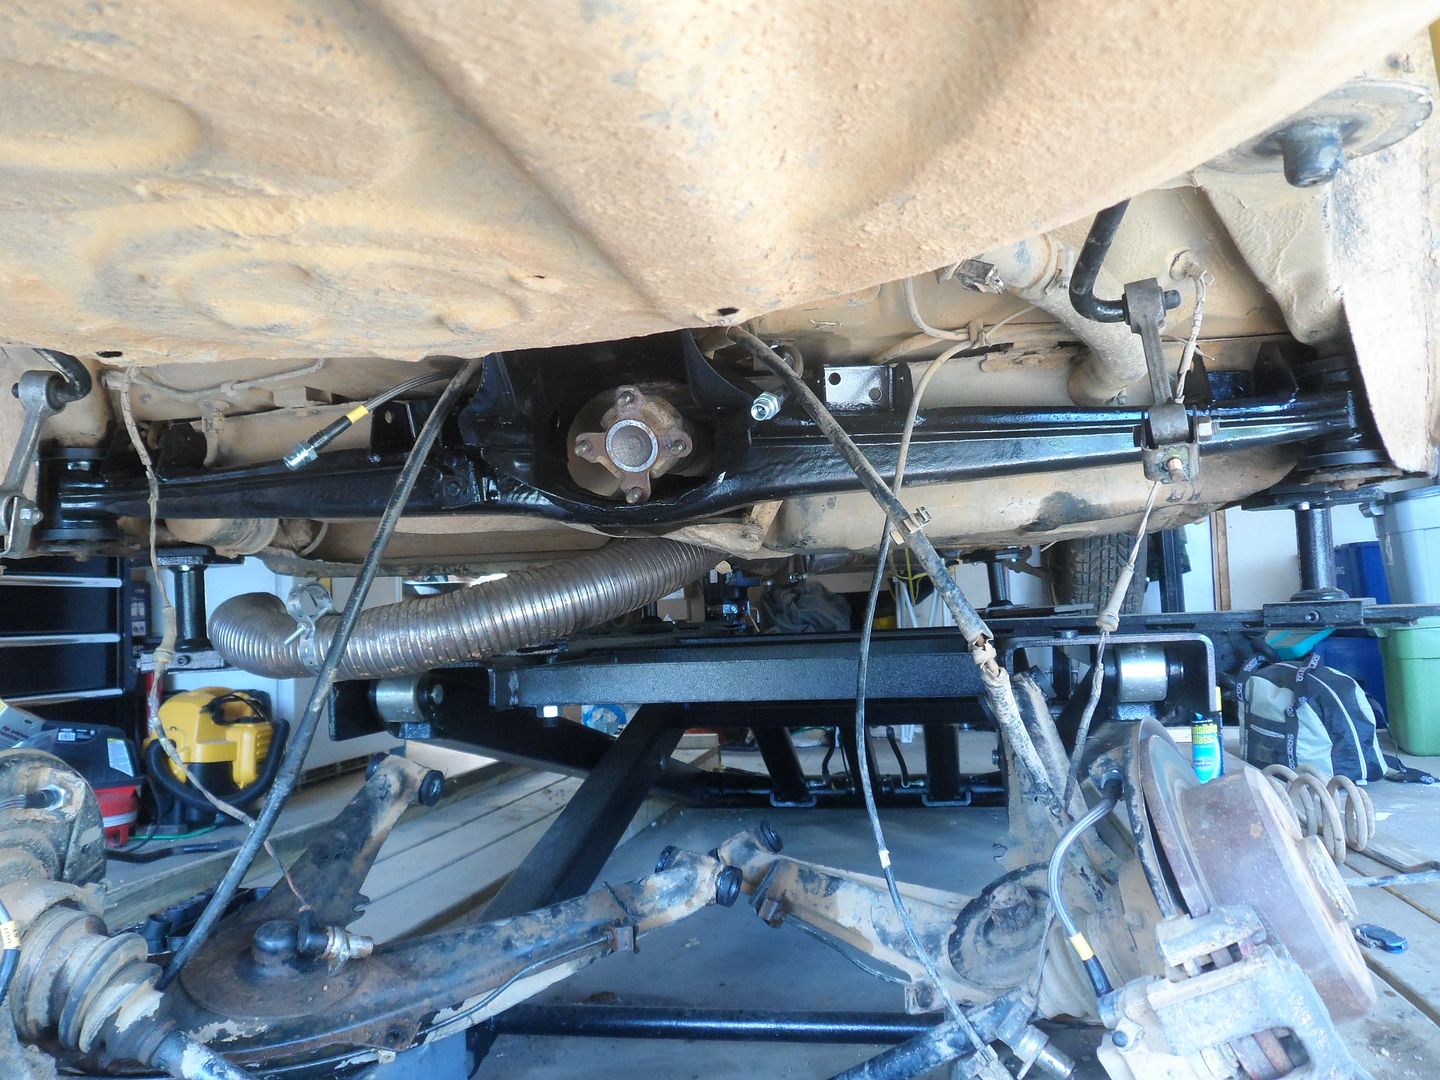
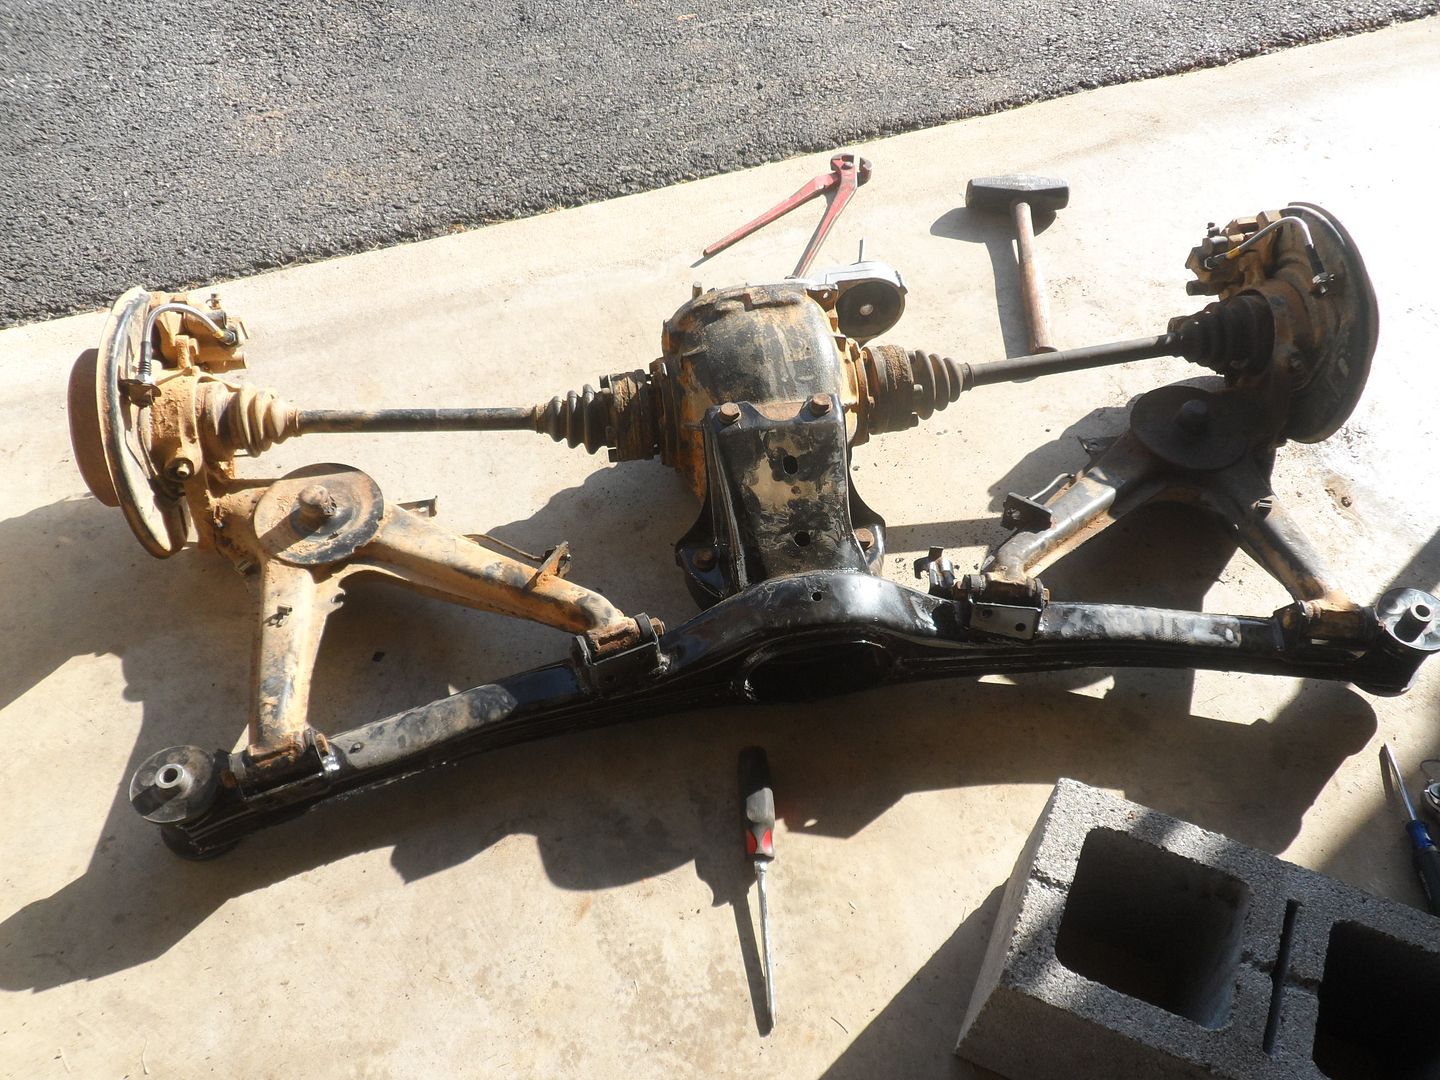
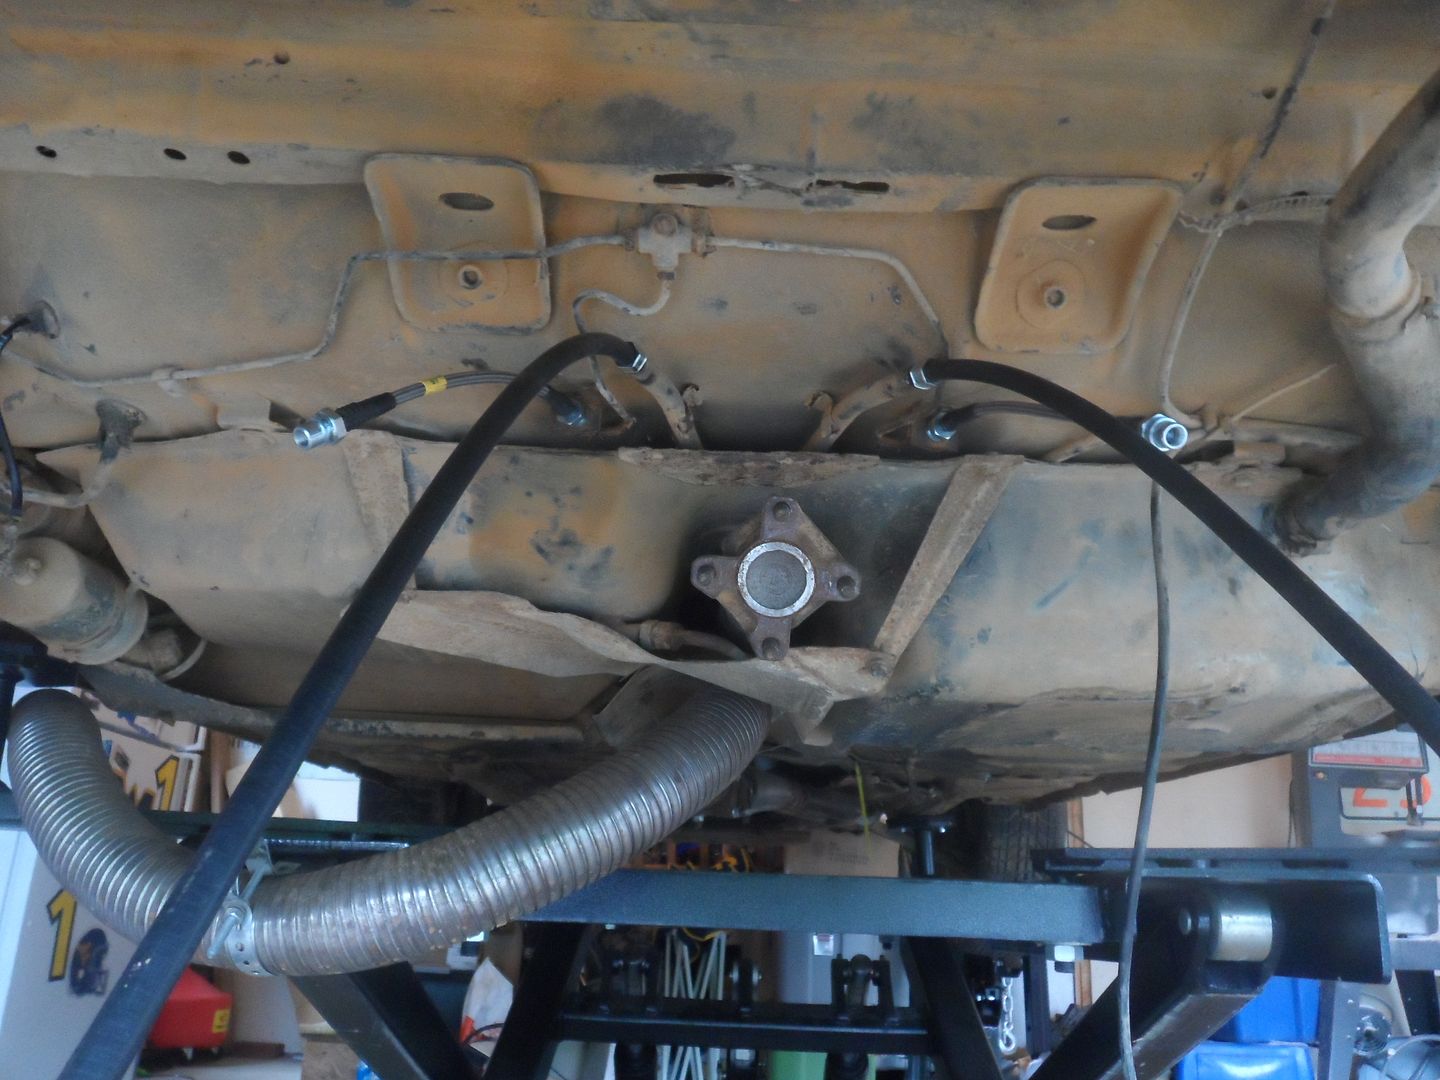
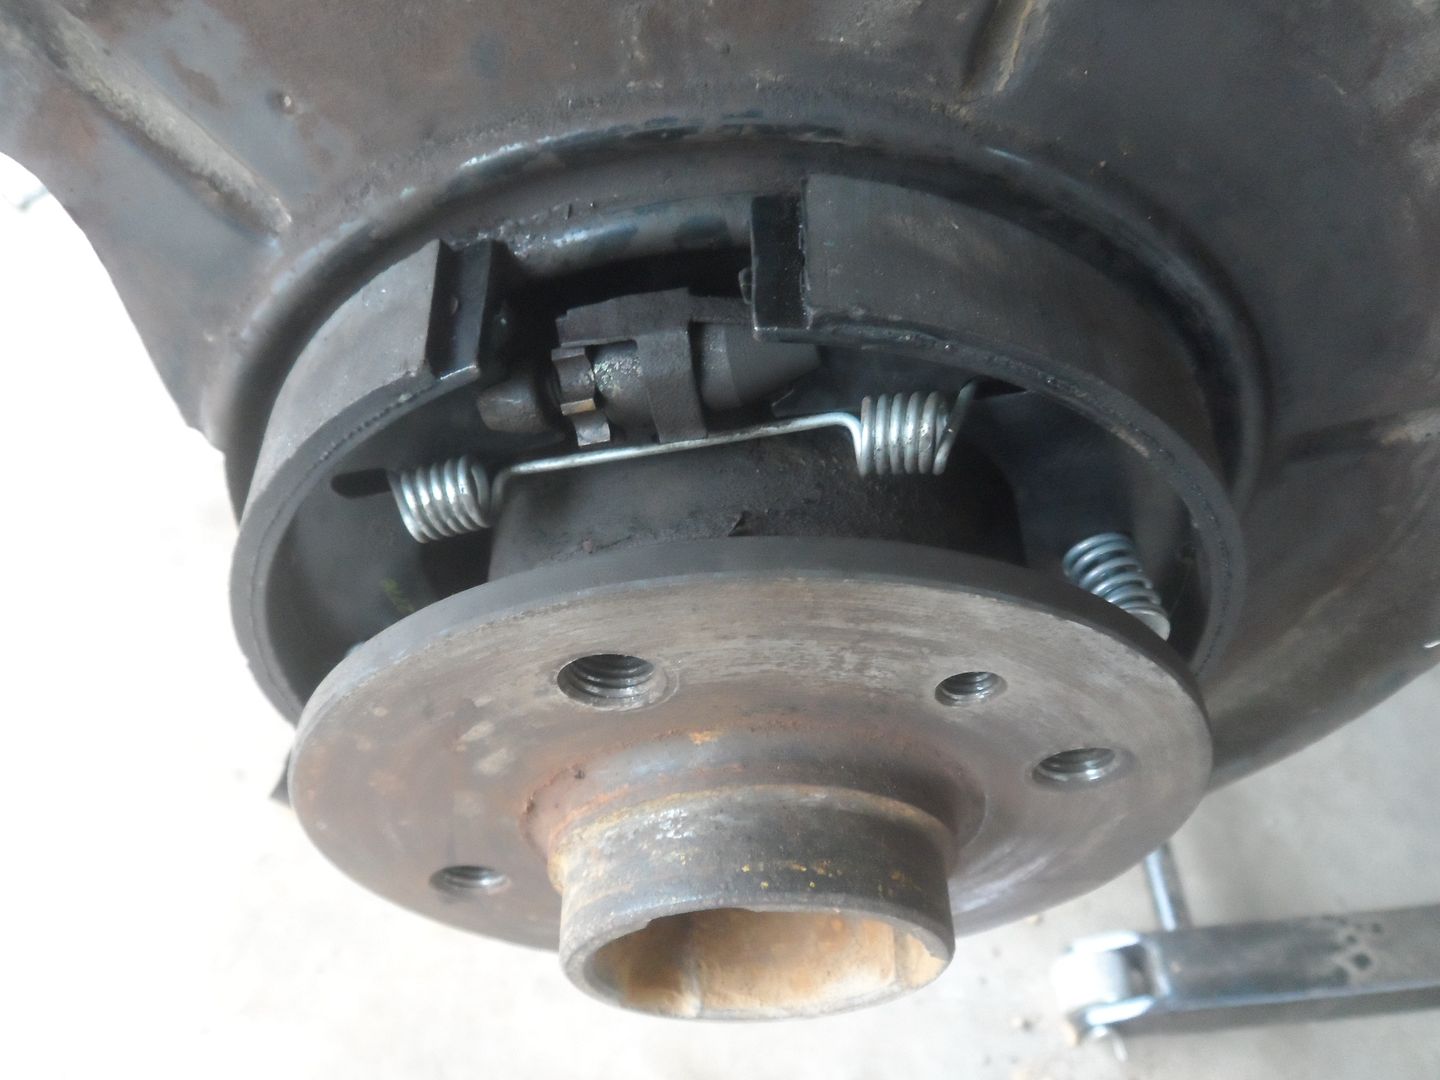
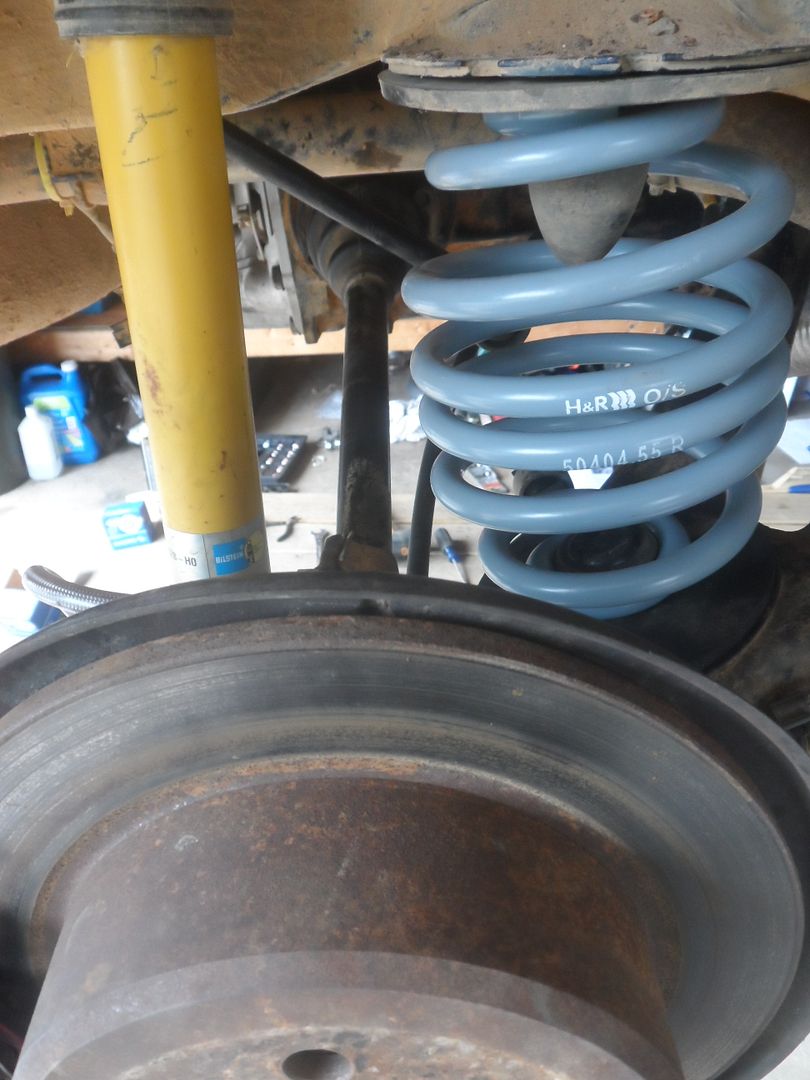
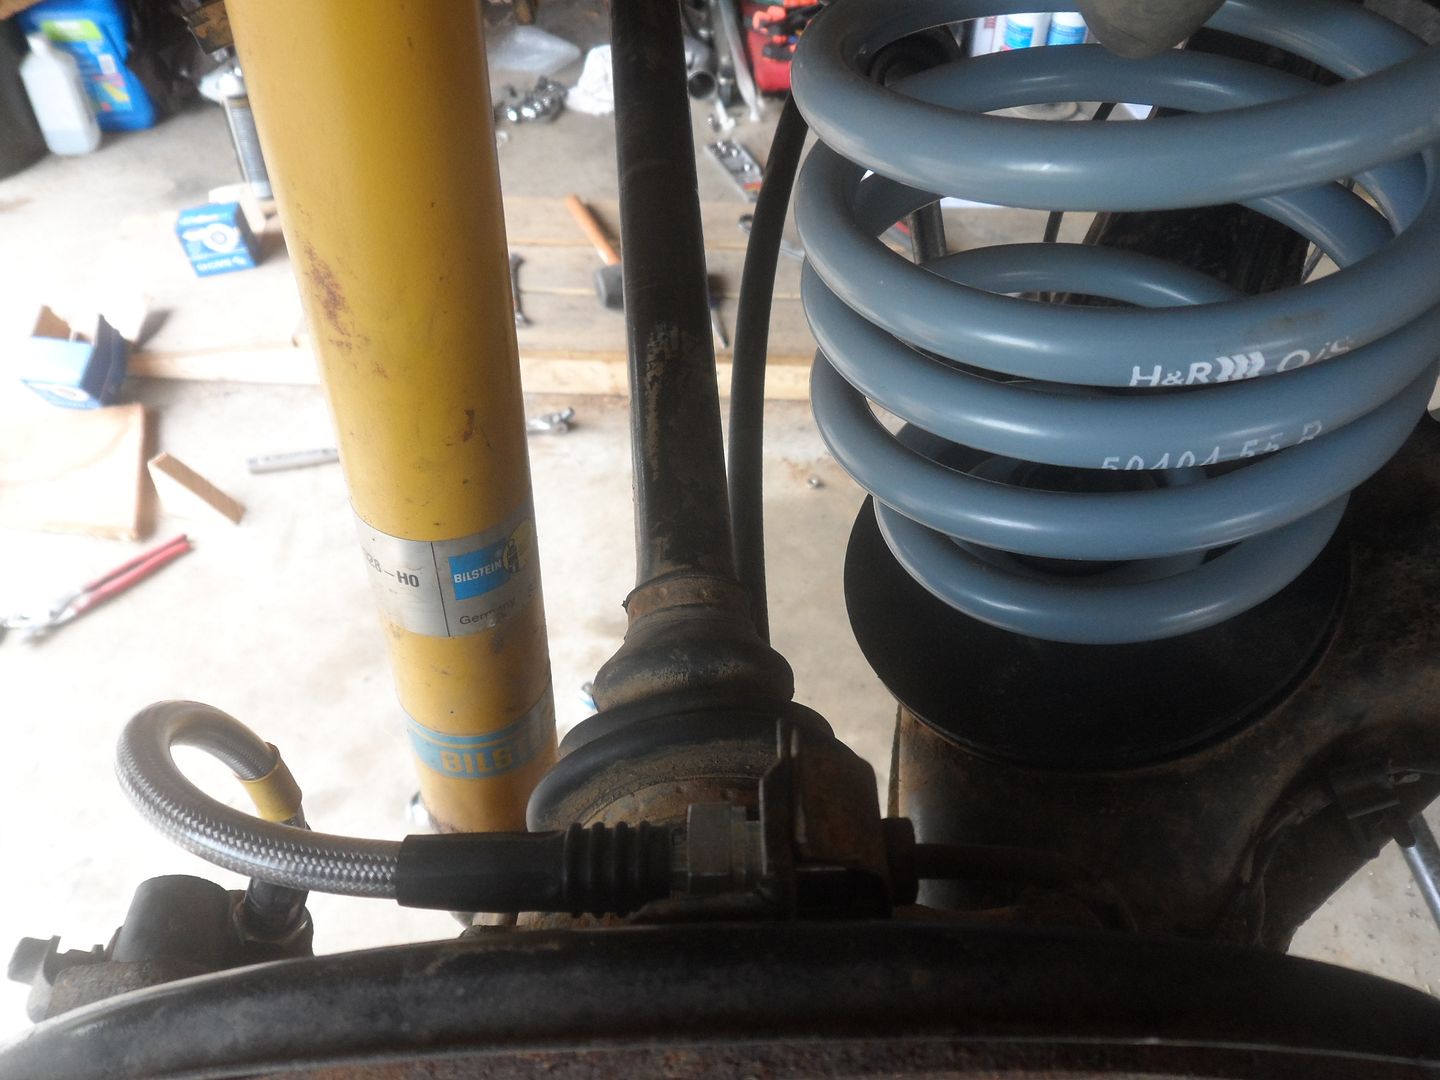
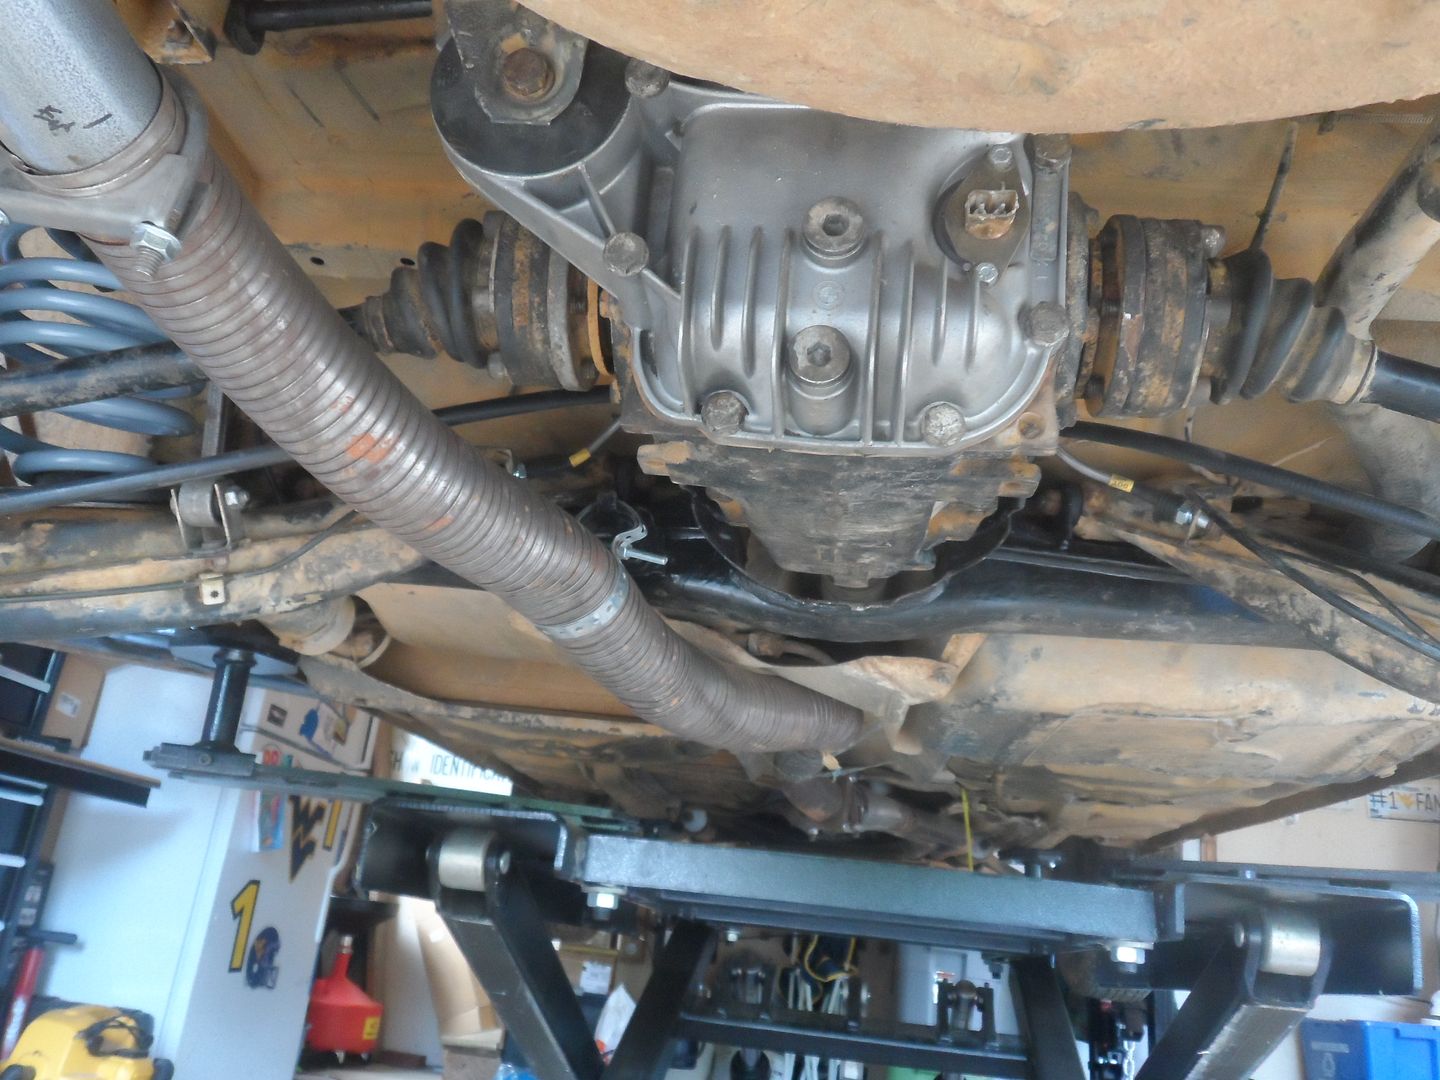
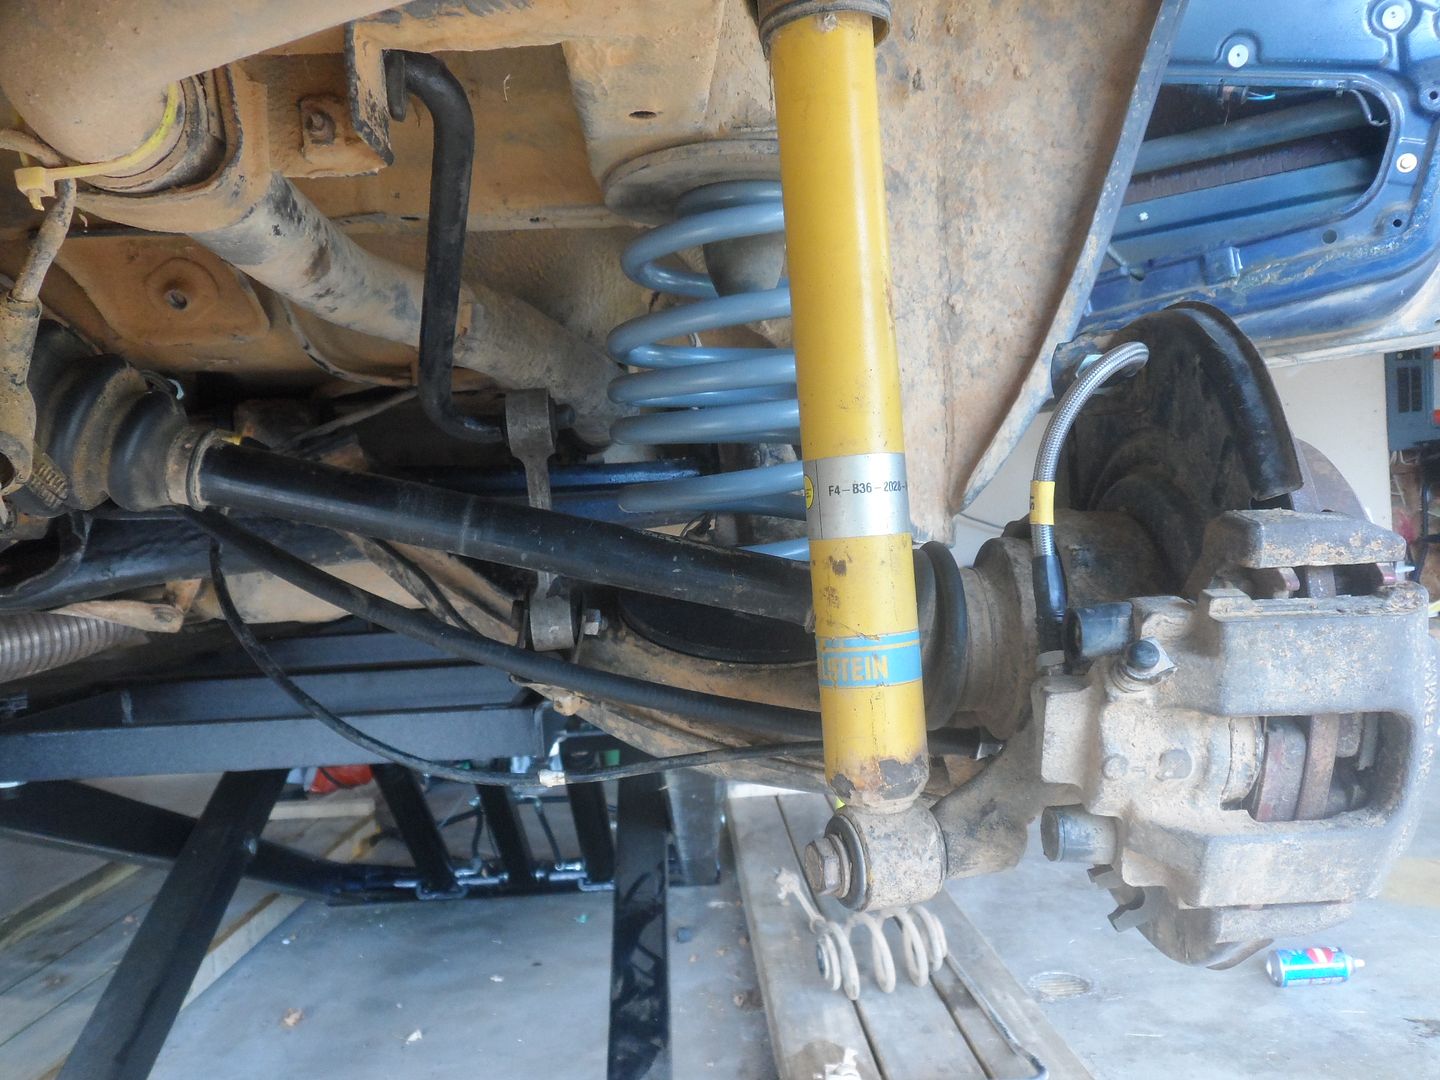
    Up and taking it all apart, plus random pic of getting the rear trailing arms separated from the subframe::
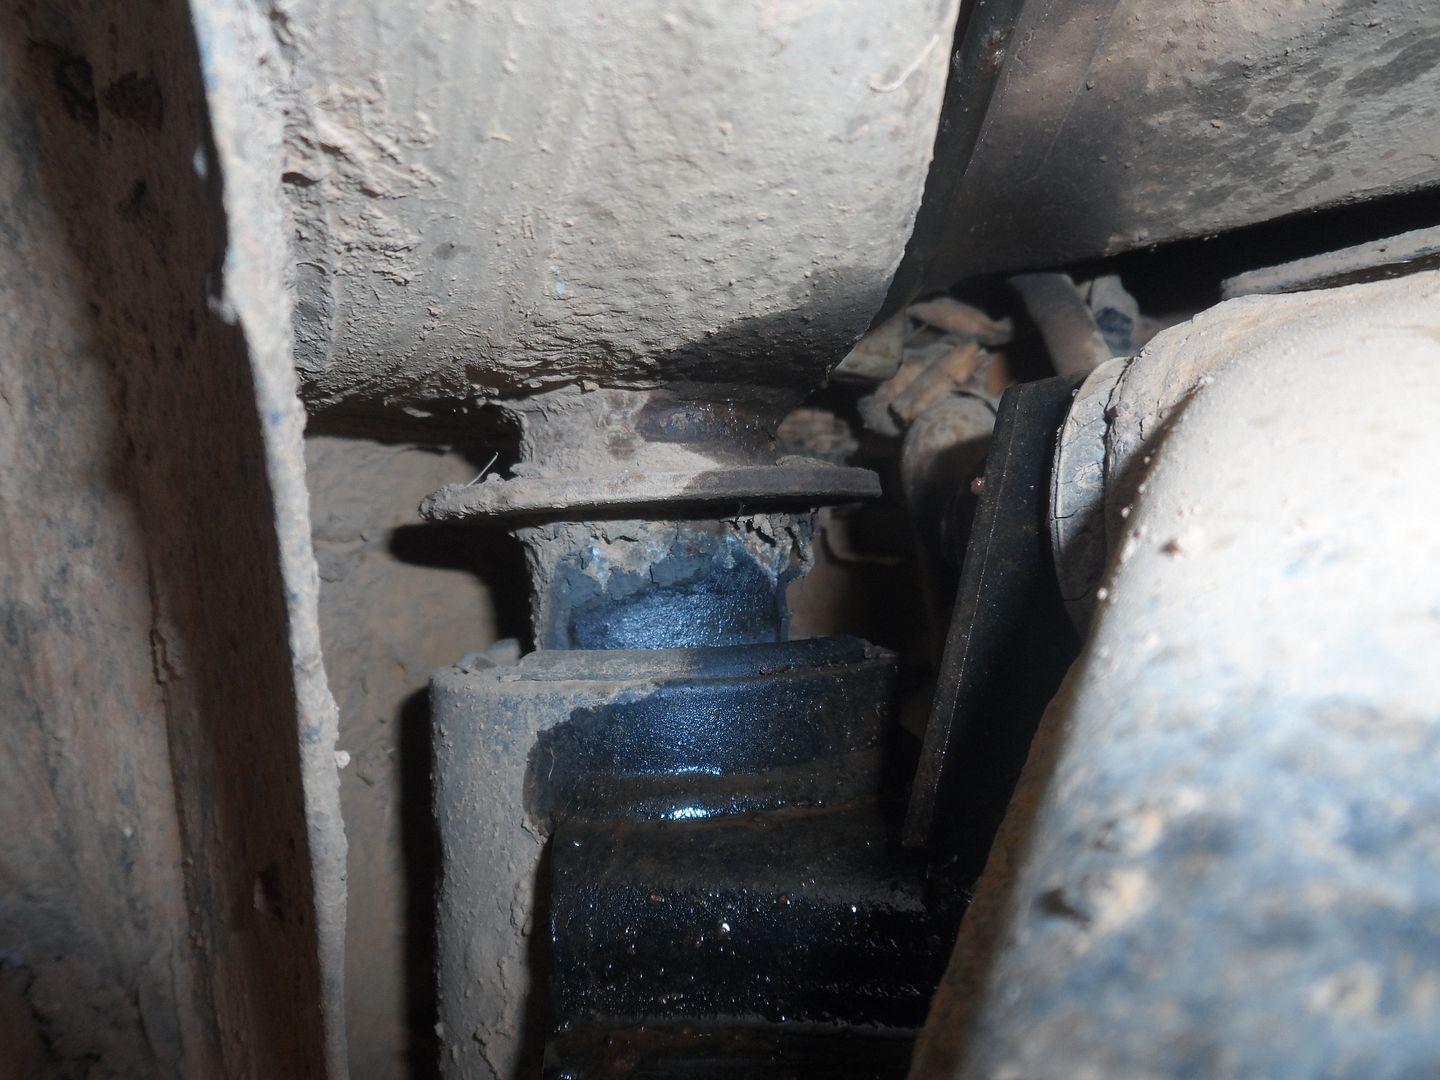
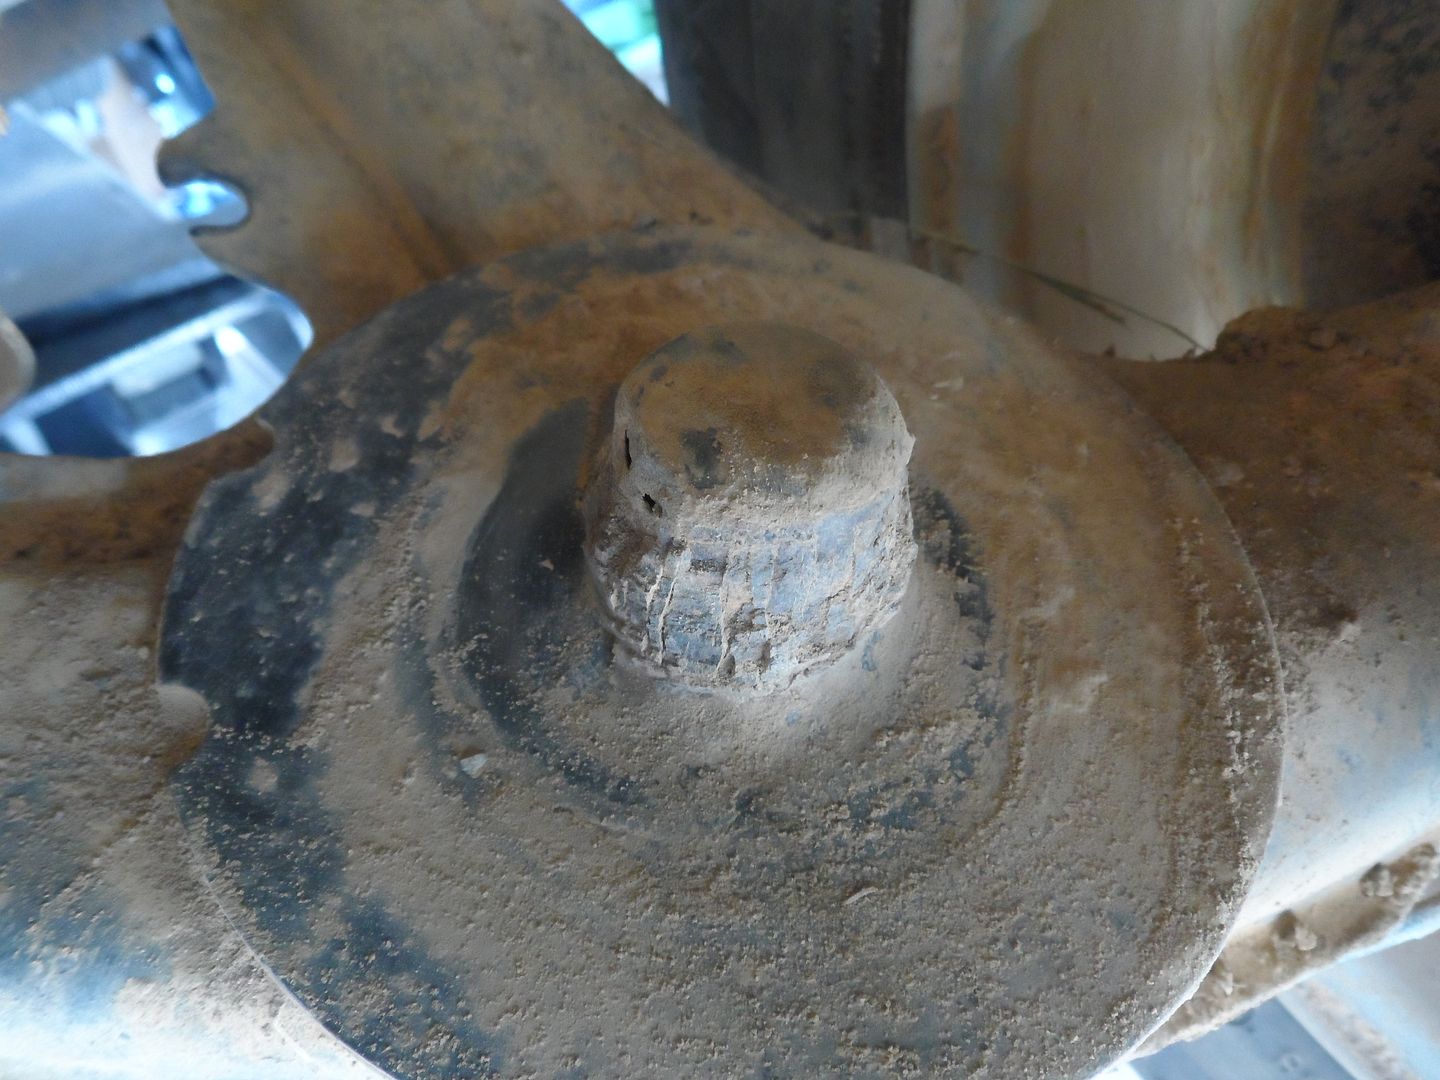
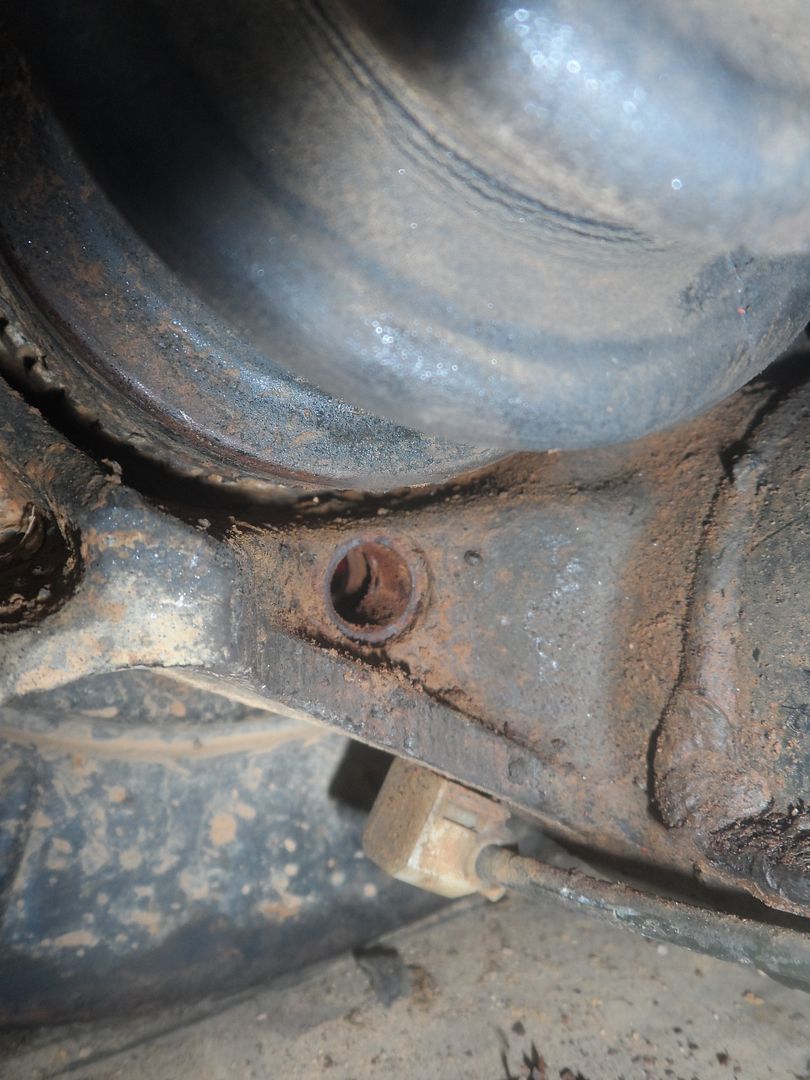


    This sucks:


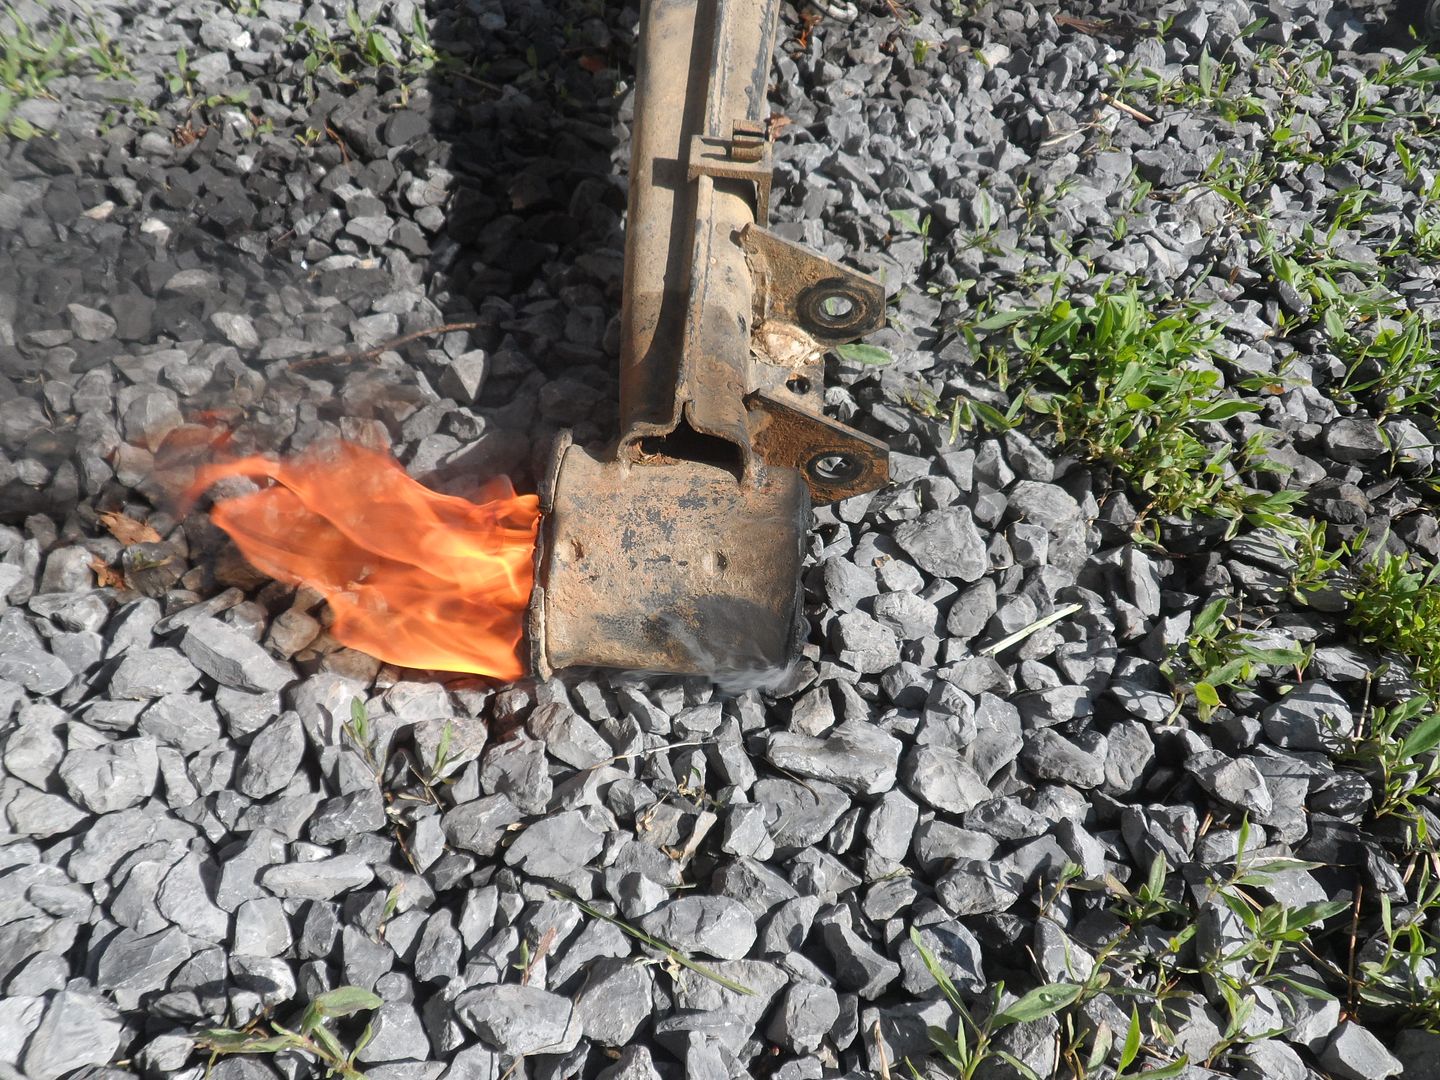
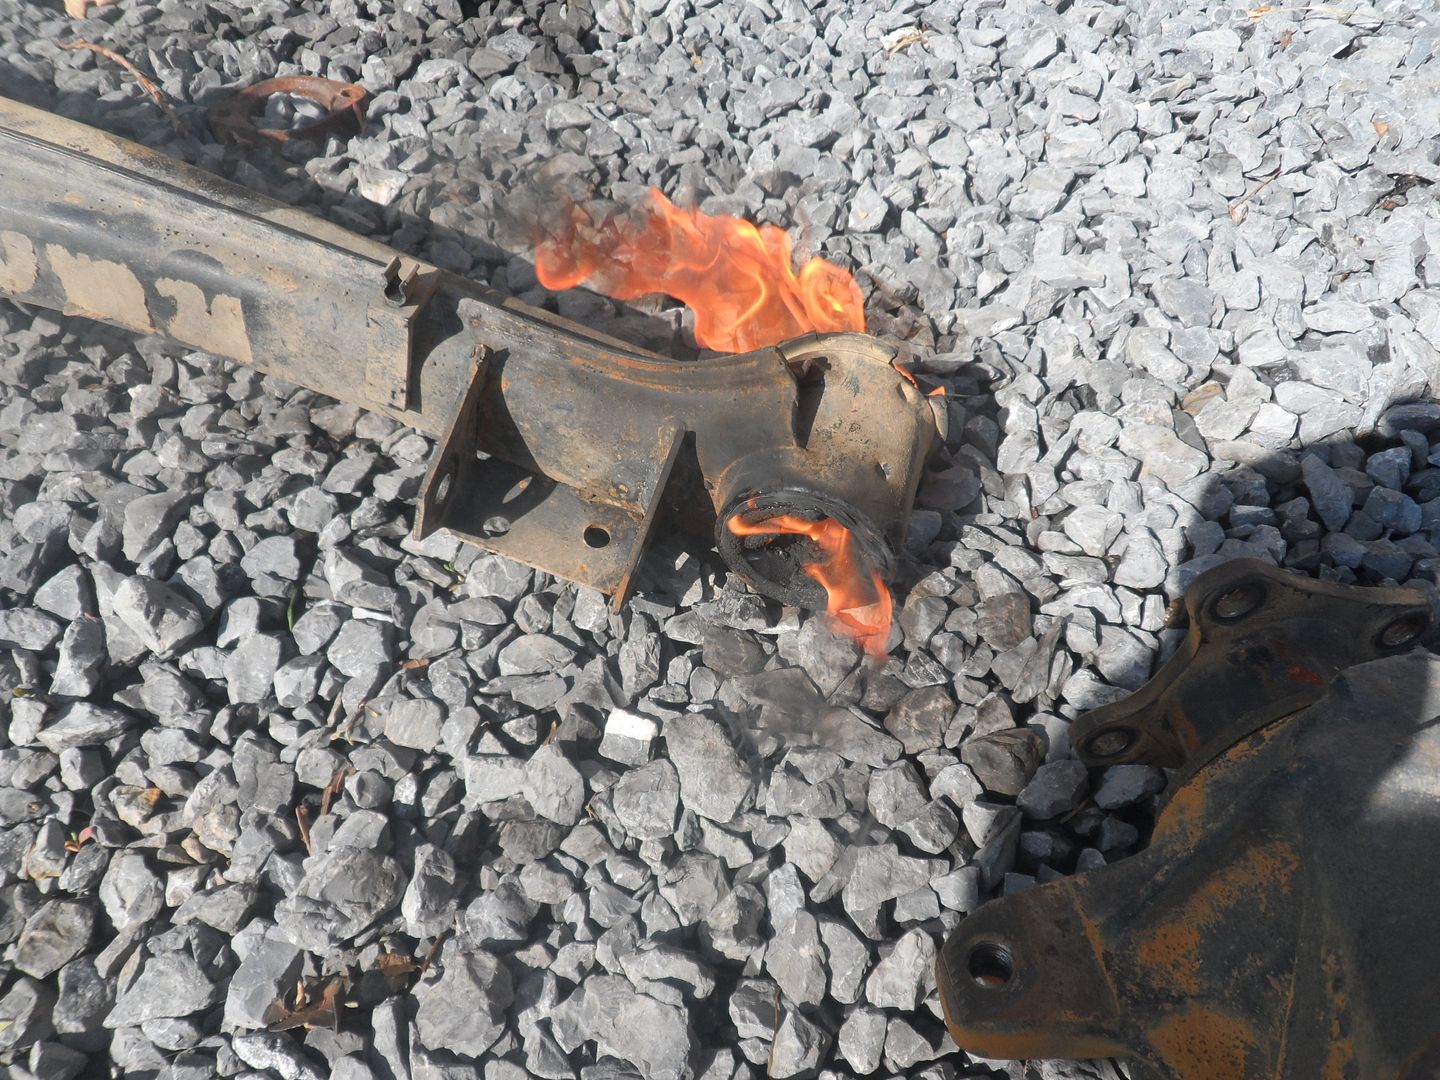
    Burning the subframe bushings out. Actually, this was quite unnecessary, I found out after burning them for 30 minutes.
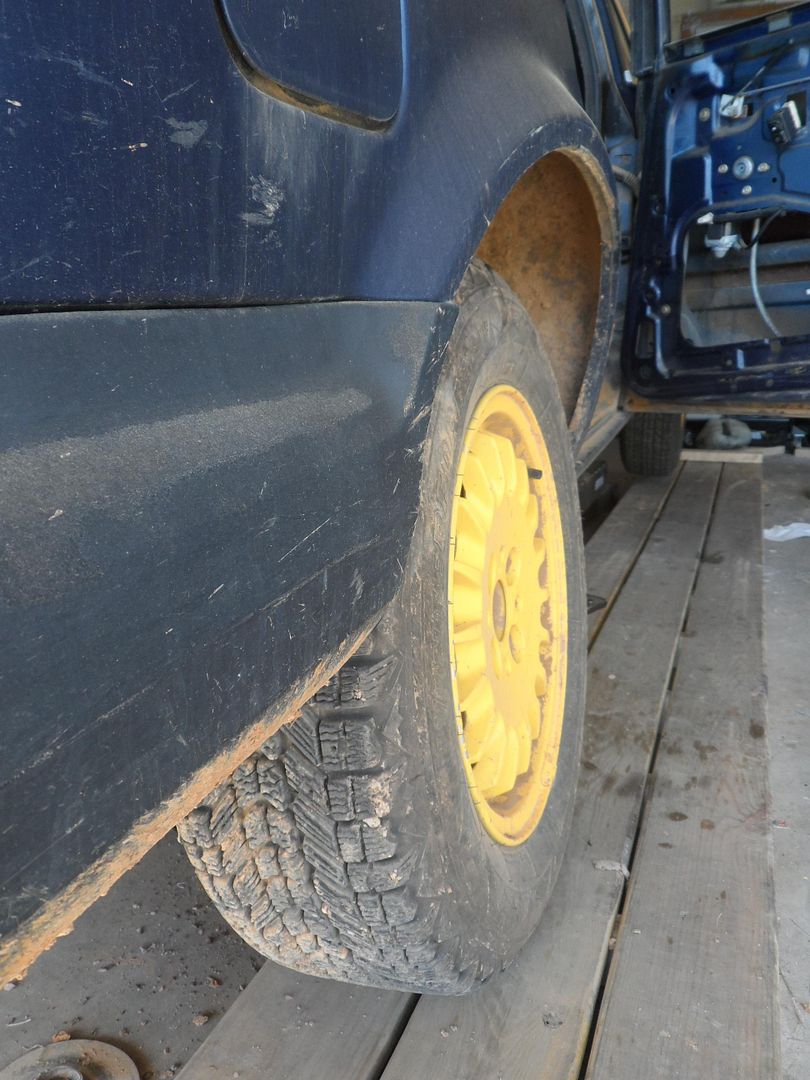
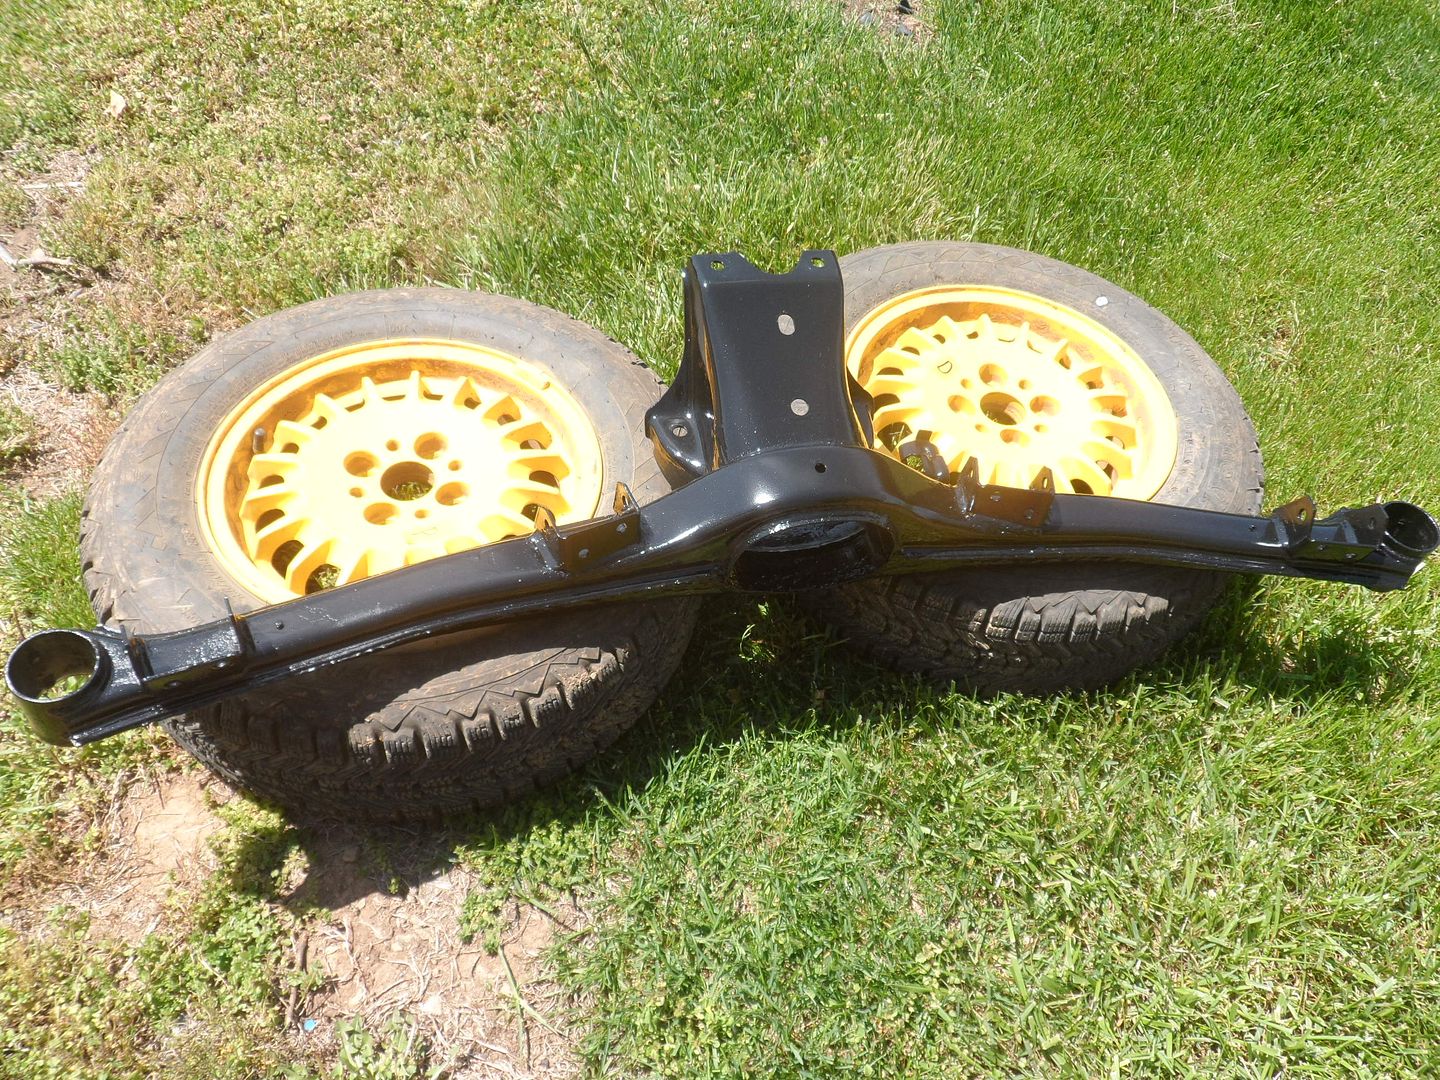
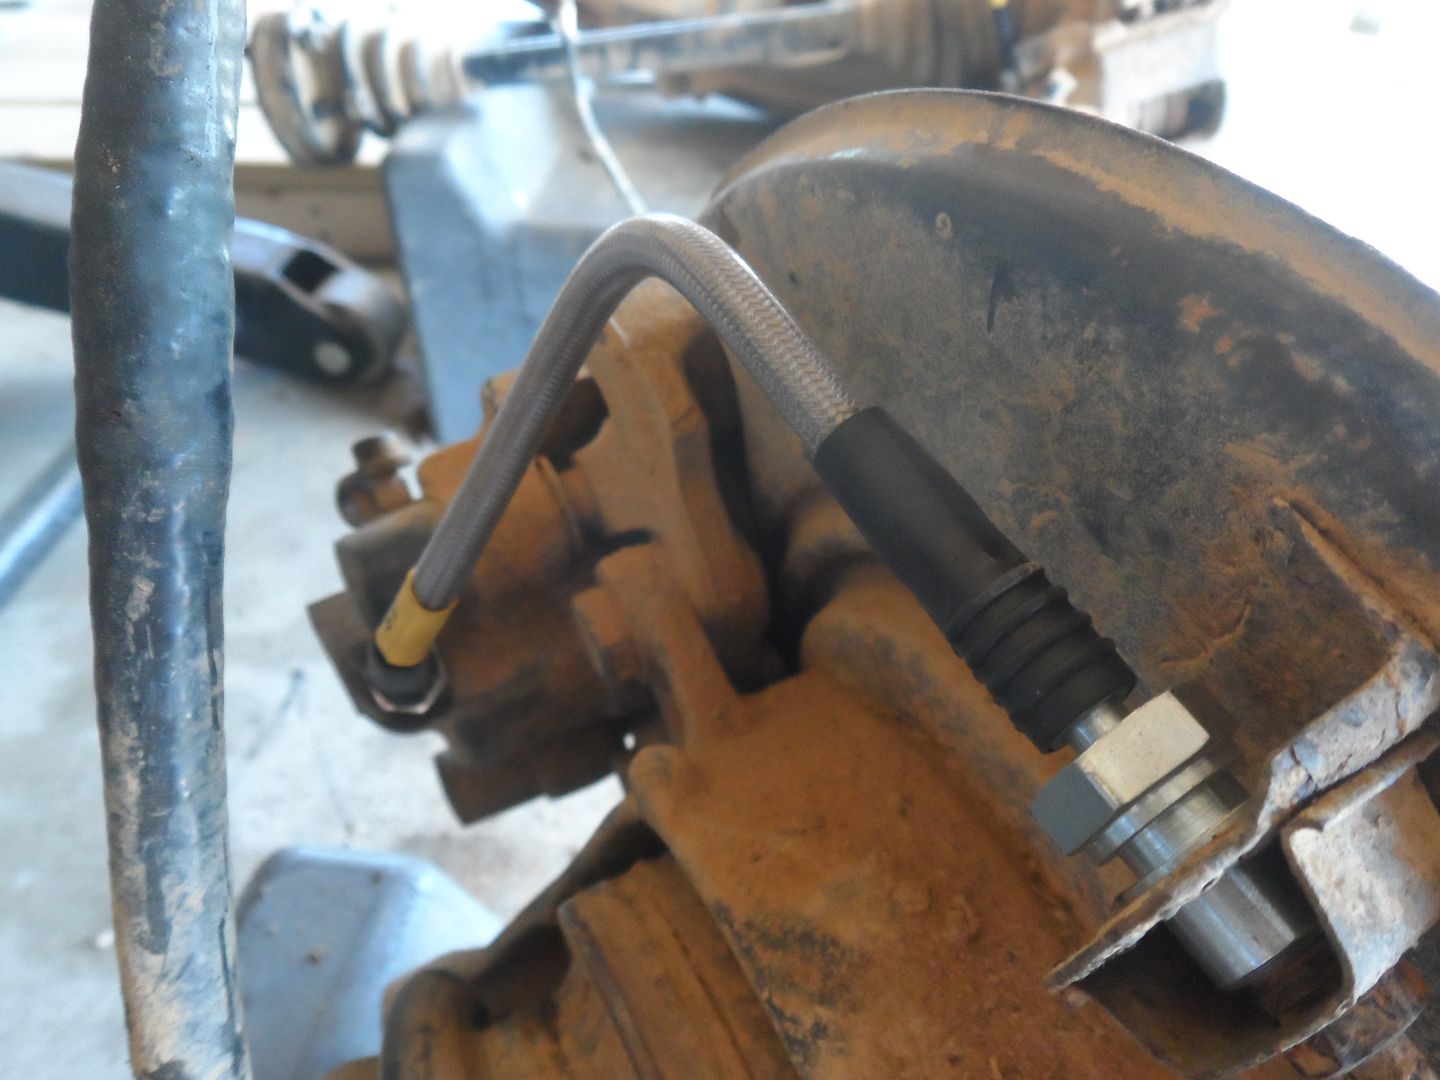
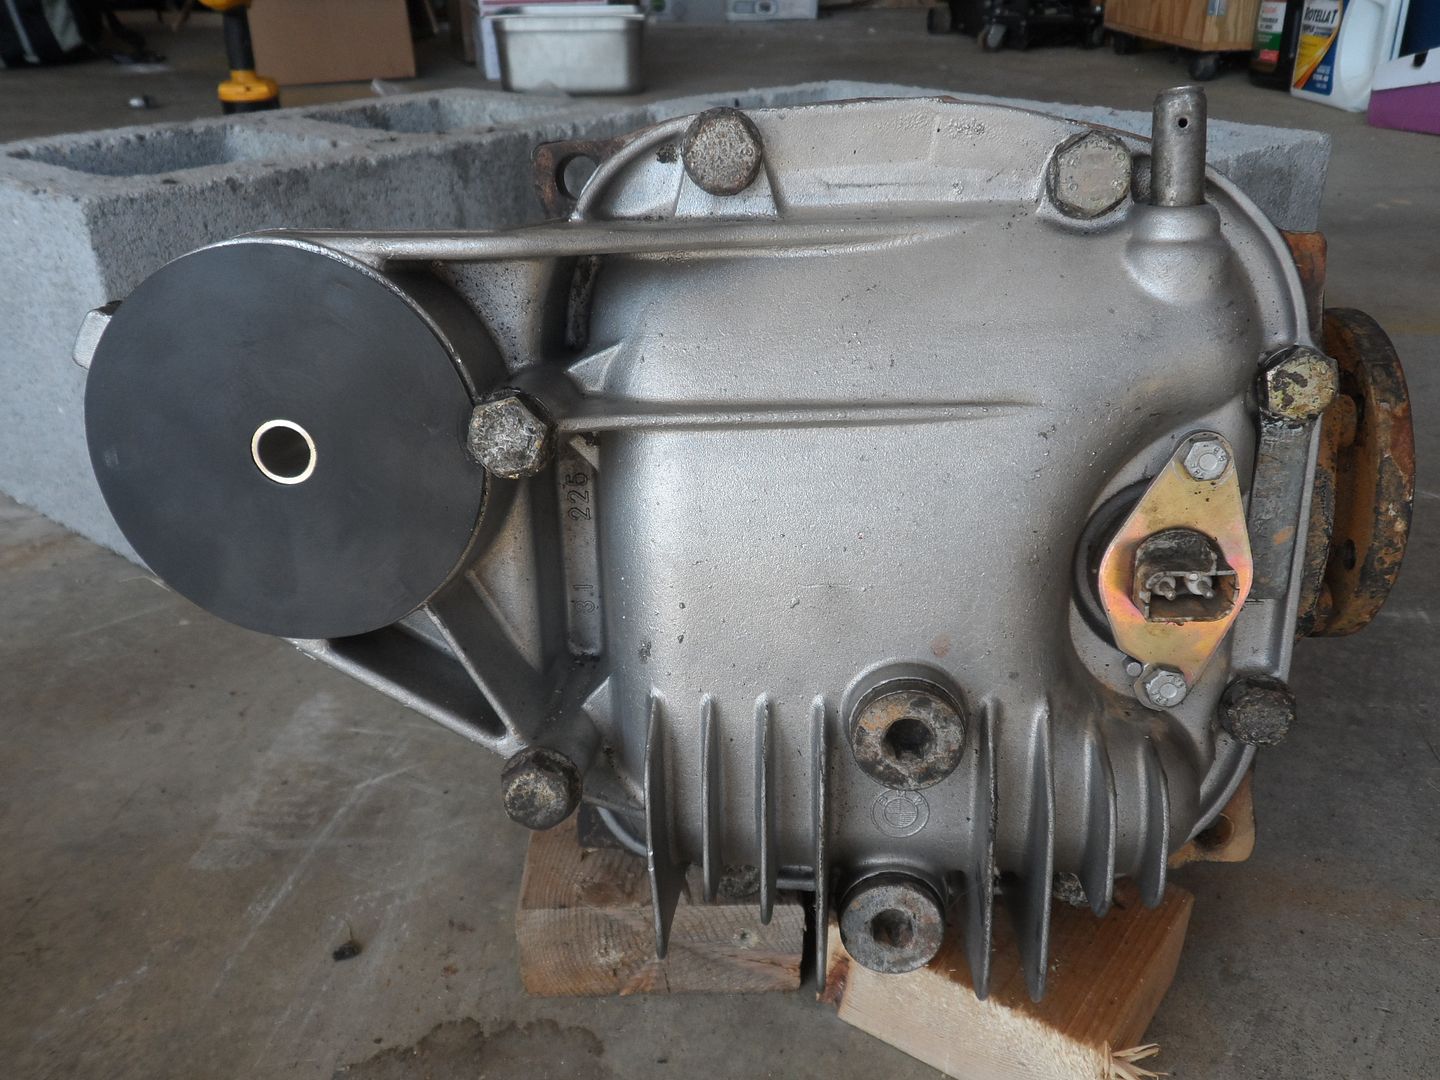
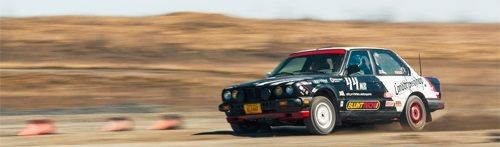


    Stanceworkz:


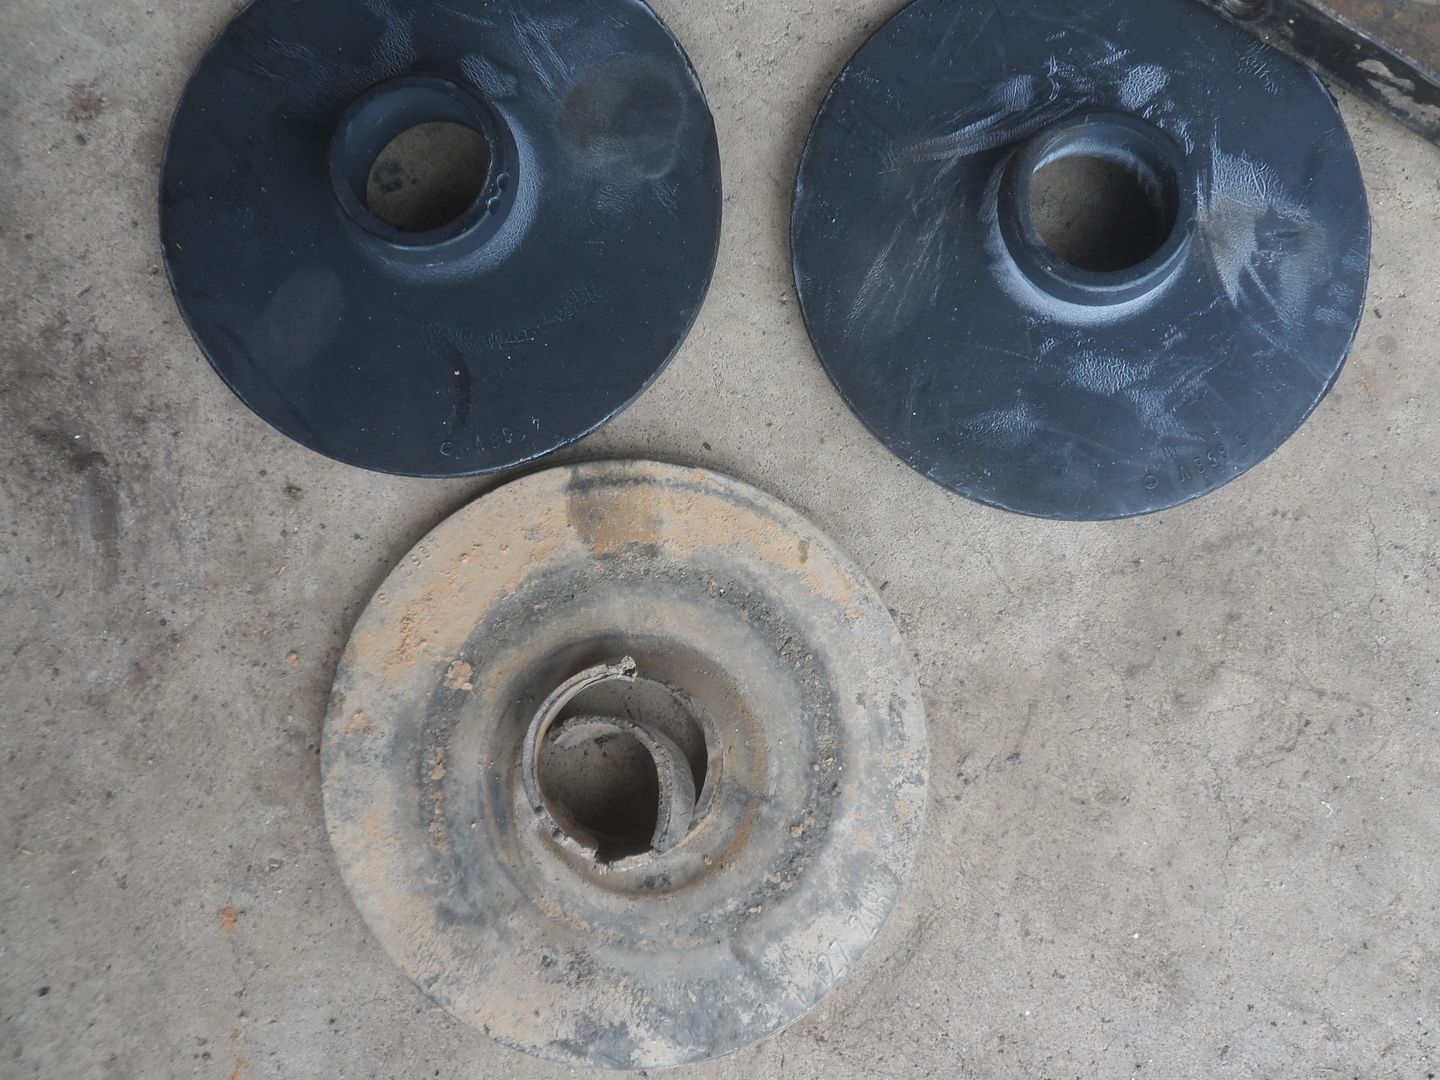
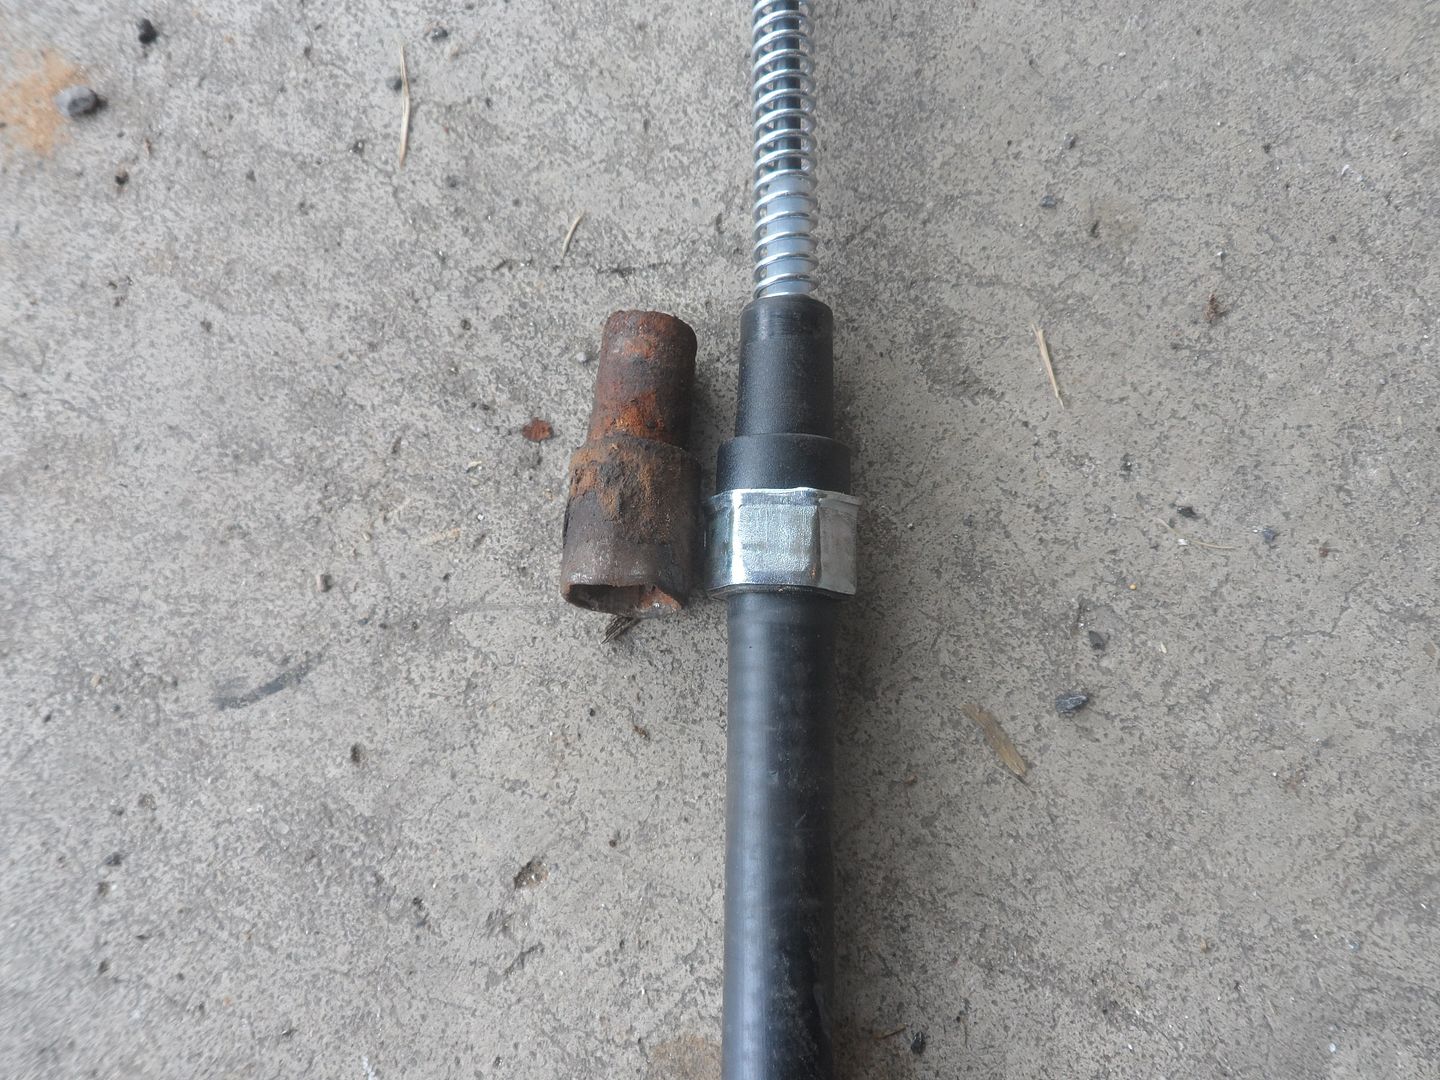
    So for reference, this is what they look like once they are out, IF they ferule tears free from the bushing itself:

    Last edited by phenryiv1; 05-04-2013, 06:55 PM.
    Patrick Henry

    1989 325iC build: http://www.r3vlimited.com/board/showthread.php?t=316880


    Comment


      More pictures. Too tired and pissed off at the process to caption them tonight.


      Patrick Henry

      1989 325iC build: http://www.r3vlimited.com/board/showthread.php?t=316880


      Comment


        trying to lift it all up as one piece with the diff and everything = :O
        Stage rally/rallycross e30 build/competition journal
        Track/street e21 build
        visit Condor Speed Shop
        visit Motorsport Hardware


        [FONT="Franklin Gothic Medium"] 1985 318i/M50 Rally Car - 1988 Porsche 924S - 2005 Sequoia tow pig - 2018 GTI

        Comment


          Originally posted by irish44j View Post
          trying to lift it all up as one piece with the diff and everything = :O
          Yeah, that was a fail. I'll add captions later.
          Patrick Henry

          1989 325iC build: http://www.r3vlimited.com/board/showthread.php?t=316880


          Comment


            Originally posted by irish44j View Post
            trying to lift it all up as one piece with the diff and everything = :O
            Thats how I did it. With two people its easily doable
            1991 335is in progress

            Comment


              Originally posted by chance View Post
              Thats how I did it. With two people its easily doable
              Not if your helper isn't so mechanically inclined. The hard part is tilting it enough to have the diff bushing flange clear the mounting points under the trunk while you slide the whole assembly forward and onto the driveshaft.

              I also made the mistake of trying to do it with the kingpins in place, but that is easily rectified.

              I had the diff where I needed it vertically but I simply did not trust the helper to hold the assembly at the proper angle to get the driveshaft into the subframe, move it forward, and then rotate it the 15-20* clockwise to properly seat the diff.

              Without the kingpins and diff in place, this will be a lot easier. If it were Irish44j and I doing it, we'd have been fine. I had my wife as a spotter and the car co-owner trying to stabilize it while I held the whole assembly myself. I was 9 hours into working on it and the last thing that I wanted to do was to be crushed if my help lost their grip.

              Since I will most likely be going at it without help when I re-try the install, removing the diff is the easiest solution.
              Patrick Henry

              1989 325iC build: http://www.r3vlimited.com/board/showthread.php?t=316880


              Comment


                Originally posted by phenryiv1 View Post
                Not if your helper isn't so mechanically inclined. The hard part is tilting it enough to have the diff bushing flange clear the mounting points under the trunk while you slide the whole assembly forward and onto the driveshaft.

                I also made the mistake of trying to do it with the kingpins in place, but that is easily rectified.

                I had the diff where I needed it vertically but I simply did not trust the helper to hold the assembly at the proper angle to get the driveshaft into the subframe, move it forward, and then rotate it the 15-20* clockwise to properly seat the diff.

                Without the kingpins and diff in place, this will be a lot easier. If it were Irish44j and I doing it, we'd have been fine. I had my wife as a spotter and the car co-owner trying to stabilize it while I held the whole assembly myself. I was 9 hours into working on it and the last thing that I wanted to do was to be crushed if my help lost their grip.

                Since I will most likely be going at it without help when I re-try the install, removing the diff is the easiest solution.

                Theres your problem! Remove the two bolts that hold the driveshaft CSB to the car and that could give you enough room, or you could loosen the nut on the spline and collapse the DS and you would have plenty of room to go straight up with the whole rear end assembly.

                once you get it up there theres plenty of room to get a 17mm box end on the drive shaft nuts.
                1991 335is in progress

                Comment


                  Originally posted by chance View Post
                  Theres your problem! Remove the two bolts that hold the driveshaft CSB to the car and that could give you enough room, or you could loosen the nut on the spline and collapse the DS and you would have plenty of room to go straight up with the whole rear end assembly.

                  once you get it up there theres plenty of room to get a 17mm box end on the drive shaft nuts.
                  I was really trying to avoid dropping the DS again. Pulling all of the heat shields is a PITA with our exhaust setup. It is a tossup on which is worse- dropping the diff and re-installing or pulling the heat shields to collapse the DS.
                  Patrick Henry

                  1989 325iC build: http://www.r3vlimited.com/board/showthread.php?t=316880


                  Comment


                    Originally posted by chance View Post
                    Thats how I did it. With two people its easily doable
                    I did it alone many times...including hooking up the drive shaft. Just have to be good at doing many things at once and take your time. #1 thing is a good floor jack.
                    ~ Puch Cafe. ~ Do business? feedback ~ Check out my leather company ~

                    Instagram: @BWeissLeather

                    Current cars:
                    ~ '87 325 M30B35 swap
                    ~ '87 535
                    ~ 01 540 Msport 6spd
                    ~ '06 X5 4.8is

                    Comment


                      Originally posted by phenryiv1 View Post
                      I was really trying to avoid dropping the DS again. Pulling all of the heat shields is a PITA with our exhaust setup. It is a tossup on which is worse- dropping the diff and re-installing or pulling the heat shields to collapse the DS.
                      I forgot about the heatshields. I pulled them off a year ago and havent ever got around to putting them back on.
                      1991 335is in progress

                      Comment


                        Originally posted by chance View Post
                        I forgot about the heatshields. I pulled them off a year ago and havent ever got around to putting them back on.
                        With all of the dirt that we fling up on-course, I decided to put them back on after the motor swap.
                        Patrick Henry

                        1989 325iC build: http://www.r3vlimited.com/board/showthread.php?t=316880


                        Comment


                          Thread jack....

                          I was told when I bought my 528e that it had a 3.23 LSD in it. After a few races I'm starting to think it needs a 3.73. I'm just not sure if the E28 comes with the medium case diffs or not. Does anyone know off the top of their head?

                          Here's what's currently in the car:


                          Can anyone tell what it is by looking?

                          /thread jack

                          ________________________1988 528e Rally-xmobile___________________
                          2014 WDCR Rally-X MR Season Champion, 2014 NE Div. Challenge MR Winner

                          Comment


                            Originally posted by 95maxrider View Post
                            Thread jack....

                            I was told when I bought my 528e that it had a 3.23 LSD in it. After a few races I'm starting to think it needs a 3.73. I'm just not sure if the E28 comes with the medium case diffs or not. Does anyone know off the top of their head?

                            Here's what's currently in the car:
                            Store your photos and videos online with secure storage from Photobucket. Available on iOS, Android and desktop. Securely backup your memories and sign up today!


                            Store your photos and videos online with secure storage from Photobucket. Available on iOS, Android and desktop. Securely backup your memories and sign up today!


                            Can anyone tell what it is by looking?

                            /thread jack
                            med case diff. e28 cover swaps to e30 med case diff if you find a 3.73 in an e30. Output flanges need swapped as well.
                            Patrick Henry

                            1989 325iC build: http://www.r3vlimited.com/board/showthread.php?t=316880


                            Comment


                              So massive progress:

                              Sourced these Ate lines from Guten Parts. Also snagged some new lower spring pads, since I want to run them and the old ones were beat up.


                              Spring pads:


                              So the parking/e-brake lines came out without much issue. I was very confused about what was part of the trailing arm and what was a part of the ferule under the car, so I was not sure where to cut/heat/twist/etc. to get the old lines out of the car. Looking at the Ate lines, I saw nothing that looked like the ends of the new lines still attached to the vehicle.

                              (Pic from AFTER removing the end of the old line):


                              After looking at both trailing arms and the lines that came out of the car (by cutting them, pulling the lines, and basically ripping them to get them out of the way last week), I saw that what I though was a part of the driver's side trailing arm was actually the end of the old line. With that info in hand, I was able to get the end of the old line out of the TA with a few light back-and-forth taps with a hammer.

                              Left with this:


                              Once you know what stays in the car and what is supposed to come out, it is a LOT easier to remove what is supposed to come out. Hindsight is 20/20.

                              I checked the tubes above the subframe and found similar ends still stuck in the ferules/tubes. I had previously thought that the ends of the tubes were flared, but after comparing them to the piece removed from the TA, I saw that there was an identical end still in the subframe tubes. 30 seconds with a torch and some wiggling of the pliers and they came right out.

                              2 minutes later:


                              So I scored a major win when I went to replace my old pads with the replacement set that I had gotten from Nick (95maxrider). At the last event, he gave me brand new pads that came with his e28 but don't fit. Because I had not planned to do ANYTHING to the brakes when I started this project, I was luck to have them in my parts stash. I was concerned, however, that I had not ordered the new spring/hardware kit, but I was happy to see the replacement hardware kit shoved in the Pagid box with the new pads.


                              I owe Nick a beer.

                              So with that all done, we installed the complete subframe assembly as one unit. I'll spare the details, but it went in after a few...complications.

                              Here is an indication of what went wrong, however...

                              This is what happens when the helper rolls a 70 lb. jack bearing a 200+ lb. subframe over your lat while you are laying under the car balancing/lining up the assembly:


                              My skin was pinched between the metal wheel of the jack and the concrete. It looks a lot worse 2 days later...

                              Anyway, we continued, getting the inner rear brake lines hooked up, installing the rear H&R OE Sport springs, new HD rear upper shock mounts, and re-attaching the driveshaft. I still need to adjust the parking brake, swap in the front SS lines and bleed the system, install the front OE Sports and new upper strut mounts, and re-bleed the cooling system, but we are a LOT closer to being ready for the event than we were 3 days ago.

                              More pictures:


                              Patrick Henry

                              1989 325iC build: http://www.r3vlimited.com/board/showthread.php?t=316880


                              Comment


                                I'm still jealous of those springs....

                                ________________________1988 528e Rally-xmobile___________________
                                2014 WDCR Rally-X MR Season Champion, 2014 NE Div. Challenge MR Winner

                                Comment

                                Working...
                                X