

Looks great! Very tasteful so far! I'm using your build thread for some help with DIY projects in fact.
-
-
My favorite color. One dayYour signature picture has been removed since it contained the Photobucket "upgrade your account" image.
www.gecoils.com
My euro 316 project Transaction FeedbackComment
-
-
-
Yes!
Comment
-
September 18-20 2013
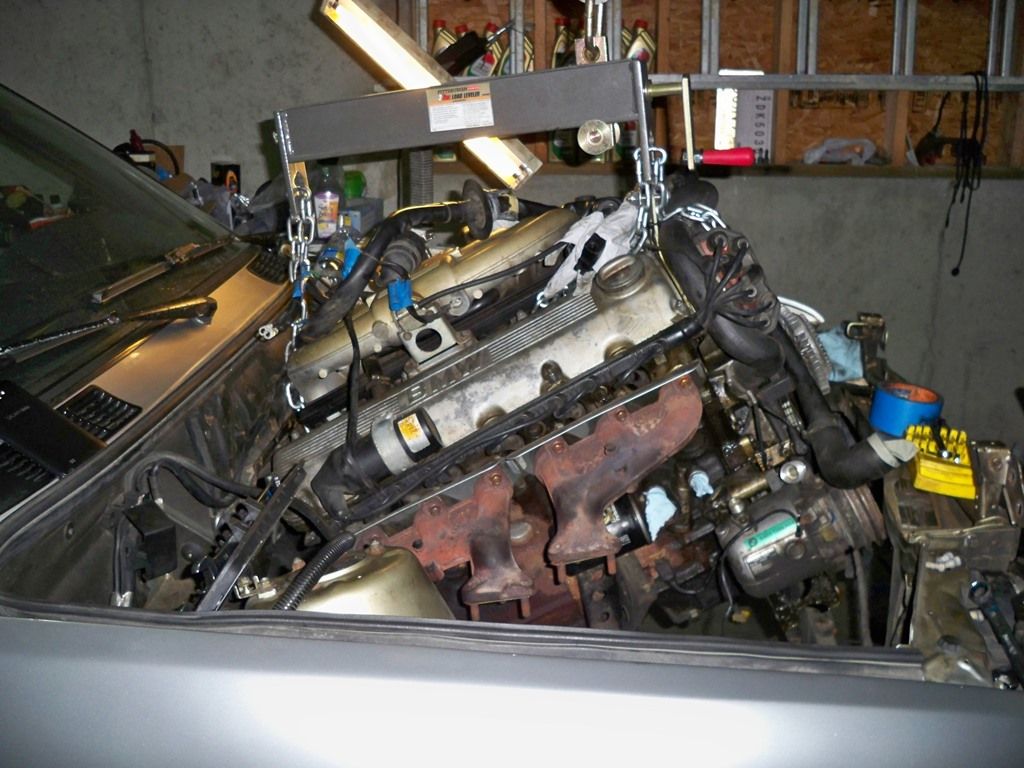
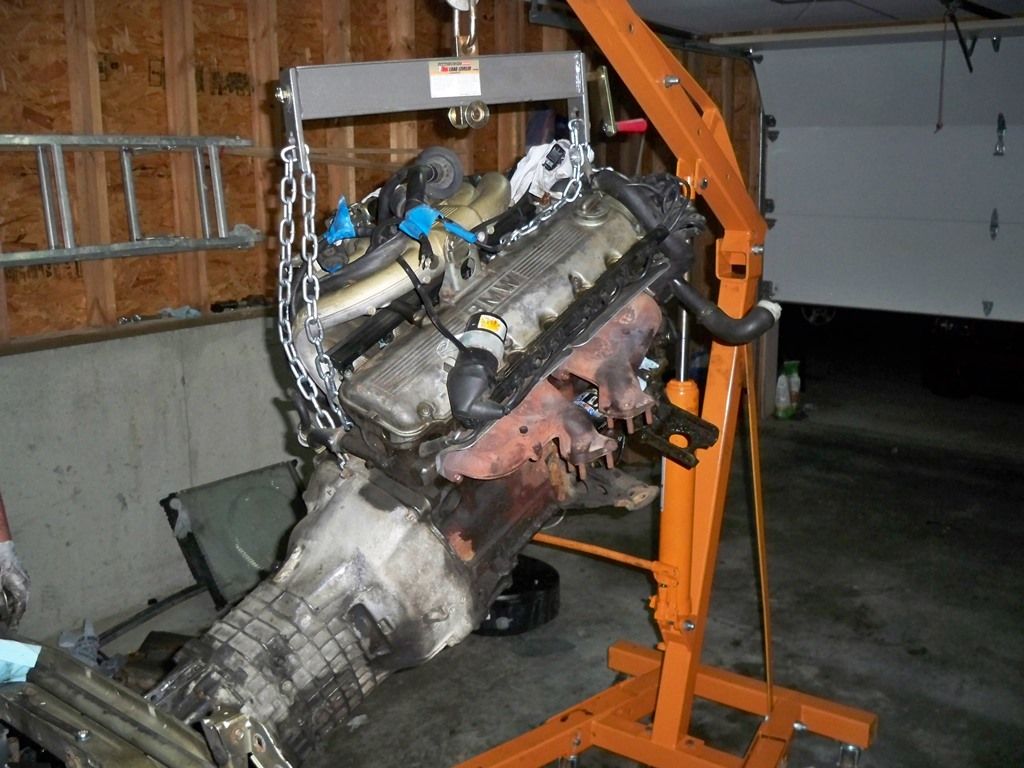
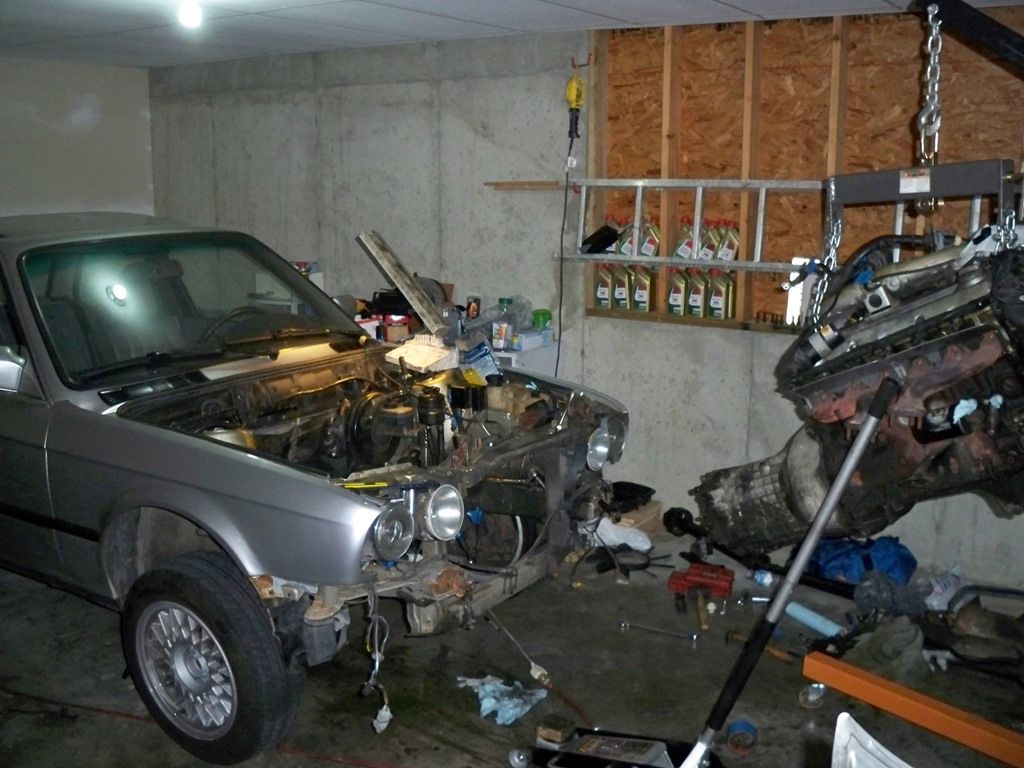
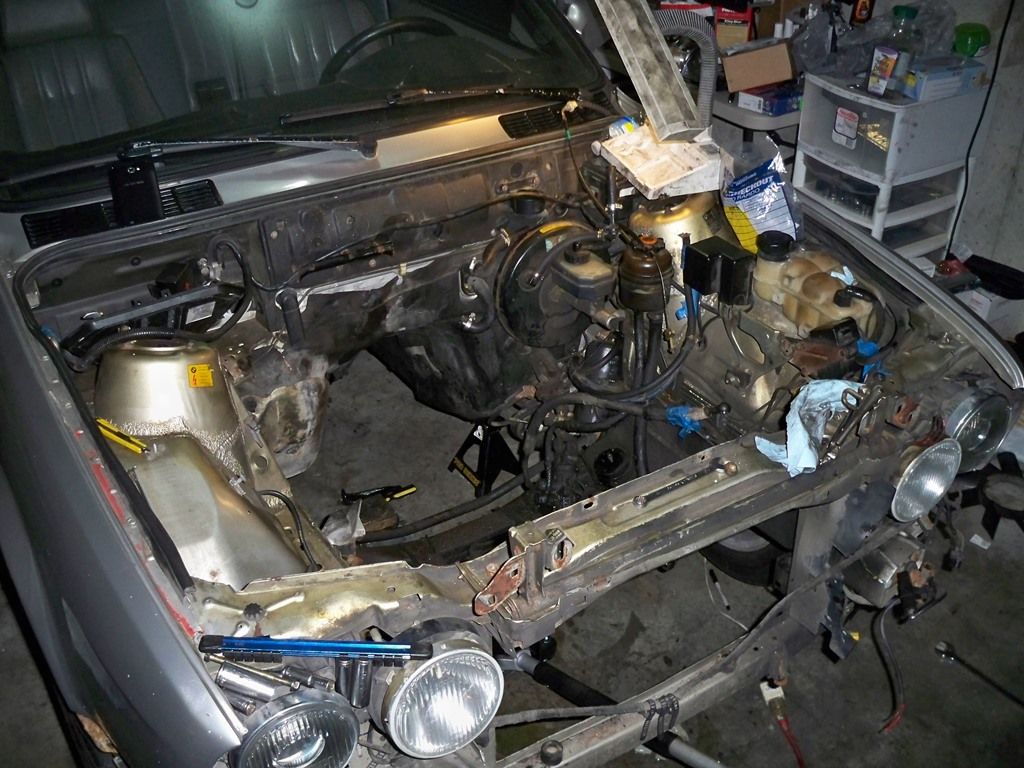
The project I am currently working on is no doubt the biggest one I have tackled so far. For this work, I actually called my friend over to help remove the old m20 and the trans. I did most of prep work such as exhaust, driveshaft draining fluids, disconnecting the harness etc the day before and some on the day of. The work was relatively easy as its only been several months since the exhaust and driveshaft bits were re-installed. I was really excited about the engine removal as it was the first time I performed this. After asking a few questions and reading a few articles, the work didn't seem all that difficult. I picked up a cherry picker locally, and my friend and I started removing the old motor from the bay later that night.
The removal was pretty straight forward and not that big of a problem. The powersteering pump and the AC compressors were in the way so they were removed (picture taken before). But other than that, the engine came out swiftly without much of a fight.
Here are some photos!
Last photo before it was removed. Despite having 150k+ miles on it, it ran strong and pretty smoothly right until the removal. The M20 and a 5 spd mt transmission is going to be listed on the classified, so look for it soon! :up:

Shot with the ///M.

November 22 2013
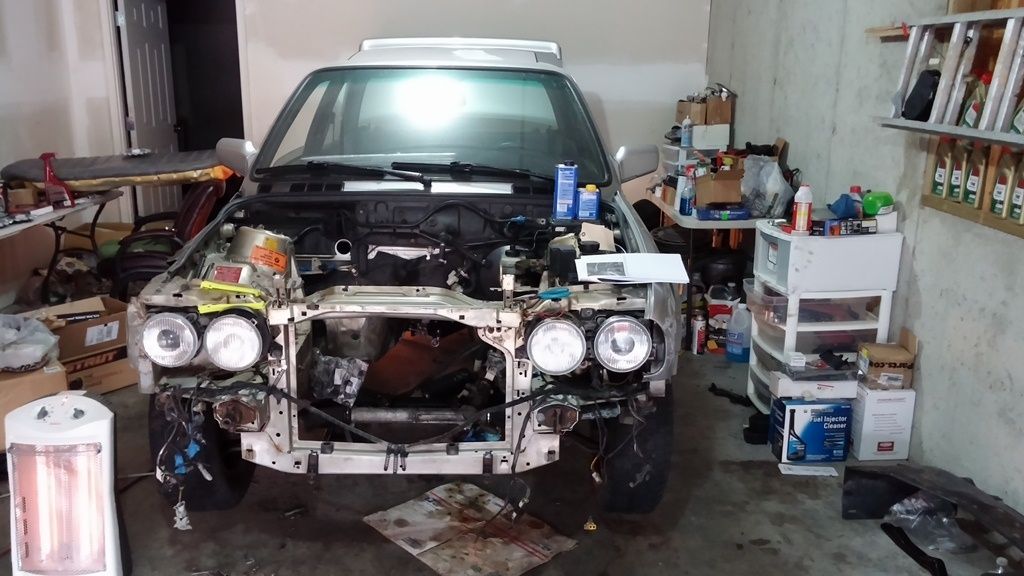
I decided to do some work on the car (mostly the S52 motor) today. Weather is starting to get colder and the temperature is more comfortable to work in, but the daylights are getting shorter. I guess its a even trade off until it starts getting freezing cold. Then Ill start missing the hot summers again.
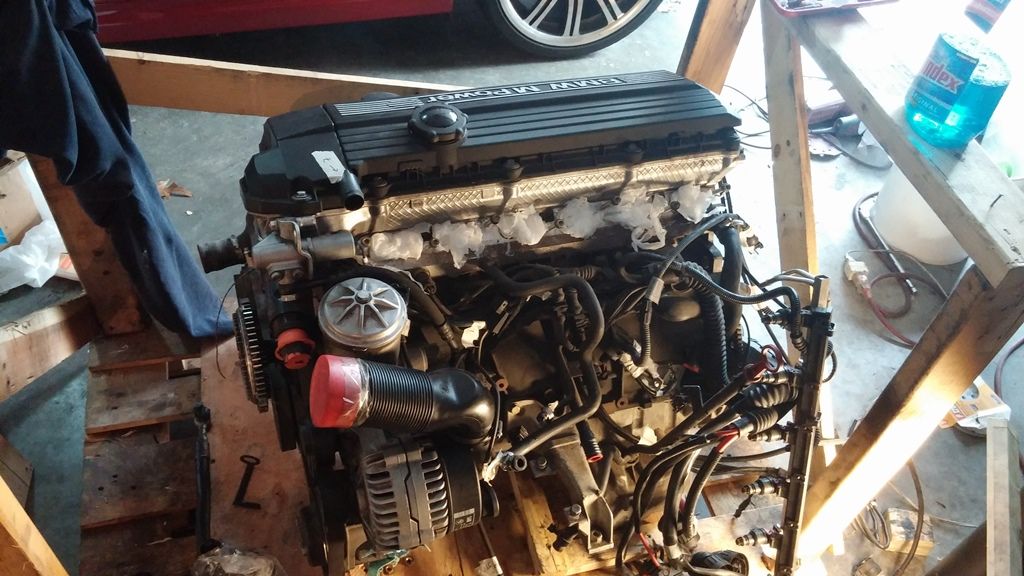
Ill start by introducing the almighty S52B32 motor I decided to go with. It was a complete set, sold with block, intake, harness, DME, etc. Pretty much every thing but the transmission. But the best part is it only has 52k miles on it! I intentionally picked up a low mile engine because I didn't want to spend a lot of time and hassle disassembling the motor and rebuilding a 200k mile motor. Its too much work for me, and I dont think I have that kind of patients.
So after evaluating the S52 for about 10 minutes, I started undoing the bolts and wires to slowly disassemble the intake manifold. Since there is no way I can remember every single plug and hose that is attached to the harness and manifold, I got some masking tape and a sharpie, and started number all the male/female connections. It took some more time, but hopefully it'll make my life easier later on. As I was taking it apart, I was very satisfied with the overall condition of the engine. Cant wait to take the oil pan out to see the (lack of) inside build up! The intake came off first in about 30 minutes. The fuel rail and injectors removed, some hoses and plugs undone and it just came right off.

I noticed some people going with a S50/M50 intake manifold for better flow, but Id rather not spend extra when a S52 intake works without any problem. Id be way more interested in something like.. oh you know ITBs for S52!! Now this is really tempting! According to WOT, this is only a prototype, and they're in the process of making these units for both E36 use as well as E30 S52 swaps.
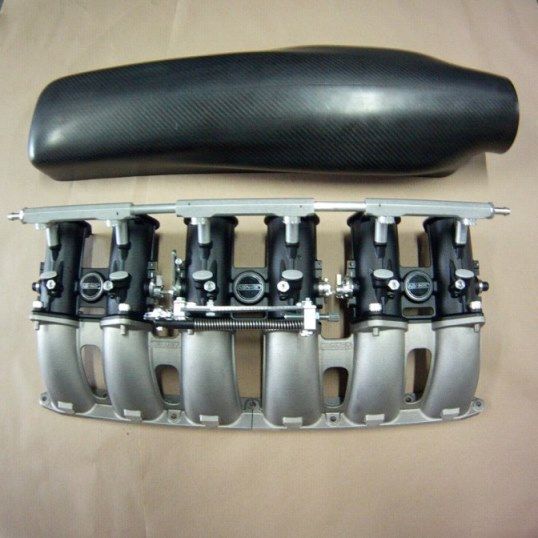
(Source: WOT-Tech)
Anyways back to taking apart the intake.
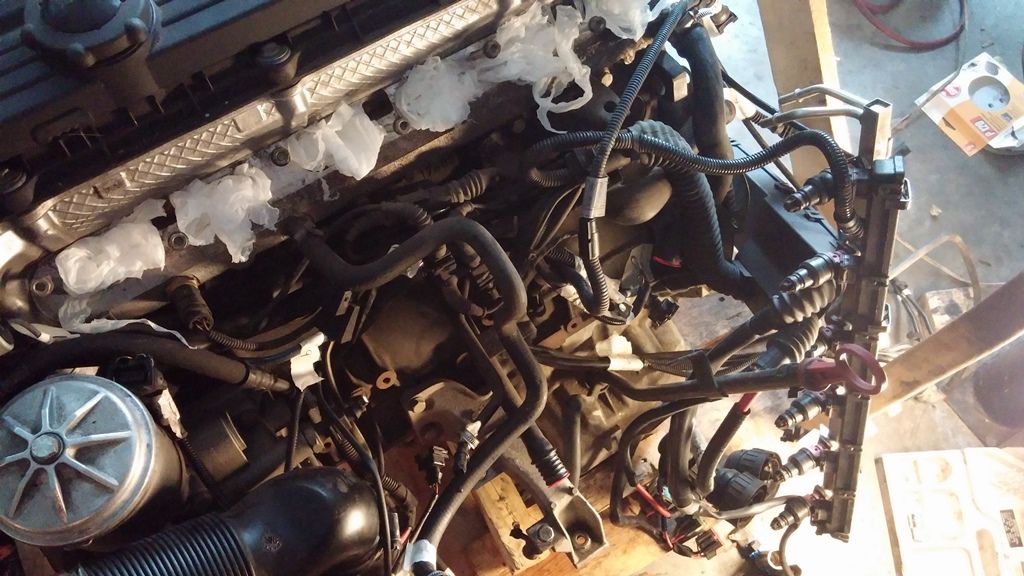
Here is a shot before the harness was completely removed. I believe 99% of the plugs/hoses were disconnected by this point.
Here's a close up
To conclude todays work, I removed the harness and sent it off to Andrew for adapter modifications. Ive always been impressed by his S54 swap build and I am confident the harness is in hands of a skillful guy. :up:
My current goal is to get the E34 oil pan installed and drop the S52 in the bay before Christmas. Long term goal is to have the E30 running before 2014 and possibly have all the exhaust work done by then too.
Happy Turkeyday!
Comment
-
November 30 2013
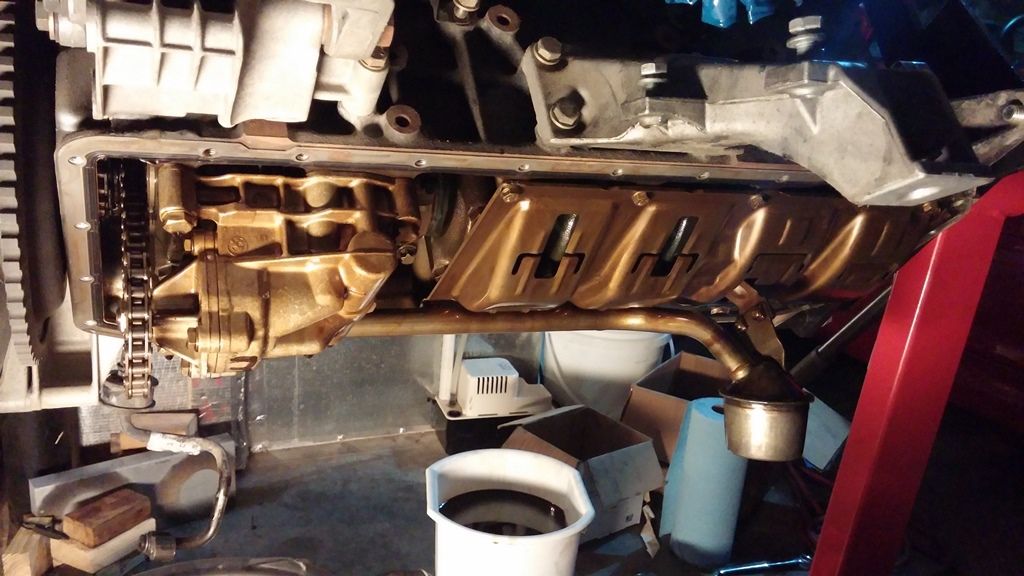
Did a little bit of work on the S52 today. It was probably ideal to finish the project over the Thanksgiving week, but I got really lazy and barely did anything productive. I somehow forced myself into the garage today and started the oil pan swap. First I drained the oil, and collected in a separate clean container in case I decide to get it tested by Blackstone. Oil looked clean and showed no sign of contamination.
After draining the oil, I started taking out the 100 bolts holding the oil pan in place! As you can see in the picture below, the oil pan is bone dry and the entire engine shows zero sign of oil leak. Not even the S54 in my M3 is this clean.
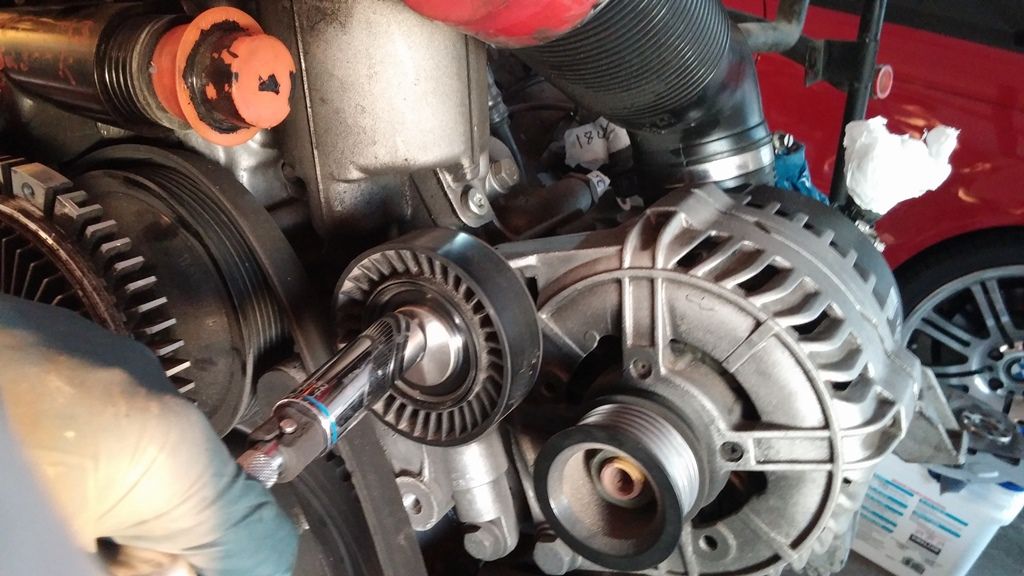
After releasing about 5 bolts, I noticed the PS pump is actually bolted down on the oil pan...and the belts and pulleys needs to be released in order for PS pump to come out. So I got a bit side tracked and started working on the front end of the motor. Despite having only 52k miles, the pulleys still sounded like some old skateboard wheels.
Old pulleys coming out
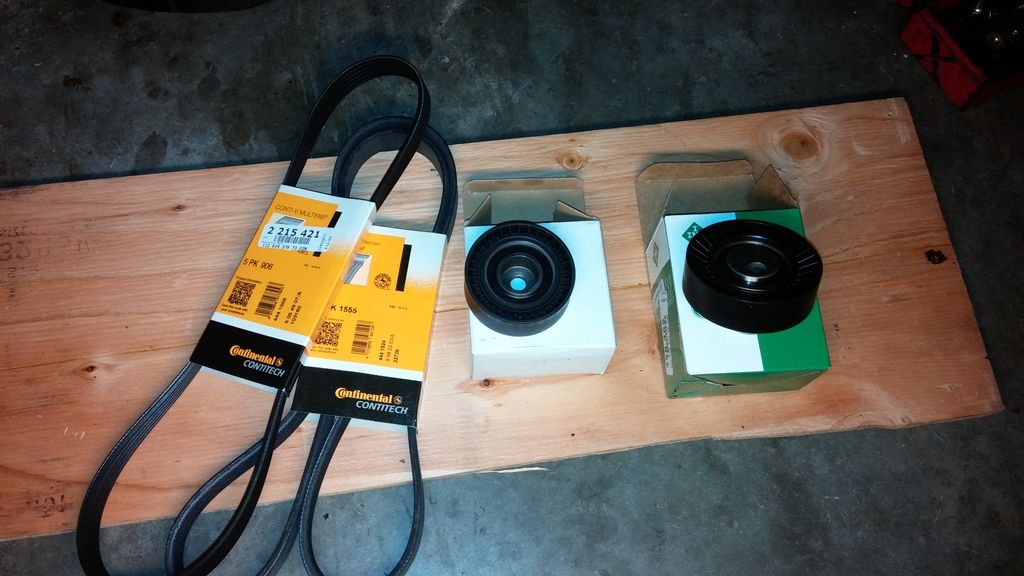
New belts and pulleys. No Napa or Autozone stuff here.
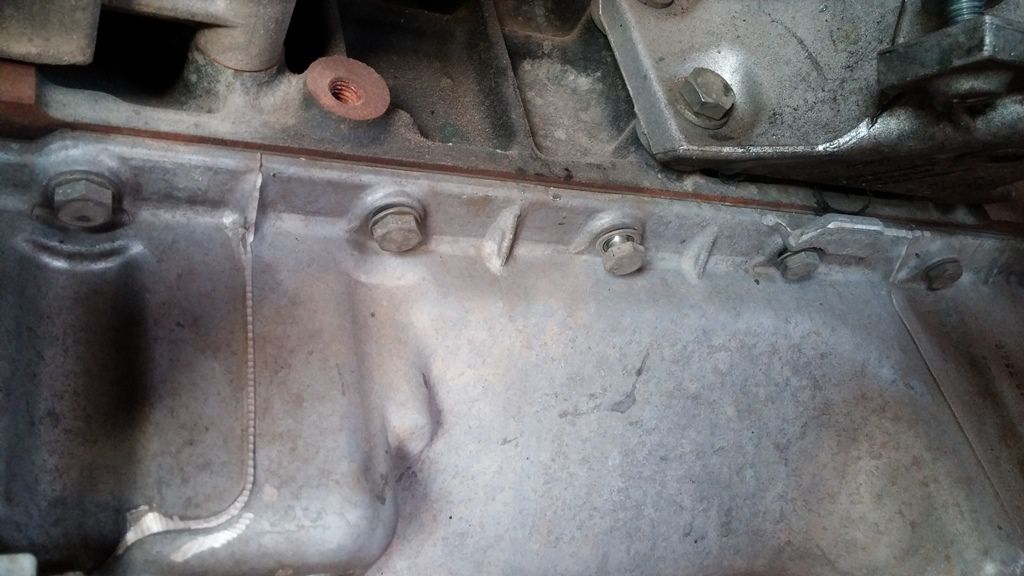
Next I removed all 300000 oil pan bolts and slowly dropped to finally view the interior of the engine. And just as I have expected, very minimal build up. :D
Everything looked to be in order so I continued on. After removing the original oil suction tube, I tried test fitting the e34 oil pan. But the hanger that bolts the suction tube down was hitting the pan. So I removed the shield piece, took a rubber mallet and punched it back and forth and it just broke off.

This concludes today work. I shouldve probably started working earlier and at least got the oil pan done today. lol To prevent dust getting on the interior, I just put the e34 pan on, threaded a few bolts to hold it in place and called it a night. Things should start picking up a bit once the harness comes back.Comment
-
December 14 2013
I forgot to post the pictures from the suspension updates I made. To be specific, I got a set of Eibach springs and KYB shocks. I heard the KYBs were made for casual driving and not much of performance parts. But price was good, so Ill just try these out. If they blow, then Ill be getting some more heavy duty shocks.
I was expecting Taiwan or PRC, but its made in Japan. :)

Height difference between Eibach and Stock is pretty drastic

Locking down the top nut. I remember first time worked on this nut on my e46 m3, it was a true pita and took me forever. Pretty simple now.

All reassembled and ready to install!

Also the front seats were completed today. Here are the before and after of my Leather World Tech dye kit. I used the original BMW silver leather color that my e30 came with. Leather world didnt have my color for some odd reason, so I had to get it special ordered using a small leather patch from my car. It seemed like a very standard color,but they didnt have it in stock.
The result are good as you can see in the picture below. I had some visible lines showing through the dye, but it looks 100 times cleaner. If you ever dye your seats, I also recommend using a very fine spray aerosol if you can. It'll have a cleaner finish and take less time.
Here's a before taken a while back by the PO

After pic. I just put on the 3rd layer of dye today. It'll need to dry and cure for several hours before I can apply the conditioner and "polish" the leather.
 Last edited by ksjdan; 12-14-2013, 08:51 PM.
Comment
-
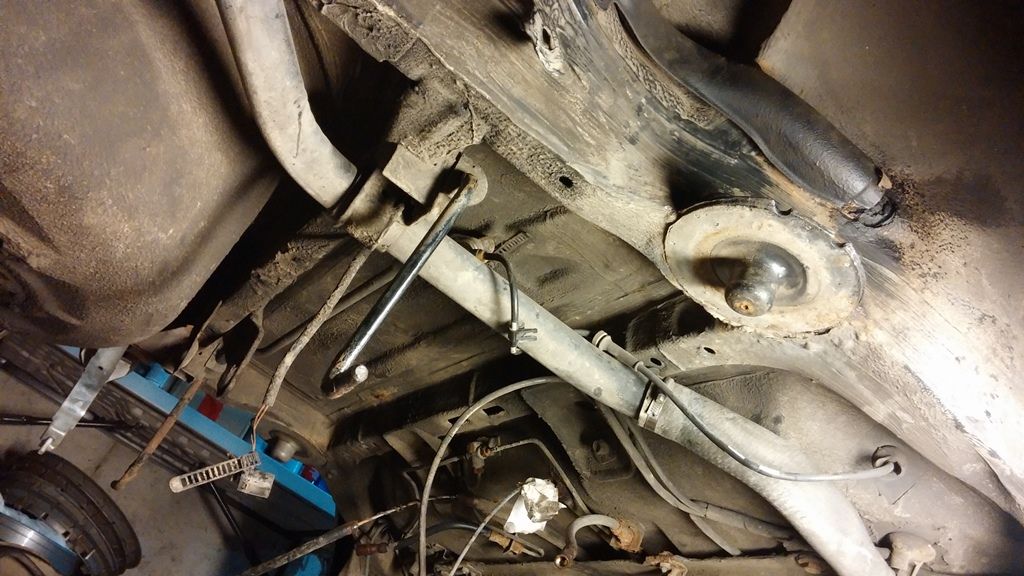
December 15 2013
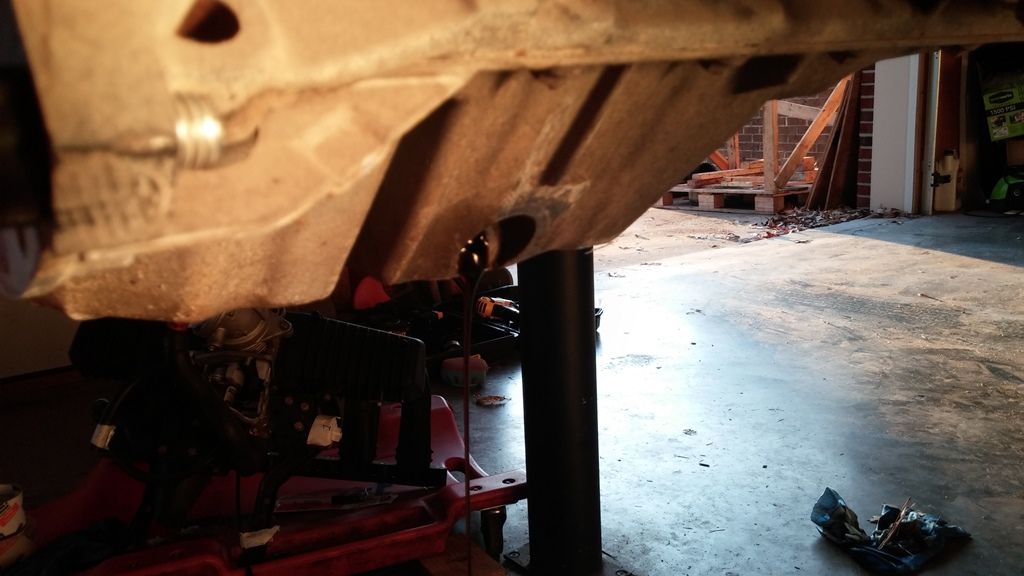
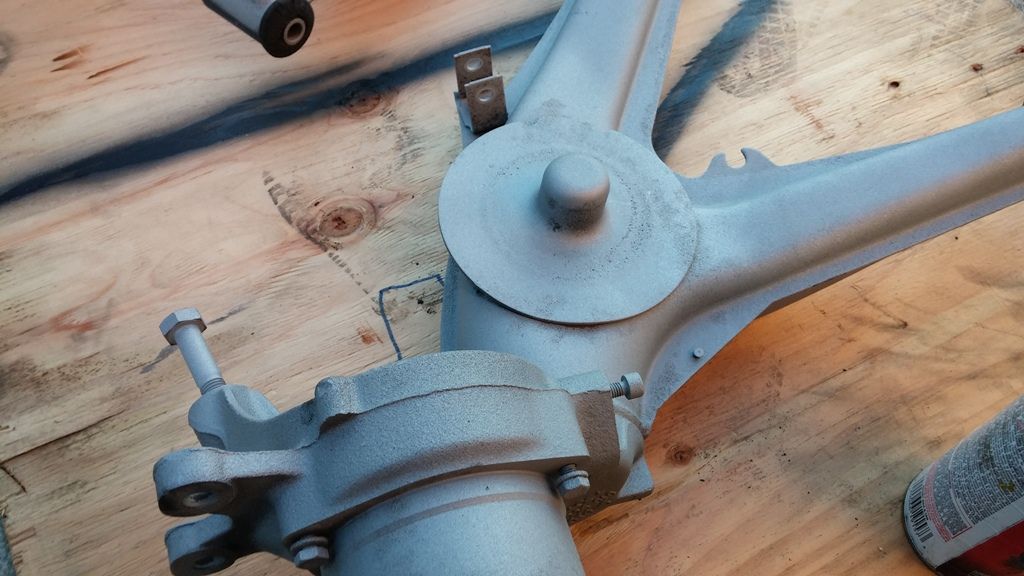
My friend and I started working on the rear subframe today. I was hesitant on rather I should rebuild the rear subframe, but after seeing what we dropped, Im really glad we did this. The work was fairly straight forward, but it being 20+ yrs old and never seen a wrench since the day it was put together, everything was frozen. The first thing I tried to unbolt was the subframe bolt, and after a few flexing, it broke the breaker bar. :down: After few hours of "man handling" every single bolts and nuts, came off.
Fun pic before we got started
It was difficult getting pictures because it was freezing cold outside and the garage door was down.
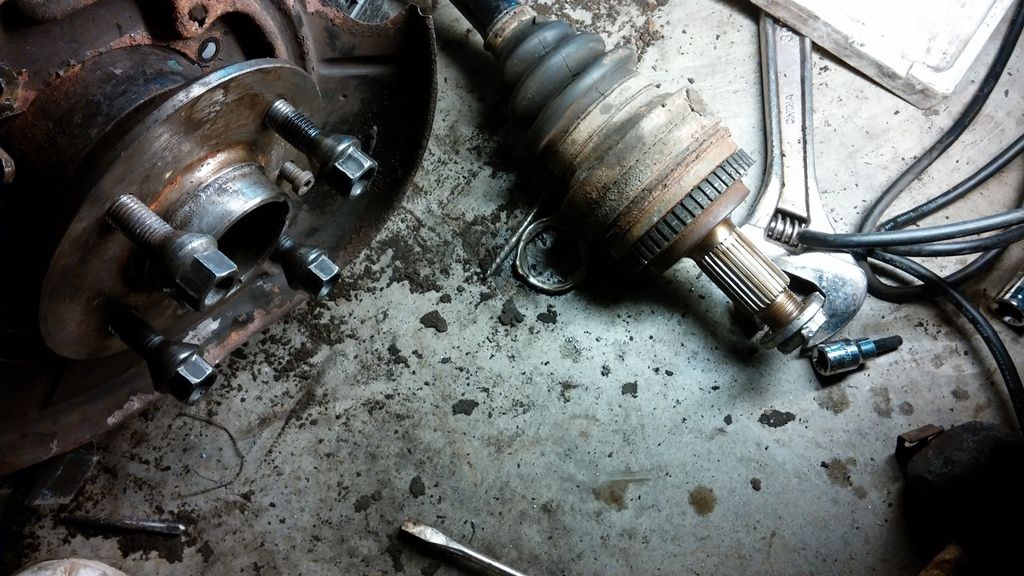
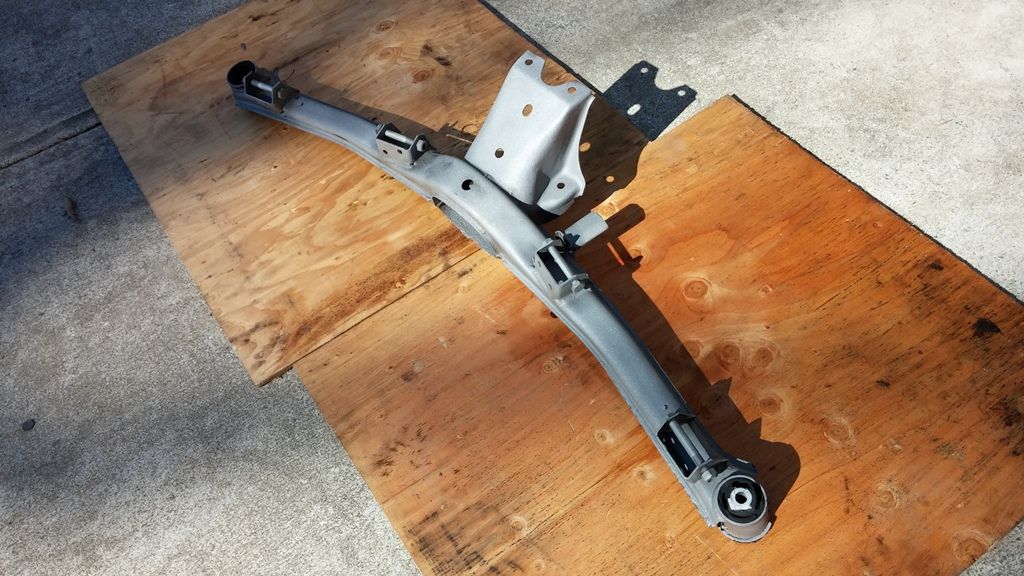
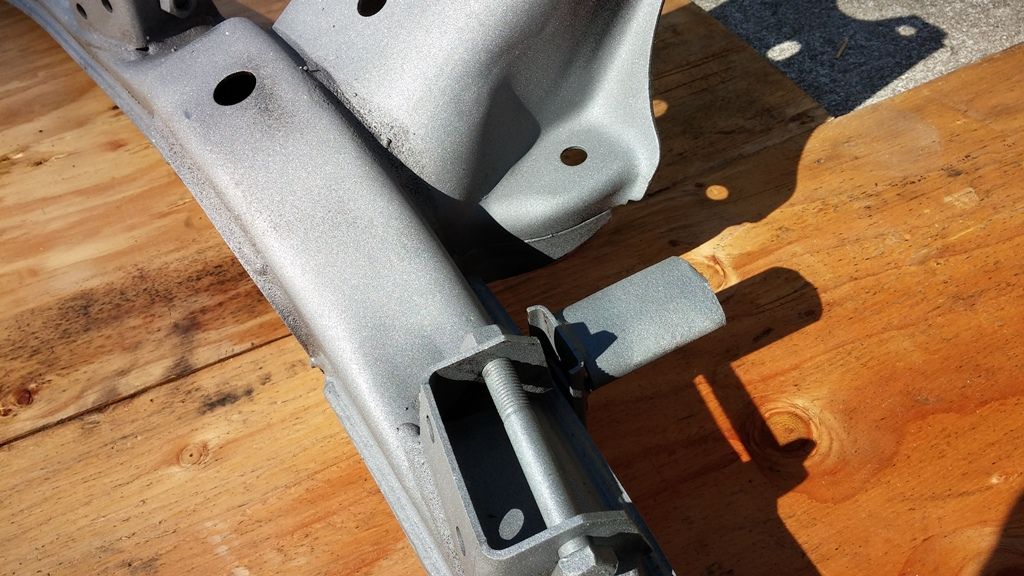
Here is the subframe and diff lowered. The e-brake cables are still stuck in their, and I have no idea how it is suppose to come out. Anyways we were taking out the allen bolts on the CV axle, but I managed to strip a bolt. doh!
Im going to need to drill a hole and extract it out...maybe.
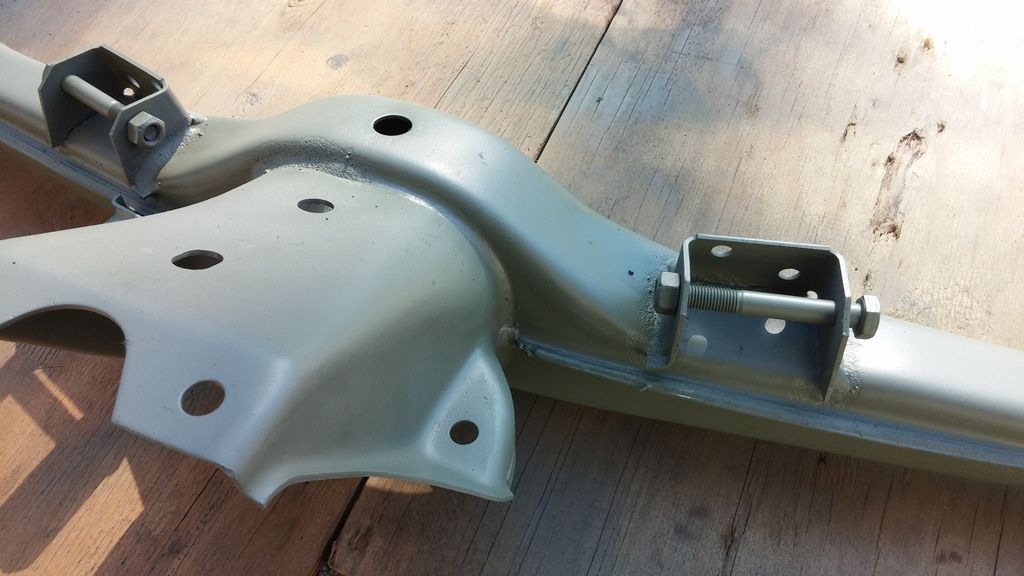
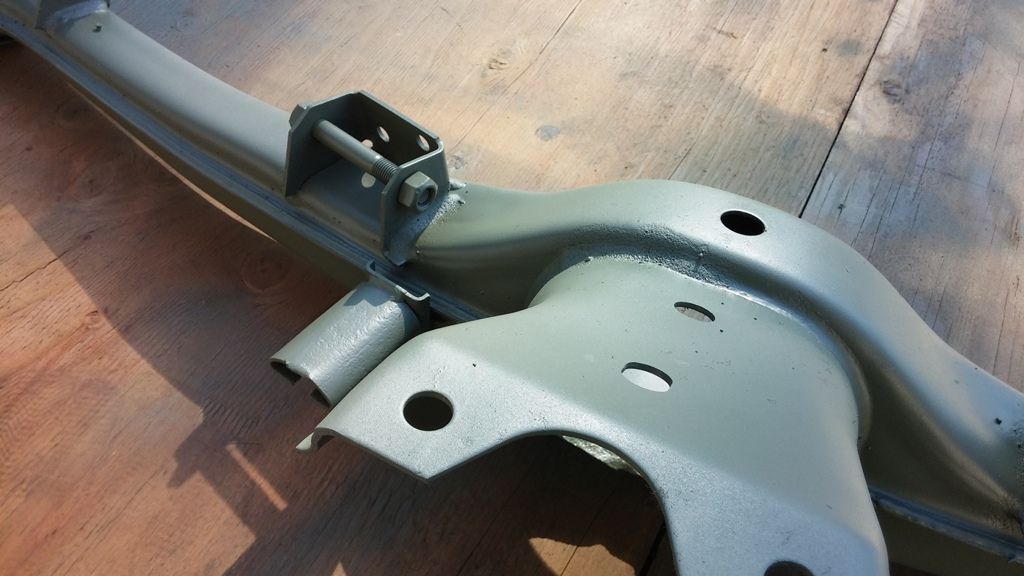
Here is how far we got. Everything will be sandblasted and recoated. I purchased some polyurethane subframe and trailing arm bushings from Ireland Engineering.

Comment
-
Try hammering in a torx socket to get that stripped allen head loose!Drilling is over kill!
your gonna have to take apart the parking brake to ge those cables out, there alittle pink youll need to drive out at the end of the cable once you get the parking break dissassemled. soak it liberally in PB.
Awesome progress, really going for everything at once Eh?1985 325e M50TU(Sold)
1991 318is Slicktop (Sold)
1990 325is Brilliantrot S50/5 Lug Swapped.
1992 525i Manual shitbox Winter BeaterComment
-
Comment
-
either try to use a massive easy out, or try to hit a damaged bolt remover over the head to remove the allen bolt.
If you can't get it out, you could just grind the head off, slide the halfshaft off, then figure out how to pull the remaining stud out with vice grips, or welding a nut to it.Originally posted by priapismOriginally posted by shamesonComment
-
We tried the impact screw driver, but it was not enough to loosen the bolt. ...Using a small hammer probably didnt help. So we got a torch and gave it some heat, and voila, came right off.
January 4 2014
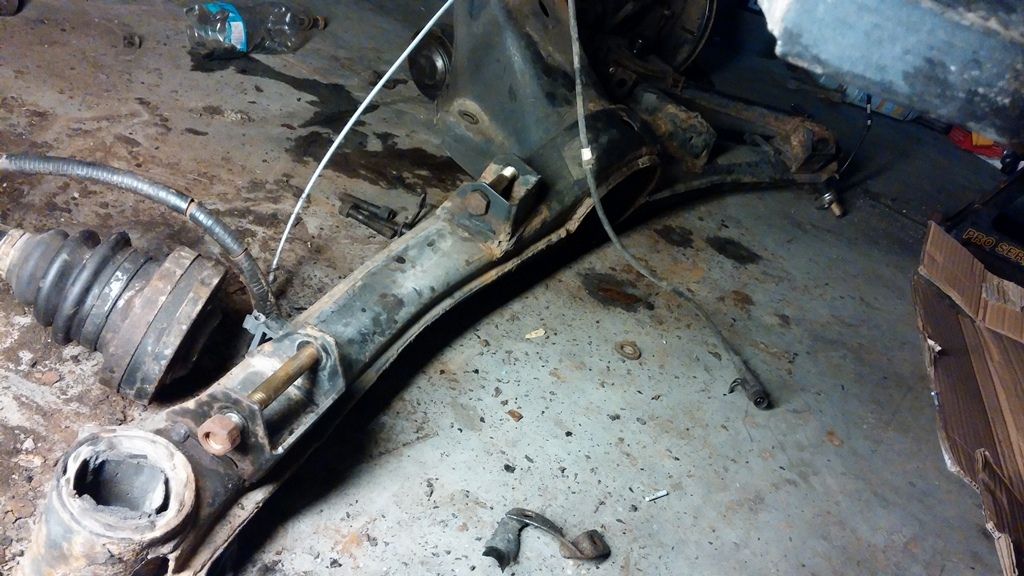
So I continued disassembling the subframe, control arm and all the little bits and pieces attached to it. Dropping the subframe was pretty straight forward and simple task. The shocks and roll bar were already detached so I only need to remove a handful of bolts and undo the brakes.
Ta da! Thankfully the body looks really clean!
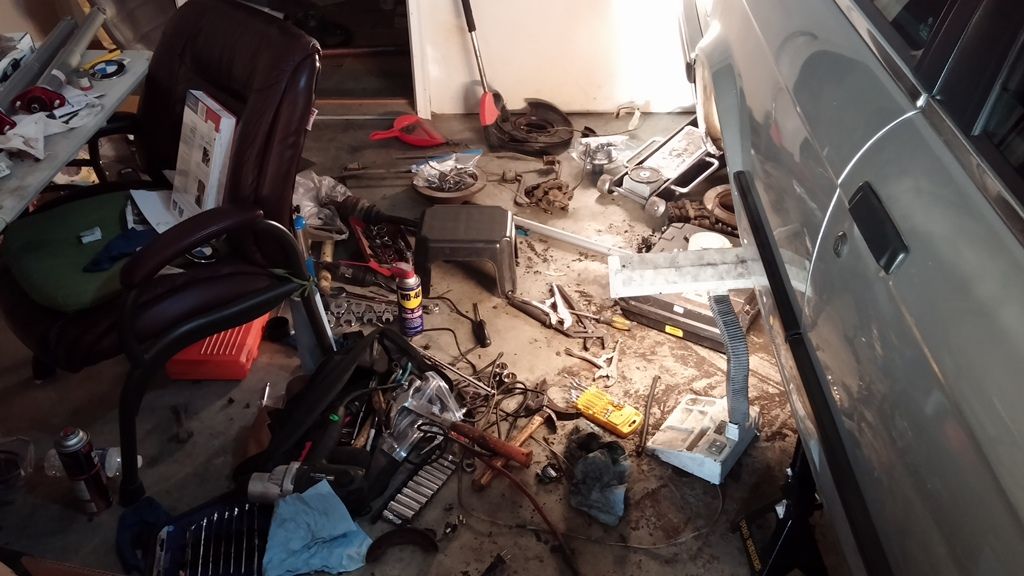
The hardest thing to remove (by a effing mile) is the parking brake cable lines. The tubes that feed up to the cabin is rusted pretty badly. I was told it should just be an easy tug and pull, but it was more like "wow not so hard, the car might fall off the jack stands!". I failed to remove it from the tube, but I was able to remove it from the control arm. Ended up cutting the lines, twisting the metal casing off, and torching the hole to clean out the rubbery casing. After fighting the parking brake cables for few hours, I gave up and just started working on the wheel bearing side. took off the calipers, rotors, wheel hub (impact wrench is pretty much required for this) and I ended up with this.
At the end of the day, this is what my work space looked like. Beware: if you have OCD, this might give you a heart attack
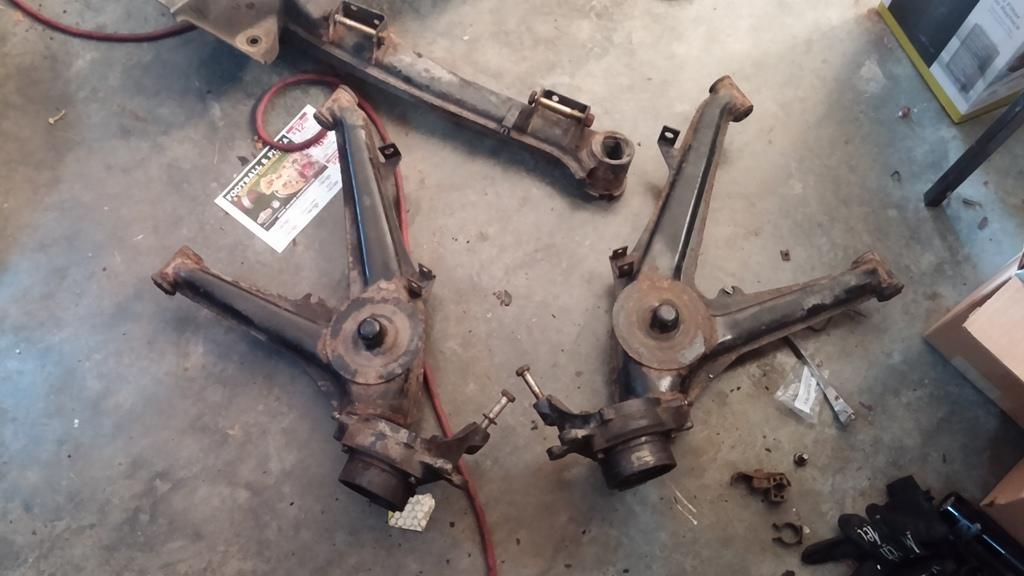
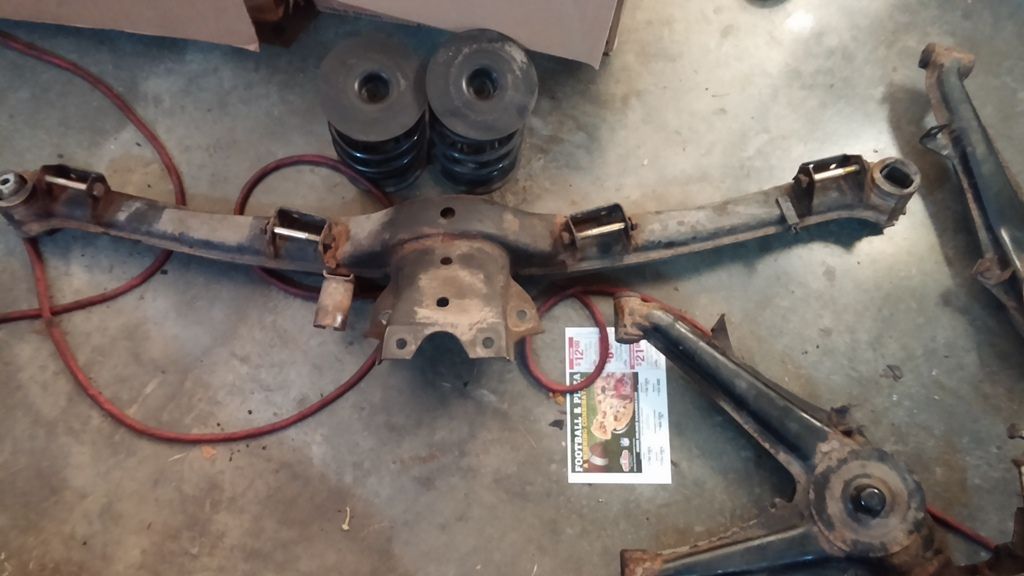
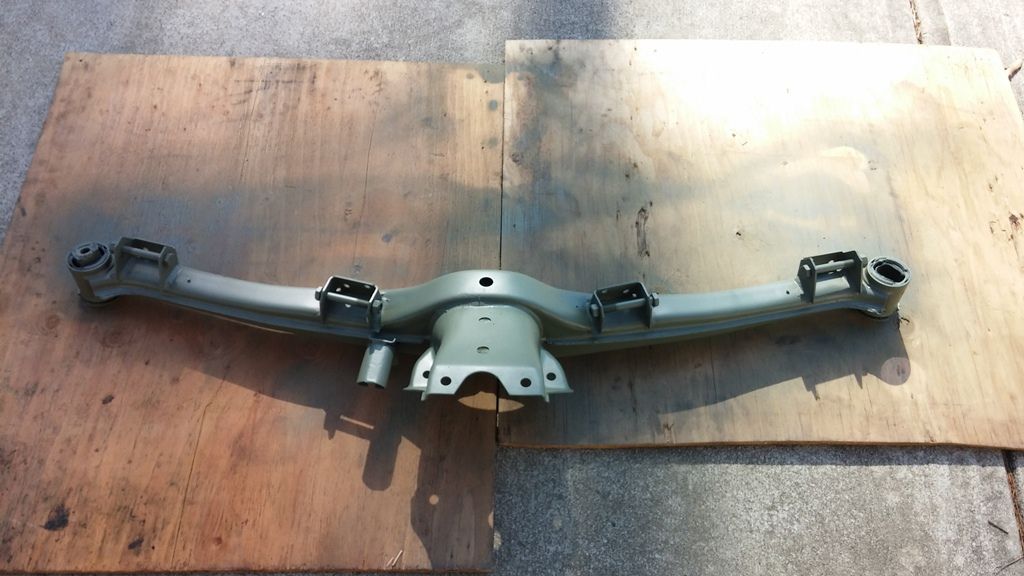
And finally some pictures of the subframe before I take it for sandblasting
Comment
-
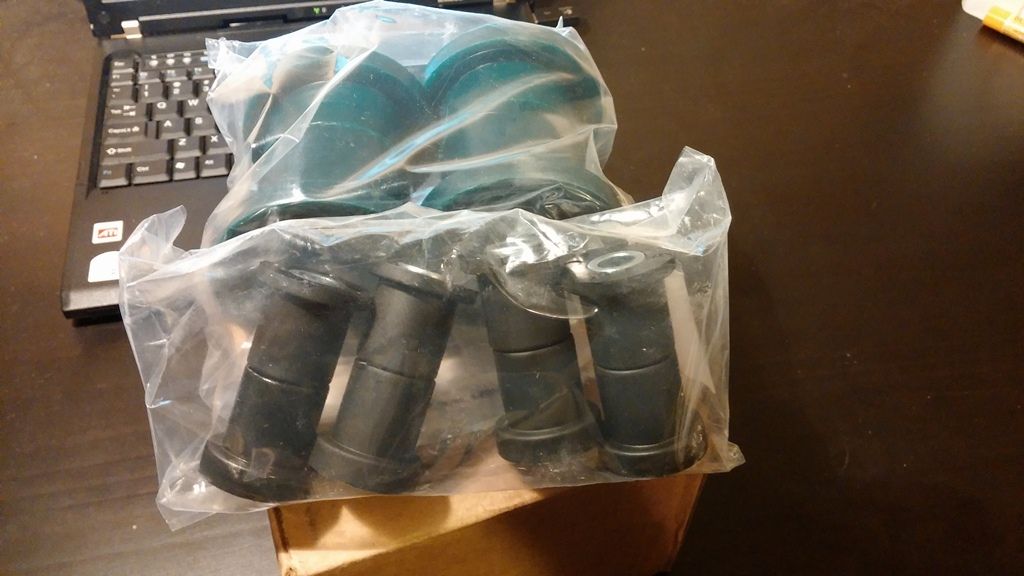
Also this just arrived in mail! Set of Ireland Engineering polyurethane subframe and control arm bushings.
Comment
-
January 23 2014
Just finished getting the subframe and control arm sandblasted at a local shop. It always surprises me how drastic the difference is. After degreasing the parts, I layed some self etching primer.

Comment


Comment