

This thread is a pictorial documentation of my engine build and also the progression of my e30.
First things first a little background on how I came to liking e30’s. I must admit I knew nothing about bmw’s or what an e30 was for that matter. I was living in Chicago (late 2005 I believe) driving a beater 1993 honda accord which I bought on ebay for $610 in non running condition. An ingnition module later I had a nicely running accord. Got bored with the 260k sohc so I swapped in a dohc (f22b I think) yawn.
Pics of accord in its winter beater glory:


Sometime later I met a girl who eventually tricked me into marrying her. She was eventually succumb to the charm of e30’s too more on that later. Though when she was still my girlfriend she was in need of a car because the Saturn that was handed down from her brother eventually crapped out. So we started browsing craigslist and happened upon a 1995 civic with a fair body and engine that needed some work. When we met up with the guy in wicker park (hipster neighborhood in Chicago) to see the car he pulled up with his friend and his friends girlfriend in some small bmw convertible that looked to have seen better days. None the less it seemed like a pretty charming little car. Eventually we struck a deal on the civic and needed a ride to the bank to get some cash. So him, his friend, his friends girlfriend, my girlfriend, and I all piled into the little bmw. That’s when I relized this little car had something I’ve always loved since my farmboy days growing up in Wisconsin, an inline 6. On top of that it had a 5 speed transmission and was rear wheel drive. Needless to say I was amazed at the potential this little car had. We ended up getting the civic and I put an imported low milage engine in it. Eventually I started doing research on this neat little car I had discovered. Later finding out it’s referred to as an e30 in bmw circles. Finding a rust free e30 in Chicago proved quite frustrating. After browsing craigslist for what seemed like ages I found a rust free black 1990 325i five speed. So I made contact with the seller to see If I could take a look at the car. He was out of town for work but the car was parked in the united airlines employee lot at O’Hare. Lucky for me I was also an airline employee at O’Hare as well so I went and had a look.
These are the pictures from that day:
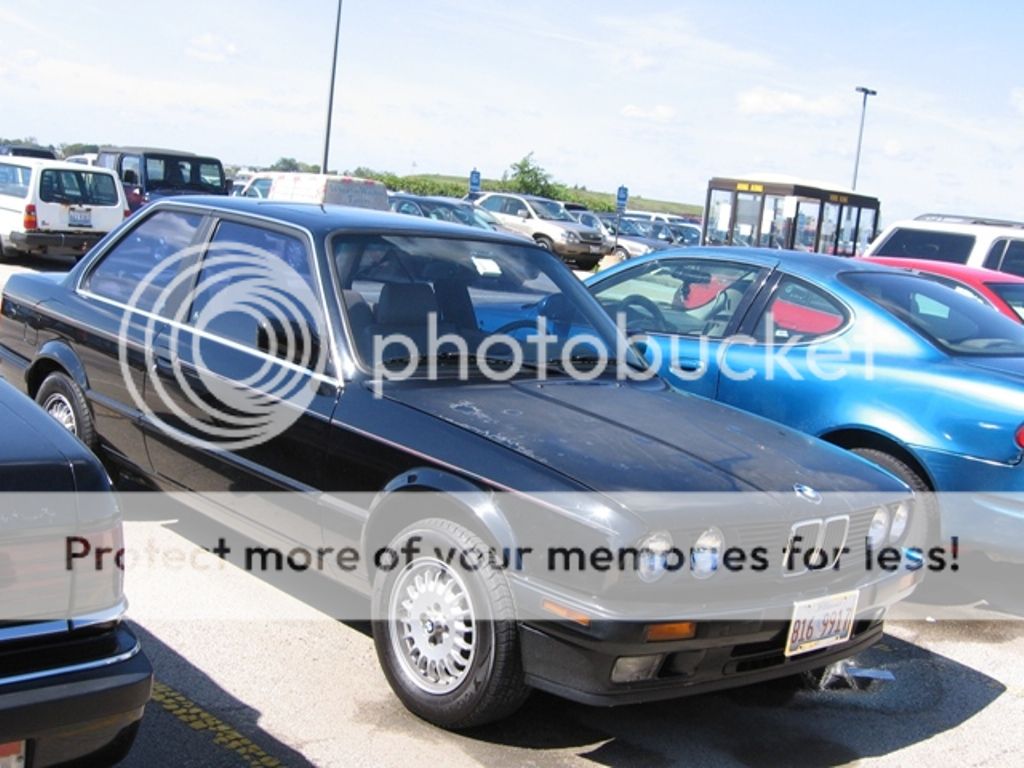


A pretty clean mechanically sound example with a straight body and only surface rust in need of a little tlc (note the boat drain plug). Once the owner returned I met up with him to take if for a drive. A few days later I was the new owner of the car. That was September 2007.
First things first, get the maintenance on the car up to date. Right out of the gate I replaced the timing belt, tensioner, water pump, cam seal thermostat, cooling system hoses, accessory belts, air filter, valve cover gasket, plugs, wires, cap, rotor, and did a valve adjustment. Once all this was done I was able to get a couple weeks of driving enjoyment before putting the car into storage for the winter.
By the time spring rolled around I had replaced the trans rear seal, shift shaft seal, reverse light switch, trans oil, differential side shaft seals and gear oil. Installed a new muffler and fuel filter and fuel lines. A short time later a full set of brakes were installed. Somewhere in there I replaced the intake and exhaust manifold gaskets, oil pan gasket and heli-coiled the stripped drain plug threads.
Now that some of the mechanics were caught up it was time to address that nasty looking hood and pin striping:

Some new shoes were acquired shortly thereafter (4x4 status ftl):

Trying to get rid of the 4x4 status with hr eo sports (reverse rake yay):

I didn't like the way the oe sports sat so i got some sports and still had some reverse rake.
Late 2009 we moved to CA:
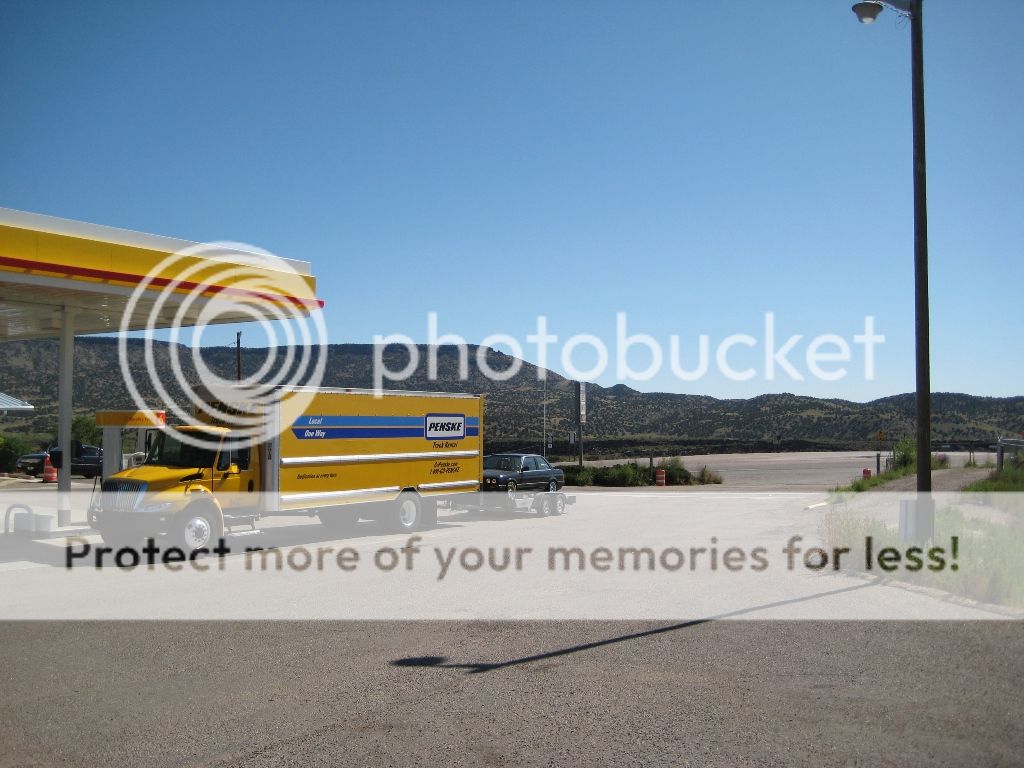
Put on quite a few miles with the car in its current state.
Got sick of playing around with drop hats and the way the car handled with them so I upgraded to german engineering 450F/650R coil overs:


Car feels so much better now!
Ireland engineering camber plates:

Bump stops after a year or so of hr sports with drop hats:

The e30 we picked up for my wife:

Body was in decent shape but was pretty rough mechanically and interior was shot. Brought it home and started going to town. Within a few weeks and lots of hours in the garage I’d replaced and fixed everything I had to do to my car to wip it into shape.


Eventually i wanted to do something with my engine after seeing well done builds by digger, jixer, chris325ix and, peerless. I started drooling over the metric mechanic m20 catolog and especially the 3.2 liter sport engine (3.1 liters realistically). Being new to the LA i contacted peerless for recomendations on shops to do the machine work. He happily pointed me in the right direction.
While researching and acquiring the needed parts I realized if I wanted to fully take advantage of the new engines potential I would need a better way of managing it than what motronic could provide. I didn’t exactly want to be learning how to how to use/tune a new ems on the new engine either. I decided a mspnp from whodwho would fit the bill. At first I was a bit hesitant with MS but there is so much info on the web and we have a few experts in the e30 community as well who are willing to help. I took the opportunity of installing MS and the wide band to over haul the wiring harness and incorportate the M3 wiring harness cover to keep the engine bay looking clean. Also got rid of the silly alarm the po had installed and installed a simple keyless entry system in the trunk.
Some pics of that:


With afm delete:

Once I knew the direction I was going i ordered the 3.2L sport pistons from MM.
In the meantime I acquired an s52 crank and rods from a local forum member.
Once i received the pistons from mm i took one of them along with a donor block to the machine shop to have the work done.
Unfortunately the first time around there was a communication error and the machine shop overshot my clearances by about .003". Unfortunately that meant having to find another block.
Not really that hard here in socal though :p

Picked an early model 86-87 eta block for internal clearance benefits and 360* oil groove main bearings.
They made good by redoing the work and this time the clearances were right on.
Fresh coat of paint:

Installing new core plugs. Pounded flush with device on the left and set them just below the chamfer with the device on the right.


Replacing the oil pump drive gear roller bearings:


Replacing the e36 pilot bearing with an e30 pilot bearing:


Rods refurbished, new wrist pin bushings installed, and balanced:

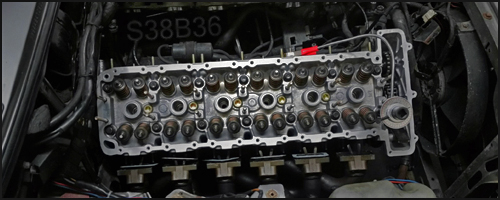
Head work was done by Shant of Myster-e performance. Can’t say enough good things about him. Lives and breaths e30’s, does great work, and awesome to deal with. Fully assembled and ported head:


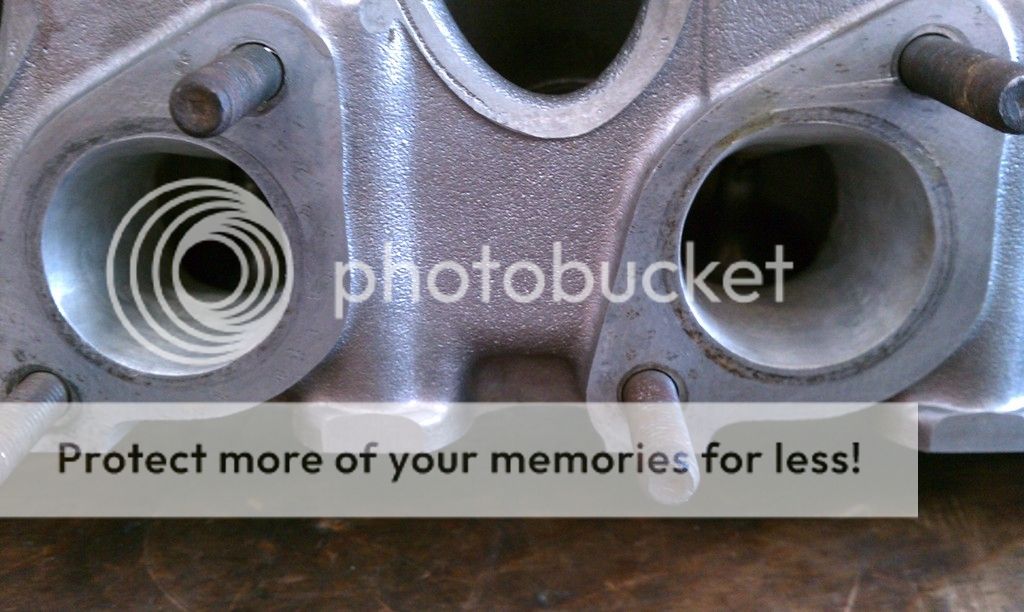

In regards to clearancing the block to fit the s52 crank. Apparently there are some internal differences such as smaller oil gallery casting between the E and I blocks. The early model (86-87) e blocks being more desirable for fitting oversided cranks. That being said the only clearance issues I ran into while test fitting the s52 crank in my e block (with s52 rod and stock piston) was the #1 con rod big end would just barely clear the aux shaft every couple revolutions. This was due to the raised text on the aux shaft. The other issue was when the crank is swinging through bdc the shoulder of the con rod just kisses the bottom of the bore where the casting line left a bit of extra casting flash behind. It probably wouldn’t be an issue after the block was bored but it was something I wanted to address anyway. Here are some pics illustrating the issues.


High tech tool used to measure bottom of bore to conrod shoulder clearance. A piece of banding strap about .025”


All bottom end clearances were checked with a dial bore gauge prior to bottom end assembly. The goal was to adhere to the .001” of clearance per inch of journal standard. Ended up using kolbenschmidt main bearings due to glycos being all over the place clearance wise. Tried using kolbenschmidt rod bearing but couldn’t get the clearances to where I wanted them. Had to use clevite std and +1 shells to dial the clearances in.
Assembly time:

Block loaded with lubed main bearings ready for the crank:

Main bearing caps torqued to spec except for the #6/thrust bearing cap:

seating and checking thrust bearing clearance:


Pistons and rods adsembled and ready to be installed:

Note the absence of oil control ring land where the wrist pin bore and ring land intersect. This requires an oil rail support ring to serve the purpose of the ring land.


Bottom end assembled:

For shits and giggles i checked piston to valve clearence. Loaded the valve reliefs with clay and snugged the head down with the old head gasket.

Rotated the engine through a couple revolutions and took the head of to see what i had:

Guess i don't need to work about ptv contact :)
For the heck of it I left the clay in place and put the head back on and left the crank at tdc and rotated the cam through a revolution to see how non interference the pistons really are. I'm kicking myself now for not taking any pics, but it is non interference by a very small amount. Something like 2mm.
With that verified i started fitting the ij crank scraper:

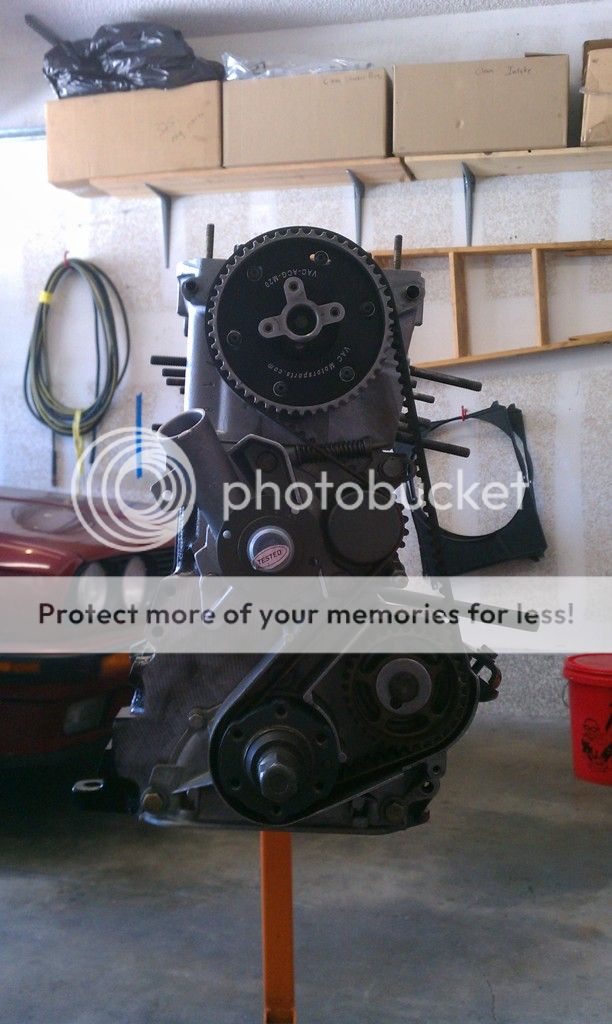
Further assembly:

Crank hub spacer/oil seal surface:

Stepped washer face machined down:


Head on:

Bitch tube restrained:

Further assembly:

Injector refurbishing:


Got a new bmw oil pump but couldn’t help but notice how dirty it was. It looked like it had been shaking around inside a cardboard box for the last 10 years. I decided to take it apart and I’m glad I did because it was filthy inside.


Once inside I couldn’t help but to make a few improvements 8D


Installed the crank scraper and oil pump for the final time and closed up the bottom end. Used the double gasket method with a coat of high tack on each side of the gasket:

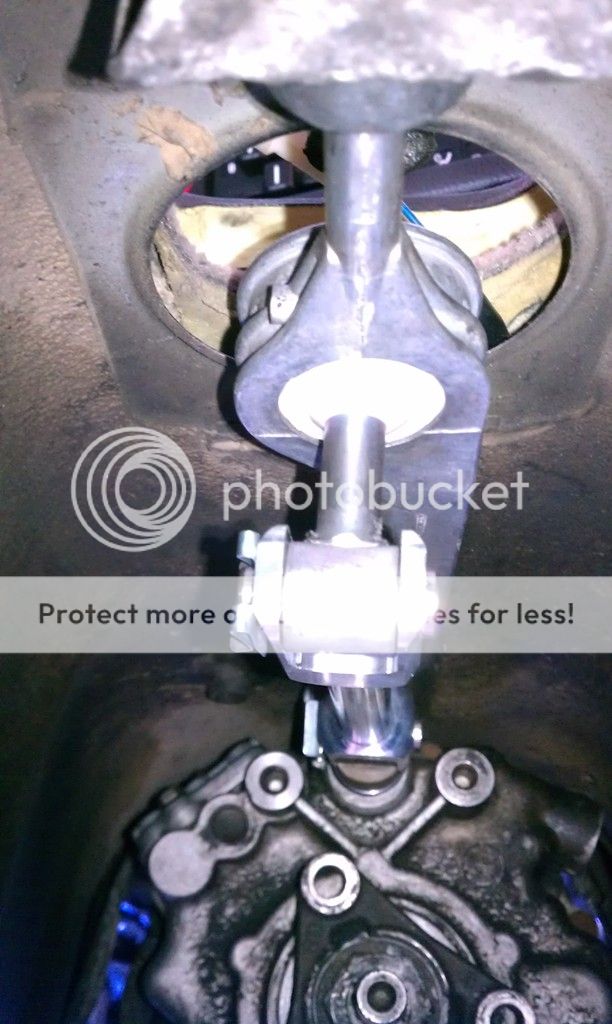
Now to address the oil pressure transmitter mounting and plumping. After some research I decided to make my own banjo block.
Started with this:

After some huffing and puffing with a hacks saw and file:

Ended with this:

Final install:

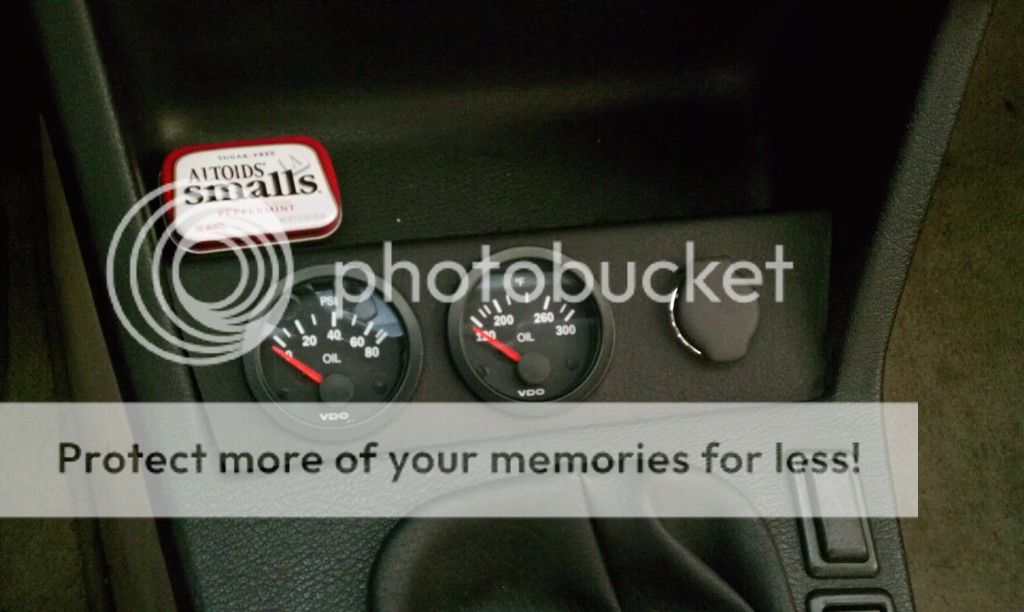
Gauges:
Acquired a big bore throttle body from a forum member. Disassembled to give a cleaning and to 180 the throttle shaft to allow for running an e36 variable tps with megasquirt:

For comparison the T-gage is stock throttle body diameter:


It was getting time to take the engine off the engine stand to start installing the flywheel and related parts but was having trouble finding a safe way to leave it on the ground without having it attached to the cherry picker. The thought of possibly damaging the oil pan and having to refit the crank scraper was motivation enough to build an engine stand for the task.

Flywheel torque down:

Disk in place:

Pressure plate torqued down:


Went with a sachs pn 883082 618 (“618”) pressure plate and organic compound sport disk (pn 21 21 2 226 841) for their extra clamping ability.
Surgery awaits:

Out with the old:

Crusty throw out bearing and nasty bellhousing:

Installing new input shaft seal and cleaned bellhousing:


New pivot installed:

Throw out bearing comparison stock on left e21 (21 51 1 204 525) on right for use with “618” pressure plate:

The stable awaiting its new ponies:

In with the new:

Getting used to the new home:

AKG delrin shift carrier bushings:

Double shear shift rod:

E60 545 short shifter pn 25117546373:
Side by side with z3:

Center support bearing was shot and the u-joints were pretty crunchy so I decided it wasn’t worth the time to reinstall it and sourced a rebuilt unit from powertrain industries in Gardena.


Induction set up:

At this point I was pretty much down to waiting on the headers to arrive. Was just tidying up little things here and there to make the time pass. Finally the day came when the headers were set to arrive. I felt like a kid the night before Christmas. I barely even slept the night before due to the anticipation. I tried to keep myself busy until 2pm when the ups guy usually comes, but he didn’t come until 6!

I thought about waiting until the next day to install them but there is no way I could possibly wait not to mention another sleepless night. Header and mid pipe install went pretty smooth as expected with the tubular design “bav auto” headers as they come with a mid pipe that takes the place of the cat and bolts up directly to the muffler. Thanks again to bullet ride for organizing the group buy!


After the headers were installed I took a quick breather and inhaled a power bar. I collected my thoughts for a bit. As the moment of truth approached I added the oil, rechecked all the fluids, and primed the oil system. Then came the moment of truth. I turned the key and it fired right up. Verified oil pressure and immediately turned the idle screw in to bring the idle up to 1500 rpm. Quickly checked for major leaks, set megasquirt to ve analyze live (veal), and backed out of the drive way to start the break in process. Keeping it under 4000 rpm but above 1500 rpm until coolant and oil were up to temp to allow for the cam to run in. Once everything was up to operating temp I proceeded to drive it like I stole it. Giving it varying rpm with lots of wot and decell gradually working my way up to redline I had the rings mostly broken in with in 20 miles or so. Brought the car back in drained the oil checked for leaks and haven’t looked back since.
Initial impressions during the breaking in process were it was very apparent there was something more powerful under the hood and was quite a handful compared to the high mileage engine it replaced. It definitely has gobs of torque down low through midrange and is very strong up to about 6500 rpm where you can feel it running out of breath. Of course some canyon carving was in short order and let me just say this thing is really at home tearing up the switch backs of Mulholland drive. The low end and mid range make it the perfect dd / canyon carver.
Final Specs:
3109cc
10:1 compression ratio
S52 crank (89.6mm stroke)
S52 rods (135mm)
86mm Metric mechanic non interference sport pistons
Myster-e ported cylinder head
Metric mechanic sport cam 286/260 specs here:
Metric mechanic beehive valve springs
Ireland engineering heavy duty rocker arms
Vac motorsports adjustable cam gear
63mm BBTB
“Bav auto” headers
Bosch design II 30lb injectors
Ishihara Johnson crank scraper
Whodwho pnp Megasquirt 2 extra
228mm Single mass flywheel lightened to 13.5 lbs
“618” sachs pressure plate and and sport disk
After 600 miles and tuned as well as I could get it on the street I headed to the the dyno.
The redline is the baseline before dyno tuning and the blue line is after an hour of dyno tuning:

I was way past mbt on ignition at wot lol.
Pre dyno:

Post dyno:

I’d like to thank all the people who have helped me along the way. Jim, Ted, and Cort at metric mechanic, peerless at e30 motorwerks, and all the forum members that answered countless questions in threads and pm’s. If it weren’t for all the helpful people out there I’d still be stuck in the mud.
Future projects entail:
Subframe bushing, rear trailing arm bushings, stainless steel brake lines, IX rear sway bar and bushings.
Play with adjustable cam gear
Build a cold air intake similar to the miller psik using intercooler piping
E36 steering rack
First things first a little background on how I came to liking e30’s. I must admit I knew nothing about bmw’s or what an e30 was for that matter. I was living in Chicago (late 2005 I believe) driving a beater 1993 honda accord which I bought on ebay for $610 in non running condition. An ingnition module later I had a nicely running accord. Got bored with the 260k sohc so I swapped in a dohc (f22b I think) yawn.
Pics of accord in its winter beater glory:
Sometime later I met a girl who eventually tricked me into marrying her. She was eventually succumb to the charm of e30’s too more on that later. Though when she was still my girlfriend she was in need of a car because the Saturn that was handed down from her brother eventually crapped out. So we started browsing craigslist and happened upon a 1995 civic with a fair body and engine that needed some work. When we met up with the guy in wicker park (hipster neighborhood in Chicago) to see the car he pulled up with his friend and his friends girlfriend in some small bmw convertible that looked to have seen better days. None the less it seemed like a pretty charming little car. Eventually we struck a deal on the civic and needed a ride to the bank to get some cash. So him, his friend, his friends girlfriend, my girlfriend, and I all piled into the little bmw. That’s when I relized this little car had something I’ve always loved since my farmboy days growing up in Wisconsin, an inline 6. On top of that it had a 5 speed transmission and was rear wheel drive. Needless to say I was amazed at the potential this little car had. We ended up getting the civic and I put an imported low milage engine in it. Eventually I started doing research on this neat little car I had discovered. Later finding out it’s referred to as an e30 in bmw circles. Finding a rust free e30 in Chicago proved quite frustrating. After browsing craigslist for what seemed like ages I found a rust free black 1990 325i five speed. So I made contact with the seller to see If I could take a look at the car. He was out of town for work but the car was parked in the united airlines employee lot at O’Hare. Lucky for me I was also an airline employee at O’Hare as well so I went and had a look.
These are the pictures from that day:
A pretty clean mechanically sound example with a straight body and only surface rust in need of a little tlc (note the boat drain plug). Once the owner returned I met up with him to take if for a drive. A few days later I was the new owner of the car. That was September 2007.
First things first, get the maintenance on the car up to date. Right out of the gate I replaced the timing belt, tensioner, water pump, cam seal thermostat, cooling system hoses, accessory belts, air filter, valve cover gasket, plugs, wires, cap, rotor, and did a valve adjustment. Once all this was done I was able to get a couple weeks of driving enjoyment before putting the car into storage for the winter.
By the time spring rolled around I had replaced the trans rear seal, shift shaft seal, reverse light switch, trans oil, differential side shaft seals and gear oil. Installed a new muffler and fuel filter and fuel lines. A short time later a full set of brakes were installed. Somewhere in there I replaced the intake and exhaust manifold gaskets, oil pan gasket and heli-coiled the stripped drain plug threads.
Now that some of the mechanics were caught up it was time to address that nasty looking hood and pin striping:
Some new shoes were acquired shortly thereafter (4x4 status ftl):
Trying to get rid of the 4x4 status with hr eo sports (reverse rake yay):
I didn't like the way the oe sports sat so i got some sports and still had some reverse rake.
Late 2009 we moved to CA:
Put on quite a few miles with the car in its current state.
Got sick of playing around with drop hats and the way the car handled with them so I upgraded to german engineering 450F/650R coil overs:
Car feels so much better now!
Ireland engineering camber plates:
Bump stops after a year or so of hr sports with drop hats:
The e30 we picked up for my wife:
Body was in decent shape but was pretty rough mechanically and interior was shot. Brought it home and started going to town. Within a few weeks and lots of hours in the garage I’d replaced and fixed everything I had to do to my car to wip it into shape.
Eventually i wanted to do something with my engine after seeing well done builds by digger, jixer, chris325ix and, peerless. I started drooling over the metric mechanic m20 catolog and especially the 3.2 liter sport engine (3.1 liters realistically). Being new to the LA i contacted peerless for recomendations on shops to do the machine work. He happily pointed me in the right direction.
While researching and acquiring the needed parts I realized if I wanted to fully take advantage of the new engines potential I would need a better way of managing it than what motronic could provide. I didn’t exactly want to be learning how to how to use/tune a new ems on the new engine either. I decided a mspnp from whodwho would fit the bill. At first I was a bit hesitant with MS but there is so much info on the web and we have a few experts in the e30 community as well who are willing to help. I took the opportunity of installing MS and the wide band to over haul the wiring harness and incorportate the M3 wiring harness cover to keep the engine bay looking clean. Also got rid of the silly alarm the po had installed and installed a simple keyless entry system in the trunk.
Some pics of that:
With afm delete:
Once I knew the direction I was going i ordered the 3.2L sport pistons from MM.
In the meantime I acquired an s52 crank and rods from a local forum member.
Once i received the pistons from mm i took one of them along with a donor block to the machine shop to have the work done.
Unfortunately the first time around there was a communication error and the machine shop overshot my clearances by about .003". Unfortunately that meant having to find another block.
Not really that hard here in socal though :p
Picked an early model 86-87 eta block for internal clearance benefits and 360* oil groove main bearings.
They made good by redoing the work and this time the clearances were right on.
Fresh coat of paint:
Installing new core plugs. Pounded flush with device on the left and set them just below the chamfer with the device on the right.
Replacing the oil pump drive gear roller bearings:
Replacing the e36 pilot bearing with an e30 pilot bearing:
Rods refurbished, new wrist pin bushings installed, and balanced:
Head work was done by Shant of Myster-e performance. Can’t say enough good things about him. Lives and breaths e30’s, does great work, and awesome to deal with. Fully assembled and ported head:
In regards to clearancing the block to fit the s52 crank. Apparently there are some internal differences such as smaller oil gallery casting between the E and I blocks. The early model (86-87) e blocks being more desirable for fitting oversided cranks. That being said the only clearance issues I ran into while test fitting the s52 crank in my e block (with s52 rod and stock piston) was the #1 con rod big end would just barely clear the aux shaft every couple revolutions. This was due to the raised text on the aux shaft. The other issue was when the crank is swinging through bdc the shoulder of the con rod just kisses the bottom of the bore where the casting line left a bit of extra casting flash behind. It probably wouldn’t be an issue after the block was bored but it was something I wanted to address anyway. Here are some pics illustrating the issues.
High tech tool used to measure bottom of bore to conrod shoulder clearance. A piece of banding strap about .025”
All bottom end clearances were checked with a dial bore gauge prior to bottom end assembly. The goal was to adhere to the .001” of clearance per inch of journal standard. Ended up using kolbenschmidt main bearings due to glycos being all over the place clearance wise. Tried using kolbenschmidt rod bearing but couldn’t get the clearances to where I wanted them. Had to use clevite std and +1 shells to dial the clearances in.
Assembly time:
Block loaded with lubed main bearings ready for the crank:
Main bearing caps torqued to spec except for the #6/thrust bearing cap:
seating and checking thrust bearing clearance:
Pistons and rods adsembled and ready to be installed:
Note the absence of oil control ring land where the wrist pin bore and ring land intersect. This requires an oil rail support ring to serve the purpose of the ring land.
Bottom end assembled:
For shits and giggles i checked piston to valve clearence. Loaded the valve reliefs with clay and snugged the head down with the old head gasket.
Rotated the engine through a couple revolutions and took the head of to see what i had:
Guess i don't need to work about ptv contact :)
For the heck of it I left the clay in place and put the head back on and left the crank at tdc and rotated the cam through a revolution to see how non interference the pistons really are. I'm kicking myself now for not taking any pics, but it is non interference by a very small amount. Something like 2mm.
With that verified i started fitting the ij crank scraper:
Further assembly:
Crank hub spacer/oil seal surface:
Stepped washer face machined down:
Head on:
Bitch tube restrained:
Further assembly:
Injector refurbishing:
Got a new bmw oil pump but couldn’t help but notice how dirty it was. It looked like it had been shaking around inside a cardboard box for the last 10 years. I decided to take it apart and I’m glad I did because it was filthy inside.
Once inside I couldn’t help but to make a few improvements 8D
Installed the crank scraper and oil pump for the final time and closed up the bottom end. Used the double gasket method with a coat of high tack on each side of the gasket:
Now to address the oil pressure transmitter mounting and plumping. After some research I decided to make my own banjo block.
Started with this:
After some huffing and puffing with a hacks saw and file:
Ended with this:
Final install:
Gauges:
Acquired a big bore throttle body from a forum member. Disassembled to give a cleaning and to 180 the throttle shaft to allow for running an e36 variable tps with megasquirt:
For comparison the T-gage is stock throttle body diameter:
It was getting time to take the engine off the engine stand to start installing the flywheel and related parts but was having trouble finding a safe way to leave it on the ground without having it attached to the cherry picker. The thought of possibly damaging the oil pan and having to refit the crank scraper was motivation enough to build an engine stand for the task.
Flywheel torque down:
Disk in place:
Pressure plate torqued down:
Went with a sachs pn 883082 618 (“618”) pressure plate and organic compound sport disk (pn 21 21 2 226 841) for their extra clamping ability.
Surgery awaits:
Out with the old:
Crusty throw out bearing and nasty bellhousing:
Installing new input shaft seal and cleaned bellhousing:
New pivot installed:
Throw out bearing comparison stock on left e21 (21 51 1 204 525) on right for use with “618” pressure plate:
The stable awaiting its new ponies:
In with the new:
Getting used to the new home:
AKG delrin shift carrier bushings:
Double shear shift rod:
E60 545 short shifter pn 25117546373:
Side by side with z3:
Center support bearing was shot and the u-joints were pretty crunchy so I decided it wasn’t worth the time to reinstall it and sourced a rebuilt unit from powertrain industries in Gardena.
Induction set up:
At this point I was pretty much down to waiting on the headers to arrive. Was just tidying up little things here and there to make the time pass. Finally the day came when the headers were set to arrive. I felt like a kid the night before Christmas. I barely even slept the night before due to the anticipation. I tried to keep myself busy until 2pm when the ups guy usually comes, but he didn’t come until 6!
I thought about waiting until the next day to install them but there is no way I could possibly wait not to mention another sleepless night. Header and mid pipe install went pretty smooth as expected with the tubular design “bav auto” headers as they come with a mid pipe that takes the place of the cat and bolts up directly to the muffler. Thanks again to bullet ride for organizing the group buy!
After the headers were installed I took a quick breather and inhaled a power bar. I collected my thoughts for a bit. As the moment of truth approached I added the oil, rechecked all the fluids, and primed the oil system. Then came the moment of truth. I turned the key and it fired right up. Verified oil pressure and immediately turned the idle screw in to bring the idle up to 1500 rpm. Quickly checked for major leaks, set megasquirt to ve analyze live (veal), and backed out of the drive way to start the break in process. Keeping it under 4000 rpm but above 1500 rpm until coolant and oil were up to temp to allow for the cam to run in. Once everything was up to operating temp I proceeded to drive it like I stole it. Giving it varying rpm with lots of wot and decell gradually working my way up to redline I had the rings mostly broken in with in 20 miles or so. Brought the car back in drained the oil checked for leaks and haven’t looked back since.
Initial impressions during the breaking in process were it was very apparent there was something more powerful under the hood and was quite a handful compared to the high mileage engine it replaced. It definitely has gobs of torque down low through midrange and is very strong up to about 6500 rpm where you can feel it running out of breath. Of course some canyon carving was in short order and let me just say this thing is really at home tearing up the switch backs of Mulholland drive. The low end and mid range make it the perfect dd / canyon carver.
Final Specs:
3109cc
10:1 compression ratio
S52 crank (89.6mm stroke)
S52 rods (135mm)
86mm Metric mechanic non interference sport pistons
Myster-e ported cylinder head
Metric mechanic sport cam 286/260 specs here:

Metric mechanic beehive valve springs
Ireland engineering heavy duty rocker arms
Vac motorsports adjustable cam gear
63mm BBTB
“Bav auto” headers
Bosch design II 30lb injectors
Ishihara Johnson crank scraper
Whodwho pnp Megasquirt 2 extra
228mm Single mass flywheel lightened to 13.5 lbs
“618” sachs pressure plate and and sport disk
After 600 miles and tuned as well as I could get it on the street I headed to the the dyno.
The redline is the baseline before dyno tuning and the blue line is after an hour of dyno tuning:
I was way past mbt on ignition at wot lol.
Pre dyno:
Post dyno:
I’d like to thank all the people who have helped me along the way. Jim, Ted, and Cort at metric mechanic, peerless at e30 motorwerks, and all the forum members that answered countless questions in threads and pm’s. If it weren’t for all the helpful people out there I’d still be stuck in the mud.
Future projects entail:
Subframe bushing, rear trailing arm bushings, stainless steel brake lines, IX rear sway bar and bushings.
Play with adjustable cam gear
Build a cold air intake similar to the miller psik using intercooler piping
E36 steering rack


Comment