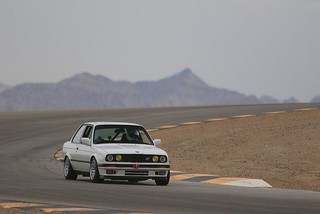
good stuff
Clint Eastwood: Old and white on the outside, black and leathery on the inside. +S52!
Collapse
X
-
It's a 1985 Kawasaki GPz550, but the Japanese spec one so it's a little quicker and has some neat JDM parts.
So I finished the exhaust today, but it leaks because the little EGR delete covers I made have no gasket and are super noisey.
So once everything was fitted, I solid welded it all.

My TIG welding has become so much better then when I was first learning last year. (on the bike) I really can't see a reason I would ever go back to MIG, when TIG is so much better. I wish I could focus on the rest of my life the way I do with my car. (and remember what I learn, jeez)

WALKIN' DA CUP

Once it was all welded, I bolted it all together in the car.

Dirty underbody. :( Not much you can do about that I guess.

Mid section needed some tweaking to fit, but nothing serious.


The whole thing hangs 1/4" from the car is most places. It sounds pretty fabulous, NOT TOO LOUD, which I am very happy with.
And the Stromung's price is totally justified by the sound, for those wondering. Highly recommended.

The bolts and nuts for the exhaust didn't come in yet, so that still has to be done, as well as put gaskets in with my EGR delete plates.Comment
-
nice exhaust work
i have the same stromung muffler, it sounds greatComment
-
Comment
-
Sorry I haven't updated anything in a while. I've been travelling/living in Asia and will continue to do so until 2017ish.
The car is in storage, but here are some photos from before I parked it.
Cardinal seat reupholstery! (Sorry I don't have many photos of the process. A old guy who used to do upholstery helped me immensely, but the seats look super good.)


Unfortunately the S52 didn't go in before I parked it, but that will be finished (maybe) by a close friend Summer 2016.
STEP 1: Buy an S52 that someone lost interest in for quite cheap.

STEP 2: Order parts.
STEP 3: Machine the block, replace the bearings, rings, etc and reassemble.


STEP 4: Reassemble the top end.

STEP 5: Park it in the underground and move away. (not before putting some Euro headlights and grills on, with a sweet new iS lip!)

See ya'll again soon!
EDIT: Couple of bonus pics.

 Last edited by MaxBell; 12-21-2015, 05:53 AM.
Comment
-
And, we're back folks...
The S52 build is now getting back underway. :devil:
Huge shoutouts to Spezzano Motorsports in Ottawa, Ontario for making all this possible. If you need any custom swaps or unique performance work done, no one knows BMWs like these guys.
Check em here: https://www.facebook.com/spezzanomotorsports/?fref=ts
First off, take the engine to the shop and finish building it.


Oil pump on, nut lock-tight'ed. Clean the E34 pan, bolt it on.
DIRTY PAN

CLEAN PAN

Comment
-
Attach the dip stick and manifold supports.

Sandblasting and painting some parts.


The wrinkle black has a super cool texture.

The oil filter housing has to be finished, then they all go in the oven to be baked.Comment
-
Seeing that early model ass with the late bumper makes me consider hacking my late model valence off... Its not in the best condition but who knows. you will love the 24v
Are you sticking with the G260 or going with a ZF?Simon
Current Cars:
-1966 Lotus Elan
-1986 German Car
-2006 Volkswagen Jetta TDI

Make R3V Great Again -2020Comment
-
Thanks for commenting. :P
Yeh, I love the late bumper with the early butt. Solid combo.

I'll go with the G260 right now, but I'm looking for a 420G 6 speed for the future.Comment
-
Nothing wrong with the G260, especially because if/ when you find that 6 speed you dont have to change your diff. Thats my plan and I actually have a plan that might reveal the early butt again soon, but thats not until mine is more "fuhraze"Simon
Current Cars:
-1966 Lotus Elan
-1986 German Car
-2006 Volkswagen Jetta TDI

Make R3V Great Again -2020Comment
-
Just some more part painting.


Comment


Comment