If this is your first visit, be sure to
check out the FAQ by clicking the
link above. You may have to register
before you can post: click the register link above to proceed. To start viewing messages,
select the forum that you want to visit from the selection below.
I always love to see updates on your thread, as I know it's going to be you doing something PROPERLY
Nice work, as always!
Thank you :-)
Originally posted by frankenbeemer
Good work. As I said before, your threads are like jlevie, but profusely illustrated. What did you clean the calipers with?
I started out with a 1/4 angle die grinder from HF only with my pancake compressor I got a good 5 seconds at full speed so I broke down and bought the 6" bench grinder and threw a wire wheel on it. I should have done that ages ago and wound up using it not just on the calipers but to also clean every nut and bolt I could get my hands on as well as cleaning up screwdriver/can openers & chisels etc. You will see how nice they turned out when I get to the brake section.
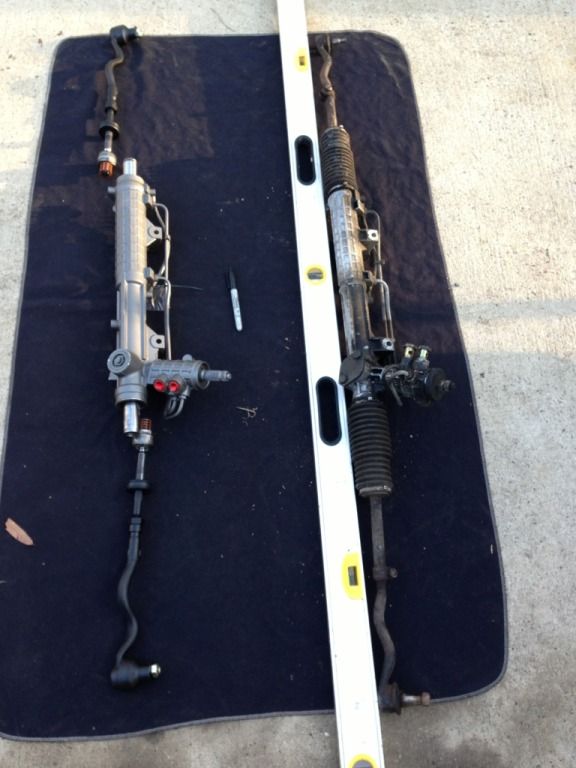
A lot of what we do involves finding the best method to get a particular job done. The 1st step is to rough match the new rack and tie rods to the old so your alignment is at least close. This worked well enough for me the last 2 times such that neither of those cars have had alignments.
I used a straight edge for consistency
and centered the rack. This was the measurement of both ends and the e36 rack has the same dimensions as the e30 version
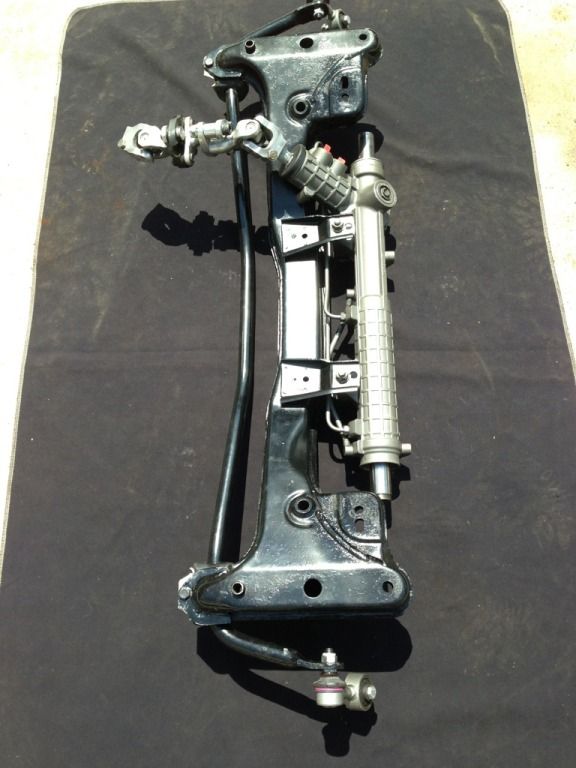
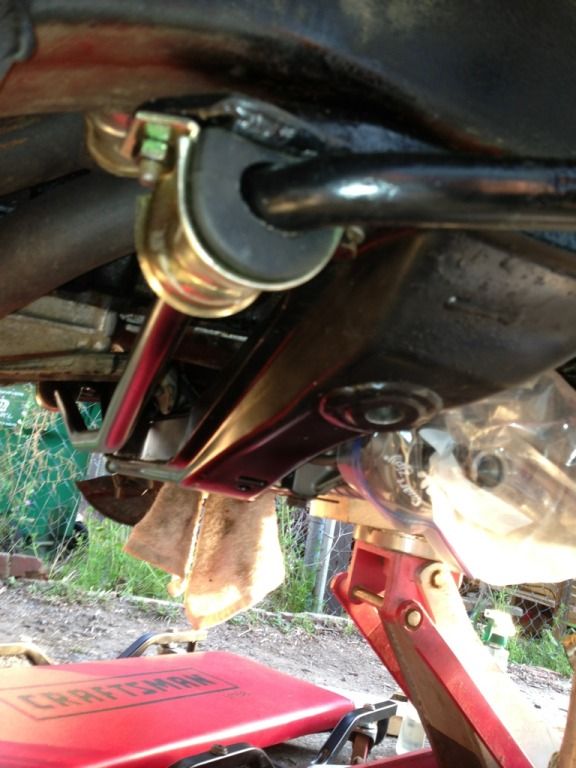
After getting the tierods locked down I removed them and got the subframe ready to install
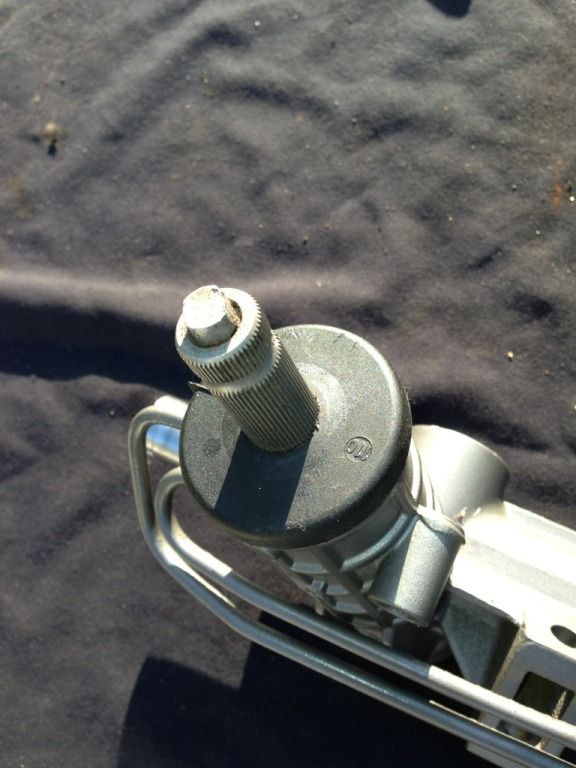
Last rack swap I found out the hard way that the remans do not come with the plastic cap in the pinion and wound up having to remove the newly installed knuckle and install this thing with the rack in place. Its actually a very tight fit and was not fun to do that way so here is your friendly reminder...do not forget to swap the cap over prior to install
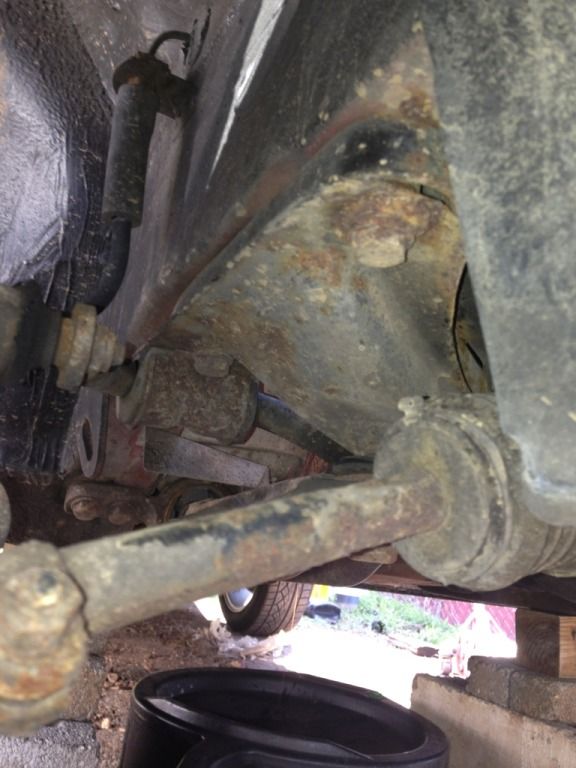
As Ive written in the rack swap DIY's, I put just the passenger side rack bolt in loosely and then can pivot the rack to install the knuckle on the steering column splines..very easy IME...but to pivot a subframe and its locating dowels was a PITA so yes, pre-install the rack, but leave the bolts finger tight then remove the drivers side bolt to put the knuckle in after the subframe is in
For comparison...before
and after
So yes its coming along..but wait a minute...go back...something is missing
Seat Shocks....I have passed the baton to John Christy from Ninestitch. Email John or Garrett at ninestitch1@gmail.com
Ok Ok...so I actually lost my phone in the house on Sunday along with all of the pics I had not uploaded so the visuals will be limited.
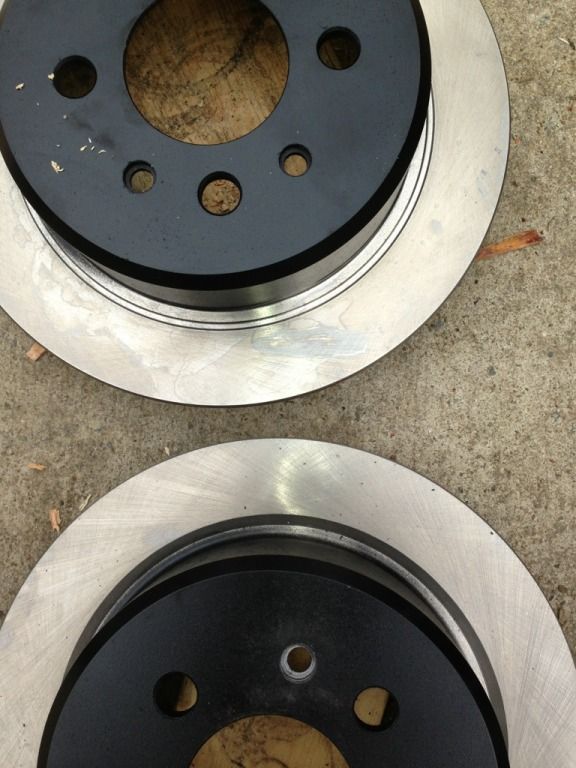
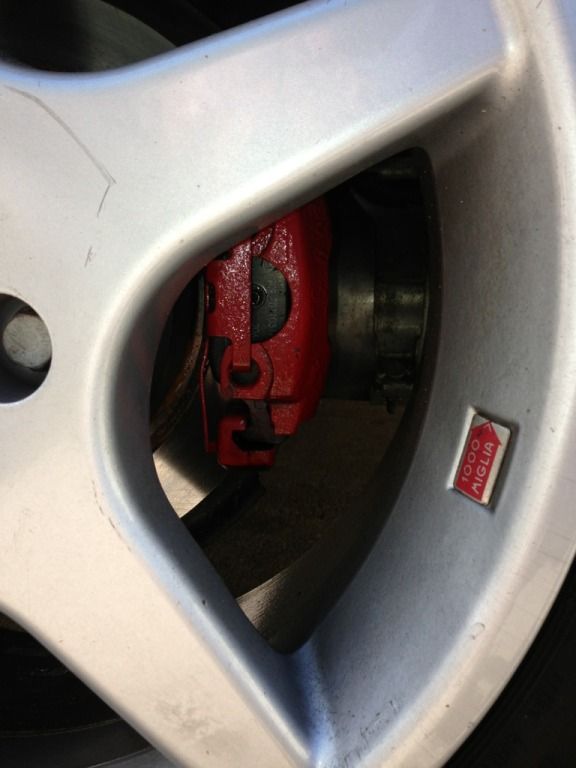
Besides the front subframe overhaul I also did the brakes. I got the Textar front rotors from a fellow forum member, had the Jurid front & Textar rear pads, OEM caliper rebuild kits and 6 Meyle brake hoses.
Having read reasonable comments about Centric rotors and being that they were $23@ from Amazon Prime I grabbed them since I didnt feel like waiting more than 2 days to get started. They looked to be well machined but since they lacked the industrial coating of the Textars (actually had no coating whatsoever) I decided to hit the hats with caliper paint.
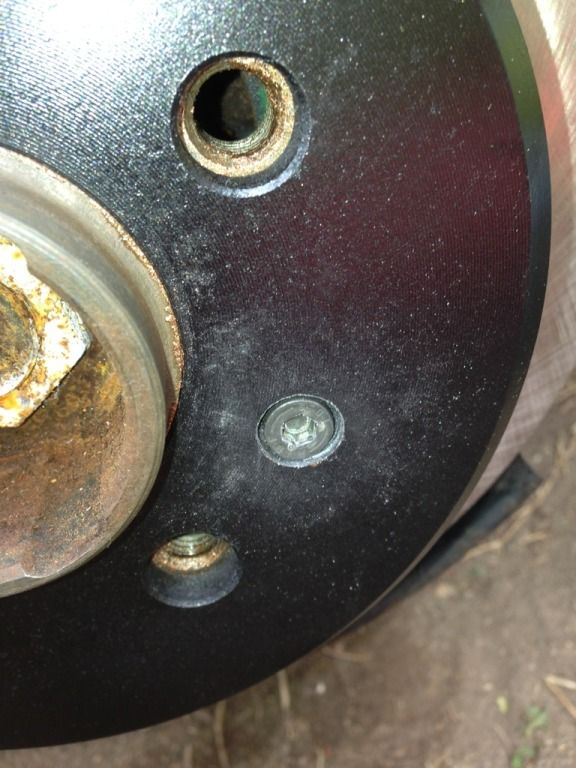
Thats when I noticed that one rotor had 2 holes for the retaining bolt and the other had one and it was not countersunk.
Since all the retaining bolt does is hold the rotor in place until the wheel is bolted on, I took a drill to the hole with adequate results.
Now this is where I really apologize for the lack of photos as the process of paintiing and baking the calipers was entertaining. The light is not the best but I will post better shots later...but I love how they turned out
I will get to the inner rear hoses when I do the rear subframe but otherwise all new pads, hoses, rotors, pad wear sensors & rebuild calipers...in short..a new brake system at the corners. Now all I had to do was bleed them.
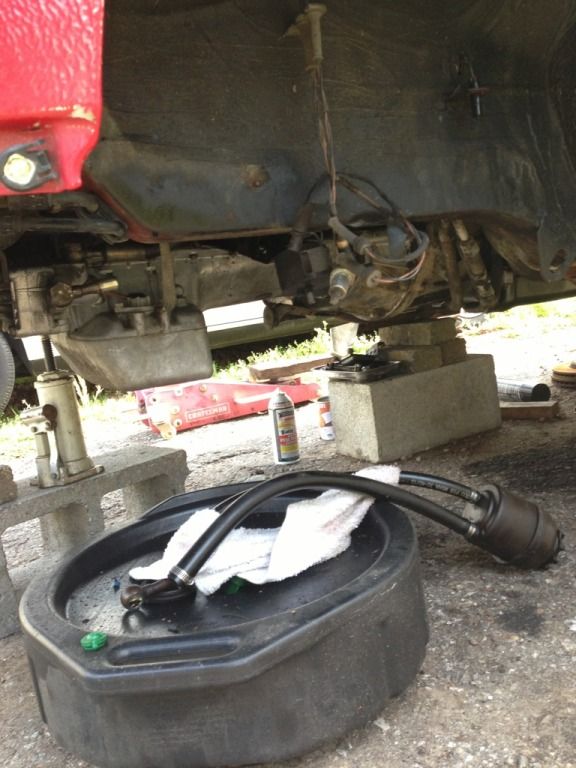
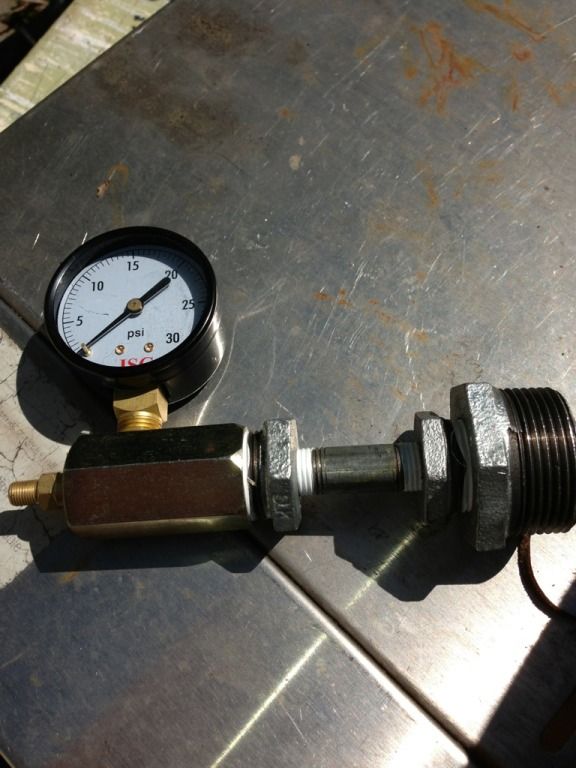
I looked in to power bleeders and did not feel like spending $50then filling it with ATE Blue and really all you were paying for was the threaded cap with the air line, so I decided to make one.
I had an air gauge that I fabbed to test a couple of radiators so just needed a couple of adaptive fittings. Whats not in the pic is the 1 1/4" Fernco that went over the large threaded fitting and also clamped to the brake reservoir. Picture this sitting on the reservoir with a rubber collar.
Although the seal wasnt 100% so it leaked a bit at the reservoir neck, I set my compressor to 17lbs and had someone hold an air line to the gauge so as to maintain constant pressure and to watch the fluid level in the reservoir. It worked perfectly and the brakes are great. Again, my apologies for not having a pic of the bleeder in action...but hey..I survived 4 days without a phone :)
Last edited by jeffnhiscars; 04-20-2013, 08:14 AM.
Seat Shocks....I have passed the baton to John Christy from Ninestitch. Email John or Garrett at ninestitch1@gmail.com
I know the suspense about the missing suspension is too much to bear so here's the deal.
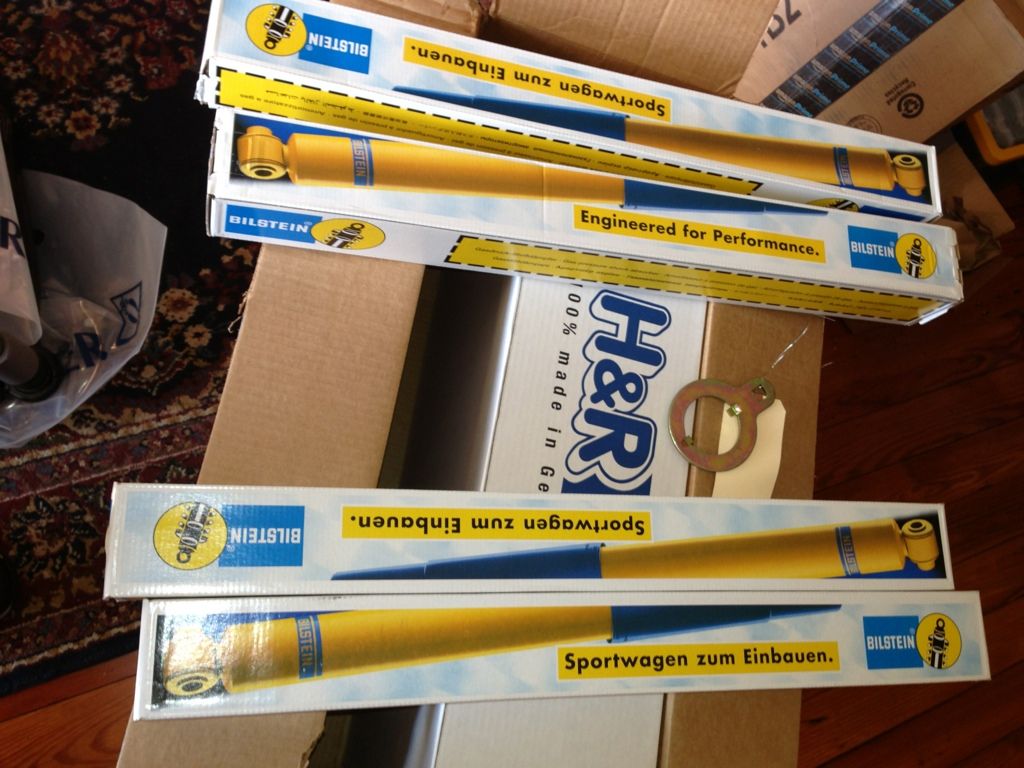
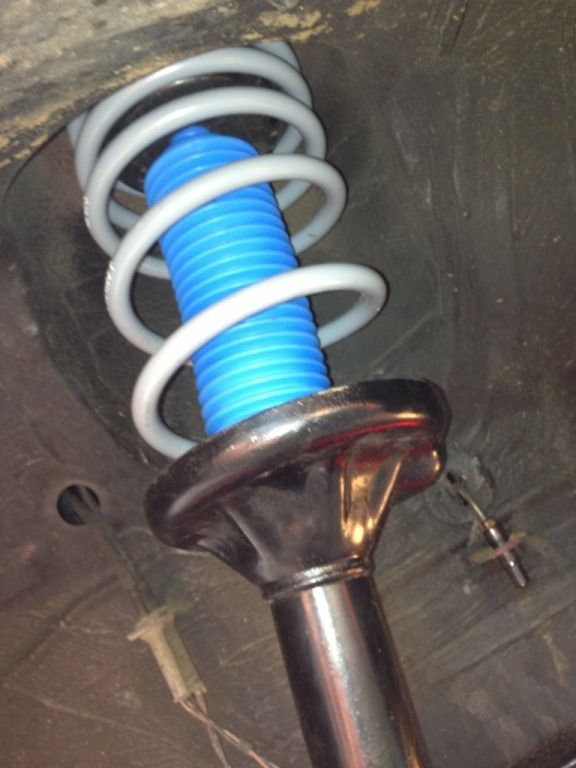
As posted earlier the front struts were totally blown and driving on slinkys was not fun so I installed a set of Bilstein Touring cartridges along with e90 drop hats and new top mounts. The car road ok but that reverse rake just drove me nuts.
I had just bought a pair of MTC rear shock mounts since both Cabrios developed a rear suspension rattle at the same time and having just repaired the AWII mount, I started by removing both rear shocks. I can't say they were blown but it only took light hand pressure to move them so they were sure close. Keep in mind I had just dine the front struts so I was either going to throw a pair of Tourings in the rear or redo the whole enchillada...and since the front strut was just hanging there, with no suspension or brakes attached I thought...hell..am I really going to put that all back together only to redo it in a few weeks or months ?
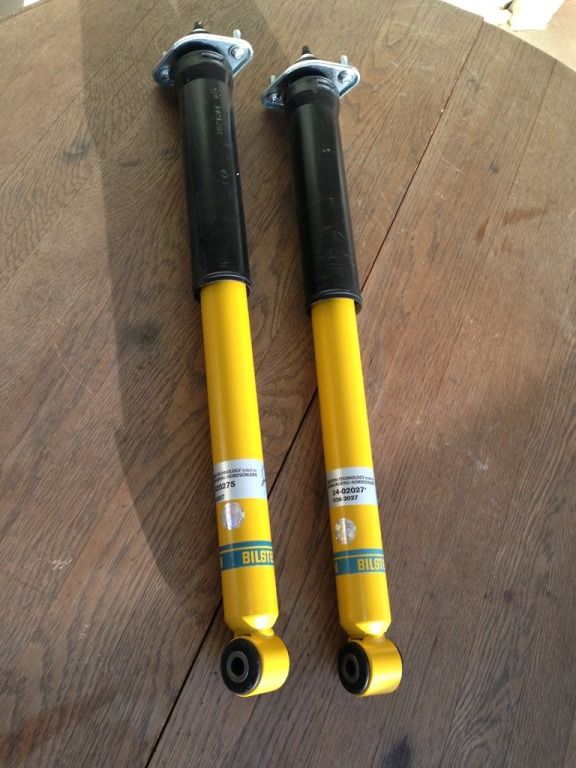
The answer:
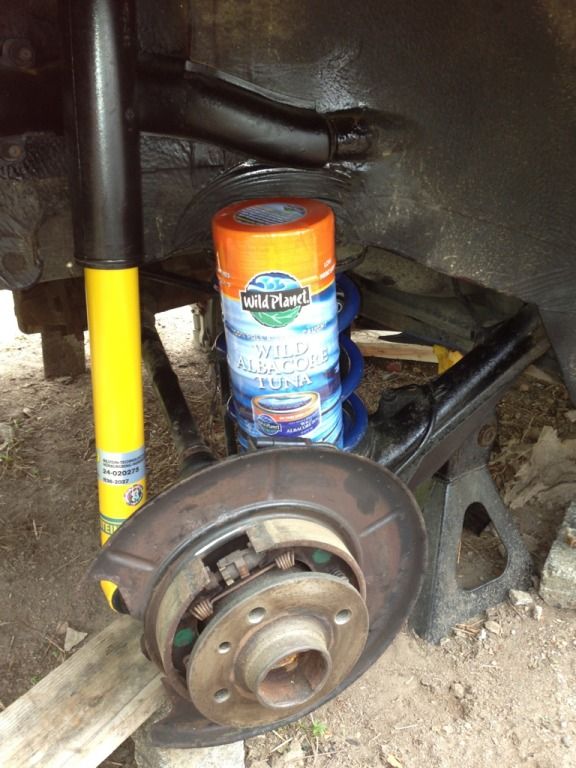
You may not recognize that so this may help
Still not sure ?
I know..I suck :-)
Last edited by jeffnhiscars; 04-21-2013, 06:25 AM.
Seat Shocks....I have passed the baton to John Christy from Ninestitch. Email John or Garrett at ninestitch1@gmail.com
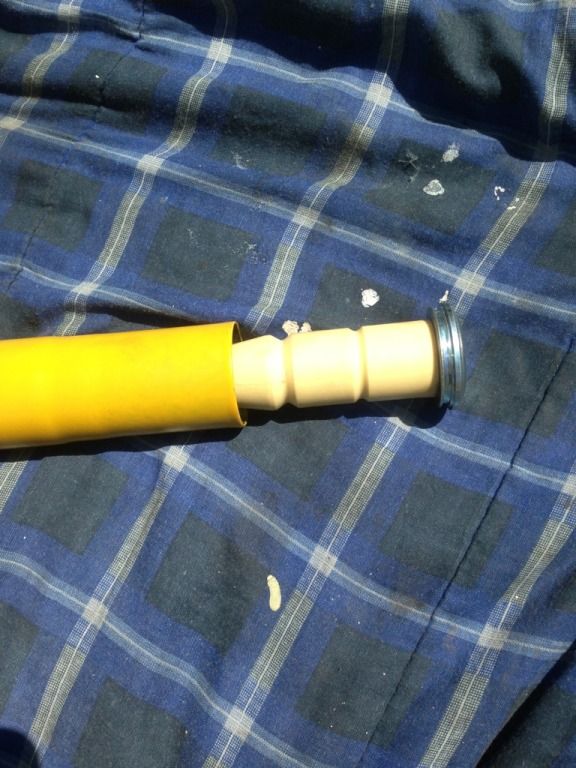
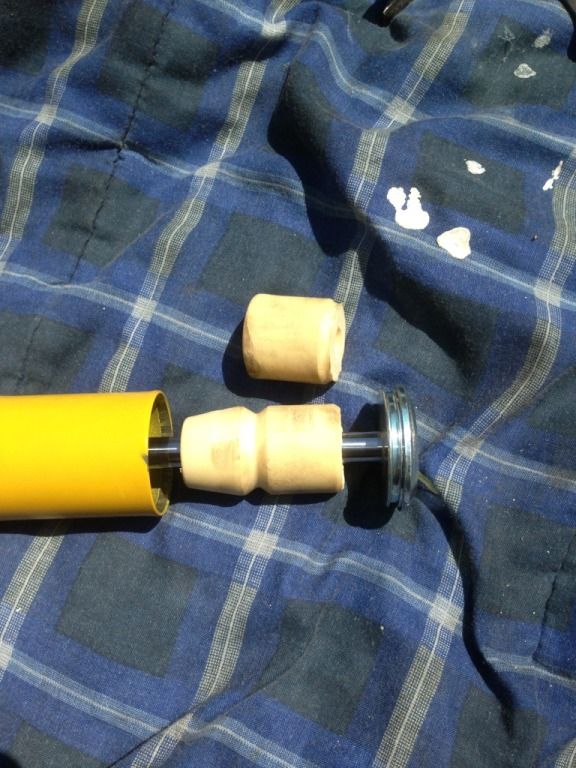
First thing I did was to avoid the mistake I suffered with for 10 years on the 84 318i and I cut down the bump stops. Before
and after
Having recently replaced the front inserts I was really not in the mood to use my HF spring compressors again to screw with this so I went to Gino's who has an $800 strut machine on his wall. It tuns that was a good plan since apparently the welds protruded enough into the housing to make the fatter BS Sport not want to go in without a bit of grinding. For $45 it was a great time saver and a bargain.
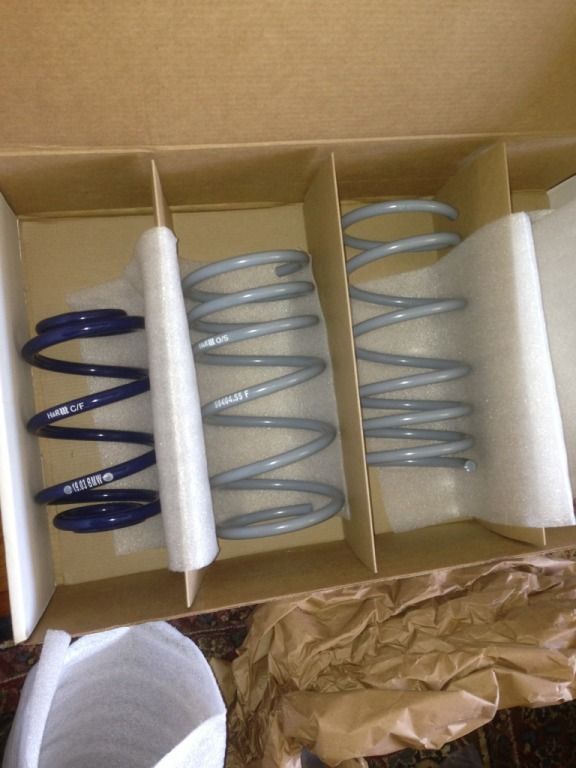
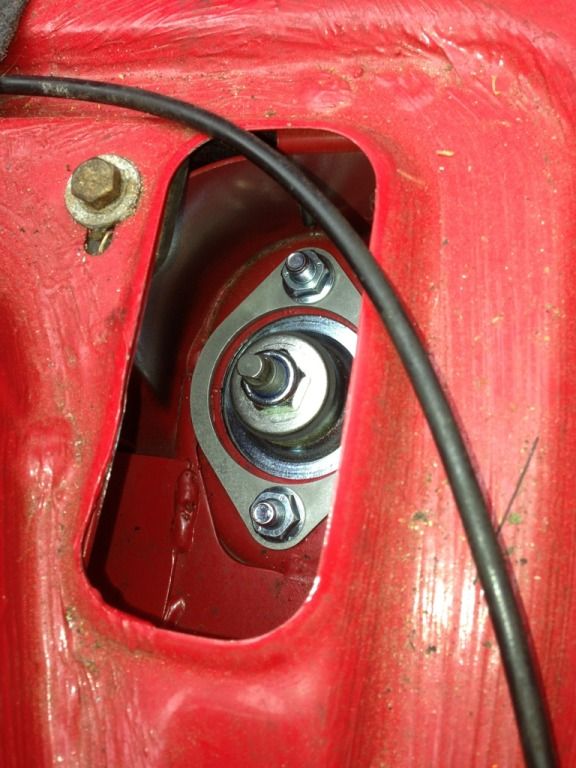
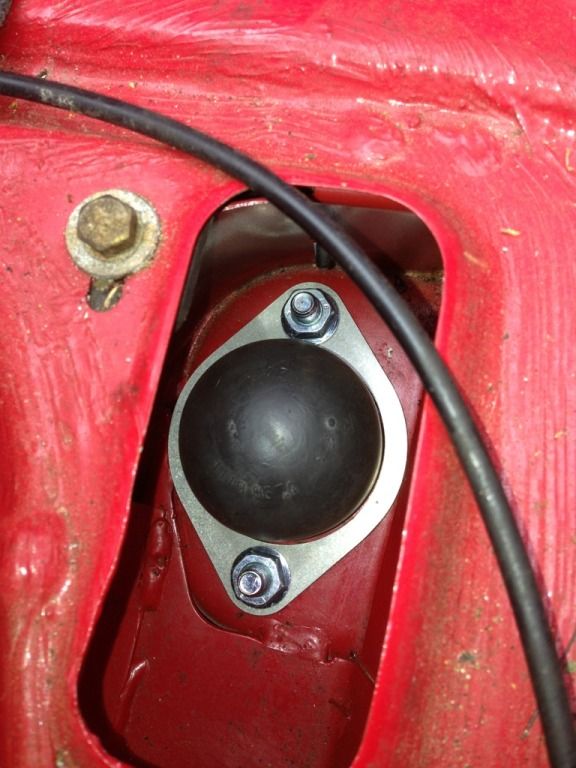
The rears of course were easier and since I was going all out anyway I picked up some Repair Shop rear mounts and reinforcing plates. Of course new gaskets.
No shortcuts here, right Frank
Depending on which rear springs you have, getting them in can be bit of a challenge. I was told these were rated at 380lbs and judging by how little they moved when I put my 160lbs on them, that seemed about right. I managed rather easily with a crow bar and the flat end of a wrecking bar using one to compress the spring and the other to direct it over the bottom nub. It really only took a few minutes and I think the results looked great.
Seat Shocks....I have passed the baton to John Christy from Ninestitch. Email John or Garrett at ninestitch1@gmail.com


Comment