

Glad everything arrived safe and sound!
You can get the fronts to sit lower if you trim the pinch welds on the inside of the frame rails above the tires.
-
God damn dude. The front looks perfect.
What offset are you running in the front?Leave a comment:
-
I've been working on the car a ton so sorry for no updates but it is now time.
I'm 85% complete with the whole bag set up. All of the difficult fabricating is finished so now it's time to touch everything up before it all goes in for the final time. I now see why not a lot of people bag these things...takes a lot of work.
Enough talking time for pictures and stuff.
I started on the rears first. Got the spring out and this is what I was presented with.

Time to play with air tools. ;D Anyways, cut it off and was left with this.

I cut it a little too high so I had a crap ton of grinding to do on this side. Learned from that for the other side which went a lot quicker. Here is what they all ended up looking like after grinding them down flat.

After that I decided to move to the front and start making measurements for all the cuts that needed to be made. It was a little confusing but luckily after some trial and error I got it right. Gathered up all of my parts and headed to my Dad's shop to do a little fabrication.
Making the cut on strut tube.

tacked in. A little too long still so I cut another 1/4" off.


The top hat that comes with the kit is huge and I had the shorten the diameter.
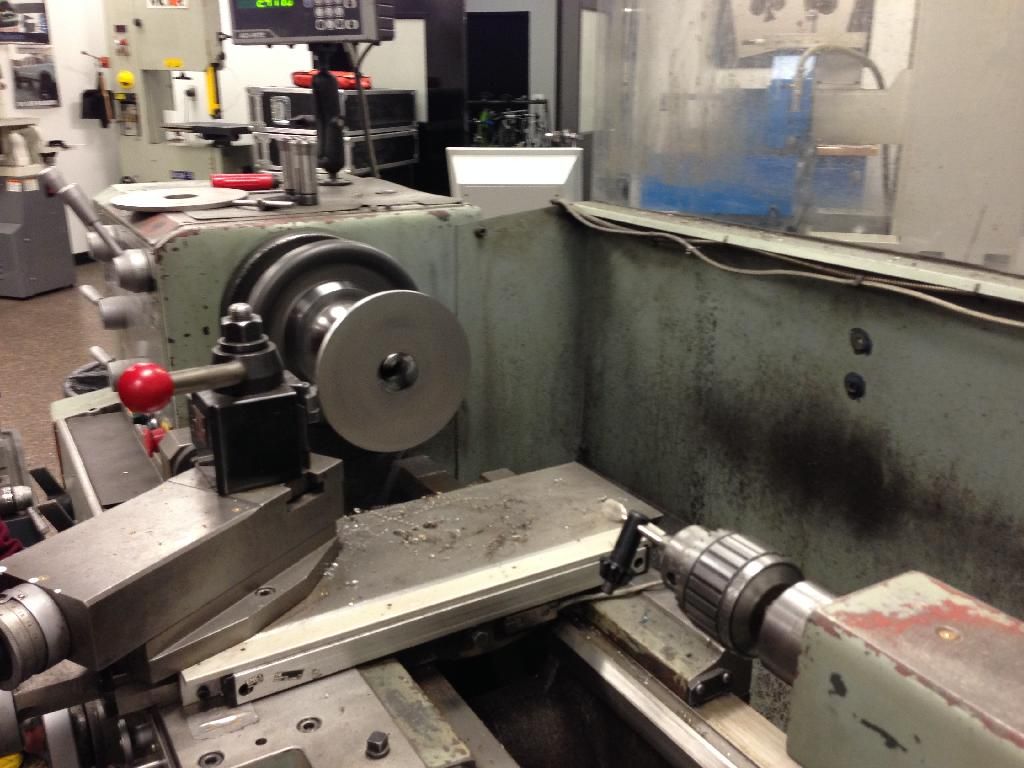
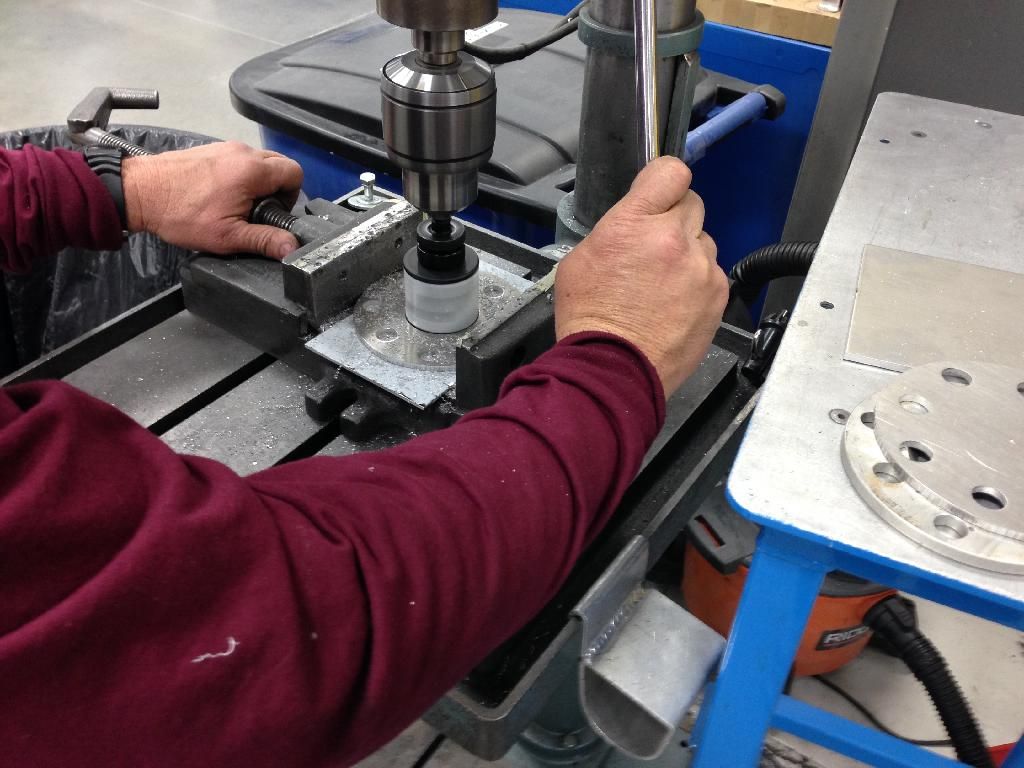
Drilling the holes
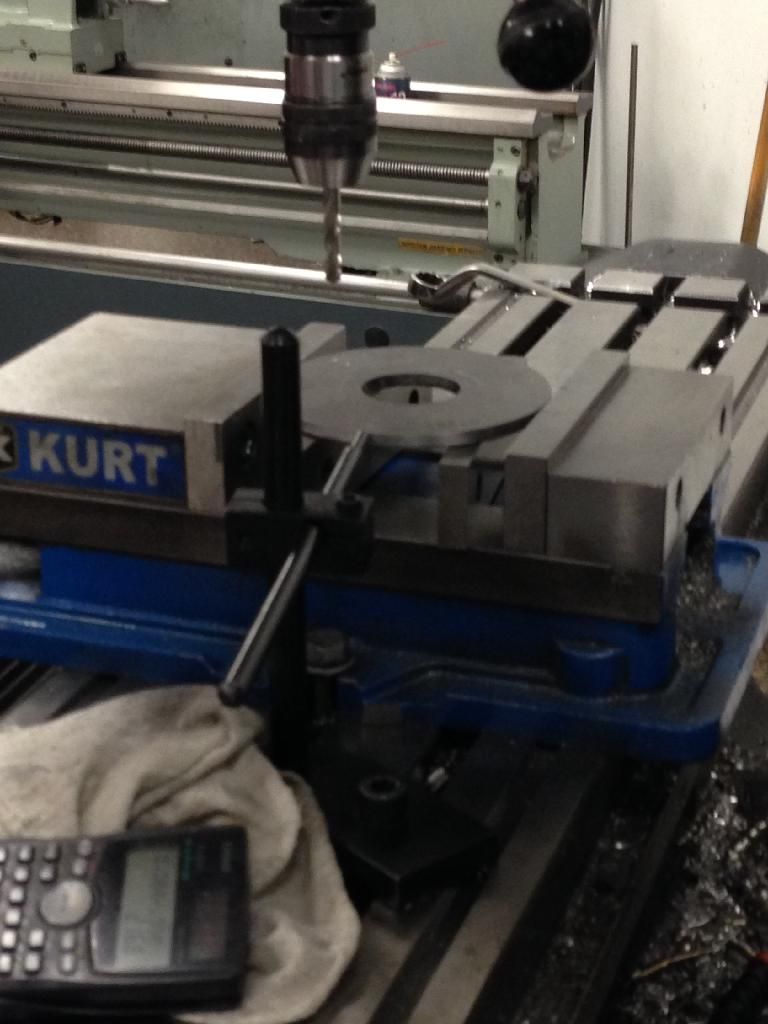
Picture of the room I was working in.
Also decided to make some 3/16" spacers since the 5mm ones were a little aggressive. Just used the 5mm ones as a template and used this awesome machine to punch the holes out instead of having to drill them out.
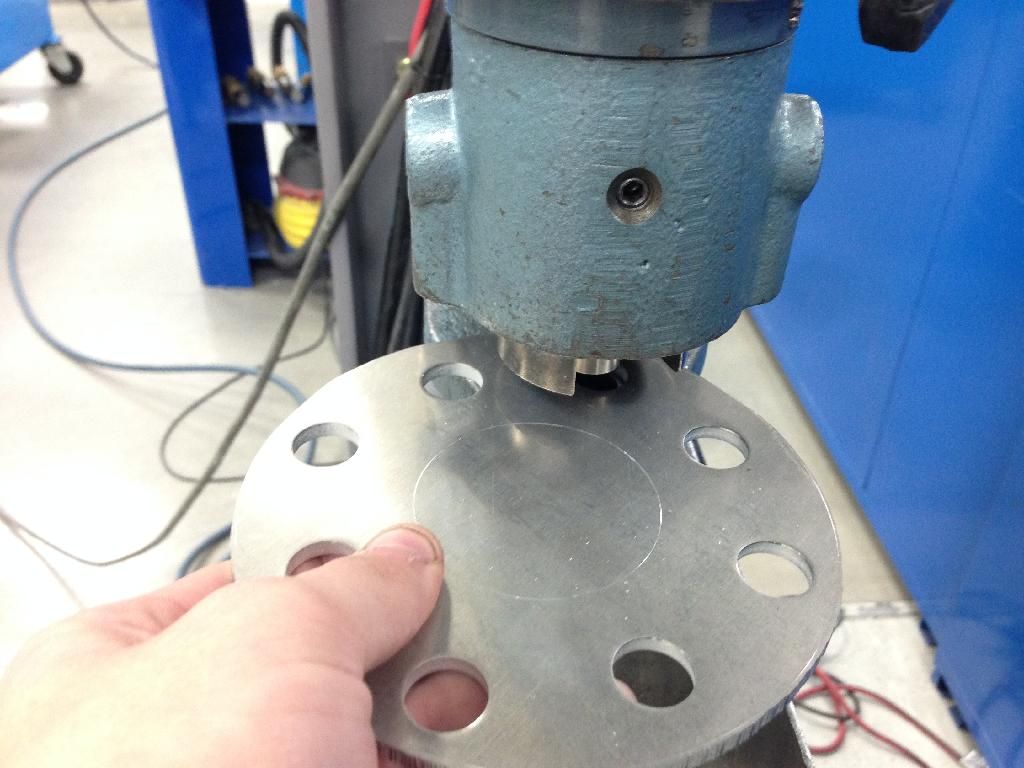
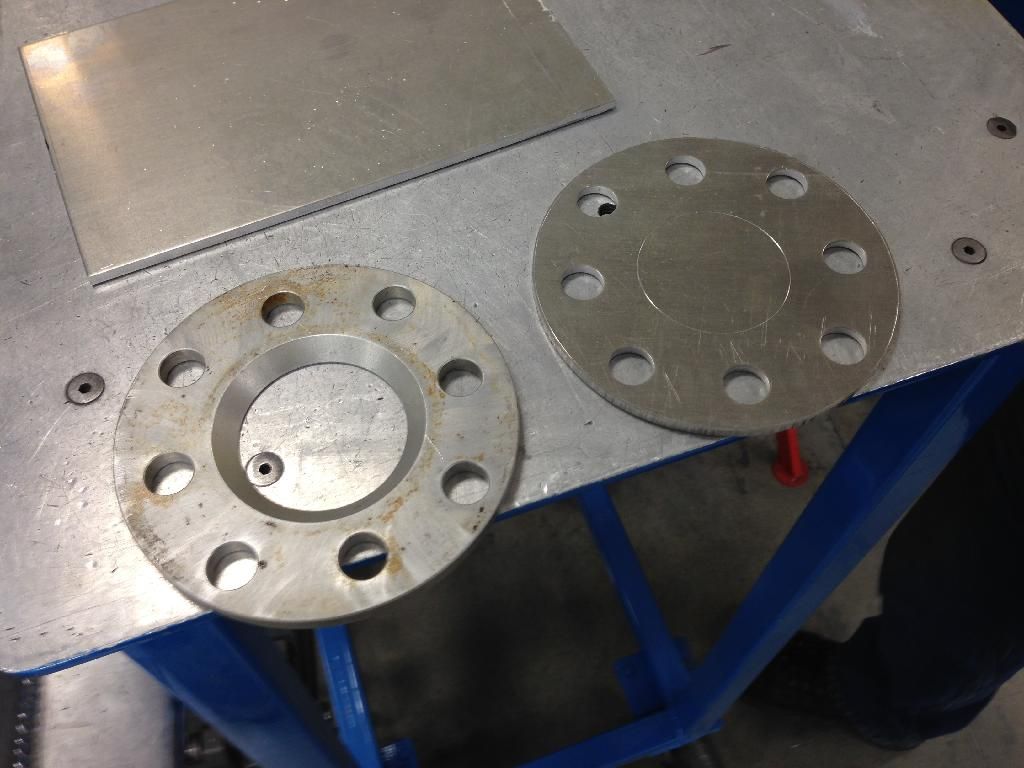
Final product


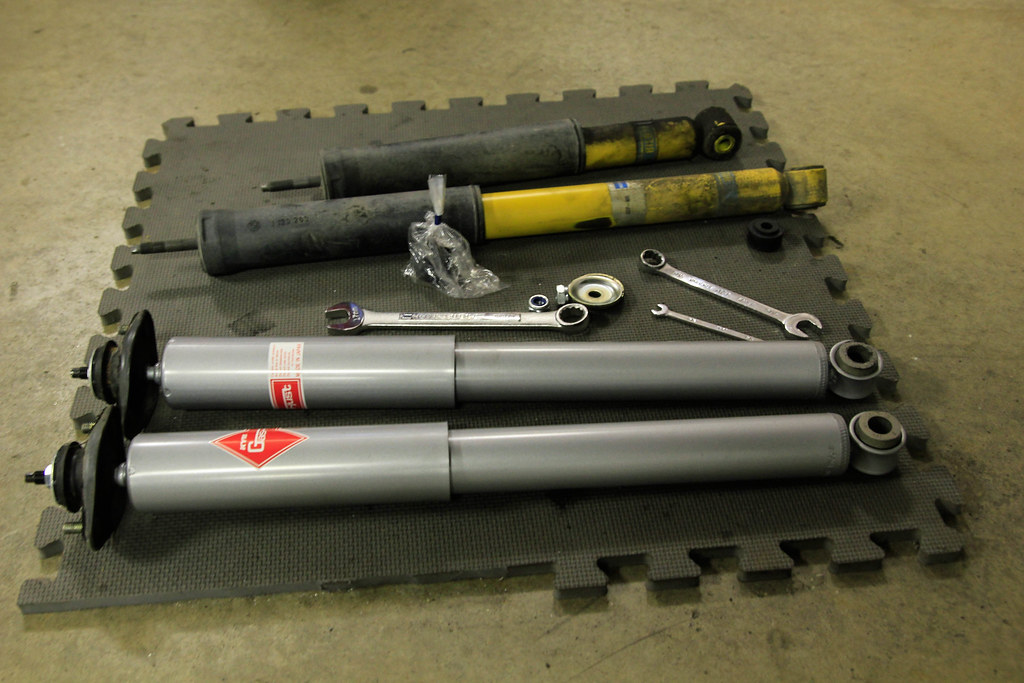
KYB Camaro shocks also showed up for the rear.


Back to the rear. Drilled a hole through the control arm for the bolt to mount the bag.


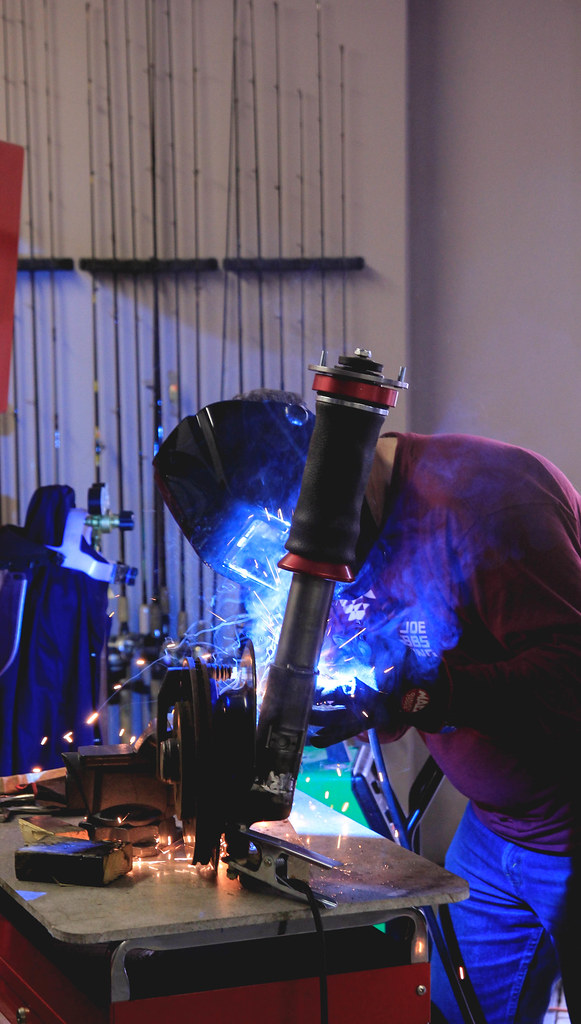
While I was doing the rear my Dad started welding up the front.

Had to do a lot of cutting and some welding on the rear top hat for the bag. Didn't take too many pictures but this is how it came out.


Dad finished up welding the front struts and they came out fantastic.


I forgot to take pictures but built some brackets for the tank as well. Nothing fancy just some simple bends but it gets the job done. Also plugged all the holes in the tank.


For some reason I jump around a lot but I got out the new shocks and assembled the top mount. The diameter for the lower bolt is too big so I have to find something to press in to fit better.

Started wiring everything together. Ran the ignition wire to the front to the fuse box, wired the compressors and the power and ground to the battery. For some reason wiring the ignition to the ignition fuse didn't work but running it to the radio/speedo did, oh well. It's all a mess right now but the compressors work so I just need to clean it all up.


While I was doing all this I painted my late model front valence and is lip using duplicolor universal black. It matches pretty well and I was happy with it. I'll get a better idea of how I like it once I get everything on the car.


All in all it's been a busy past couple of days. I had no idea there was so much involved. Just looking at pictures and reading this thread probably doesn't seem like a lot but it is. I can't wait to come home and finish it so I can see all the work paid off. A little tease.


Last edited by dillon7; 03-21-2023, 03:17 PM.
Last edited by dillon7; 03-21-2023, 03:17 PM.Leave a comment:
-
Today was basically christmas when this showed up to my house


So the parts list includes:
Air Lift Sleeve-over strut kit
Air House 2 rear bag
5 gallon tank
dual 444 compressors
3/8 lines
water traps
325is front lip
Pretty stoked about all the parts. I'll be installing everything over the next couple days so I'll have plenty of updates. Hopefully everything goes along smoothly and I should learn a lot along the way.
Besides opening boxes I sanded down and primed the late model front valence. Going to wait for the weather to be perfect before I paint it.
Say goodbye to static
 Last edited by dillon7; 03-21-2023, 02:36 PM.
Leave a comment:
-
Made some progress today.
Finished welding the exhaust up. I can't TIG weld very well so I had my Dad do that while I took some pics.


I also picked up a late model front valence the other day. It is nice and straight so should work well. I did a quick test fit and it looks really close but I might have to do some tweaking. It will be sanded down, prepped, and painting tomorrow.
Also, some big parts came in today and hopefully the rest come in tomorrow. This build is about to get interesting again Last edited by dillon7; 03-21-2023, 02:31 PM.
Leave a comment:
-
It's kind of hard to find any info, just have to ask around from people that have done it. I've talked to white325is (he sold me my set up, buy yours from him great deal) and NickL and a couple of friends that have bags, not on e30s though, to try and figure it all out. I'll be sure to take plenty of pics and stuff for you haha.Leave a comment:
-
-
-
^ Do they really need that much clearance when fully aired out? I don't I think I've ever seen a picture of them in their fully aired out state.
You're talking about this style, right? (obviously not this exact model)

Leave a comment:


Leave a comment: