Announcement

Collapse
No announcement yet.

Turbo Inka 4 Door: Stripped & street legal rotisserie build + Powdercoating Pr0n

Collapse
X
 
  • Filter
  • Time
  • Show
Clear All
new posts

  • eduTechnic
    replied
    Well, the cabinet is about finished. I added a baffle inside to better direct the sand, and stuck some velcro to a piece of tarp to keep the sand running from the square hole of the cabinet into the round bucket lid hole. This thing evacs dust pretty well! The water was just black black black from teh coal slag dust. That stuff eats through paint so much better than the medium grid silica sand. I did the whole front subframe in like 15 minutes.


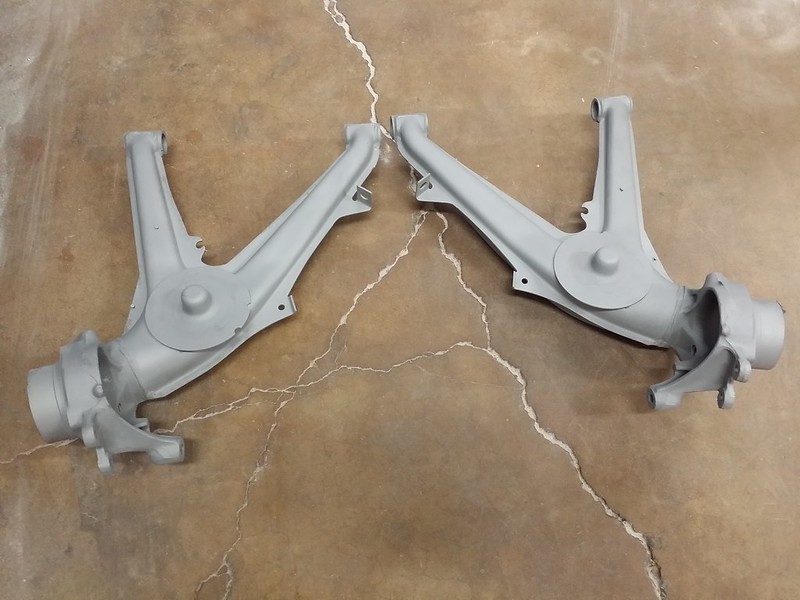
    Going to play around with some different media types this weekend and get everything I'd like to do ready for media blasting.

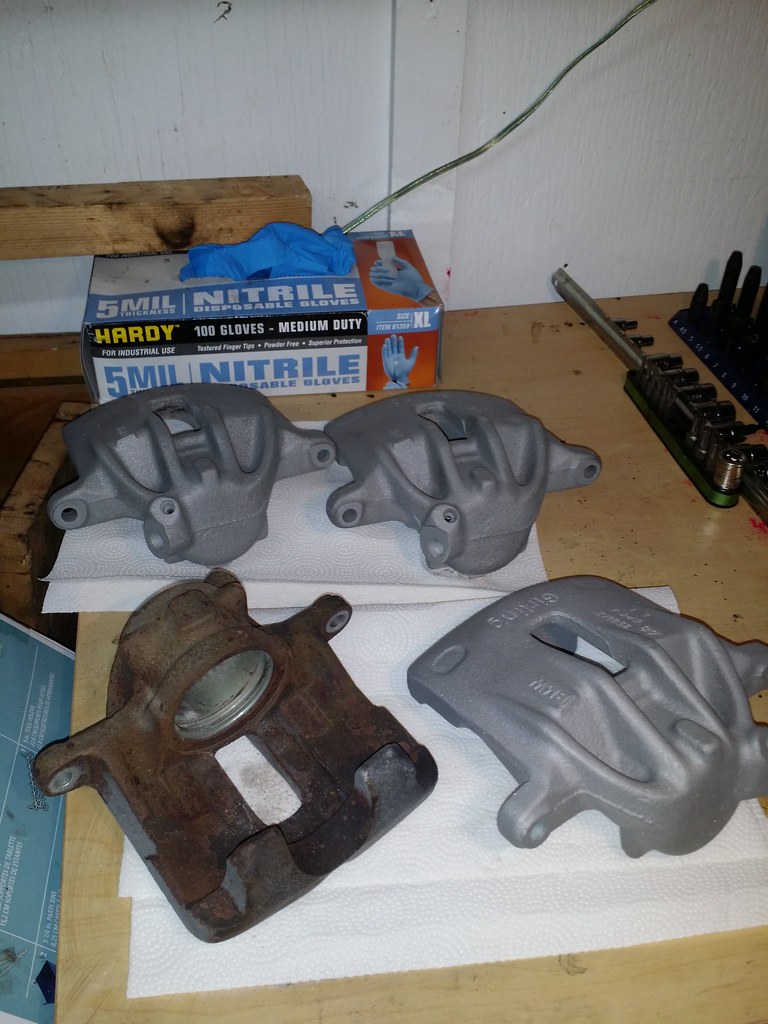
    In the mean time I've lined up a few jobs from people nearby: A set of valve covers from a '56 ford Fairlane, some Audi A4 calipers, and a set of 18" wheels. Time to get my own stuff going and make the mistakes on it!

    Leave a comment:


  • ohrvik
    replied
    nice work!

    Leave a comment:


  • eduTechnic
    replied
    Well, no more work on the car, just infrastructure to work on parts, I guess.

    The single-door 50s fridge was set aside for being slightly too small for the powder coating oven, so I decided to repurpose it yet again to be a blasting cabinet. The pvc-frame "tent" wasn't cutting it, too messy. It did exhaust the dust pretty well though.

    The inner and outer tubs that bolted together, sandwhiching the fridge insulation:


    My wife and I went back and forth on what might work and we settled on the idea that we'd set the fridge on it's back so that the single door opened up and away from you, and the inner tub would set inside the hole.


    In order to have the sand fall down through a screen and into a bucket I needed some angle.


    By cutting out a triangular piece from each side of the inner tub and welding the bottom up along that angle, I had my slope.


    Then I silicone'd the holes that were all over the inner tub for the fridge's plastic trim to attach to and taped off the gap between the two tubs with aluminum tape, then duct tape, which holds up pretty well to blasting. I may have to add some angled pieces later to cover the gaps if it wears out too quickly.


    My wife said "if it's going to be in my yard, I want it to be pretty." Lucky for her Lowes has paint with such names as "Dark Palomino" (orange) and "Koi Pond" (sea foam green).
    Sanded the sucker down and painted it up.


    Next up is relocating the hinges a bit so I can use a thin door seal along the cabinet door edge, cut some holes for dust vent vacuum line and sand hose line, as well as rig up some screen into a 5-gal bucket lid so it screens the media as I go.

    I just bought some pvc pipe flange, elbow, and pipe to go into a bucket filled partly with water. The pvc pipe feeds into one hole in the top of the bucket and has a tube glued to the lid that empties the dust just above the water line, trapping the dust. A shop vac is then attached to the other hole in the lid to provide the vacuum.
    Show don't tell


    Three leftover oven grills fit perfectly inside the cabinet so I'm stoked on that. Waiting for parts from Lowes now...the fresh bags of blast media are burning holes in their buckets, I want more of this:

    Leave a comment:


  • eduTechnic
    replied
    Nothing too much to update. Just degreasing all the things.
    Trans almost done, need to pressure wash inside the bell housing
    Using a siphon gun with low odor mineral spirits, then alcohol, then comes paint. At a certain point they'll all just get pressure washed because PSI is awesome.


    Brother in law came up for our fam's to hang out. Work got done. This lock ring and nuts was completely rust-fused to the hub. Chop chop


    Work mates birthday Bimmered my office. They're everywhere, including under my keyboard and mouse...and phone...wondered why those didn't work...

    I am now the paper roundel king.


    2015 BMW Calendar

    Leave a comment:


  • eduTechnic
    replied
    Originally posted by eurolife View Post
    I'll pay you as long as the kids aren't involved haha


    Sent from my iPhone using Tapatalk
    Aw shoot, hoping you'd go for the kids just so I could watch a 4 year old with a sand blaster go nuts. You're welcome to come do it yourself if you show up with a 100# bag of $8 silica sand from Home Depot (only place I've found it) and some powder or I could do it for a pretty fair price. Subframe would take 3-4 total hours tops.

    Leave a comment:


  • eurolife
    replied
    I'll pay you as long as the kids aren't involved haha


    Sent from my iPhone using Tapatalk

    Leave a comment:


  • eduTechnic
    replied
    Oh yeah bring it up and I'll let my kids do it. No cost. Special, for you.

    Leave a comment:


  • eurolife
    replied
    When I do the 24V swap, want to powder coat my front subframe? :) :)


    Sent from my iPhone using Tapatalk

    Leave a comment:


  • eduTechnic
    replied
    Not too much in the way of updates. I don't have a ton of time but I'm giddy when I get out in the garage. My wife loves how much info I feel the need to share with her about the smallest of details...I can see it in her eyes...that look is fascination and wonder right honey? Right? Honey? Oh, your show, yes, carry on.

    Got these trailing arms done for Mitchlikesbikes. He's tearing mine down with his press at the moment so I get to do this again myself.

    Blasting has gotten a lot easier now. The first arm took maybe 90 minutes, the second, about 30 without ever dipping below 75psi on the media hopper.


    After blasting, I ran alcohol through a Harbor Freight siphon-feed gun at high pressure. Then I baked them for 30 minutes or so. Bit of flash rust after they got out of the oven..wonder if that was from the rainy day's humidity or the alcohol having some water vapor in it. Wire-wheeled that off, alcohol again, masked, and shot powder.


    The first arm came out awful, I think because I had it hanging from some saw horses so low off the ground I couldn't see well. I could have sworn I double checked every inch of this. DAMN YOU FARADAY! (<--1337 science joke, but srsly, Faraday Cages suck on trailing arms).


    Went to the hardware store and bought some 20c/ft wire, and some crimps and hooks and rotating clip that makes it easy to move the piece around while coating. This should fix that! Scuffed up the problem area, cleaned, and shot a second coat on some areas after re-masking and it faded in beautifully after coating while the arm was at 180-220 degrees. Came out of the oven clean!


    Used a wet q tip to remove the powder from the inner stop of the area.


    2nd TA came out beautiful


    Now to drop these off and do all of my suspension. Blasting party this Saturday. Whose coming?! *Crickets*
    Last edited by eduTechnic; 01-14-2015, 11:15 AM.

    Leave a comment:


  • eurolife
    replied
    They are, I've had it for a few months but school has kept me from doing as much as I'd like with it... Had a lot of with it over the holiday break


    Sent from my iPhone using Tapatalk

    Leave a comment:


  • stonea
    replied
    ^3D Printers are the shit!!!! I love mine

    Leave a comment:


  • eurolife
    replied
    I am both of those. Just got a 3D printer as well (work bonus) that I was planning on using for prototyping some m20 ITBs. I could use them for s5X stuff as well.


    Sent from my iPhone using Tapatalk

    Leave a comment:


  • eduTechnic
    replied
    Sweet man. Going to rent a space? Have you looked into the S5X ITB adapter at all? I found a guy locally with CNC table and an engineer in my neighborhood that's interested...buy you are both of those amirite?! Some duder on Bimmerforums (Not RobertK?) advertised a run of them he did a while back. I emailed him and he said they're still in the works.

    Leave a comment:


  • eurolife
    replied
    I'm jealous of the 'fridge' as well. I'm getting a shop down here in Provo soon (I've over stayed my welcome with my 'garage' being an extra bedroom in the house, plus the wife wants to turn it into a nursery) and hope to make one as well.


    Sent from my iPhone using Tapatalk

    Leave a comment:


  • eduTechnic
    replied
    Goodies in the mail Euro cluster with vacuum/boost gauge. Not sure what's up with the "fully electronic vehicle" blank on the fuel level gauge.


    Tried to coat an oil pan for my brother in law's '56 Fairlane, 1st coat was a little thin, heat was a bit too hot. Green scrubbied down and tried to paint again but it was really humid and just when the dew comes out or something, the powder was acting crazy with little moisture dots. I thought it was from preheating then going out in 35 degree weather but I tried shooting powder several times and it was weird moisture/static. I'll have to try again today after work when it's warmer & dryer.


    Wife is getting into it. She wants these done and said she's headed to the thrift store to find some cool old stuff to coat. Whatever.

    Leave a comment:

Working...
X