-
I dont know why but I actually enjoyed rebuilding the pedal box on my last 02. Maybe Im weird hahaha
Good work!Leave a comment:
-
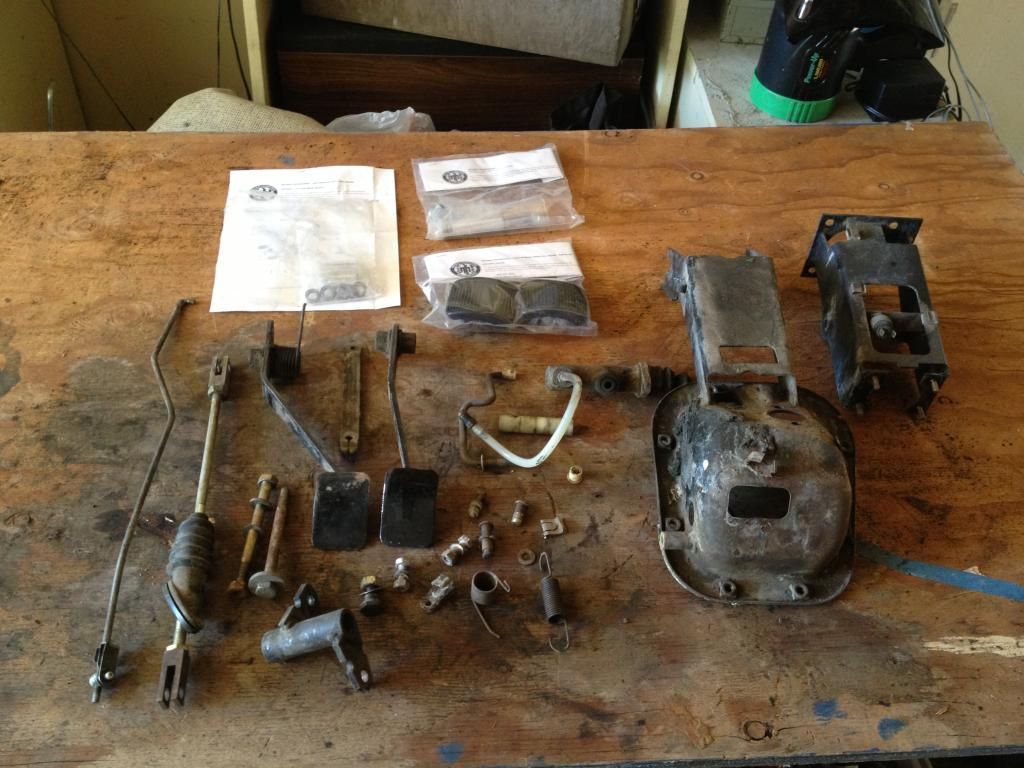
Tedious things today. Stripped down and cleaned the pedal box and all bits associated with it. Here's where I started:
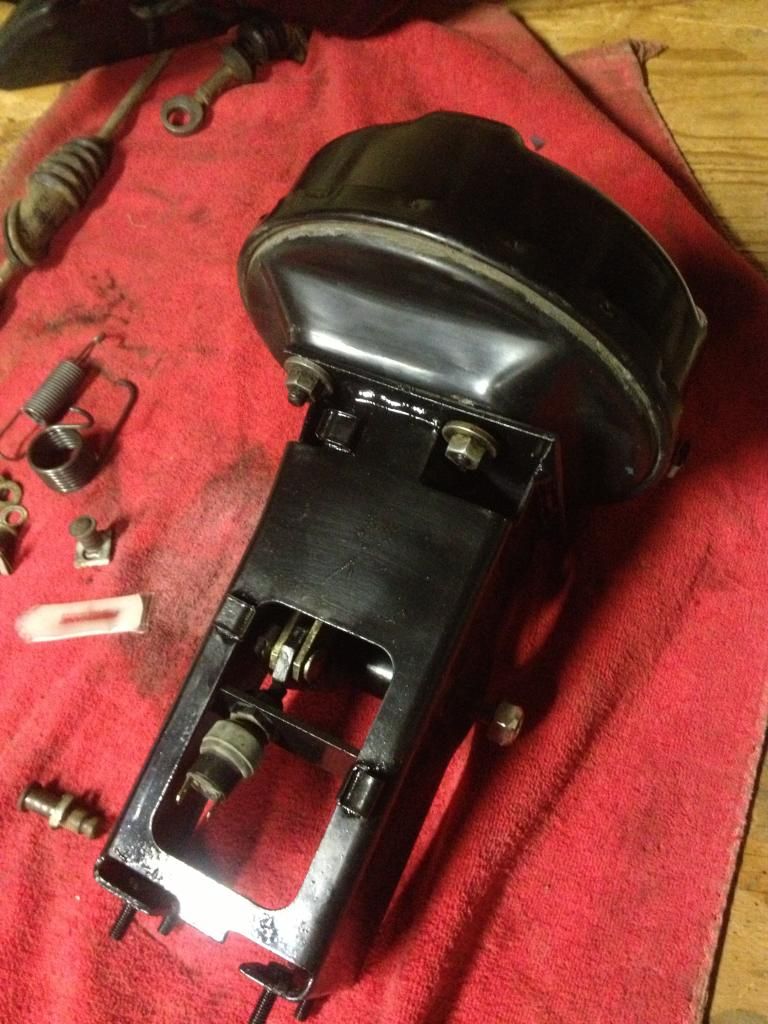
I primed and painted anything metal that was to be reused. The clutch and brake pedals, pedal box itself, brake booster mounting plates, and the booster pivot arm. While those dried I measured, re measured, measured once more and drilled the holes for the 5 speed Massive mounts. Per discussion in Marshall's M2 build on the FAQ, I made sure to grab large washers for the new bolts that secure the mounts. Avoids vibrations through the power train eventually pulling the small bolt heads through the thin sheet metal in the trans tunnel, especially since I have those solid bushings.
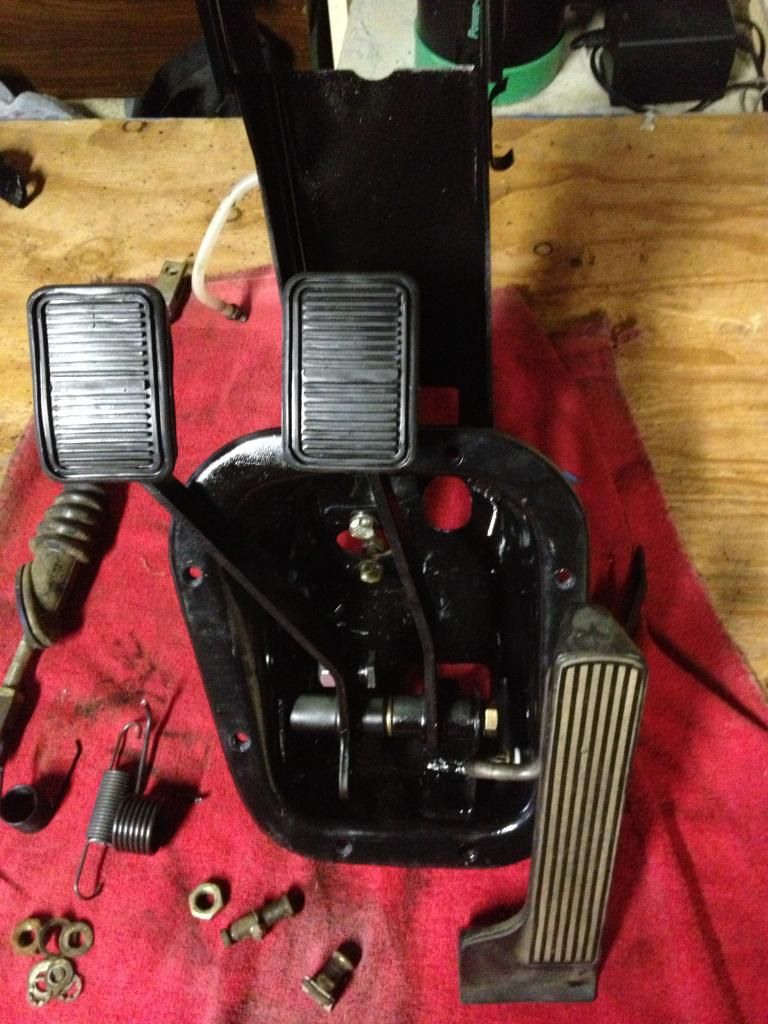
Back to the pedal box. Followed IEs exploded views of the parts to rebuild the unit. Old plastic sleeves are replace with their kit in favor for small bearings and aluminum spacers. Much nicer! It all went together without surprises. Ill take a few pieces off to install the box tomorrow and reassemble once again onto the car.

Tomorrows agenda. Finish the wiring on this guy finally.
Leave a comment:
-
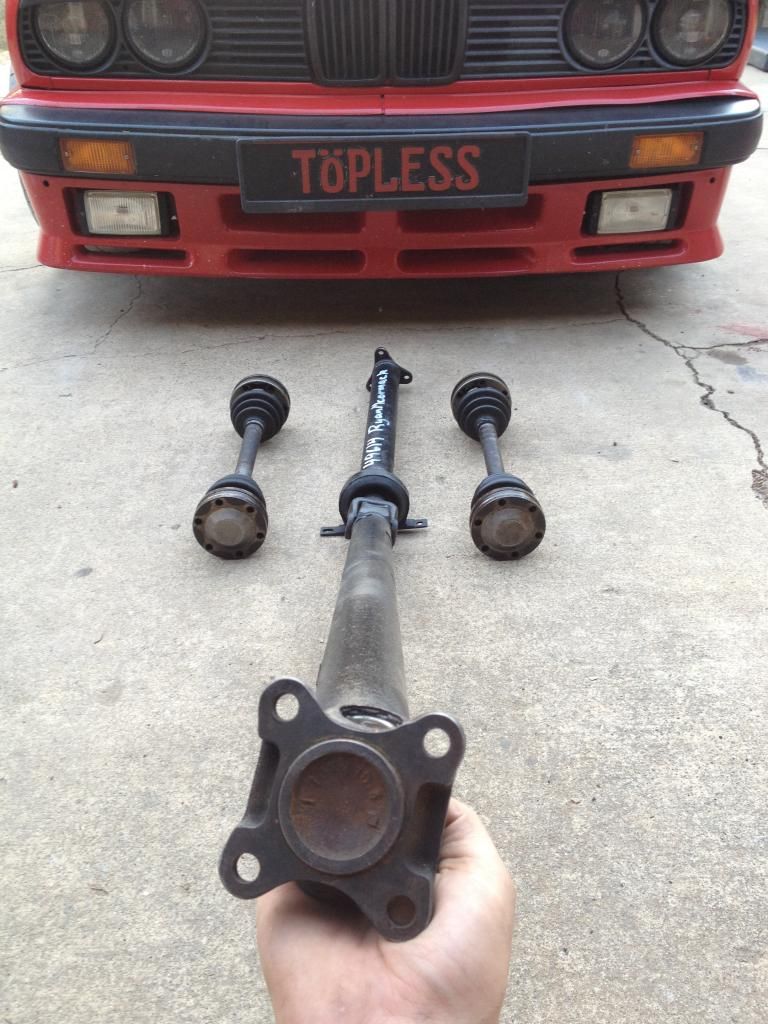
Another long day of work completed. It started out with a couple deliveries. One from Mr. Danco, a pair of E21 half shafts. The other from IE, the new 5 speed driveshaft.
Thought this was interesting:

Despite being handled poorly in delivery everything looked fine.
My brother and I spent some time on his E30 convertible today^. Tranny flush, 750iL master cylinder, louder exhaust. Then we got to work on the 2002...
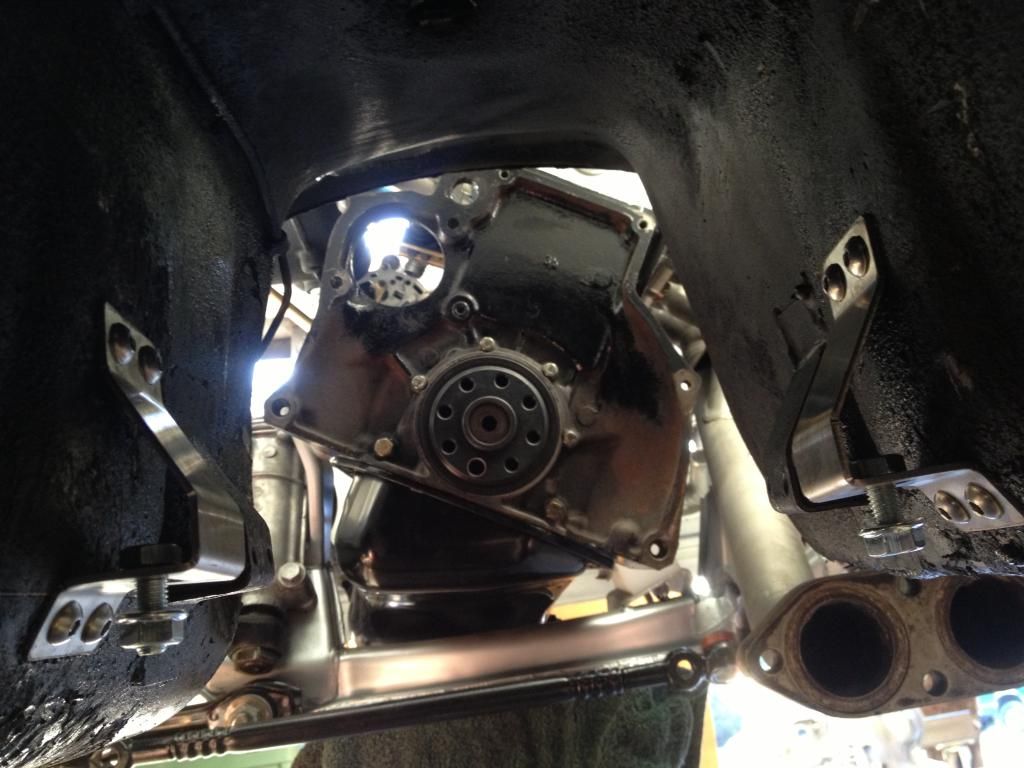
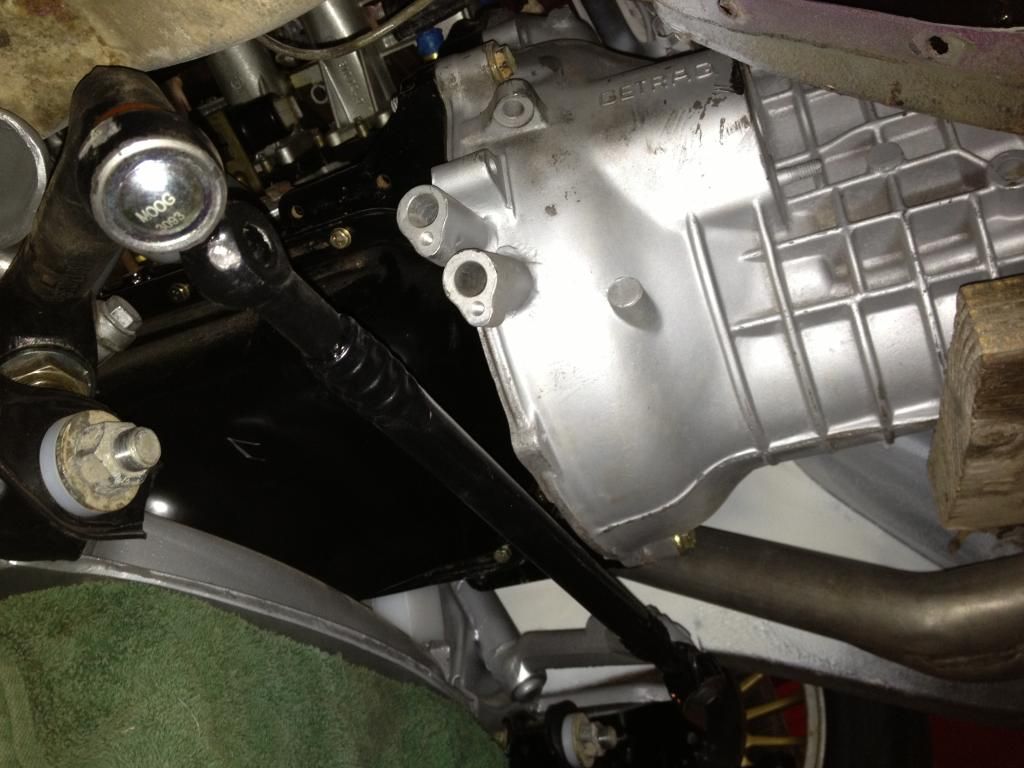
Test fit of the 5 speed transmission to mock up the new Massive rear mounts and marked the spot on the tunnel that needs to be massaged a bit for the slave cylinder. Not the best pic but it was getting late. At first the 5 speed transmission was not sitting straight in the tunnel. It was tweaked toward the driver side about 1/2 inch. To remedy this we supported the front of the engine to take the weight off the engine mounts. I had to remove the driver side engine mount and bushing and get it into the vice. I slotted the hole in the engine mount arm where the bushing bolts travels through and also placed a washer between the engine block and the engine mount to space it a tiny bit. This allowed me to adjust the trans dead center in the tunnel. Once it was lined up I tightened the engine mounts back down and now the S14 and trans sit perfectly in line. :)
With the transmission supported, I could finally test fit the IE radiator. Clearance between the water pump pulley mounting bolts and the radiator is slim. With some massaging of the radiator support, and some thinner hex key bolts to replace the standard 10mm pulley bolts, I achieved the needed space between pulley and radiator.

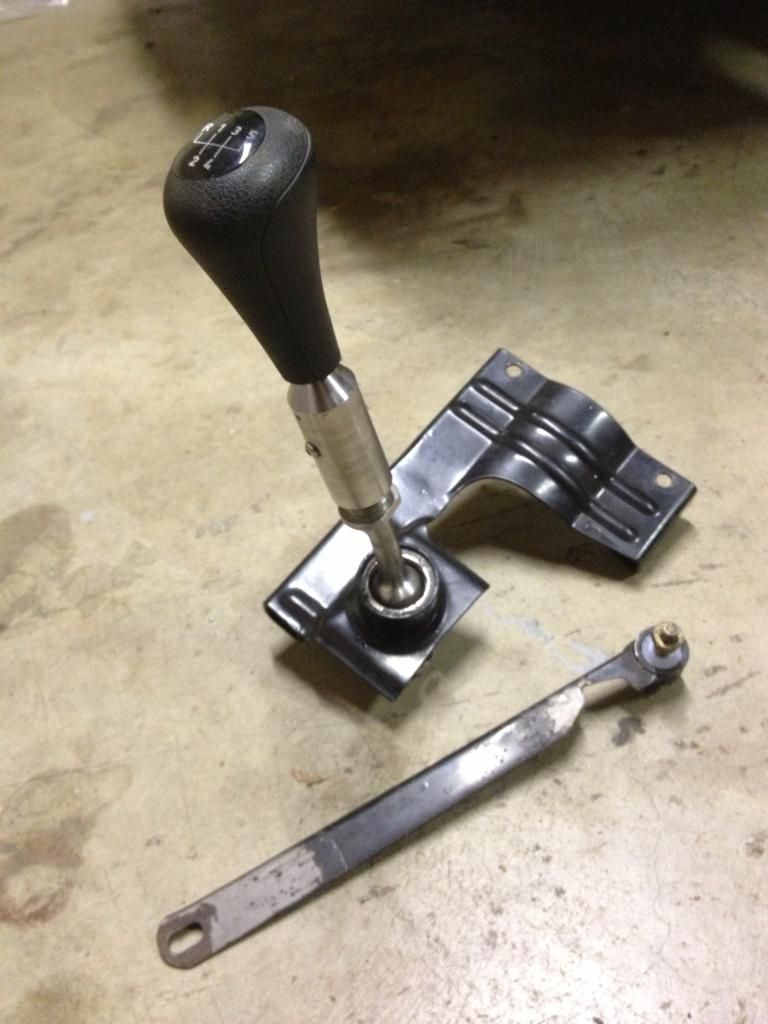
Finally, I spent some time mocking up the Aardvark Racing 5 speed shifter plate. I'm using the UUC EVO III shifter with early model E30 shifter hardware. I did have to modify the support arm that supports the shifter plate and connects to the transmission. Once modified, I pressed in the IE solid bushing. It'll all be painted up tomorrow now that I know it clears and installs without issue.
Tomorrow I will be installing the 5 speed Massive transmission mounts, shortening the transmission crossmember a bit to fit the new mounts, and then test fitting the drive line. Next Ill tackle the pedal box rebuild and the brake booster hardware rebuild with the kits IE offers.
On a side note, I pulled the carpet yesterday and was surprised to see how much sound deadening material there is underneath. I must have removed 20 lbs from the passenger side alone. Once it's all removed from all floor pans and the tunnel, Ill likely add some sort of floor cover back to the passenger front floor board. With that header running underneath, and then the remainder of the exhaust traveling beneath that floorboard, I just want some heat shielding for the new carpet and passengers feet. Looking into a firewall heat shield also to further help heat blockage.Leave a comment:
-
No updates just yet. I managed to get another week off so ill put some more time in and hopefully have the s14 running by the end of the week.
Thanks, I'm glad last minute I went with the bronze also. I had them painted, and I've had good results with painted wheels over the last 3 years.
I really enjoy bronze on red, ran that combo on my last E30!Leave a comment:
-
looking good......
the bronze was a good choice.
Im thinking same for my e30 track car, which is red.
Did you paint or PC?......
I keep on reading PC ing track wheels has lead many to failure....hmmmmLeave a comment:
-
I wanted to run a little more than a 195, but tire sizes available in 16 inches makes that tough. There weren't many other options to keep outer diameter constant if I wanted to run the 215s in the back. I will say that these tires appear to run a little wide, my 215 rears on the Alpinas are wider than my 225 Bridgestones on my set of Euroweaves. They should be more than adequate for the cars purpose for now though.Leave a comment:
-
ugh that looks so damn good. this isnt helping the evil thoughts in my headLeave a comment:
-
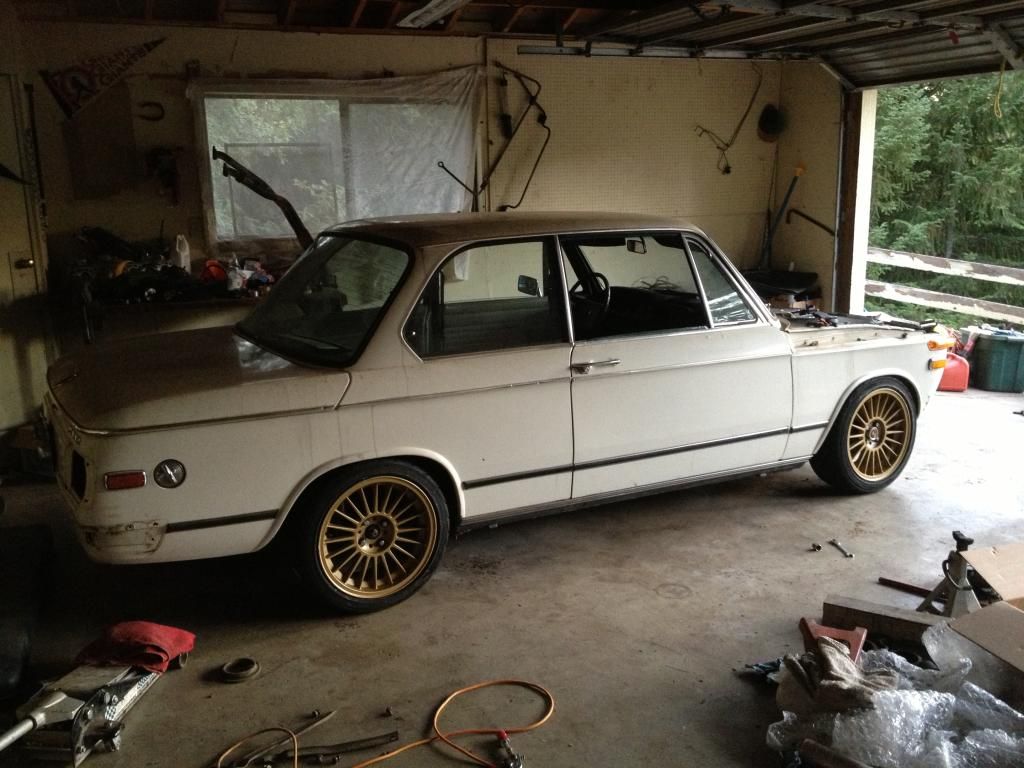
Its starting to actually look like a car again now that she's able to roll! Special thanks to Mark and the guys at Ground Control for putting in all the time and effort to build up the suspension for the 02. We changed the specs on them a few times, ill post up the final spring rates once I have the build sheet in front of me. Ground Control has always gone out of their way to make sure I was a very happy customer and I will continue to use GC for my future builds. Quick shot of the front suspension:
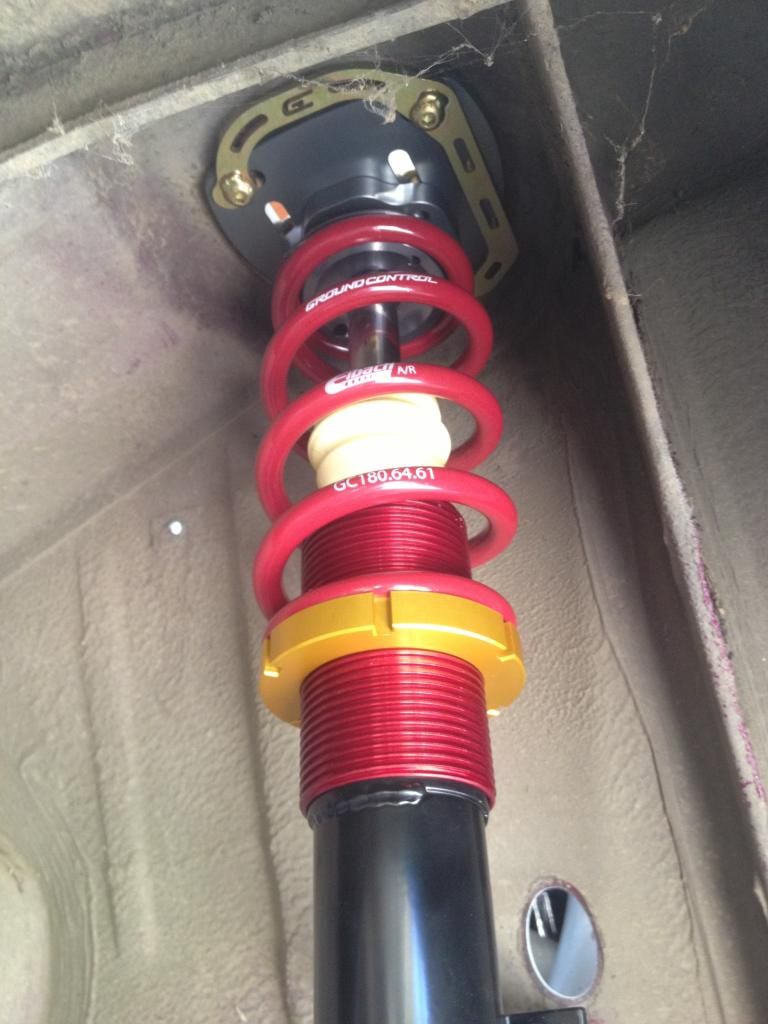
I had to do a mock up once I picked the stuff up, mainly to ensure everything fit properly. I'm referring to the wheels and tires, I was very nervous during the wheel mounting. Once I got them on... Wow there is maybe 1-2mm's of space between the inner wheel and tire and the front, lower GC spring adjuster. Same story in the back, 2mm's between the trailing arm and the rear wheel and tire. The space was so thin the rear wheel balance weights had to come off as they prevented the wheel from turning a full revolution. Ill have to bring them back and have flat weights used opposed to the type that snap onto the lip of the inner barrel. Both front and rear wheel faces sit flush with the factory fender flares.
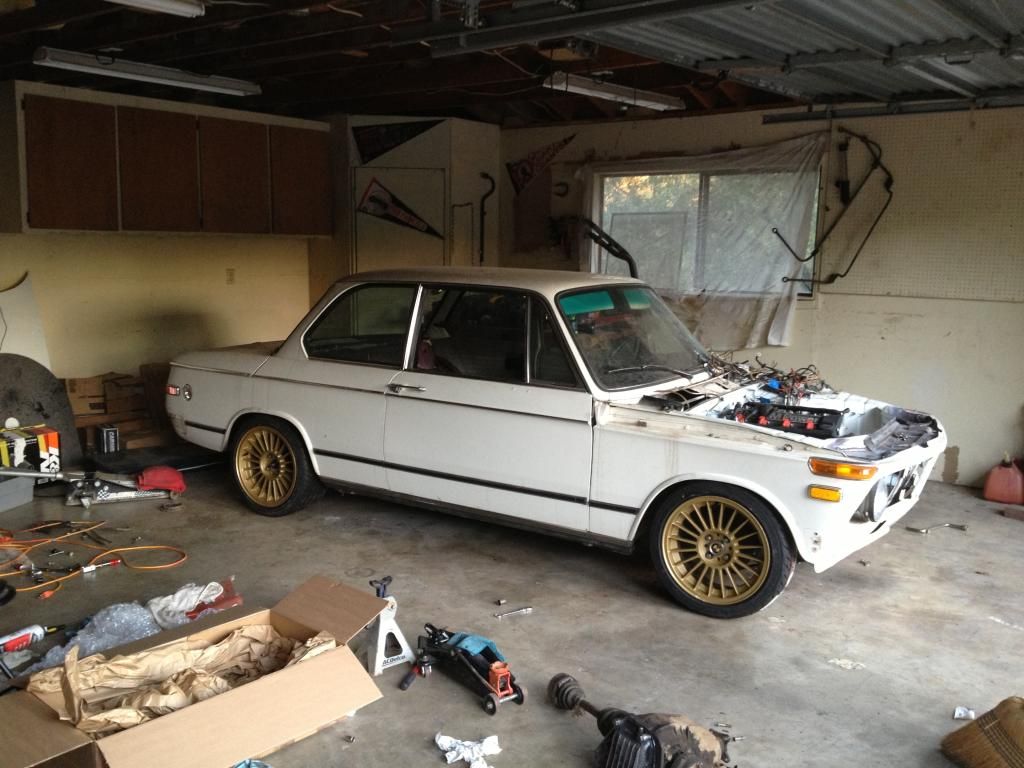
On a stock fender 2002, these wheels and tires are just about the widest that I can see fitting without doing other changes to the suspension. I am beyond happy with the fitment, no need to run turbo flares as of now.
Front: 16x7 et28 195 45 r16
Rear: 16x8 et28 215 40 r16
Leave a comment:


Leave a comment: