

Does anyone know how much vacuum a non-cat M20 exhaust system produces? I'd like to see some real-world numbers. We're planning to install a tapered bung in the downpipe, immediately downstream of the O2 sensor, to help vent the crankcase (via a Trick Flow air/oil separator).
-
-
That's actually a lot more than I expected!
Also, I sprung for a polished valve cover to match the distributor blockoff plate. The wrinkle black valve cover is now for sale for $125 plus shipping.

Comment
-
Great job dude! :)Comment
-
Update time...
We made a custom spark wire loom:

Resealed the transmission all around:


Tested our dual-shear short shifter setup:

Painted the engine bay in Regal Red rattlecan to match the Zinnoberrot paint job coming later:

Wrapped the body wires in new wire looms:

Repainted the headlight backplates & rebuilt headlight assemblies:

Mounted the Aeromotive fuel pressure regulator at the intake manifold:


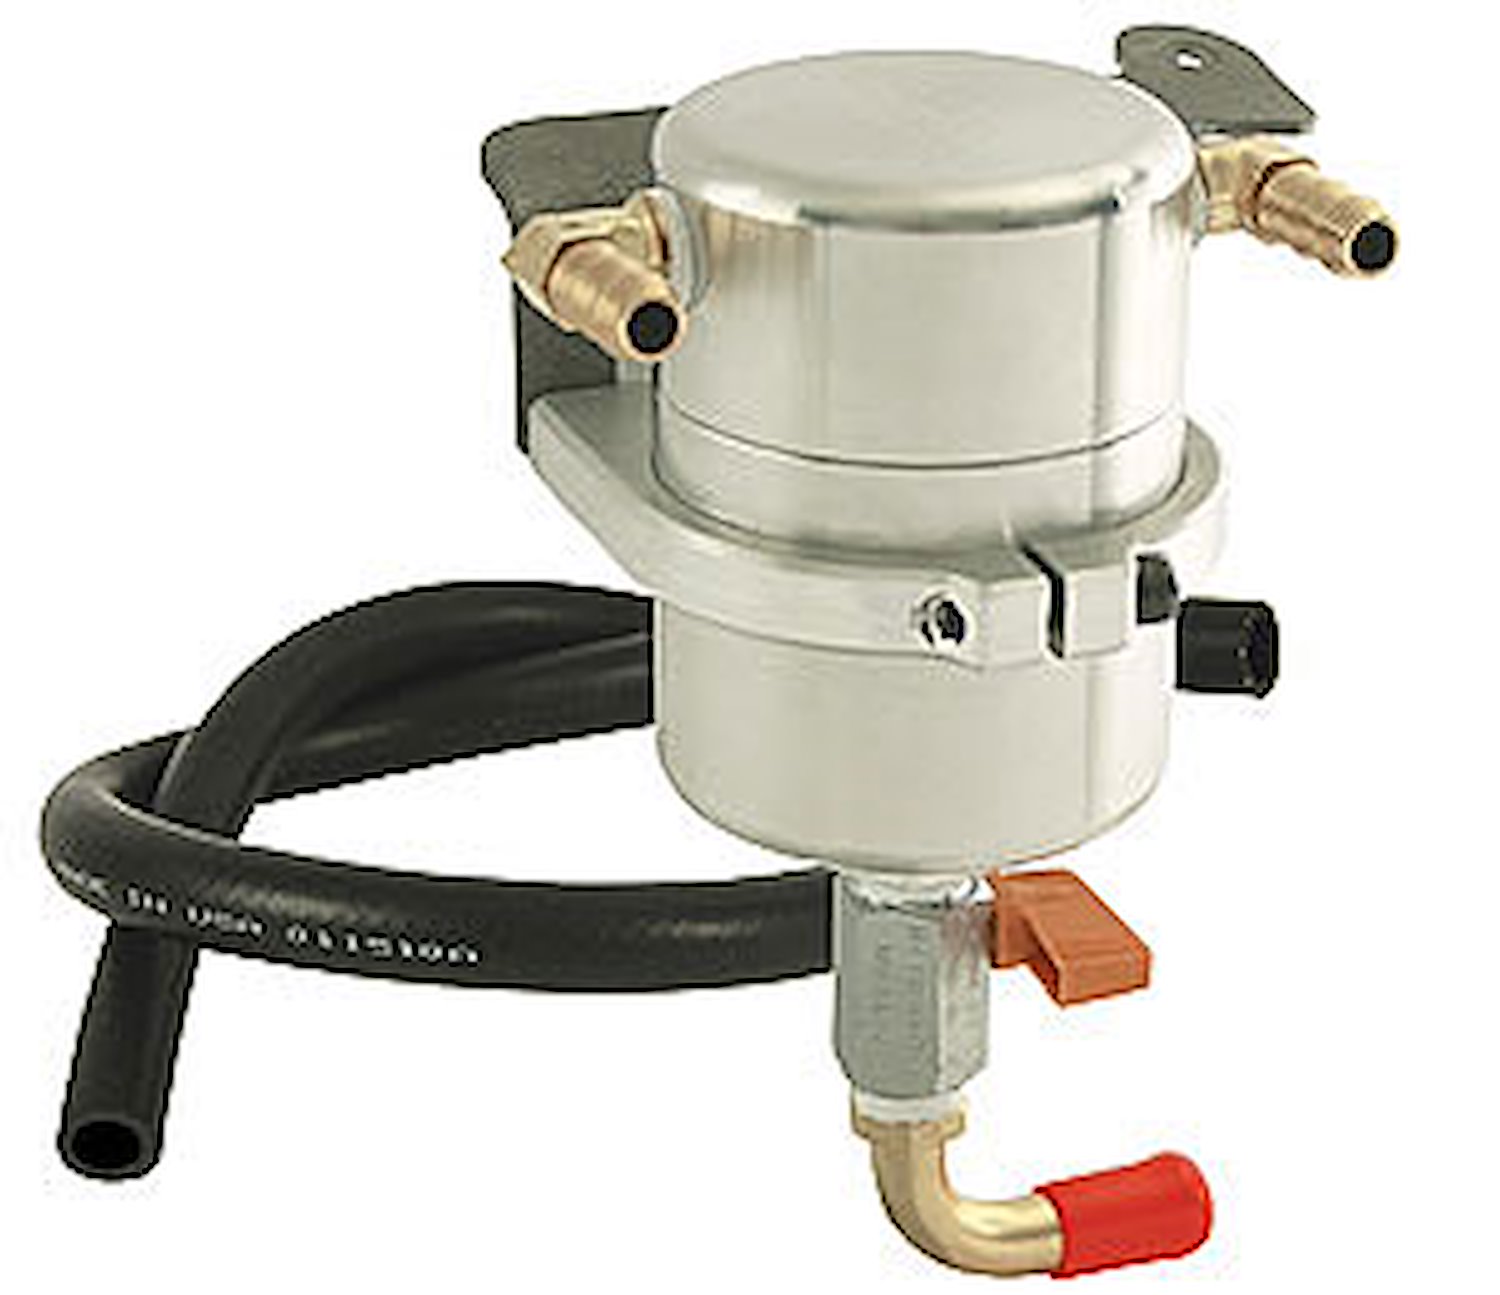
Mounted a Burger Tuning air-oil separator between the valve cover and throttle body:


Got in our MSPNP, QuadSpark ignition module, and LC-2 wideband O2 sensor:

Comment
-
That's a hell of an update, nice work!Comment
-
Stunning detail...
i like the polished valvecover .. A LOTSveinbjörn Hrafnsson
E30 CABRIO V12 M70B50 ///
ALPINA B10 BITURBO 346 @ 507
E34 550 V12 JML
Finnish wisdom : If you want to Win,, hire a Finn
http://alpina.123.is/pictures/Comment
-
want a car audio for my car
want to buy a new car audio for my car ,i got a website for car audio wholesale,hope i can get a good and cheap car audioComment
-
Another brief update...
Clutch bled (no pics)
Put our very expensive, very new engine on the hoist in preparation for TCD Stage 1 clutch installation:

New pilot bearing pressed into place:

TCD clutch & pressure plate in place:

Trans bolted on, ready to thread everything into place...

Lifted the rear end to help with the angle:

Ended up hanging the engine off of the lifting bracket alone; tried using a load leveler and attaching to the rear of the engine as well, but we couldn't get the load leveler handle to turn once the chain angle got too steep. Very scary - bracket bent quite a bit!

I also had to stand inside the engine bay and *very carefully* lift the tail of the trans over the front edge of the engine bay. With my helper manning the hoist, I then got under the car with a floor jack and a block of wood. We landed the trans tail on the block, then choreographed the hoist & jack to get the engine/trans dropped down and back into place. This part took about an hour, as we went back and forth checking for pinched hoses/wires.


Reinstalled the lower control arm brackets & bushings, per the Bentley's *very specific* weight-loading procedure:


Unfortunately, our modified fuel rail developed a leak at one of the welds, so we went back to a stock rail with a pressure regulator delete adapter, and with the hose barbs adapted for AN fittings:


Connected up fuel lines, hotwired the fuel pump, checked fuel system for leaks & adjusted pressure:

Comment
-
God this car is clean. Great work

1989 325is l 1984 euro 320i l 1970 2002 Racecar
1991 318i 4dr slick top
Euro spec 320i/Alpina B6 3.5 project(the never ending saga)
Vintage race car revival (2002 content)
Mtech 2 turbo restoration
Brilliantrot slick top "build"Comment
-
Got our Mishimoto radiator in:

The frame mounting required a little fabrication:


But the fan shroud mounted up fine and fit great:

Comment
-
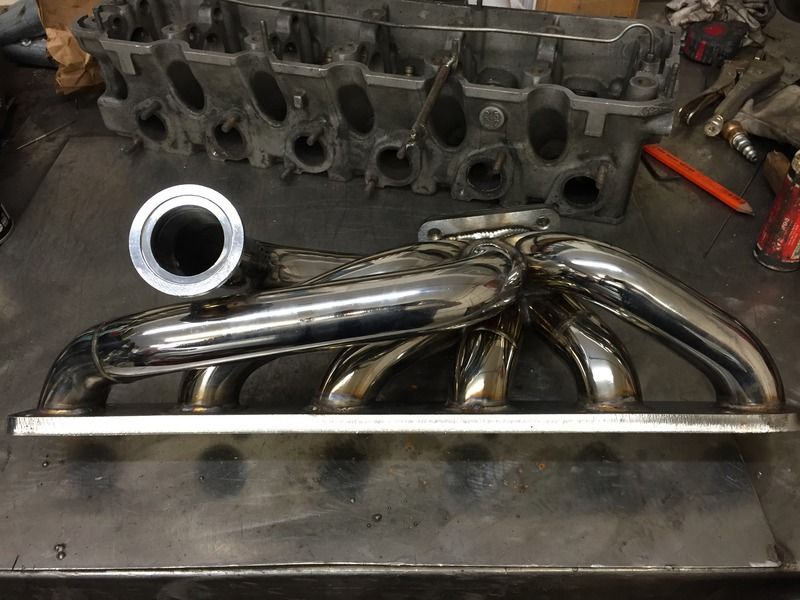
Also put down a deposit on a Good&Tight M20 turbo manifold:
And relocated the battery to the trunk. Used a Taylor battery relocation kit:

Ditched the factory 50lb trunk weight:

Drilled 1-1/16" holes and used grommets to route the cable:


Comment
-
As far as I know, the e30 and e36 share the same radiator. I couldnt get the fan shrouds to mount without modifying them, and the e30 fan still hit the bottom of the shroud! I bought a new shroud and will mount it soon....hopefully I wont have any issues, but I plan to document the install for Mishimoto at their request!1997 Artic Silver M3
CES GT4094r 651hp/615tq @ 24 psiComment
-
Long overdue update... engine is in, short shifter kit w/DSSR is in, Mishimoto radiator in, driveshaft in. Custom 3" exhaust with a resonator & muffler welded up & installed. Wired up IGN-6 coil pack, QuadSpark ignition module, Megasquirt PNP from DIYAutotune installed. Startup tune ran great (once I fixed the MAP sensor setting - was wrong in the base map). Been dialing in the VE map. Also got the AC idle-up and open-loop idle air control working, once DIYAutotune replaced the Microsquirt module in our MSPNP box (transistor U8 was defective). Installed a GM flex fuel sensor and have been playing with the settings. Also installed a knock sensor but haven't done anything with it yet. Ordered a Raamaudio sound deadening package (package #2). Will eventually order Roadworks Auto E30 convertible carpet kit and either have our sport seats reupholstered or, as my preference, order Corbeau GTS II seats in cloth. I just wish they came black/tan two-tone. Currently hunting for a mint condition dash, as ours has a 3" crack in it. Have our refurbished instrument cluster from Bavrest ready to install once the dash is replaced. Also have my stainless M20 turbo manifold ready to use once we get around to turbocharging (probably about a year out). A/C charged and working great!
First drive: https://www.youtube.com/watch?v=0nYgPaXuGws

Comment


Comment