-
True but you’ll have fuel starvation approaching 1/4 tank.
I ran the same pump with e85. I had to run a larger FPR and the pump flowed too much fuel for the stock return siphon on the gas tank, pressure would not drop below 55 at idle. Might be worth noting.
Depending which fuel tank you have, you’ll either have fuel starvation like he said or have elevated idle fuel pressures. Would be super easy to get rid of the starvation issue with the surge tank he already has -
The 450lph pumps go very well, a friend has one in his 1jz E30 and it's super quiet and has plenty of flow. Big set of injectors and it's good as goldLeave a comment:
-
e30 316 build x2 (m52/m50, turbo, 3pcs bottle caps etc)
Glad you made the switch [emoji4] ms3 is great.
Do you have an e34 subframe installed?
You could also cut the top off that surge tank and convert it to house an intank pump. No noise that way.Leave a comment:
-
Then finally time for my e30. I haven't touched it for a year because we had our second son and I haven't got time to work on it. But hopefully next summer I will be driving it again.
As a start I wanted to do something for the fuel system. It's bit undersized because raising boost caused the engine lean out. Which wasn't big problem but the most annoying thing was the noise. The carter pump which moves fuel from original tank to surge tank is noisy as hell.

So that all is gone now:


That all will be replaced by in-tank walbro 450lph e85 pump. I just need to keep enough fuel in thank when driving hard so that it won't gasp any air. The 450 walbro is bit too big for the stock m52 fpr so I would need to replace that. But I have another solution which is this:

That will replace the stock fuel pump relay and I will be able to do PWM control the fuel pump. So on idle and cruise I can make it pump less to reduce noise even more and also keep the fuel pressures down with the undersized fpr. Remember. the fpr is only at the return side. It doesn't affect the max fuel flow. But if the fpr is too small the fuel pressures will raise on idle/cruise when there is not much fuel flowing to injectors.
The current engine management KDFI is not capable of PWM controlling fuel pump because it's ms2 clone. So I also bought ms3x kit to replace it. I already started assembling the board:

And assembled. Ready to be tested:

That v3 bord is same for ms1,2 and 3. Which makes it ms3x is the ms3 processor card and the expansion board:

But before mounting those, I will need to test the base board.Leave a comment:
-
Then back to this day. The rear tires have never been at the center of the wheel well so we took the rear axle down to fix that:

For the engine we have this great looking intake to replace the crappy m50 intake:


Forgot to take pic of the whole thing but this is how it will look installed:


And also we have euro s50 oil filter housing and oil fcooler for that waiting to be installed.
We got annoyed with the KDFi current limiting problems with the KDFI ecu so we also got ms3x megasquirt to replace that. We will be using all the fancy stuff it allows us to to like fully sequential fuel and spark, boost by gear, flex fuel etc.:

The m50 OEM VR sensors will be replaced by cherry hall sensors. We have those for crank and cam. Also new coil wires which hopefully don't spark trough.

I also found this neat OEM solution for flat shift/lauch button using cruise parts:
 Last edited by pazi88; 12-15-2017, 12:25 AM.
Leave a comment:
-
Seems like I have forgot to post updates here, so I need to recap whole summer :D
So after last post we got the car running for the first time:
Next up was the the exhaust. It has now 3,4 inch down pipe and rest is 3":

Which sounds like this when recorded using phone camera:

Rear arms got new eccentric bushings:

And the goal is to get the tires straight as possible for maximum traction. Quite opposite what all stance guys do :D
We also got new rear end with longer 3.15 ratio:

That doesn't have lsd unit unfortunately, so we need to transfer that from the old rear diff. We couldn't find diff with correct case and ratio with lsd for sale, so now we need to do some extra work with that.
We also did some aero stuff to increase high speed stability and reduce drag:

And then when we opened the new diff it was quite disappointing:

So getting the thing moving will take longer than we thought...

I have never seen diff bearings in this bad condition :D

But after lot of work I managed to get the new 3.15 gears inside the old diff:

That ended up being quite of hack job, because only new parts I could source with short notice, were new pinion seal and new pinion clamping bush. I did shimming the bearings in this way: :D

But well i got the the bearing friction, teeth contact and backlash in spec so it will be fine. After that we could continue tuning the engine.
Before we could start driving the car, the idle needed sorting. The engine didn't want to idle below 1000 RPM because with those aggressive cams, there isn't much vacuum at lower RPM. At 1300 RPM the idle was fine but for MOT check I need to get the car idle below 1000 RPM. Enriching the mixture to 12-13 pump gas AFR makes the car idle below 1000 RPM but then the emissions will be bad and aging the car won't pass MOT. I needed to get the car run closer to 14.7 AFR but that leads to very unstable idle.
Fortunately after lot of trial and error I found out that ms2 has dedicated idle advance map that i could use to stabilize idle. And after dialing it in, the idle works fine and engine doesn't stall when coming off throttle. The setting look like this:

So normal idle advance is 14-15 degrees, but if the RPM gets lower, there is more advance and it will bring up the RPM again. And then if RPM gets higher, there is less advance which will bring the RPM back down.
End result is this:

See how the much the ECU needs to use the ignition advance to keep the idle stable. Without that dedicated idle advance table, it was almost impossible.
Full video about all this: https://youtu.be/D03lyG4wiQQ
And passed the MOT:

The limit for HC is 1000 so not even close :D
After that I fitted electronic boost controller and now with new megasquirt firmware, the closed loop boost control works like a charm.

But then more problems. engine just doesn't want to run past 4000 RPM on boost. It will misfire badly.. There was lot of problem solving and stuff, but we didn't get it working. We even found out that KDFI has current limiting for the coils so we even didn't got any benefit from those expensive AEM coils.
So that needed sorting out, so here I have bypassed those current limiters:

But that wasn't the problem. Eventually I ruled out everything except the used coil wires we had. 4 of those seem to be working fine::

But rest 2 weren't so good:

Soo yeah.. Quick hack and to fix that and finally it pulls clean on boost.

Full video about all of that: https://www.youtube.com/watch?v=UsfIOF-pGZs
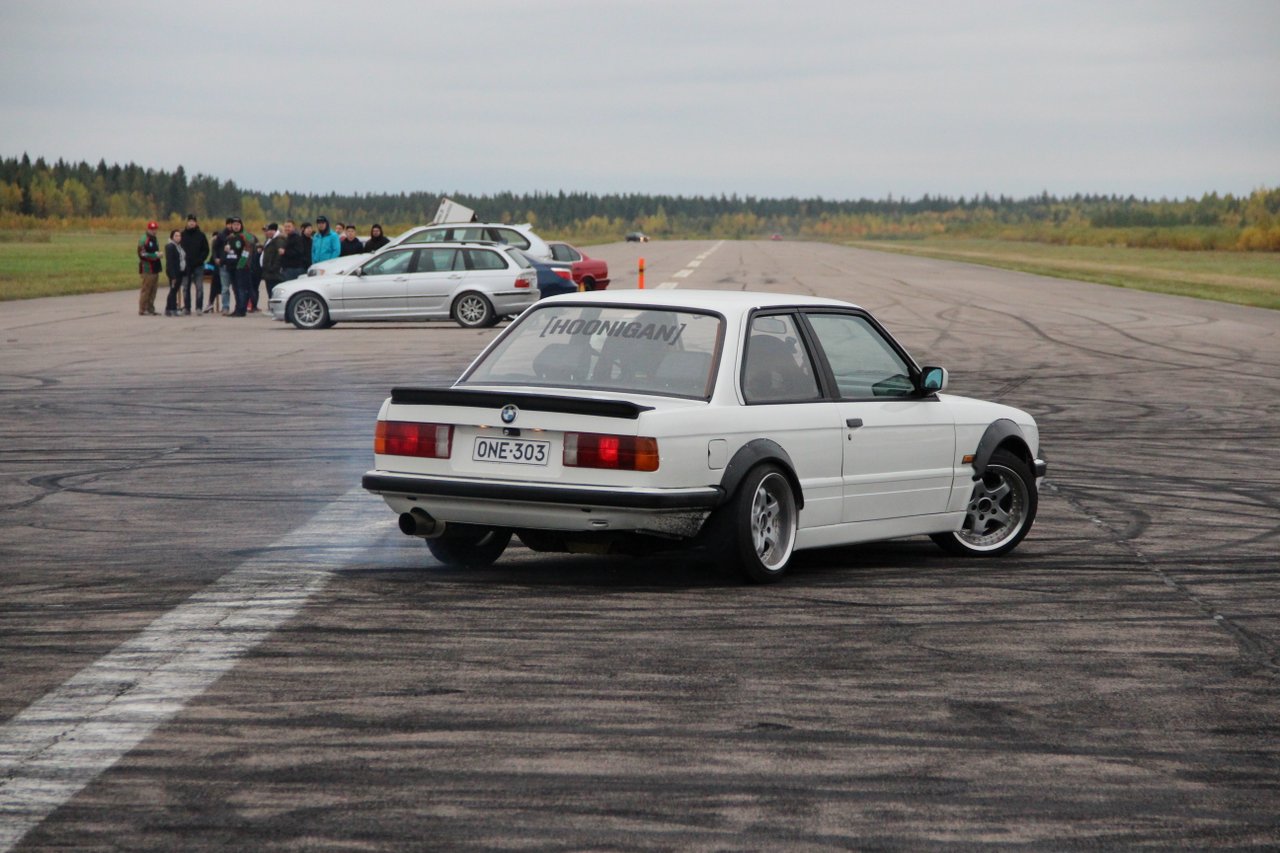
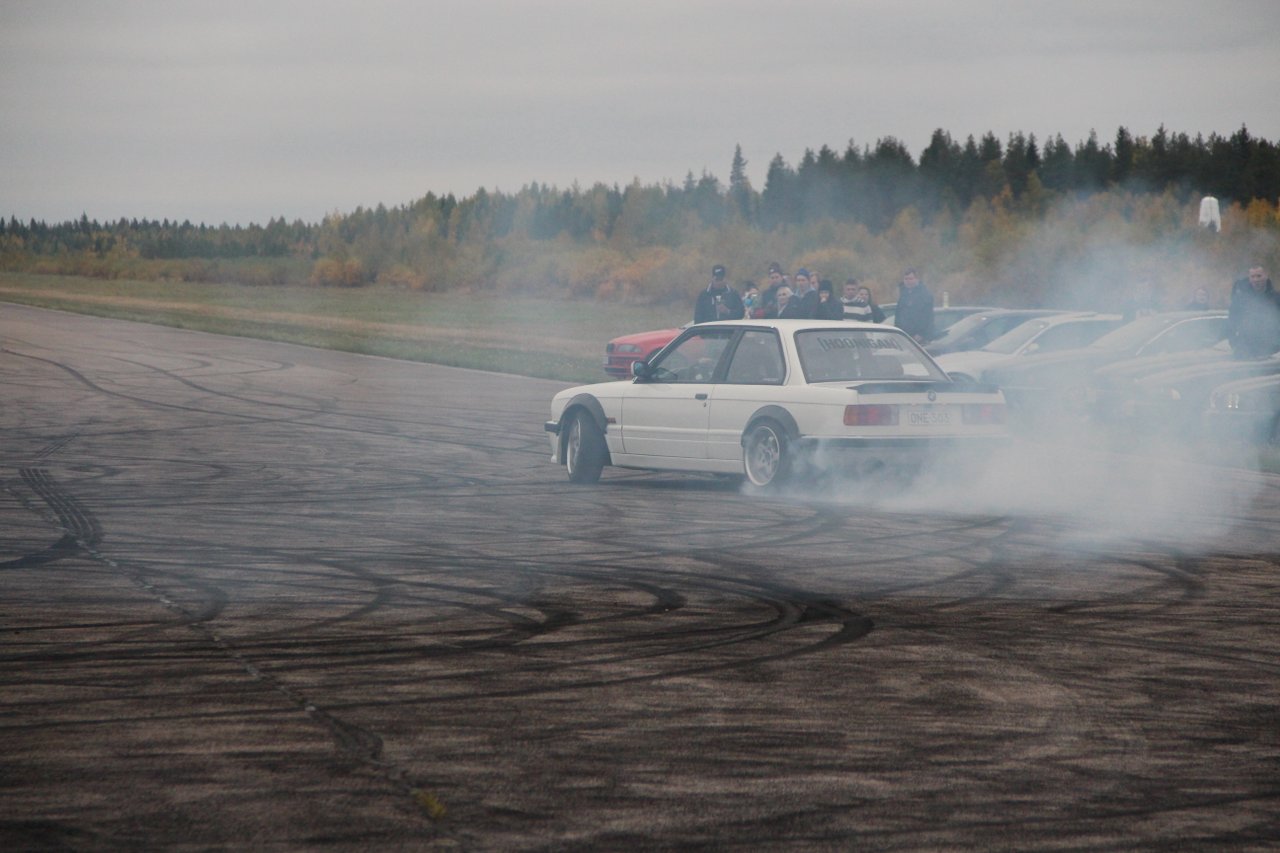
But we missed the main events of the summer which was bit of a letdown. But ok we still had fun with the car. Maybe too much because the driveshaft started twisting :D

We also took the car to one Tuning car show to be shown:


Where we did got top3 performance trophy:

After that we got 3 piece work wheels to replace the borbets. Can anyone guess the model:

And to end the summer season there was ykameet, where we could destroy the wrong size tires which came on those wheels:

Here is video material also: https://www.youtube.com/watch?v=dpl8VyoDolkLeave a comment:
-
Next episode:
last weekend we swapped the 870cc injectors from my e30 to the ONE and then the 630cc injectors to my cars. That's because I calculated that the 630cc injectors should be enough for me but those would be too small for 600-700 hp we are wanting from the new engine. Also we added my Bosch 044 knockoff from aeroflow to the ONE in addition to the old one so that there would be enough fuel for the engine. I will change to in-tank pump setup because I'm sick of hearing all the nose from the external pumps.

Wires are just temporary to test if the fuel pressures would stay at control.
I needed to weld outlet for second pump:

Not much room because I designed that for one outlet only. But I managed to work that out.
The wastegate was welded to the turbo exhaust housing:

Leave a comment:
-
-
Oh I forgot to update here.
Here is the next episode in YouTube:
In that we assemble the rest of the bottom and bolt the gearbox to the engine.
Doing that i noticed some differences in m50/m50tu and m52 oil pumps:

The two left ones are from non-vanos m50 and the right one is from m52. The m52/m50tu oil pump has thicker gear so it will produce more oil flow.
The housings are pretty much the same:

But one bolt is slightly offset in m52 pump compared to non-vanos m50 pump. So I needed to grind that to fit the m52 pump to non-vanos m50 block:

And I also needed to make room for ARP main studs with the girdle.

Then new timing chains and stuff:

And the bottom end is assembled. We didn't have m50 spider hose in our garage so we needed to make the metal tube system from m52 to fit m50 block:

Then goes in the RHD engineering heavy duty flywheel:

And that seemed to be too low so we modified the clutch lever to compensate that:

And after gearbox, the engine went in:

Before bolting the head I checked the valves. And two of those seemed to leak so I fixed those.

Here is the video of the head installation:
I painted the exhaust manifold with Martelius Black satin because the VHT paint did burn away:

And here is all in:

From that I haven't yet made any videos but here's what happened next:


Leave a comment:
-
Thanks!
After paint we took the old engine out and disassembled it:
And soon after that started assembling the new engine:

Assembled:


And as usual, video about that:
We also got some other goodies for the engine as RHD flywheel:

AEM coils (these are same as ign-a1 coils):

I sent the cams to be regrind and they already got back:

Leave a comment:
-
And then the painting. To cover up all the horrors of the misaligned rust repairs we glued some m-tech II parts to the body using 2-component body panel adhesive. And then sprayed some sanding primer:


Of course after laying the sanding primer comes the sanding:

And after that I sprayed on the Alpinweiss III color:


looks quite good to be done in normal garage by amateurs instead of professionals in real paint booth.
And the video of the paint job:
Leave a comment:
-
Got the pistons:


Those are 8.8:1 compression ratio pistons meant for m50b25tu engine with 140mm connecting rods. But should give around 9.5:1 compression ratio with b28 crank and 135 connecting rods. Now we have almost all the parts that are needed to build the new engine.
And here is the new episode in youtube:
Also the car looks like this now if you didn't watch the video:

Leave a comment:


Leave a comment: