
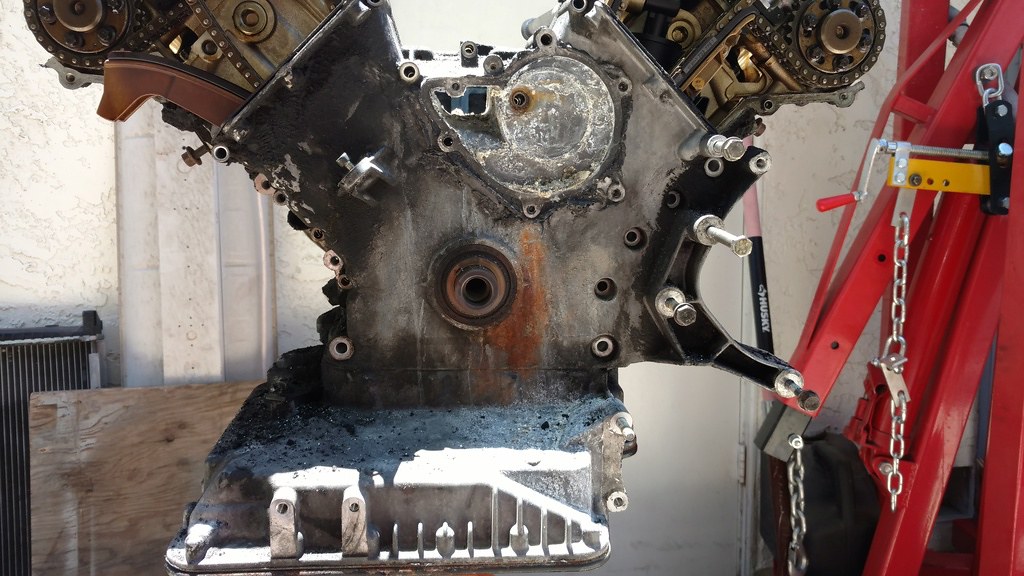
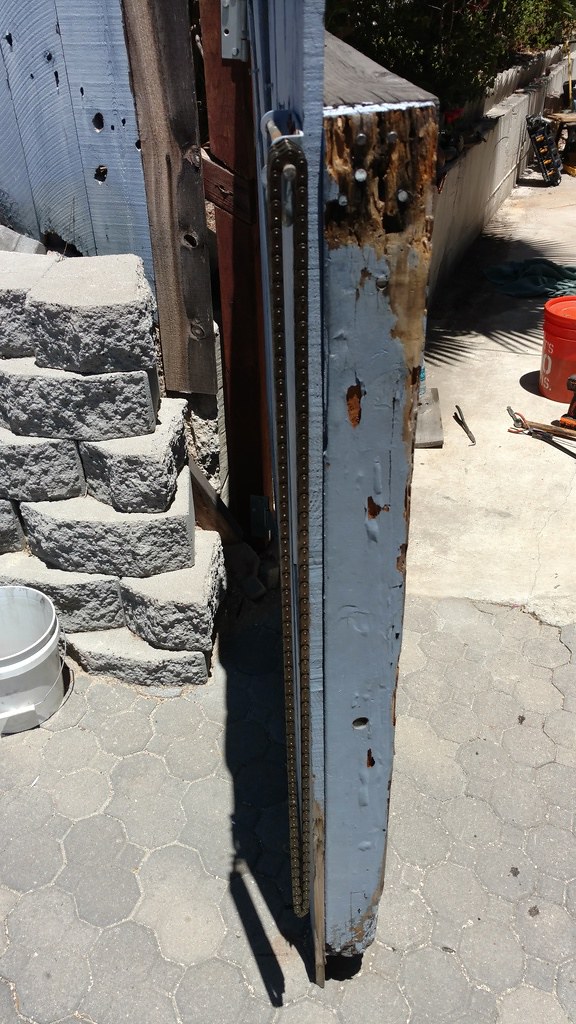
Jesus, I never noticed how much volume the valley pan takes up. It must hold an entire gallon just by itself. Also, I agree on the WTF-ness of that rear access plate. makes zero sense.
-
-
I don't think it holds as much volume as you think it does. Really, its like putting a bowl inside a larger bowl and keeping water out of the smaller bowl and only between the two bowls. Odd, but I think that explains it.Originally posted by CorvallisBMW View Post
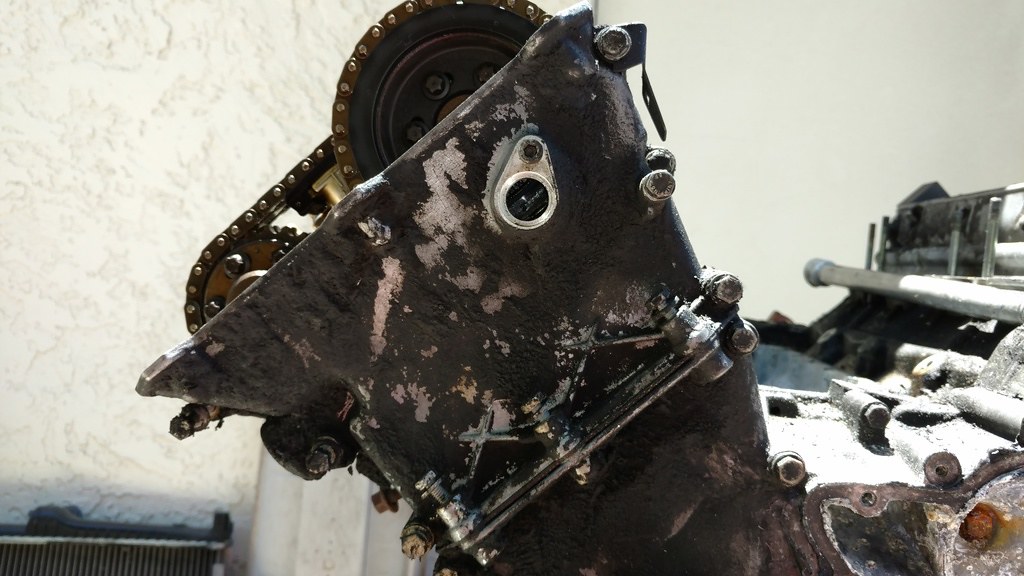
ANd yeah, the back plate cut the shit out of my finger yesterday so screw that thing.
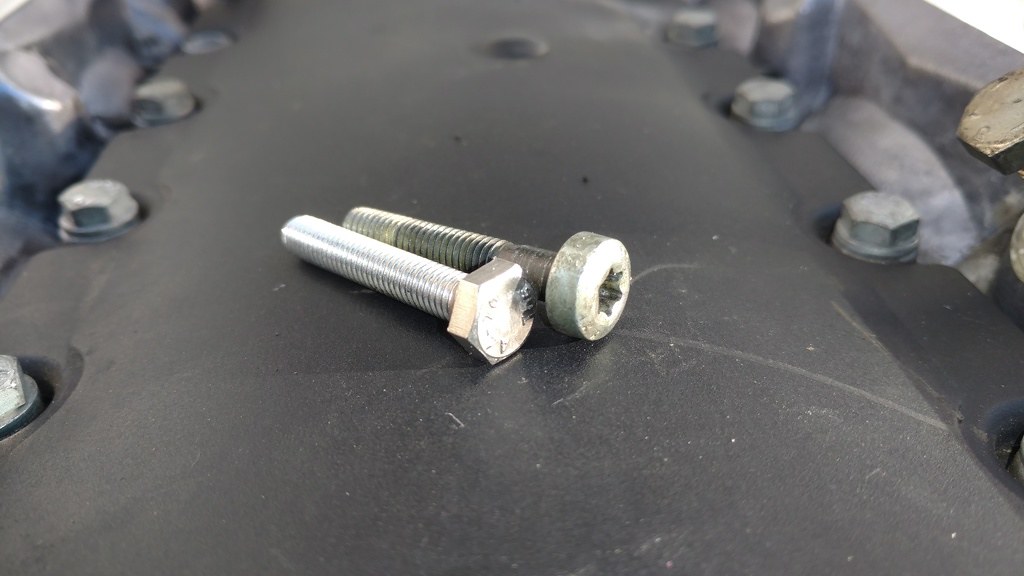
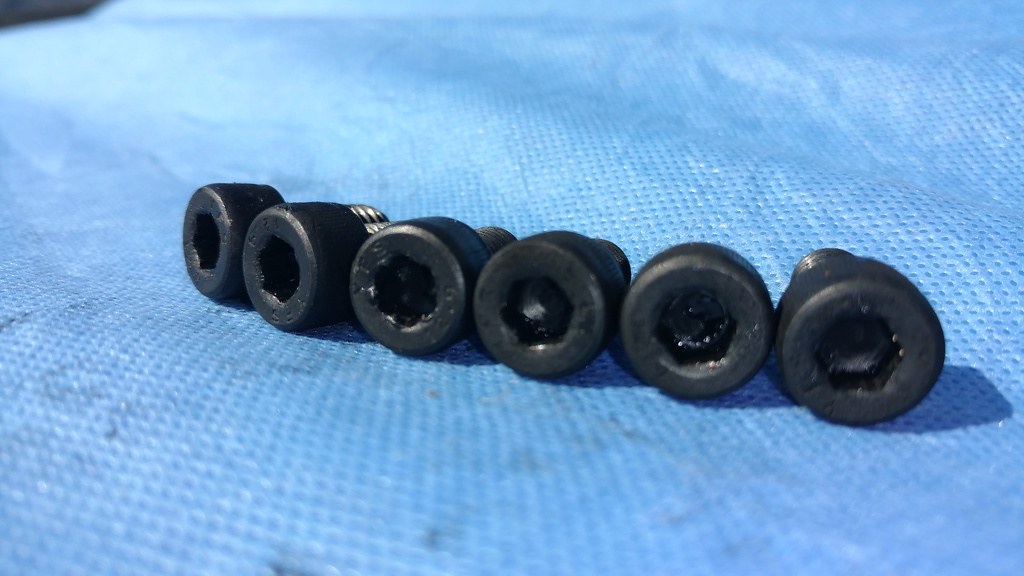
Some new bolts came in! No pics, but they will be able to help me get the motor mounted to my new engine stand. Also, I got hex bolts to get rid of the stupid ass torx bolts on the rear main seal housing.
 IMG_20160606_181956949_zpsyuaggoqd by Paul Abbott, on Flickr
I am going to leave the rear main seal alone BTW. I saw no signs of it leaking and it looks to be in great shape. If that bites me in the ass, then today's me can say to that dastardly day's me, "I told you so."
 IMG_20160606_181948345_zps7u9gx4oi by Paul Abbott, on Flickr
 IMG_20160606_182818992_zpsqyq3smrs by Paul Abbott, on Flickr
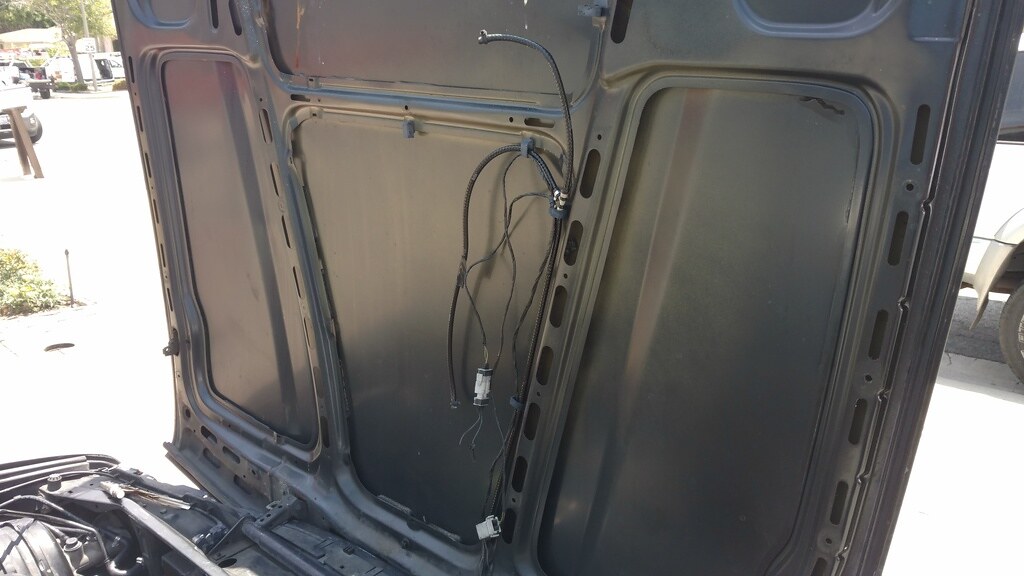
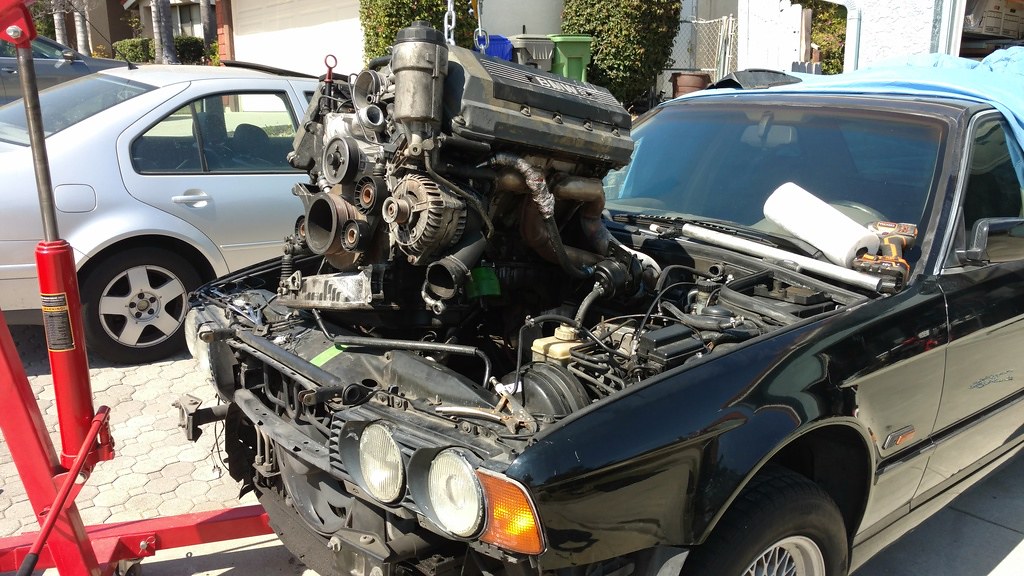
I did wind up getting some started to be pulled out of my car's engine bay in prep of pulling the motor.
Here is what I started with.
EDIT: Imagine a picture of a normal 540i engine bay. Can you see it? Me neither.
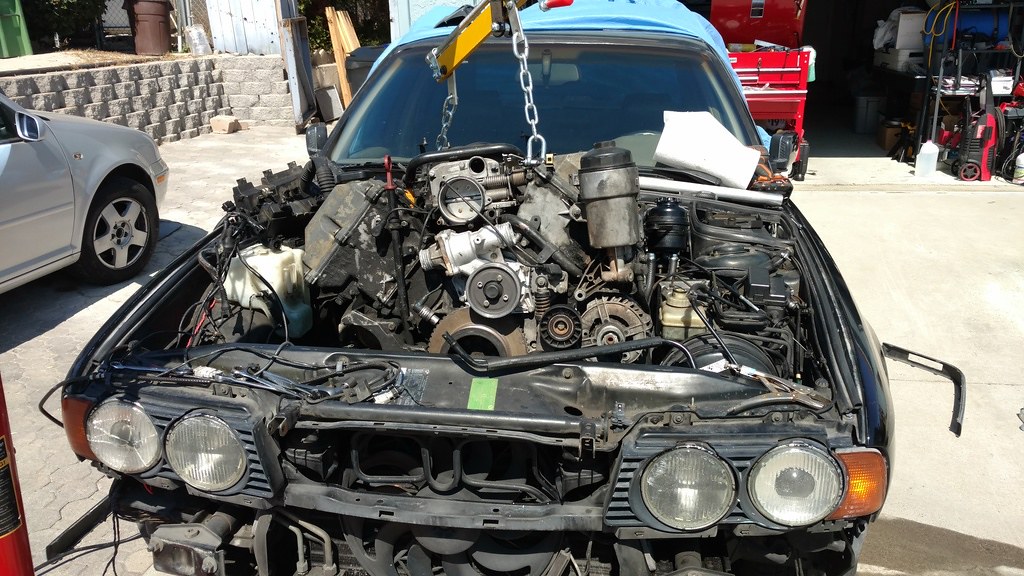
Here is what I ended with.
 IMG_20160610_121936644_zpsuxuh1cpv by Paul Abbott, on Flickr
I pulled lots of hoses, the radiator, most of the harness unplugged, coolant reservoir and pulled the top two bell-housing bolts.
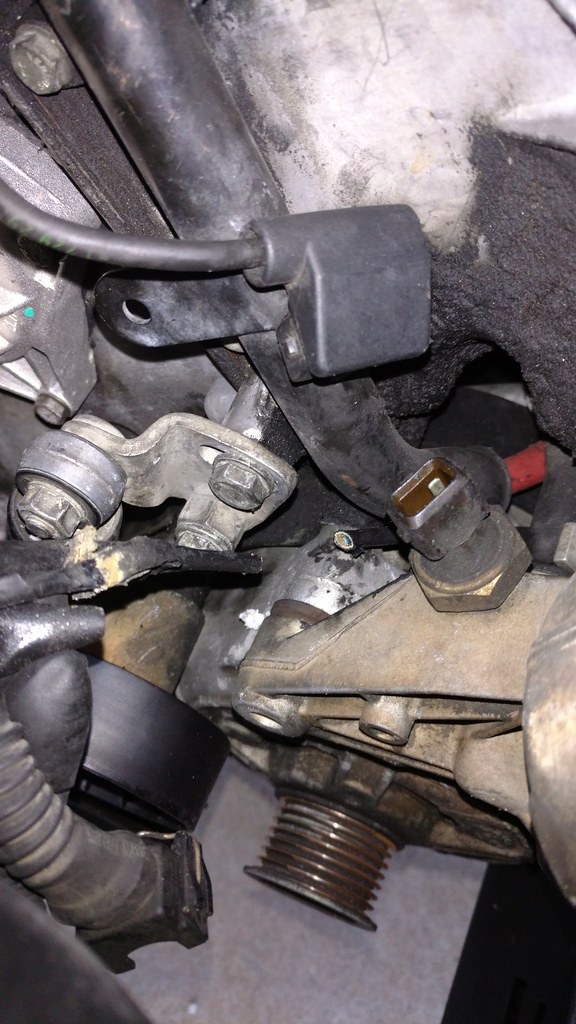
Here is a picture of where I clipped the alternator wires from the harness.
 IMG_20160531_193110347_zpsehuetlmg by Paul Abbott, on Flickr
Stupid how tight they are and really, they are impossible to remove without lifting the engine up. I will extend them and possibly make a male/female connection later.
And here is proof someone has done a clutch job.
EDIT: I lost the proof.
DAPO, right? Fuck the proper inverse-torx socket, let's just jam a 9mm on there, then leave it for the next owner to deal with.
EDIT: Imagine a picture of a bolt with a socket jammed on it.
Now that some of my bolts have arrived, I can finish sealing up the back of the engine and get it on the stand. I bought some brass wire brushes and a 180 grit nylon wheel to clean up the piston tops when I get there this weekend probably. Should give you plenty of time to tell me I am an idiot for using a nylon wheel brush to clean up the top of the pistons. That and some google-otomy.
Also, I absolutely know what my next project will be after this car is a reliable daily driver. The 4Runner is going to go away, I am going to get a full-size Ford Bronco and put a 4BT Cummins in it.

Oh, and if anyone is remotely interested, you must read the Anti-Federalist Paper that Brutus wrote.Last edited by marshallnoise; 10-21-2019, 04:35 PM.Si vis pacem, para bellum.
New Hawtness: 1995 540i/6 Claptrap
Defunct too: Cirrusblau m30 Project
Defunct (sold): Alta Vista
79 Bronco SHTF BuildComment
-
Did a couple of things yesterday, some of which were stupid.
I had been waiting for Fastenal to get my order in so I could replace some of the torx bits with regular 10mm hex head bolts.
That's now two bolts that snapped using very light torque. Tried drilling this one out and no dice. I am still debating on taking the block down to a machinist and having them drill and tap the bugger. Or just chancing it.
Today went pretty well. No pics though. I decided to do some more stuff out of the car in prep for the engine pull.- Harness: Removed O2 sensors and what I presume to be speed sensors from under the car
- Harness: Removed the starter solenoid wire (still have another wire left)
- Unbolted the power steering pump from front cover (couldn't get it off, will have to wait until its lifted up a bit)
- Removed exhaust bolts; there should be eight bolts and nut combos (I had a colorful variety of 7, all different)
- Removed 9 bell-housing bolts, one of which was buggered up real bad
Last edited by marshallnoise; 10-21-2019, 04:39 PM. Reason: I pulled out the old bad picture links. Photobucket!!! YOU ASSHOLES!!!!Si vis pacem, para bellum.
New Hawtness: 1995 540i/6 Claptrap
Defunct too: Cirrusblau m30 Project
Defunct (sold): Alta Vista
79 Bronco SHTF BuildComment
-
Sold my 540i/6, but glad I can work vicariously through you without getting my hands dirty.Comment
-
Got the engine pulled yesterday, hallelujah. Originally planned on pulling it via the side and just the engine. Wound up pulling the hood off to get some tugging action going. :D
The only thing I had left to do before removing the engine was the 12th bellhousing bolt, remove the A/C compressor from its mount, and disconnect the starter leads.
I did that and then got to work.
 IMG_20160610_130222900_zpsl4mmqbmk by Paul Abbott, on Flickr
Found out why I didn't have any sprayers for the wipers. I shit you not this is how I saw the hood right after pulling the mat.
 IMG_20160610_133843249_zpsulpqvak3 by Paul Abbott, on Flickr
Hood on the lawn. This took a lot longer than I expected. You have to remove the front bumper, to get the grille out (because tabs are broken that release the grille) to get to the 4 bolts holding the hood on. The e30 arrangement is much better in this regard.
 IMG_20160610_143818626_zpskm54dcrx by Paul Abbott, on Flickr
 IMG_20160610_143823754_zps13xhmvv2 by Paul Abbott, on Flickr
After a couple hours of struggling and coaxing, she is finally starting to give birth.
 IMG_20160610_151207048_zps75nqej2e by Paul Abbott, on Flickr
 IMG_20160610_151218961_zpspmanqofs by Paul Abbott, on Flickr
 IMG_20160610_153218395_zpsyqfyyb0v by Paul Abbott, on Flickr
 IMG_20160610_153232622_zpsotegwou5 by Paul Abbott, on Flickr
 IMG_20160610_153247399_zpsrcb5pcpz by Paul Abbott, on Flickr
 IMG_20160610_153440563_zpsegvxytq8 by Paul Abbott, on Flickr
 IMG_20160610_153913546_zpsol30htks by Paul Abbott, on Flickr
Amazingly tight fit. Like a virgin. Seriously though, its a tight fit.
 IMG_20160610_153929573_zpsmxjk3okq by Paul Abbott, on Flickr
 IMG_20160610_153938541_zpsso4rzql0 by Paul Abbott, on Flickr
Freaking oily mess. No idea why either.
 IMG_20160610_153948773_zpspk1gkiw7 by Paul Abbott, on Flickr
 IMG_20160610_153956778_zpsdgdexeo2 by Paul Abbott, on Flickr
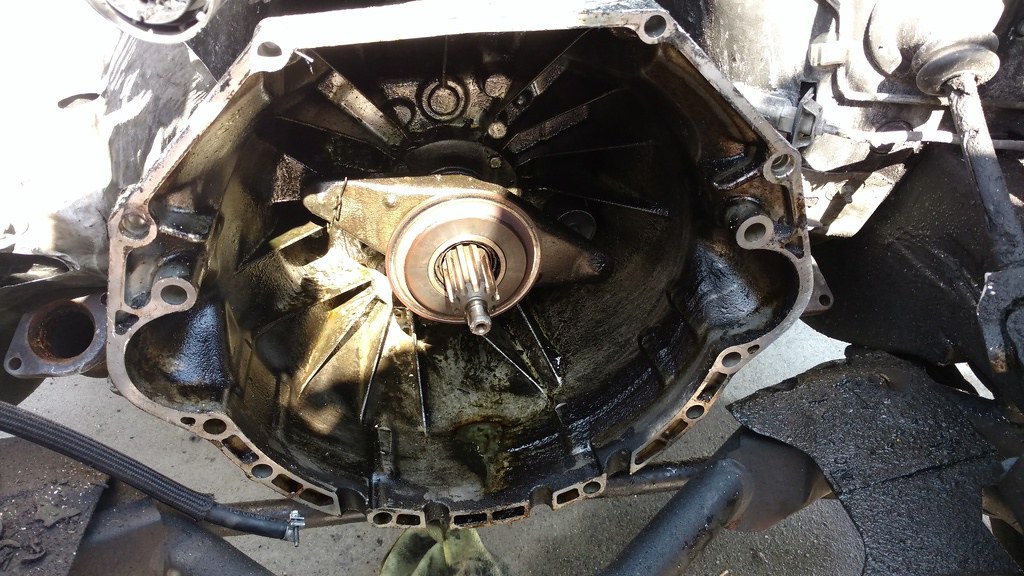
The clutch plate had to be removed (first time I have ever done this) in order to get it on my stand. Of course we have two different type bolts, some of the bits were used in either one.
 IMG_20160610_155004704_zpsftcor6rx by Paul Abbott, on Flickr
 IMG_20160610_160010412_zpsnjovgtor by Paul Abbott, on Flickr
Flywheel looks a little scorched. I am debating on seeing if I can have it tested since it is a factory dual mass and has a certain service life and that's it. Or just bolt it back on because it was fine before disassembly.
 IMG_20160610_155808751_zpsguzscfqe by Paul Abbott, on Flickr
Clutch. OEM Luk. Doesn't look horrible to me.
 IMG_20160610_155756276_zpsjla3iv9g by Paul Abbott, on Flickr
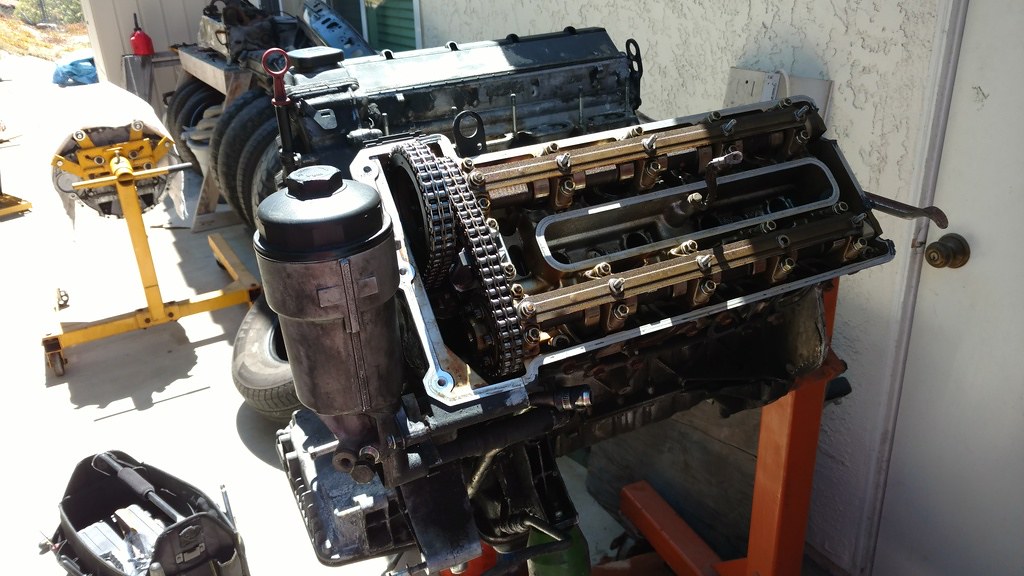
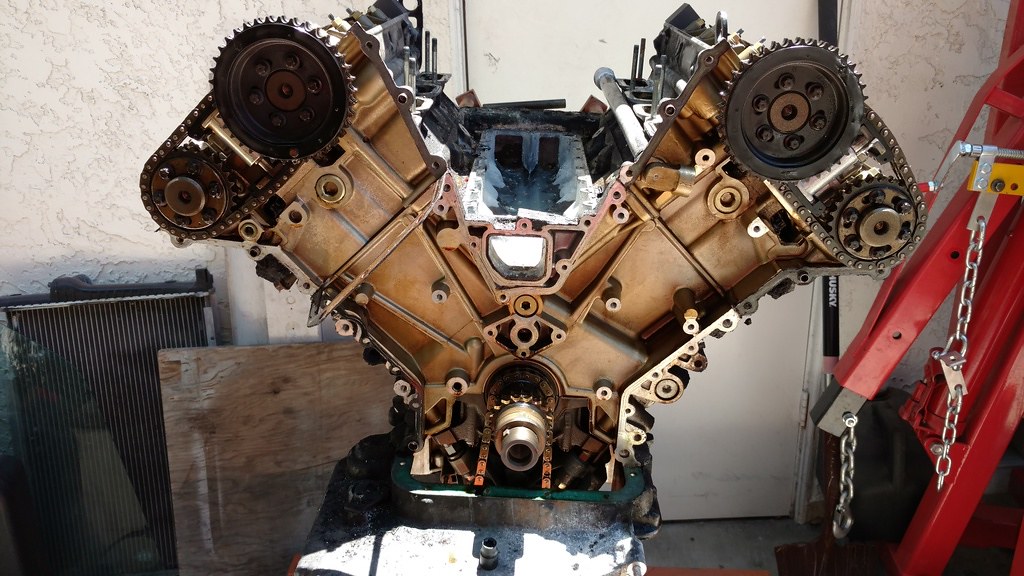
And on my giant diesel engine stand.
 IMG_20160610_172435212_zpswafquemf by Paul Abbott, on Flickr
 IMG_20160610_172447470_zps8zke03v4 by Paul Abbott, on Flickr
It just about killed me because I did this alone. I didn't work fast on this and it took me about 6 hours. My arthritis is killing me today. In a couple days though, I will be fine and I can get after the swap. I still need to put the 4.4 block on my other engine stand so I can begin moving stuff over.Last edited by marshallnoise; 10-21-2019, 04:47 PM.Si vis pacem, para bellum.
New Hawtness: 1995 540i/6 Claptrap
Defunct too: Cirrusblau m30 Project
Defunct (sold): Alta Vista
79 Bronco SHTF BuildComment
-
Flywheel looks a bit beat up
The main thing is to check for high spots / warpage
Good job getting that engine out on your own , bitch of a job , we usually have 2 to 3 people doing that job to help jiggle it out of the engine bay.
Now we prefer to unbolt the front panel and slide the whole engine + transmission assembly out.Comment
-
Yeah, I'll have it checked out when I get the heads off. If the heads aren't flat, then they are getting torn down and taken to the machine shop for decking. I'll ask them about the flywheel then.Originally posted by 90-E34-M5 View Post
Yes, it is a bitch of a job. I think I would have pulled the front clip and done it the way you mentioned if I had to do it over again. Although, it really wasn't that horrible. Just time consuming (mainly my pace). And it definitely requires wrestling.Si vis pacem, para bellum.
New Hawtness: 1995 540i/6 Claptrap
Defunct too: Cirrusblau m30 Project
Defunct (sold): Alta Vista
79 Bronco SHTF BuildComment
-
m60b40 Disassembly
Decided to get out there after work and start pulling parts off the m60b40 and see if there are some clues as to this engine's issues or not.
 IMG_20160614_183011697_zps1sl4v1ey by Paul Abbott, on Flickr
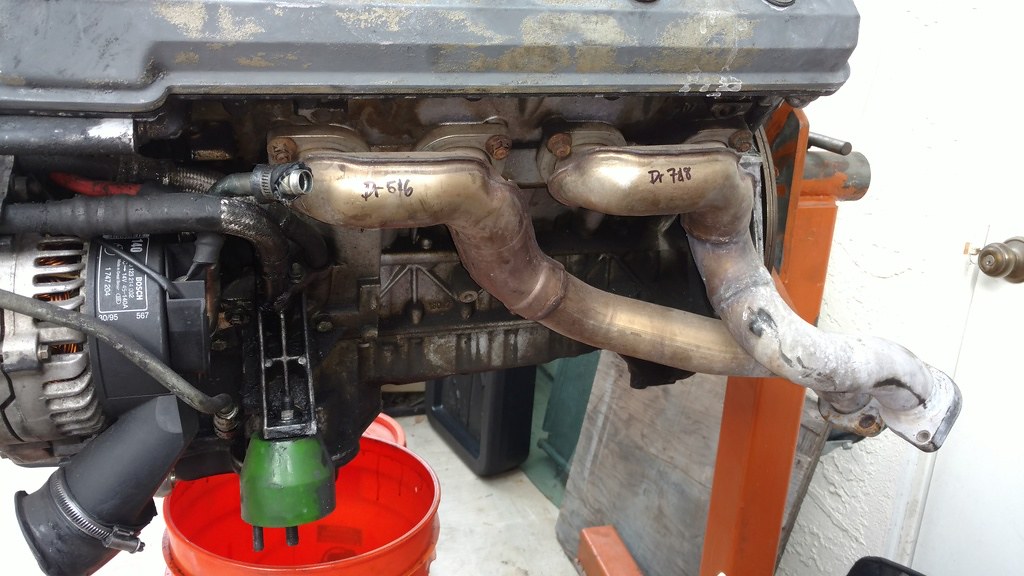
Drivers side exhaust manifolds.
 IMG_20160614_183642064_zpsumccmotr by Paul Abbott, on Flickr
Drivers side exhaust manifolds removed.
 IMG_20160614_183936294_zpsuuoa6ydx by Paul Abbott, on Flickr
Moved over to the passenger side and started loosening 7 of 8 exhaust header nuts...yes, 7 if 8.
 IMG_20160614_184141582_zpsduzwhfmy by Paul Abbott, on Flickr
Passenger side exhaust manifolds removed.
 IMG_20160614_184422408_zpspyg8sskt by Paul Abbott, on Flickr
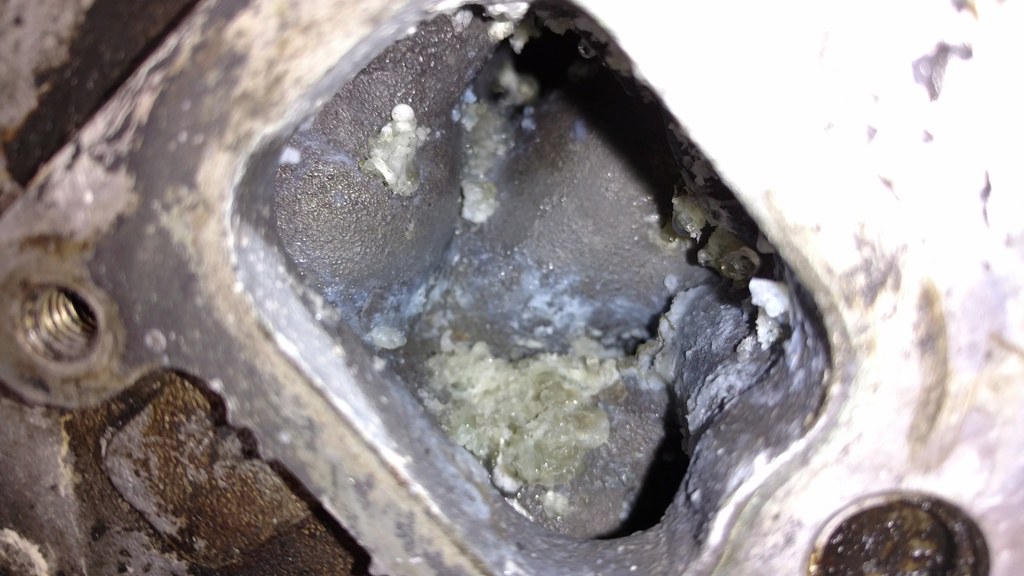
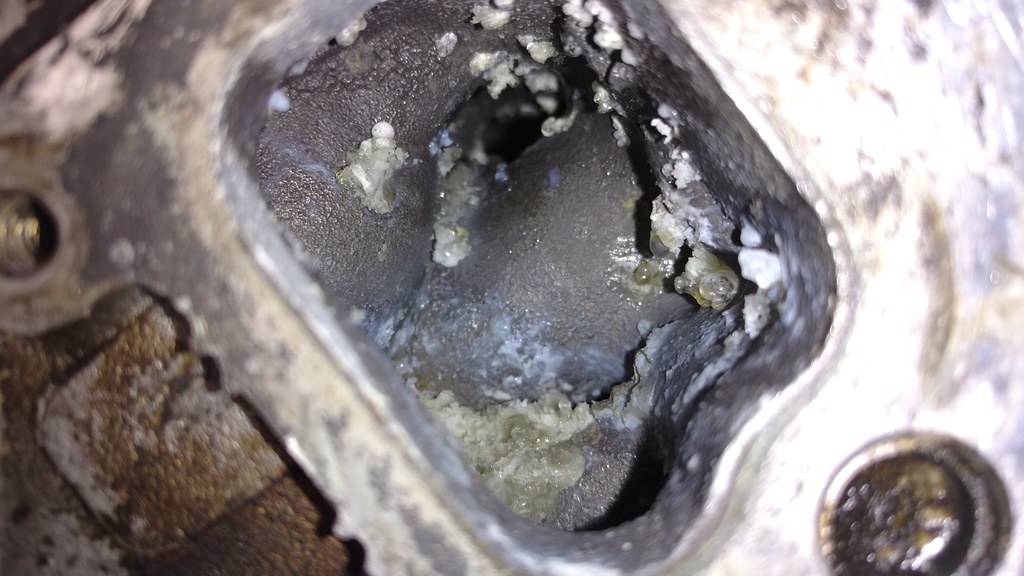
Ruh-roh: Number 3 cylinder that had the nasty plug. (I erroneously thought it was number 7).
 IMG_20160614_184427255_zpsdvm8mcnf by Paul Abbott, on Flickr
Before intake manifold removal.
 IMG_20160614_184640344_zpsgzv1xicu by Paul Abbott, on Flickr
Post intake manifold removal.
 IMG_20160614_185521009_zpsthyhb2cf by Paul Abbott, on Flickr
3 & 4 intake port. Nastiness in 3 and a little in 4.
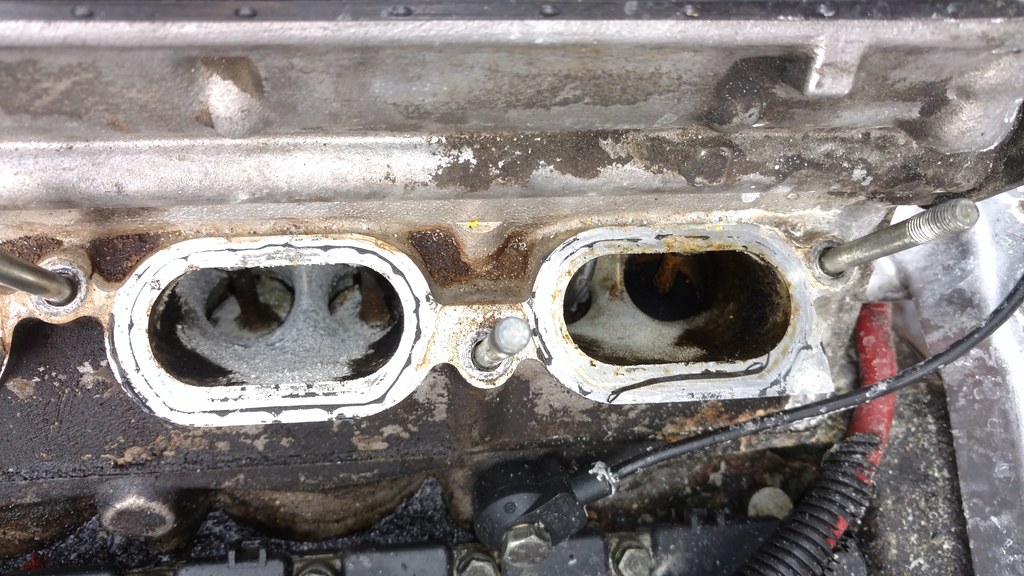 IMG_20160614_185535118_zpsnf7ghzyv by Paul Abbott, on Flickr
Coolant crossover manifold battery cable mounting (probably going to do something different here).
 IMG_20160614_185706736_zpstjfatomm by Paul Abbott, on Flickr
Removed battery cable mount.
 IMG_20160614_185711356_zpsuuvkb0nt by Paul Abbott, on Flickr
Crossover manifold and crossover tubes resting on the m62 block.
 IMG_20160614_190438115_zpskpp3wvmo by Paul Abbott, on Flickr
Empty m60 rear head area.
 IMG_20160614_190447861_zpsrbatop42 by Paul Abbott, on Flickr
FYI, "The Right Stuff" was epic. The coolant manifold was stuck on there VERY well assuring me that as long as its applied evenly, there ain't gonna be any leaks.
Next three pics are of the passenger side coolant crossover manifold port.
 IMG_20160614_190532681_zpstwscrzj5 by Paul Abbott, on Flickr
 IMG_20160614_190536809_zpsa5yyshrc by Paul Abbott, on Flickr
 IMG_20160614_190540066_zpskqp1s0pl by Paul Abbott, on Flickr
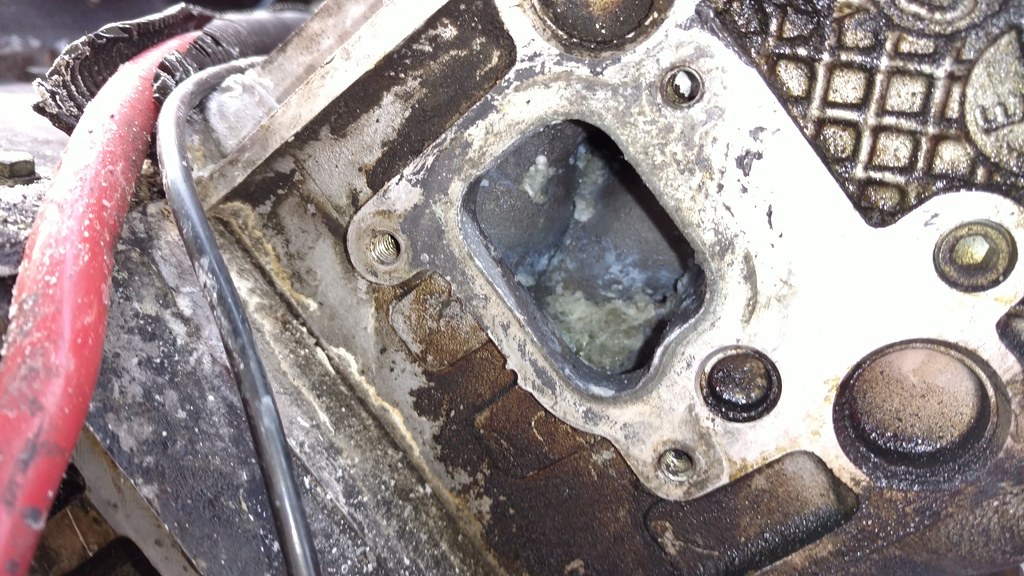
Drivers side coolant crossover manifold port. Little bit of nastiness.
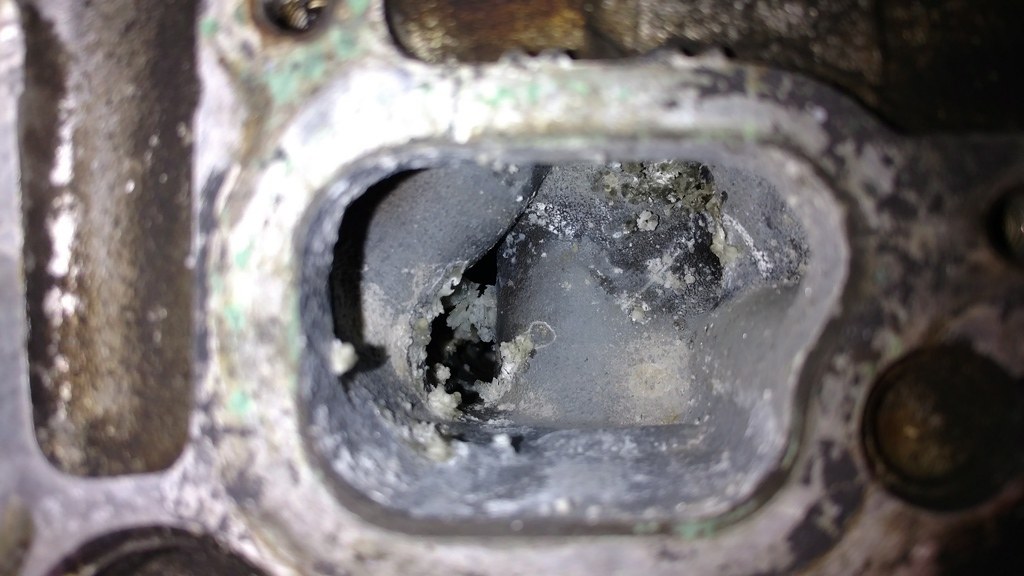 IMG_20160614_190559618_zpsbwrip5tx by Paul Abbott, on Flickr
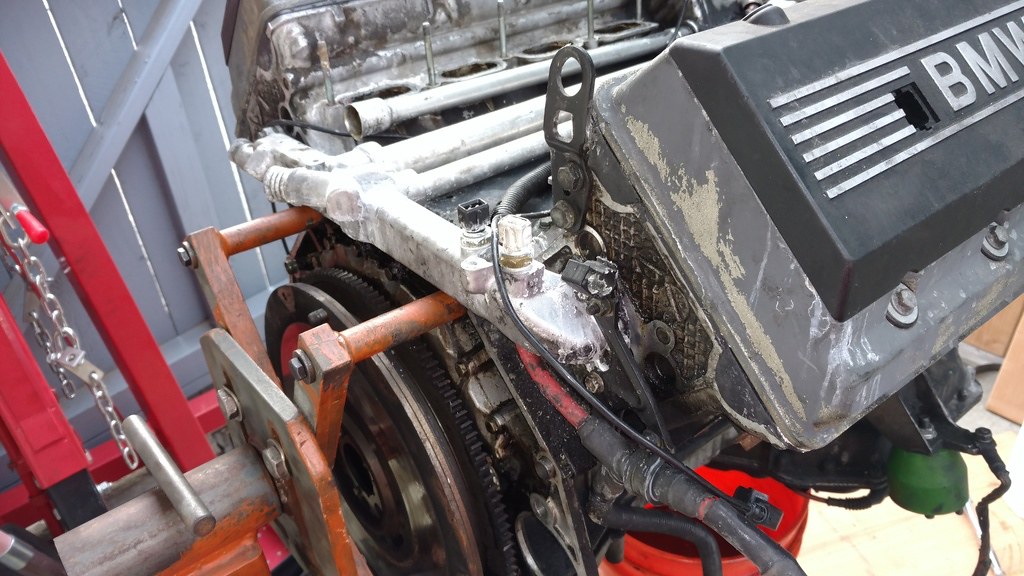
Alternator and oil filter mounting shot.
 IMG_20160614_190809562_zpsxmjqsfvu by Paul Abbott, on Flickr
Alternator idler assembly (for future reference).
 IMG_20160614_190926099_zps32spa2ia by Paul Abbott, on Flickr
And that's how I left it for the evening. Probably going to do some more tear down on Friday. So far, its looking like I should have the heads decked and cleaned at the very least and probably have the valve guides replaced.
Any ideas about how much that should run?Last edited by marshallnoise; 10-21-2019, 07:55 PM.Si vis pacem, para bellum.
New Hawtness: 1995 540i/6 Claptrap
Defunct too: Cirrusblau m30 Project
Defunct (sold): Alta Vista
79 Bronco SHTF BuildComment
-
Great progress Paul! As far as machining your heads, call Shant (Bimmerheads) I know he really wants to work on a set of M60 heads. As soon as I'm to that point in my build, I'll be sending my heads to him.Comment
-
I know Shane! Well, I bought a set of e30 bumpers from a few years ago. Considering I don't want any portwork or anything done, I see no point of driving up to LA for just a head cleaning and decking. If though, these heads turn out to need a valve job, I might just source some different heads then send these on up to Shane so he can tinker to his hearts content. I also have a really good set of m62 heads if he wants them.Originally posted by unrulygrace View Post
Ok, next post!Si vis pacem, para bellum.
New Hawtness: 1995 540i/6 Claptrap
Defunct too: Cirrusblau m30 Project
Defunct (sold): Alta Vista
79 Bronco SHTF BuildComment
-
Data dump and lots of work done today.
As I started out today.
 IMG_20160617_104011037_zpsv2sttyz1 by Paul Abbott, on Flickr
Crank pulley pulled off.
 IMG_20160617_104349698_zpsf2ipwt7g by Paul Abbott, on Flickr
Water pump pulled.
 IMG_20160617_105133680_zpsto1zftgw by Paul Abbott, on Flickr
Pulled the cam position sensor, crank position sensor and knock sensors.
 IMG_20160617_105940744_zpsatywyslg by Paul Abbott, on Flickr
Drivers side valve cover off.
 IMG_20160617_111738735_zps7e1sk8iu by Paul Abbott, on Flickr
Passenger side valve cover off.
 IMG_20160617_112414537_zpsgxwerbyn by Paul Abbott, on Flickr
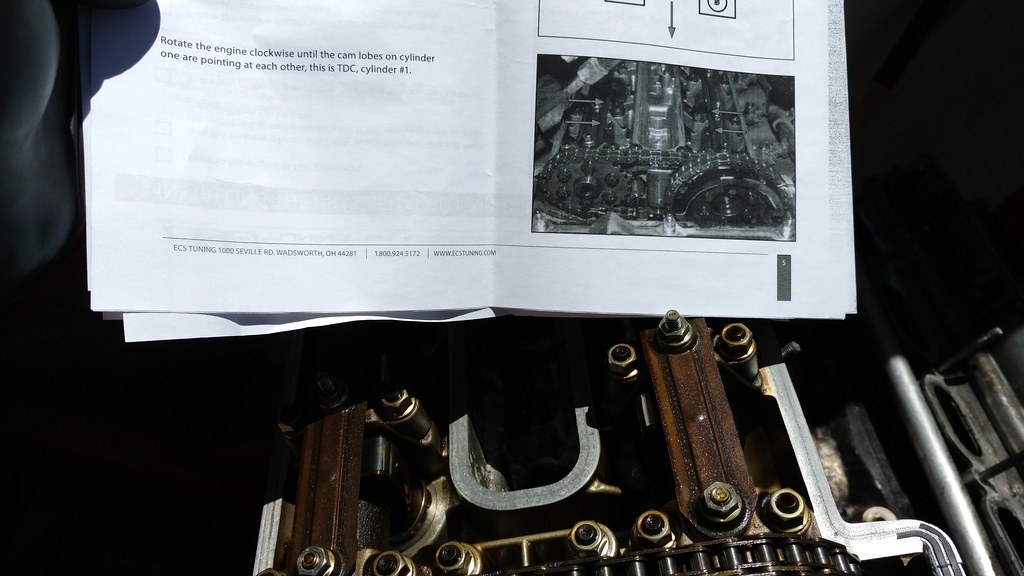
Used my Baum Tools cam lock tool instruction on the passenger side head. Basically, cylinder 1 is the one at the front on the passenger side. The cam lobes are to be pointed toward each other on this cylinder. You can barely make it out in the pic. But they are in the right position. Turns out to be a moot point later.
 IMG_20160617_112846077_zps25u7cxkg by Paul Abbott, on Flickr
Passenger side cams locked in place.
 IMG_20160617_113509951_zpsx0ln5zy9 by Paul Abbott, on Flickr
Drivers side cams locked in place.
 IMG_20160617_113519283_zpsu8bmv9jv by Paul Abbott, on Flickr
Time to install the timing chain tensioner (again, pointless for as much work as I am doing.) You can see it sticking out on the left of the passenger head.
 IMG_20160617_114143798_zpsegltji7m by Paul Abbott, on Flickr
Another shot of the manual tensioner and the passenger side engine mount off the motor.
 IMG_20160617_114150652_zpscs4adhct by Paul Abbott, on Flickr
 IMG_20160617_114957053_zpsnj8senoc by Paul Abbott, on Flickr
Drivers side engine mount off (this one has the oil passages and o-rings going through them). Stupid freaking design.
 IMG_20160617_115945697_zpsru3r9bvu by Paul Abbott, on Flickr
Gotta give it to this Horror Freight Earthquake 1/2" pneumatic tool. It took 110psi for about 3 minutes, but it did the work and broke the Jesus bolt loose with minimal effort.
 IMG_20160617_121019114_zpsoex9rftm by Paul Abbott, on Flickr
Jesus bolt off.
 IMG_20160617_121905246_zpsrdaieude by Paul Abbott, on Flickr
Drivers side upper timing cover bolts backed out.
 IMG_20160617_122257333_zpsowmhi089 by Paul Abbott, on Flickr
Drivers side upper timing cover removed.
 IMG_20160617_122619788_zps7iu7rolx by Paul Abbott, on Flickr
Passenger side upper timing cover bolts backed out.
 IMG_20160617_122820259_zpssznql6yb by Paul Abbott, on Flickr
Passenger side upper timing cover removed. Already removed the manual tensioner.
 IMG_20160617_123308910_zpsjo4kpmfb by Paul Abbott, on Flickr
Lower timing cover bolts removed.
 IMG_20160617_124400261_zpsdyl9xzja by Paul Abbott, on Flickr
Have to remove the lower oil pan to get access to the 4 remaining lower timing cover bolts.
 IMG_20160617_124405431_zpstfopldut by Paul Abbott, on Flickr
Aaaaand there is water in the motor. Head gasket leak.
 IMG_20160617_124549909_zpstmu8gvwv by Paul Abbott, on Flickr
Horrible attempt of showing where the 4 bolts are. I was tired.
 IMG_20160617_124602784_zpslfenwhll by Paul Abbott, on Flickr
This is the m60 oil level sensor that needs to be taken out and put on the m62 oil pan.
 IMG_20160617_124653722_zpsnrajgick by Paul Abbott, on Flickr
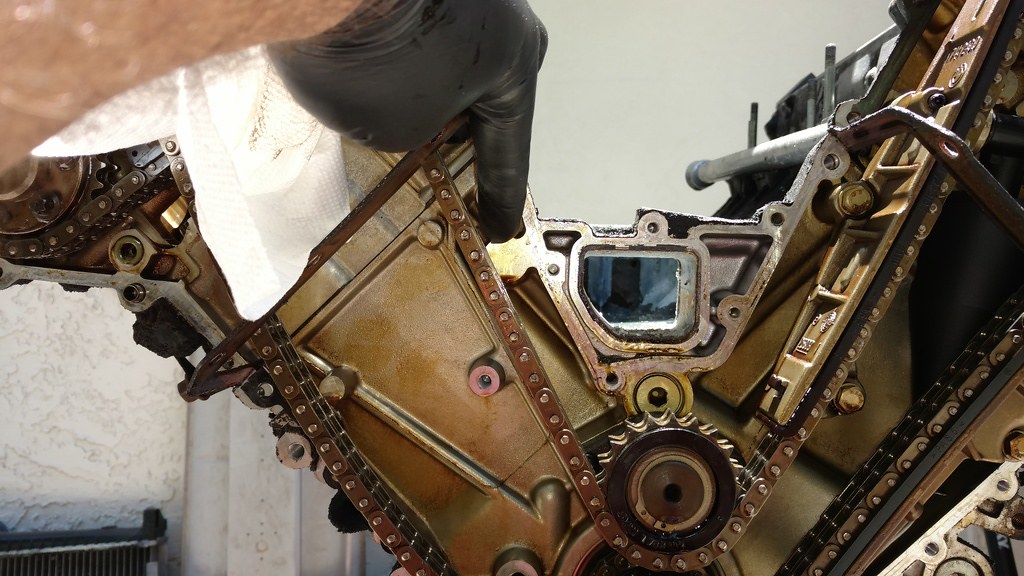
Lower timing cover removed.
 IMG_20160617_125902820_zps8xopctu7 by Paul Abbott, on Flickr
Tensioner furthest to the left removed (you pretty much work from left to right sitting in front of the engine). And I am using hex bolts instead of the e-torx on the m62 wherever possible.
 IMG_20160617_131017079_zps5qqqqral by Paul Abbott, on Flickr
Showing the idler sprocket. Love this thing.
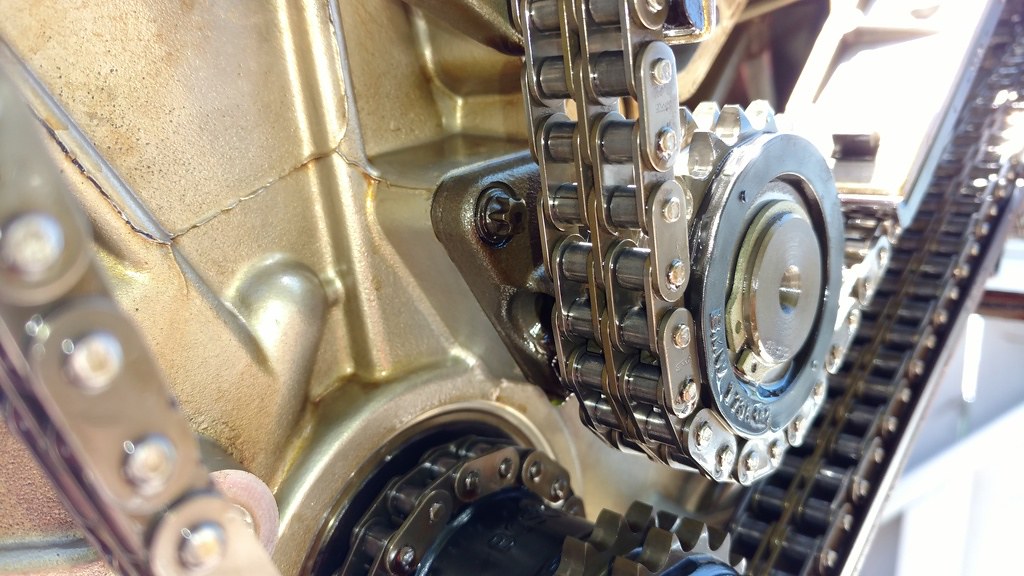 IMG_20160617_131024022_zpshrfgzrdg by Paul Abbott, on Flickr
Next one.
 IMG_20160617_131618737_zpst8cmfx72 by Paul Abbott, on Flickr
This is the part of the m60 block that needs to be blocked off on the m62 block.
 IMG_20160617_131629474_zps2dofth0o by Paul Abbott, on Flickr
This shows the set screw used to keep the OSV valve from moving on an m60. The m62 doesn't have this.
 IMG_20160617_131743209_zpsi0qhy8pw by Paul Abbott, on Flickr
Next chain guide removed.
 IMG_20160617_132106279_zpsamylturs by Paul Abbott, on Flickr
This is what the set screw is holding in place.
 IMG_20160617_132120156_zpsa0smxf0y by Paul Abbott, on Flickr
You can see it is attaches to the OSV. This the pipe that crosses over to the PCV plate on the back.
 IMG_20160617_132122359_zpsxv83ojlg by Paul Abbott, on Flickr
And the 4th chain guide removed.
 IMG_20160617_132445732_zpsb81p88xw by Paul Abbott, on Flickr
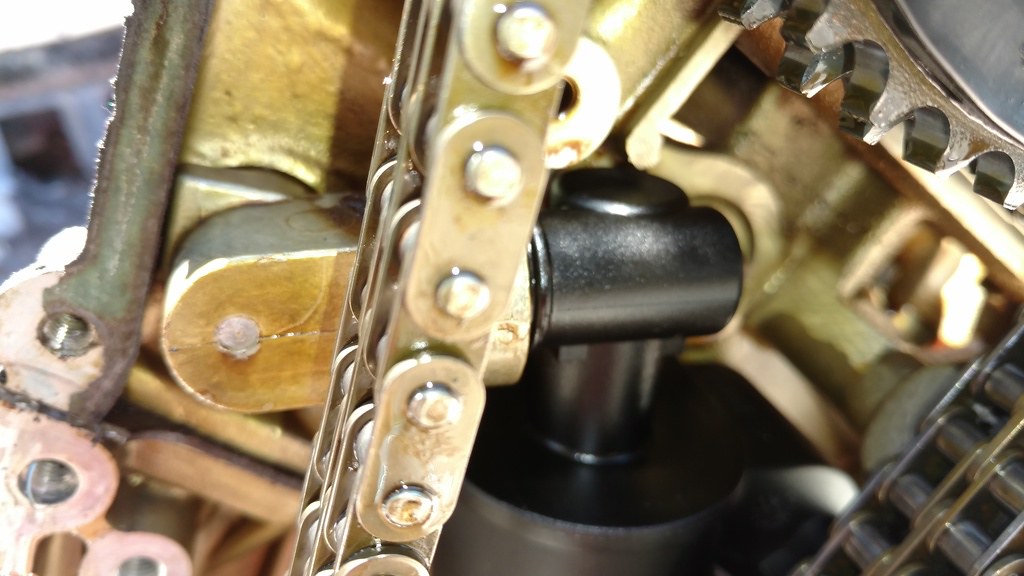
Idler sprocket is held on by a snap ring. Easy as pie to remove.
 IMG_20160617_132953438_zpso0y6edzb by Paul Abbott, on Flickr
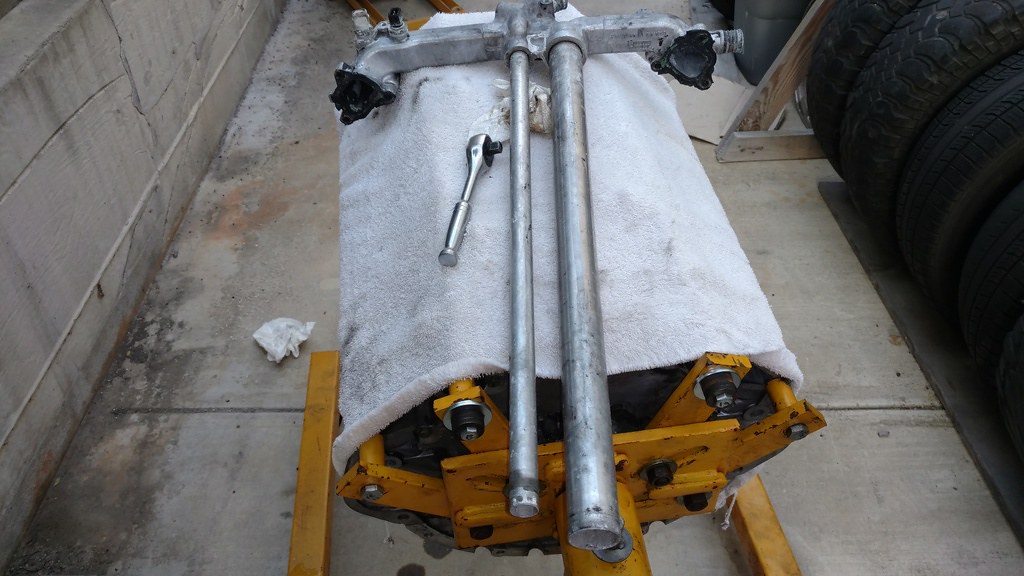
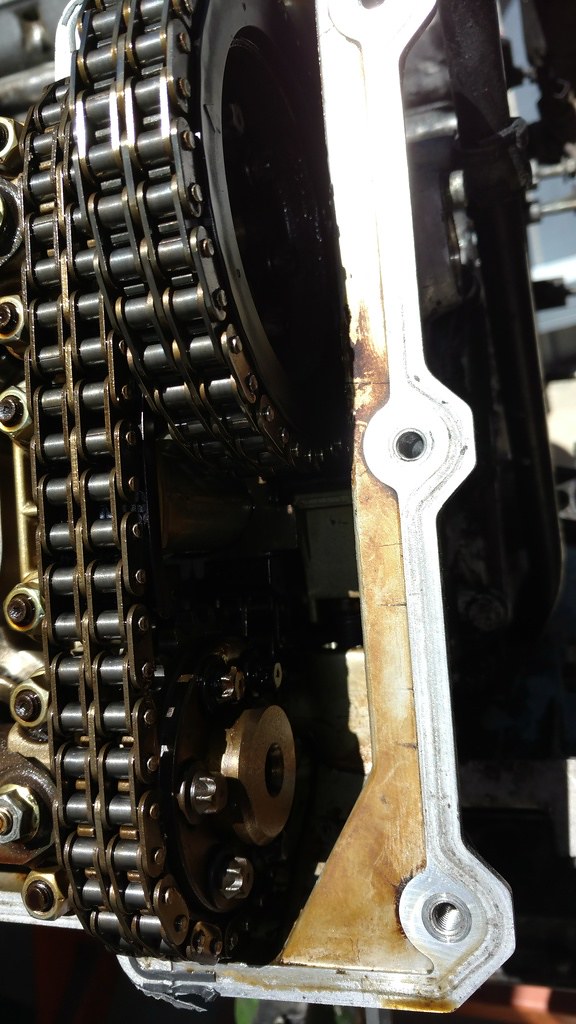
Since some people want to know if the m60 and m62 chains are the same length, I took some time and showed some comparison pics. This is the first pic.
 IMG_20160617_133712032_zpsifcguc2m by Paul Abbott, on Flickr
Showing they are more or less identically positioned at the top. M60 duplex in the back.
 IMG_20160617_133718177_zpsgzo1t95s by Paul Abbott, on Flickr
And the bottom of the chains. The m62 is a link or two shorter. I think the m60 tensioner setup can compensate, but I am not going to try for anyone.
 IMG_20160617_133729380_zpsa7t1dhsc by Paul Abbott, on Flickr
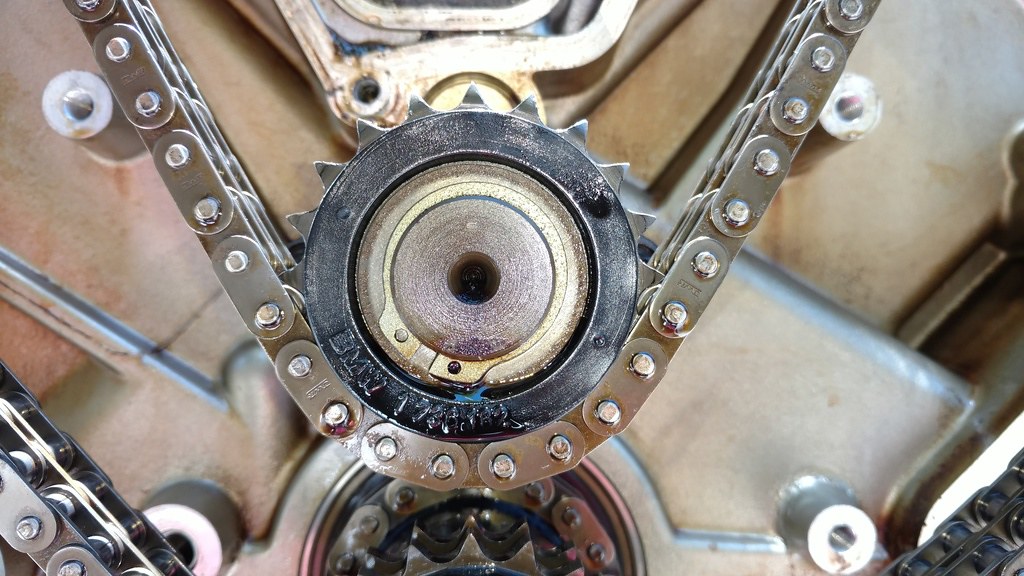
Idler sprocket removed. Now to get the chain off, I had to free up some slack on the idler, remove the snap ring and then pull the idler off it's mount.
 IMG_20160617_133931238_zps9xynamcz by Paul Abbott, on Flickr
Chainless m60.
 IMG_20160617_134501105_zpsag4ztbd5 by Paul Abbott, on Flickr
I started to put the m60 stuff on the m62 engine just for giggles.
 IMG_20160617_134517845_zpsszciw0m6 by Paul Abbott, on Flickr
Finally pulled the heads off. Couple notes about this: First, having the cam locks on blocks two of the bolts that need to be removed. Pointless to have them on, but I took them off and then put them back on.
Here is the passenger side block. Frickin nasty.
 IMG_20160617_142600346_zpsrksbkxvm by Paul Abbott, on Flickr
This is cylinder number 3 with a bunch of shit in there. I believe that it is mostly baking soda. Whatever I did with the muriatic acid first definitely flushed out any blockages. Then the baking soda (to neutralize the acid) did it's number, but also deposited tons of this crap everywhere. Not one of my best ideas.
 IMG_20160617_142607779_zpsdqu4boog by Paul Abbott, on Flickr
Driver's side (sorry for shadow, fixed below).
 IMG_20160617_142625761_zpsi7n36wnb by Paul Abbott, on Flickr
Drivers shaded cylinders.
 IMG_20160617_142629024_zpsfekvsoe6 by Paul Abbott, on Flickr
Continued below...Last edited by marshallnoise; 10-21-2019, 08:09 PM.Si vis pacem, para bellum.
New Hawtness: 1995 540i/6 Claptrap
Defunct too: Cirrusblau m30 Project
Defunct (sold): Alta Vista
79 Bronco SHTF BuildComment
-
Continued...
Drivers side head.
 IMG_20160617_142700081_zpsqdyt242p by Paul Abbott, on Flickr
Passenger side head. Chamber for 3 has the rusty intake valves.
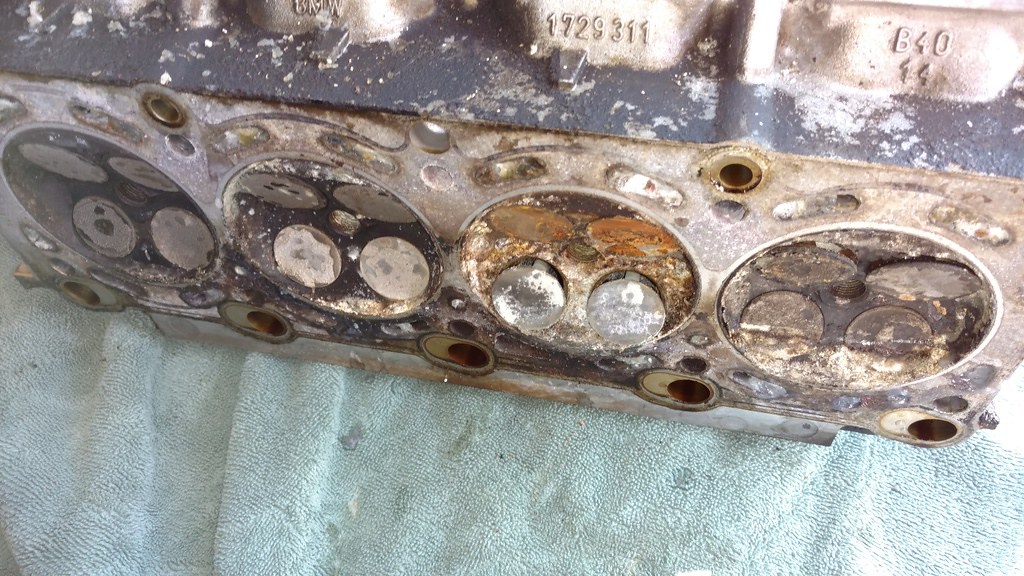 IMG_20160617_142706106_zpsx5mnccwq by Paul Abbott, on Flickr
Block number. Yes, this is a Nikasil block. I always wanted to know...
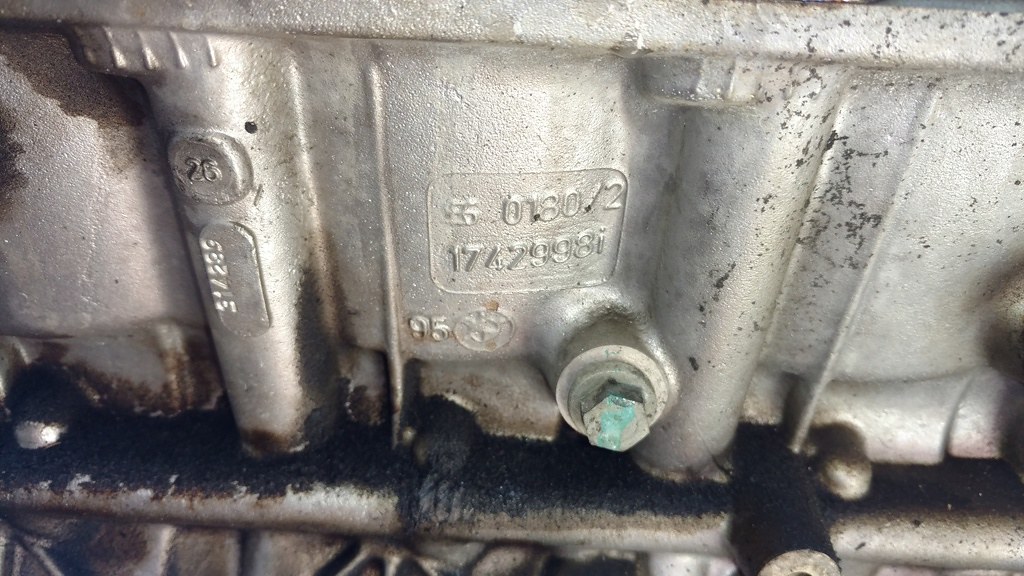 IMG_20160617_142835018_zpsqwazwu8h by Paul Abbott, on Flickr
Close up of cyclone valve top.
 IMG_20160617_144038883_zps8xrkwjsc by Paul Abbott, on Flickr
Another close up.
 IMG_20160617_144044810_zps93myoiok by Paul Abbott, on Flickr
You can see that swirling forces throw liquid oil up against the wall and then the liquid flows down into the crank case. The gasses apparently get sucked up into the intake. Just did that for curiosity sake mainly.
Took the heads to the machine shop (Machine Tech in Oceanside). They are pretty respected around here and I have no reason not to trust them to do typical cylinder head stuff. Basically, I have to tear the cams out to see what condition the heads are in.
Oh, cam tool info: This is a Schwaben manual in PDF form. I got mine off eBay for $100 shipped. I believe you could time the driver side head very easily without the tool, but the passenger side would require impressive balancing skills as the intake cam wants to roll forward on its own. Hence the need for the tool. Also, looking at it, I think you could make your own tool pretty easily. But for $100, this is a no-brainer.
I got two quotes initially.- $140 for head cleaning and decking
- $700 for cleaning, decking and full valve job
If it turns out that option 2 is needed, I will find another set of heads. It's just not worth it.Last edited by marshallnoise; 10-21-2019, 08:45 PM.Si vis pacem, para bellum.
New Hawtness: 1995 540i/6 Claptrap
Defunct too: Cirrusblau m30 Project
Defunct (sold): Alta Vista
79 Bronco SHTF BuildComment
-
This is some good porn. Keep it coming.Comment
-
doing work!Comment
-
Tryin!Si vis pacem, para bellum.
New Hawtness: 1995 540i/6 Claptrap
Defunct too: Cirrusblau m30 Project
Defunct (sold): Alta Vista
79 Bronco SHTF BuildComment

Comment