Announcement

Collapse
No announcement yet.

The Adventures of Golden Boy, my Rebound E30

Collapse
X
 
  • Filter
  • Time
  • Show
Clear All
new posts

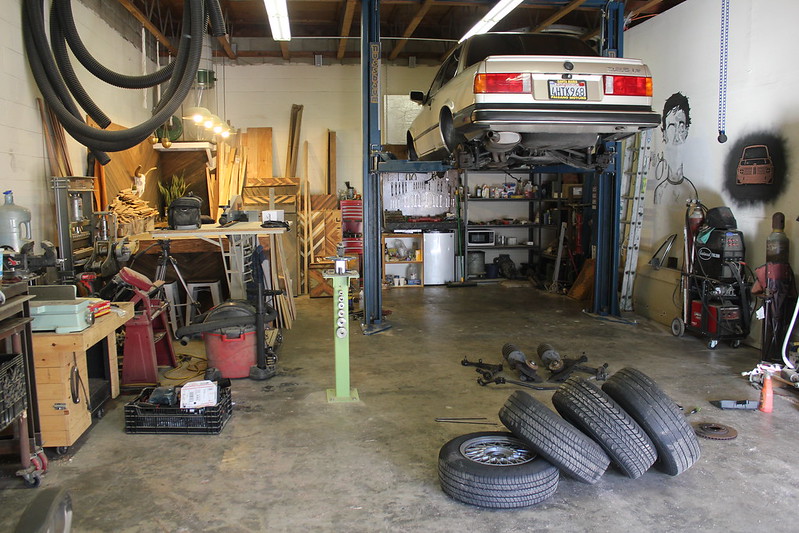
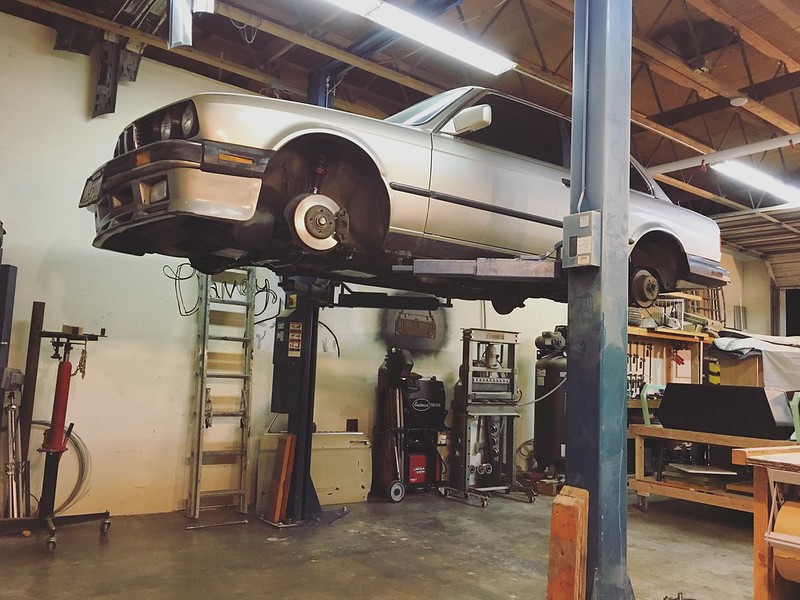
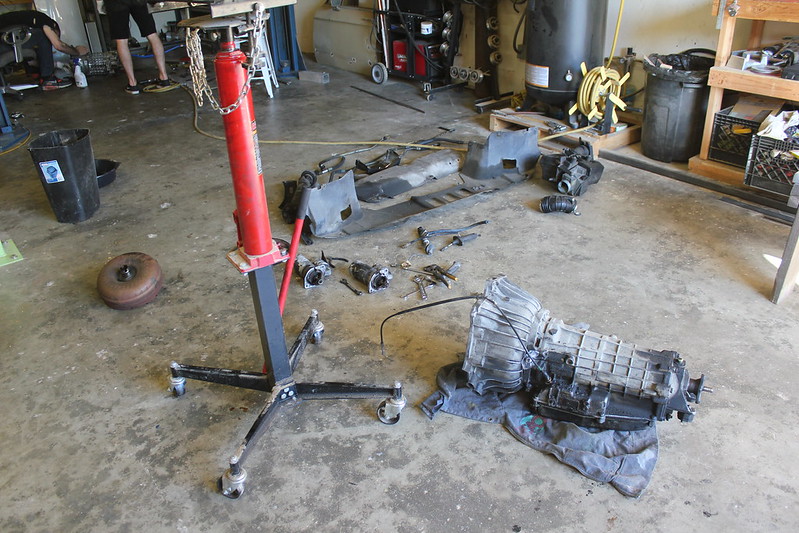
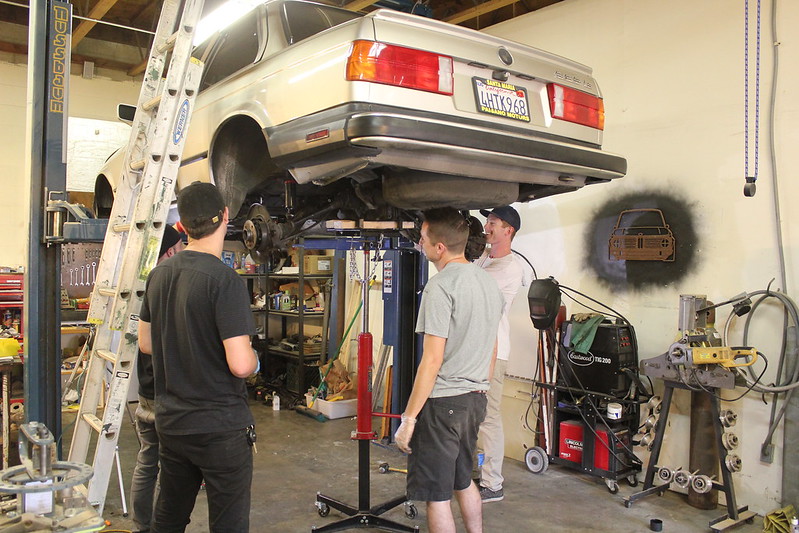
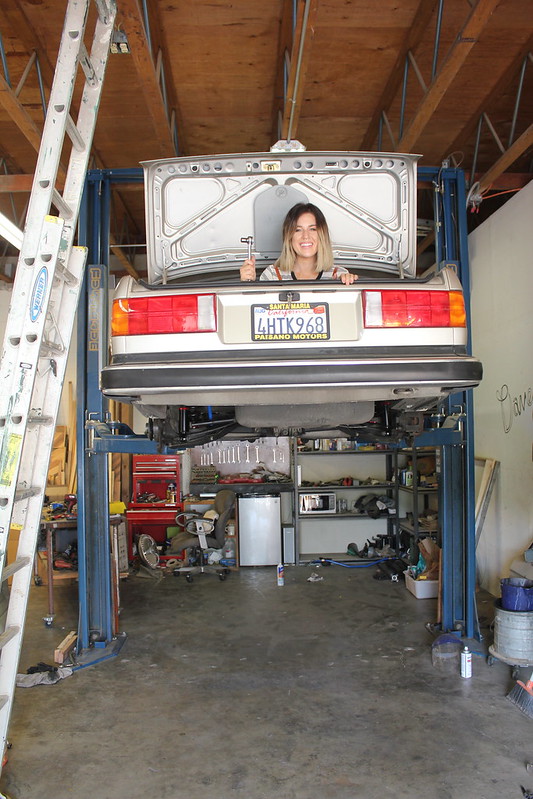
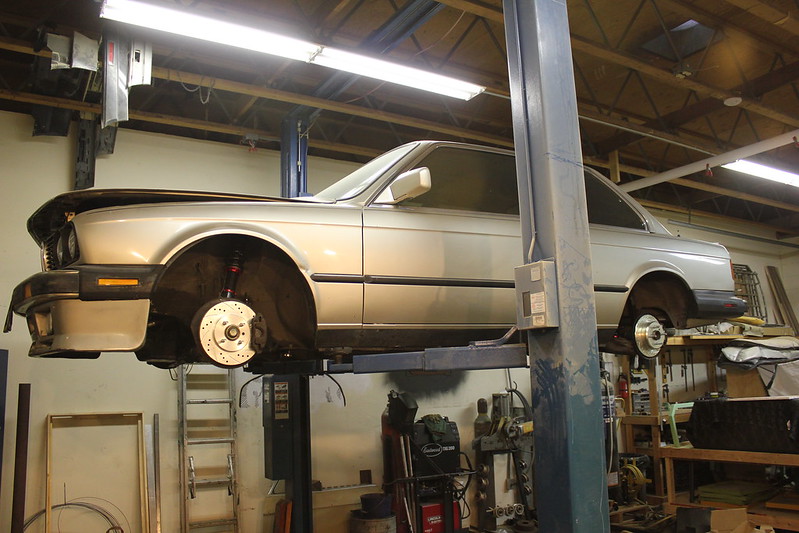
    After a lot of anticipation, I finally got the E30 up on the lift and started working on it today:


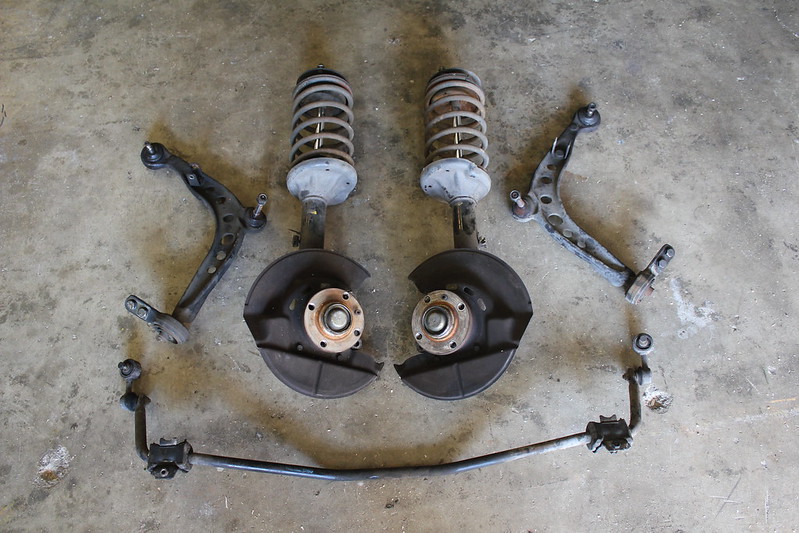
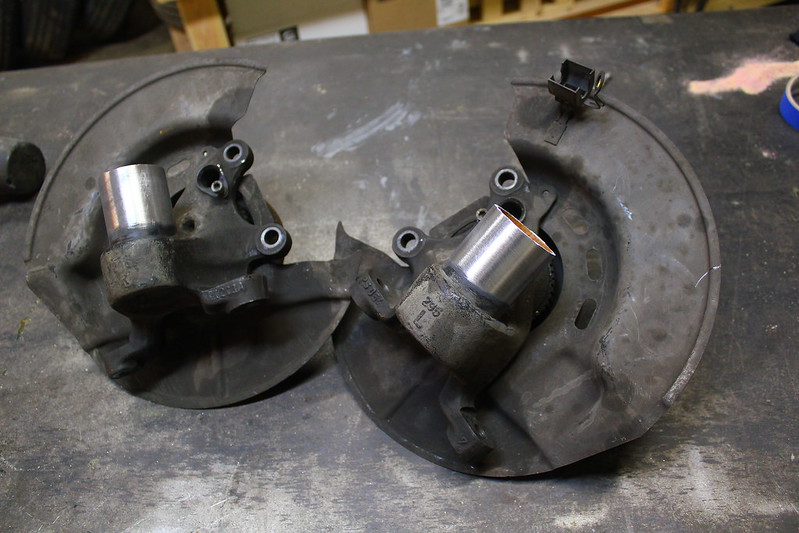
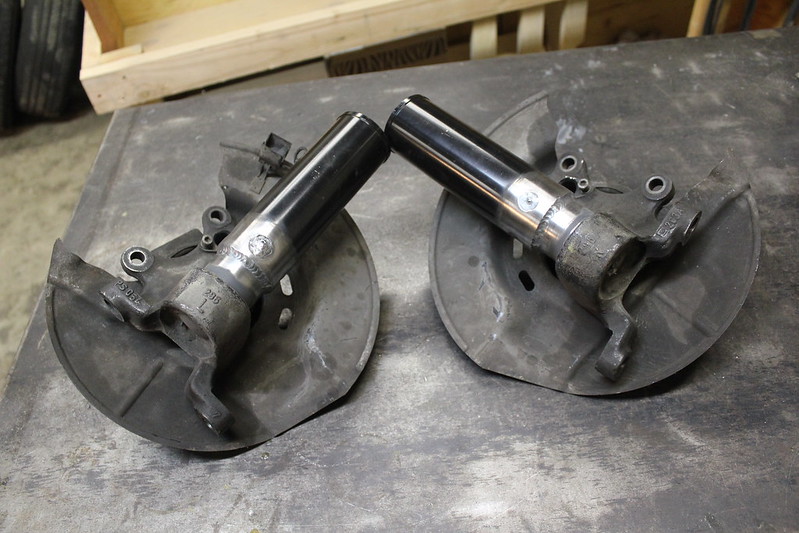
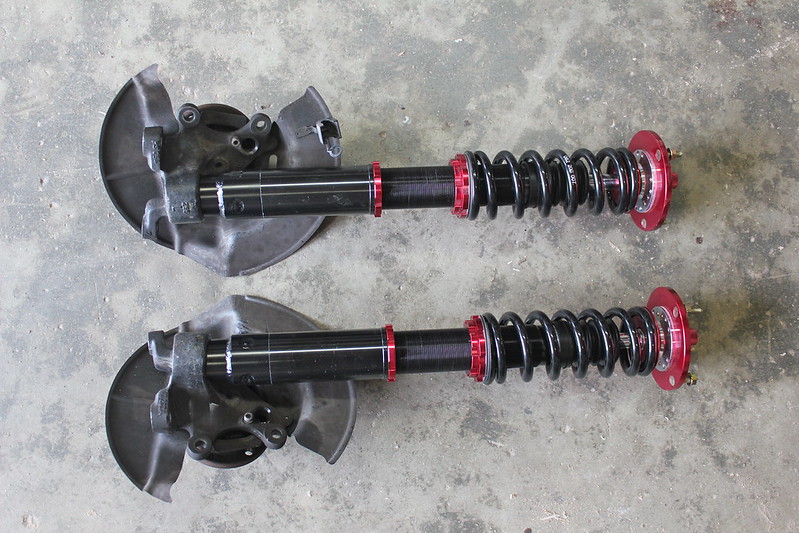
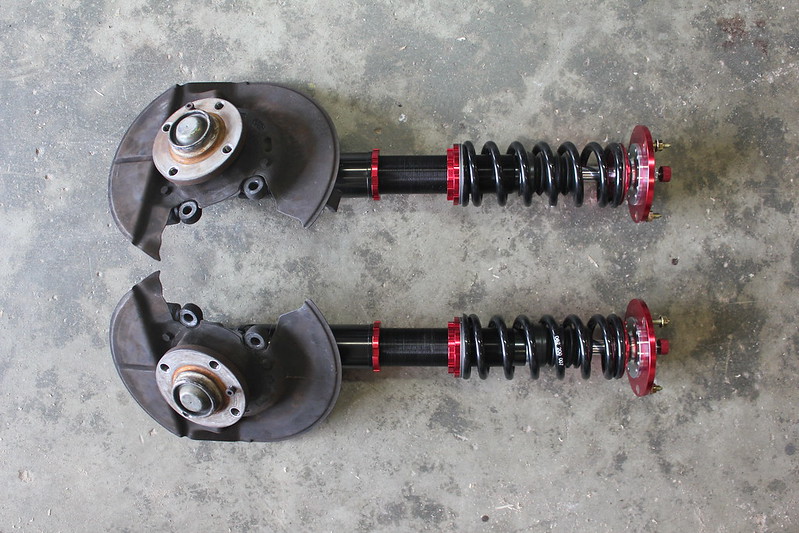
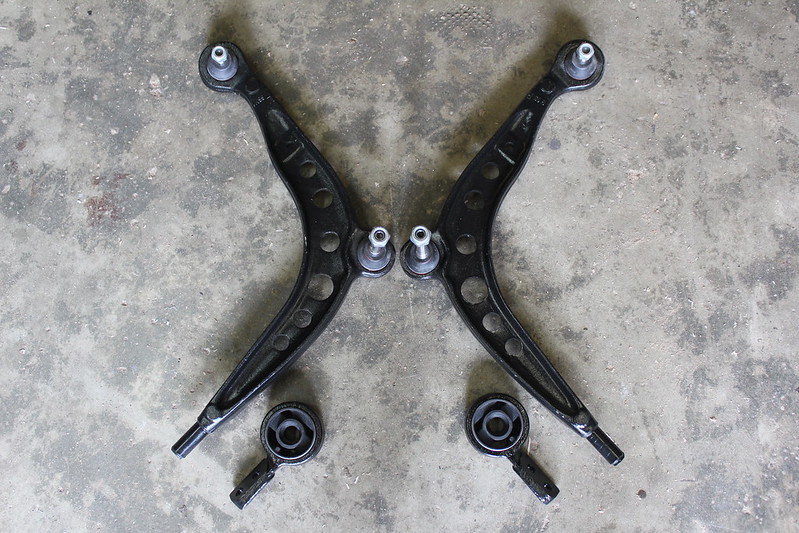
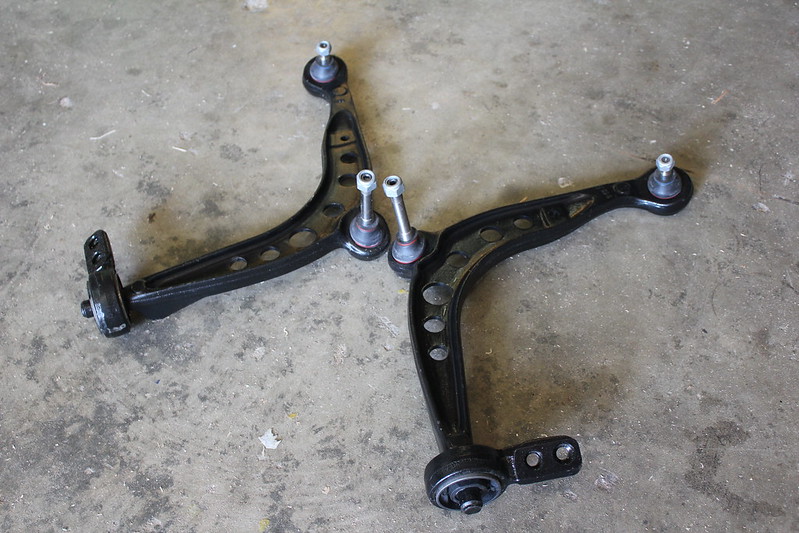
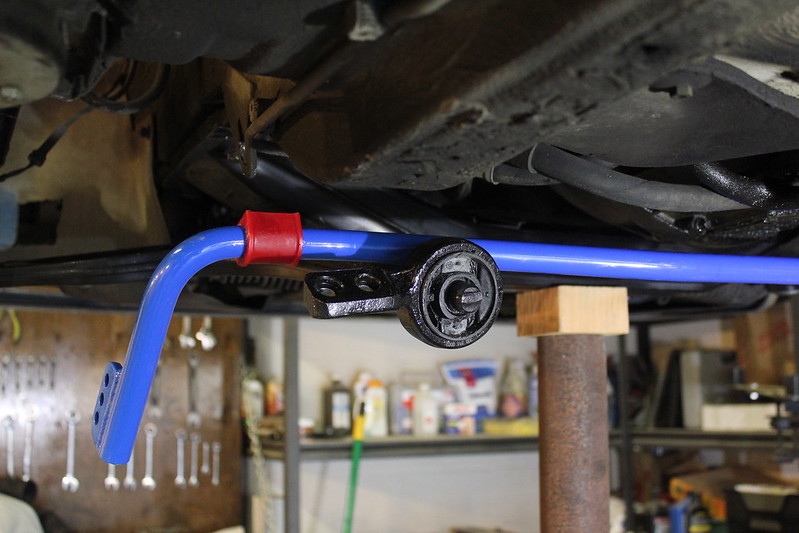
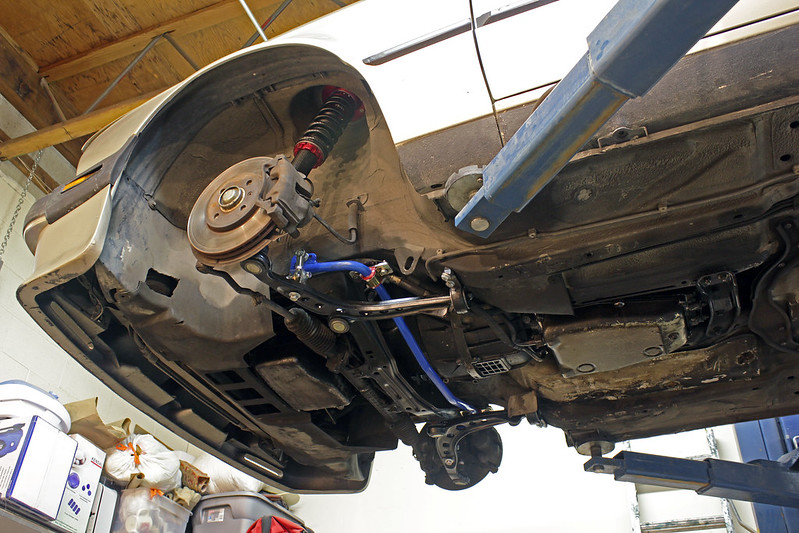
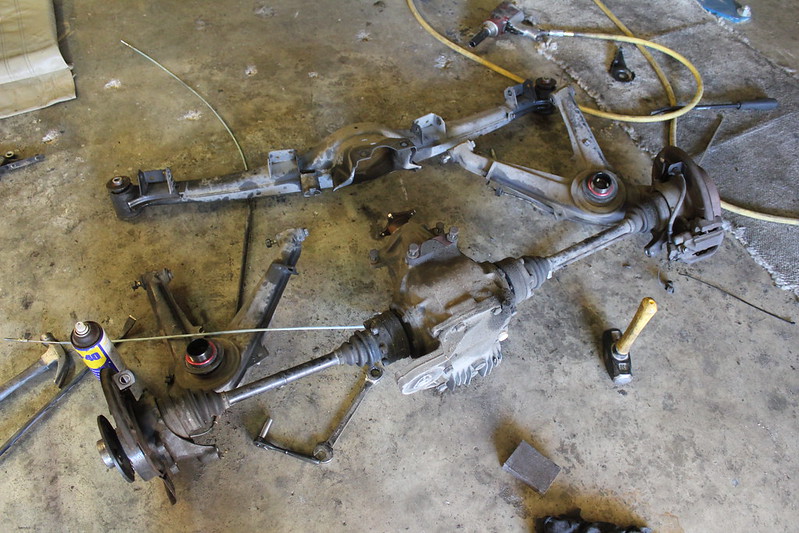
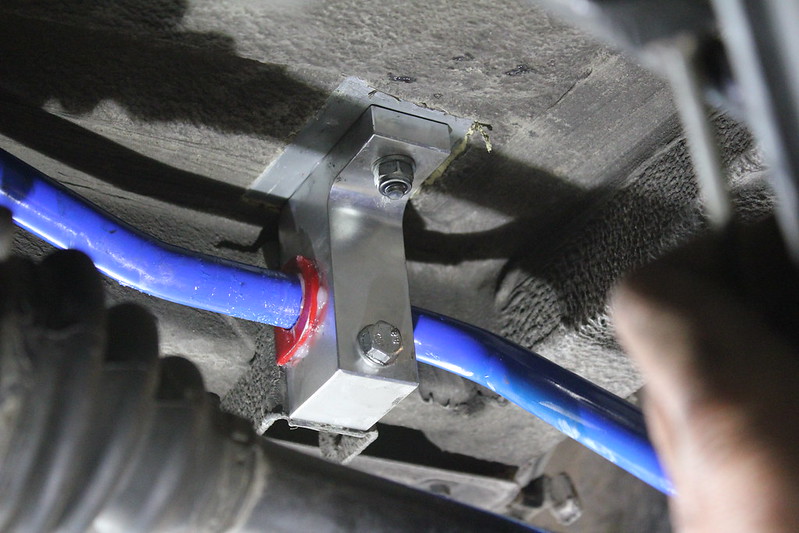
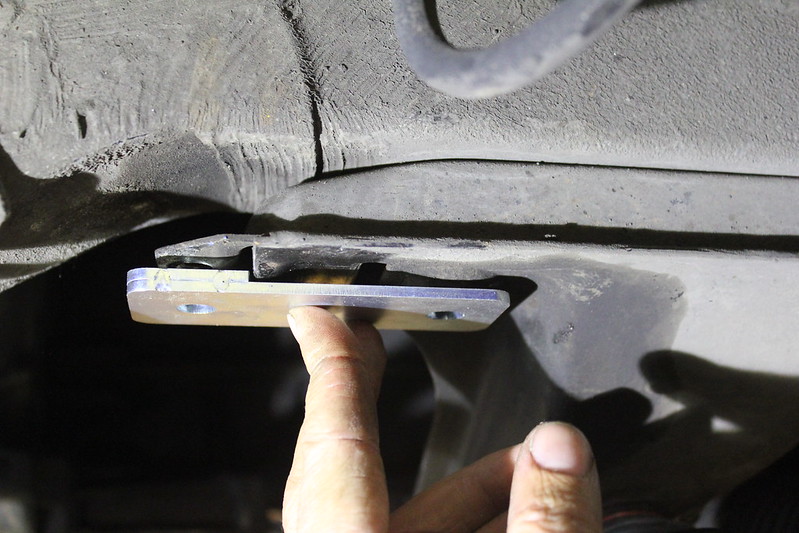
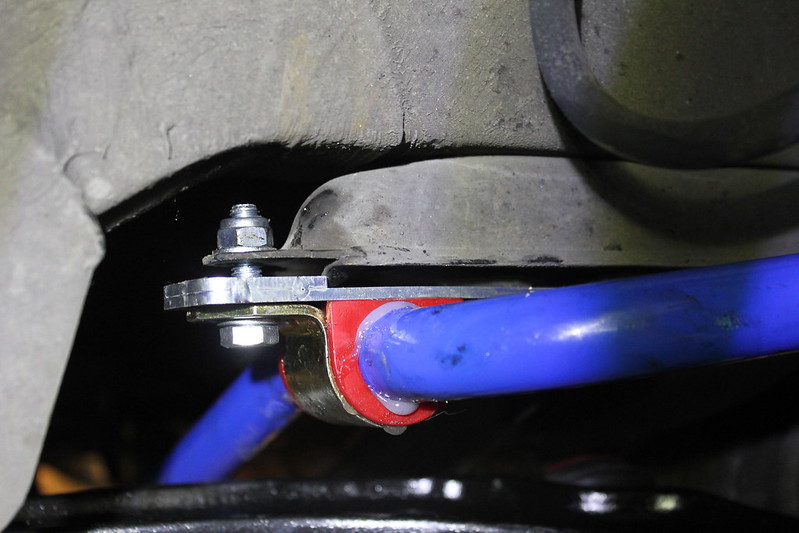
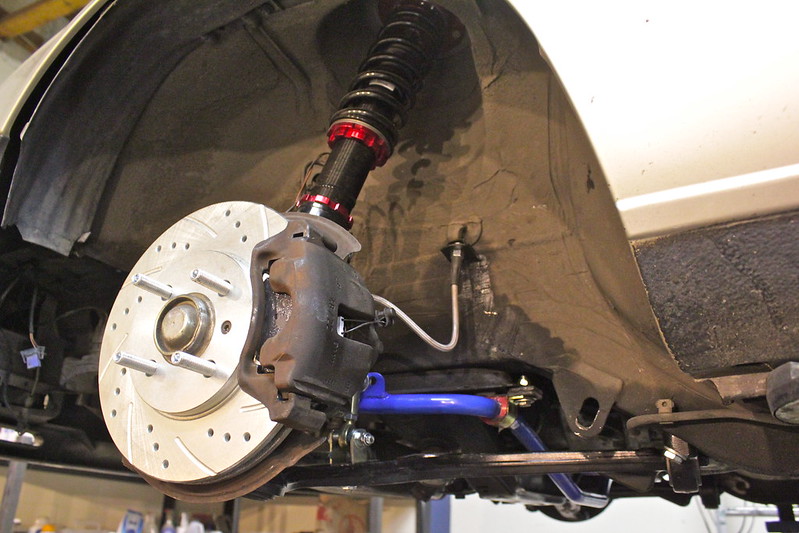
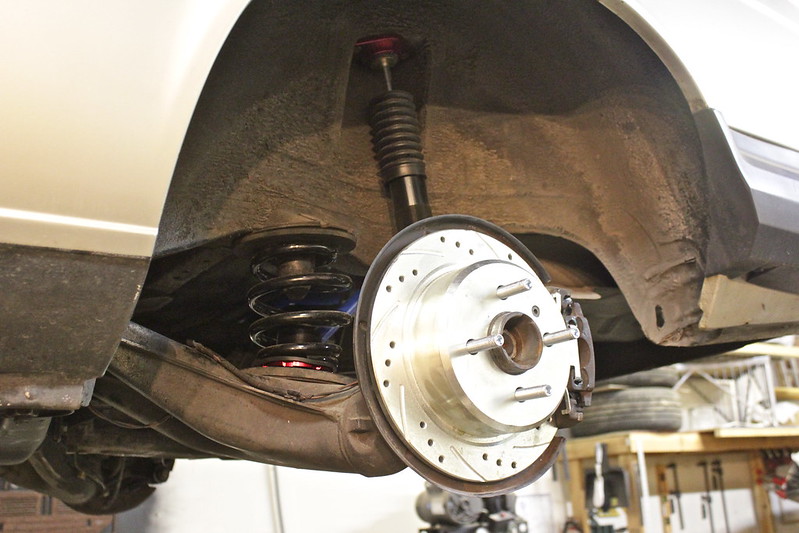
    I attacked the front suspension first since I'm still waiting on a few parts for the rear subframe. Got the strut assemblies, sway bar and control arms off in prep for the CAtuned coilovers and IE sways:


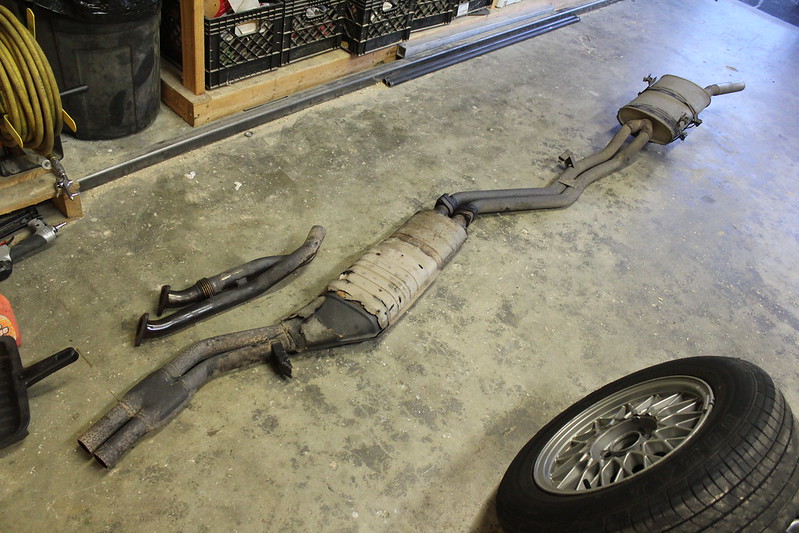
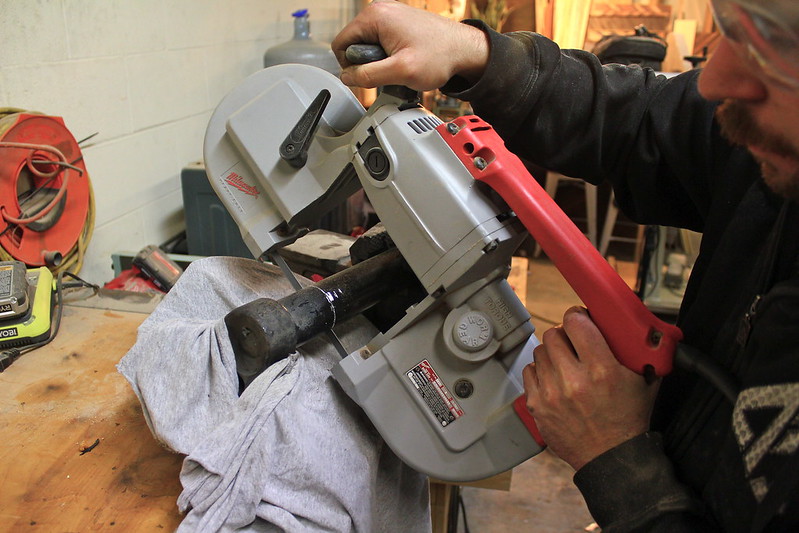
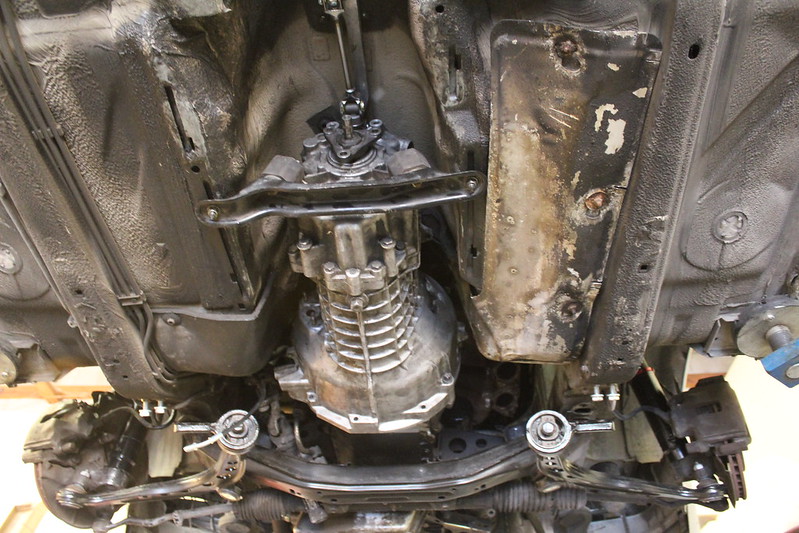
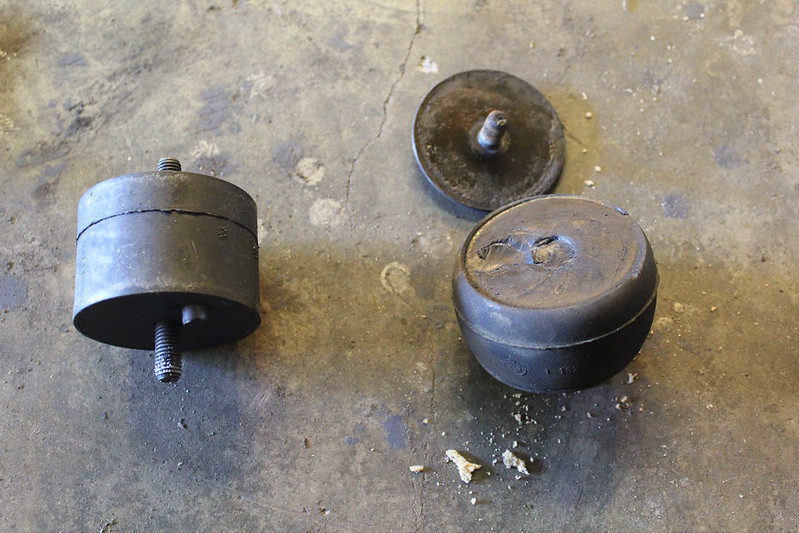
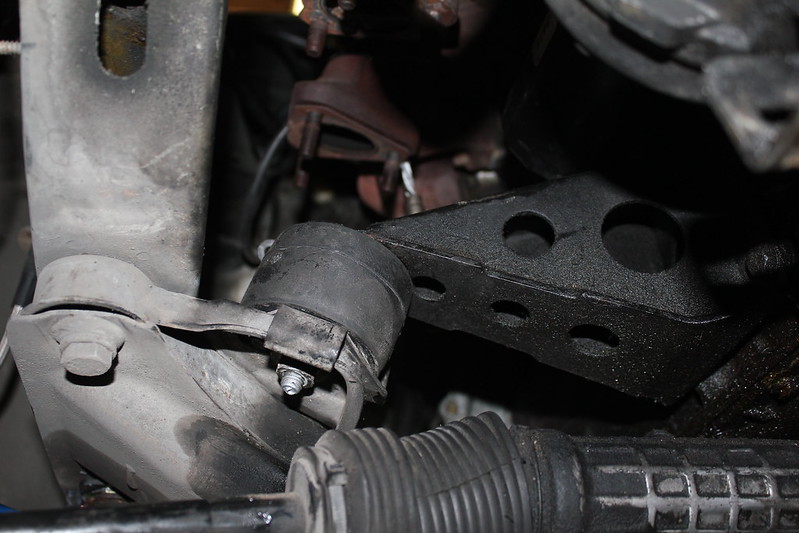
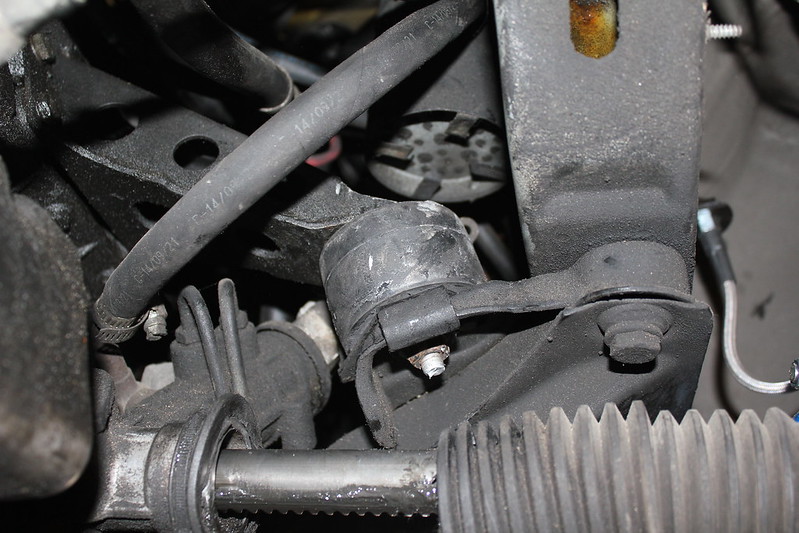
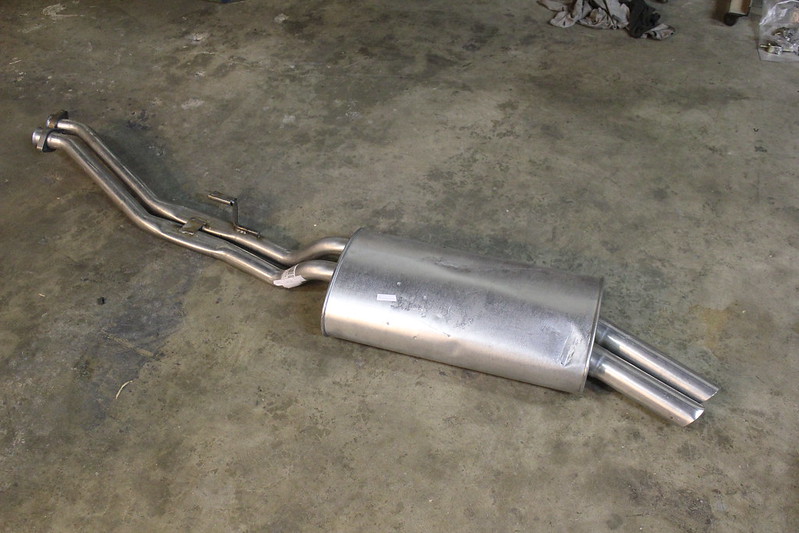
    I also decided to take the exhaust off, which was a bitch because the downpipe was hitting a heat shield tab coming off the motor mount, so I pulled the sawzall out since I have another downpipe in better condition anyways:


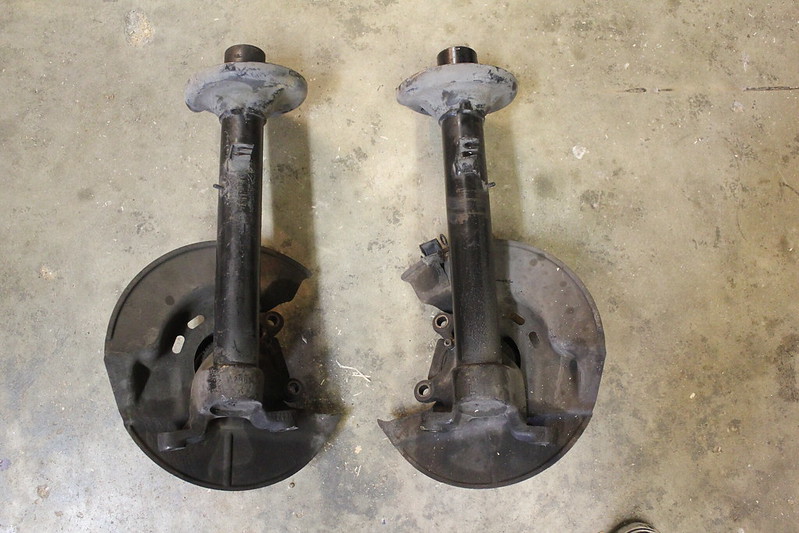
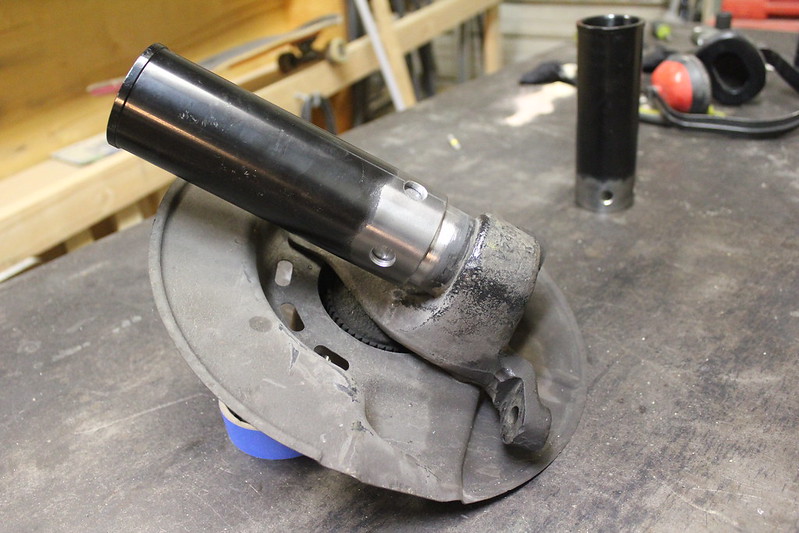
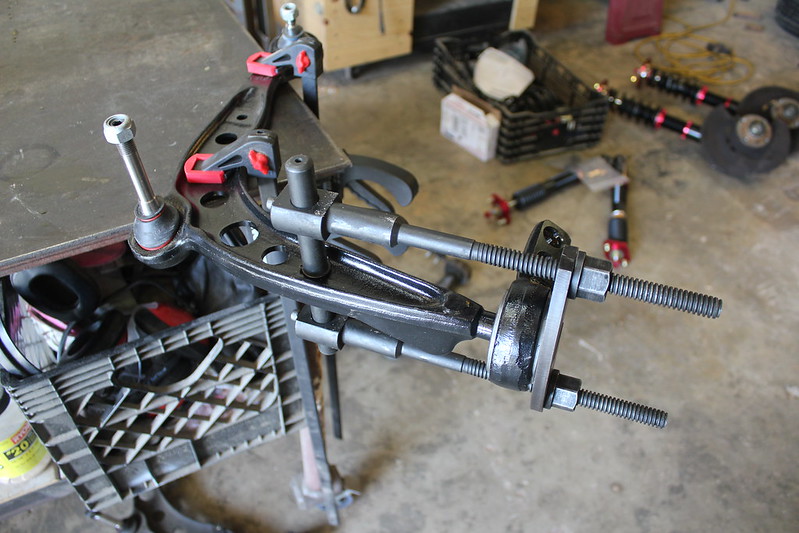
    Tomorrow I'm renting a spring compressor so I can get those strut housings disassembled and chopped up.


    --Roundie Revival 2.0 - 1973 BMW 2002 Build Thread--
    --Golden Boy E30 Build Thread-- (sold)

    Comment


      I secretly wish there was an e10 up on that lift.

      Still excited to see how this bronzit turns out

      Comment


        Originally posted by pandaboo911 View Post
        I secretly wish there was an e10 up on that lift.

        Still excited to see how this bronzit turns out
        Same here, one day there will be another 2002 up there. Thanks though, I am too


        --Roundie Revival 2.0 - 1973 BMW 2002 Build Thread--
        --Golden Boy E30 Build Thread-- (sold)

        Comment


          Made a bit more progress over the past few days. Rented a spring compressor from Autozone and got the front strut assemblies stripped down:


          I measured 2-1/8" up from the bottom of the strut housing to make my cut and whipped out the portaband saw. This cut does not need to be perfectly square and precise (but you should still take pride in your work and get it close ;)):


          Got the remains of the original strut housing prepped for welding:


          I prepped the coilover tubes and drilled a few holes in the bottom of them so that I could plug weld them:


          One thing I really like about this coilover design is that the bottom coilover tube inner diameter is machined so that it fits very snug around the original BMW strut housing, which ensures that the new coilover assembly will be positioned correctly when everything is welded up. Here is how it sits before welding. I set the bottom of the tube 1" up the strut housing:


          My TIG welds aren't nearly as beautiful as some other guys', definitely still getting the hang of it. I'm confident with the penetration of the welds, but my technique could use some work. Anyways, got them all welded up:


          Gave the bottoms a coat of paint and assembled the coilovers!


          Now that that was done, the next task on my list was to take care of these guys:


          My friend Rob let me borrow this handy tool to press the lollipops onto the control arms, worked great:


          And there we have it folks:


          Started putting things back on the car, including the Ireland Engineering front sway bar:


          I put the original rotors back on for now just so I could roll the car around, the new brakes will go on at a later time within the next few weeks. I won't be able to actually drive the car again until the full suspension rebuild and 5-speed swap is done so it'll be a little wait, plus the battery is toast (keep forgetting about that). I have a lot of work ahead of me! Happy to be making progress.
          Last edited by CubbyChowder; 03-14-2016, 11:25 PM.


          --Roundie Revival 2.0 - 1973 BMW 2002 Build Thread--
          --Golden Boy E30 Build Thread-- (sold)

          Comment


            Great progress. Why did you weld the coils 1 inch upwards? To avoid the iron?

            1991 325iS turbo

            Comment


              Originally posted by ak- View Post
              Great progress. Why did you weld the coils 1 inch upwards? To avoid the iron?
              At first it was because I'm not ever planning on going as low as these coils can go, so I set them an inch up so that I can raise them up close to stock height in the future in case I ever need to (which probably won't happen, but you never know).

              Once I started mocking things up I realized I like that approach better anyways, so that I could weld to the strut housing instead of the cast iron spindle. I don't think it makes a huge difference either way, but I'm happy I went the route I did.


              --Roundie Revival 2.0 - 1973 BMW 2002 Build Thread--
              --Golden Boy E30 Build Thread-- (sold)

              Comment


                It's been a great week for Golden Boy.

                I've really been looking forward to getting all these parts off my shelves and onto the car, and I finally set the time and shop space aside to make it happen. Luckily I had a couple buddies willing to help out for Saturday and Sunday so on Friday evening (April 15th) I rearranged everything and put the car up on the lift and took the wheels off so that we could get straight to the good stuff the next morning.


                We got to the shop at 9am Saturday morning and started tearing right into it. Of course the starter bolts had us questioning humanity and the other top bell housing bolts taught us a few new words as well. I had at least 8 extensions duct taped together at one point. We laughed it all off and got through it, it was a rewarding moment when we lowered the trans down on the jack and pushed it out from under the car. High fives were slapped, but it was a bit too early for celebratory beers.

                This is where I'd like to take a moment and express how truly grateful I am to have a lift and transmission jack in my shop (among many other necessary tools to complete a job like this). I've done work like this crammed under a car on my back on asphalt on a hot ass day trying to make things work and being miserable. This is much better. Still a bitch at times, but much better. I am very fortunate to have my shop, and I make it a point to appreciate it every single day.

                Anyways, back on track! By about noon or so we had the perfectly functioning automatic transmission out, ready to hit the R3v classifieds (still need to get to that, not enough time in a day...)


                Sprawled out some miscellaneous parts for the swap that I had been gathering:


                So the sedan parts car that I acquired to help with the manual swap ended up having a clutch kit in very good condition, you could tell it had been replaced very recently. Everything still looked new, so I decided to reuse the kit from the parts car and sell my new clutch kit to provide extra money to get this thing back on the road (still need to post that up for sale. Again, not enough time in a day...)

                Got the new pilot bearing in, flywheel torqued down, clutch disc aligned and pressure plate torqued down as well:


                This concluded day one and at this point I had 4 or 5 friends over to see progress and lend a hand so instead we drank some beers and patted ourselves on the back :D

                I headed to the shop early Sunday morning to prep the Getrag 260 so we could lift it straight in. I got the shift carrier all set up with new delrin bushings and installed the IE short shift kit and DSSR:


                I ended up having to take the short shift kit out again to install the transmission, otherwise it interfered with the trans tunnel, so that made me feel stupid. Learning as I go...haha


                But we got it in! We focused hard and made sure everything was lining up perfectly, and within a few minutes we had it butted up flat against the engine block. That was a good feeling, I was a bit nervous about that one. The manual was very refreshing to work with since it's so much smaller than the auto, so the top bell housing bolts were basically a breeze to get through with my patented "8 extension duct taped tool".

                **Whenever you work on your car, I highly recommend Sam Cooke radio on Pandora. It's perfect.

                My helpers headed home at about 6pm Sunday evening and I proceeded to tackle the pedal box conversion. The manual pedal box was a nightmare to get installed and I even caught myself nodding off at 10pm laying on my back with my head under the steering wheel and my feet up on the back seat, that was my cue to head home for the night.


                After the pedal box was in, I installed a new clutch master cylinder, slave cylinder and stainless steel clutch line.

                Monday morning came and I started prepping the rear subframe to come down. Disconnected all the brake lines, parking brake cables, etc. By that afternoon I had a shop full of friends again ready to help me pull the sucker down. Of course I fed them beer the whole time, it's important to provide an incentive for them to come.

                Got it down and snapped a pic after I already disconnected it from the diff and trailing arms:


                Got the bushings out:


                Then came the task of welding in the posi-lock style camber/toe adjustment tabs into the rear subframe. This was a big job actually, it took me the better part of two days to complete. They required quite a bit of extra work.

                Figured out how to properly set the toe adjustment tabs and cut the original TA mounts accordingly:


                Created a complicated looking jig (not actually that complicated) to make sure the tabs lined up perfectly and were parallel and square to each other:


                Got the toe tabs tacked in:


                I created some of my own tabs to replace the original TA mount that I previously cut off and later welded these in so that the TA bushing would bolt up firmly when it's torqued down:


                I did a bad job taking photo's of every step. After I finished the toe adjustment tabs I started on the camber tabs which were a lot easier. Notched it out:


                Here's a photo after everything was welded up and new subframe bushings pressed in. You can see I boxed the toe adjustment tabs in a bit for support:


                I then prepped and painted the subframe:


                I pulled all the original trailing arm bushings out and replaced them with OEM bushings, and then bolted everything back up so it could be reinstalled as one unit:


                While I had the subframe out I installed some of my new stainless brake lines:


                Reeled in some buddies again to help get this thing back on the car. I get by with a little help from my friends:


                Once the subframe was bolted back up, I started focusing on the Ireland Engineering sway bar mounts. This took a lot of work but I think it will be well worth it. I started off by mocking up the reinforced sway bar brackets and figuring out where they would bolt up. I chiseled away the factory undercoating so I could bolt everything to bare metal:


                I set the mount up, marked my holes and drilled them. From the top side (inside the trunk compartment) I chiseled away the factory sound deadening to get to the bare metal to ensure everything bolted up properly. That was a doozy, I was sweatin bullets after that one:


                Got it chiseled out on both sides:


                Once that was done, everything bolted up beautifully with the help of my lovely girlfriend and shop mate Janine:


                The top portion of the mount installed:


                Here you can see my new CAtuned rear shock mounts with damping adjustment as well as both Ireland Engineering rear sway bar tabs bolted up :


                Now that the rears were taken care of, I had a small issue with the front sway bar that I wanted to correct. The mounting tab didn't really sit properly against the original sway bar mount, you can see gaps :


                So basically what I did was figure out the empty space and filled it with more metal so that everything would bolt up tight with no gaps. I added a 1/4" thick section and a 3/16" section to the supplied IE tab and came up with these. They're nothing pretty but they'll do the job. I painted them black:


                And here's how it sits now. Everything bolted up firmly, I'm much happier with these:


                With the sway bars finally installed, it was time to focus on other things.

                I accidentally broke a motor mount when we were doing the auto to manual swap, which is ok with me because they looked like they needed replacing anyways. I made an order through BluntTech for an array of odds and ends that accumulated throughout all this work and they showed up yesterday. Here's a new motor mount compared to the one that broke:


                Got the mounts in (I'm planning on giving the whole engine bay and under carriage a heavy pressure wash up at my dad's house soon). You'll notice my steering rack boots are smoked, I'm planning on upgrading to an E46 rack in the very near future :):


                Once those were in, it was time to focus on brakes. I serviced the calipers and got the new rotors and pads in. I installed stainless steel brake lines all around and also installed a lug stud conversion so that I can easily run spacers with my new Fifteen52 wheels:


                Part of my BluntTech order was a new catback exhaust since my original one was toast. It's just a standard Bosal unit, didn't have money to splurge on a nice one unfortunately. UPS had it's way with it and put some shitty dents in the muffler and one of the exhaust tips, that was a bummer to see but I'm not going to make a big deal out of it. I'll try to straighten out the tip and probably paint the whole thing black since it's raw welds and would be a big silver eye sore to anyone looking at my car:


                So that's where I'm at with Golden Boy as of Friday, April 22nd. I can't thank my friends Oliver (r3vlimited member BobaFlesh) and Eric enough for helping me through those first days! It was a lot of fun getting greasy with my buddies and spending a lot of time wrenching on my E30. I'm very close to taking this thing on it's first test ride with all of the new goodies installed! I still need to button up a few things like installing the driveshaft, bleeding the clutch/brakes and buying a new battery. I really hope everything goes smoothly, I'll guess we'll have to wait and see. I've gone into every aspect of this build expecting setbacks so I'm sure things will pop up but I'm on the final stretch!

                Thanks for taking the time to follow my build and read through everything, I'm so excited to enjoy this thing!
                Last edited by CubbyChowder; 04-24-2016, 09:07 PM.


                --Roundie Revival 2.0 - 1973 BMW 2002 Build Thread--
                --Golden Boy E30 Build Thread-- (sold)

                Comment


                  Super cool man, it will be a great feeling to take it down the road again.

                  Your attention to detail shows you're quite the craftsman. That roof rack... fit and finish 10/10. I use to do a lot of wood working so this thread was a really enjoyable read.

                  And props to you to be able to share your work space and work side by side with your girl, that's truly something special.

                  Comment


                    Man that subframe is almost NSFW. If you're ever on the east coast you should come over and do mine, lol.
                    My Garage
                    2001 Z3 2.5i Steel Gray/Black (Lexi)
                    1988 325ix Diamond Schwartz/Black (Izzy)
                    1989 325i Cirrus Blue/Houndstooth (Stitch)
                    Feedback

                    Instagram: Stone.Hopkins

                    Comment


                      Just did the E46/330i rack on my M60 swap.....
                      I used the E46 inner tierods, and E36 outters.....Seems to work....
                      Dumpster Fire Pilot

                      Comment


                        Rad. Clean updates.

                        1991 325iS turbo

                        Comment


                          What kind of motor mounts are those?
                          Oem or aftermarket?

                          Comment


                            Originally posted by Ryan335 View Post
                            Super cool man, it will be a great feeling to take it down the road again.

                            Your attention to detail shows you're quite the craftsman. That roof rack... fit and finish 10/10. I use to do a lot of wood working so this thread was a really enjoyable read.

                            And props to you to be able to share your work space and work side by side with your girl, that's truly something special.
                            Thanks a lot man! I'm really looking forward to driving this thing. And yes its nice being able to share a space together, we're having a really good time there.

                            Originally posted by stonea View Post
                            Man that subframe is almost NSFW. If you're ever on the east coast you should come over and do mine, lol.
                            Haha! We'll see about that one...

                            Originally posted by delamaize View Post
                            Just did the E46/330i rack on my M60 swap.....
                            I used the E46 inner tierods, and E36 outters.....Seems to work....
                            Sweet, I've heard great things.

                            Originally posted by ak- View Post
                            Rad. Clean updates.
                            Thanks man :up:

                            Originally posted by efficient View Post
                            What kind of motor mounts are those?
                            Oem or aftermarket?
                            They are aftermarket, Rein Automotive is the brand.


                            --Roundie Revival 2.0 - 1973 BMW 2002 Build Thread--
                            --Golden Boy E30 Build Thread-- (sold)

                            Comment


                              So nice...

                              Any reason you didn't pull all the trunk tar out?

                              Originally posted by SpasticDwarf;n6449866
                              Honestly I built it just to have a place to sit and listen to Hotline Bling on repeat.

                              Comment


                                Originally posted by lambo View Post
                                So nice...

                                Any reason you didn't pull all the trunk tar out?
                                I didn't really see a reason to, is that something people do? I'd imagine it provides some sound deadening from road noise


                                --Roundie Revival 2.0 - 1973 BMW 2002 Build Thread--
                                --Golden Boy E30 Build Thread-- (sold)

                                Comment

                                Working...
                                X