

Subd since I just ordered all the shit to do this when the gc set up goes in. Good work and great write up!!
-
89 325 cabrio in progress m52tub28 swap
99 540it
86 Volvo 240 wagon
99 Cherokee
13 Passat -
Alrighty, I got all the stuff back from the shop this afternoon. All new rear bushings and mounts, and some new wheel bearings. Apparently the bearings are a real pain in the ass, particularly with the trailing arms off of the car. It sounds like using pullers with the TA's on the car is easier than using a press with the TA's off of the car. They didn't have any of the BMW special tools though, so I guess it's fair enough in that case. A lot of the shops I called didn't seem to have the E30 specialty tools anymore, and I wasn't about to pay dealer labor rates to have it done there!
I also met up with fellow r3v'er kronus and swapped sway bars. It looks like all of my ducks are now in a row, and now I just need to put everything back on the car! The stock sways will be interesting...I have not driven an E30 with stock bars since 2001!
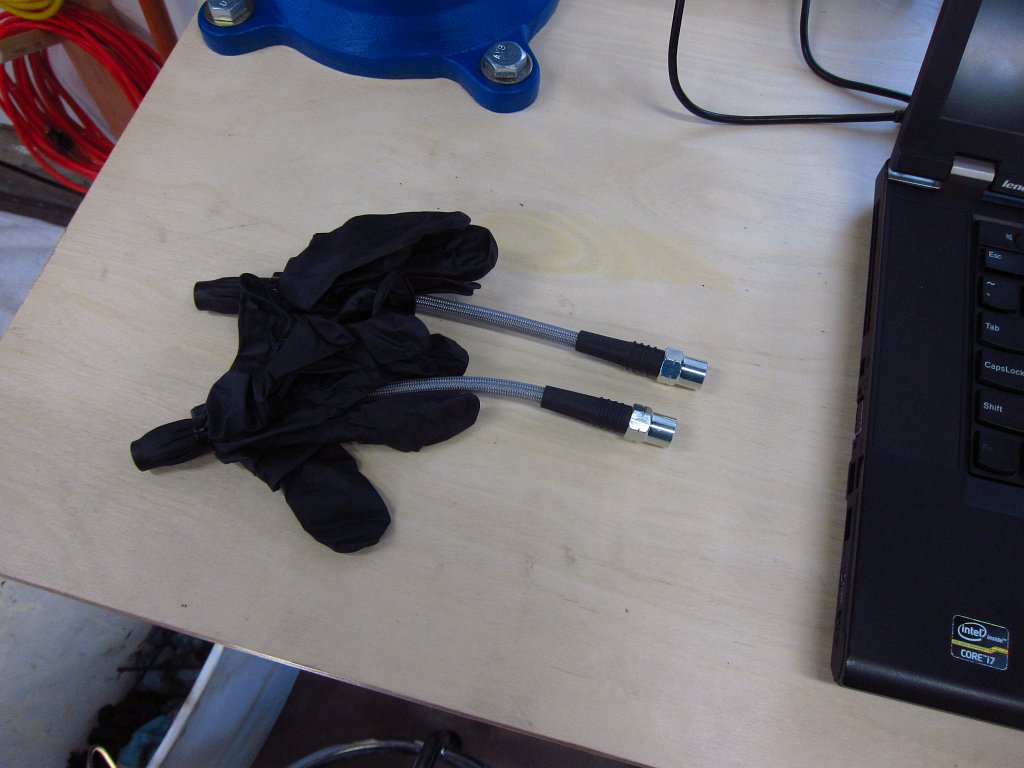
Tonight's plans include reinstalling the sway bars, removing the driveshaft and swapping the brake lines (since the ones in there are apparently not DOT approved). I'll see about taking (way too many) more pictures as I do things lol.Comment
-
Nightly update...
One thing I didn't get pictures of was the removal of the front sway bar. It takes all of 5 minutes. Just unbolt the end links from the control arms, unbolt the bushing shells from the chassis, unbolt the control arm lollipop on one side and slide the bar out. No hassles there.
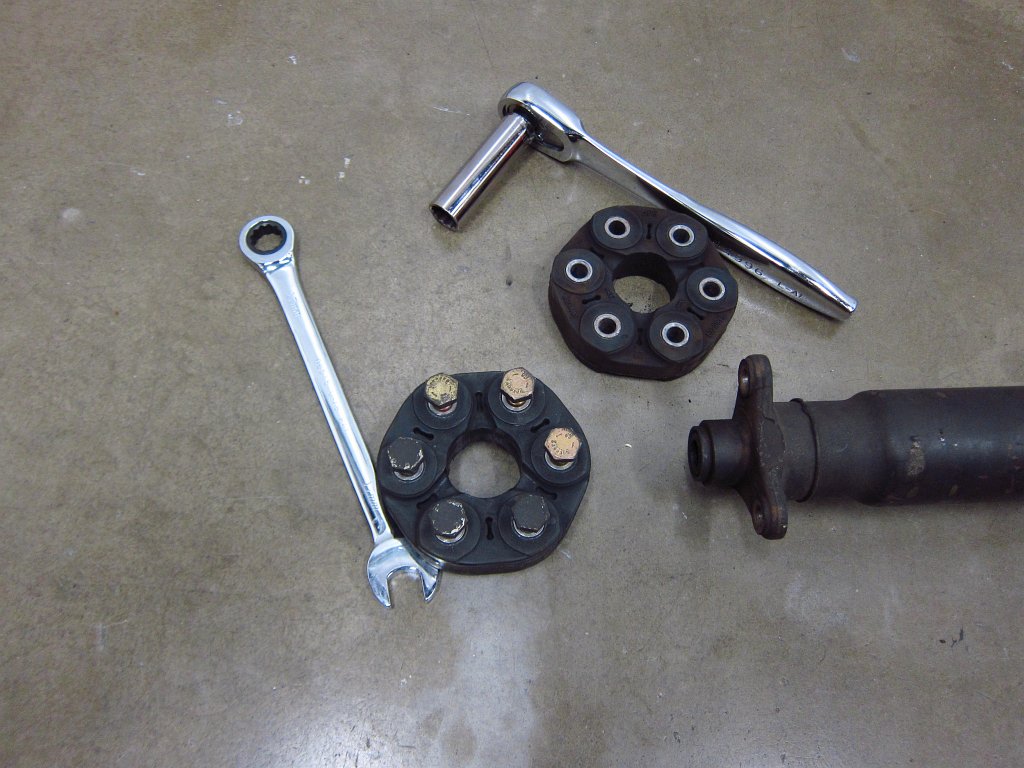
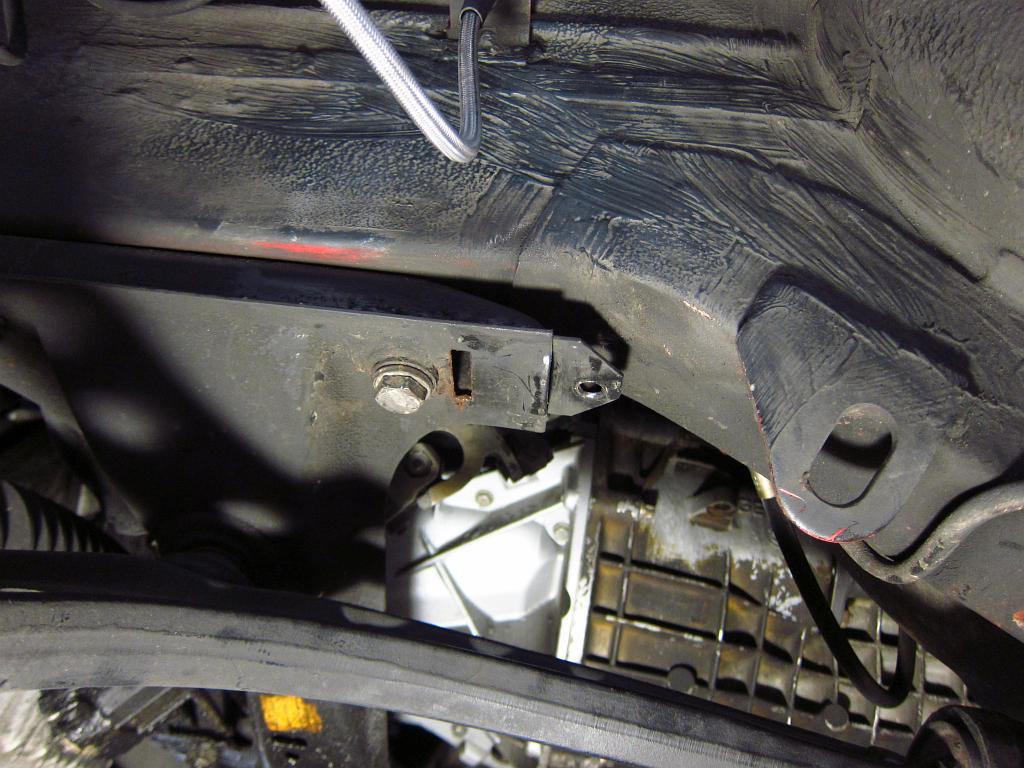
I took care of a few odds and ends this evening. To start, I unbolted the driveshaft from the transmission. This is pretty easy to do. Just stick the transmission into neutral so that the shaft will spin freely, and take off the three 17mm nuts and bolts that hold the guibo to the tranny's output flange. A combo wrench and socket will make short work of this. There's an important detail to note in here, particularly if you plan to replace the guibo. See those little triangular bumps on the outside of the guibo? They are supposed to point to at the flange that they connect to, not a bolt head (so in this case, it is installed properly). To be honest, I have no idea what difference this makes, but the shop manual says to pay attention to it.
Here it is, ready to be removed. Super duper easy.
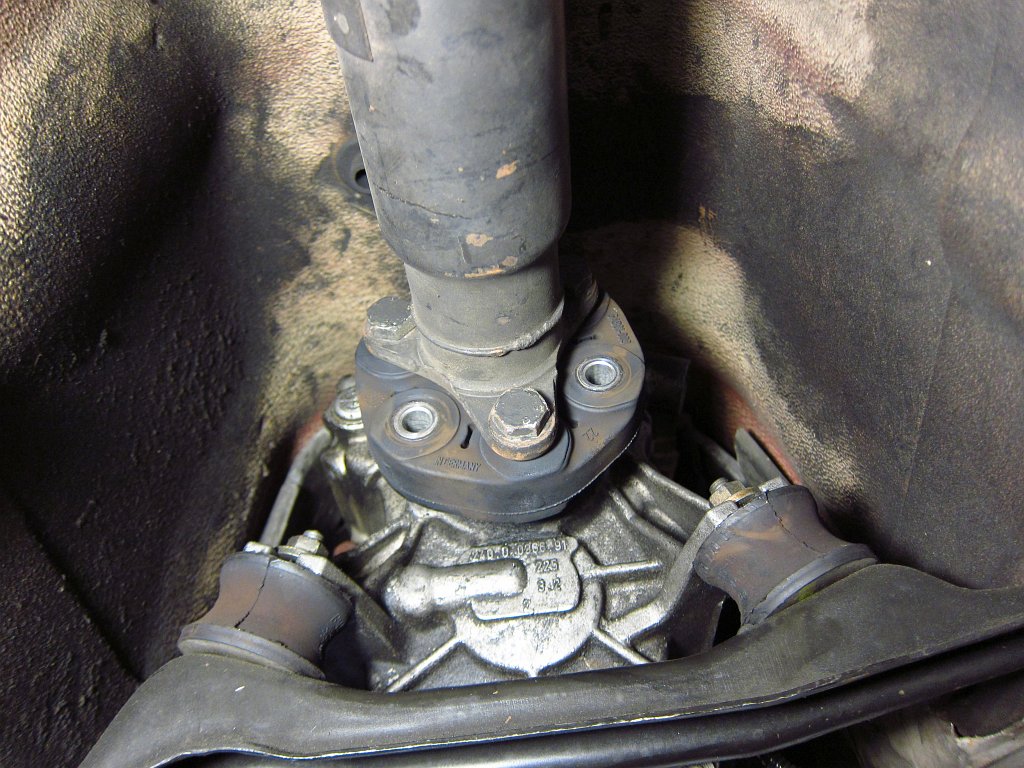
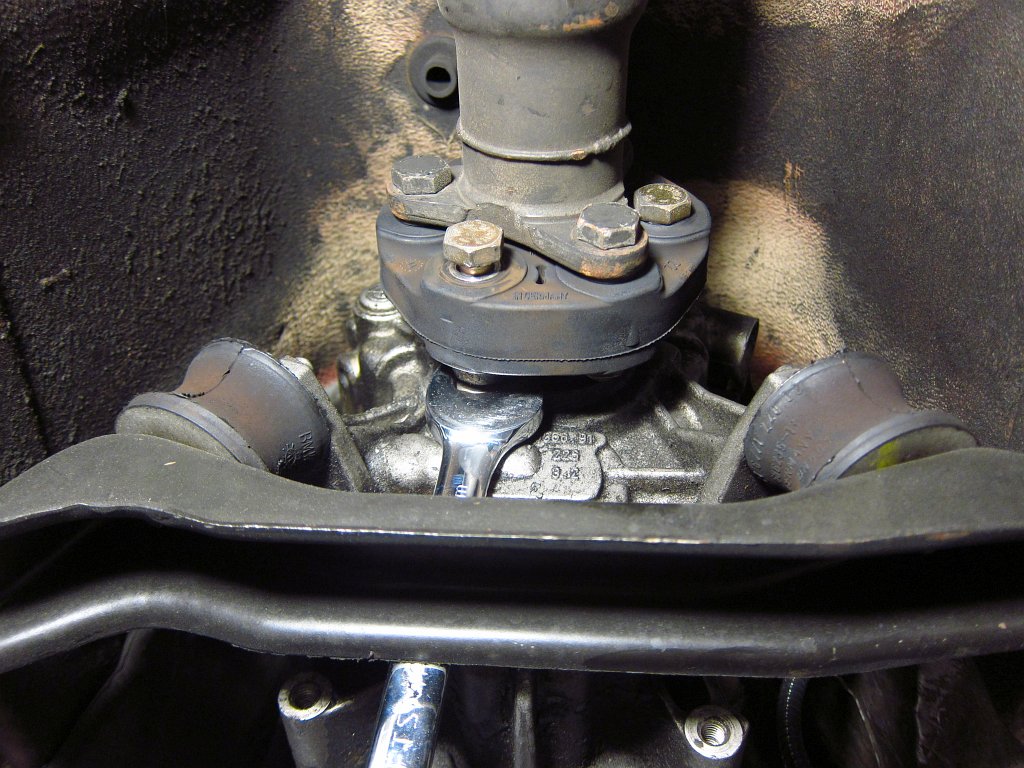
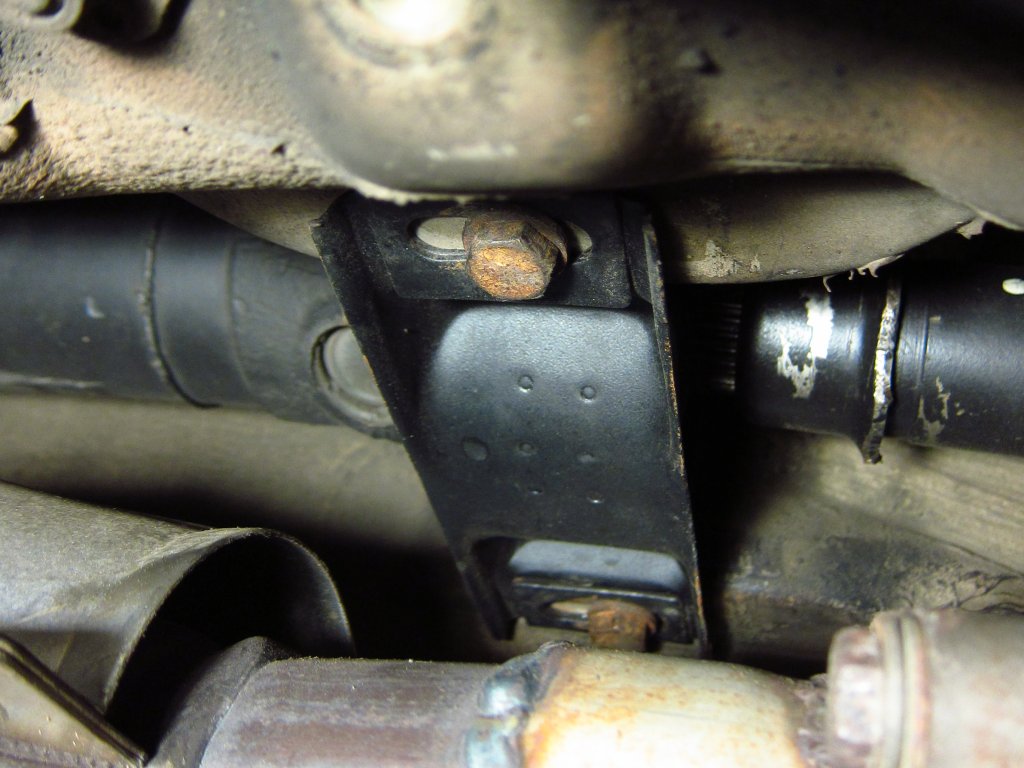
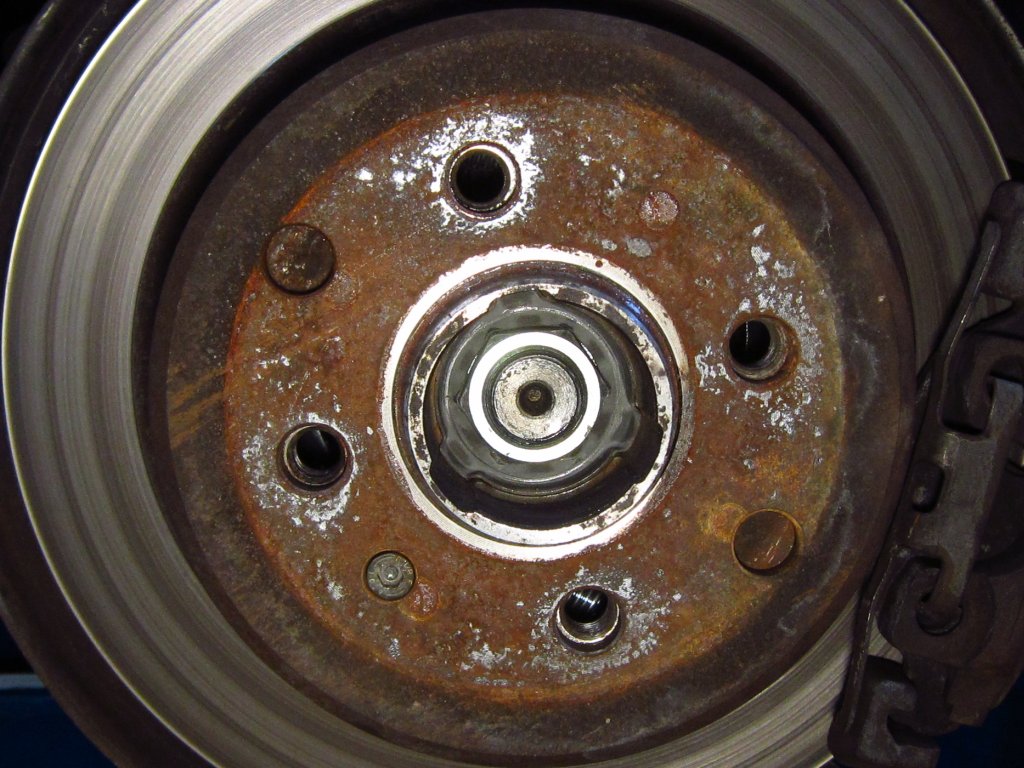
The next order of business is getting at the center support bearing. Pulling the heat shield is necessary here. In the case of my car (M42 engine with gen II Supersprint cat-back with no resonator) I didn't need to pull the exhaust to get it out, but it did take a couple of minutes worth of shimmying.
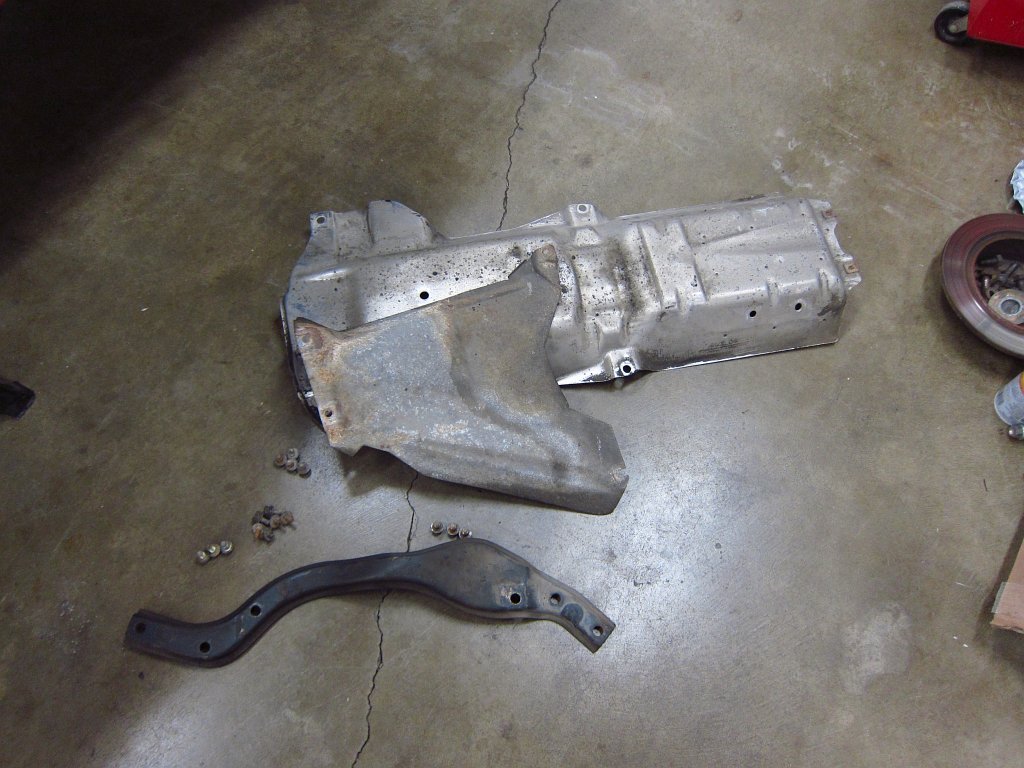
Loosen the two 13mm bolts that hold the CSB and slide everything out.
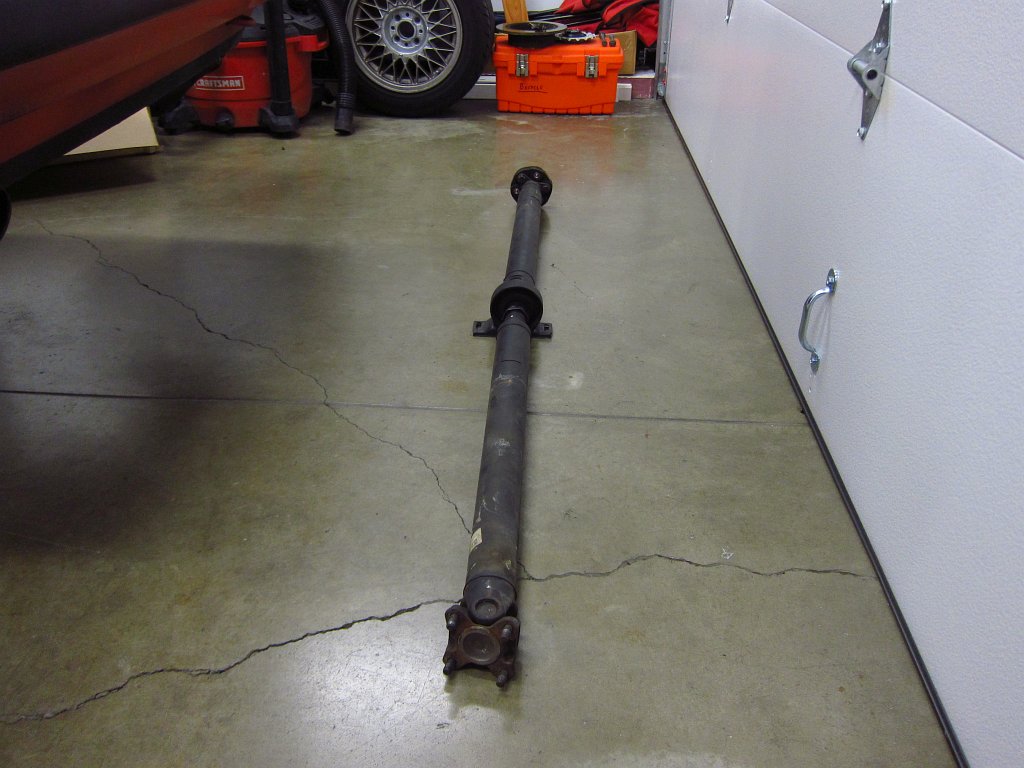
When you pull an E30 driveshaft, remember that the two halves are balanced as a unit, and you need to keep them in the same orientation that they were balanced in. There are little white paint marks that indicate the alignment. In a lot of cases they will be obscured by dirt, but they should be there. The first time I pulled a driveshaft (like 15 years ago) I had no idea about any of this and put it back together out of alignment. BIG mistake. The car felt like it was going to rip itself apart by 35MPH.
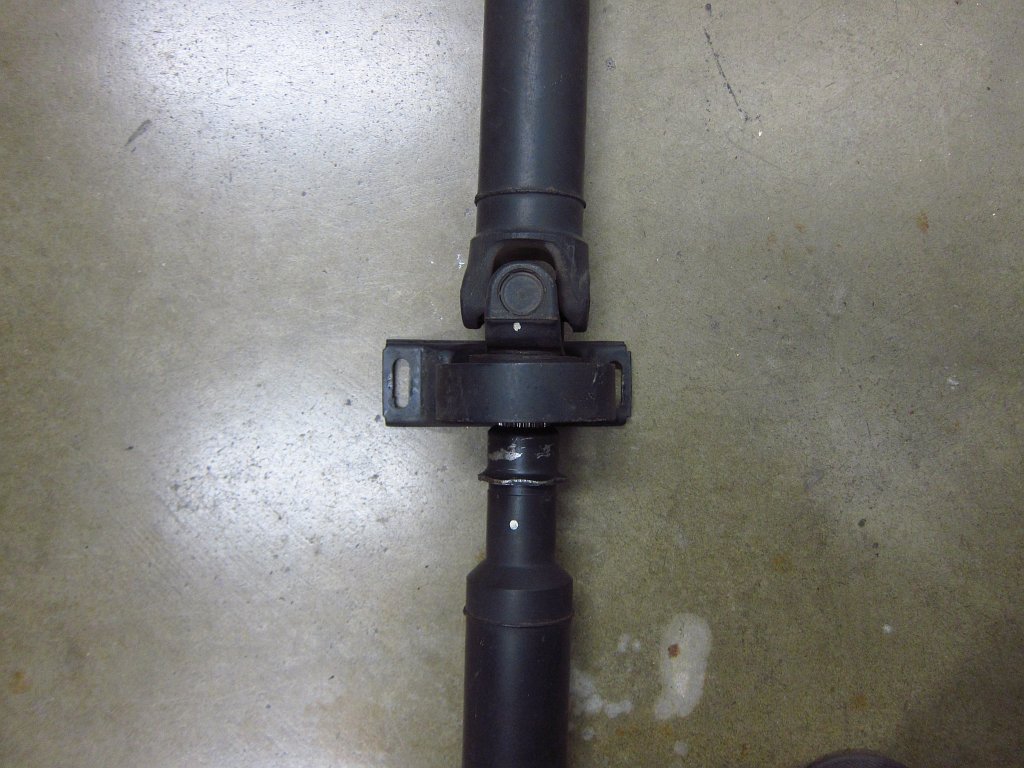
So here things are, unbolted and I the new guibo, which will go on a new(ly refurbished) driveshaft.
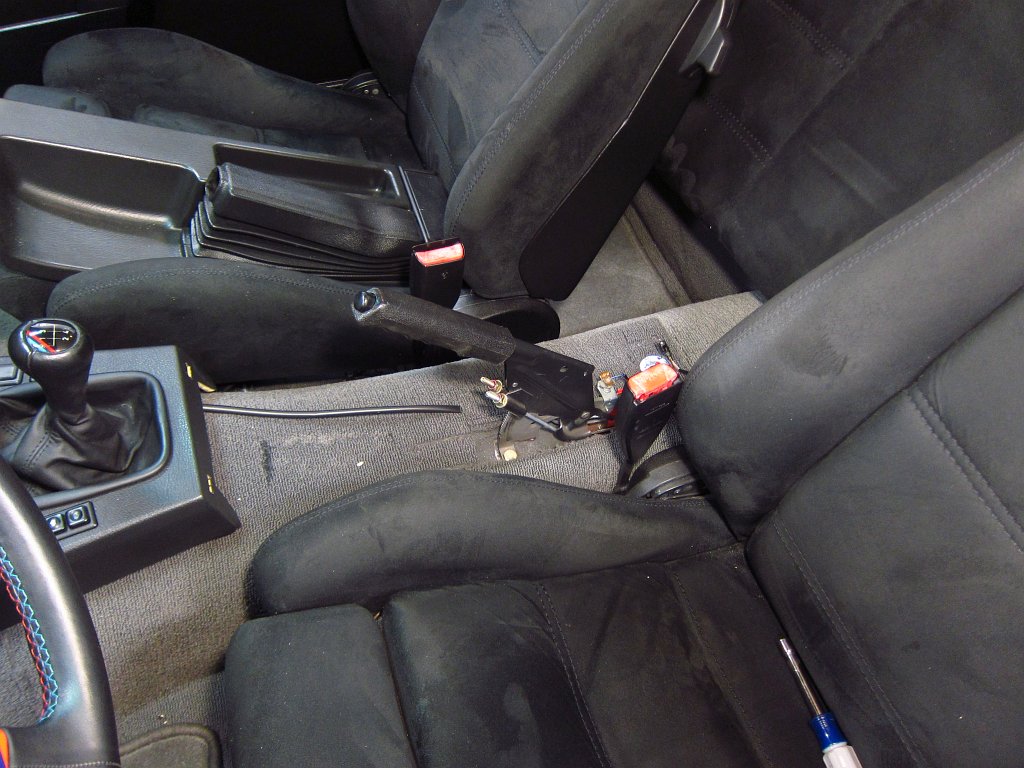
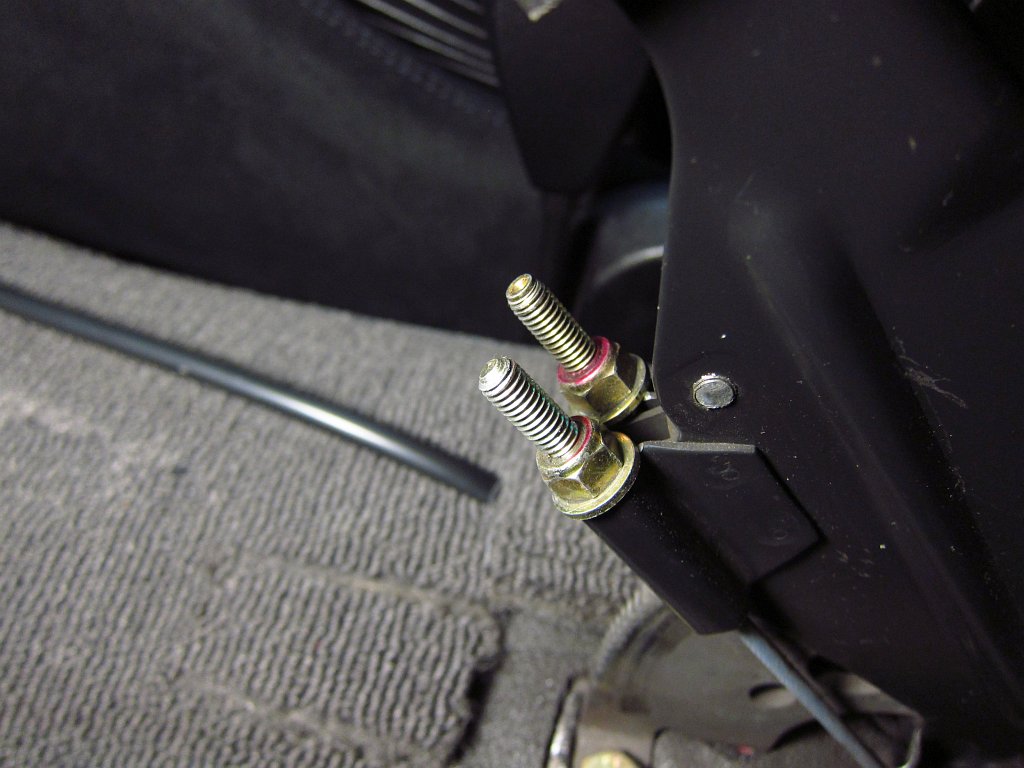
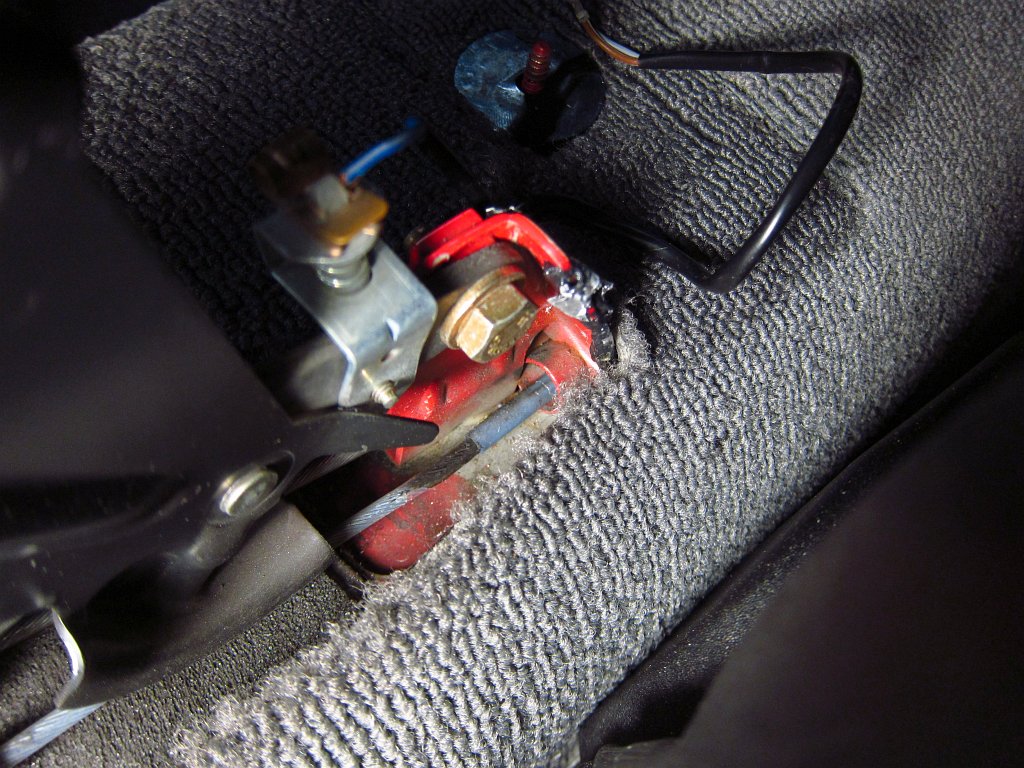
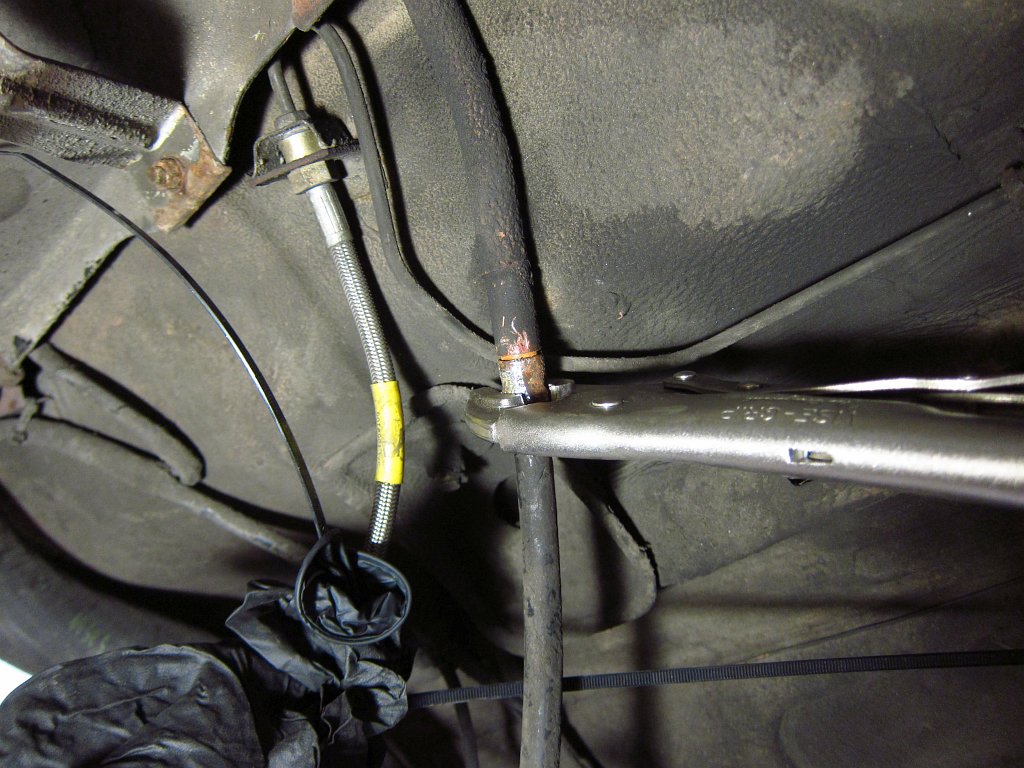
So, with the driveshaft out, I turned to the parking brake cables. First up was the easy part. Take the rear center console out (one plastic 10mm nut under the ash tray). Then remove the 10mm nuts that hold the cable ends in the lever. Also observe where the cable tubes come up into the cabin. You will want to move the cables so that they can be pulled straight through from under the car.
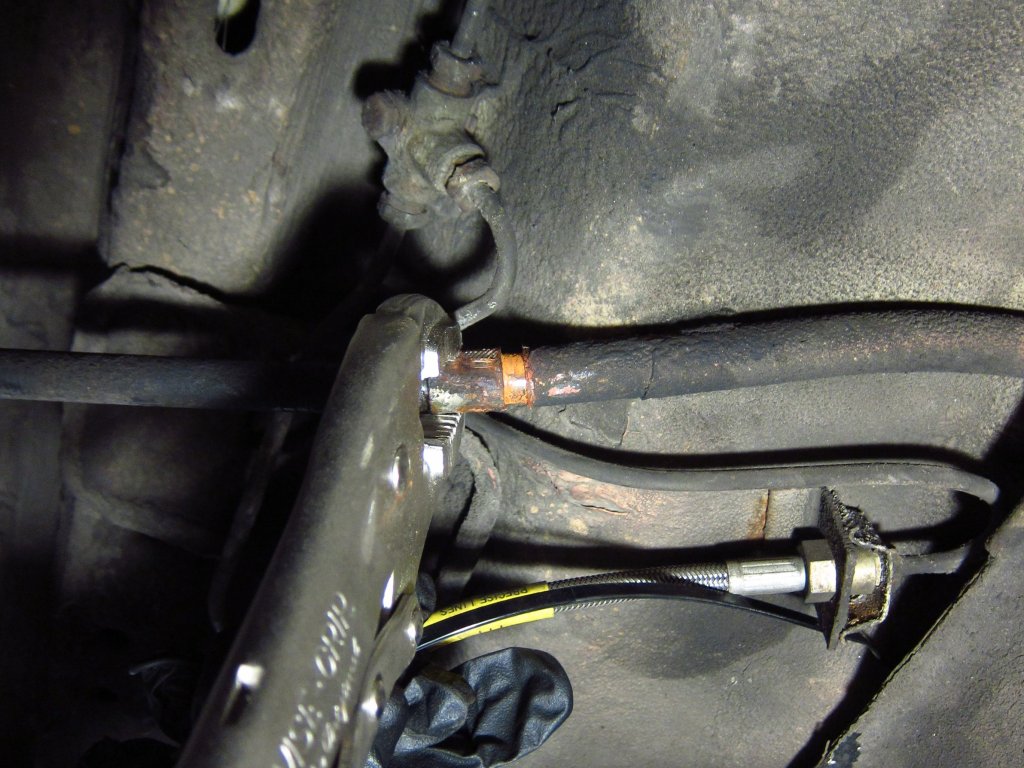
The next part seems to be the one that causes much consternation in people that try to replace these. I have read all sorts accounts of how people get these out, and a lot of them seem to involve a torch. I was not about to go that route since the brake lines are directly adjacent to these suckers, as well as a 25 year old gas tank and hoses. I soaked the joints in PB Blaster for 2 days (which I found did exactly nothing after the fact) and ultimately broke them free with vise grips. I clamped them down really hard on the ends of the ferrules and twisted hard. I was a little worried that the tubes were going to break free, but the ferrules gave out first and came right out without any drama.

And this is where I ended the evening...old parking brake cables out of the car, with only minimal difficulty.
Tomorrow the big reassembly adventure starts!Comment
-
Daily update time. I got a lot done, and hopefully I will have it all buttoned up tomorrow. Most of the big stuff in installed now, and the differential is the only big item remaining. The rest is odds and ends.
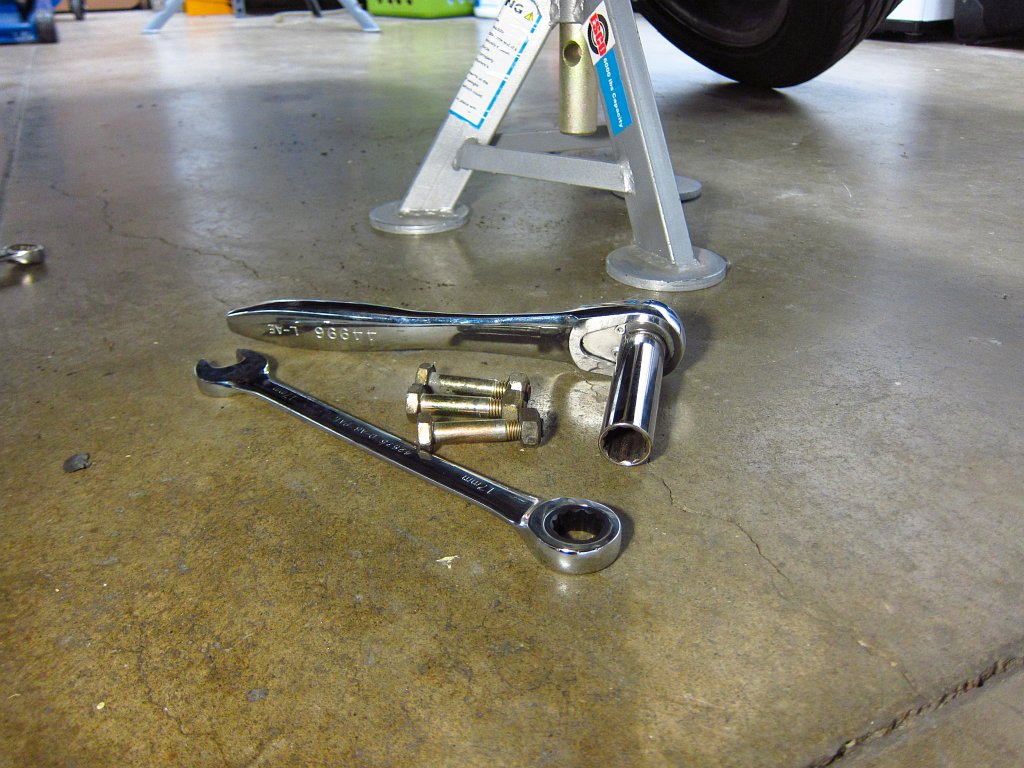
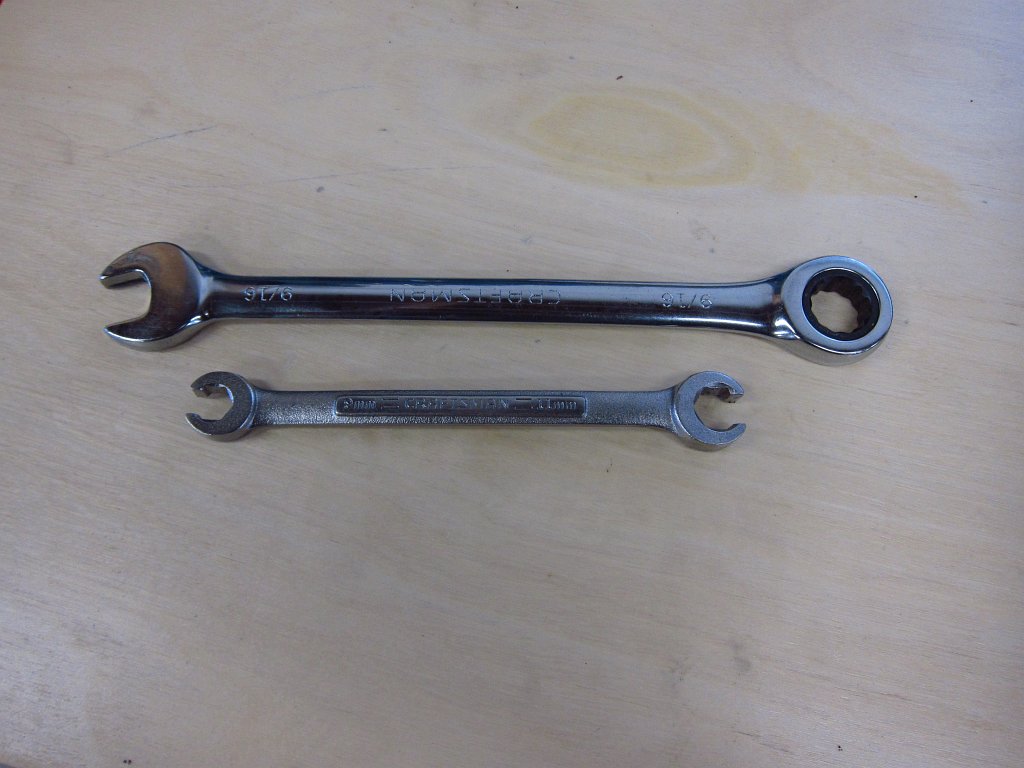
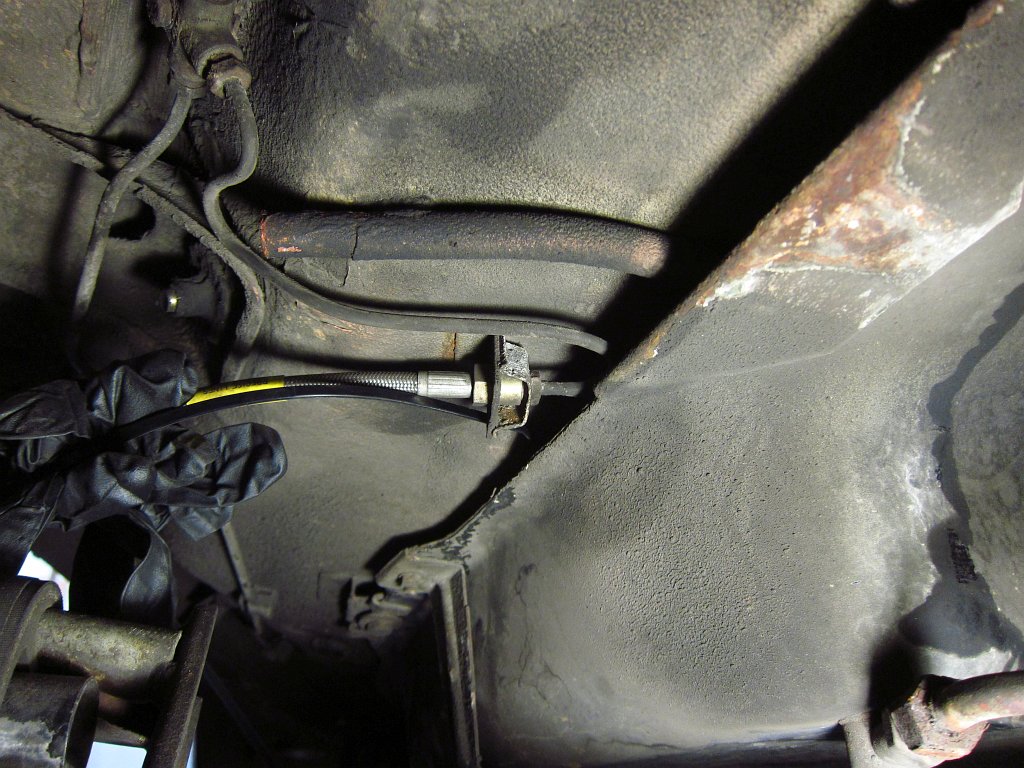
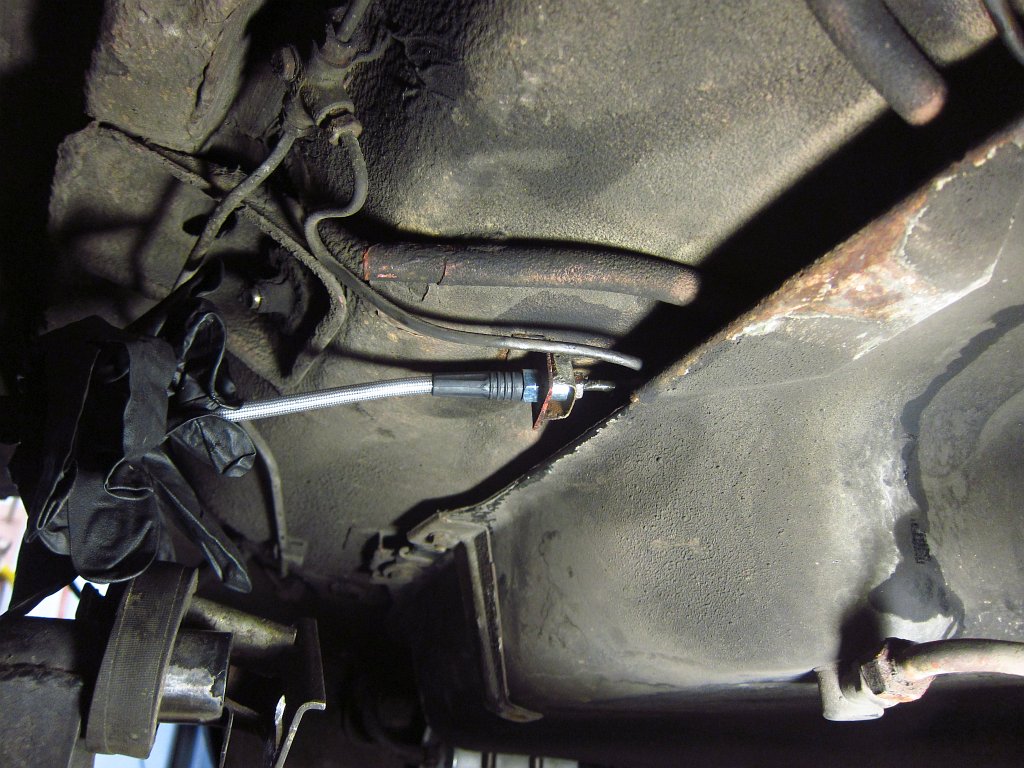
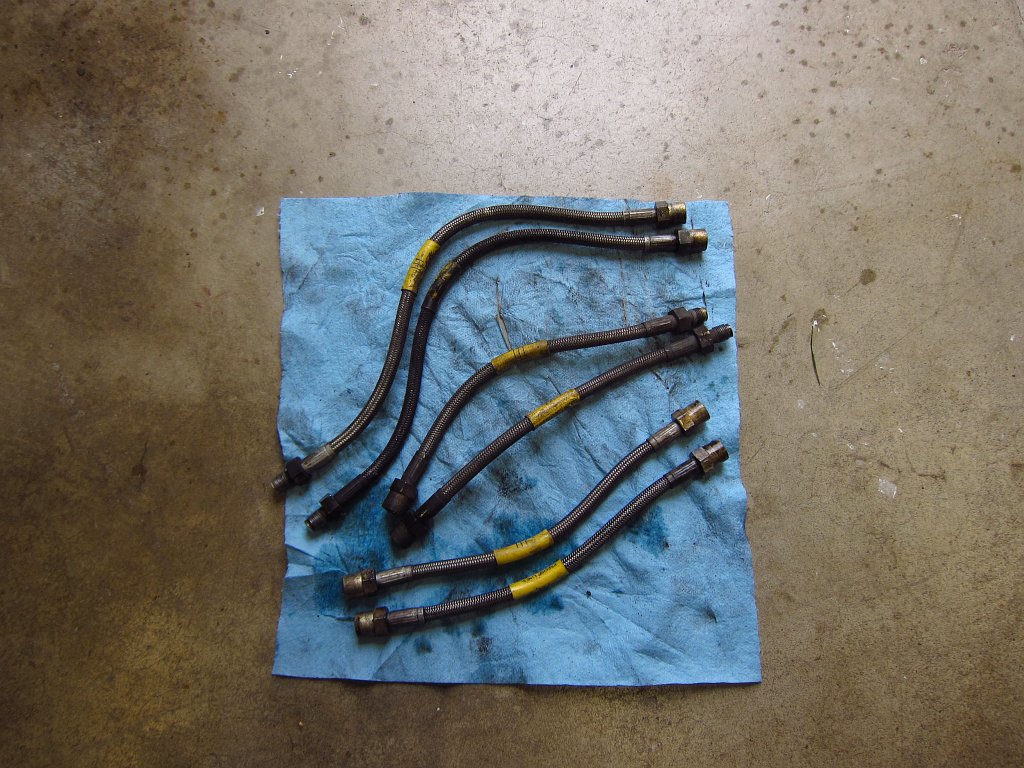
The first order of business this morning was to swap out the brake lines for DOT approved ones. An 11mm flare nut wrench is essential here because the nuts on the hard lines is soft and you WILL strip it if you use a regular combination wrench. For some reason, probably because a lot of these lines are made in the USA, a 9/16" wrench seems to fit a lot better than a 14mm one. I also suggest using a flare nut wrench on that side, but I didn't have one of those and since these are new I was not too concerned about stripping them.
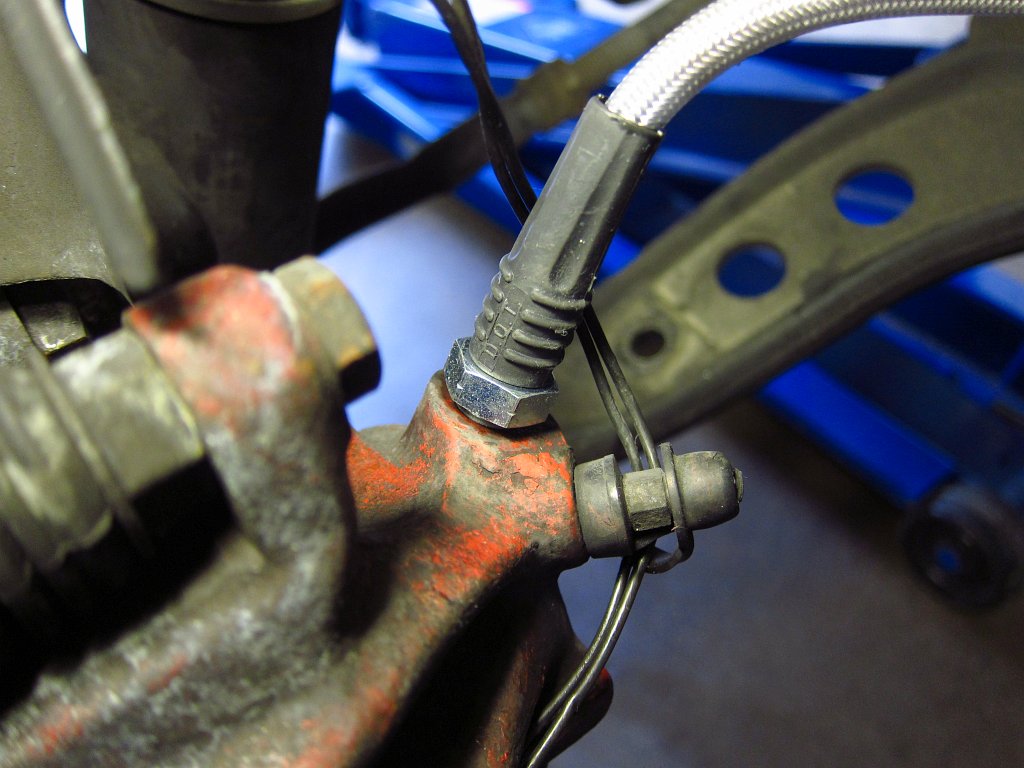
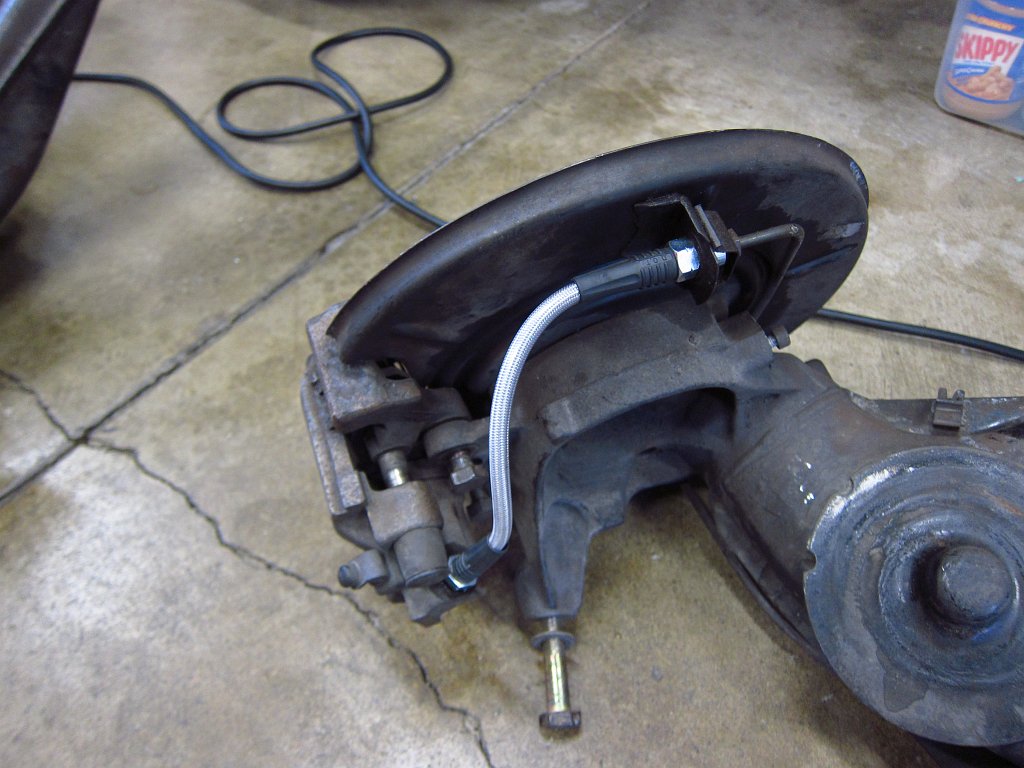
I started with the easiest ones, the fronts. Thread the ends into the calipers first, since the fittings do not spin independently of the hose, and then rotate the flare nuts in. After I finished I shot the area down with some brake cleaner.
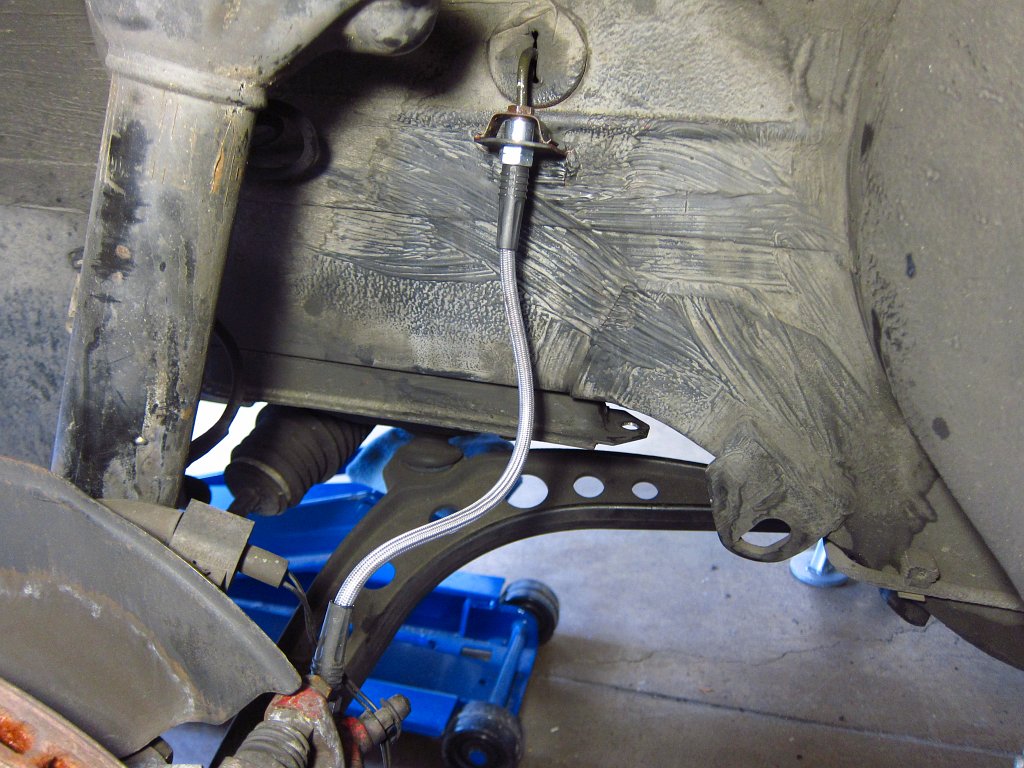
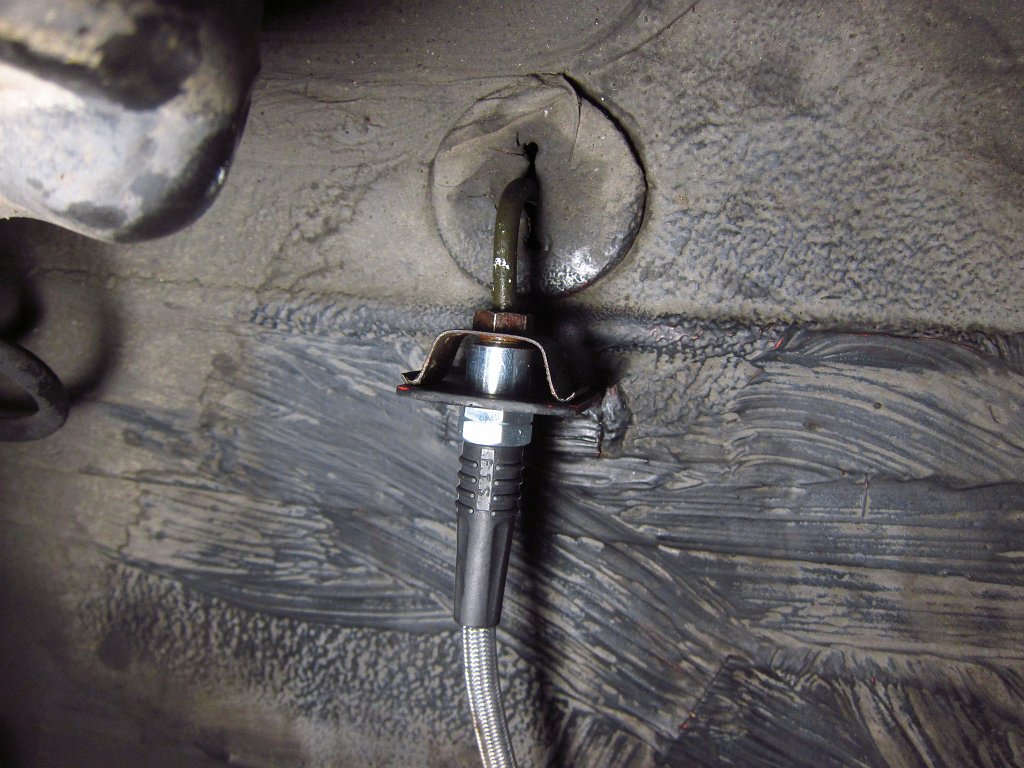
The rear upper lines were next. These are soooooooo much easier to do with the subframe out of the car. I pre-emptively sealed the ends before installing them to try to minimize the mess. I hate brake fluid...it is messy shit and it always manages to make a big mess.
The rear caliper lines were also super easy to do, especially with the trailing arms off of the car. Same deal as the fronts...screw them into the calipers and then screw the flare nuts into them.
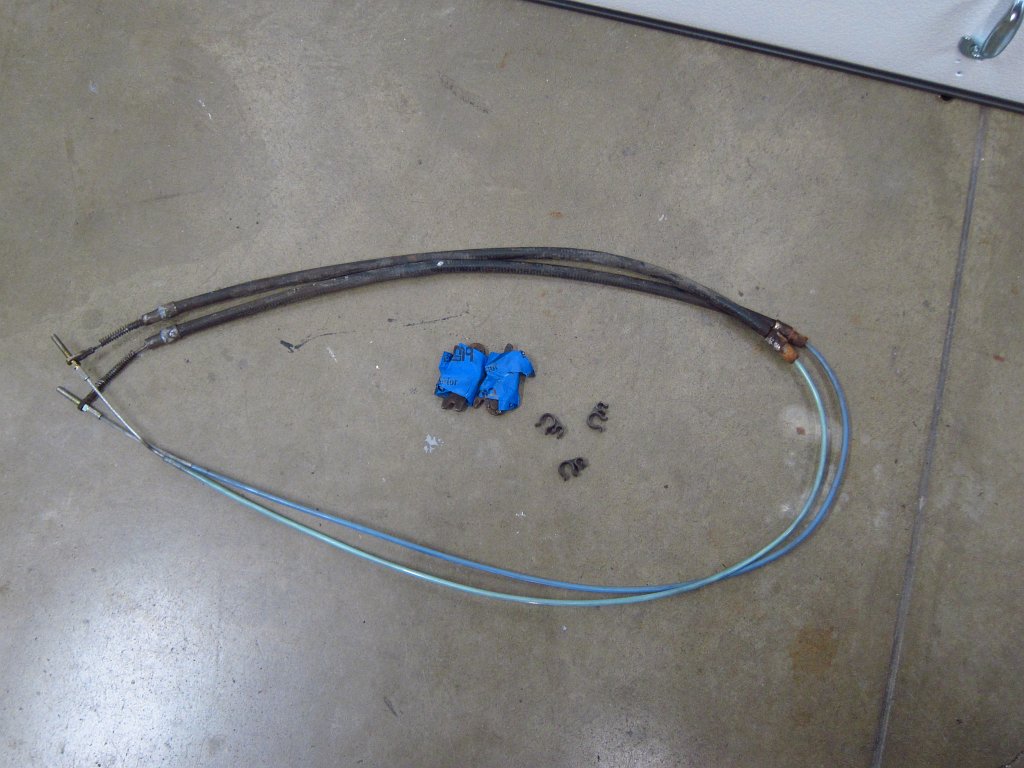
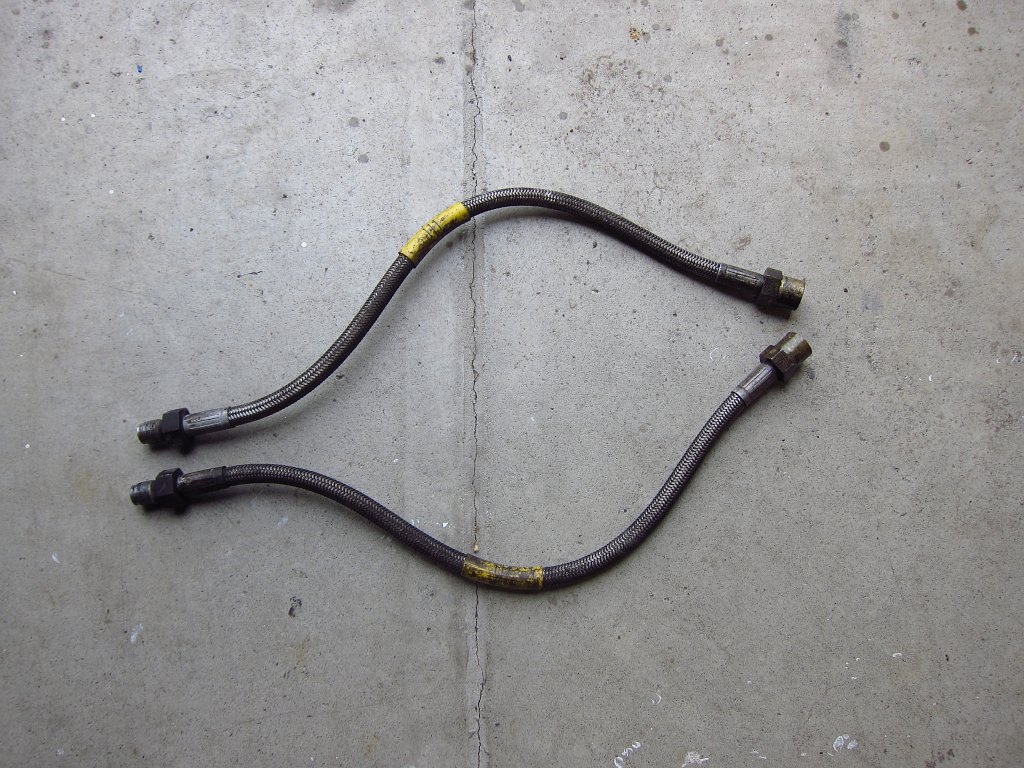
Here are the old, non-DOT-approved ones. I think that I got them from Pelican a few years ago.
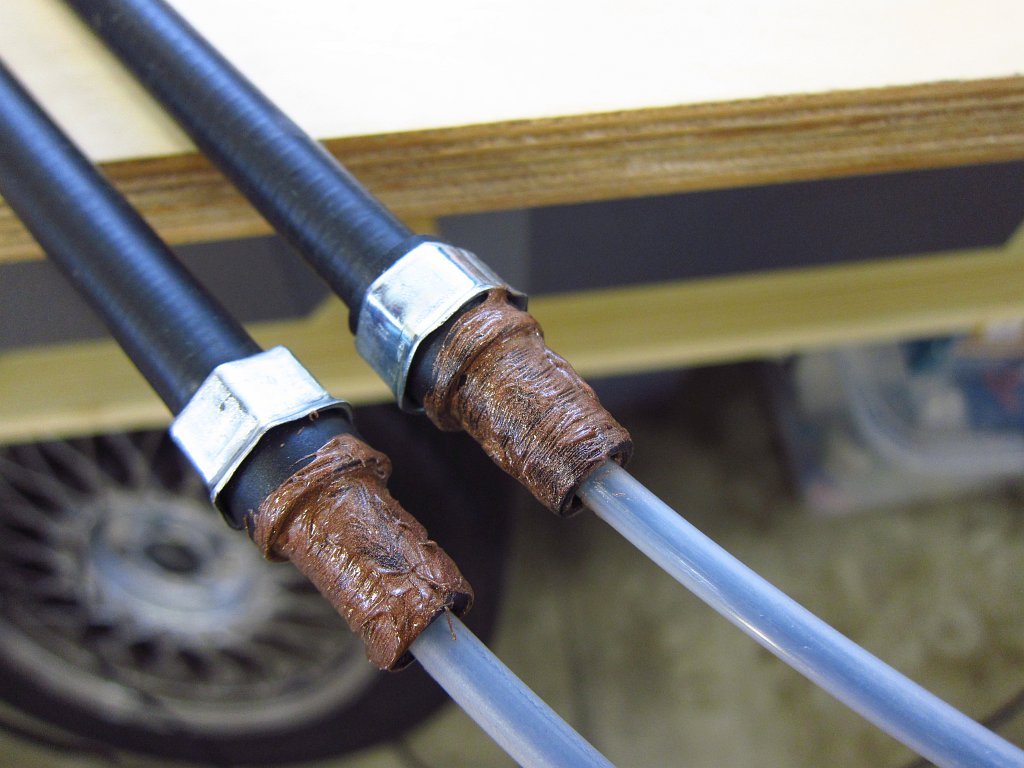
Next up was the installation of new parking brake cables. These have plastic ferrules, as opposed to metal like the old ones. Despite this, I still coated them with anti-seize compound before installation.
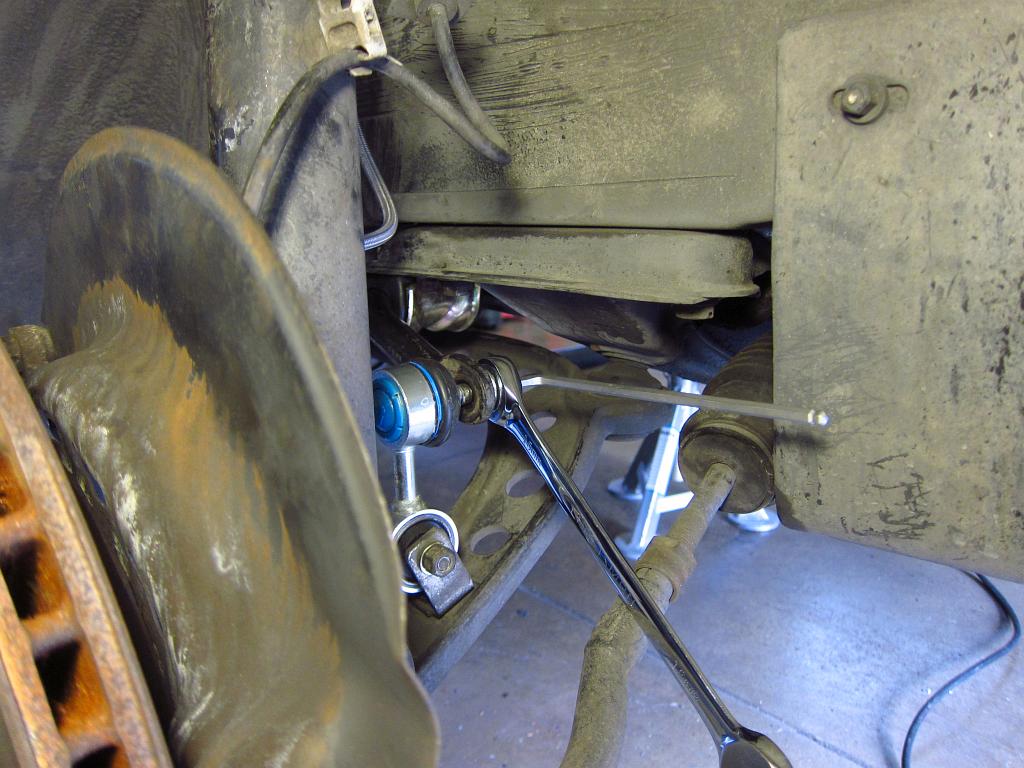
The rear sway bar went in next. New end links were a very tight fit, so some Windex, a socket and a mallet were brought back into action. After that, I lubed the inside of the rubber chassis bushings with a little bit of silicone and installed the bar.
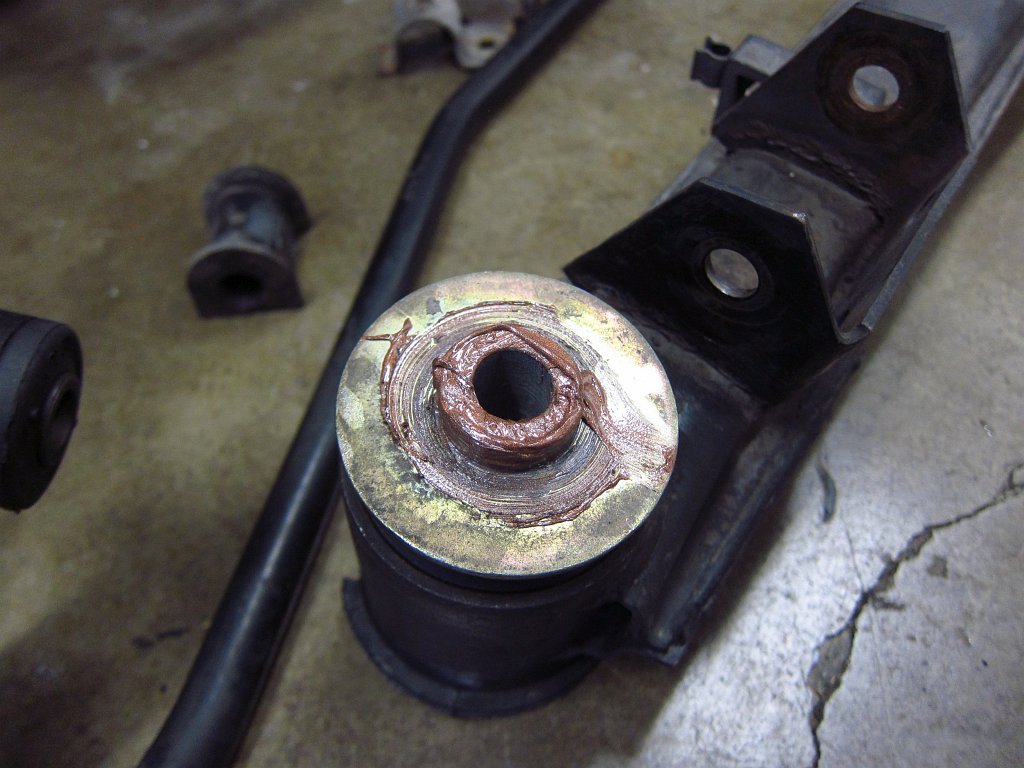
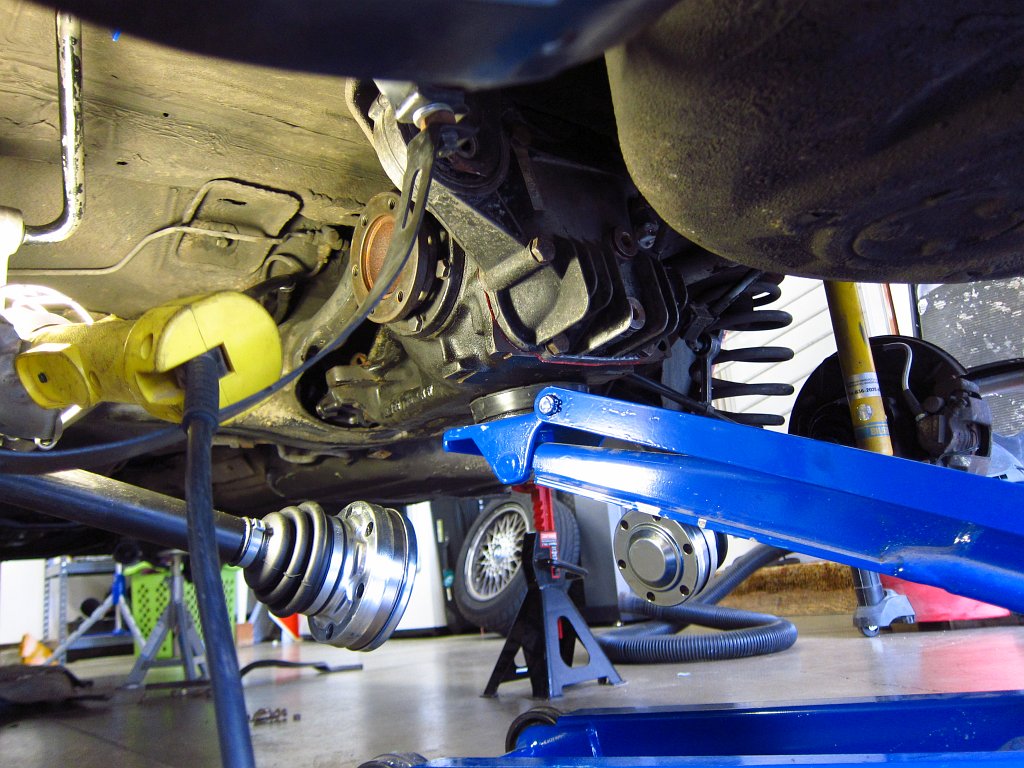
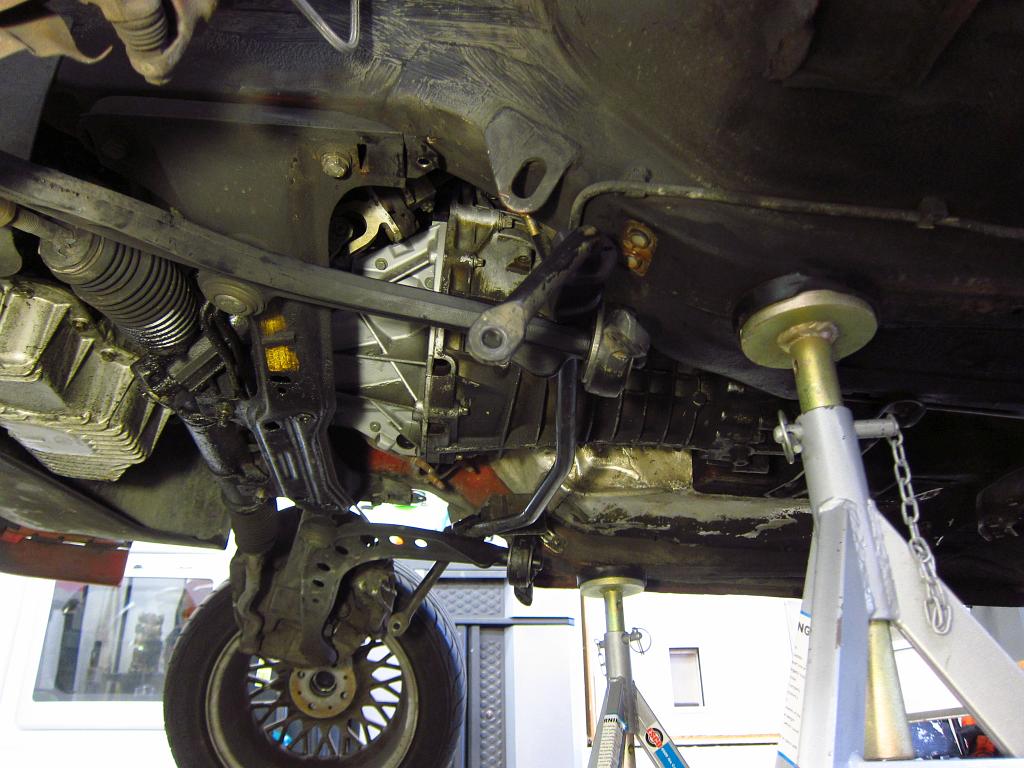
My next step was to install the rebuilt driveshaft. For this, I removed the exhaust since it was in the way. In hindsight, I should have done this later since it made installing the subframe a little more of a pain. No big deal though. Also, make sure to bias the CSB forward by ~5mm and then tighten it into place. This creates a necessary pre-load in the CSB's rubber web.
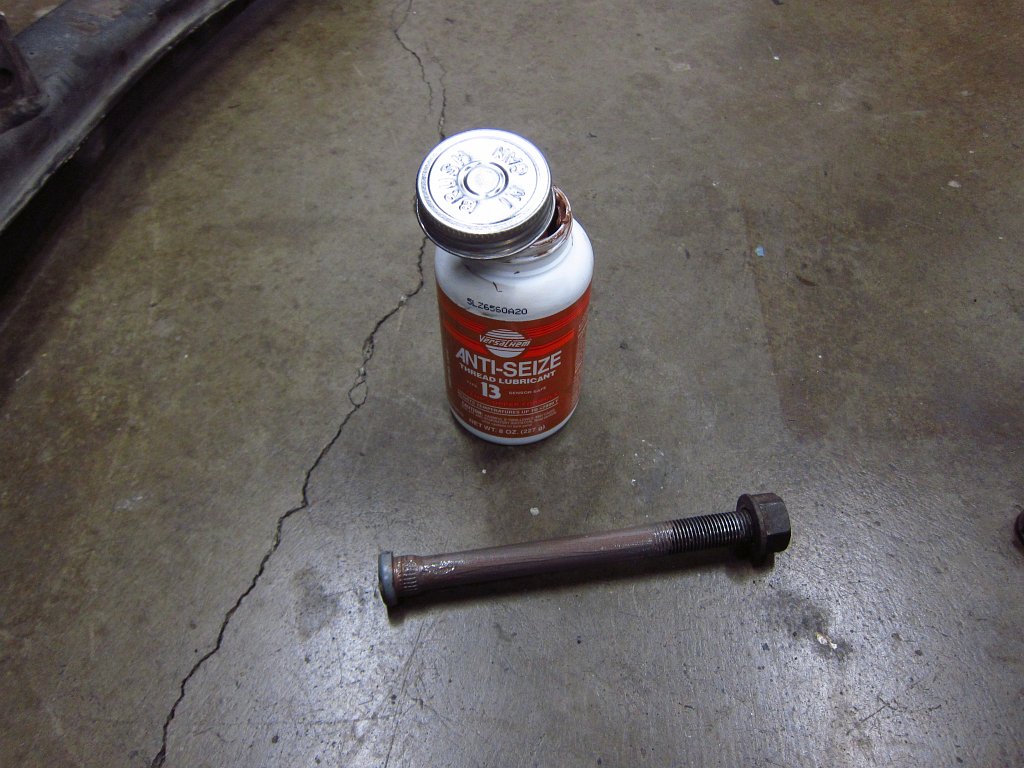
So, with the driveshaft in, it was time to install the subframe. As per usual, I applied anti-seize to the aluminum posts that mate into the chassis, and I coated the long knurled bolt too since that is contacting the aluminum post (dissimilar metals + salty/dirty water = recipe for galvanic corrosion issues). Installation was pretty straightforward, BUT, I did forget that the passenger's side trailing arm bolt would interfere with the gas filler hose so I had to drop it back down a few inches to install that.
Although I was planning to do this later, I decided to install the new half-shafts (or at least see if i was going to have to deal with pressing the splined end in since the old ones had to be hammered out). Thankfully, they slid right in by hand with no nonsense. The axle nuts are hand-tight for now, and I will fully torque them after the differential is back in the car. Lock plates will then be installed. Also, note that the procedure calls for you to lubricate the axle nuts to achieve the proper load on the shaft end. I spread a little bit of grease on the nut flange before threading them on. And yeah, I know, you generally want to avoid having the half-shafts hang on the joints. It's only temporary and the boots are brand-spanking-new so it's fine.


Here's a very important tip to remember. Do not tighten the bolts that secure the trailing arms to the subframe while the trailing arms are extended down. You need to elevate them to the regular ride height position and THEN tighten them. This is because the center metal tube is going to be locked to the subframe when you tighten the bolts, and you want the rubber to be free of torque when the arms are at their normal neutral position. I used a jack to lift the arms to the normal ride height position (jacked them until the car started to lift off of the stand) and the torqued things down. This is a bit of a pain in the ass since you have limited room to work with a 19mm wrench and socket, but it is perfectly doable.

Here's where things are at now. It should all get buttoned up tomorrow.Comment
-
Another daily update. The car still needs a bit of work before I can drive it. The plan was to finish today, but a couple of hiccups during reassembly made things run a bit more slowly than expected. The stuff that I still need to do:
- Torque the diff cover-to-chassis mount bolt
- Torque rear axle nuts and install lock plates
- Finish adjusting parking brake cable tension and apply anti-seize to the plastic ferrule in the hub
- Reinstall exhaust and O2 sensor
- Install front sway bar
- Bleed brake system
Question for other folks: Do you use silicone lube between the sway bars and stock rubber bushings? I have read a lot of conflicting info on this.
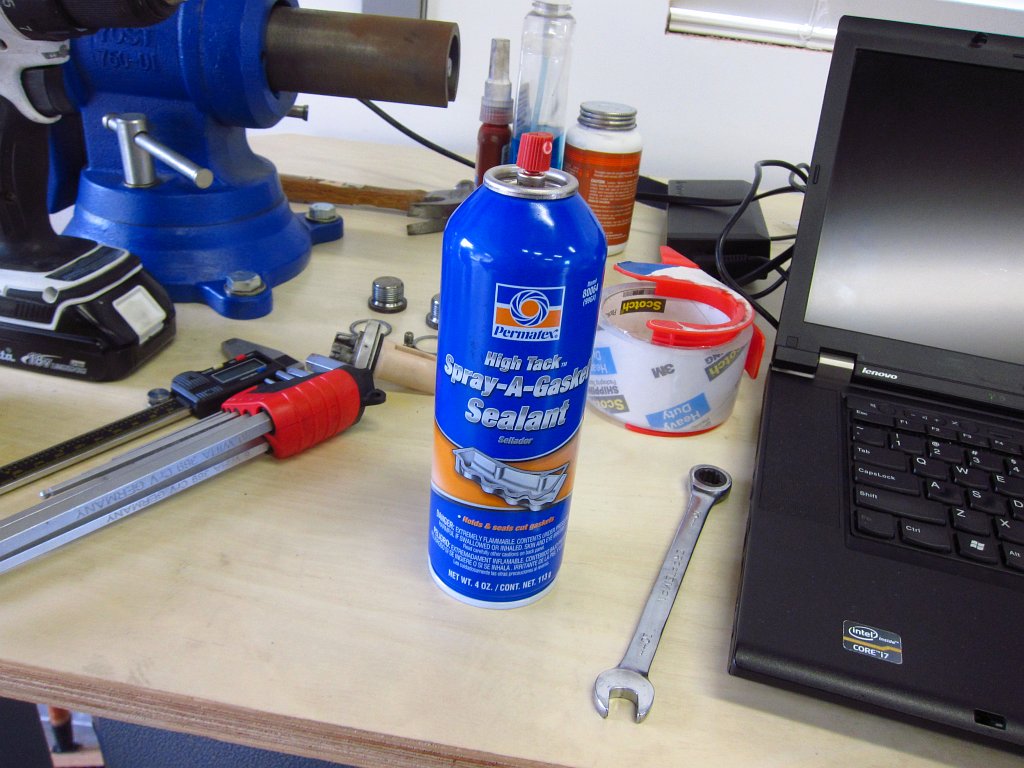
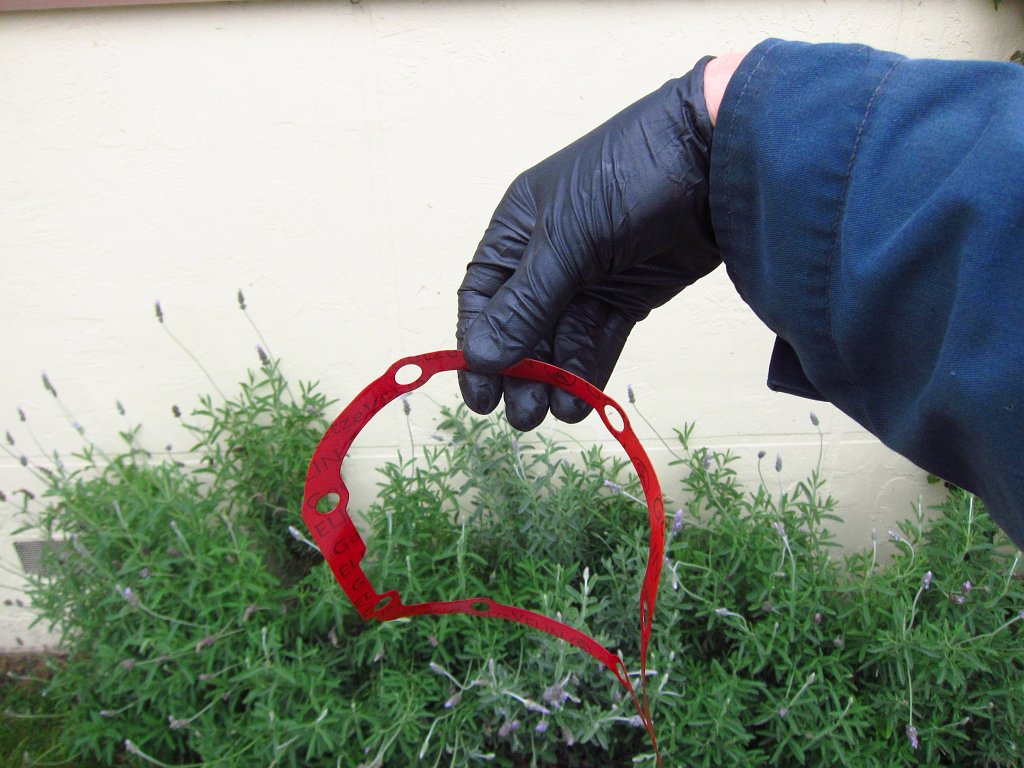
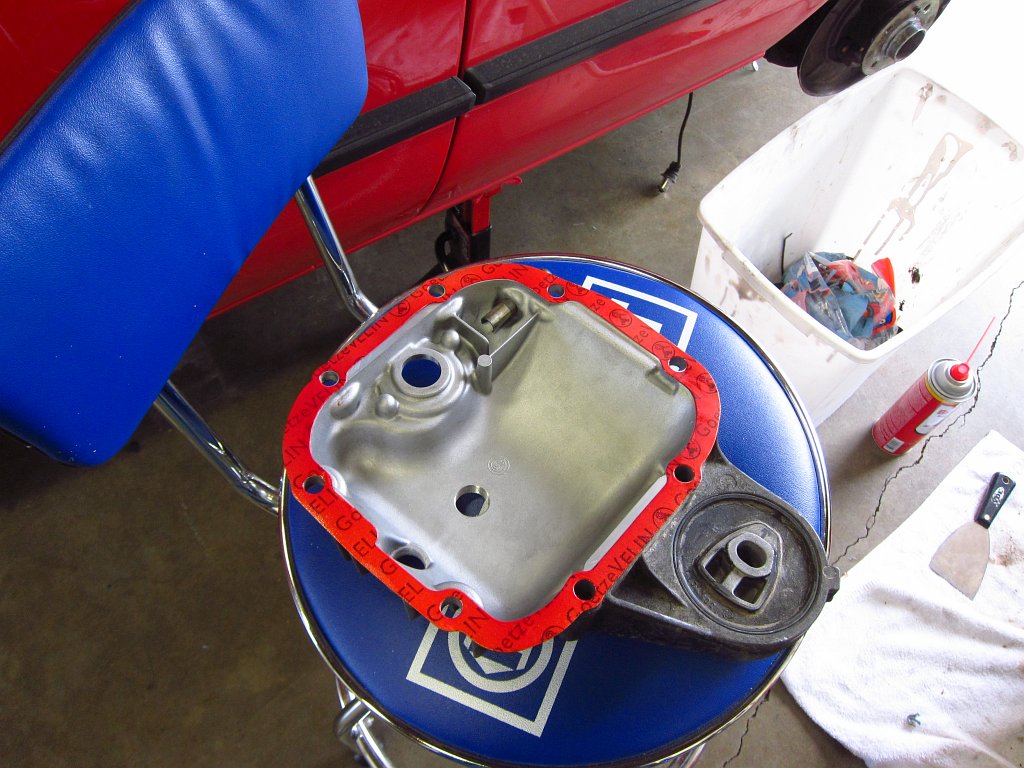
Anyway, not many pictures today, but lots of progress. I started out by cleaning up the differential cover's gasket surfaces. The aluminum cover got some sanding with a block and 400 grit paper, and then a good scrub with some Simple Green. The diff body got some scraping and wiping with brake cleaner. As for the gasket itself, I sprayed both sides with a couple of coats of Permatex High Tack Spray A Gasket. This is my favorite stuff since it is easy to apply even, thin coats. It also holds up well against most car fluids, isn't impossible to remove if you take things apart in the future, and the gasket won't "walk" when bolting it down because the coating is pretty thin.

I scraped the gasket surfaces as well as I could, but there was still a little crap left. I did not want to sand or do anything that would send grit and debris flying because I did not want it getting into the diff gears.
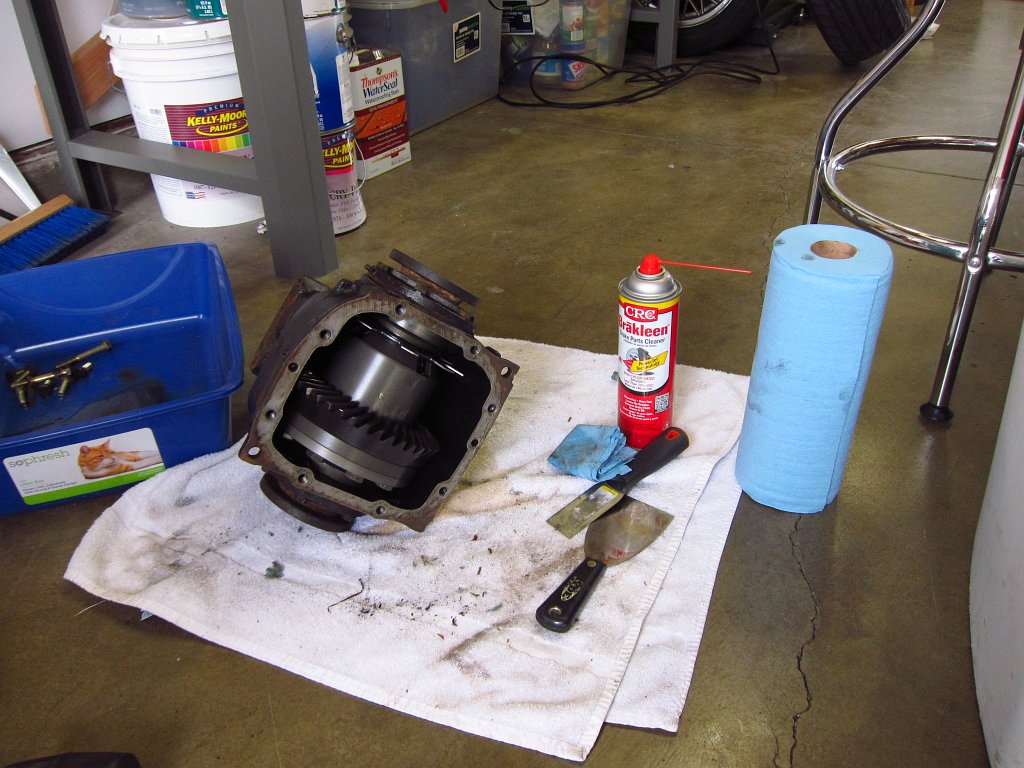
While the cover was off I added the fluid. We all know how "good" gear oil smells. This stuff (Titan Sintopoid) smells a lot less terrible than any other gear oil I have used over the years.
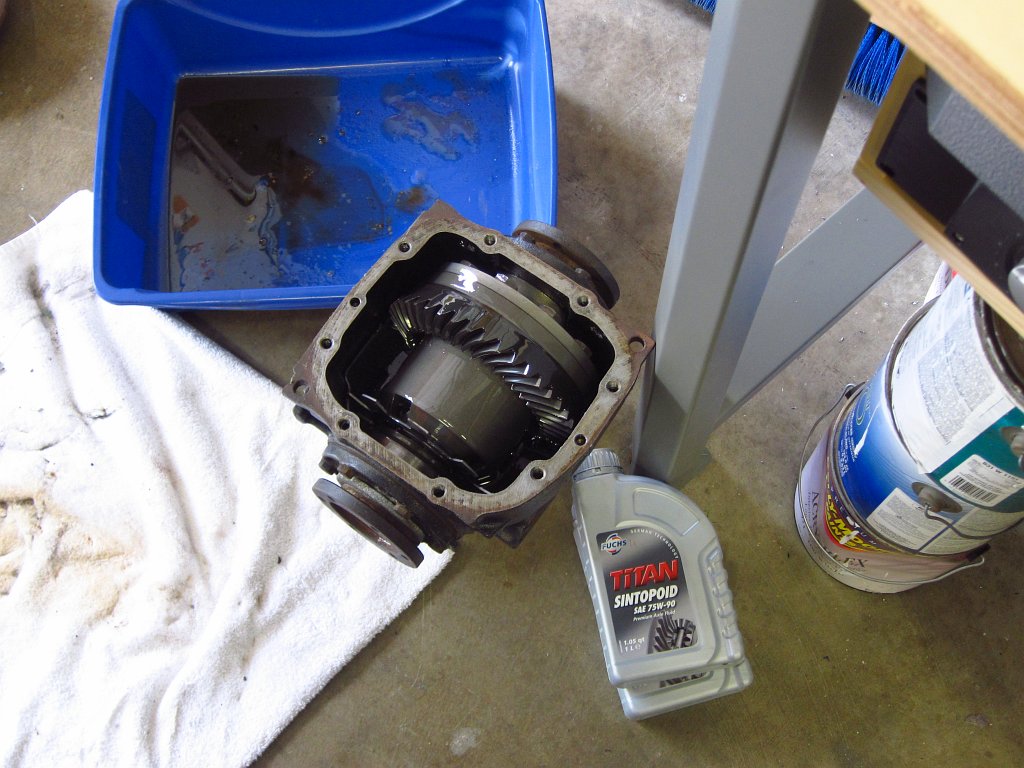
All buttoned and sealed up.
While the gasket sealer finished curing, I got the new parking brakes set up. The little expanding shackles got a little anti-seize compound since those seem to get rusty and nasty. They are pretty easy to install, just pull the brake cable end through and pop them on.
The rest of it was fairly simple too. The shoes go on (all of them are the same, just make sure to put the bigger notch on top), and a small mirror helps a lot with getting the securing posts into place properly. Next goes the tensioner screw, and then the springs which are easily installed with some needle-nosed pliers. From there, it was just a matter of messing around with the tensioner screw and the cable nuts in the cabin. According to the shop manual, things should be adjusted so that the parking brakes are fully engaged by 8 clicks of the lever (and it should be very tight by that point), with no dragging when the brake lever is down.
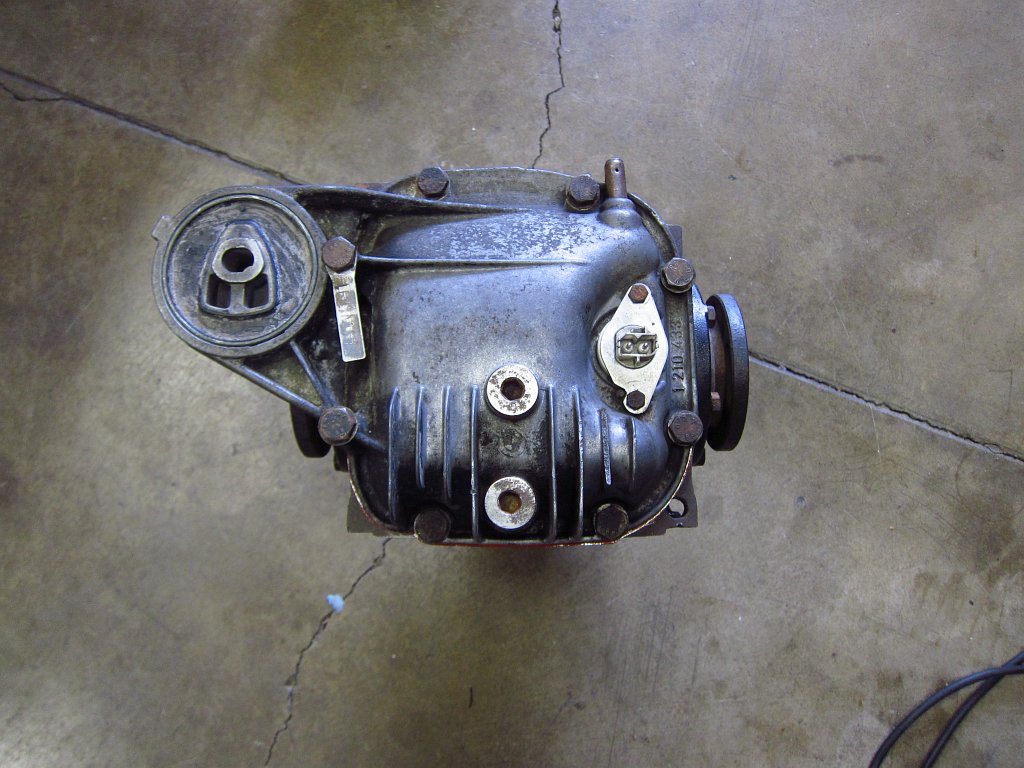
After that I set about to install the differential. It is fairly easy with a jack and a small mirror to make sure that the bolt holes are lined up. I STRONGLY recommend getting the driveshaft studs into the diff's input flange at this point, rather than trying to do it later after the diff is bolted in. It can be a pain to get the studs through the holes, at least with a medium-case diff. It's a lot easier to do it when the diff is still mobile. I mention this because I did not do it this way, and I wish that I had lol.
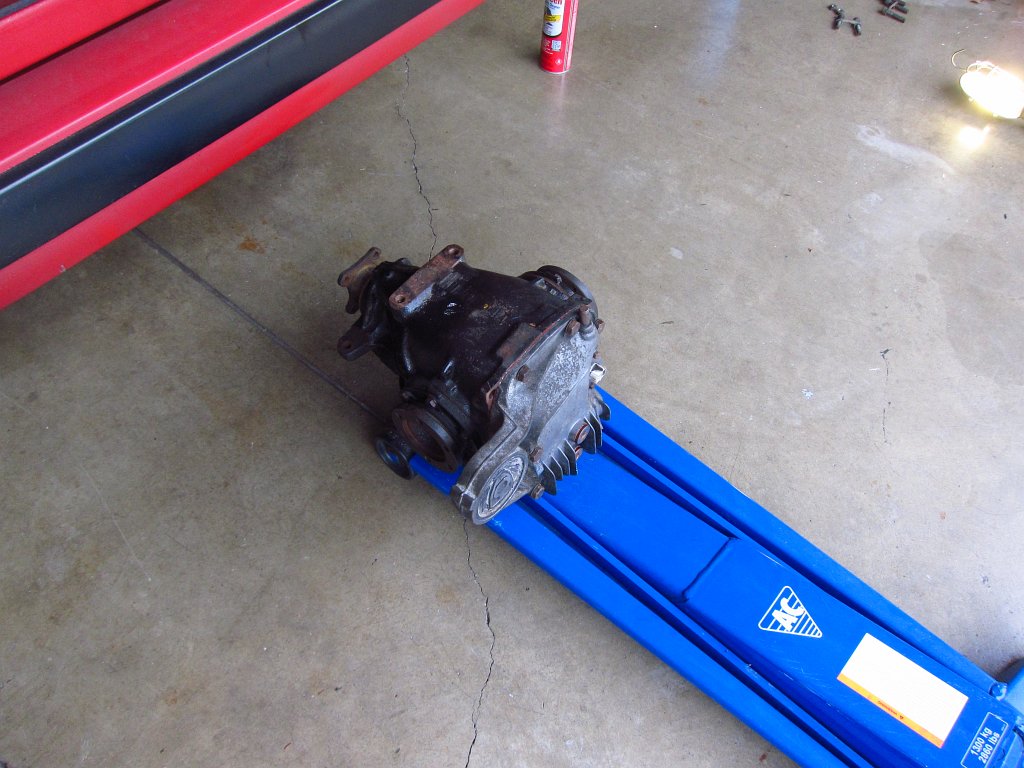

After that I attached the half-shafts and torqued their bolts to spec. Things are really coming together now!
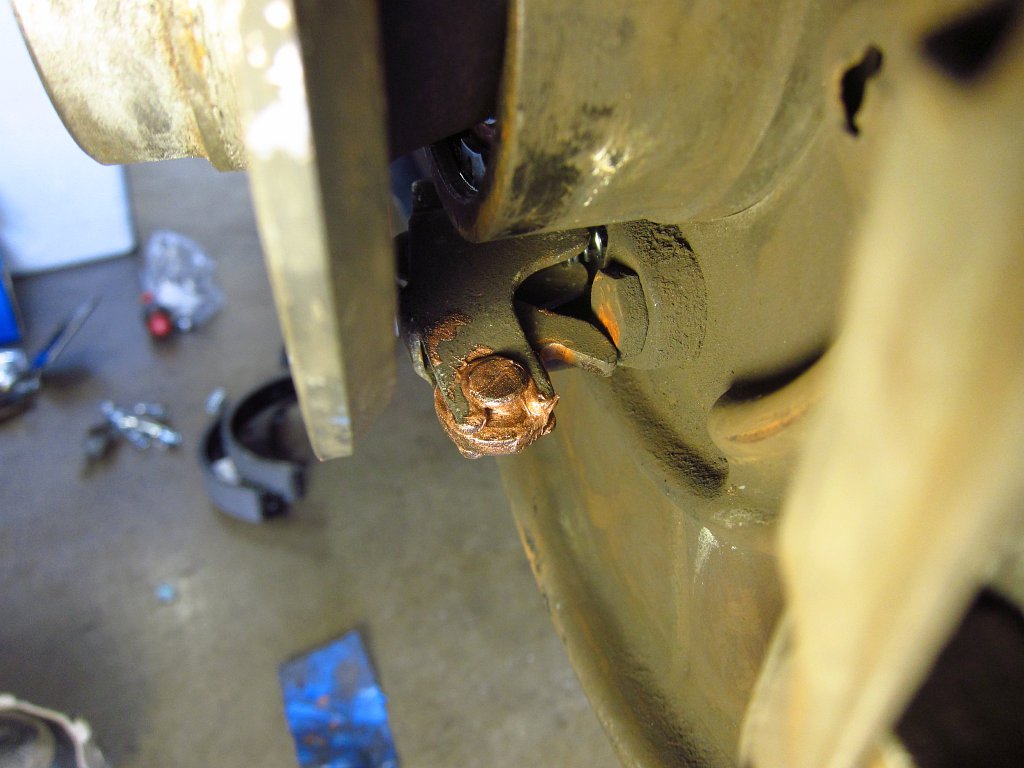
The big hiccup that I ran into today was that one of the threaded studs in the end of the driveshaft was not properly staked into the yoke, and it would spin when I was trying to tighten the nut on the diff side. The local hardware store didn't have anything remotely similar, so I had to improvise. I chased the stud's threads and ran a tap through the ovaled nut so that it would at least go on smoothly. Because of this I did opt to use thread locker. Anyway, I managed to get some full size vise-grips onto the stud's head and wedge them between the driveshaft and subframe so that I could apply full torque to the nut. God help me if/when I need to remove this, maybe the same trick will work then too. If not, I will just have to disconnect the driveshaft in the middle and drop the diff with it still attached.
One other, less severe, complication today was related to the front sway bar. It turned out that I didn't have all of the stock linkage parts that I needed to mount it, but I should be getting those later this week. As odd as it might sound, I am actually excited about returning to stock bars. Sure, the car will roll a little more in corners, but I figure that traction will improve a little since the inside wheels will have less force pulling them upward.Last edited by bmwman91; 03-10-2016, 08:02 PM.Comment
-
-
This thread is a goldmine of information, thanks for sharing!Zelig the Zinno • 300k and counting
http://instagram.com/zelig.the.zinnoComment
-
Haha, sure I can probably lend a hand. Getting the subframe off of the car is the easy part!Comment
-
Fun, fun! The mirror is a good idea--I use studs for the diff now which makes it easier, but also presents a different issue if the car is not level in the air.paint sucksComment
-
Studs are a good idea, I like that. Lining up the bolt holes is a big pain, especially with the coil springs pushing the subframe down at an angle.Comment
-
So, it looks like we are at the end of the overhaul (for now). This is probably the most images I have ever posted in a single thread lol.

The project is finally done! Six hours of wrenching this morning/afternoon got the last of it buttoned up, and it's on the road again.

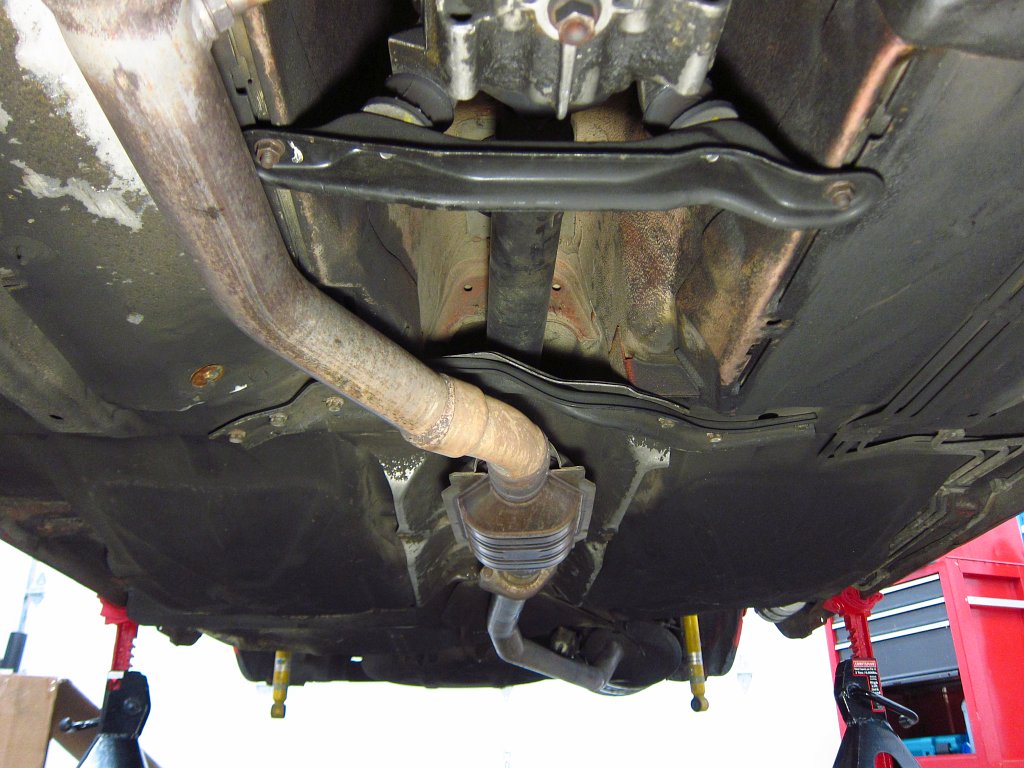
What all did I do today? Well, I am glad that you asked (I know you did, don't lie). Well, I did a couple of things that I didn't take pictures of. For one, I removed the rear brake discs so that I could wipe off excess anti-seize from the parking brake shackles and pull the cable ferrules out to apply some to them. I also took the reinforced sway bar brackets off so that I could apply a little bit of silicone grease to the inside of the bushings. After that I put the exhaust back on the car and tightened the big bolt that secures the diff mount to the chassis (I used the jack to lift the diff up before tightening).
The topic of greasing stock rubber bushings seems to be one of those topics that nobody really has a solid answer for and it causes lots of debate. Overall, I am of the opinion that it is probably unnecessary unless specified by the factory. You want to be particularly careful not to use any pretroleum- or lithium-based lubes on the rubber bushings because it is going to shorten their life. Silicone lube is fine in most cases, and is what I used. So, why did I grease them? Well, remember that with any suspension bushing that involves a moving part through it, you absolutely do not want to tighten it down until the car is resting on the wheels with the suspension in its normal neutral position (don't just lower the car onto the wheels, roll it around a little so that the wheels settle). In this case, I didn't feel like dicking around under the car trying to tighten up stuff with it sitting down on the ground, so I lubed these bushings to allow the sway bars to move to the suspension's resting position without applying any undesired torque to the bushings. Recall that for the control arms and rear trailing arms, I did move the wheels to their normal position before tightening things up, and I did it without lube since those are much more critical.
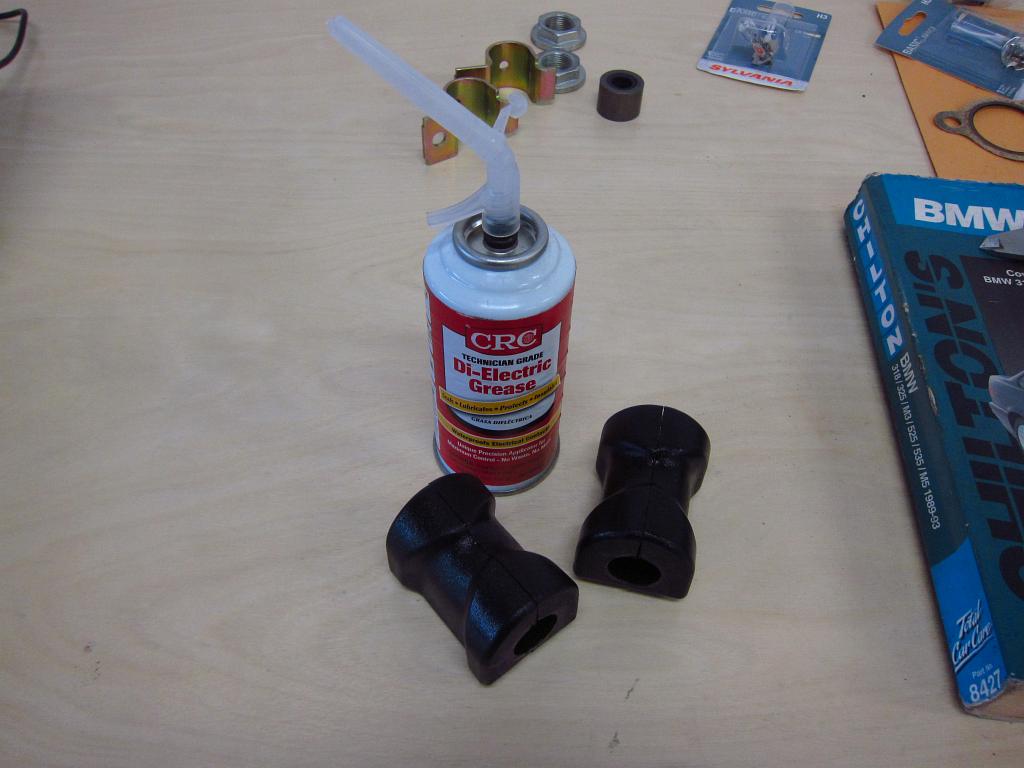
Replacing the front sway bar bushings is a bit of a pain if you are using stock ones. I put a TINY amount of lube on the outside to allow them to slide into the shackles, and I put a little on the inside where they contact the bar as well. The rubber bushings need a lot of squeezing to get things into place! They have an orientation as well. Notice the chamfered side...this goes on the rearward side to clear the protruding portion of the subframe.
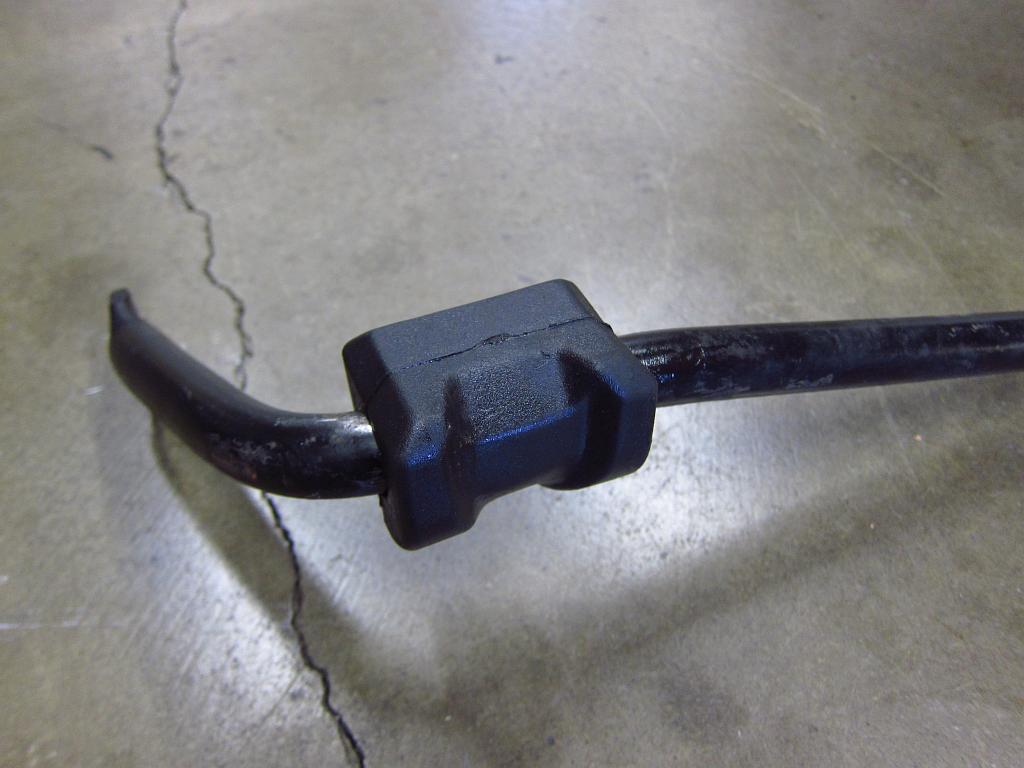
Getting the bar into place is super easy. You can unbolt one or both control arm lollipops to maneuver it into position.
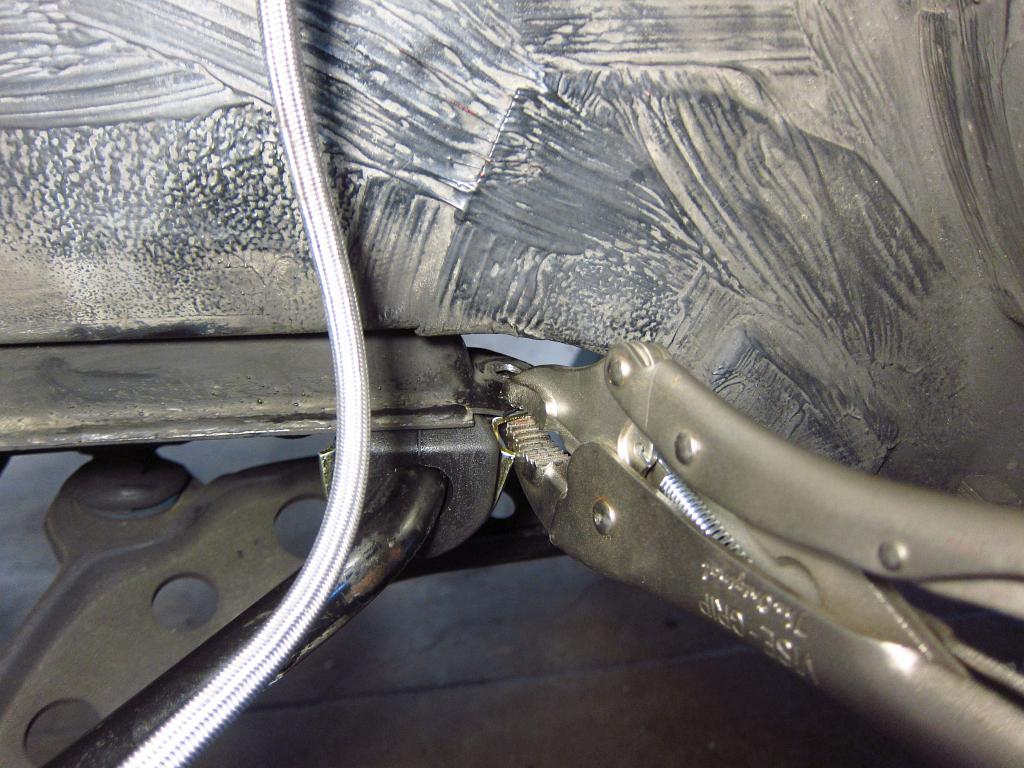
Getting the shackle into place is a little bit of a chore. I have had great success (/Borat) using a floor jack (with pad removed) and vise grips. Just pay close attention to the tab that inserts into the subframe and make sure that it stays in. Once the jack has the shackle going into place a bit, use some vise grips to hold it in place. After that just install the nut & bolt! Make sure to check the shackle's tab to make sure that it looks fully engaged. Also don't push too hard with the jack because you don't want to bend the shackle.

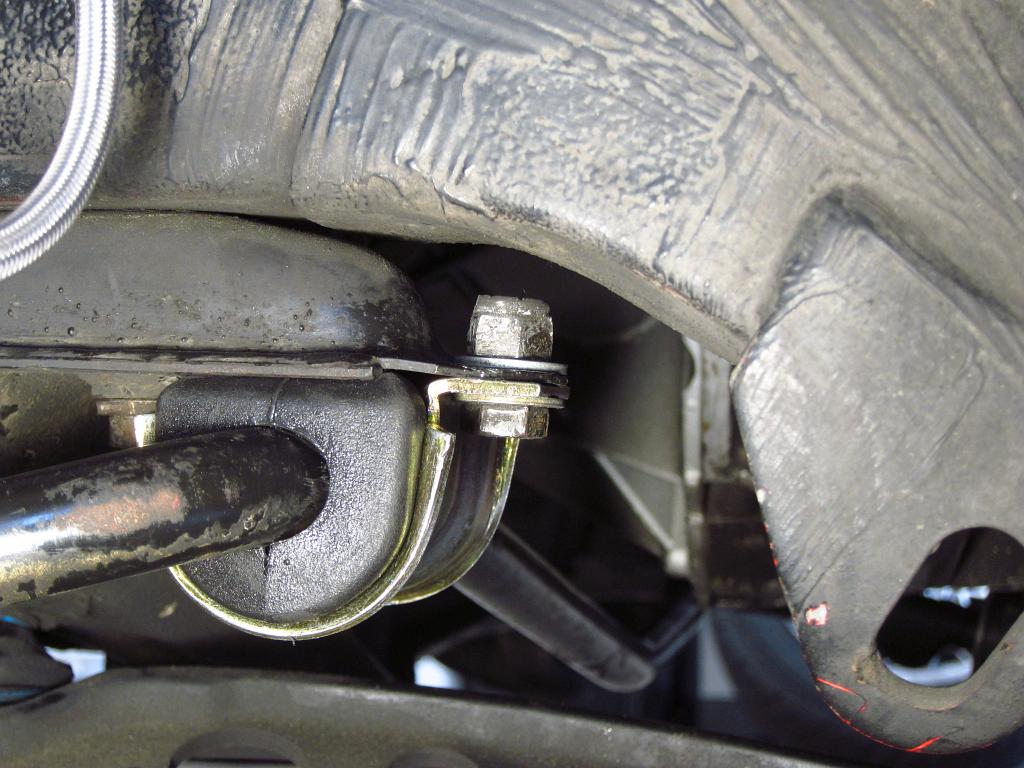
The rest is pretty trivial. Install the linkage and call it done. In this case I opted to use Meyle HD drop links, and they can accommodate a 5mm allen key in the end which makes tightening the staked nut very easy. Others I have seen require you to jam a combo wrench up against the boot which sucks.
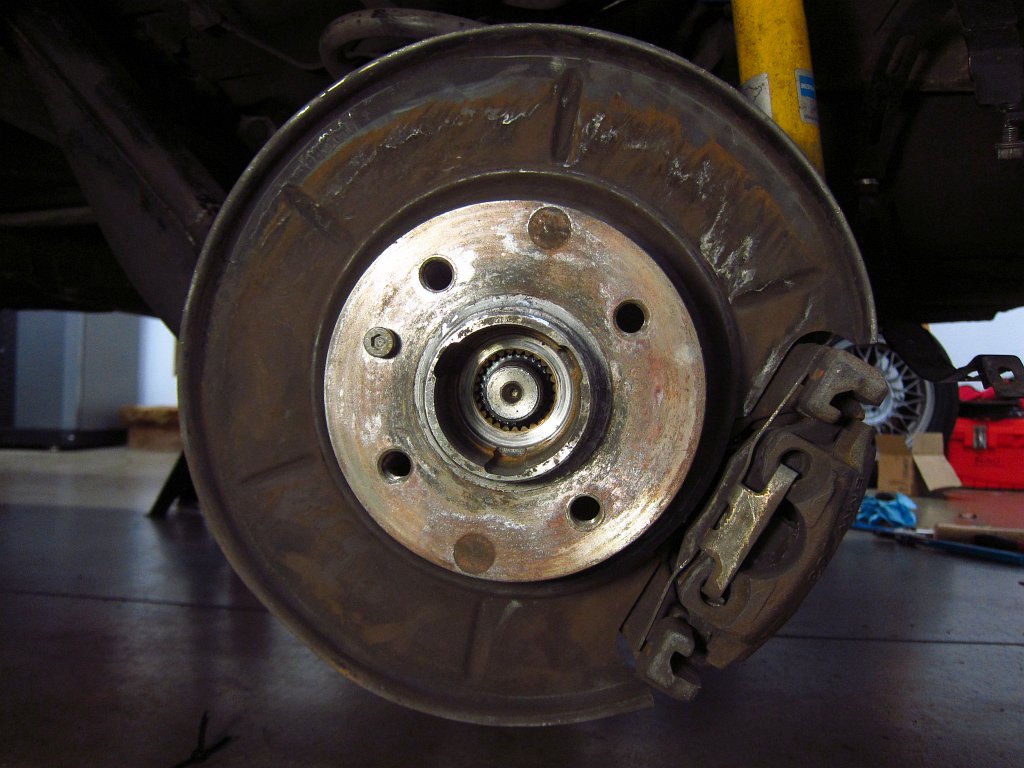
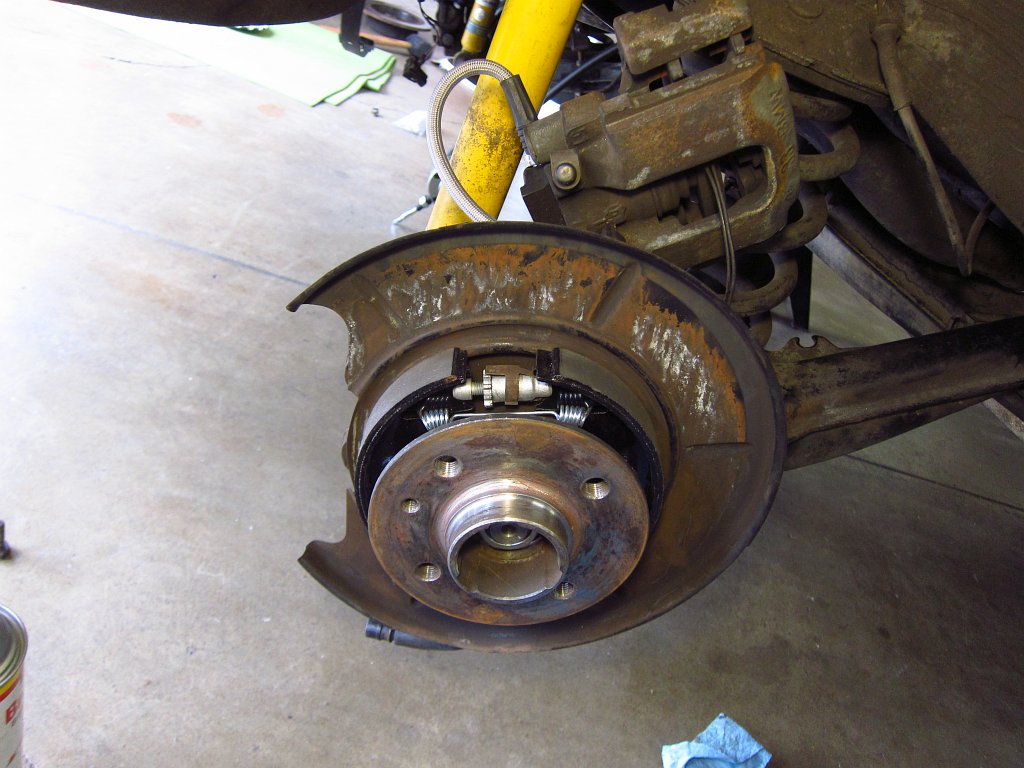
The other big items that I finished were the rear wheel bearings. I did these with the wheels off and the car up on stands so that no load would be placed on the bearings while the big 30mm axle nuts were tightened. Putting the car into gear and applying the parking brake was more than enough to hold things still while I applied the specified 145 ft-lbs of torque. Remember to apply some oil or grease to the flange n the back of the nut. This is called for in the factory procedure!
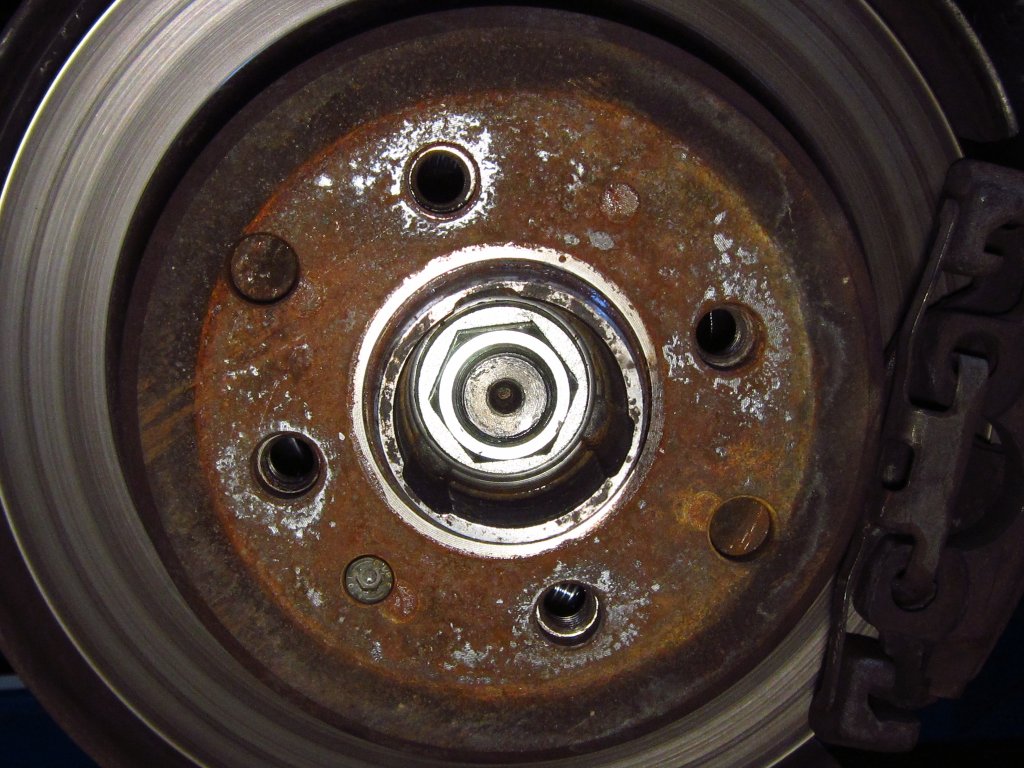
After that I installed the lock plates. You can do this with a rubber mallet, 1/2" extension, 32mm socket and 30mm socket. Do not use a metal hammer, despite the fact that it may seem easier.
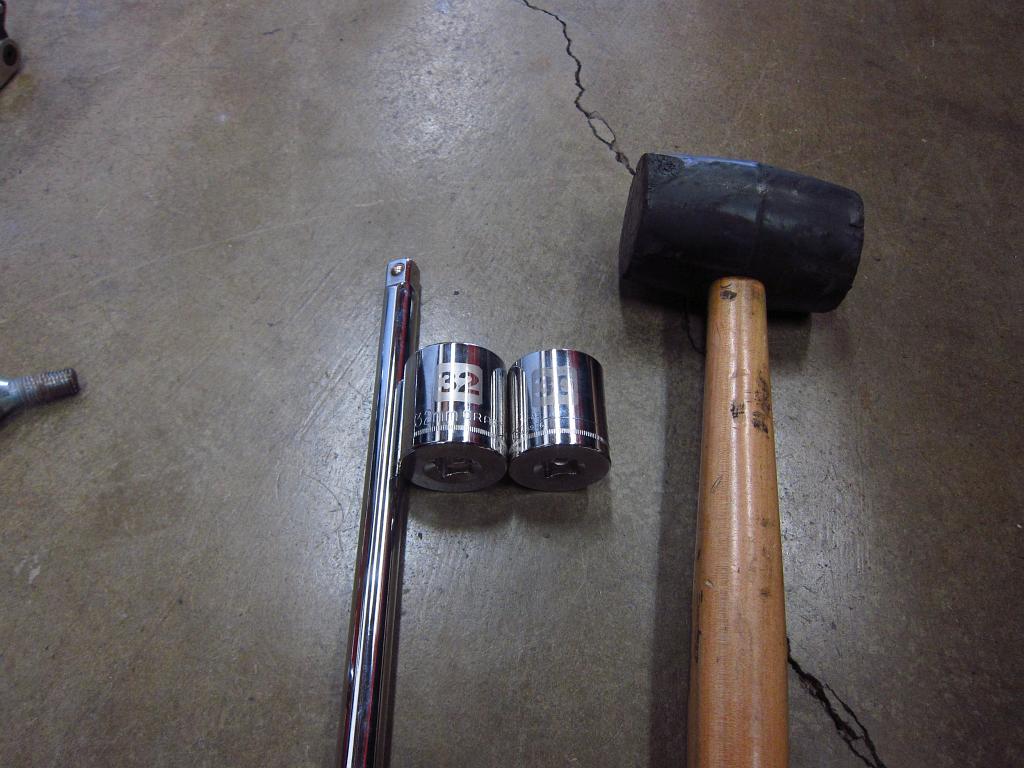
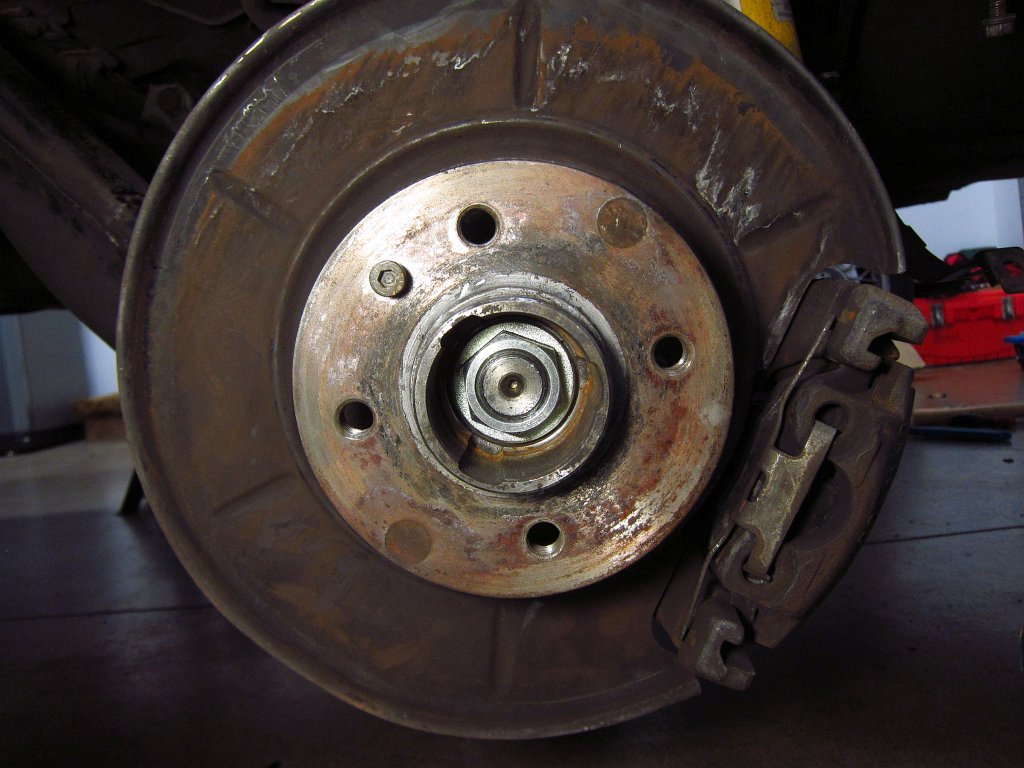
Slide the lock plate into the bore.

Use the 32mm socket and mallet to form the lock plate onto the nut.
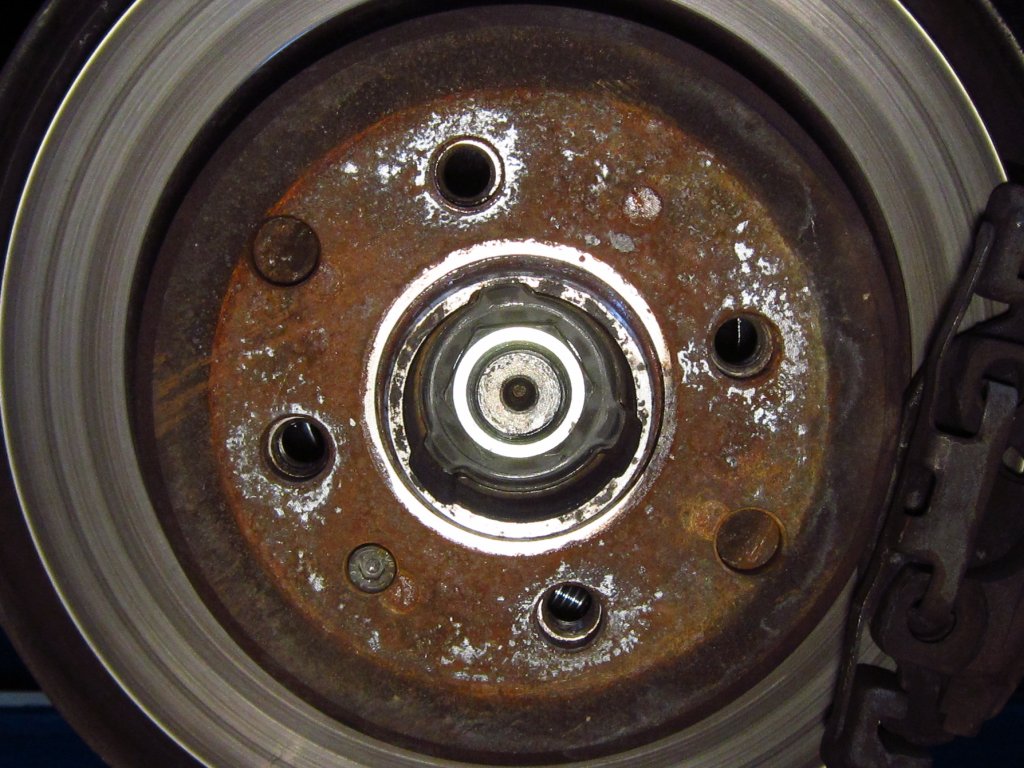
Then use the 30mm socket and mallet to get the lock plate to bite down tightly onto the nut.

That's that. Other than that I just had to adjust the parking brake cables inside the car a little and bleed the brakes (did all four corners twice). Then it was test drive time. Overall, I LOVE it. The car rides a hell of a lot better and hugs corners much more tightly than before. Shredded subframe mounts were not helping anything before lol. I also really like the stock sway bars. The car feels a lot more balanced and less prone to understeer. Funny thing...it's almost as if BMW knew what they were doing when they designed these things!
Drivetrain noise is also greatly reduced. I have the iX VLSD in the car now, and while I don't plan to run it for very long, it is in a lot better shape than the small case LSD that was in there. It sounded like a coffee can full of rocks! The newly balanced driveshaft, new half shafts and all new wheel bearings probably also contribute to the smooth and quiet feel the car has now.
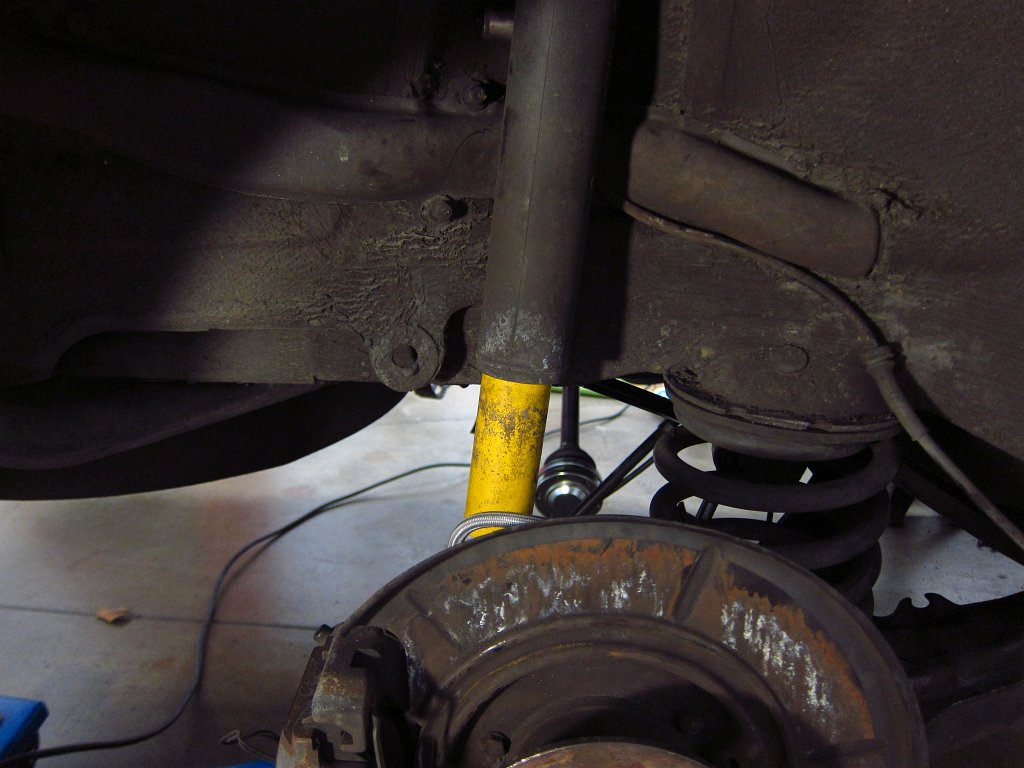
So I would say that this a big success overall, and it was well worth the hours of toil. Having owned an E30 with stiffer/lower shocks and springs, all poly bushings and mounts and beefy sway bars, I am going to say that an almost-completely stock suspension is best on the street. The car is pleasant to ride in both in terms of vibration and noise, it absorbs bumps easily and it handles fantastically. It just feels perfectly balanced and planted. While body roll has increased a little in my switch back to stock sway bars, it is made up for with what I think is improved grip (granted, some of that is probably because I have new subframe bushings and stuff). On a track, I would say that sure, go for stiffer bushings and a ride height drop because those things will pay off on nice perfect asphalt. On the street where the pavement typically sucks, however, I am a believer in a mostly-stock setup. The items that I think are worth upgrading / beefing-up are the shocks (Bilstein HD), the front CAB's (E36 M3 centered solid rubber) and the diff mount (E30 325iX solid rubber). I also have beefed up and reinforced rear shock mounts since the stock ones are known to be poop. Other than that though, the OEM bits are just fine.
I hope that people have found this thread useful and that maybe it will save people some time and effort. Everything is pretty straightforward with these maintenance items, it just requires some patience, careful thought about the order in which you do things, and more patience (and money...parts aren't getting any cheaper lol).Comment
-
Quick follow-up, regarding the torque spec for the rear axle nuts. If you look around online and in shop manuals, it seems to vary from 145 ft-lbs to 185 ft-lbs to 210 ft-lbs. Most places seem to list it as 185 ft-lbs. However, I believe that this is incorrect for most or all E30's. My trusty Chilton's Manual for the E30 lists it as 145 ft-lbs. Beyond that, SKF has a technical guide that covers this, and it seems to explain why there are different values!
The specs for the wheel bearings used on the E30, E36 and E46 are on page 4 in the upper-right (all in one line item). The fronts are 214 ft-lbs (290 Nm) as expected. For the rear bearings, there is a reference to note 40. Scroll to page 26 and look near the bottom for note 40. There are 3 specs listed, and they vary by thread size.
M22 thread = 147 ft-lbs (200 Nm)
M24 thread = 184 ft-lbs (250 Nm)
M27 thread = 221 ft-lbs (300 Nm)
I got my calipers out and measured the major diameter of the threads on my old half-shafts (which are the same as the new ones I just installed). The outside of threads measure 21.80mm in diameter, which means that this is an M22 thread, and hence 147 ft-lbs is the correct answer. Looking through RealOEM, it appears to be the case that the E30 and E36 compact/ti models use the M22 nut.
http://www.realoem.com/bmw/enUS/part...&q=33411125664
The SKF technical guide has a blurb at the beginning regarding tightening torques. Basically, you want to do it to-spec (duh). Too loose and the bearings will have slop between the balls and races, so they wear out faster. Too tight and the balls will be jammed into the races, they get excessively hot, so they wear out faster. Do your best to hit the torque spec because you will just be screwing yourself if you don't! Hopefully this puts things to rest and will help people in the future.Last edited by bmwman91; 03-13-2016, 11:17 AM.Comment
-
Doing great on the car upgrades, Thanks for all the info and pictures. Will be helpful for myself when I do it on my cars.Comment
-
Literally everything posted on that first page I have to do between my two cars. My white car's front wheel bearing started crapping out on me two weeks ago. Pictures where a great help, thanks for the details. After that my black car needs the rear bearing replaced.. That's the job I'm not looking forward to so much.
1992 M tech 2 Convertible - S50 Swap
1992 e34 Touring- S50 Swap
1992 325i-S50 Swap (SOLD)
1995 e36 M3 Mugello Red - S50 (SOLD)
1991 325i Convertible Laguna Green (SOLD)
1987 325i (SOLD);1992 M tech 2 Convertible (SOLD)
1988 325i Convertible Alpine White (SOLD)
1991 Brilliantrot Convertible 80k Miles (SOLD)
1992 325i Convertible Schwarz (SOLD)
1992 318i Convertible Project-Finished (SOLD)Comment


Comment