A 50 year old Japanesse lady: SRL311 01228

Collapse
X
 
  • Time
  • Show
Clear All
new posts

  • 2mAn
    replied
    Nearly done with school for good and finally got some decent weather and time paired up to get some work done. I painted the pass side of the engine bay, took a step back and its obvious I HAVE to paint the firewall too...


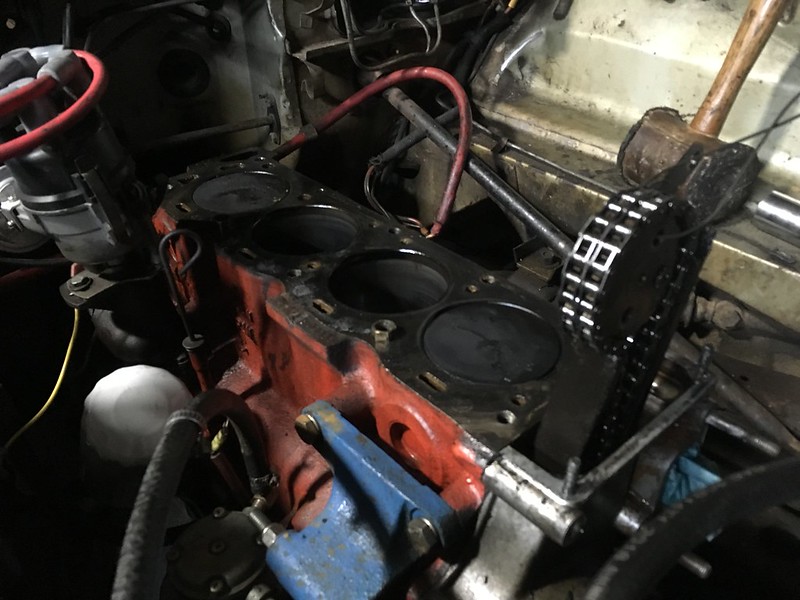
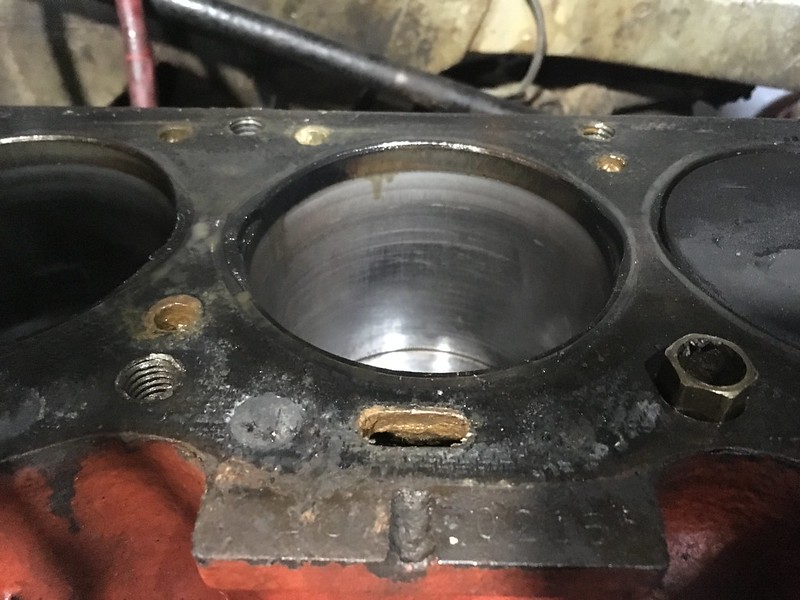
    As much as I dont want to work around the brake lines, it seems like the better move is to actually remove them and have less obstructions in the way of the paint. Hopefully by the time my cylinderhead is done along with the custom cam, I will have all the paint work done, and the rear diff swapped over.

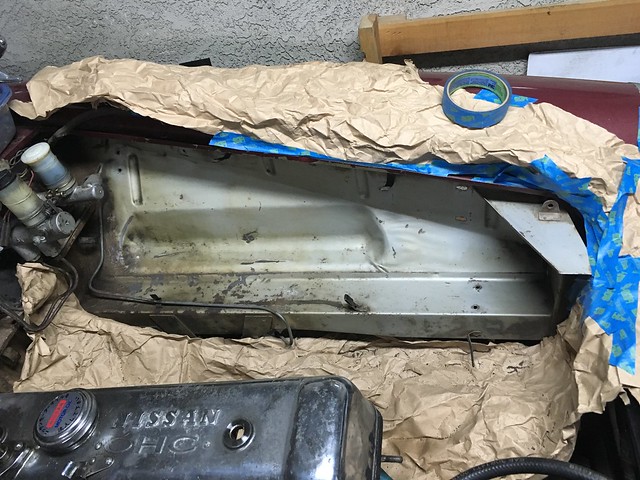
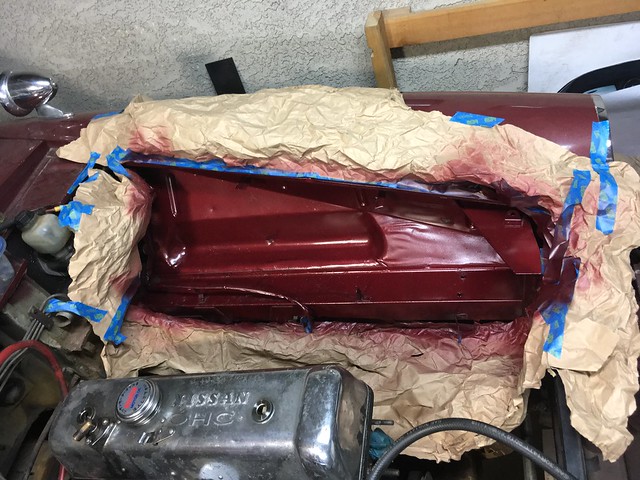
    I figure that since I have to disconnect the brake lines to get the axles out far enough to swap the diff, I might as well also pull the brake lines in the engine bay so I can finish the engine bay color-matching. It doesnt look too close, but thats because you're looking at a dusty, dirty body and fresh paint. I have a few other things I want to get done while the car isnt running so that when Im done, Im done.

    I miss driving her, but the weather hasnt been that nice anyways

    Leave a comment:


  • LJ851
    replied
    Originally posted by jeenyus
    So did they rebalance it or something?

    Sent from my Pixel 2 using Tapatalk

    Probably.

    A rebuilt damper would also include replacing the rubber, effectively making the harmonic balancer new again.

    Leave a comment:


  • jeenyus
    replied
    So did they rebalance it or something?

    Sent from my Pixel 2 using Tapatalk

    Leave a comment:


  • 2mAn
    replied
    Still waiting for the head, but I think we're close to getting it done . In the mean time, I also sent out my damper to Damper Doctor to have it "rebuilt" whatever that is!... haha

    Before


    After


    Now about that head....

    Leave a comment:


  • 2mAn
    replied
    Originally posted by LJ851
    Wills exhaust CFM is a lot different than yours!

    It will be interesting to see what power you can gain from your engine.
    Yes, Wills cylinderhead has a lot of work done to it by a known shop, mine is completely stock.... for a little while longer :devil:

    Im probably going to leave the intake side stock and have him spend time on the exhaust side. I had planned to put in a 284/294 dual pattern cam, but final call will be from the expert, as Im not a guy who does this for a living.

    The car will definitely hit the dyno when its all done to see what it makes.

    Leave a comment:


  • LJ851
    replied
    Wills exhaust CFM is a lot different than yours!

    It will be interesting to see what power you can gain from your engine.

    Leave a comment:


  • 2mAn
    replied
    Originally posted by BlackbirdM3
    You should post mine up with yours to show the differences.

    Will
    As you wish...Per Wills request, here is the flow numbers on his head. Same bench, same time, much better results!


    Lets see what mine will end up at when Rich is done.

    Also, the cam was sent out today to Schneider cams. Shits about to get real!

    Leave a comment:


  • BlackbirdM3
    replied
    You should post mine up with yours to show the differences.

    Will

    Leave a comment:


  • 2mAn
    replied
    Small update:
    Im always looking to learn more and in this case, we wanted to know where we were starting with the head. Teaming up with TEM Machine was great (Thanks Will!). Its a slow process, but they say good things take time. Here, we have a baseline of what the U20 head does. Quite interesting results.

    Leave a comment:


  • BlackbirdM3
    replied
    Originally posted by 2mAn
    Im back in school and this is my last semester so Im excited about that but my spare time is quite limited now. I took advantage of a free afternoon today and since my wife is out of town, I could spend as much time in the garage as my heart desired. I had two goals in mind; #1 Get the big nut and crankshaft pulley off, and #2 Get the rear diff out to swap in the 3.9

    My good friend came over and helped me with some stuff. I asked him to help with the diff, and mentioned we could try and get the big nut off too. He did help me get the big nut off and we worked on the rear diff but left before the job was done. A little help is better than no help at all! After he left, I took a break to eat, recharge and try not to get sucked into football.

    After lounging for about 2 hours, I went back to work. The Drums were already off, axles ready to slide out, the 4 driveshaft nut & bolts were also out and I was about halfway done with the diff bolts. After sliding under the car, the driveshaft fell down on me where it was disconnected and in a total brainfart moment with the rear driveshaft sliding out, I proceeded to remove it and once it was out, I immediately knew I made a mistake... someone please tell me it wont be a nightmare putting it back in?... Im hoping it wont need to be rebalanced, but I think I know whats to come ... ugh... and I still couldnt get the diff out after spacing out the axles to the point that I know they are out of the diff. I was able to slide it out quite a bit, but something is still hung up. Dammit!

    Frustrated from that, I left it and refocused my attention on the crankshaft pulley and timing cover. Per JTs instructions, I threaded in a pair of bolts into the pulley, threaded the big nut back in without the big washer and grabbed my two different pulley pullers. The one with two hooks was way too big and the smaller one was a 3 hook setup so the two werent a straight shot to the bolts. I figured I was close and having already made one stupid mistake plus not wanting to be a total failure, I figured if I used a pry bar carefully and slowly I could use the little bolt and the big bolt ...and wouldnt you know it... slowly but surely, the pulley came out. Took off the timing cover, admired my work with a few pics and called it a night.


    now about that driveshaft.... sigh... I'll leave that for another day
    Good work. How does that lower timing chain look?

    The drive shaft can effectively only go on one way, so all you need to do is make sure the piece on the transmission has the U joint oriented the same way as the rear one (I like to set it so it pivots up and down. then it just slips in and you rotate the diff around till the bolt holes line up. No big deal. Its an easy one to over think and not nearly as much of a PITA as an E30 drive shaft. The splines are big enough so that if you set the front in, and you are off, when you look at the back, its obvious you are a spline off, so you adjust accordingly.

    Will
    Last edited by 2mAn; 02-19-2019, 10:39 AM.

    Leave a comment:


  • 2mAn
    replied
    Im back in school and this is my last semester so Im excited about that but my spare time is quite limited now. I took advantage of a free afternoon today and since my wife is out of town, I could spend as much time in the garage as my heart desired. I had two goals in mind; #1 Get the big nut and crankshaft pulley off, and #2 Get the rear diff out to swap in the 3.9

    My good friend came over and helped me with some stuff. I asked him to help with the diff, and mentioned we could try and get the big nut off too. He did help me get the big nut off and we worked on the rear diff but left before the job was done. A little help is better than no help at all! After he left, I took a break to eat, recharge and try not to get sucked into football.

    After lounging for about 2 hours, I went back to work. The Drums were already off, axles ready to slide out, the 4 driveshaft nut & bolts were also out and I was about halfway done with the diff bolts. After sliding under the car, the driveshaft fell down on me where it was disconnected and in a total brainfart moment with the rear driveshaft sliding out, I proceeded to remove it and once it was out, I immediately knew I made a mistake... someone please tell me it wont be a nightmare putting it back in?... Im hoping it wont need to be rebalanced, but I think I know whats to come ... ugh... and I still couldnt get the diff out after spacing out the axles to the point that I know they are out of the diff. I was able to slide it out quite a bit, but something is still hung up. Dammit!

    Frustrated from that, I left it and refocused my attention on the crankshaft pulley and timing cover. Per JTs instructions, I threaded in a pair of bolts into the pulley, threaded the big nut back in without the big washer and grabbed my two different pulley pullers. The one with two hooks was way too big and the smaller one was a 3 hook setup so the two werent a straight shot to the bolts. I figured I was close and having already made one stupid mistake plus not wanting to be a total failure, I figured if I used a pry bar carefully and slowly I could use the little bolt and the big bolt ...and wouldnt you know it... slowly but surely, the pulley came out. Took off the timing cover, admired my work with a few pics and called it a night.


    now about that driveshaft.... sigh... I'll leave that for another day
    Last edited by 2mAn; 02-19-2019, 10:39 AM.

    Leave a comment:


  • 2mAn
    replied
    Originally posted by E30335i
    Get a mirror and look in with flashlight
    Im assuming this was a response about whats hiding in the pan, luckily the windage tray is removable. It has some cracks that will need to be welded up, but its common with this pan...

    Anyways, I had a few things I wanted to get done today, but alas with some entertaining football games I spent less time in the garage than planned. I did, however, make a decision to add some paint in the engine bay. I figured now was the time for the driverside with the manifolds and stuff out of the way, so I took a scotchbrite pad, some blue tape and paper and got to work. This wasnt the final masking of stuff, but I was on a break and figured Id snap a pic...


    Then with the temps hovering towards the lower end of the recommended temp I figured it was now or never. I figured one coat now isnt a bad start and Im liking how its coming out. I will add a few more layers on the driverside in the next few days and knock out the pass side later on down the road.

    Leave a comment:


  • E30335i
    replied
    Originally posted by 2mAn
    I agree :up:


    Spent a little time wednesday night getting the rockers and headbolts out, leaving the actual head removal for last night. I was literally standing on the car, inside the engine bay and eventually got the head off, and then later after taking a short break went back into the garage and finished removing the oil pan.


    Pics arent that great because one of my lights stopped working (the one thats actually above the car!.. sigh..)


    Head off, parts scattered in organized chaos. Head is now in the trunk and should be on its way to the machine shop later today...


    Block doenst look too bad either, pistons had STD on them so no overbore it appears.


    Not wonderful, but not terrible either


    Aluminum Oil pan looked good too, I think I can remove this shielding and see whats underneath, but not sure I want to potentially create more headaches for myself


    Get a mirror and look in with flashlight


    Sent from my iPad using Tapatalk

    Leave a comment:


  • 2mAn
    replied
    Originally posted by jeenyus
    single seat and dirty engine bay is the only way really.
    I agree :up:

    Spent a little time wednesday night getting the rockers and headbolts out, leaving the actual head removal for last night. I was literally standing on the car, inside the engine bay and eventually got the head off, and then later after taking a short break went back into the garage and finished removing the oil pan.

    Pics arent that great because one of my lights stopped working (the one thats actually above the car!.. sigh..)

    Head off, parts scattered in organized chaos. Head is now in the trunk and should be on its way to the machine shop later today...


    Block doenst look too bad either, pistons had STD on them so no overbore it appears.


    Not wonderful, but not terrible either


    Aluminum Oil pan looked good too, I think I can remove this shielding and see whats underneath, but not sure I want to potentially create more headaches for myself

    Leave a comment:


  • jeenyus
    replied
    single seat and dirty engine bay is the only way really.

    Leave a comment:

Working...