-
They sure do^ also the lower the car the more the swaybar leans into the headers. -
Ha - one of these days I will try a set of coilovers. Yes, the header pipe bend should be and easy fix - I have access to a tubing bender and a qualified brain to run the equipment.
That is exactly the Y-pipe I have been looking at and it should work out perfectly. The Z3 wiring harness utilizes one rear O2 sensor (front will be deleted) so my O2 bung will work fine at the merge and I can fit a converter in the stock location with an S-bend from the merge to the center of the car.
I'll work on an appropriate decal ;D
Thanks for the heads up - I have heard this could be an issue. Seems Garagistic makes a nice spacer that could help with this.
MJLeave a comment:
-
Glad the housings worked out despite the gland nut fight. By the above I think you mean "ready for welding of coilover ring seats in preparation for Ground Controls" :D
Bummer those headers hit at the bottom tube, but it does look like they're at an easy place to bend out to fit. I was going to merge after the collectors with a Vibrant 10355, put my O2 bung right after the merge, and run 2.5" the rest of the way back with a Vibrant bullet style resonator in the mid section and a single in, dual out Magnaflow out back.
Thanks again for the g260! You've supplied the majority of my M20 parts- I'm going to need an mjweimer sponsor decal to complete the package.Leave a comment:
-
I cannot begin to explain how horrible it has been to get all of this seam sealer removed. A wire wheel on a drill works great but most of the areas are too tight for that process so it has been a lot of manual scraping and liberal use of a heat gun. Too add to the fun, the lines on the ABS pump are so tight that I am afraid to remove them for fear of breakage and I've had to work around it...
I'm beginning to think I've lost my mind starting this mess....if there wasn't rust in/behind/between all of these areas I wouldn't be so concerned with getting it all clean but that's not the case and I need to make certain the rust converter can do its job.
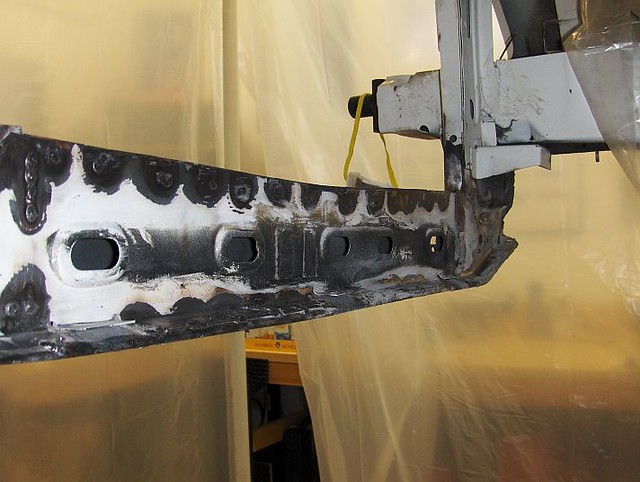
The inner-most fender support was replaced from the RF corner to just past the upper strut mount, the entire lower radiator support was replaced and some of the torn spot welds just forward of the door were repaired. Based on what was replaced, it looks like the car went into a ditch nose first and shoved the wheel *just* into the drivers side floor.
Some shots of the progress, you can see some of the rusty areas:


On another subject AWDBOB and I did some parts swapping and I ended up with a set of headers (that have been nicely powdercoated). For reference, these are the Speed Daddy Ebay pieces that many have used on their swap projects.
I don't think these would clear the front subframe without some modification - mines notched so a non-issue.
A lot has been said about the quality of these headers, overall they seem well made with clean welds and smooth port transistions. I checked the flanges and they are nice and flat too. Having said that, they are not perfect out of the box:

Nothing that cannot be easily handled with a little massaging. Still debating whether I will run these or go with something different. I need to think through the rest of my exhaust before making up my mind.
Last edited by mjweimer; 12-04-2021, 02:44 PM.Leave a comment:
-
Been a while since an update - lots of little stuff getting done over the past several weeks and more parts sourced. I really think I have everything now...
Finally figured out why my RF camber was positive = bent strut housing. It is bent in the area behind the bearing spindle. Luckily fellow R3v'er AWDBOB is fairly local and had a good used pair of housings available. They are in great shape but fought hard during disassembly, the gland nuts took lots of heat and Kroil before coming loose. They are now cleaned up and ready for welding of swaybar link tabs.
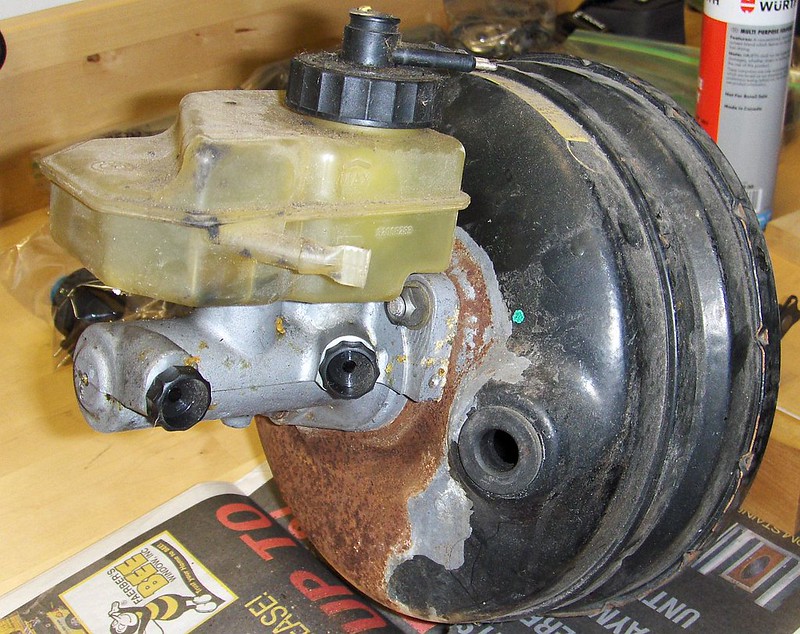
Grabbed the iX booster out of the parts pile - forgot how rusty is was...
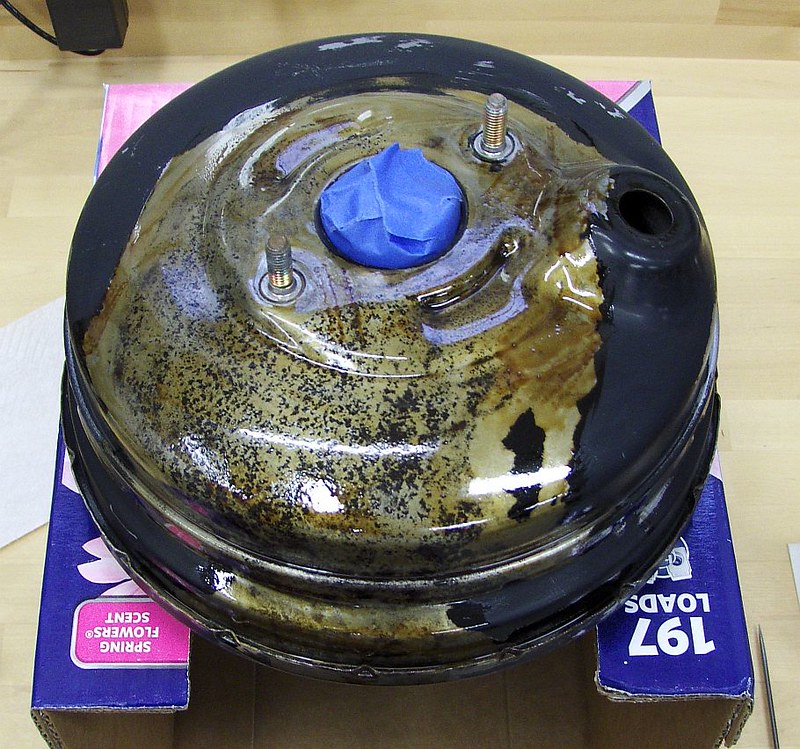
Cleaned, scuffed and rust converter applied. I have been using Fertan which is popular with the British car crowd.
Painted:

As mentioned in a prior post there was a lot of seam sealer applied over the panels that were replaced during the repair of the wreck. They did not prime the metal before applying the seam sealer and surface rust was visible at the edges...I feared what might be underneath.
I had to come up with a solution for a grinding/painting booth in the garage to protect the other cars and parts from dust and overspray....this is what I came up with:

1-1/4" pvc and 3 mil plastic sheet. So far has been working great, I have been able to work on clean parts on the bench while grinding away in the bubble.
More to come....
Last edited by mjweimer; 12-04-2021, 02:32 PM.Leave a comment:
-
Skarpa - thanks for the info. I have not looked into the details of the shift lever much so that is helpful. There are a couple of used levers in my parts stash from the U.S. E36 M3, E46 M54 (and even the E21 320i) so I should be able to try them and see what works best.
I've been following your awesome restoration build and continue to be impressed!
MJLeave a comment:
-
Regarding the shifters: ZF gearboxes have a longer throw to engage gears than Getrag ones. (crude generalization but applies to the typical gearboxes in E30 builds) Using your short shifter stick or the Z3 1.9 stick will lead to pretty long shifter movements. You want an E36 328i, M3 or Z3 6-cylinder shifter or a short shifter with similar lever ratio to have a good shifter feel. Propably you already knew but just wanted to make sure.
PS. Great build!Last edited by Skarpa; 01-06-2018, 11:05 PM.Leave a comment:
-
It is not a reman, it is the rack from the parts car. Has ~114k on it but is very clean and the fluid looked good.
MJLeave a comment:
-
-
Here is a slightly blurry pic of where the spacers installed - top of the rack (bolt is installed backwards at the moment ignore that):

They just make up the difference of the thickness of the rack. Some folks use washers and some have used other forms of spacers. I think the difference in height is ~14mm.
Yes, the retaining bolt for the lower u-joint fits into the groove of the rack splines and the upper bolt fits as well although there is no groove in the steering shaft - the u-joint is designed to allow clearance to the full spline diameter. Yeah, it worked out and it will all bolt up with no binding.
No worries about being chatty - this is how we figure stuff out.
MJLast edited by mjweimer; 12-04-2021, 02:23 PM.Leave a comment:
-
MJ, cool - yea I have those spacers, PG 3 of my build. I'm not entirely sure where you'd put yours. Compare your steering shaft to mine, it doesn't appear to have the same design so you wouldn't be able to use the spacers you shared. I have seen people install poly steering shaft couplings but that doesn't provide any additional length. Do your retaining bolts fit in the groove of the input shafts of the rack and the output shaft of the top side of the column? If so, you should be good to hook.
However, I have heard of subframe spacers but I think people mainly use them on M6X builds. Regardless, sorry for being chatty but glad you figured some shit out.Last edited by paynemw; 01-05-2018, 08:02 AM.Leave a comment:
-
Probably should have said that more clearly - I was referring to the aluminum spacers that make up the difference in rack thickness (E36 vs. E30) at the rack mounting tabs on the subframe. No spacers needed for the actual subframe to the chassis.
These:

Interesting. Thanks for confirming it is the Euro part. I guess it could have been installed upside down - I just reinstalled in the same orientation it was with the E30 rack. Just for fun I will flip it around and see if it fits better. You are right that it works either way.
MJLeave a comment:
-
-
that makes sense. The way my linkage would collapse under load (lots of it), where as yours wouldn't. I can see that as being a euro linkage... they don't typically have the design requirements the US has. You did subframe spacers? Is that common for a 24V swap?Leave a comment:


Leave a comment: