
I should also mention I had an e30 stainless clutch line from Ireland Engineering, and I don't remember the length difference between that and the stock e30 line.
I also installed the line to the slave, then bench bled the line+slave before installing the two at the same time.
-
Leave a comment:
-
-
Can't say I have experience with either slave cyl, I used an E36 328i one. Might be the same as one of the two though.Leave a comment:
-
Over the past couple of days, I managed to finish a few details on the rear suspension - new e-brake cables, swaybar links and the replacement of the speed sensor wiring that had been damaged at some point in its lifetime. It was now time to tackle transmission #2. Unlike trans #1, this one shifts well through the gears on the bench....I checked first this time....It was however covered in an oily mess and had evidence of several leaks.

I started with the rear output shaft seal and sure enough it was rock hard and wanted to come out in pieces - the pic looks rough but I managed to not damage the bore.

The manual says to use Curil K2 or equivalent to seal the splines and surface of the nut, I use Aviation Form-a-Gasket 2 which has very similar properties, is cheaper, and is more readily available. Loctite 243 is used on the threads.

I fabbed up a simple bar out of a piece of scrap 1" box tube to assist holding the output shaft while the nut is torqued - 125 ft lb initial - release the nut - then 95 ft lb. I also followed the manual and heated the output shaft in the oven to 180F - it essentially slipped right on.

Input shaft seal was next - a small slide hammer makes this easy work.

Cleaned up the splines and installed a new TO bearing guide tube, the old one was heavily scored.

Shift detent pins were next, this is my least favorite job. Removing the 5th and Reverse pin bushings are a huge pain and don't seem to get any easier with experience. Both the 5th and Reverse pins were stuck in the bushings on this transmission so it must have been trying to stick into those gears.
I used this excellent guide for the work (may have posted it before): https://webspace.ringling.edu/~dplas...hift_pins.html


With the interior out and an empty engine bay, the clutch master is a piece of cake. I also replaced the soft line and left it extra long since I am unsure where the 2002 fluid reservoir will ultimately mount.

I've got both Z3 2.8 and E46 clutch slave cylinders and will decide which fits better once the transmission is installed in the car. I have heard the soft line is difficult to install on the E36 slave due to the orientation of the threaded hole...the E46 has that in a different orientation but it may need a longer line. I did confirm that both are 22.2mm bore. Anyone have experience with either part on an M5x - ZF320 swap?
Z3 2.8 top and E46 bottom:

Hopefully more progress today.
Last edited by mjweimer; 12-05-2021, 01:13 PM.Leave a comment:
-
Ha - no, no - that is a well used fuel filler gasket I found in my parts stash. I just cleaned it up a bit prior to install...the rubber is pretty stiff and it is torn in the lower area around the filler but it is not too bad. I just can't bring myself to spend $40+ on a small piece of rubber!!
The large vent line is 14x20mm cloth covered hose. The OE part number is: 16 12 1 177 553. I believe I sourced mine through BelMetric:

Of course the overall length needed is just over a meter (it's about a meter to the Y-fitting) but I had some leftover from the E21 that made up the difference.
MJ
Leave a comment:
-
Look at that nice new fuel filler ga$ket! What did you use for the large vent line?Leave a comment:
-
Made some more progress this weekend.
Finished assembling the rear subframe - just need the new mounting bushings to show up and it will be ready to install.

Two if the parking brakes shoes were missing the friction material and they were partially frozen so everything came apart, cleaned and reassembled with a mix of new and old hardware.

Installed all new rubber hose at the fuel pump, and vapor recovery tank.

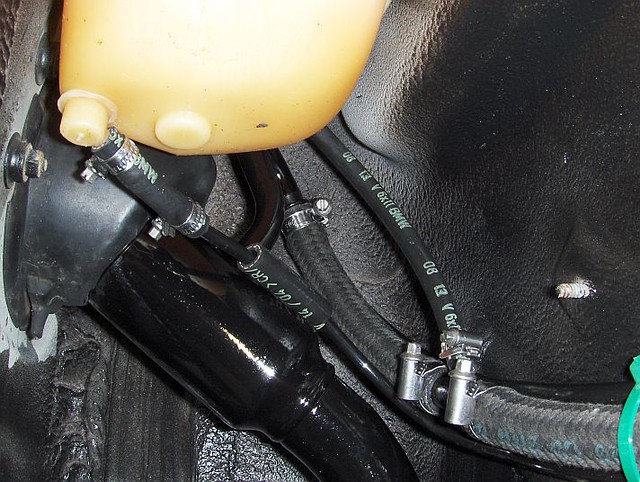
I hope to have some time this week to install the endlinks on the rear anti-roll bar, get the clutch master cylinder swapped out and test fit the iX brake booster.
Last edited by mjweimer; 12-05-2021, 12:52 PM.Leave a comment:
-
The fuel tank was dented badly on each side from sloppy placement of floor jacks and lift arms...sigh. I had good luck with a Spectra radiator on my E21 so I decided to try one of their fuel tanks - the BM1B for the late model E30. It comes in a nice silver NiTern finish, however I thought it would look weird so I gave it a shot of black paint, installed a new VDO pump, new seals for the level senders and new rubber grommets at the mounting locations.

It fit perfectly - zero issues with mounting hole alignment that some have said was an issue in the past.

Next up was trailing arm re-assembly. Everything went together smoothly....I have done many of these rear suspension refreshes over the years and have finally assembled a collection of tools that makes it straightforward.
I used Lemforder bushings and FAG bearings and unfortunately had to buy one new hub from BMW due to damaged splines.


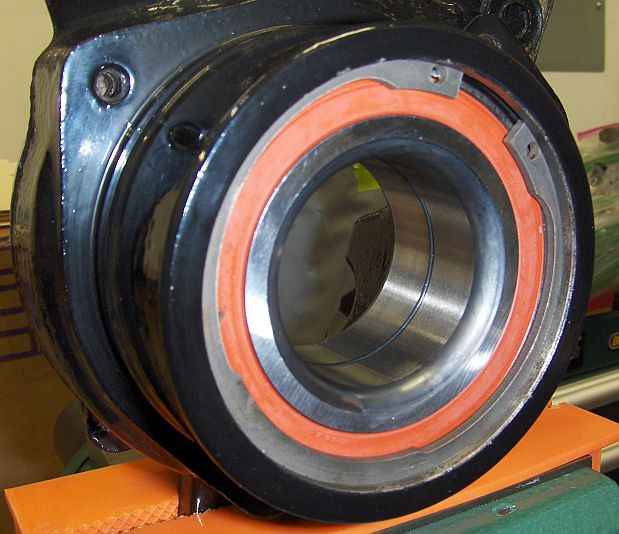
I also installed a new set of Lemforder subframe mounting bushings...upside down...I figured this out quickly but they were damaged upon removal....(says the guy who was bragging above about doing so many of these....)
No pics = never happened.
However it seems that Lemforder subframe bushings are NLA...no one has them in stock and their website shows discontinued. It is too bad because these were the OE parts (the BMW logo and part numbers are ground off). I'll probably suck it up and buy a set of BMW parts. I don't want to go poly on this car and I don't necessarily trust the other "stock" alternatives.
Moving on....rear dampers assembled and installed along with a stock E30 M3 14.5mm rear anti-roll bar.


Last edited by mjweimer; 12-05-2021, 12:29 PM.Leave a comment:
-
Continued progress...
Rear wheel house and rocker repairs are done. After the seam sealer dried, I sprayed several areas with 3M stoneguard, then finished that off with 2k satin black paint. Without a professional gun I could not get an exact match to the texture of the factory applied stone guard but it's not too bad.


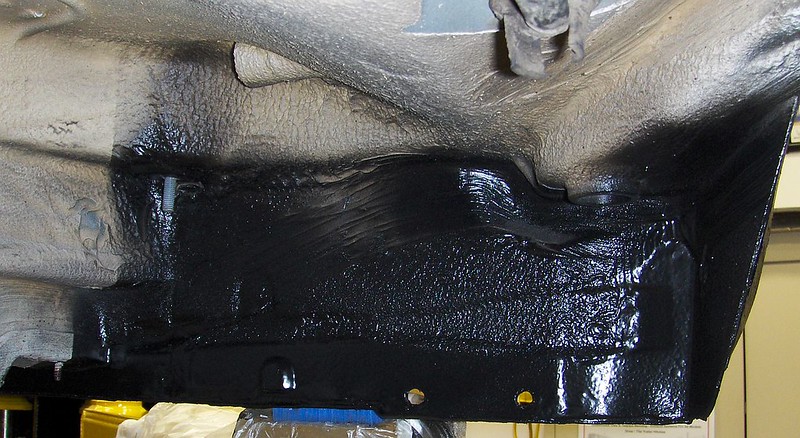
Since my pseudo paint booth was up, there was no better time to paint the fuel filler and the steel line that runs on top of the fuel tank.

Installed all new seals in the junkyard 3.15 differential and was happily surprised to find a Torsen LSD...not the Salisbury. The build date of the donor was mid '98 so I had assumed it was a clutch type but there must have been a changeover around this time.
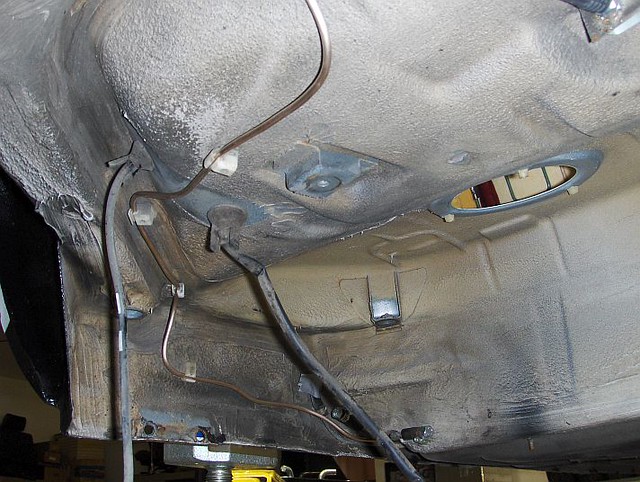
An inspection of the brake lines revealed a badly rusted area in the main rear line towards the front of the chassis in the area where the firewall transitions to the floorpan. It did not look too bad initially but a quick poke from a screwdriver removed a large chunk of material.

I had heard good and bad about NiCopp/Cunifer brake line but had never used it....it is easy to bend but those same properties also make it hard to keep a long section from folding under its own weight as it is installed. I had also heard it could be challenging to flare but I did not seem to have any issues.....we'll find out later when the system is bled.
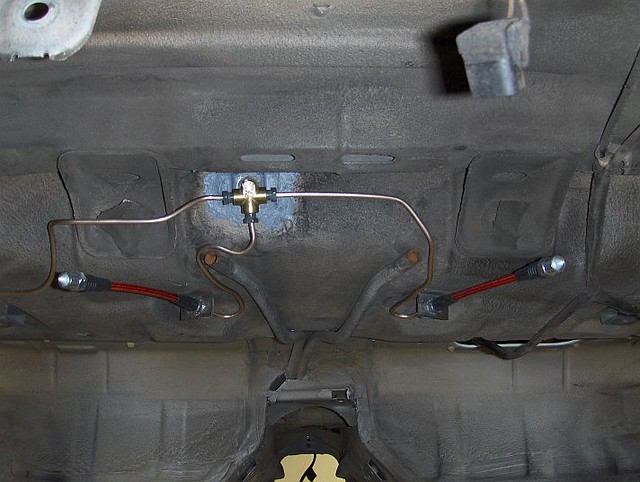

Making progress.....
Last edited by mjweimer; 12-05-2021, 12:04 PM.Leave a comment:
-
Yes, it is readily available, is reasonably inexpensive, and it is a 3M product. The only watch-out with the 550 is that they say it skins in 10-15 minutes and they say ideally to apply between 70F and 85F. In my experience it much skins faster and I have no issues applying ~60F but I also try to keep the shop a constant temp for 24 hours to avoid any curing issues.
The fast skinning is a blessing and a curse, it's good because you can apply in vertical areas without sag but bad because you need to get your brush or finger on *right now* to avoid pulling the surface away from the coating. In a couple of my pics you can see some areas where the it had started to skin and the brush pulled some small areas creating a rough texture. Not an issue in a wheelwell but in a more exposed area it would look bad.
MJLeave a comment:
-
I am happy to see you using Dynatron 550. I was wondering about what seam sealer to use, and was looking at that stuff since I am able to get it locally.Leave a comment:
-


Leave a comment: