If this is your first visit, be sure to
check out the FAQ by clicking the
link above. You may have to register
before you can post: click the register link above to proceed. To start viewing messages,
select the forum that you want to visit from the selection below.
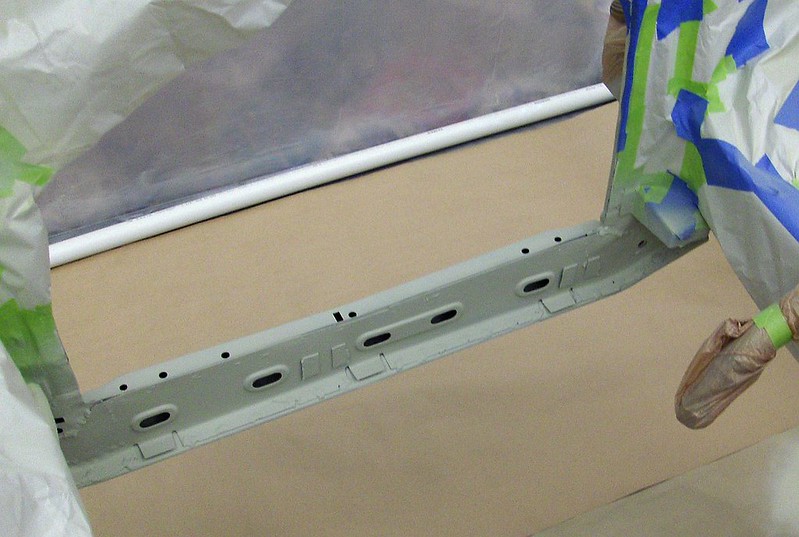
No super exciting updates here....today scuffed the exposed E-coat and Rust Bullet then applied Dynatron 550 seam sealer. Looks decent, the remaining areas will be coated in rock guard/schutz once the seam sealer is cured.
Between fighting a cold and Holiday events there has still been some progress.
Rear suspension components came back from powdercoating and look great.
Got all of the seam sealer removed from the welds and the flaky rust removed and I am moving forward with the rust mitigation.
I am using a product called Fertan to convert the rust and then Rust Bullet to seal it up. I have used both of these products individually on several different projects (with excellent results) but I have never used them together. I was concerned there would be adhesion problems so I took a piece of rusty box tubing and applied the Fertan per their instructions and then two coats of Rust Bullet per their instructions. To test adhesion I had placed strong tape across half of the treated part and painted the Rust Bullet over the treated metal and the taped area. My thought was that if it did not adhere to the cured Fertan it would lift around the edge when I pulled the tape....it did not lift and it actually adhered so well the tape was very hard to remove at the edge. I also tried to scrape the RB off of the treated area with a sharp knife and it would not flake off....perfect.
Fertan application - it is water based and can be brushed or sprayed on rusty surfaces. Once cured, the excess is cleaned off with water and you are left with a surface that can be painted.
The Rust Bullet applied...it was tricky making sure to get even coats in areas like the wheel arch lips...a flashlight and mirror were helpful.
In between the multiple coats of products I messed around with a few other odds and ends. I've got a 3.15 LSD from the Z3 2.8 to match the ZF320 and I had read the output shafts from the E30 3.73 needed to be swapped over to get the proper width. I can confirm without any doubt that the width of both diff's w/output shafts is identical. In fact the output shaft dimensions are identical and they can be readily interchanged.
I planned to reseal the 3.15 this weekend when I realized I forgot to order the output shaft seals....so I ordered those and then gave it a coat of paint instead.
i had to buy one of those covers right when i bought my car. I still need to go back and reexamine everything that I know a few things. The key placement is amazing... lol
So glad to see updates on this. Quit getting sidetracked!
HA! I'll try harder. Once I get through the remaining rust remediation it should move along much more smoothly.
Speaking of that work here is what's going on:
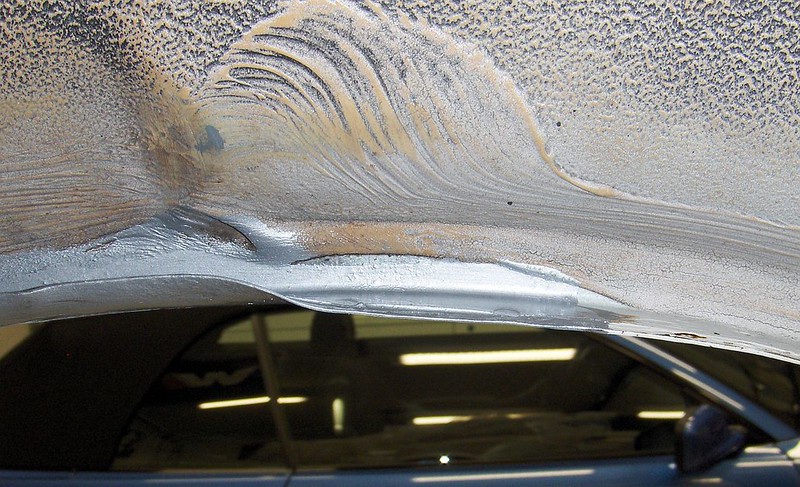
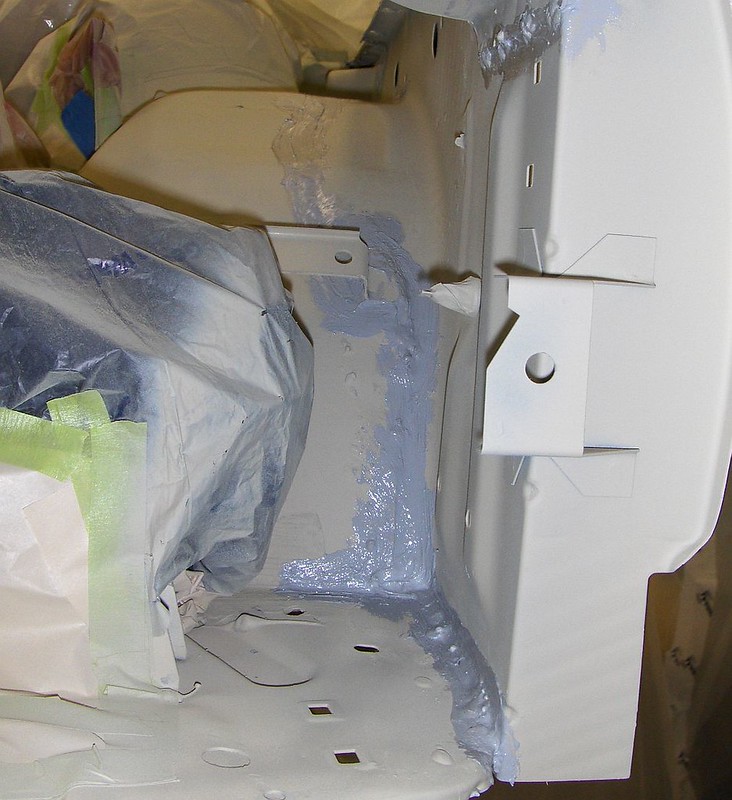
As you can see there is a lot going on here. They did a good job cutting spot welds and welding the new panel back in place, unfortunately, they failed to do a good job sealing everything up afterwards. These areas are all a bit tricky to get into...the seam sealer is stuck really well and it takes awhile to get back to bare metal. I have the first coat of rust converter (Fertan) sprayed on all the areas and its doing its thing.
Meanwhile I also found more rust hiding behind the infamous vapor canister lines in the RR wheelwell. It was just packed with mud and grime (Note the PO's placement of the spare key....)
The metal cover is paper thin and can't be saved....a new one is ~$80 (!!!) from BMW but I lucked out and was able to source a good piece from one of AWDBOB's parts cars.
I'm off to pick up the rear subframe parts at the powdercoater, I can't wait to see how they turn out.
Wow, it's been a while. A whole year of interesting events shelved the project until about a month ago. Other cars were fixed, then sold and another big project was started at the end of August and is almost completed. Nevertheless, I am again making progress and hope to continue the updates from here until it is done - famous last words.
The power steering lines are done, a local hose shop built a hose and provided some fittings to braze on the modified stock hard lines. I made sure to put the orifice back into the hose and secured it with an Oetiker clamp.
Here's how it all fits together:
Next up was re-sealing and refreshing the shift pins in the ZF320 using this excellent guide:
Of course I did all of this work and then realized this junkyard transmission had an internal knock and would only shift into 3 gears....sigh....stupid mistake, I should have checked all of this prior to doing any work but I got carried away. I will be sourcing another transmission from a known running/driving car.
Just like the front of the car, a section of the rear was repaired after the accident and the repairs were showing their age (remember this was done back in 1995). The front half of the right rear quarter was replaced and the un-primed welds under seam sealer were starting to rust. To gain access the fuel tank and rear subframe needed removed.
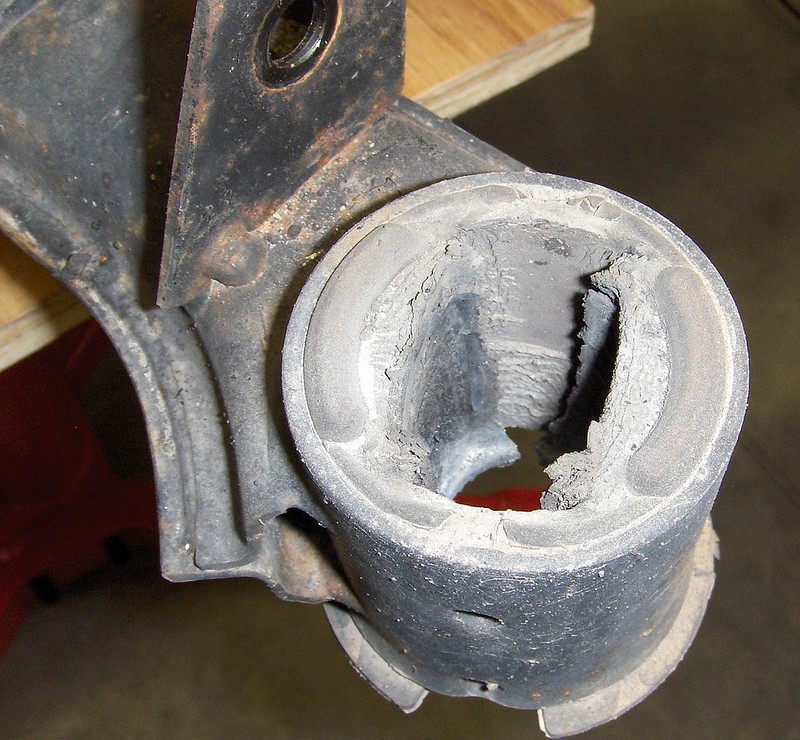
The rear subframe bushings were so bad it almost fell out of the car....
Once the subframe was out of the way, I had to figure out a way to roll the chassis outside for a thorough cleaning prior to the rust removal...the whole rear underside of the car had a coating of thick mud/dirt/etc.
The subframe and trailing arms are at the blaster/powdercoater and I have been having fun grinding away more underbody coating and seam sealer. More to come.
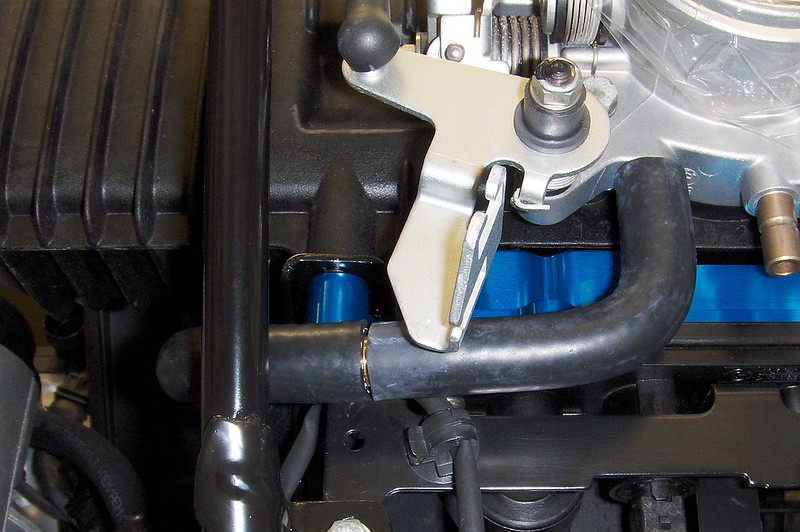
I cut and welded the original Evap purge valve bracket so the valve could be relocated and mounted under the front of the intake. This position is near the original location so wiring and hose routing works well.
I'm keeping the throttle body heating circuit since the car will see cold weather. The routing of these lines was made a bit more complicated since I am also running an OBD1 throttle body. I was able to use two of the original forward mounted hoses cut and spliced to fit around the CCV and intake mounting brackets. A 3/8" barb splice fits the internal diameter of the hoses perfectly.
Next up was installing the exhaust manifolds. The SAP delete plates were made using the original flanges from the air tubes and a couple of stainless carriage bolts cut down and welded into the openings. This was a cheap alternative to aftermarket parts.
I plan on installing the engine from the bottom so the front subframe received the swaybar and steering rack prior to mounting up to the engine. Will be running stock E30 M3 front and rear bars and of course the Z3 steering rack.
With the steering rack installed, work has started on the power steering lines. I am running the original Z3 pump which has a threaded o-ring fitting for the pressure line and a straight hose fitting for the feed line from the reservoir.
There are really no off the shelf hoses that will work for this application so custom lines are being fabricated from old parts and the pressure line will be custom made. Below is the initial work on the return line from the rack.
I should have the pressure hose back from the shop today to test fit. Once that is confirmed, I should be able to finish up the hose install and move on to prepping the chassis for the engine. I still need to mount the brake booster/master, run a new clutch feed line, reinstall the cruise actuator and install the throttle cable.
Work continues on prepping the chassis and engine for installation.
Bent the heater core pipes down and towards the drivers side for better intake clearance:
I also decided to install a new heater core since there is no better time than when the car is stripped down. Was a bit disappointed in how the new Behr core fit into the opening. The new core has a smaller end-tank flange on the drivers side that required additional foam to seal and the front lower mounting hole did not line up with the existing mounting flange. Easy enough to add some extra foam strips and slot the mounting tab and use a large washer on the screw to install it securely.
Shaved the intake manifold fins for brake booster clearance:
Got the wiring harness installed on the engine and made a new harness for the oil temp gauge. The temp sender harness has a connector at the firewall that will mate to a new harness from the instrument cluster.
Staying OBD2 and running an OBD1 intake with the Turner Motorsport conversion along with an OBD1 throttle body present some challenges. The major hurdles are CCV drain routing, Evap solenoid mounting, and throttle body heater hose routing.
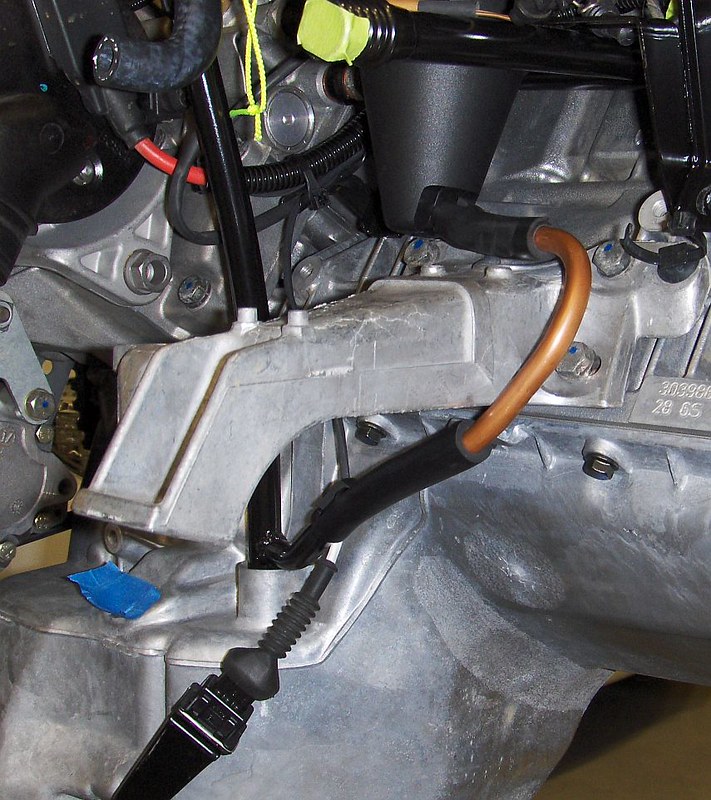
Thanks to the front sump pan and inherent location of the dipstick, the CCV drain is facing the wrong direction. The additional challenge is that the Turner kit lowers the CCV about an 1.5 inches...further reducing clearance for a drain hose.
Given the situation I decided to route the drain around the bottom of the engine mounting arm. This solution should drain well and still allow clearance for the steering rack/hoses but I won't know for sure until it's all in place.
If I were to do this again, I would not go with the Turner kit and would investigate some of the other options for retaining the OBD2 components.
Modified drain using copper tubing...ignore the cuts in the hose, it will get all new hose/clamps during final install:
Today the plan is to finalize the throttle body heater hose layout and finish the bracket for the evap purge solenoid.
Finally got caught up with everything else - E91 Xi got the oil pan gasket replaced, a new front differential, Bilstein B12 suspension kit, speaker/amp upgrade and new wheels and tires. It turned into a much bigger project than I had anticipated.
Building momentum again on this swap project.
So...LF strut is bent from the accident way back so I sourced a used pair of struts. Unfortunately they had some issues so I dug out another set from my buddies barn. They are from an '87 iS we parted out 15+ years ago - a bit rough but its all just surface rust.
Welded on swaybar tabs so I can run E30 M3 style links:
Disassembled, blasted and then had a local shop powder-coat all the strut parts as well as the front subframe and the front swaybar:
Need to finish up odds and end's in the chassis to prep for the engine - brake booster/master, heater core - and then get the wiring harness and other ancillaries on the engine to get it ready for install.
The problem with stopping and starting these projects is keeping track of where you left off and what needs to be done next. Hope to make some good progress in the next few weeks.
Great progress. I haven't heard much about the N52 leaking oil, but that's kind of a bummer to hear. My next car will be an e91 manual. Hopefully I can avoid having to drop the oil pan.
I can't say that *all* N52's leak oil but they seem to have their fair share of issues. Most seem to leak from the valve cover or oil filter housing gasket but sometimes the oil pan is the issue.
The E91 is a fantastic car, I love mine. I'm doing a Bilstein B12 kit since the front end will be apart and am excited to get it back on the road to feel the improvement.
Great progress. I haven't heard much about the N52 leaking oil, but that's kind of a bummer to hear. My next car will be an e91 manual. Hopefully I can avoid having to drop the oil pan.
With all of the areas in primer, the next step was to shoot SEM rocker panel spray in the wheel well (no pics) and then shoot the Alpine white and black in appropriate areas.
I used Spraymax 2K color matched to AW2 over all primed areas and once cured SEM semi-gloss black for the lower valence and wheel wells.
The pictures are not exciting but at least everything is properly protected from the elements and looks much better in person.
After the paint had fully cured I applied some 3M cavity wax into the hidden areas of the old repairs. This should keep moisture from creeping into the areas impossible to paint but exposed from the previous welding/grinding.
It's hard to get pics of hidden areas but the upper fender mount has decent access. The wands used to apply the wax have excellent coverage.
That's all for now. The project is once again going on hold thanks to a leaky N52 in my Xi touring. Believe everything you have read about N52 engines leaking oil and how much fun it is to remove an Xi oil pan.
I should be able to get back into the wreck sooner than later and I should have all the parts needed to make major headway.
So 7 months later...an update. The project is not dead, just slowed down by some other car and garage projects.
So when we left off.... I was killing myself removing seam sealer from all of the nooks and crannies so the rust could be abated. This took far too long but in the end it was all removed.
I used Fertan rust converter on previous projects and did the same on the wreck.
It turns all of the rust black and it is able to be painted over once the excess is removed and dry.
Next step was masking off the areas not needing paint and shooting some primer. I used a tan 2k epoxy primer from SprayMax, followed up by SEM seam sealer in the appropriate areas.


Leave a comment: