Announcement

Collapse
No announcement yet.

1990 - 24v swap

Collapse
X
 
  • Filter
  • Time
  • Show
Clear All
new posts

    #91
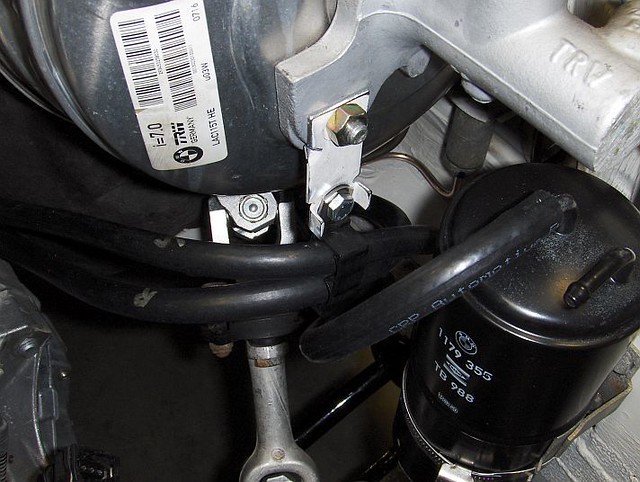
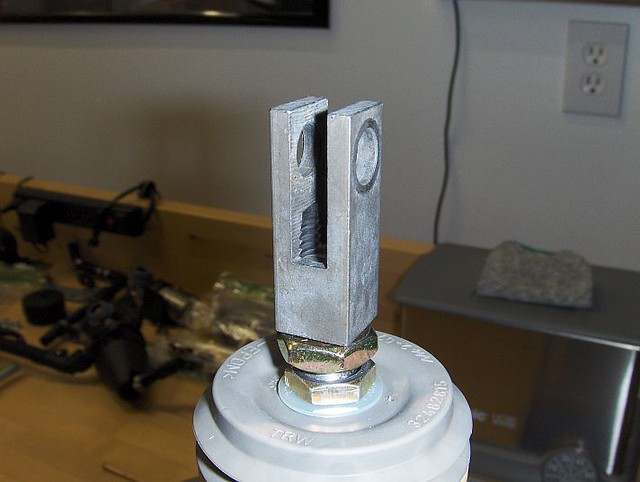
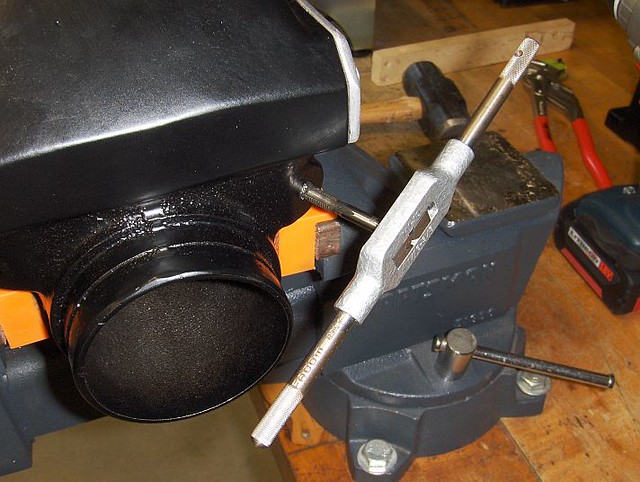
    The iX booster and master cylinder is now installed. I chose to use the spacer/bracket so the clevis rod did not need to be modified and the pedal position would not change or require a compromise.

    As others have stated prior, this all drops right into place and bolts up using the 4 original holes. I did not need to adjust the clevis position since it matched exactly in length to the original (~120mm from the mounting base to the center of the clevis hole).


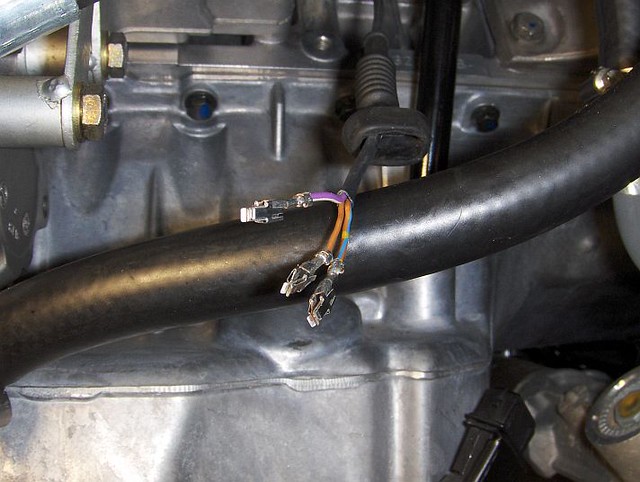
    However, there are a few catches I thought I would document to help others in the future. Using the spacer/bracket does create an issue with the vacuum connection point by burying it right up against the LF strut tower. In this position you cannot install a 90deg fitting for the hose without some metal work.


    I knew this would be an issue but I had no idea it was so tight. A lot of the photo's from other folks builds are gone thank to P-bucket so no other choice but to try it out.

    As it turns out it is an easy fix - remove the booster, unbolt the spacer/bracket and rotate it 180deg and bolt it back up to the booster. At this point you can rotate the booster assembly and the vacuum port will be in a much better position. Essentially this places the vacuum connection in the same position as the E32 booster.


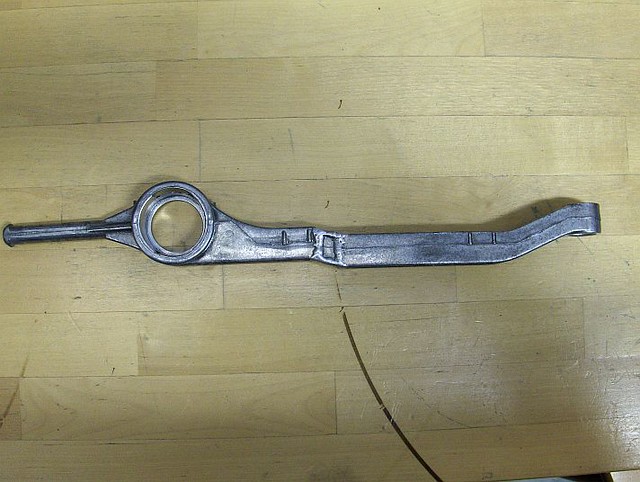
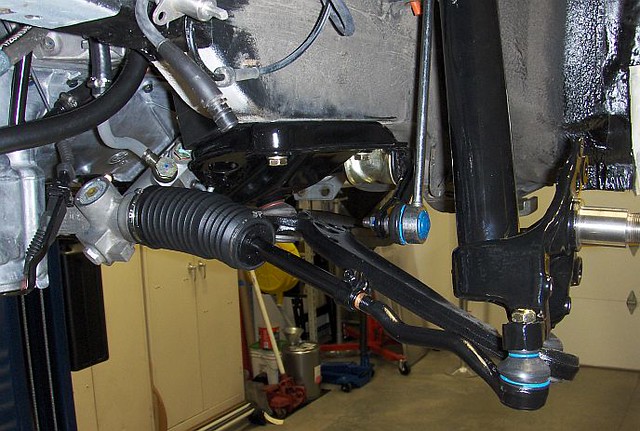
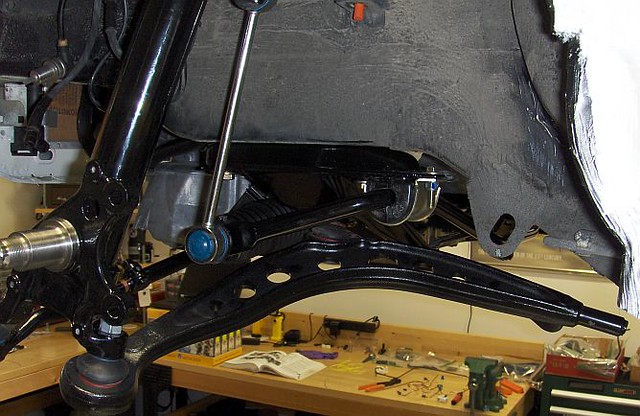
    The second minor issue is the fitment of the brake lines. The front line needs just a mild tweak to bolt up, but the rear line is too long to fit cleanly since the iX master rear brake connection point is at a 45deg angle and more forward. The rear line can be bent and made to fit but ultimately I did not like how it looked and bent up a new line to replace it.


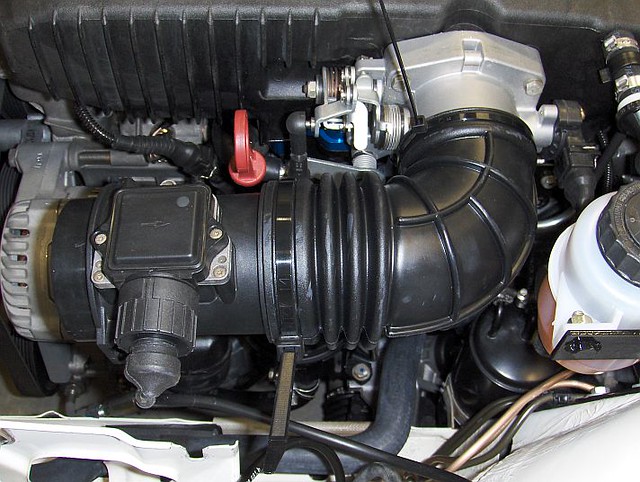
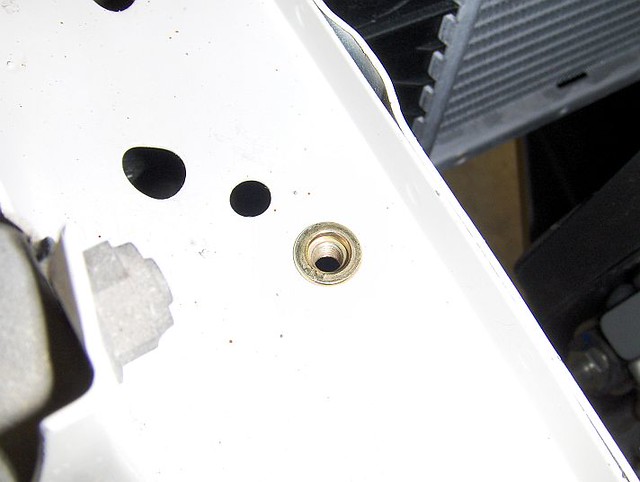
    The third issue is the need to run a remote fluid reservoir. Based on my quick measurements, the rubber intake boot will ultimately try to occupy the same space as the original reservoir and would be really tight with an alternate like the E34 525i. My plan is to use a 2002 set-up mounted somewhere on the strut tower - exact location TBD after the engine is installed.

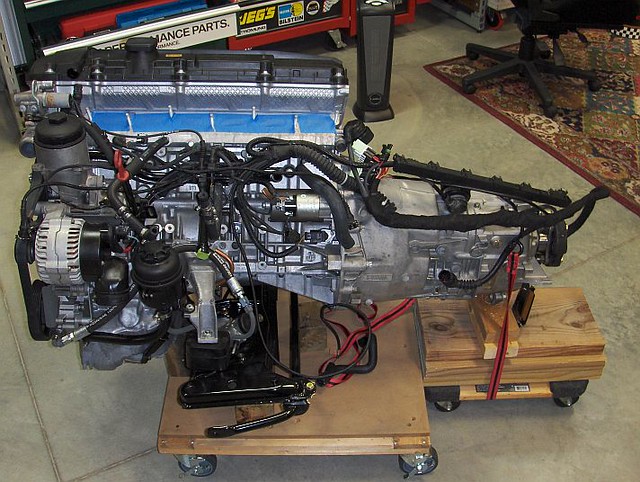
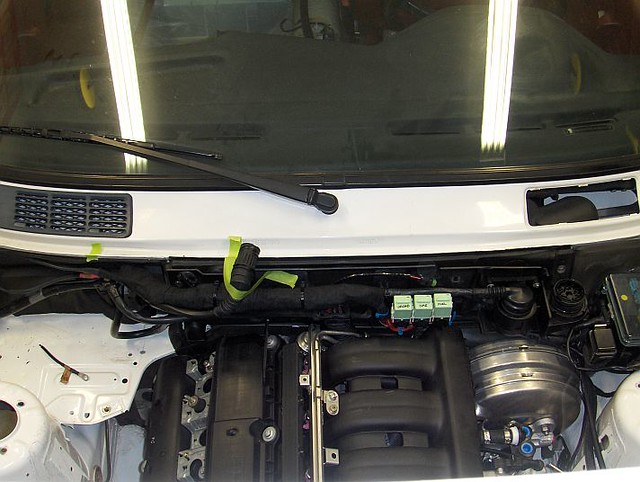
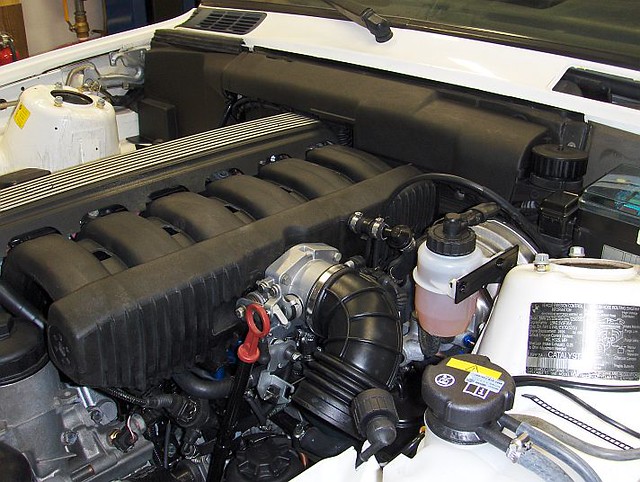
    It will be interesting to see how this all clears the intake manifold - I hope it clears the intake manifold!
    Last edited by mjweimer; 12-05-2021, 02:40 PM.

    Comment


      #92
      Back again....good news is that I have made a lot of progress on the car since my last update, bad news is that I have failed to update this thread for 5 months. Better late than never I guess....


      With the master/booster installed it was time to install the engine, pulled the intake for extra clearance and lowered the chassis on to the engine/subframe assembly:


      Things went sideways from here....I attempted to install the intake manifold and it had hard interference with the booster. This set off a series of events that took a lot more time to deal with than I had hoped....I am sharing all of this so that someone else who runs into this issue can get a little direction.

      It went down in this order:

      1) Lift engine and trans assembly slightly off of the mounts with engine hoist to shift everything towards the passenger side = booster clearance good, trans position in tunnel very bad. AKG engine mounts not sitting flush to subframe (in a bind).

      2) Remove each engine mount arm, slot the holes to help move engine over and rotate trans in tunnel = booster clearance bad, trans position in tunnel OK. Engine mounts sitting more flush.


      **Huge gap in time thanks to some sort of pandemic that upends everything at work**


      3) Sent a couple of PM's to others who have done several swaps. Suggestions ranged from just use E28 mounts...spend more time shifting the engine around....the iX booster will not work....etc. (thanks KIRIEW and E30_Austin for the advice).

      4) Again I lifted the engine and trans slightly and was able to get a lot more movement with the slotted mounting arms but I was chasing trans alignment with booster clearance.

      5) Thought this all through and decided to start over....thanks to my brother in law who welded up the holes in the aluminum arms and then milled flat and re-drilled.


      6) Meanwhile.....purchase E83 X3 booster and put everything back together = the X3 booster mounts closer to the firewall and offers better intake clearance but there was still slight interference.

      E83 X3 master booster replaces the iX booster:


      7) Call AKG and ask if they have ever ran into this issue. Yes! Sometimes the mounts get in a bind and require the holes in the subframe to be slightly opened up. They said this this allows the mounts to sit flush on the subframe and with the geometry of the mount, the rest will fall into place. They also said I might need to slightly slot the rear trans crossmember with the ZF320 (to shift it towards the drivers side) and never slot the mounting arms.

      8) Slot the subframe holes for the mounting stud and alignment pin ~5mm, slot trans crossmember (where it mounts to the chassis on the drivers side ) and put it all back together = perfection.


      Before putting the intake on for the last time, I decided to install the charcoal canister and figure out the best routing for the fuel lines. You can use the stock E30 charcoal can mount but it will need to be flipped 180 to allow clearance for the coolant tube. Installed new foam on the bottom of the can:


      In the pic above you can see the bracket I made up to hold the fuel lines below the booster, a mix of an E90 clamp and the old airbag sensor mount. This should keep the fuel lines from dropping down into the steering shaft and laying on top of the heater hoses.


      Before I put the intake on for the last time, I need to pull the X3 booster and mod the actuator shaft and clevis....


      Last edited by mjweimer; 12-05-2021, 02:52 PM.

      Comment


        #93
        A couple more items to tidy up before the intake could go on for good, heater hoses and modify the booster rod/clevis.

        It seems for an M52/S52 common wisdom is to use an E30 heater hose from the back of the head to the inlet of the heater core (62 21 1 380 527) and an E36 heater hose from the metal pipe to the outlet of the heater core (11 53 1 703 844).

        I tried the E30 hose and found the bend to be really close to the starter body and it also interfered with my intended routing of the large +12V wire to the starter. I found that a Gates 28476 generic heater hose fit perfectly with a bit of trimming at each end and tucked up tight to the firewall.


        For the upper heater hose, the E36 part fit but had a slight kink in the end near the core connection. I did not like this so I decided to use two pieces (one from each end) of the E30 "spider" hose along with a barb fitting to create a custom hose. The barb fitting I used is from ICT billet part number AN627-12A.


        That done it was time to tackle the X3 booster clevis and rod. I really wanted to make sure that my brake pedal position did not change when swapping to a non-E30 booster so I took some dimensions and set to work.


        RWD E30 and AWD E30 clevis position from the firewall to the base of the pin was the same at ~122mm:


        I followed KIRIEIW's work documenting his X3 booster swap and decided his approach to to mod the clevis and rod for a M12 thread rather than grind and re-thread the rod for an M10 thread was the way to go. Drill the existing M10 threads with a 10mm drill (M12x1.75 tap drill = 10.2mm).

        See: https://www.r3vlimited.com/board/for...58#post9916158


        With the hole drilled, use the appropriate M12x1.75 tap.


        Next up was running a die down the rod...I got a little stupid with this trying to keep the same overall threaded length for pedal position so I won't bore you with all the steps but it turned out like this:


        Dimensions were spot on at 122mm.

        Last edited by mjweimer; 12-05-2021, 02:58 PM.

        Comment


          #94
          Since I'm running the ZF320 I decided to use the large guibo early 325e driveshaft for my swap, there are other options but this was a preference. Since I have a late E30, the center bearing needed to be swapped. My puller was not long enough so I made some extensions out of scrap...


          That done I needed to sort out the shift lever carrier before installing the driveshaft. There is much variety and discussion around which shift carrier works best, most seem to use a version of the E36 carrier but it can still leave the shifter a bit off-center. I played around with the E30, E36 and E46 parts and found that none of them fit my car well. A bit of measuring turned into this hybrid of the E30 and a piece of the E46 carrier:


          Next up fuel lines, I am using the early E39 528i fuel rail since I am staying OBD2 and wanted to ditch the running lossless set-up.


          The holder arrangement under the booster works perfectly to keep the lines up and out of the way.


          Just enough room to sneak behind the heater hoses (note the E30 fuel line holder to keep the lines separated at the curve).


          Now the fun of tidying up the wiring harness...I am using the E30 318i/M3 firewall holder/covers, which makes for a tight fit. Another interesting point is that the Z3 2.8 engine wiring harness is a bit longer than an E36 328i harness due to the placement of the DME box in the Z3. I had to find a way to take up some of the extra length but still hide the harness behind the covers in the engine bay and the glovebox.


          Reused the Z3 coil wiring connector bracket with a bit of a trim.


          Last edited by mjweimer; 12-05-2021, 03:40 PM.

          Comment


            #95
            I test fit the radiator and the stock E30 9-blade fan...clearance was good (~10mm) at the tightest point near the bottom. For kicks, I ordered up the mythical "diesel" fan just to see if it improved the radiator clearance. What I found was surprising given all the forum posts stating otherwise...both fan/clutch assemblies are the same height. Yes, the diesel fan by itself is a thinner profile but its offset on the clutch places the outer ring of the diesel fan at the same height as the stock fan.


            I decided to run the diesel fan since it and the clutch were new (BTW:Behr aftermarket is waaay cheaper than the factory part and you can see where they ground the BMW p/n off of the blades) and I like the idea of the re-enforcing ring around the perimeter.


            Next up the brake caliper carriers. I put Evap O Rust into my ultrasonic cleaner and dropped the nasty parts in one at a time...it took about an hour to do each part but what emerged was a clean, bare steel part ready for paint ( I forgot to take pics....). For paint I used Rustoleum High Heat - 2000F paint in the cast aluminum color. This label says to either bake the finish in steps or heat cycle if on an engine component. I had access to a "garage oven" so I did the three step baking process. I was impressed with how well this paint sprayed and the coverage was really good.


            Struts, control arms and tie-rods went in:


            I wanted to get the downpipe and O2 sensor installed before starting the engine. Initially I was going to fab some downpipes but after discovering my parts were double walled I changed course and purchase a downpipe kit from Syncro Designworks. This comes in two pieces; the front section from manifold(s) to a merge and an S-bend that gets from the merge to the center (under the driveshaft). There is no O2 sensor bung because most M/S5x swaps uses two sensors in the manifolds, the Z3 however has a single pipe exhaust from the factory and places a single O2 sensor at the merge pre-cat....just like this Syncro Design set-up.

            I test fit everything and marked the locations for the O2 bung as well as the position of the S-bend, then started welding. I also used the lower half of the and E46 exhaust hanger (at the trans) and welded it to the pipes. The silver paint is "cold galvanize"....I've never tried this on an exhaust so it may or may not protect the welds from rusting....time will tell.


            Front swaybar clearance is perfect:


            X3 booster uses M12 fittings at the master so new front lines (you can use the stock lines with an adapter but....I had already re-worked my lines for the iX booster and just decided to replace them):


            To get some more clearance around the master, I decided to do a 2002 remote reservoir. I fabbed a bracket that used the body nut for the M20 power steering reservoir and then added another body nut just below that (there is a slot for another that is normally not used). This bracket should also leave enough clearance for a strut brace.


            That done, it was time to install the brakes; new ATE front and NOS rear calipers, Garagistic/Techna Fit lines, Hawk ceramic pads and all new hardware. The rotors were replaced by the PO 500 miles before I pulled the car apart so I just cleaned them up a bit.


            Hopefully I can keep this momentum....


            Last edited by mjweimer; 12-05-2021, 03:48 PM.

            Comment


              #96
              Finished up the fuel system with a new filter and rubber lines at the tank:


              Since the front corner took a shot in the accident years ago the radiator support is a little off and I could not get the upper mount to fit without placing the radiator into a bind. They "fixed" this when it was originally repaired by leaving off one of the lower radiator mount plastic cups and letting the whole assembly float. I didn't feel good about this since I'm running a mechanical fan and don't have much clearance to spare so I made up a couple of new upper mounts using some aluminum angle, the rubber buffers from the stock mount and two rubber airbox mounts. Nothing in a bind now and it is not going anywhere...hopefully.


              E34 throttle cable installed....the adjuster needs to be run all the way in to allow just a bit of slack and allow the throttle blade to close properly.


              Filled the coolant, transmission, differential, mounted and fitted the new lines for the remote hydraulic reservoir, bled the brakes/clutch and temporarily installed the MAF and boot.


              Pulled the plugs and cranked the engine over until the oil pressure light went out, reinstalled plugs, installed the coils, jumped the fuel pump relay to bleed air and check for leaks, plugged into the diagnostic port with ISTA to check for anything weird and....turned the key and it fired right up!

              Last edited by mjweimer; 12-05-2021, 03:53 PM.

              Comment


                #97
                With the car running well there were a few items that I wanted to tidy up before taking it on a test drive. First priority was an air filter...but it had just shipped....so other stuff first.

                Red46 skid plate:


                Then a few wiring bits and pieces to fix issues found at start-up and get the oil temp sender ready. Quick swap of the oil level sensor pins:


                All that done, the harness covers could be installed on the firewall:


                Back under the dash, I pulled out the OBC wiring harness and relay box. I don't see much need for the OBC since the MPG and range functions will no longer be accurate, the radio will have a clock and old OBC relays can fail and leave you stranded...no pics...just started pulling wires.


                Now I could have a little fun and work on the E30 M3 cluster. The cluster bits and pieces are basically interchangeable but there are some differences. The main differences are fairly obvious....7k redline, oil temp in place of MPG, red needles and of course the little ///M badge on the bezel. Smaller differences are...the M3 cluster has the ABS light integrated into the cluster circuit-board (my 325iS has separate wiring harness for the light) and the M3 does not have a check engine light (325iS has a separate harness for this as well). The M3 also uses the 55L fuel tank throughout production so the gauge is set up for the single level sender rather than the 9/87+ 325i 63L tank with dual senders.

                Because of these small differences and a few others I prefer to swap the gauges from the M3 cluster over to the 325iS circuit board. The plan was to keep my original speedometer/odometer and fuel gauge (swap the needles) and retrofit the M3 tachometer/oil temp gauge and water temp gauge.


                With the higher redline tachometer, you need to do a bit more work to make it read accurately. There are a couple of options, buy a coding plug that has been modified (Ebay) or buy an E28 M5 coding plug and swap the chips. I have not seen this documented so I took a couple of pics. Decent soldering skills are required to avoid bridging pins or lifting the trace from the board but it's more time consuming than difficult.

                E28 coding plug is physically different in shape and this also applies to the circuit board. E28 board on the left and E30 coding plug on the right - the difference in pin depth prevents the board from fitting properly in the original housing & cluster.


                Back to the air filter. I had planned to modify a stock E30 air filter housing rather than use a cone filter set-up but the lower portion of the airbox wanted to occupy the same space as the dipstick tube and top of the alternator. I briefly thought about modifying the airbox but I was not too excited about it....back to the drawing board. After a ton of searching and looking at builds on this board, I happened upon something interesting on Dbilas Dynamic's site and pulled the trigger hoping I could make it fit.

                https://dbilas-shop.com/en/intake-tr...-eckig?c=10938


                I mocked it up to check clearance and found the stock E36 OBD1 throttle body boot was too long and the filter inlet touched the radiator...a Bimmerworld silicone boot with some careful fitting/trimming did the trick.


                Of course the supplied bracket was meant for mounting into a car with an M20 so a bit more work. Some steel cut/drilled/welded allowed me to support the rear of the housing from the filter mounting studs and the engine ground lug on the frame rail (M52 is grounded on the opposite frame rail).


                For a front mount, I supported it with a piece of wood and made a couple of cardboard templates to see what would work. I ended up cutting/bending the support bracket DBilas supplied, drilling and tapping the filter housing, and inserting a nutsert into the frame rail. Rock solid.


                OK - now we are all caught up to present day. The filter brackets have been painted and are drying so those will go in soon and I need to repair some interesting wiring I found under the dash before installing the cluster. The ICV vacuum line doesn't fit too well so it will take some more thought...but it works for now. Hope to drive it soon....at some point I need to get the exhaust done between the cat and the muffler to keep the neighbors happy.


                Last edited by mjweimer; 12-06-2021, 02:22 PM.

                Comment


                  #98
                  Man, your attention to detail on this thing is insane! I can’t wait to go for a cruise.

                  Also..... that intake will be perfect for my car after reviewing your mounting solution. Great find!

                  Is the coupler 3” or 2.75”?
                  1990 Brilliantrot 325iS Build Thread
                  1989 Zinnoberrot M3 Build Thread

                  Comment


                    #99
                    great build! that dbilas intake looks and fits great!!
                    89 325i 4dr s52
                    02 BMW 525iT m54b30/manual swapped (daily) *sold*
                    21' Toyota Tacoma TRD OR 4x4 6 speed Manual

                    Comment


                      Originally posted by AWDBOB View Post
                      Man, your attention to detail on this thing is insane! I can’t wait to go for a cruise.

                      Also..... that intake will be perfect for my car after reviewing your mounting solution. Great find!

                      Is the coupler 3” or 2.75”?

                      The inlet of the filter housing is 80mm/3.0" and the outlet of the filter is 70mm/2.75". Don't know what size of MAF you'll be running on the stroker but there are tons of 2.75 -> 3" couplers available. I did not have the real estate available for a stepped coupler.....so I just slipped an 80mm coupler over the 70mm and trimmed it so the MAF inlet sits right at the outlet of the filter.

                      I was initially concerned with the smaller outlet being a restriction but after measuring the inner diameter of the filter housing and the inner diameter of the MAF and finding them only ~2mm different I am not worried.


                      Originally posted by s14brent View Post
                      great build! that dbilas intake looks and fits great!!

                      Thanks!


                      MJ

                      Comment


                        Super rad!
                        Paynemw
                        1986 Toyota 4Runner SR5 - Sold!
                        the ebb and flow of 325is ownership - In RVA
                        1988 BMW 535is - RIP but my dream BMW

                        Comment


                          It's been a while since the last time I read your project topic. Very nice and careful work all along the line. Highly enjoyable read.
                          E30 Armo "330i"

                          Comment


                            Minor update - have put several miles on the car but can't get too far away from the house on a straight exhaust with no lights and no plate. So far so good, the engine is a sweetheart and really wants to pull, suspension feels great but I need to spend some time dialing the toe and the feel of the X3 booster is just spot-on.

                            A couple of small punch list items = speedo/odo not working (probably the diff sender) and a bit of rev hang off idle (need to check my charcoal can/purge valve plumbing).


                            Originally posted by Skarpa View Post
                            It's been a while since the last time I read your project topic. Very nice and careful work all along the line. Highly enjoyable read.
                            Thanks! Not quite as big a project as your car thanks to my lack of skills but it been a fun learning experience.


                            MJ

                            Comment


                              Great work as always, glad you were able to get the AKG mounts sorted out,, some very good info for future swap guys cause the mounts always seem to do that.. Happened to me on both swaps like I was saying earlier and was very discouraging.. I'm also glad to hear AKG mentioned it's OK to slot the trans brace, because I had to as well. Looking back I should have given them a call as well..


                              Hope your enjoining the X3 booster? I recently "upgraded" the booster in the Mtech convertible to the X3 as well and love it.


                              1992 M tech 2 Convertible - S50 Swap
                              1992 e34 Touring- S50 Swap
                              1992 325i-S50 Swap (SOLD)

                              1995 e36 M3 Mugello Red - S50 (SOLD)
                              1991 325i Convertible Laguna Green (SOLD)
                              1987 325i (SOLD);1992 M tech 2 Convertible (SOLD)
                              1988 325i Convertible Alpine White (SOLD)
                              1991
                              Brilliantrot Convertible 80k Miles (SOLD)
                              1992 325i Convertible Schwarz (SOLD)
                              1992 318i Convertible Project-Finished (SOLD)

                              Comment


                                Originally posted by KIRIEIW View Post
                                Great work as always, glad you were able to get the AKG mounts sorted out,, some very good info for future swap guys cause the mounts always seem to do that.. Happened to me on both swaps like I was saying earlier and was very discouraging.. I'm also glad to hear AKG mentioned it's OK to slot the trans brace, because I had to as well. Looking back I should have given them a call as well..


                                Hope your enjoining the X3 booster? I recently "upgraded" the booster in the Mtech convertible to the X3 as well and love it.

                                Thanks! X3 booster/master is excellent. It gives a nice firm pedal with stock levels of vacuum assist. This is really a great option for a swap if you don't mind a little modification; easy to find, cheap and fits great.


                                Yeah, I'm trying to post stuff that will help others in the future or that is not clear in other threads....I have read and received a lot of good advise on this forum so hopefully can give back a little bit.


                                MJ

                                Comment

                                Working...
                                X