
Originally posted by ArtFoodBMW
-
To be honest it really wasn't all that bad, the longest part of it was waiting on the paint to dry. All told it probably took about 2-2.5 hours start to finish spread over two days, less if I wasn't taking a million pictures. Not a bad time investment given the results, I was really happy with them. Definitely not something that you'll be able to tell a difference driving, but nice to know that the axles are good to go for the foreseeable future and they look 10x better.'86 325e Zinnoberrot /// '02 325ci Schwarz II /// '18 M4 Azurite Black Metallic ///
Albie325 Build Thread | Albie325 COTM Jan 2021 -
Your attention to detail is something I strive for. Keep it coming1989 325i LS Swap (Money Pit):https://www.r3vlimited.com/board/sho...d.php?t=244933
COTM Feb 2019: https://www.r3vlimited.com/board/sho...d.php?t=428404

Comment
-
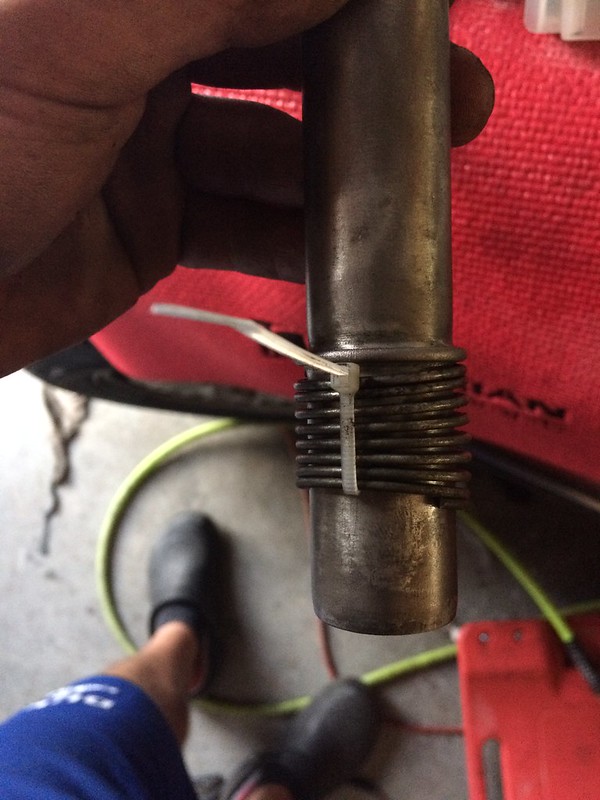
I just did my head gasket not too long ago and i took the intake off to make it a little more managable. Had a hell of a time getting this thing to stay in, really good idea with the zip tie, kicking myself for not thinking of this!Originally posted by Albie325 View Post1990 325iX - sterlingsilber metallic
1991 325i - lazurblau metallic

Originally posted by delamaizeComment
-
Nice work man! That's a great go-by for someone else looking to do the job.I do things.Comment
-
This is good to know. The IX has either over priced CVs or impossible to find. This will be a great resource for me in the future. Thank you!Originally posted by Albie325 View PostComment
-
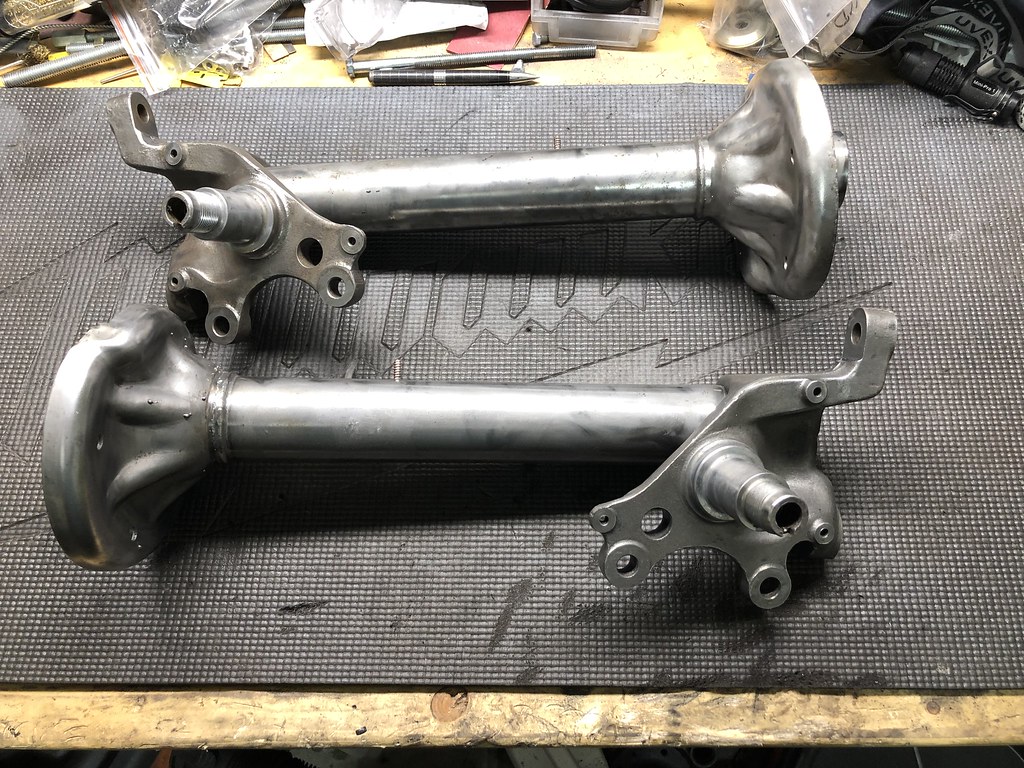
If you don't care about painting them, this can seriously be done in less than an hour. The OEM half shafts seem to be way better quality than any aftermarket options from what I've read, so as long as yours are in good shape it's a no-brainer to just refurb them for the cost of a couple boots and some grease.Originally posted by jeenyus
Glad to see the write up is helping. I figured if I haven't been able to find a good comprehensive DIY then I can't be the only one who'd want to see something written up. I also really appreciate when I look through a good build thread and the author puts in how he went about the process rather than just putting a before and after. Makes certain projects that seem untouchable a little more attainable.
For the rest of this thread, I'll do my best to write up any project that I haven't found a really good DIY for, and if something has already been well-documented I'll attach the link for reference.
Happy Holidays guys'86 325e Zinnoberrot /// '02 325ci Schwarz II /// '18 M4 Azurite Black Metallic ///
Albie325 Build Thread | Albie325 COTM Jan 2021Comment
-
Made some good progress since getting back from CT:
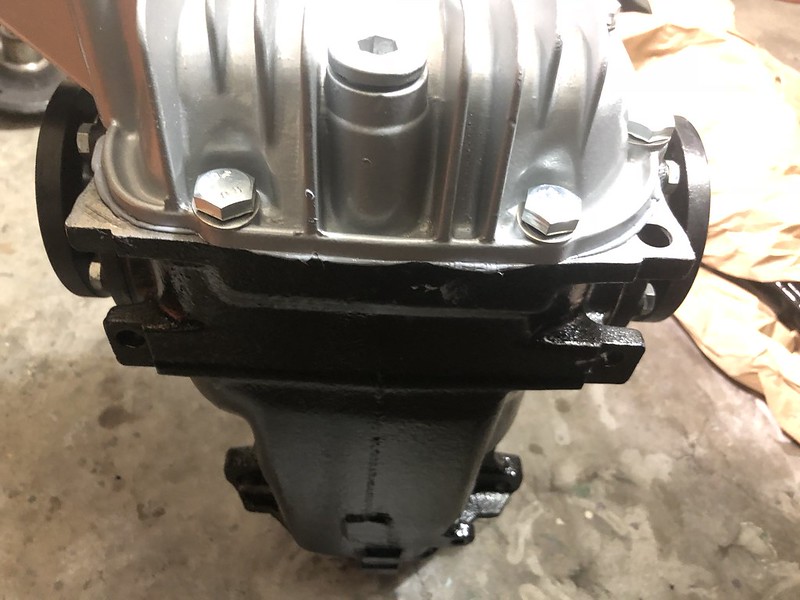
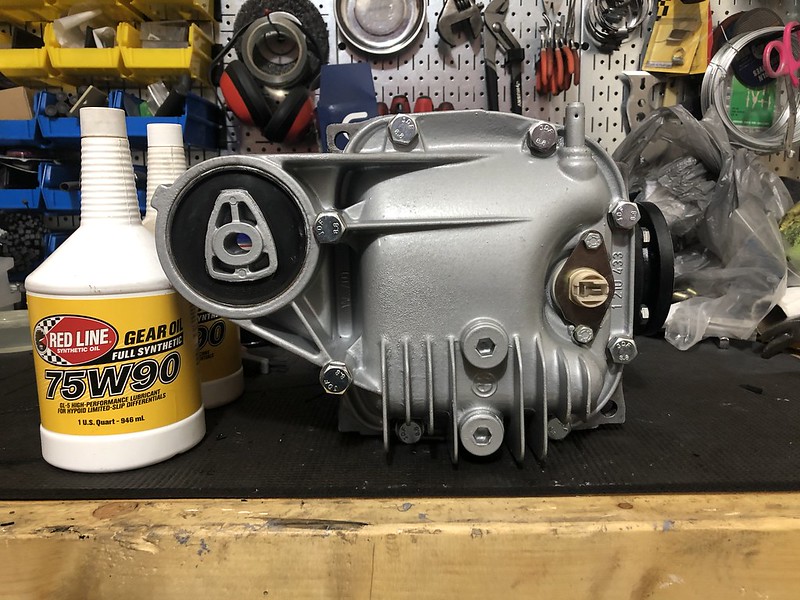
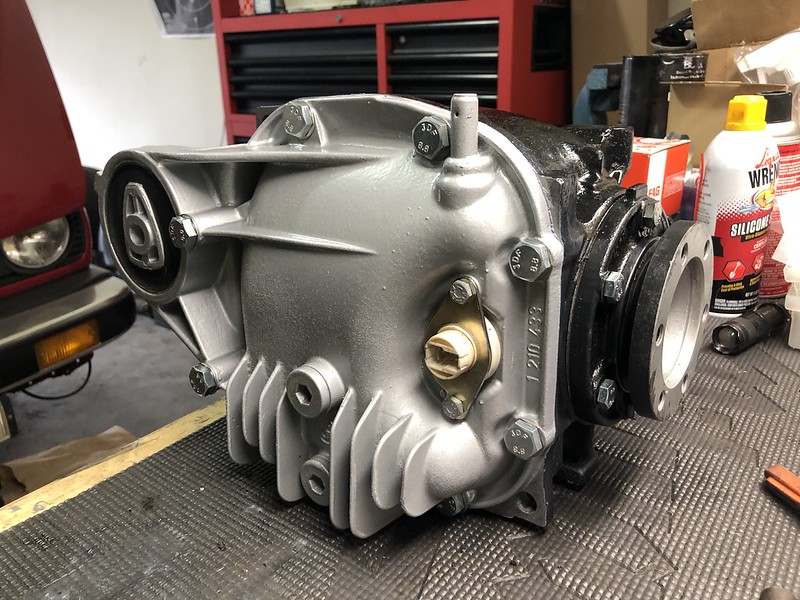
Re-sealed the diff with Permatex Ultra:
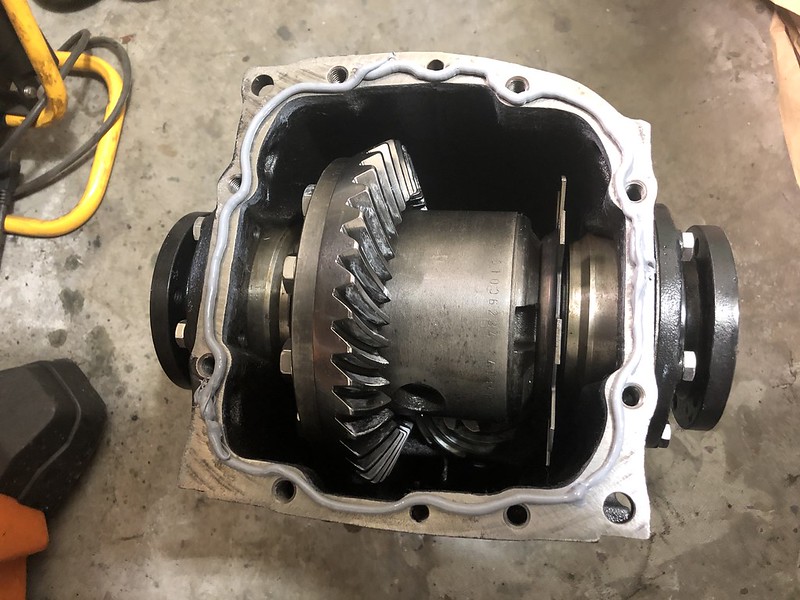
I had a paper gasket as well but decided to forego it after a bunch of reading. If it ends up leaking I can always use it.
Hand tightened the nuts and got a nice bead to squeeze out all around, then waited an hour to torque down.
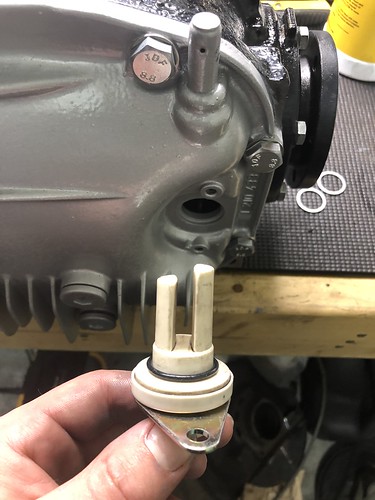
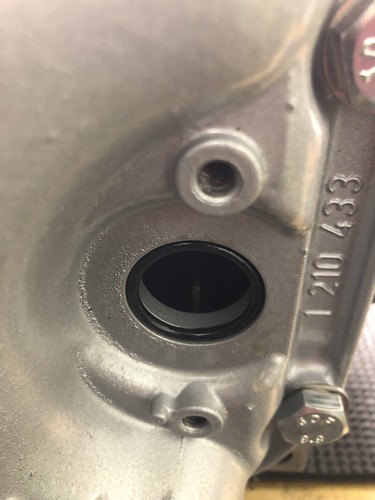
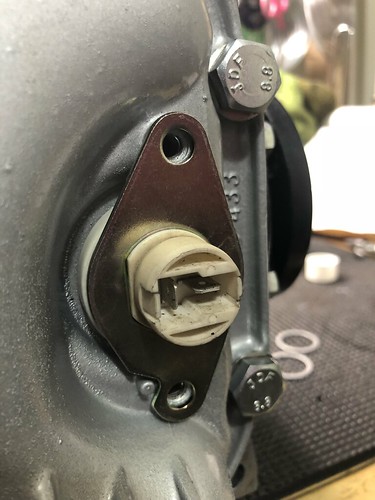
I waited til the next day to fill it with Redline 75w90. Also replaced the speed sensor, the longer end goes towards the outside of the diff. When you put the securing plate back on you'll see it can only go on one way. Also, don't forget the speed sensor O-ring:
It was easier to put the O-ring in the hole first and slide the sensor in than to seat it on the sensor and try to get it on:
Flat side of the sensor aligns with the flat part of the lock plate:
Not quite Jordan level sparkly, but looks really good. I didn't have a 3.25lsd tag, if anyone has one lemme know.
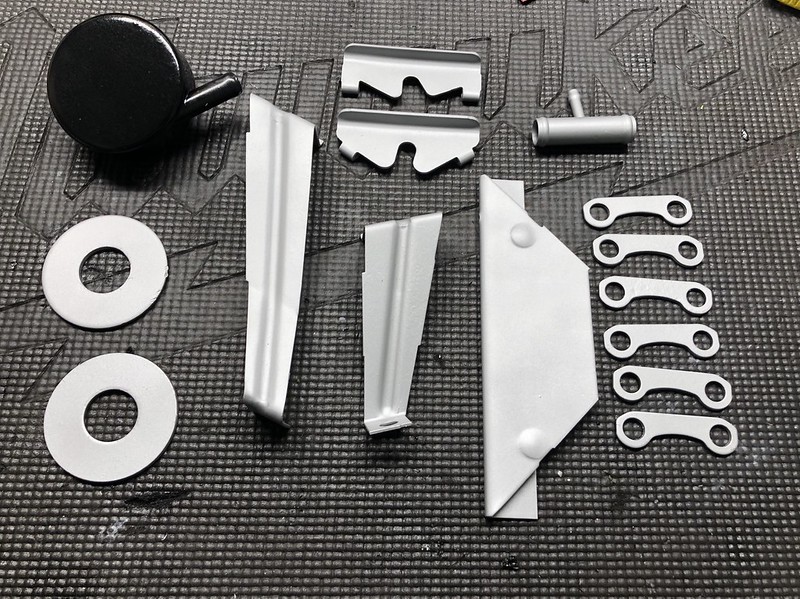
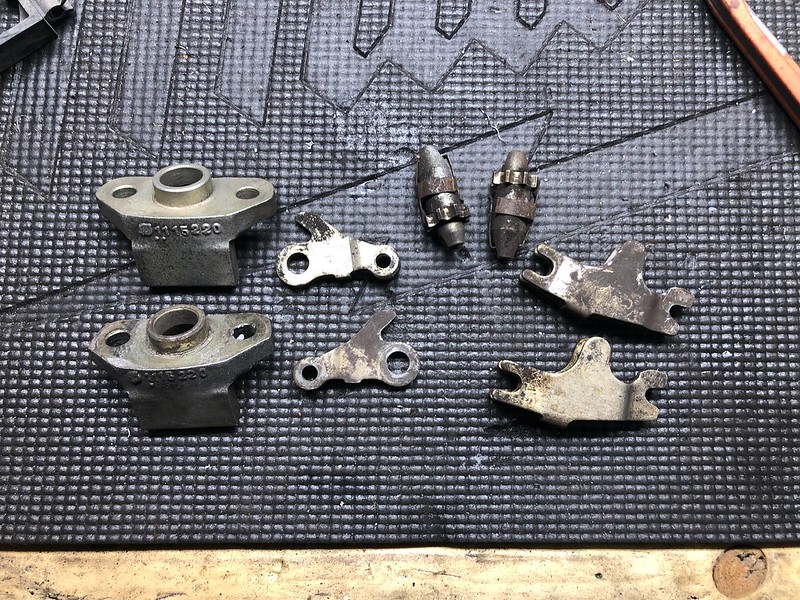
Also got to work refinishing some random hardware, still have a box full of stuff to get done before reassembly:
Fuel tank mounting brackets before and after cleaning:
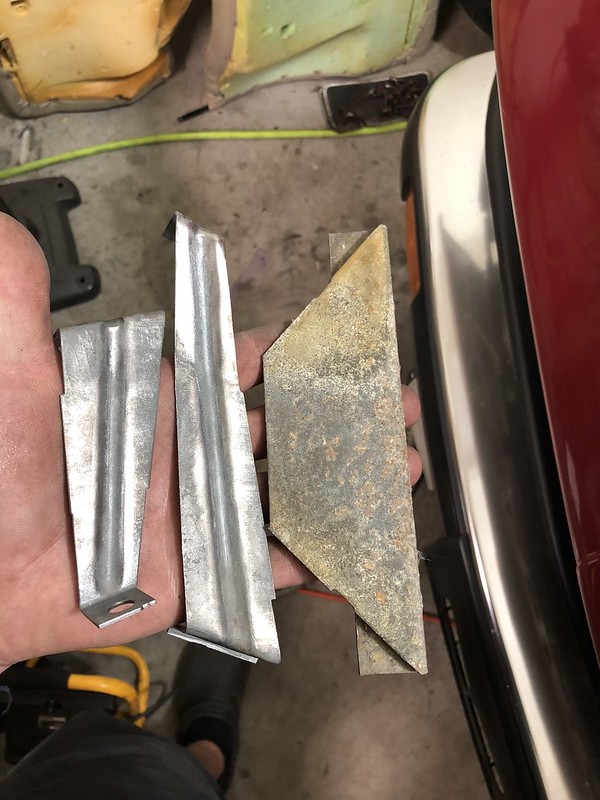
And after paint:
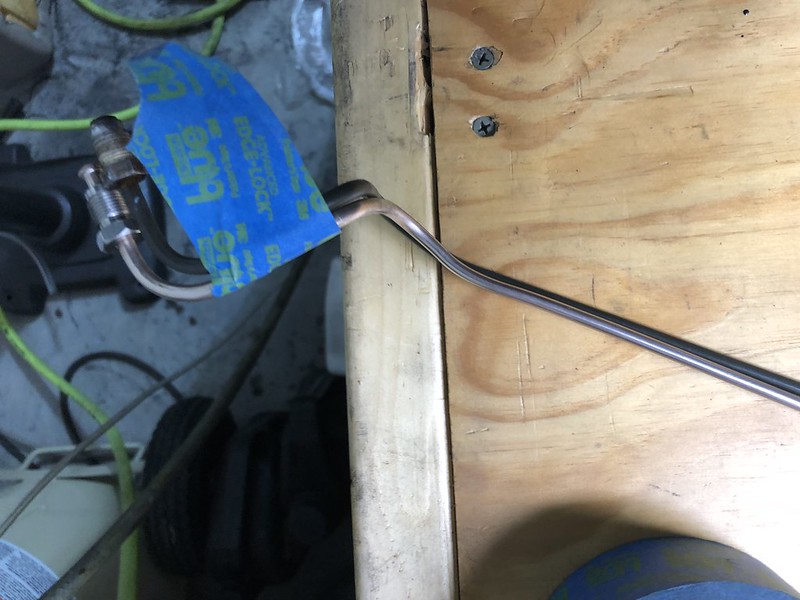
Also got to work bending my new hard brake lines. I found this article helpful:

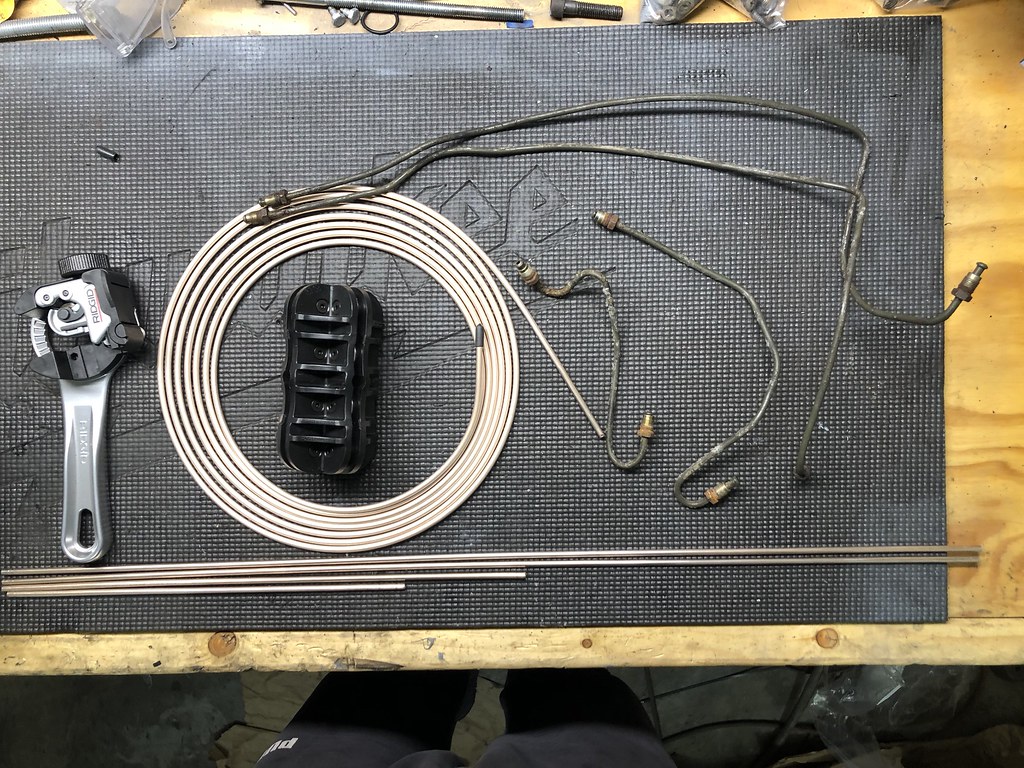
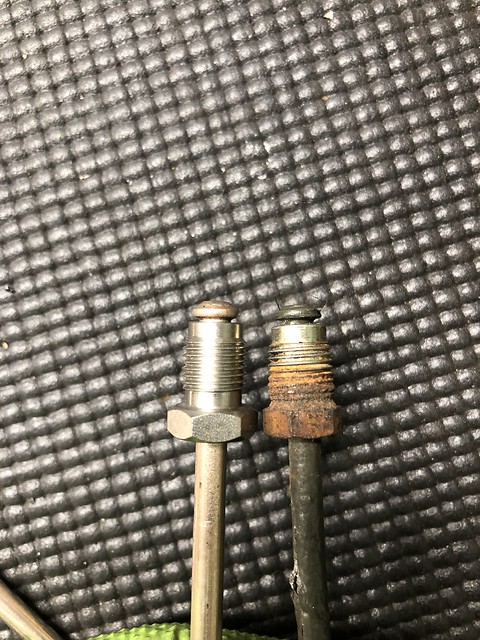
I ended up using Cu/Ni brake line. It was really easy to work with and made really good bubble flares. It's also supposed the be the most corrosion resistant, which judging by my old lines was the main goal. I bought the Eastwood flare tool as well as the line straightener, they were a little pricey but made life easy. I ended up buying a total of 25 feet of line and still had a few feet left over. You'll also need a total of 10 3/16" 10x1mm bubble flare fittings.
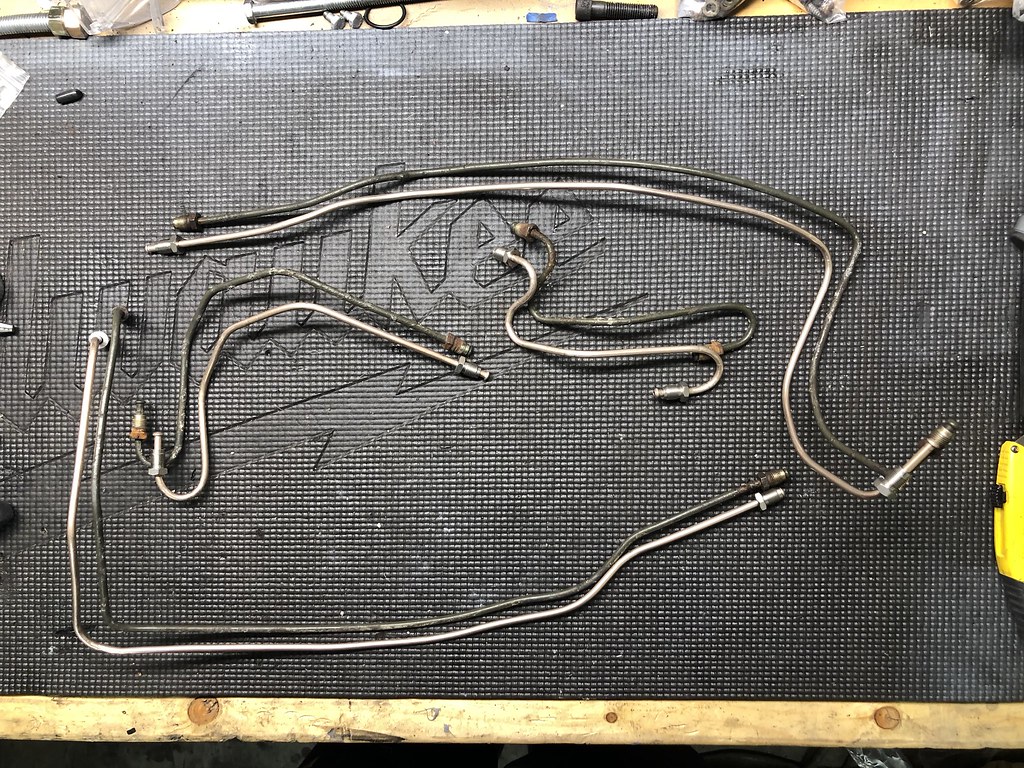
I was really happy with how they turned out. For the main line that runs the length of the car and connects the front to the rear T-connector, it was a little unwieldy to work with (120 inches of line in a tight rental garage was a stretch) and became hard to make the bends in the correct 3-D orientation. I'd make the correct bend in 2D left-to-right, but then the orientation would be off front to back. If you ever have to do it you'll see what I mean. I ended up taping the old line to the new and used that as a template to keep everything together and it worked well.
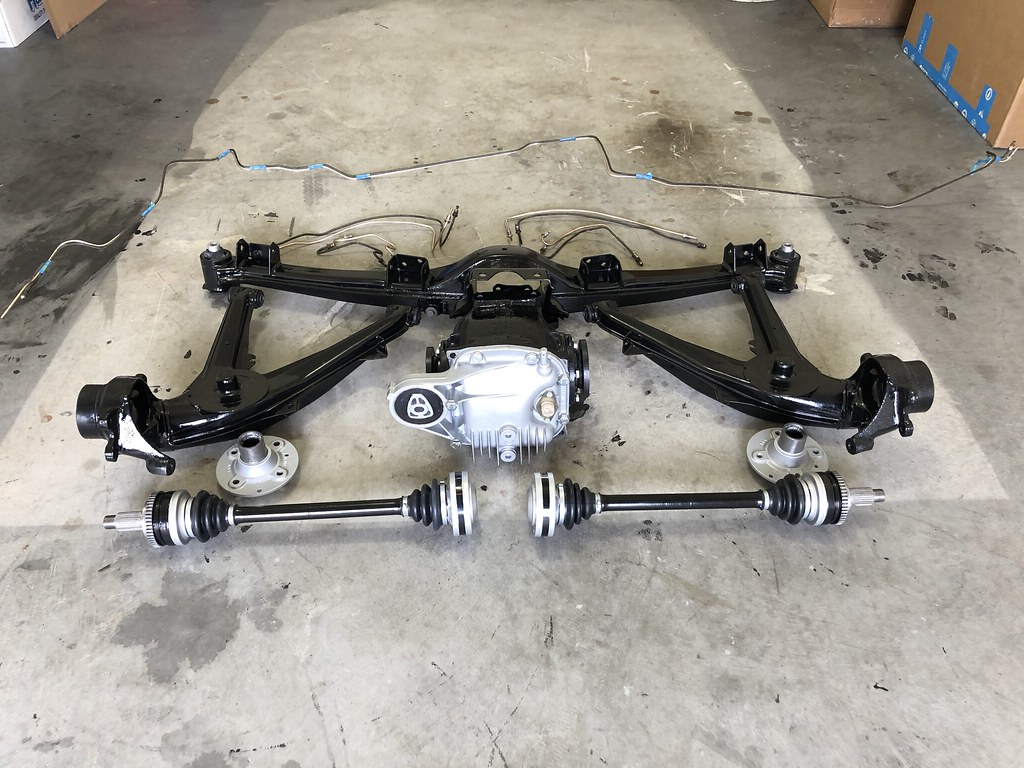
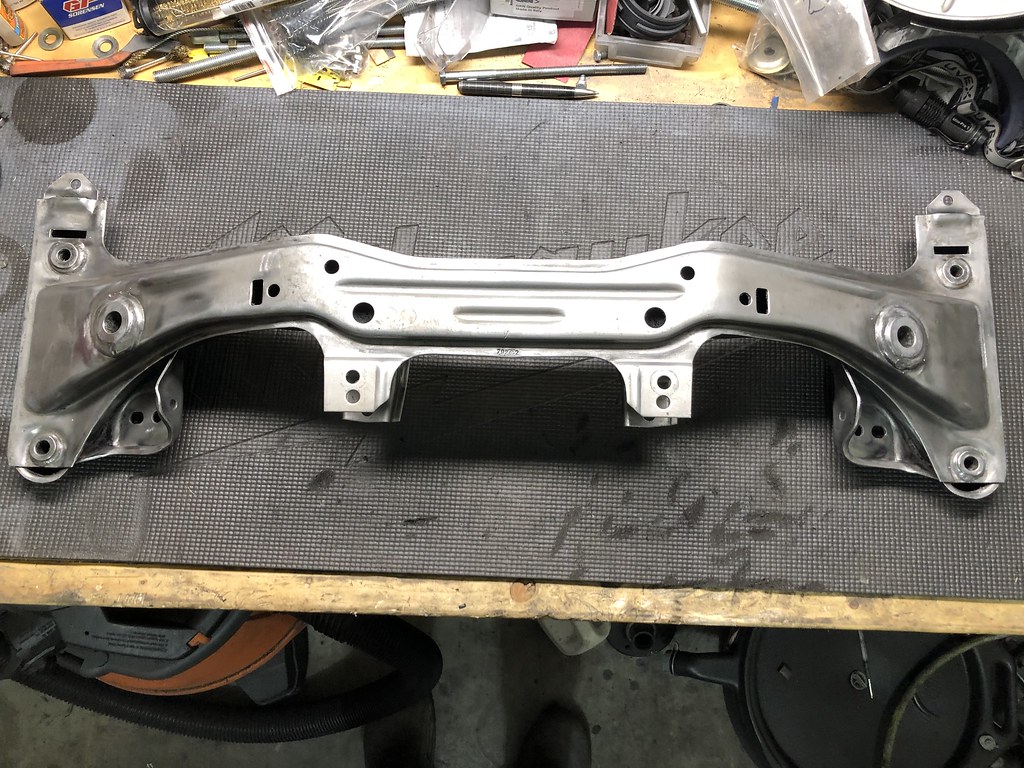
I also got all my subframe/trailing arm bushings pressed in as well as the rear wheel bearings. All pretty much set to go back in once I get the dust shields painted, waiting on cleaning a few other parts so I can paint a bunch of stuff all in one shot:
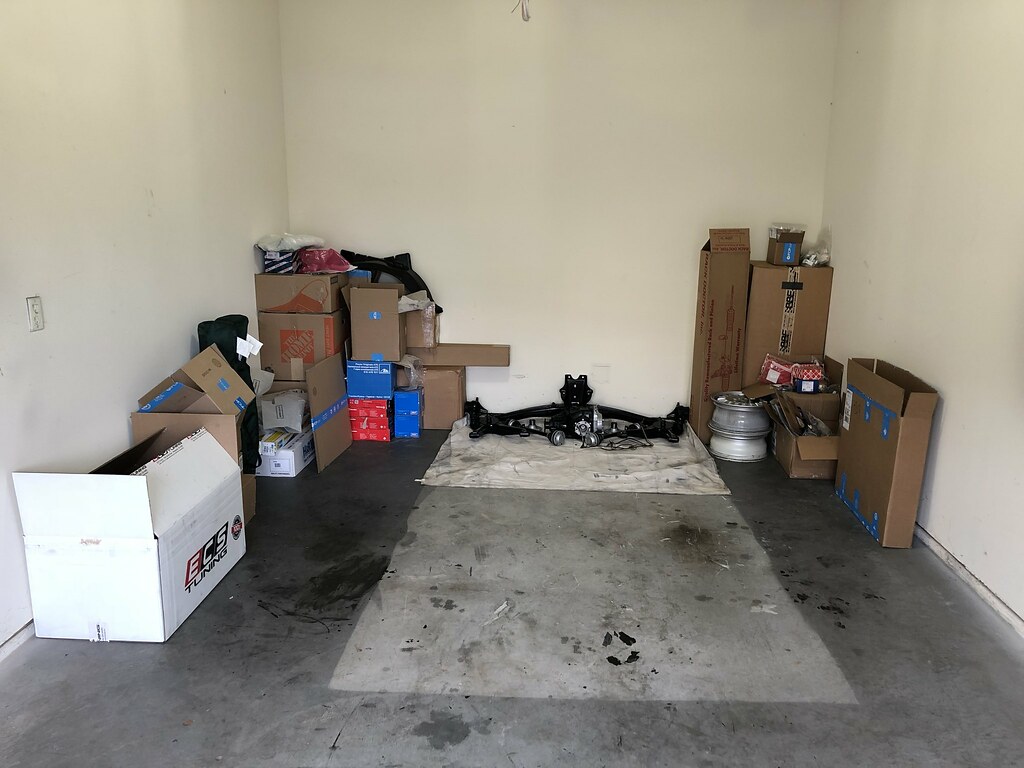
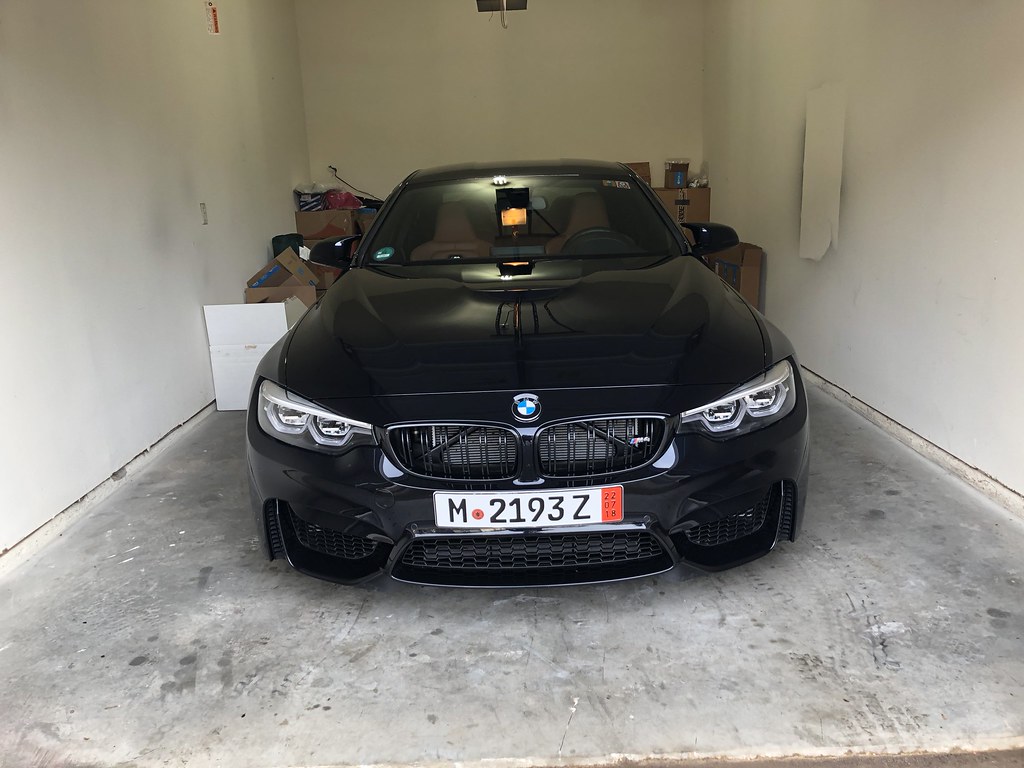
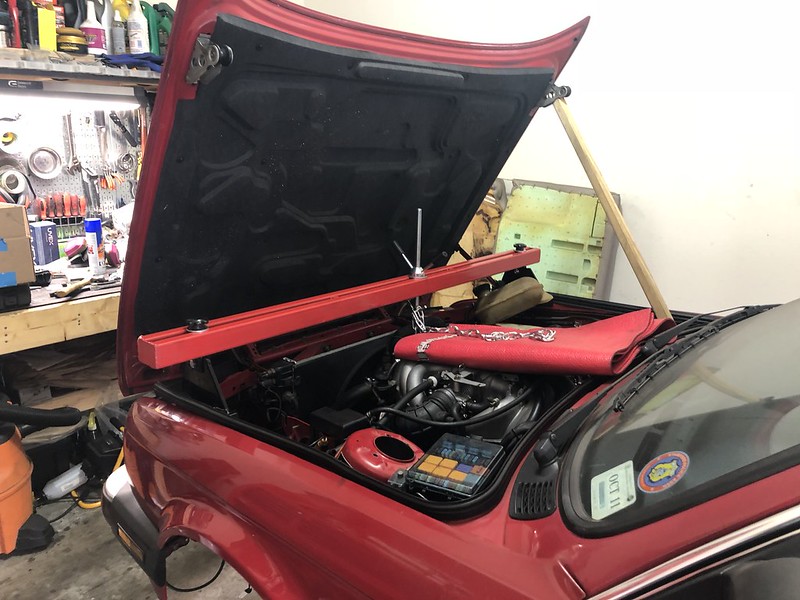
I need to start reassembling soon, my (other) pride and joy is slowly getting squeezed out of the garage:
Last, I took out the power steering pump and dropped the front subframe with the intent of also doing the oil pain gasket while it was off:
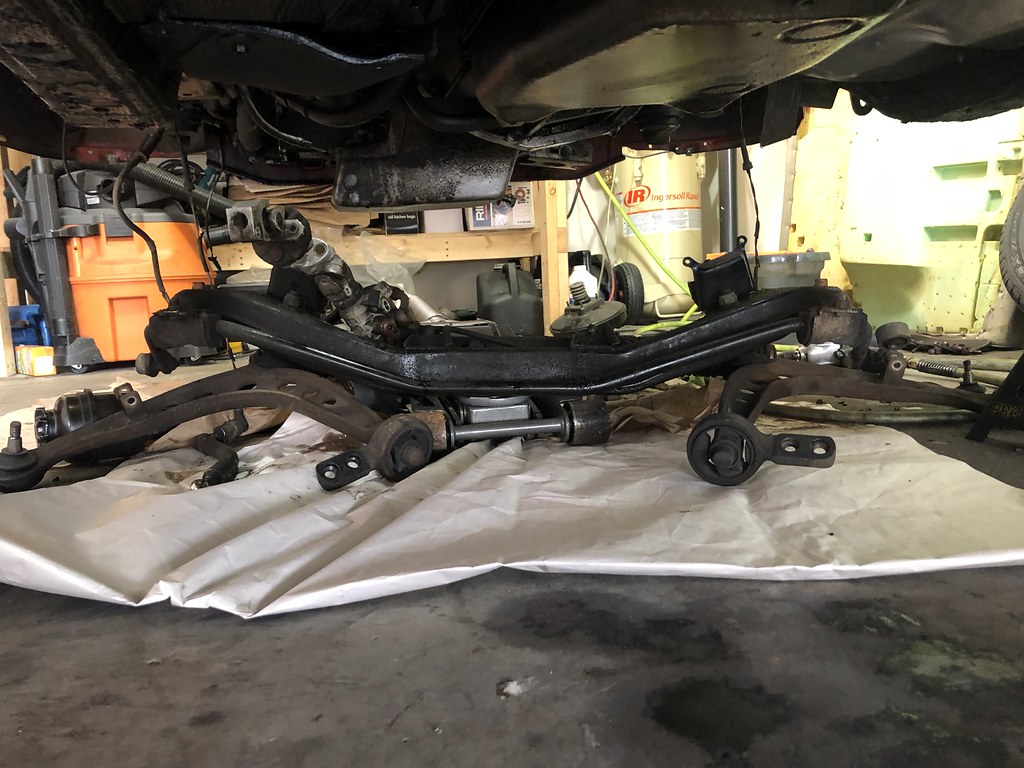
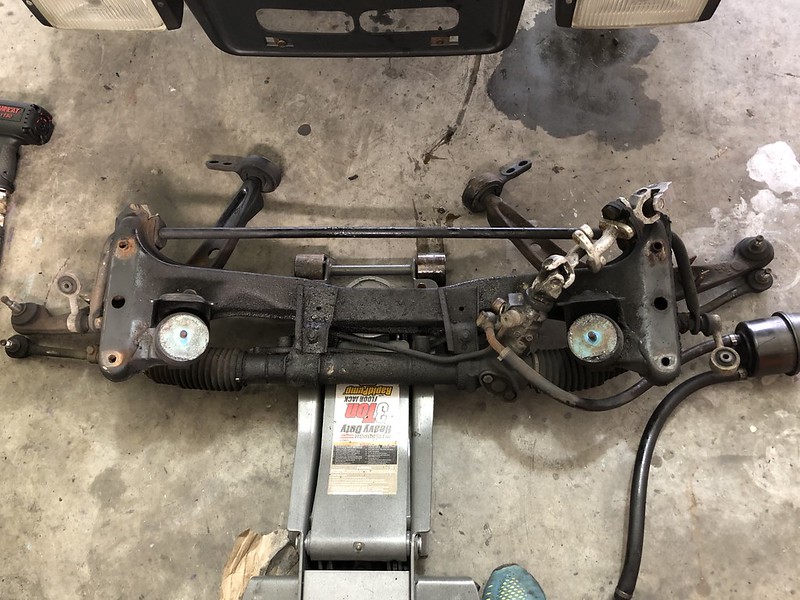
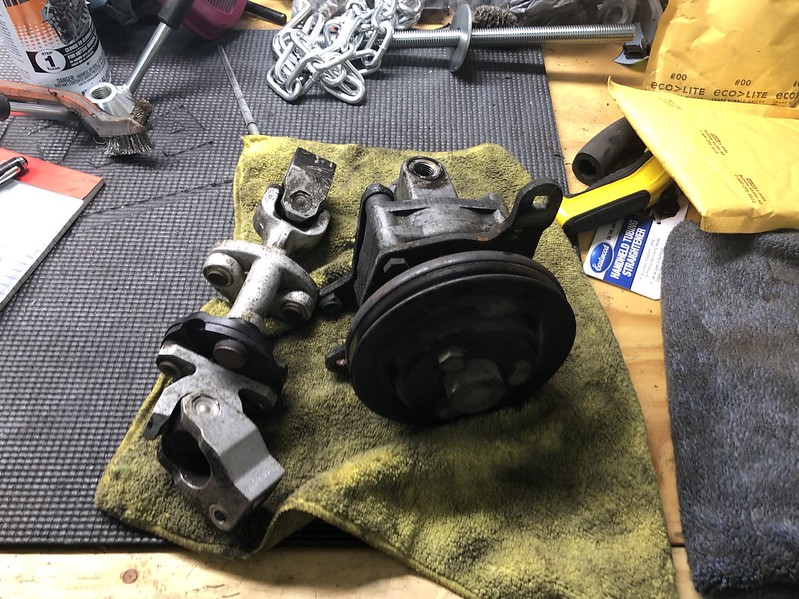
Got everything disassembled:
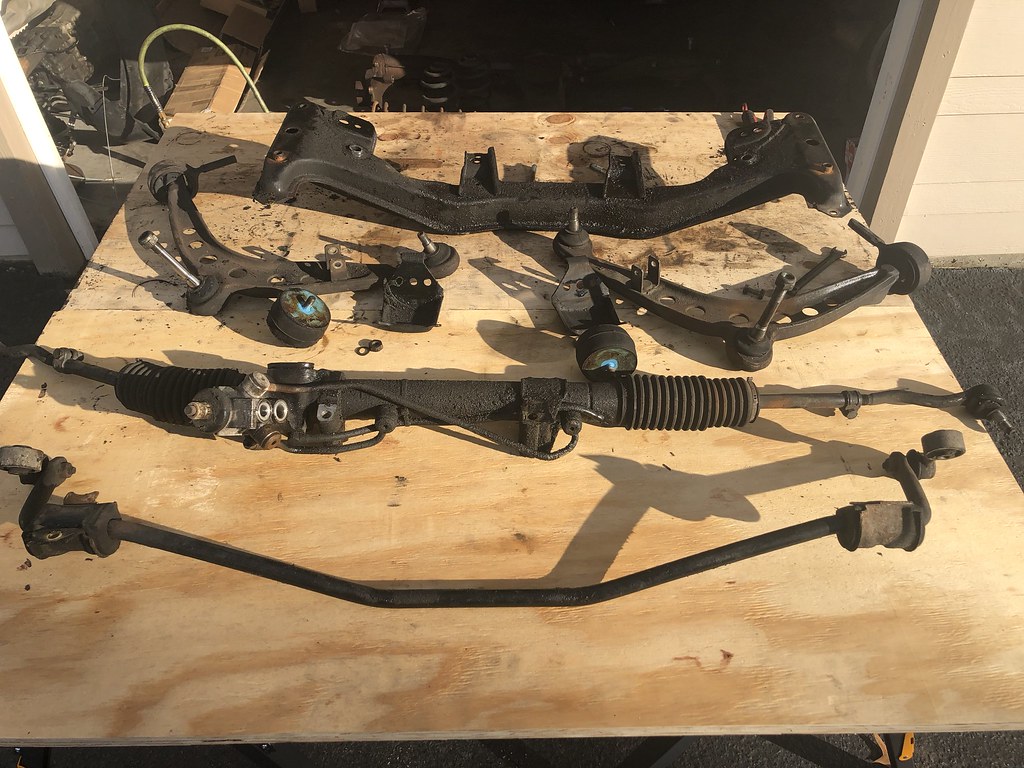
Then got everything that will be reused degreased and ready for paint.
Next I went to work on getting the oil pan out and hit a snag:
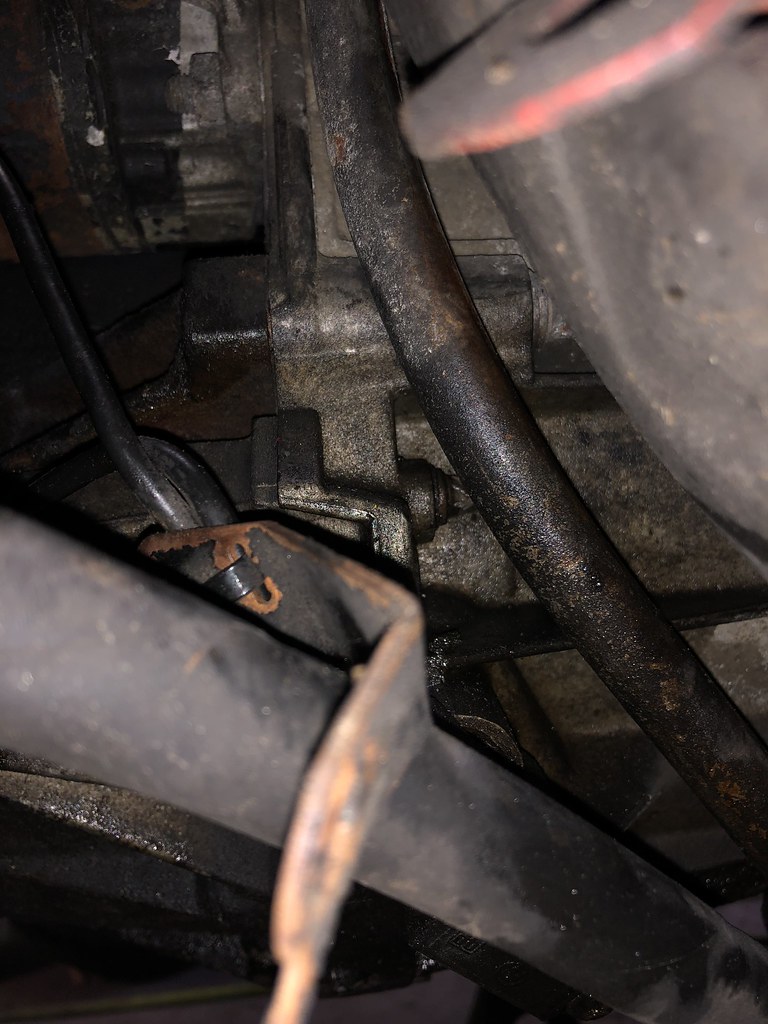
That little e10 Torx bolt tucked way up behind all the autotragic coolant lines stripped. It was the last of 8 bolts to get the transmission reinforcement bracket off. Couldn't have been one of the other 7 completely accessible bolts, had to be the one tucked way the f*** back up there. I did everything I could to make sure the socket was seated all the way in, but with all the coolant lines in the way I must not have been all the way on. I tried an extractor but I need to tap it on to get it fully seated and just don't have the room to get a hammer in there. UGHHHHHHHH I was and still am PISSED. WTF. I could have had the oil pan out, cleaned, and resealed 10 times over in the time it took me to mess around trying to get that bolt off.
With the trans lines out of the way and if I remove the mounts and drop the angle of the trans down a bit it wouldn't be tough to get to. I didn't want to have to remove all the lines and thus the transmission fluid, especially with a 5-speed swap planned. I guess I'll just have to wait until I do the swap and take down the front subframe again, which I didn't want to have to do. Removing the subframe actually wasn't all that bad, so oh well. Unless someone has any other suggestions, I'll just hold tight on the oil pan until then, not the biggest deal in the world.
Happy New Year!'86 325e Zinnoberrot /// '02 325ci Schwarz II /// '18 M4 Azurite Black Metallic ///
Albie325 Build Thread | Albie325 COTM Jan 2021Comment
-
Beautiful E30 and good work. If it hasn't been mentioned already you should join the NCE30 facebook group. Some of the Raleigh guys and also most of the Triad people will be at Backyard Bavarian Jan 4th-5th for our New Years Party. Feel free to come hang and enjoy great free food.Comment
-
I bought the same engine support bar with only one goal and intent. Fixing the oil pan gasket. My gasket was in pieces and definitely seemed to be a major source of a vacuum leak. Seemed to tighten up my idle. Great job on the car.
Sent from my iPhone using TapatalkComment
-
Really nice work! Also great job on the half shafts. I considered doing that but in the end I bought new ones. Yours came out amazing, and after looking at all that work I am glad I bought mine and didnt mess it up lol!!Comment
-
I just pulled my rear, and plan to do all the difference seals. Good to know to use a sealer on the case, instead of the gasket .I do things.Comment
-
I'm on the NCE30 FB site, just haven't been super active while the car is inoperable. I hope to make it to some Third Thursdays soon, and hopefully some bigger events in the Va/NC areaOriginally posted by Jamie H
For sure, once it's finally up and running I need to start making some appearances at some of the meetsOriginally posted by agent
Yah that's the exact reason I bought it, another reason I was so bummed I won't get to do the oil pan this time around. I guess I'll get more usage out of the support bar, and it's a reason to get to that 5 speed swap a little soonerOriginally posted by htseng'86 325e Zinnoberrot /// '02 325ci Schwarz II /// '18 M4 Azurite Black Metallic ///
Albie325 Build Thread | Albie325 COTM Jan 2021Comment
-
Alright, some progress (finally).
The last few weeks have been spent cleaning, stripping, and de-rusting various parts to get ready for paint. In this time, I've also realized my newest least favorite activity: cleaning, stripping, and de-rusting various parts to get ready for paint.
Got the exhaust manifolds cleaned and painted in high-temp:
Before:
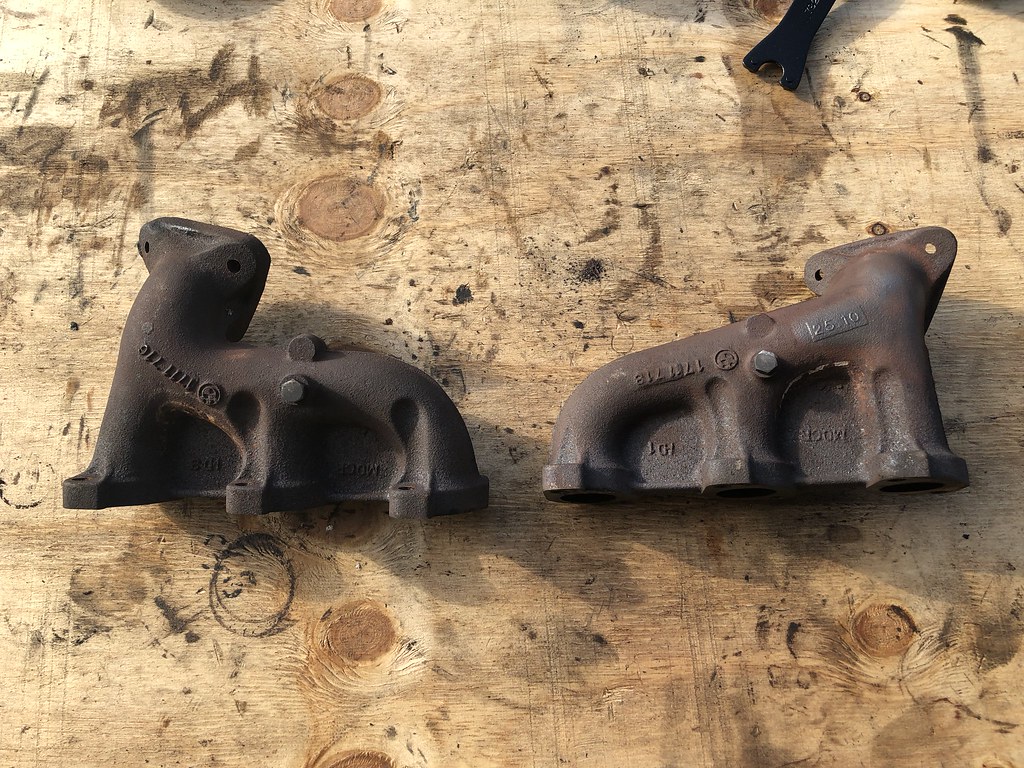
After:

All rust was removed prior to paint, and they looked similar to how that one little clean patch on the manifold on the right looks after cleaning. Not sure how long that'll last, but it looks really good for now.
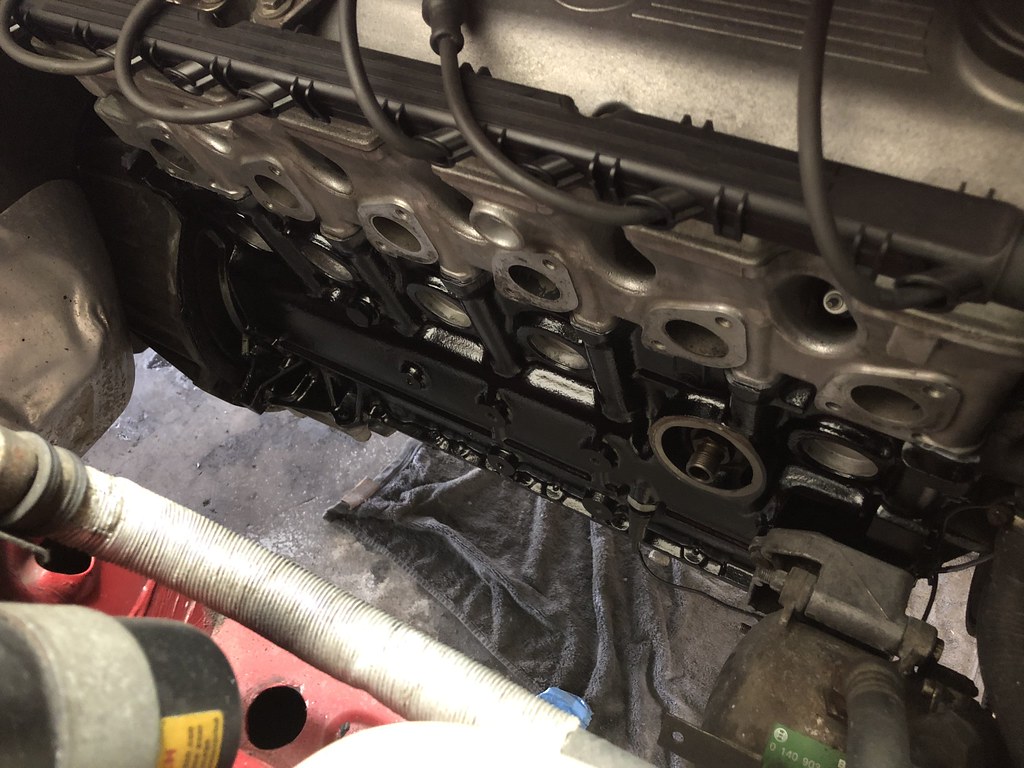
Also got the other side of the engine block painted:
I had been painting a lot of the random small hardware using caliper paint or black engine enamel, however while searching for some plastic resurfacer I came upon this kit from Eastwood:
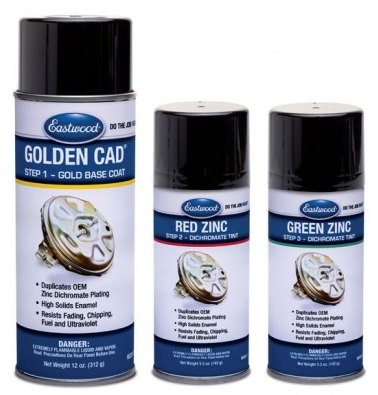
As I wanted the zinc plated look but didn't have the time, money, or knowledge of a local plater, I decided to give it a try and was pretty pleased with how things came out.
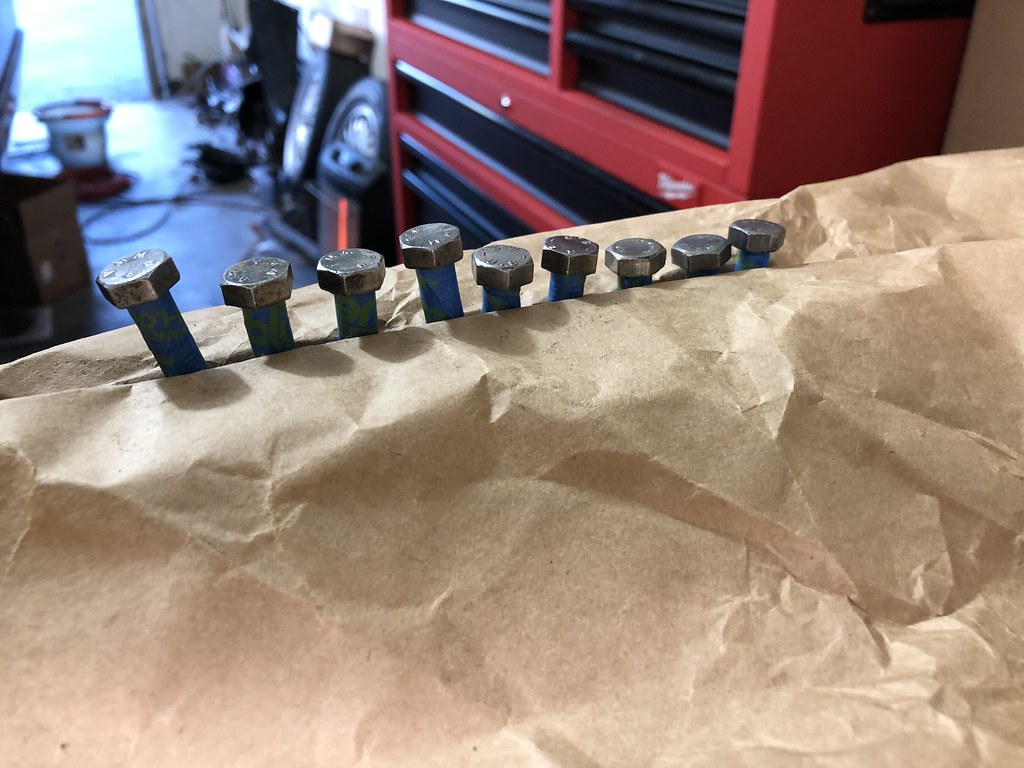
Most parts starting out looking about like this or worse:
After some cleaning:
And ended up like this:
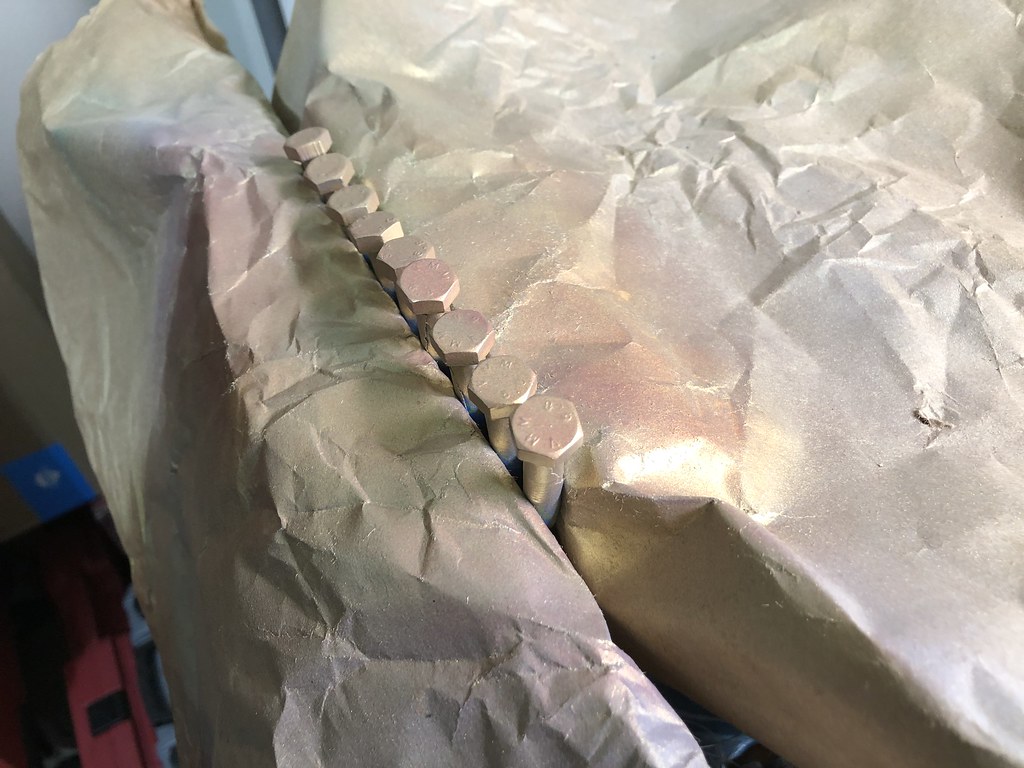
With a few other parts:
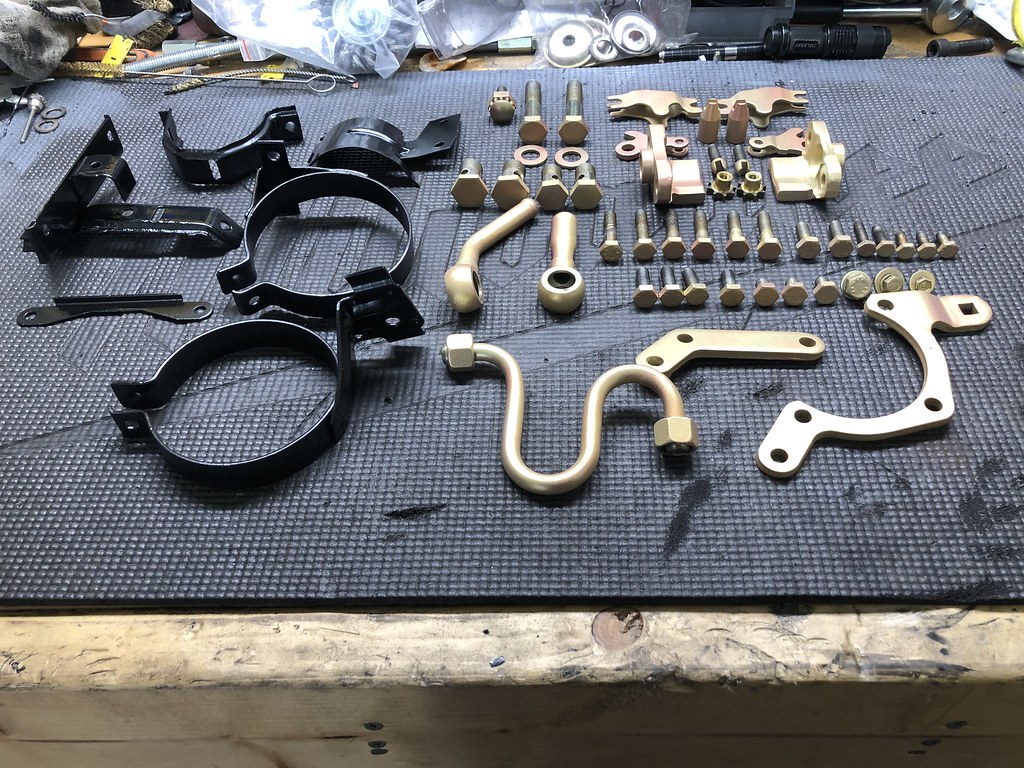
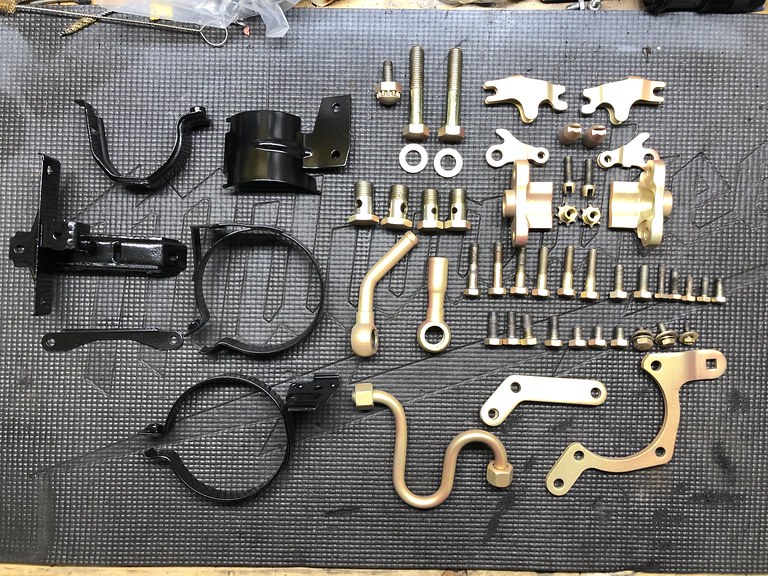
I only painted the bolt heads for obvious reasons, the threads were simply cleaned with a wire brush.
I also purchased these, which I should have done long ago. Would have saved me hours, nay, DAYS of hand cleaning parts:

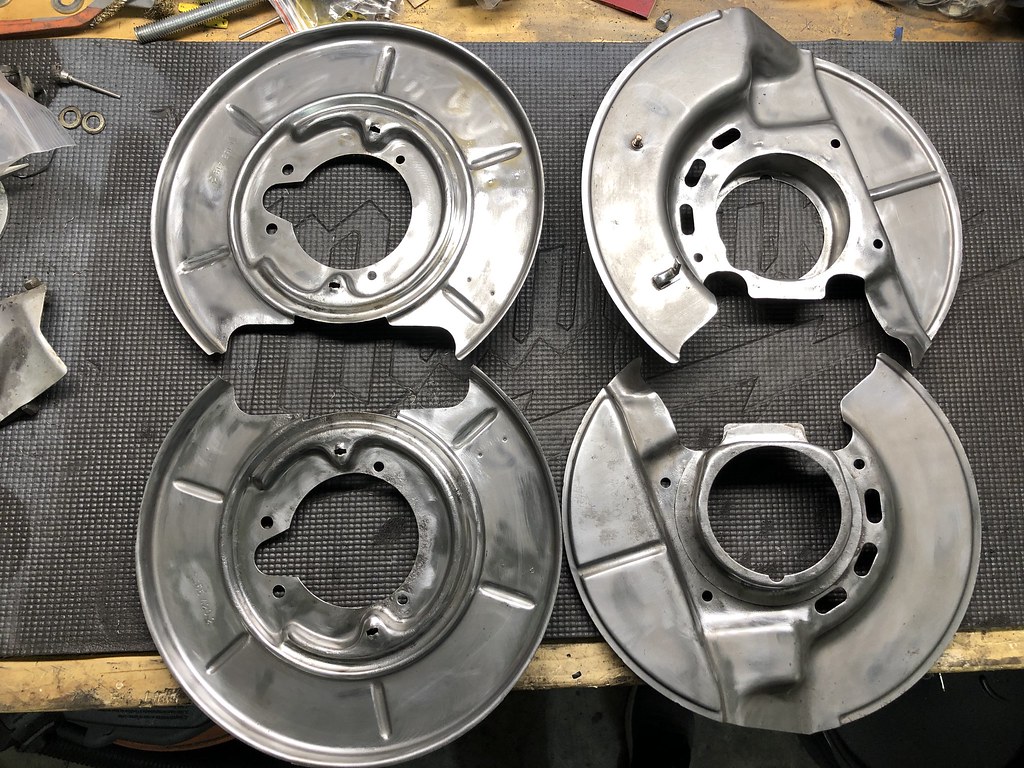
Ended up finally getting the dust shields and a bunch of other parts down to bare metal:
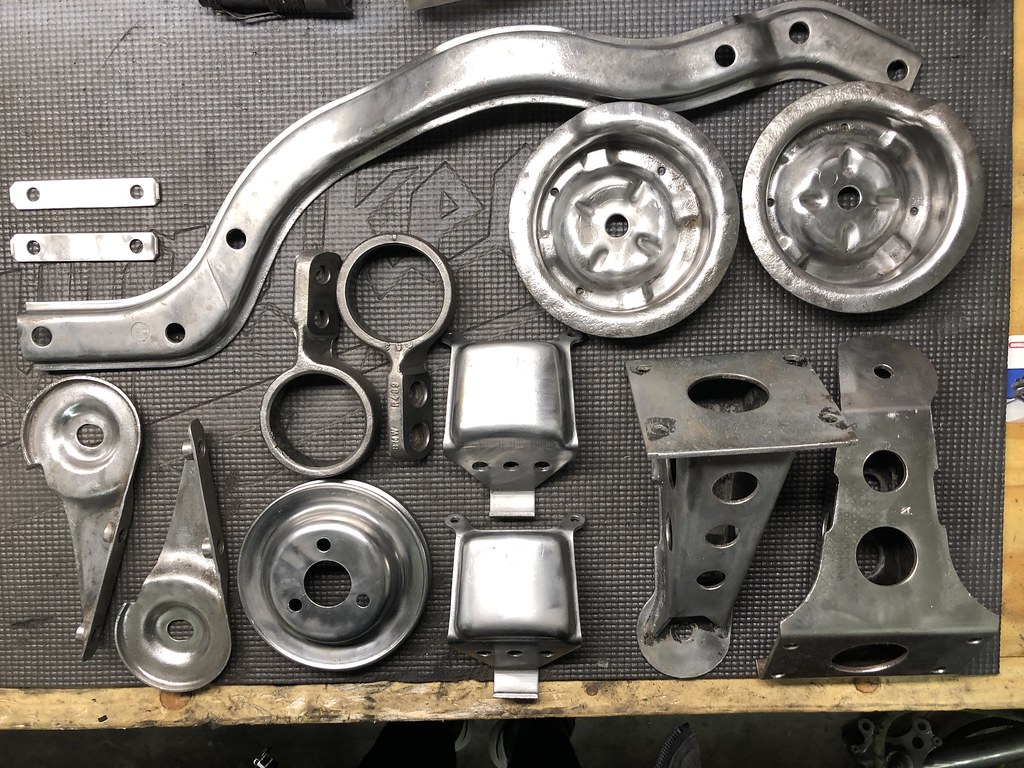
My front strut tubes would have taken FOREVER to completely clean and I didn't want that holding up the project. I found some CA grown examples for cheap so opted for those instead:
I was going to paint everything last weekend however it was a little too cold and I didn't want to have to wait hours in between coats. This weekend is supposed to be warmer and I hope to knock it all out on Sunday.
Also, I got a large package (that's what she said) today:
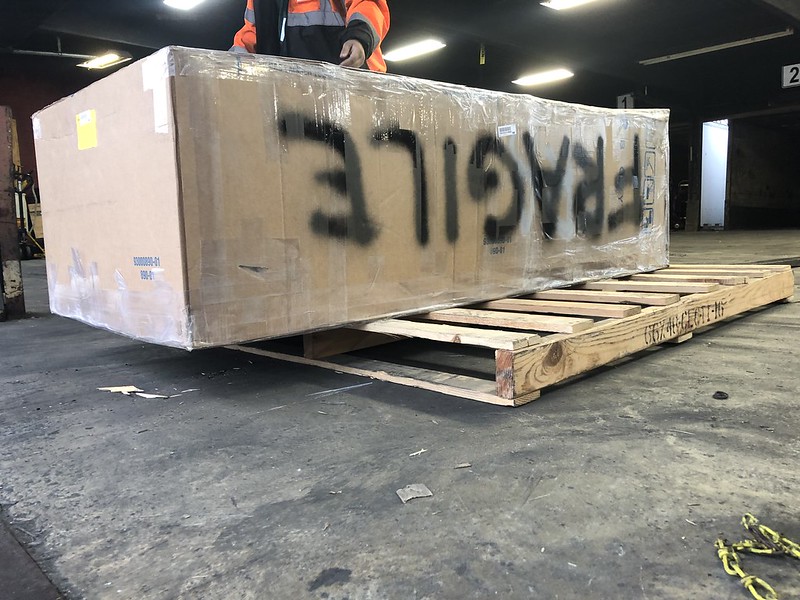
Hmmmm... must be Italian...

Stay tuned...'86 325e Zinnoberrot /// '02 325ci Schwarz II /// '18 M4 Azurite Black Metallic ///
Albie325 Build Thread | Albie325 COTM Jan 2021Comment
-
How you going to leave us hanging? WHATS IN THE BOX?!91 318is M50 swapped
05 Honda Pilot
24V swap thread
http://www.r3vlimited.com/board/showthread.php?t=302524Comment

Comment