
It was fun, although the pictures of me are scary...
-
-
well?
Comment
-
Ill update as soon as im done detailing, She is looking PURDYComment
-
Awesome. Great to see the car come to life. Really makes me want to do something similar. e28s are tanks and awesome DDers.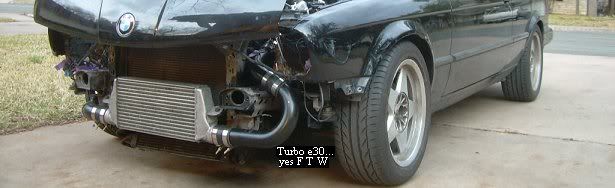
'88 325is
VP UT of Austin Autoholics
BMWCCA 380364Comment
-
 love it
props for the 5 speed swap!

Comment
-
MMK well there was a major leak at the back of the tranny. It was a big mess, leaking all over the cat and smoking up into the cab.
This led me to changing both the output shaft seal and selector rod seal. However the leak persisted and the severity never changed. I was scratching my head and finally figured it out.
When we changed the early style shift plate assembly to the later style with a shift arm, we had to unbolt the plate from the upper points on the top of the transmission. They actually go into the transmission and are not machined into the rear housing. After bolting these up with a little bit of sealant the leak stopped. :-D
There were also problems with the larger guilbo from the 535i smacking the selector rod in 1st, 3rd, and 5th while under load. It was so bad it tore a new guilbo apart in a few weeks. This was remedied by pulling the driveshaft (sigh...) and combining the front portion of an I shaft to the 535i rear (which had the new CSbearing). I also had to re-pull the output flange and replace with a smaller one.
Everything fit out and worked/s perfectly.
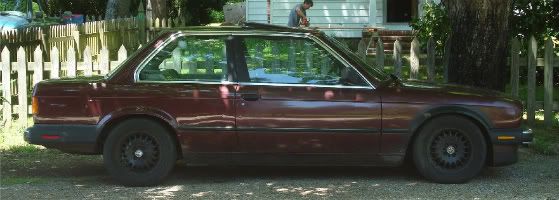
Finally it was time to detail, Which was a bitch in the weather we had been having since I have limited space and my garage holds my show car. I finished up all the Prep and the engine bay.
sorry for blurry pictures.


The oxidization was so terrible on the roof and hood the the paint was practically flat. But after a pass of aggressive cutting, 2 passes of polishing, and a final pass of sealant (since it is a daily driver) It transformed into this.

I don't have any good interior photos but the tan when from very dirty to clean lol.
When James and Luke finish the CarPC and stereo, the last thing* to do will be to patch a little hole in the bottom of the chassis which keeps letting in water and soaking the rear carpet.
*- last thing as in get it in perfect DD condition, I don't know what crazy ass planes James has for the styling yet. :-PComment
-
what did you use to cut the oxidation? and polish?Comment
-
Wow, that cleaned up beautifully.Comment
-
Cutting - Meguire's #4 heavy cut/cleaner.
Polish 1 - Meguire's #83 Duel action cleaner/polish
Polish 2 - Meguire's #9 Swirl remover 2.0
Sealant - Griot's garage paint sealant.
I always finish with griot's products. If you dont wanna sealant I would recommend the best of show wax. followed with the carinuba(sp) wax stickComment
-
Paint looks great after the detail! Just get rid of that nasty tint and throw some euro bumps on her! ;-)Check out Undr8d Empire on Facebook: www.facebook.com/Undr8dEmpireLlc
INSTAGRAM: @UNDR8D_EMPIRE
Scarlet V2 - #Project333Ti by @castromotorsport, @kingsautobodyshop, @bimmerheads, @hardmotorsport, @excel_motorsports & @mateomotorsports - http://www.r3vlimited.com/board/showthread.php?t=371356
Your signature picture has been removed since it contained the Photobucket "upgrade your account" image.Comment
-
any up-close pics of the new paint after the polishAW 89' 325i Vert - SOLDComment
-
I only use a Direct drive rotary buffer unless Im just applying a quick coat of sealant on a newer car, then i'll use a dual action (PC).
I have different grit pads for different compounds, If your gonna do the swirl removal then I recommend a very soft anti-hologram foam pad like this one:

No but i'll get some next time I'm by the car in decent light.Comment
-
any updates on this?Comment
-


Comment