Announcement

Collapse
No announcement yet.

The MR E30 Project Thread - E36 M3 Edition

Collapse
X
 
  • Filter
  • Time
  • Show
Clear All
new posts

    #16
    How does E36 dash removal compare to E30 dash removal? My E30 dash replacement took me about ~8 hours (and then about ~6 when I had to redo it because of that center mounting tab). 2 hours doesn't sound too bad, but maybe I just work slow.

    I'm loving the write-ups and level of detail, btw! A great way to spend a Saturday morning with a cup of coffee.
    Last edited by mike.bmw; 08-01-2020, 07:11 AM.

    Comment


      #17
      Originally posted by mike.bmw View Post
      How does E36 dash removal compare in comparison to E30 dash removal? My E30 dash replacement took me about ~8 hours (and then about ~6 when I had to redo it because of that center mounting tab). 2 hours doesn't sound too bad, but maybe I just work slow.

      I'm loving the write-ups and level of detail, btw! A great way to spend a Saturday morning with a cup of coffee.
      I pulled an E30 dash, with the windshield removed, way back in late ~2009. The E36 dash was even easier than that. BMW seemed to make the process 'smarter' with that metal sub structure behind the dash. Also, most of the center console bits (OBC, HVAC Panel) are simply pushed out from behind, taking seconds to remove, as opposed to finding those 'hidden' screws that E30 uses. The HVAC system is also much easier to disconnect (on a 97 at least) due to it being digital. The side attachments from the dash to the body are also much easier to deal with (easier access, (1) 13mm bolt per side).

      The only large, more difficult, difference is the three 7mm bolts at the front of the dash, beneath the windshield defrost vents. You have to pull those straight out and then finagle a small 7mm wrench to undo them. My windshield is destroyed, so although I didn't break it any more than it already was, I wasn't overly concerned with banging into it while removing those three bolts. If I had been it may have been more time consuming or frustrating.

      Today is another day with the car. Pulling carpet, and steering column to notch those bolt heads for future convenience. I'll see if I get past that point.

      If anyone has any input on how to clean the inside of the bare chassis let me know. I won't be stripping the paint away, but I want a very clean surface for the Dynamat to adhere to. Will experiment with chemicals I have in my garage.
      My previous build (currently E30-less)
      http://www.r3vlimited.com/board/showthread.php?t=170390

      A 2016 Toyota Tacoma TRD 4x4 Offroad in Inferno is my newest obsession

      Comment


        #18
        Hello Mike.

        I’m sorry to hear about your father. I never got to give my dad a ride in my E30’s. He got to see my obsession. He past away last year.

        I remember meeting you in your e36 m3 years ago. I wish I never sold my 1997 blk e36 M3.

        I will be watching this build for sure.

        I have seen worse condition BMW’s than yours. My 87 Alpina project did not have engine, suspension, bumpers, head lights and gutted interior. You have a lot of love and passion for this e36 m3👍👍👍👍👍👍
        Projects Hartge,Alpina & AC Schnitzer Builds.http://www.r3vlimited.com/board/showthread.php?t=280601
        http://www.r3vlimited.com/board/showthread.php?t=227993
        http://www.r3vlimited.com/board/showthread.php?t=289362

        DSC04926 by Raul Salinas, on FlickrDSC03413 by Raul Salinas, on Flickr

        Comment


          #19
          Originally posted by MR E30 325is View Post
          If anyone has any input on how to clean the inside of the bare chassis let me know. I won't be stripping the paint away, but I want a very clean surface for the Dynamat to adhere to. Will experiment with chemicals I have in my garage.
          If you can protect the electrical connections, a steam cleaner does a great job at loosening filth so you can just wipe it off. Sometimes you can use it to remove old adhesives too.

          Comment


            #20
            Originally posted by roguetoaster View Post

            If you can protect the electrical connections, a steam cleaner does a great job at loosening filth so you can just wipe it off. Sometimes you can use it to remove old adhesives too.
            Excellent idea, and I have one of those stashed away in a closet somewhere. Thanks Rogue!
            My previous build (currently E30-less)
            http://www.r3vlimited.com/board/showthread.php?t=170390

            A 2016 Toyota Tacoma TRD 4x4 Offroad in Inferno is my newest obsession

            Comment


              #21
              Agh. Something like this I would walk away....primarily because its way beyond the scope of my skills/budget but I am totally digging it. As long as it has a clean title, that color and potential engine swap has the makings of something epic. Tuning in. Sorry to hear about your dad.

              Comment


                #22
                Originally posted by e30m3s54turbo View Post
                Hello Mike.

                I’m sorry to hear about your father. I never got to give my dad a ride in my E30’s. He got to see my obsession. He past away last year.

                I remember meeting you in your e36 m3 years ago. I wish I never sold my 1997 blk e36 M3.

                I will be watching this build for sure.

                I have seen worse condition BMW’s than yours. My 87 Alpina project did not have engine, suspension, bumpers, head lights and gutted interior. You have a lot of love and passion for this e36 m3👍👍👍👍👍👍
                Thanks Raul, I appreciate the condolences.

                It has been quite a while, but I am glad to see you're still around!
                My previous build (currently E30-less)
                http://www.r3vlimited.com/board/showthread.php?t=170390

                A 2016 Toyota Tacoma TRD 4x4 Offroad in Inferno is my newest obsession

                Comment


                  #23
                  August 1st, 2020

                  The day started early again, with the first task being the removal of the steering column and metal support structure so I could get the carpet out of the way.

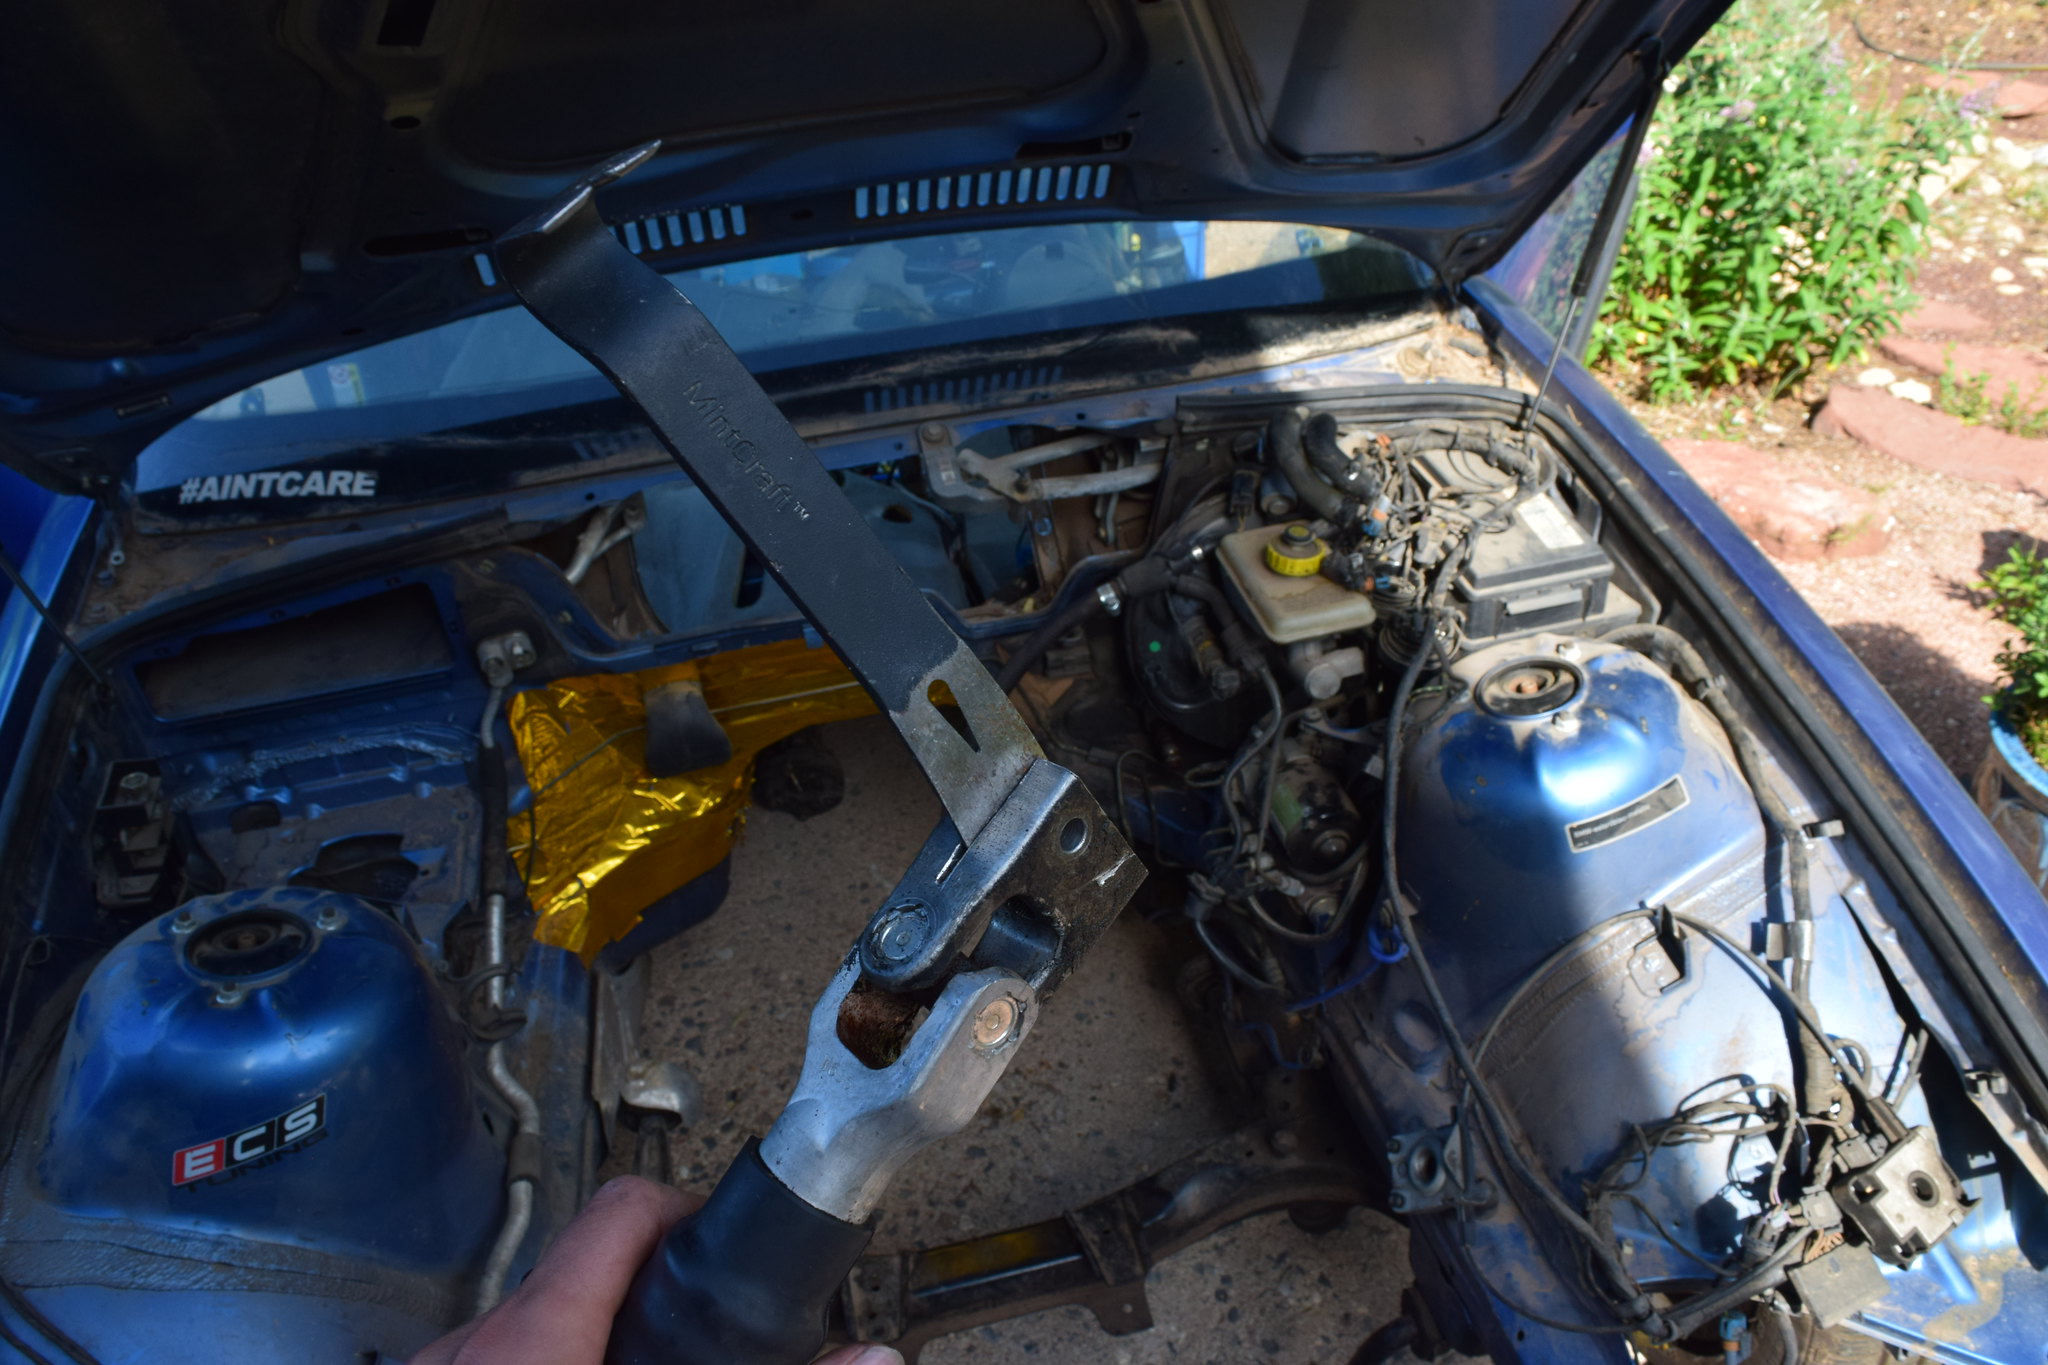
                  I did some quick research on how to free the steering knuckle assembly from the steering column itself. The finely splined shaft bites onto the knuckle very effectively, so after removing the bolt that slides through a notch in the column, you have to spread the knuckle apart ever so slightly to get it free.

                  I thought about it for a moment and realized the ‘splitter’ needed to be tapered, rather pointed at the end, and with a degree of taper that would allow it to spread the aluminum. The perfect household tool came to mind: the flatbar. Place it on the slot, and 8 blows of the hammer drove it in deep enough to set the knuckle free. Pry it back out by twisting it back and forth and you are home free and onto the next step.

                  12 - Steering Knuckle Removal by Michael Rickerd, on Flickr

                  Having removed the metal structure yesterday, the only thing holding in the steering column was a few electrical connections, all disconnected and then labeled, and (2) 13mm bolts on the firewall, accessed from inside the cabin. Undo that and the whole setup slid out with ease.

                  13 - Steering Column Removed by Michael Rickerd, on Flickr

                  Removing this led me to find another spliced wire connection that will need to be patched up correctly.

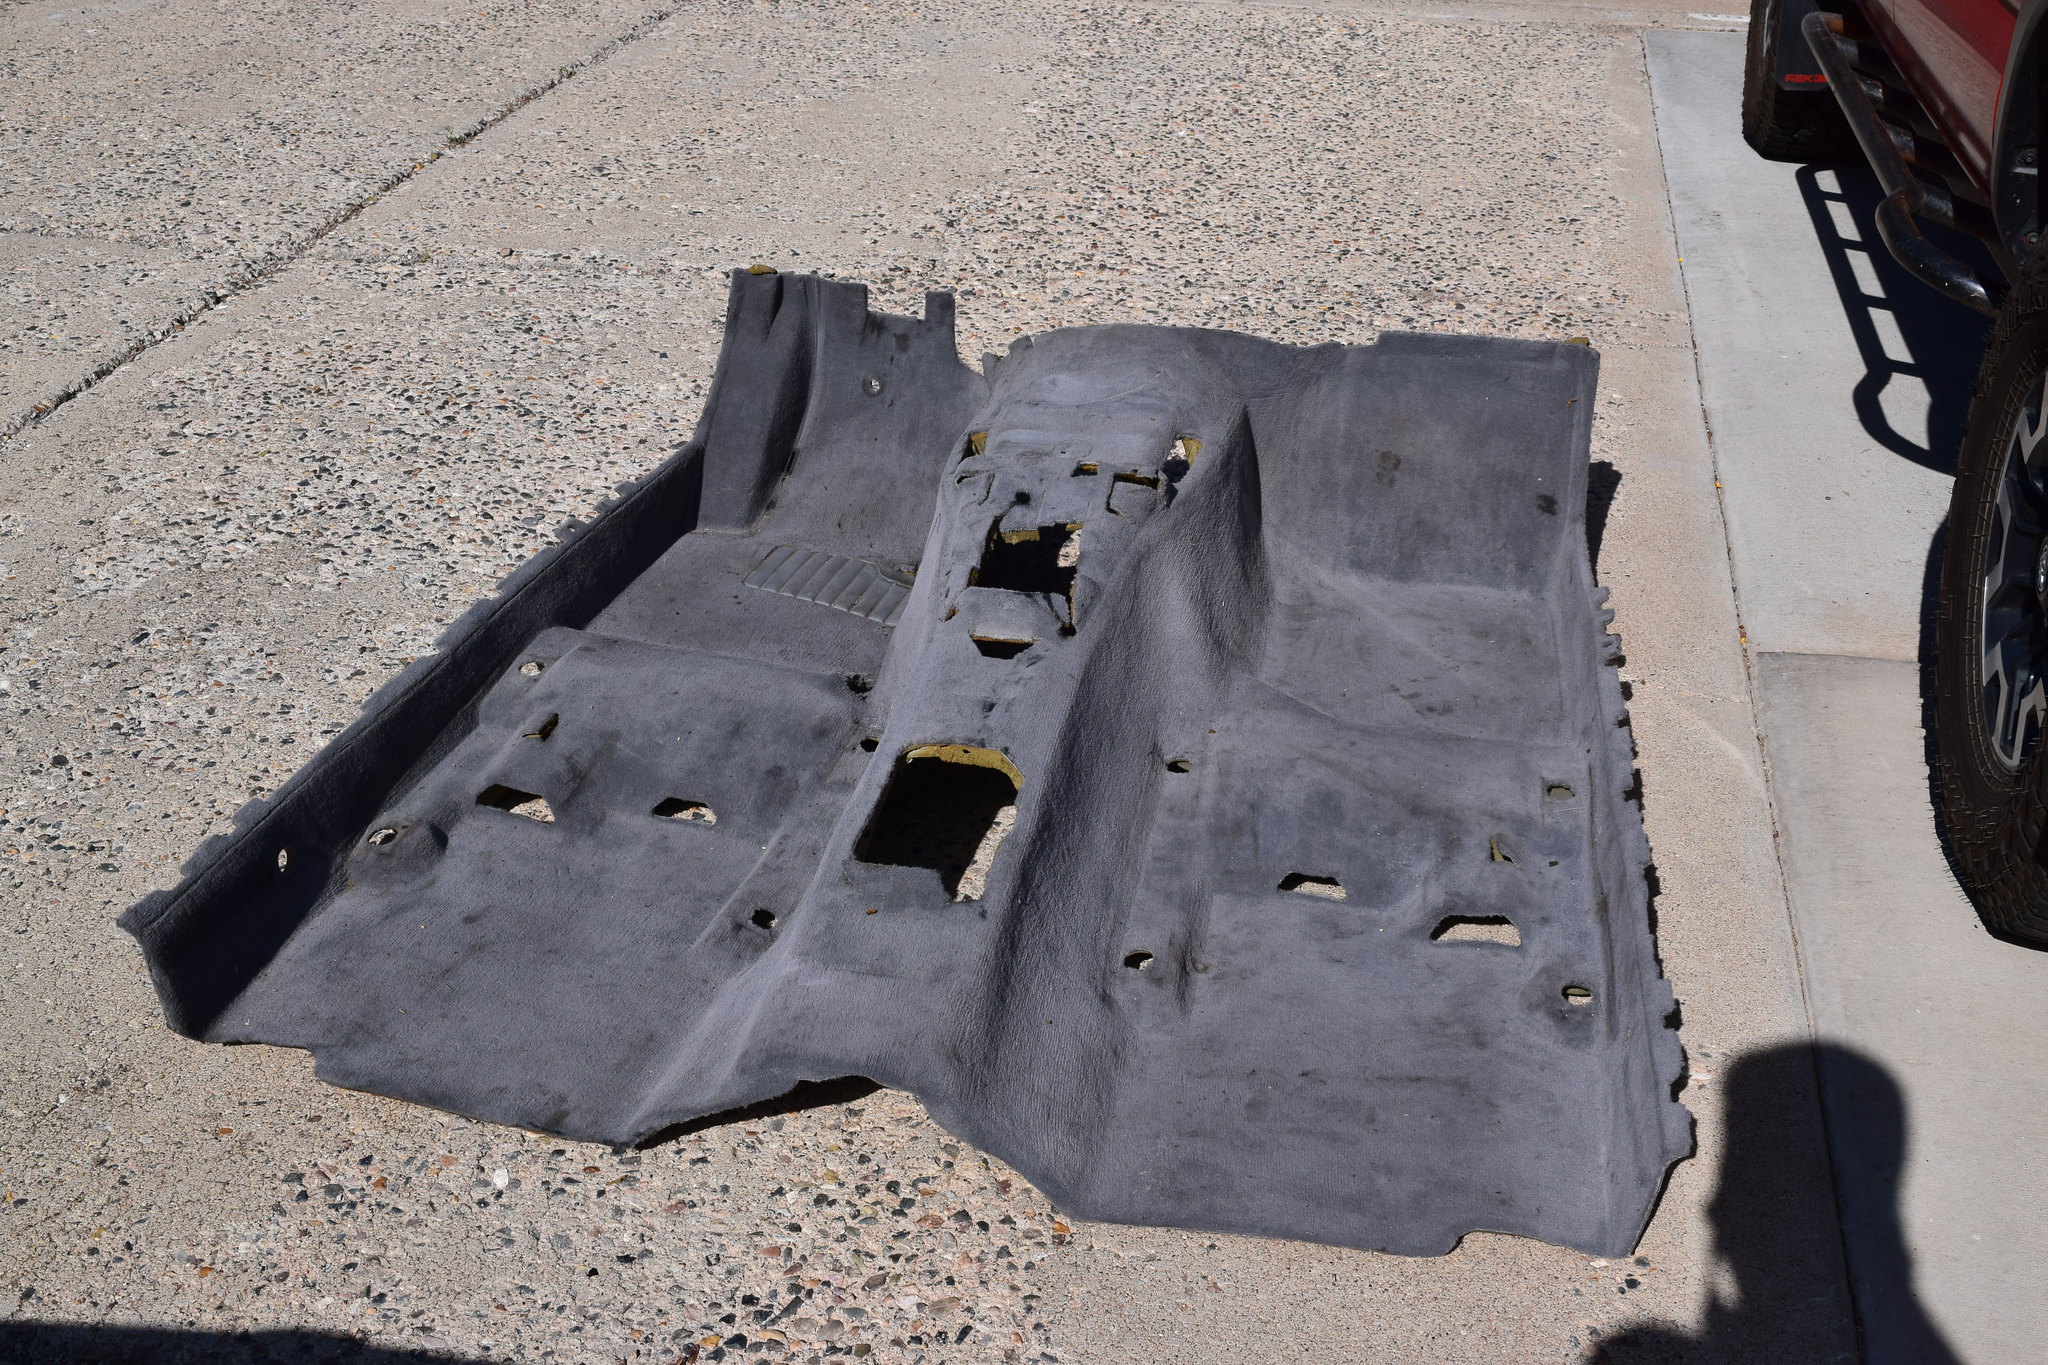
                  After that I pulled the e-brake assembly to facilitate the removal of the carpet. Then out came the carpet in all its dirty glory.

                  14 - Carpet Removed by Michael Rickerd, on Flickr

                  Stashing that aside in case I need it. On the prowl for a black coupe carpet now.

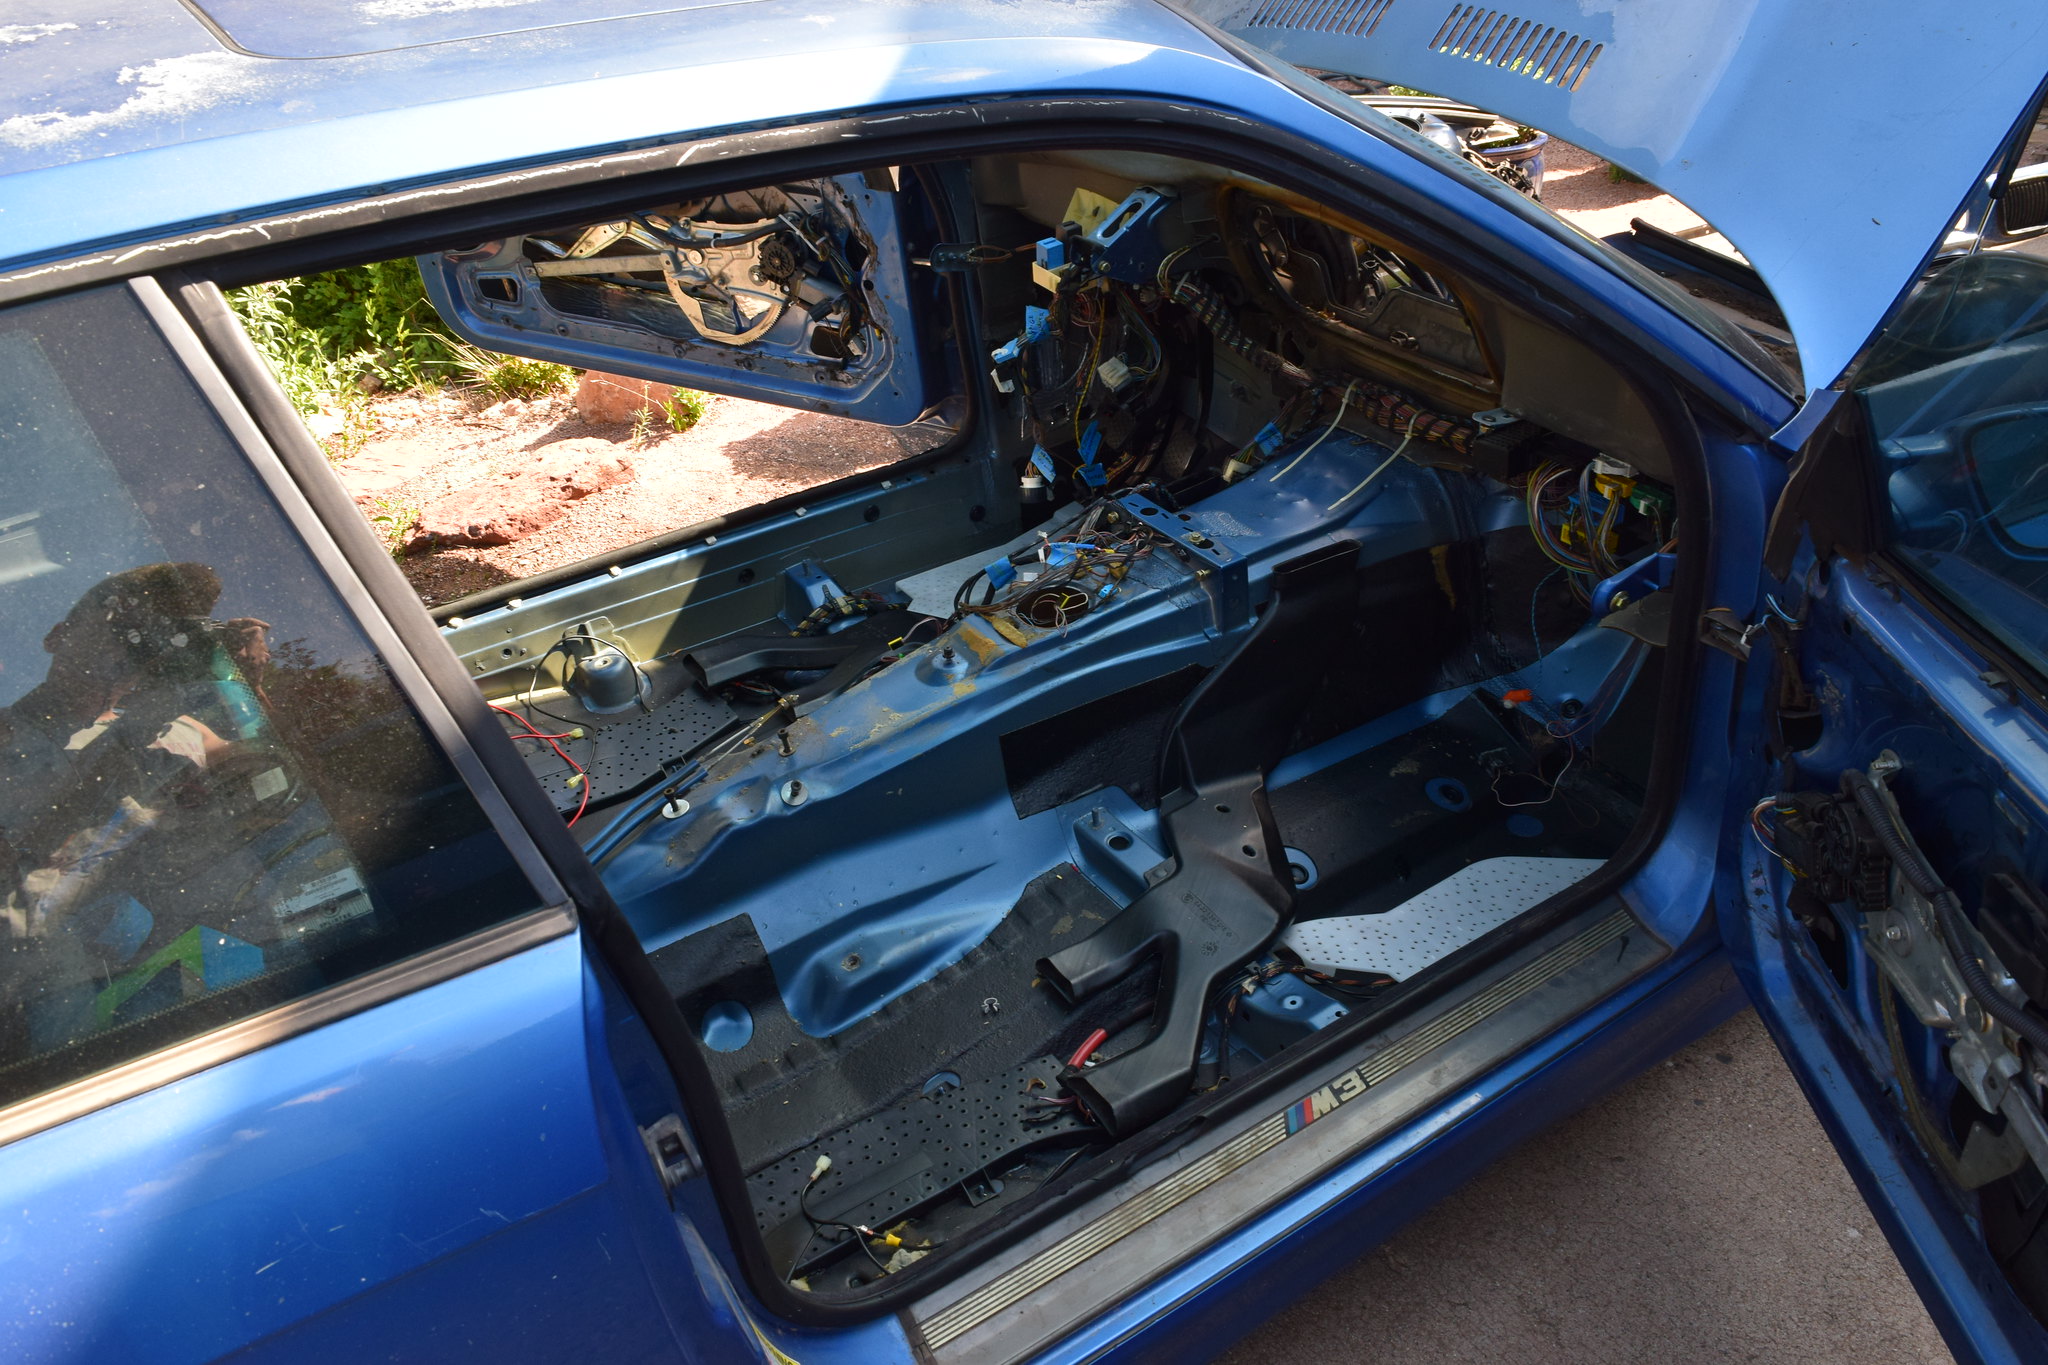
                  After that was removed I was happy to see that the floor pans all looked very very nice. Except for the top of the transmission tunnel. It has numerous bumps in it. Maybe this happened when the S54 was swapped in. Either way I’ll look for a way to rectify this.

                  15 - More Empty Interior by Michael Rickerd, on Flickr

                  16 - Barren Dash by Michael Rickerd, on Flickr

                  The floor had venting and plastic covers covering important wiring. This picture is for my future reference.

                  17 - Drivers Side Interior by Michael Rickerd, on Flickr

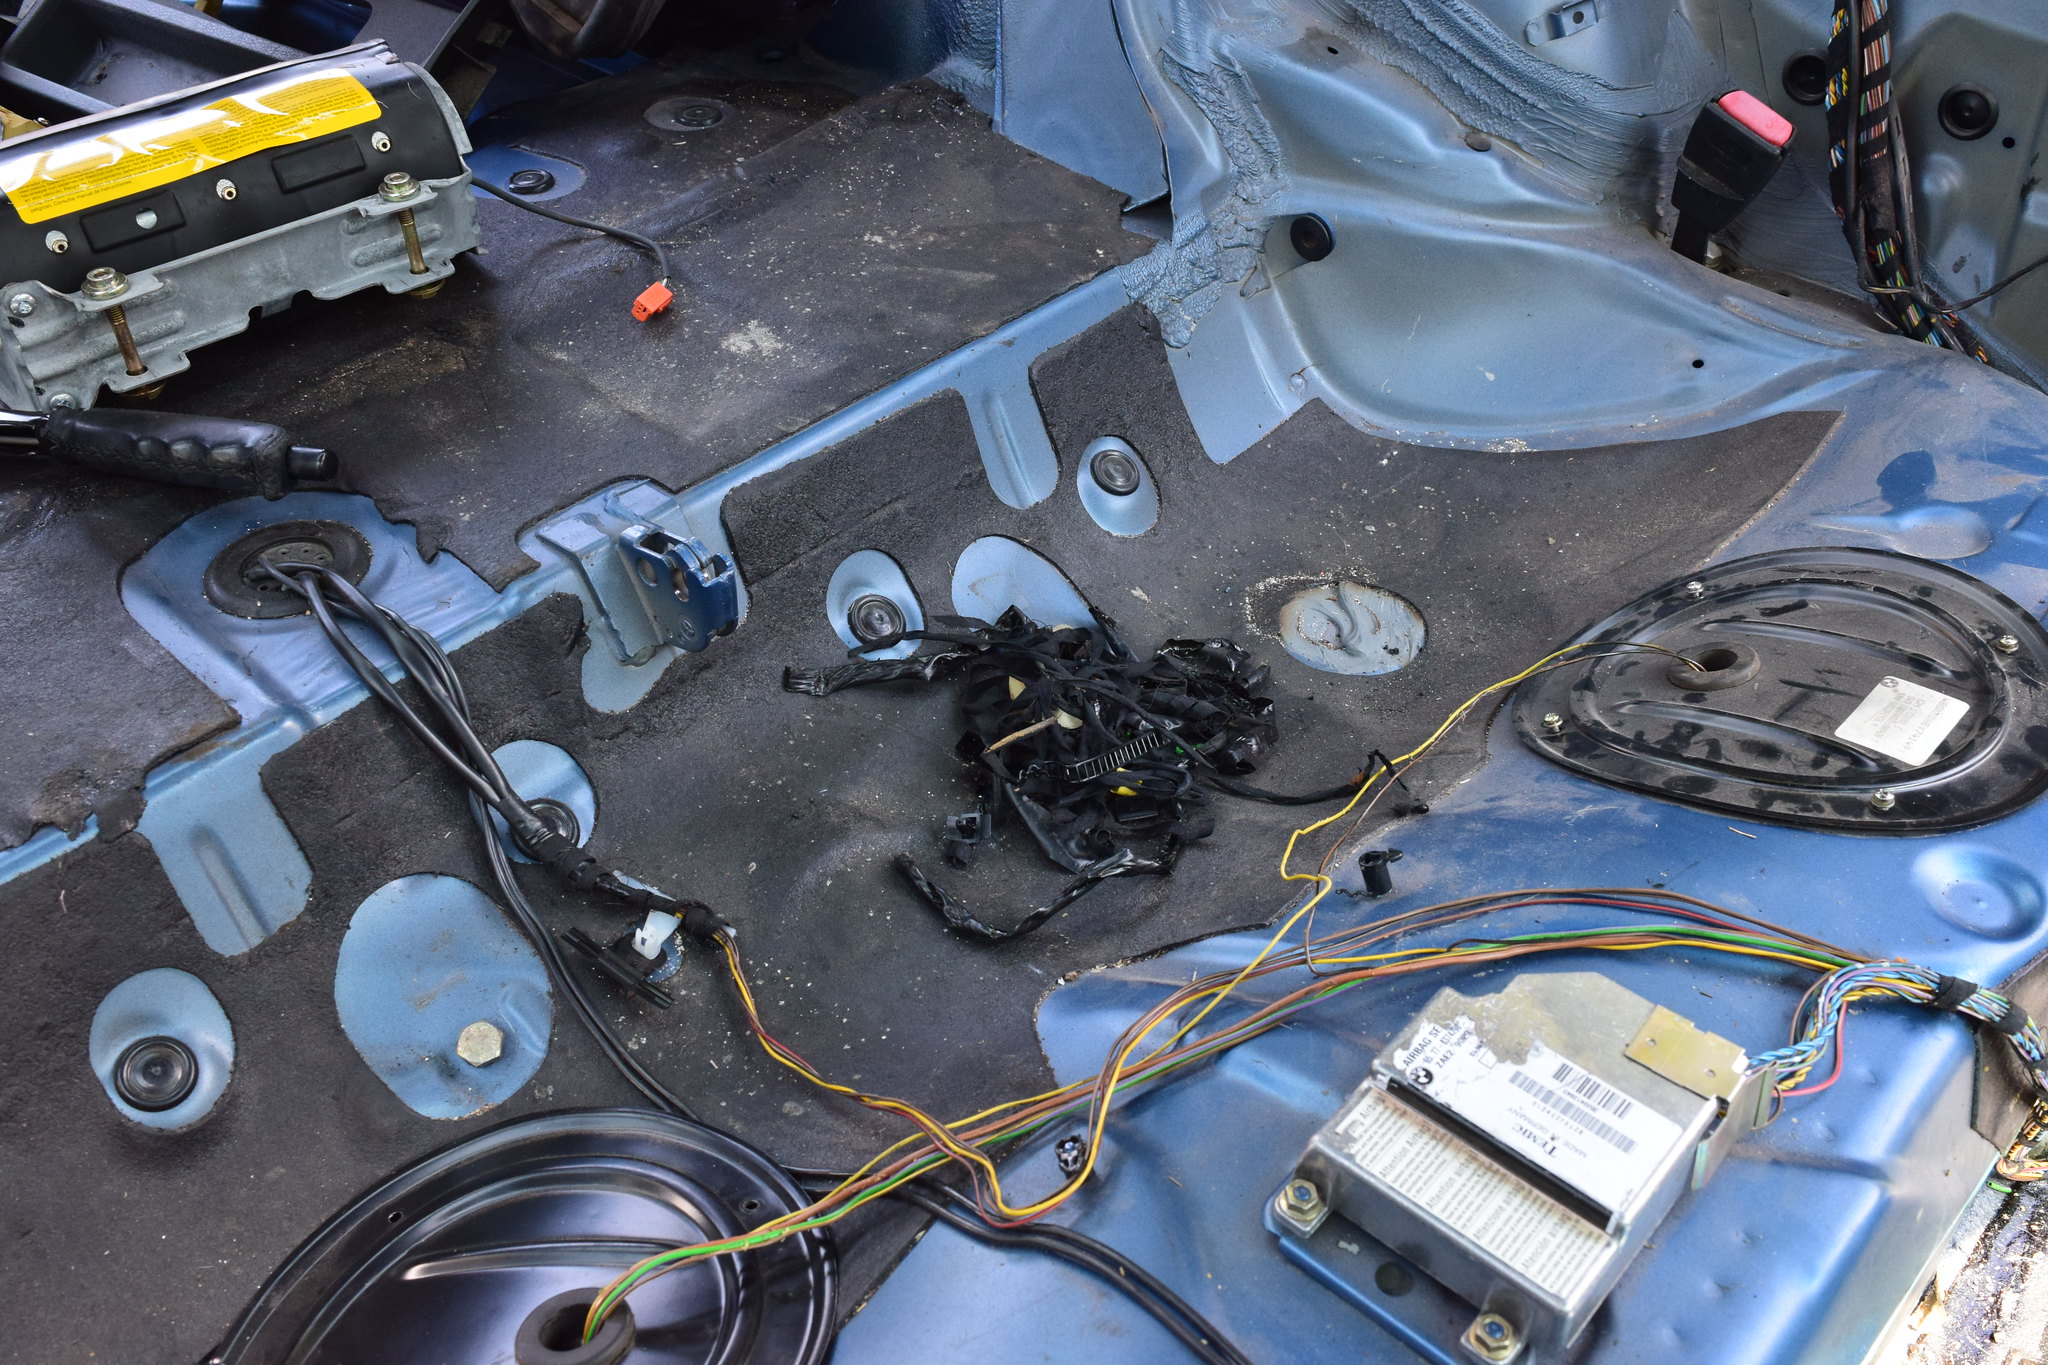
                  With the carpet removed I was able to chase down even more non-factory wiring. One bundle led me to the passenger side fuel pump cover. Underneath I found some janky work. I need to figure out where the brown and green wires are supposed to go and then get them re-wired correctly. I don’t want to have any excess issues getting whatever engine I am going to throw in this thing going, so handling these problems as they come is paramount.

                  18 - Modified Fuel Wiring by Michael Rickerd, on Flickr

                  I also pulled all electrical tape off of any wiring and pulled off all of the failing factory cloth tape. The wiring that is normally accessed more often (under the center console, under the rear seat, etc.) had failing cloth tape, while the rest of the factory tape looks good enough for me. I am researching through Jordan’s fantastic 318is thread to find out what and how he used what he used.

                  19 - Removed Electrical Tape by Michael Rickerd, on Flickr

                  Close up of the dinged transmission tunnel.

                  20 - Damaged Transmission Tunnel by Michael Rickerd, on Flickr

                  This is the ‘frequently’ accessed wiring that will get rewrapped like it was when new.

                  21 - Messy Wiring by Michael Rickerd, on Flickr

                  As an effort to share the level of detail I am currently employing, these are the types of things I do to keep things as they should be. This bundle of wires is zip tied to the passenger side rear floor vent. I know I could be more precise, but this feels very natural to me.

                  22 - Level of Detail by Michael Rickerd, on Flickr

                  After that it was finally time to vacuum the interior once again. A lot of dirt makes it under the driver’s side foot area, so that was nice to clean up. I could tell the backseat had been out for a while, as the rear seat area is much dirtier than the area covered by the carpet. Tomorrow I will steam clean and degrease the front interior before moving on to the trunk area.

                  23 - Revacuumed Stripped Interior by Michael Rickerd, on Flickr

                  I wrapped up the day by heading over to Harbor Freight to purchase an ultrasonic cleaner. Ended up spending 1.5 hours there, going up and down every row filling up a cart, finding all sorts of random tools that I don't necessarily need, but may be super helpful when I am trying to solve a problem, or get access to something, or things like that. Definitely a cool resource to have around.


                  ‘til tomorrow.

                  Approximate Hours Invested in Project Since Purchase: 34
                  Last edited by MR E30 325is; 08-01-2020, 05:32 PM.
                  My previous build (currently E30-less)
                  http://www.r3vlimited.com/board/showthread.php?t=170390

                  A 2016 Toyota Tacoma TRD 4x4 Offroad in Inferno is my newest obsession

                  Comment


                    #24
                    Originally posted by Javier h View Post
                    Agh. Something like this I would walk away....primarily because its way beyond the scope of my skills/budget but I am totally digging it. As long as it has a clean title, that color and potential engine swap has the makings of something epic. Tuning in. Sorry to hear about your dad.
                    I can definitely understand that. Thankfully a project of this magnitude is within my current scope of abilities.

                    The title is peachy clean.

                    Thank you Javier.
                    My previous build (currently E30-less)
                    http://www.r3vlimited.com/board/showthread.php?t=170390

                    A 2016 Toyota Tacoma TRD 4x4 Offroad in Inferno is my newest obsession

                    Comment


                      #25
                      August 4th, 2020

                      On the second of August I spent the morning out at a local do-it-yourself junkyard Northeast of town. I normally do a morning mountain bike ride with a group of guys, but we all got invited to do a road bike ride instead, which isn’t my style, so it was a good time to get dirty in a junkyard.

                      The yard had (3) E36’s in it. None of them were Estoril (not surprising), none of them were coupes (a bit surprising), none were manual (surprising), and (2) were 318’s while (1) was a 325i.

                      Junkyard E36’s by Michael Rickerd, on Flickr

                      Junkyard E36’s by Michael Rickerd, on Flickr

                      My hunt started off rather simply, but then quickly spiraled out of control when I saw the condition of the Calypso E36 pictured above. It had an interior that was in incredible shape. Like it had been garage stored its entire existence. And everything in the trunk, of which my M3 has absolutely nothing, was in pristine condition.

                      So, I began squirrelling away nuts, bolts, clips, etc. that I definitely did not have in my M3 or that I might need somewhere else. I pulled all sorts of plastic covers and the ‘carpeted’ trunk panels to put into the M. I found the OEM piece of sound deadening for beneath the back seat, a piece that isn’t glued down, and snagged that as well. None of the E36’s were coupes, but one had black carpet, so I grabbed the rear portion of the carpet to see if it transferred over to a coupe, but it is slightly different, so I wasted 3 dollars on that piece, but oh well.

                      I met a buddy there and helped him pull a Camaro front clip for potential use on his turbo V8 Vette kart build.

                      After that it was finally time to grab what I had originally came for. An e-brake handle that still has the ratcheting mechanism installed, so I don’t have to chock the tires anymore (once I am ready to reinstall interior components that is, still need to steam clean interior). This was an easy find, and I grabbed the actual mounting hardware that BMW used, not some Allen headed bolts one of the PO’s installed.

                      Next was a steering rack so that the two front wheels are tied together so that moving the car around is less of a hassle. I will be getting (or potentially doing myself) a refurbished steering rack to install in the car, but I don’t think I will get to that point before I trailer the car somewhere else for the winter. Thankfully one of the E36’s had the engine pulled, and one of the tie-rods already disconnected, so getting the rack out was a 5-minute affair. I also grabbed the two bolts that hold the steering knuckle to the column and the rack, as my M3 did not come with either of those two.

                      With my rolling cart overflowing with parts I went to the check out and paid a tidy 89 dollars for my loot.

                      I didn’t spend much time doing actual work on the car the rest of Sunday, or Monday, as one of my rentals needed some love and attention, but I did start diving deep into engine choices. Just like picking a car out of the myriad choices (I was contemplating all sorts of cars before finding this M, such as E24’s, 300zx, 280z, etc.), the choices for engines is widespread as well.

                      I still need to do a bit more searching before asking for your guys’ input though, but that proposal will be coming soon.

                      However, I would like some input about something else.

                      I want to keep the inside of this car fairly quiet, so I was originally thinking Dynamat as I used this on my old Tundra and liked the result. However, after some deeper research, it turns out it may not be the best route to take.

                      My desires are two-fold:

                      First, to keep transmission tunnel temps as low as possible. My old E30 would get boiling after a long-ish drive and my right leg would not enjoy it. I will be doing most all of my FLG to PHX travel in this car once it is done, so this is something I am keeping in mind. I will be doing a heat shield inside the trans tunnel to help as well but would like to overdo this part to make driving more enjoyable.

                      Second, as previously mentioned, I want to quiet the interior a bit over factory, without going overkill and covering every square inch of the interior. The doors already have Noico in them, and they feel and sound very solid, which I like.

                      Does anyone have any good references to help solve either of those two desires?

                      TIA.

                      Approximate Hours Invested in Project Since Purchase: 42
                      My previous build (currently E30-less)
                      http://www.r3vlimited.com/board/showthread.php?t=170390

                      A 2016 Toyota Tacoma TRD 4x4 Offroad in Inferno is my newest obsession

                      Comment


                        #26
                        I searched through Jordan's recent build thread and found that he went with Tesa Fabric Loom Tape to recover his harness. Amazon sells it for $6.71 for 25m. I ordered two as I am not redoing my entire harness. He installed it by covering every bit of wire, not leaving a tape width gap between wraps like the car came with. I will also use this methodology to keep everything nice and tidy.
                        My previous build (currently E30-less)
                        http://www.r3vlimited.com/board/showthread.php?t=170390

                        A 2016 Toyota Tacoma TRD 4x4 Offroad in Inferno is my newest obsession

                        Comment


                          #27
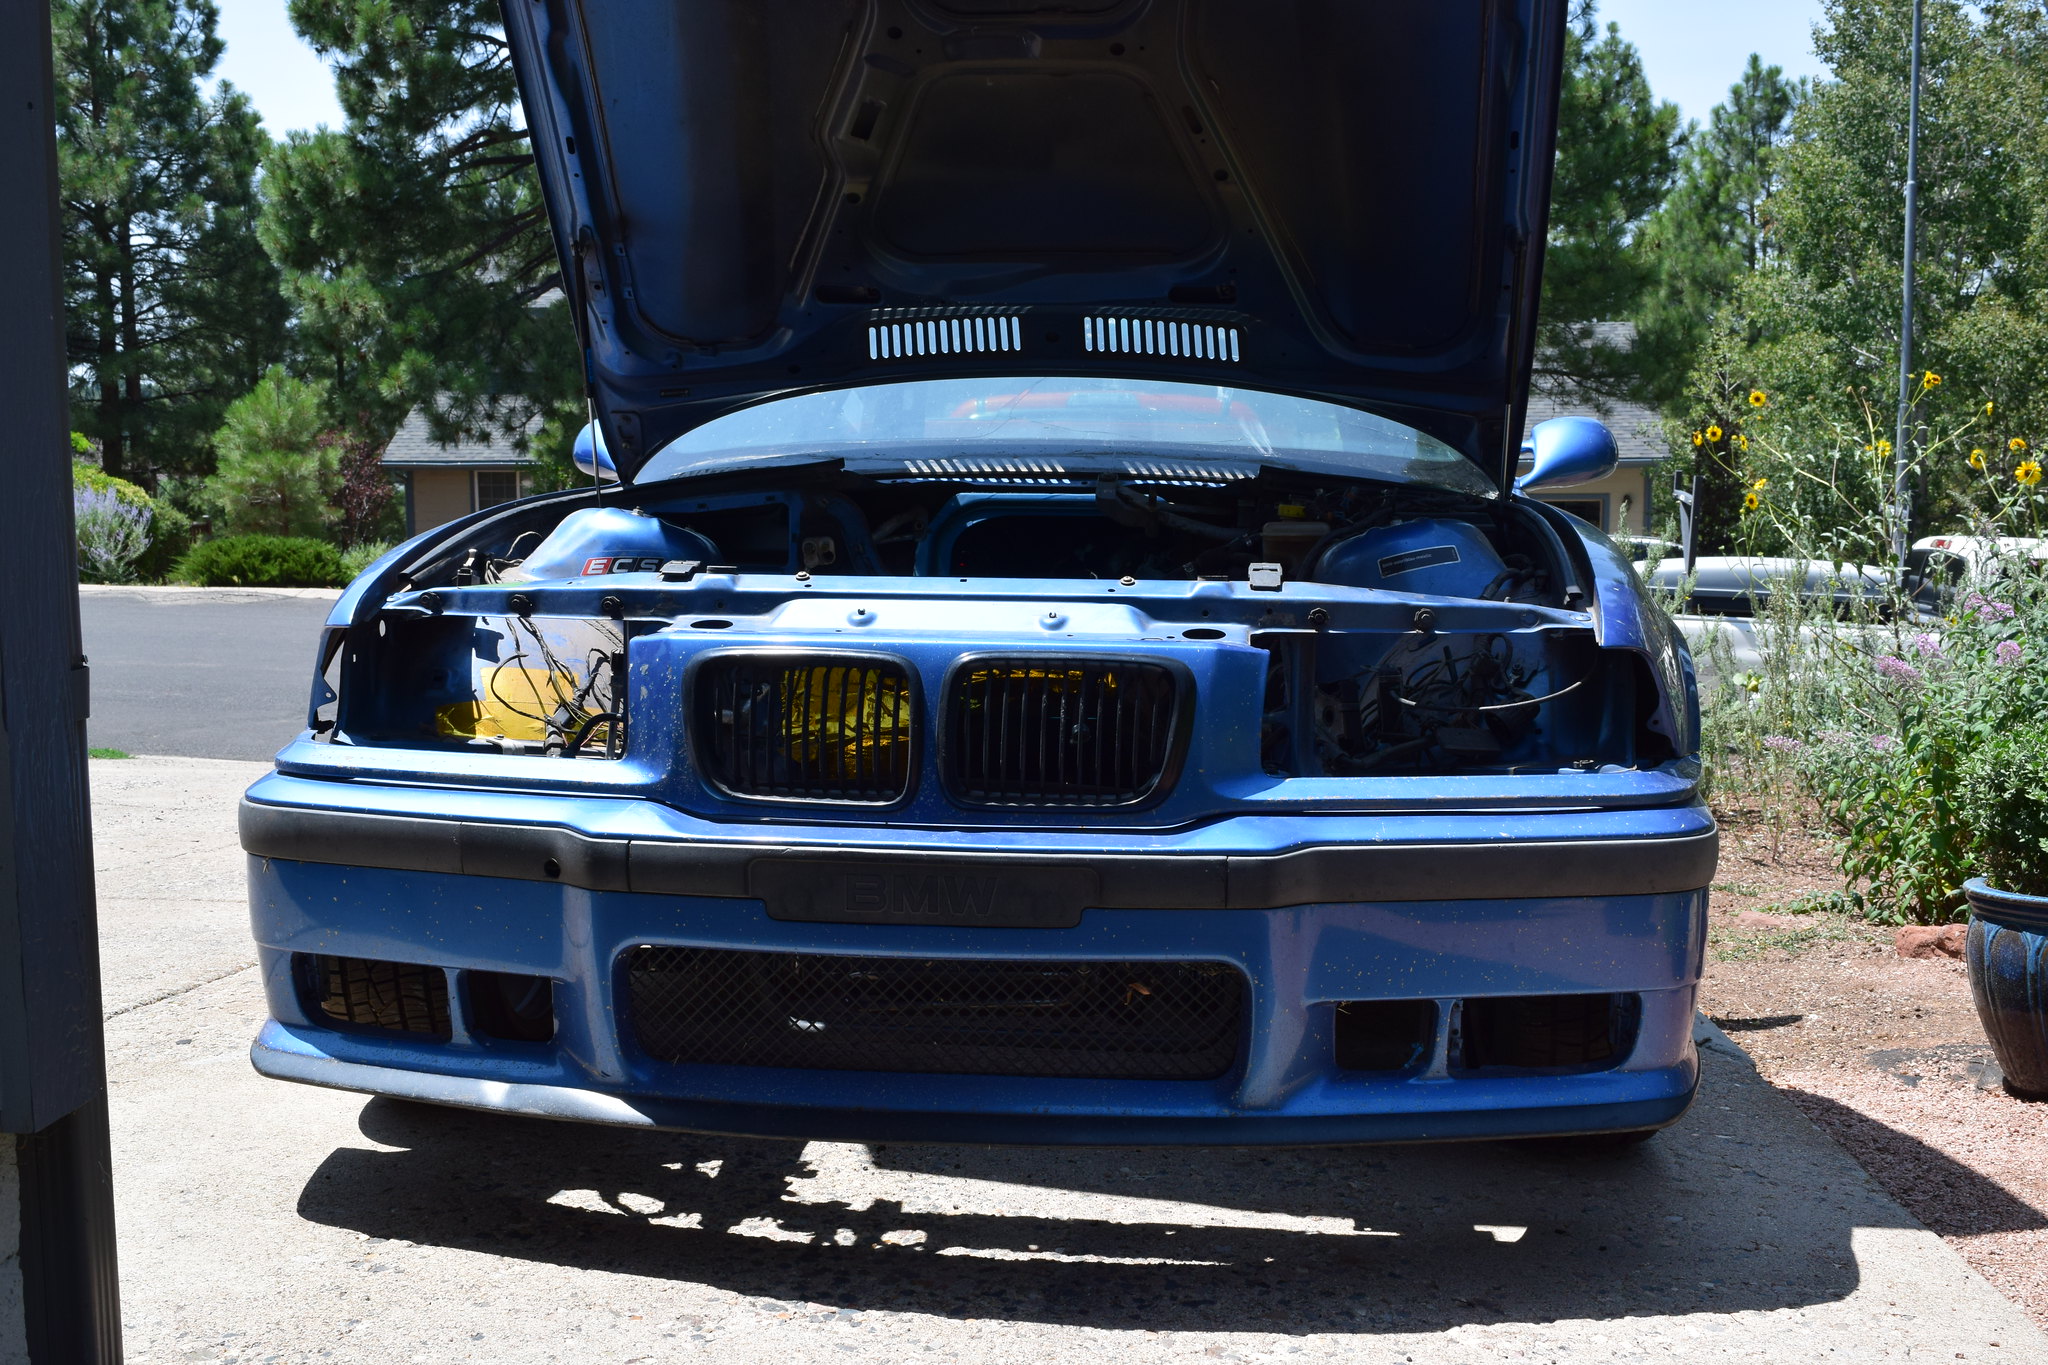
                          Spent a little time during lunch getting the temporary steering rack installed as well as the front clip bolted back up.

                          The front clip is back on, and it looks straight and true (albeit the paint is destroyed), except for the drivers side edge near the wheel. I think the metal corner of the piece that supports the kidney grills got slightly rotated and bent sometime while the front end was disassembled. Also, the plastic clip at the end on the drivers side that holds the bumper edge needs to be adjusted outwards slightly. I took the time to reinstall these just so I didn't have to keep moving them around, as my garage is still my gym.

                          01 - Front Bumper Reinstalled by Michael Rickerd, on Flickr

                          The steering rack went in to make the car easier to move around. The car had outer tie rods, but that was it. Pulling the outer tie rods off of the junkyard rack was a pain as they were rusted on, but it was done. It's dirty, but it serves it's purpose for now.

                          02 - Temporary Steering Rack by Michael Rickerd, on Flickr

                          Hopefully I'll have some time tomorrow to get back on the interior cleaning, though I need to research how to best remove these dings from the transmission tunnel to smooth that metal out again. Never done any metal work before, so I'll search YouTube for the good stuff.

                          'til next time.

                          Approximate Hours Invested in Project Since Purchase: 44
                          My previous build (currently E30-less)
                          http://www.r3vlimited.com/board/showthread.php?t=170390

                          A 2016 Toyota Tacoma TRD 4x4 Offroad in Inferno is my newest obsession

                          Comment


                            #28
                            Hammer and dolly is probably what you need to get the dents out.

                            Comment


                              #29
                              Originally posted by rturbo 930 View Post
                              Hammer and dolly is probably what you need to get the dents out.
                              I agree. Watching YouTube now and I'll pick up a set this afternoon or tomorrow and give it a go.
                              My previous build (currently E30-less)
                              http://www.r3vlimited.com/board/showthread.php?t=170390

                              A 2016 Toyota Tacoma TRD 4x4 Offroad in Inferno is my newest obsession

                              Comment


                                #30
                                August 5th, 2020

                                Alright, logged some more time with the M3 today, though no pictures worthy of uploading this time around.

                                Started out by scrubbing the interior in front of the back seat to the firewall. Had to pound down (2) bumps in the floor pan, behind the drivers and passenger seats due to some previous damage. Used a 3 lb sledge and a piece of 2x cut to size. The scrubbing paid off, as lots of stuck in dirt and grime was wiped away. Anything more stubborn got a dose of Goof Off from a huge jug of the stuff.

                                I reinstalled the (4) floor wiring covers, and the (2) backseat floor heat vents. I need to order one clip to secure the drivers side floor vent. I'll vacuum out the bare floor one more time just before I put the carpet back in, but for now it is good.

                                I went over to a buddies at lunch to help him pull the windshield out of his Vette kart after his Level 2 DMV inspection this morning. I should have snapped a picture but the build will be awesome.

                                He happened to have a hammer and dolly set from HF that someone had gifted him that he had never used. Like all good friends he lent it to me to use on my transmission tunnel and wherever else I may need to straighten sheet metal.

                                Straightening the transmission tunnel was pretty straightforward. Put the universal dolly inside the transmission tunnel via your left hand through the shifter hole. Use the hammer in your right hand to lightly pound the pointy dents flat, using the 'on dolly' method.

                                Took ~10 minutes and it looks 95% better, which is good enough for me.

                                I wrapped up the day by cleaning each individual wire in any bundle of wires that people 'normally' mess with (gauge wiring, all the wiring down the center console, wiring under the back seat, etc.) and any other wiring that had clearly failing cloth tape. This was oddly therapeutic, carefully wiping each wire inch by inch. Almost makes you forget that the rest of the car needs some serious attention!

                                My Tesa cloth tape arrives tomorrow, so before it gets here I will fix several wiring issues due to aftermarket splices or wire taps that left behind exposed wiring. If that all gets done I'll pull out the parcel shelf and start cleaning the back seat area.

                                Approximate Hours Invested in Project Since Purchase: 51
                                My previous build (currently E30-less)
                                http://www.r3vlimited.com/board/showthread.php?t=170390

                                A 2016 Toyota Tacoma TRD 4x4 Offroad in Inferno is my newest obsession

                                Comment

                                Working...
                                X