
Yeah that would be awesome to find one like that. After seeing this one, I have two center VC cut open that I'd like to try and modify with a removable end. I have an idea of how to do it but we'll see if it works out. It'd be cool to "easily" test out different viscosity levels for the silicon fluid.
-
Your signature picture has been removed since it contained the Photobucket "upgrade your account" image.
Build Thread
Rear Diff Rebuild
Rebuildable Viscous Coupling
Transfer Case Rebuild
"Life is simpler with 12 valves" -
I finished the diff rebuild write up on the previous page, let me know if I F'd something up or need to clarify anything. :DYour signature picture has been removed since it contained the Photobucket "upgrade your account" image.
Build Thread
Rear Diff Rebuild
Rebuildable Viscous Coupling
Transfer Case Rebuild
"Life is simpler with 12 valves"Comment
-
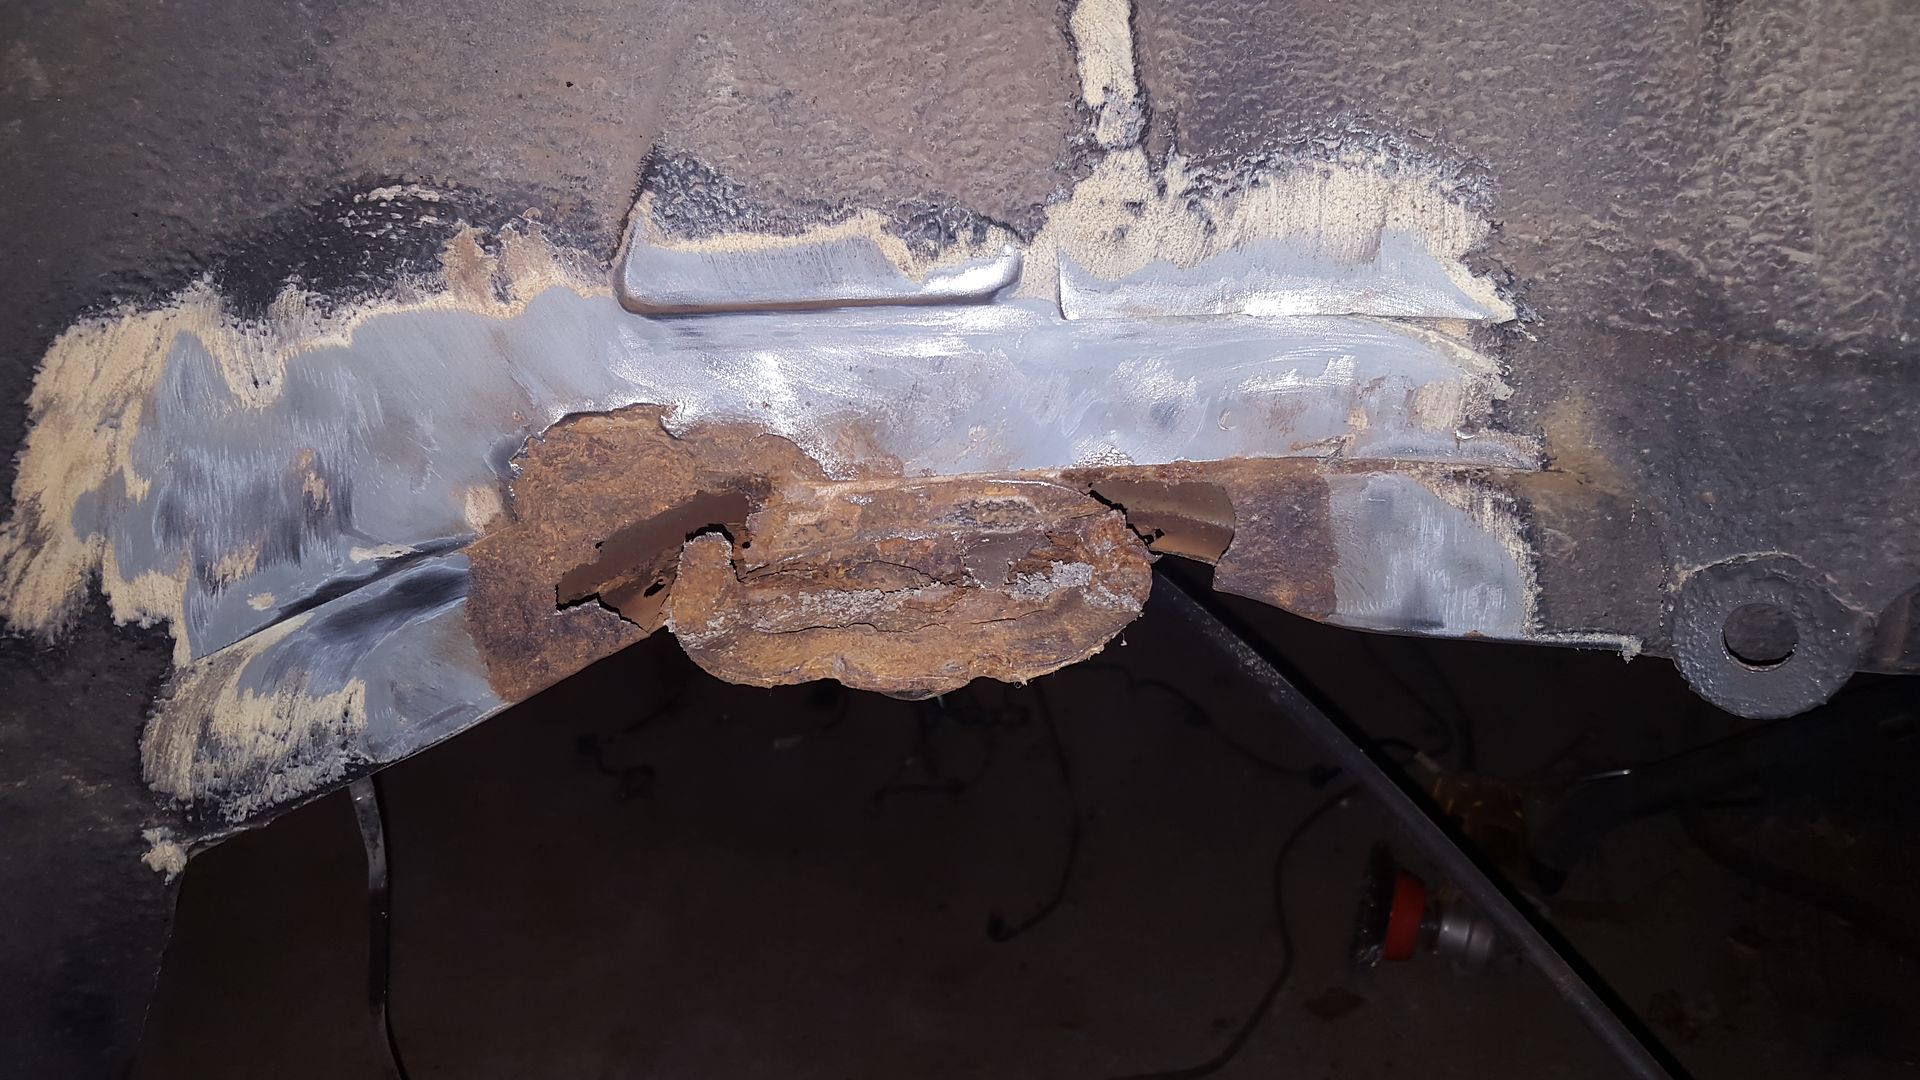
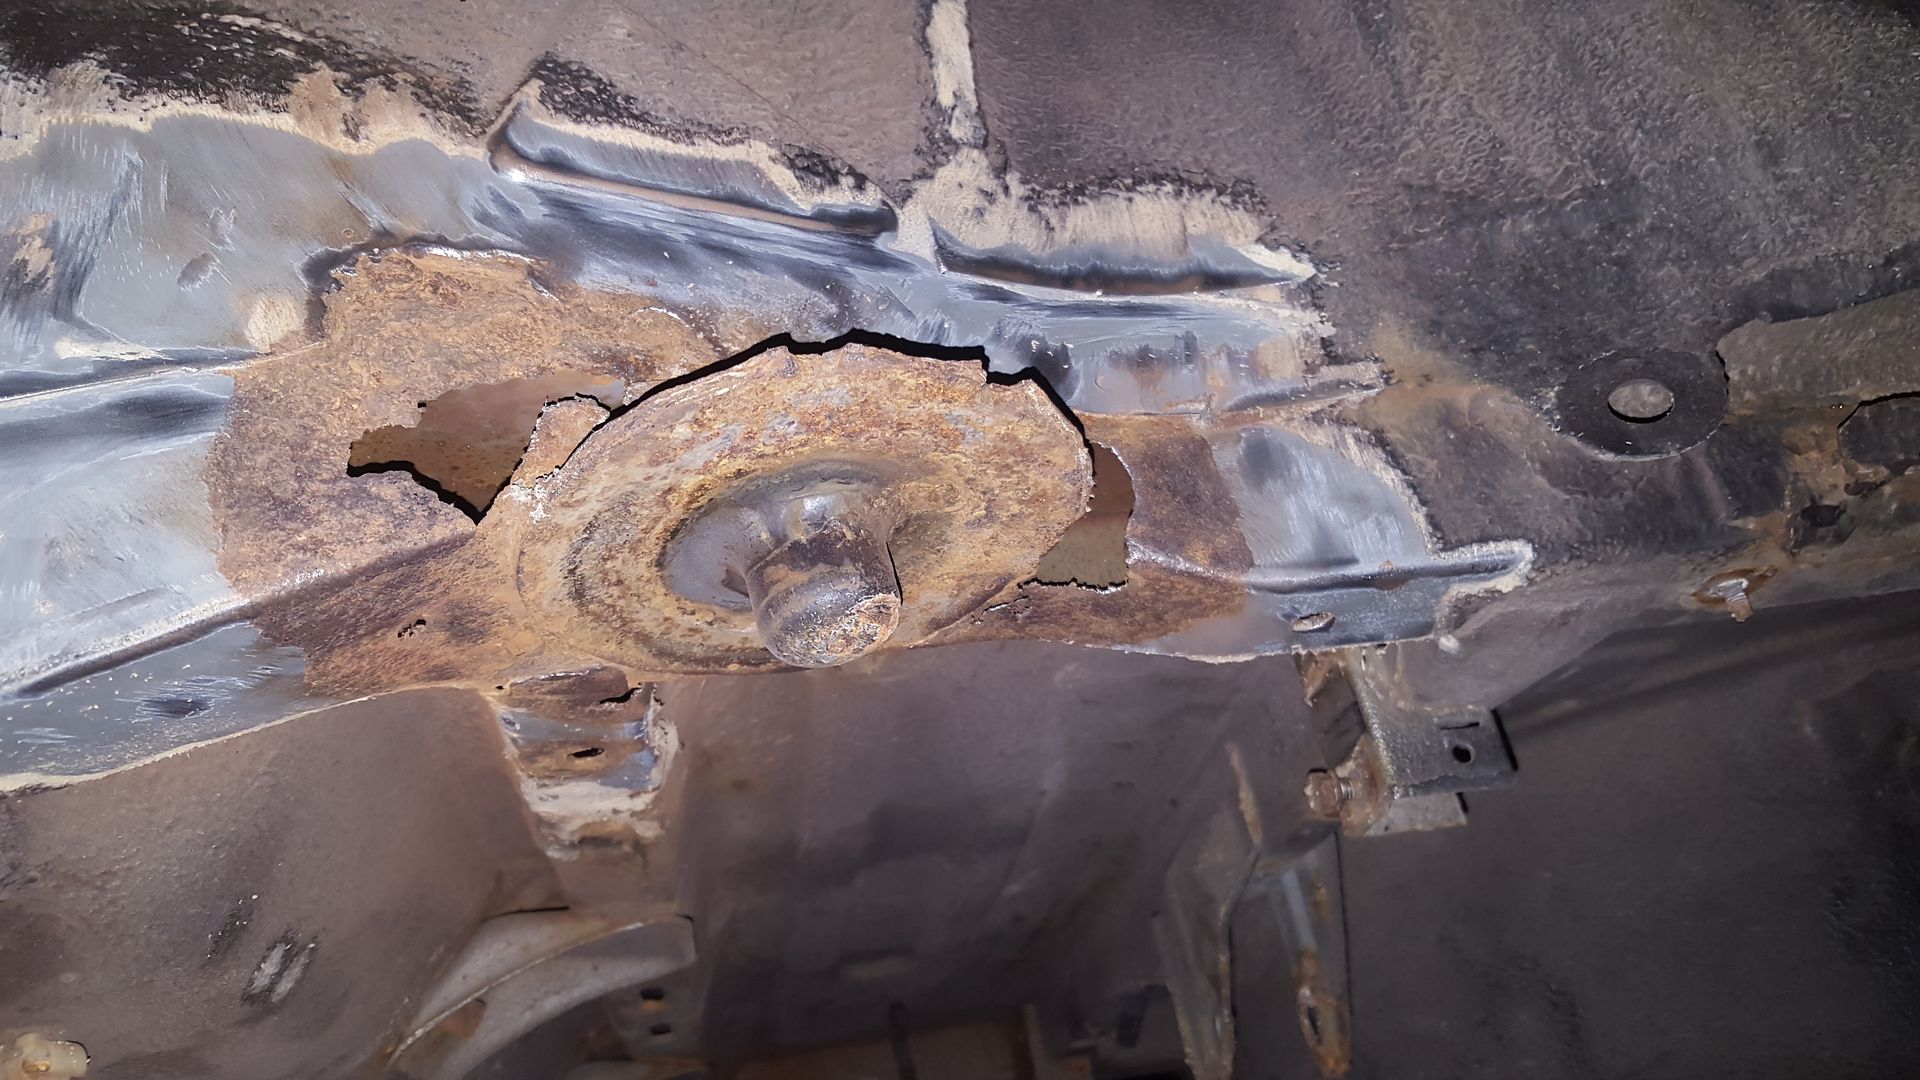
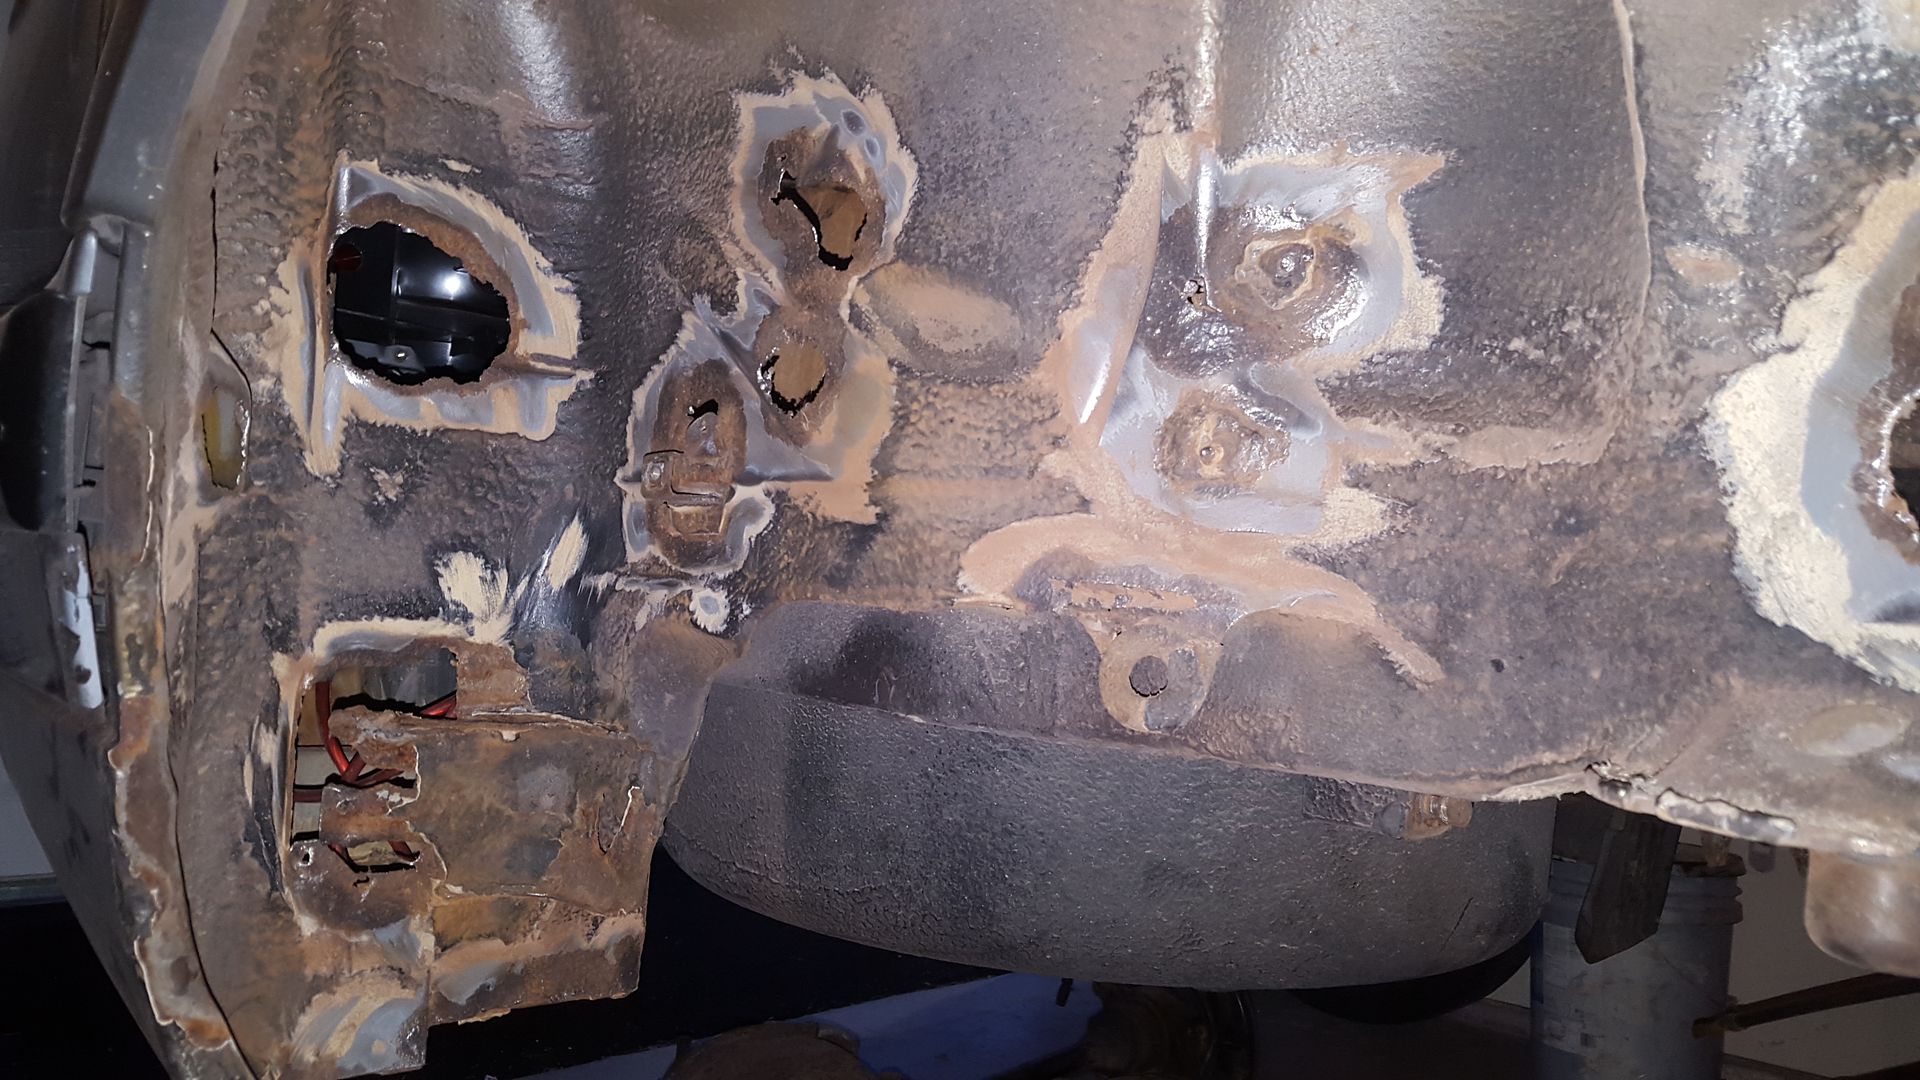
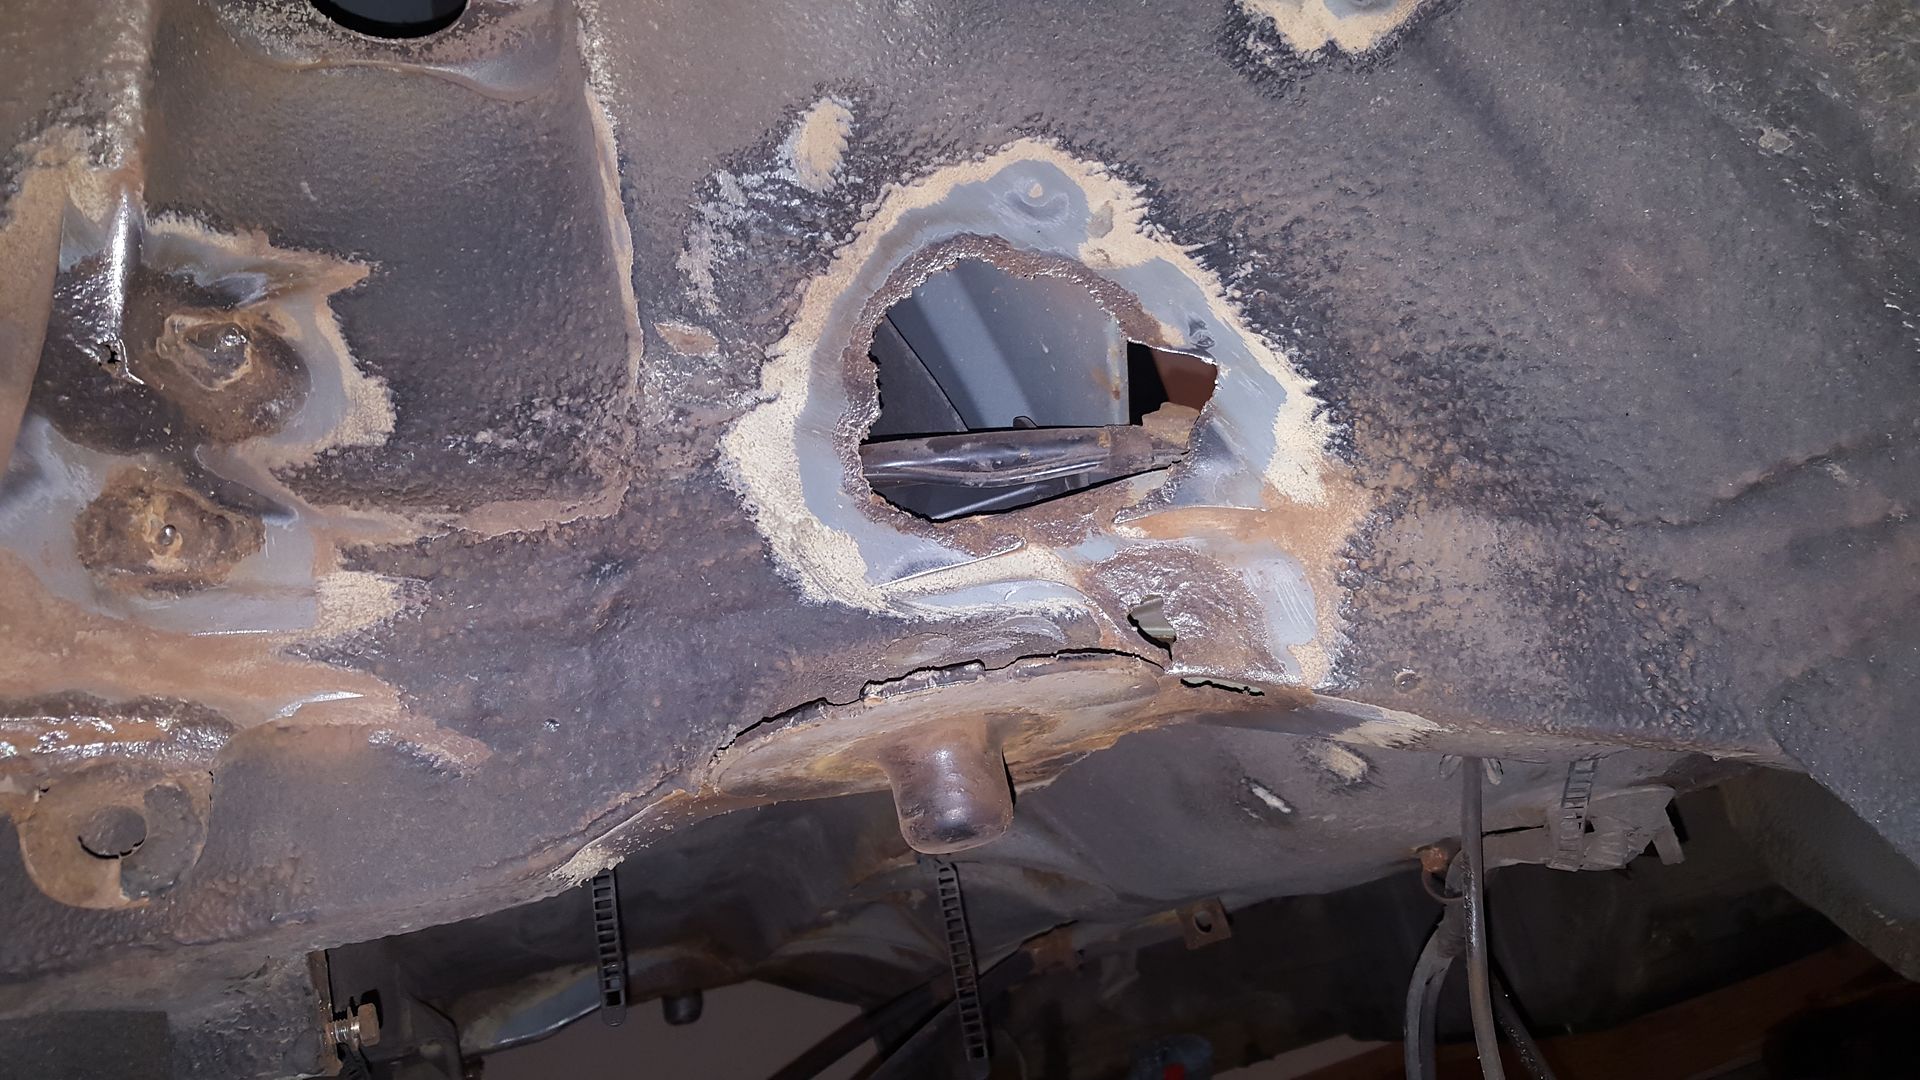
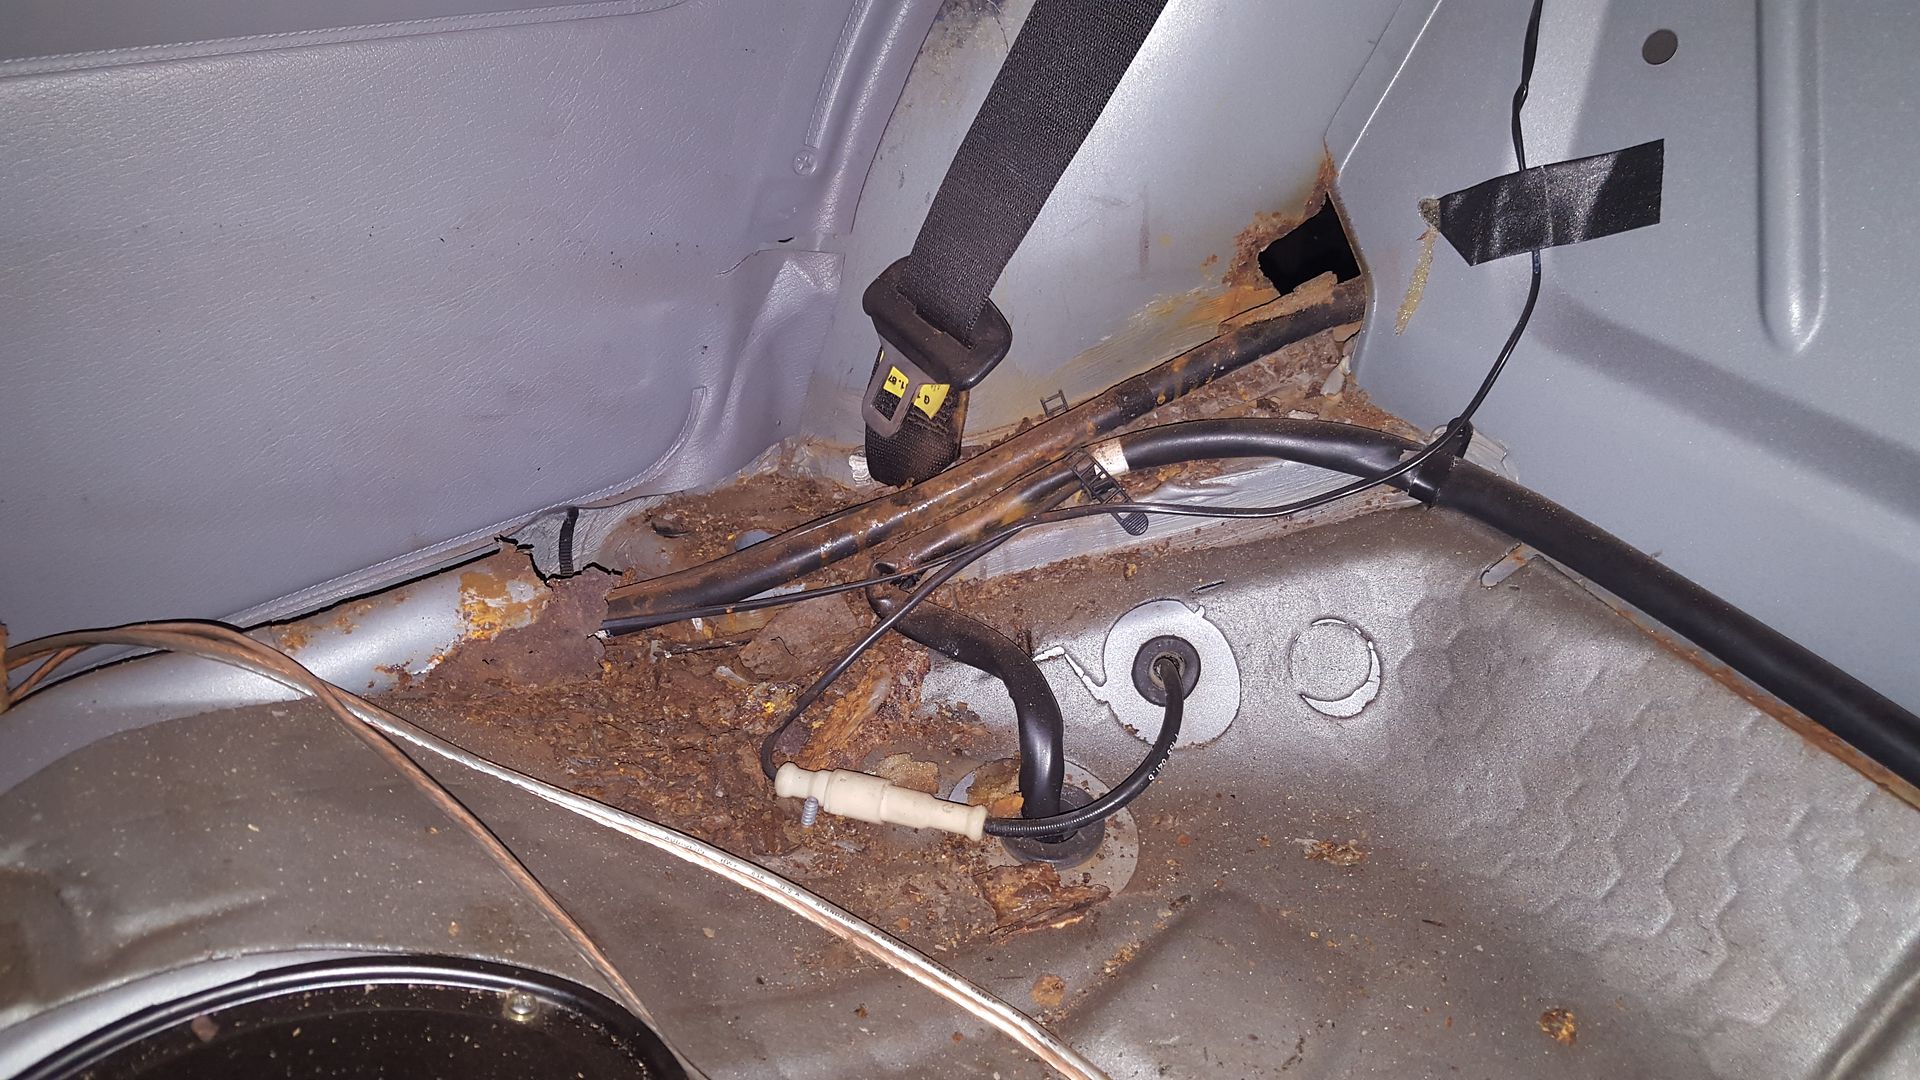
I'm in the process of stripping off the undercoating in the "problem areas". I always knew my car had some rust on the underbody but this is kind of shocking. I'm honestly surprised the drivers side spring perch didn't just collapse. If anyone has any rust free patch panels... I'm in the market :/ I don't want to live in the midwest anymore... #justixthings
 Your signature picture has been removed since it contained the Photobucket "upgrade your account" image.
Build Thread
Rear Diff Rebuild
Rebuildable Viscous Coupling
Transfer Case Rebuild
"Life is simpler with 12 valves"Comment
-
Little up date on things, I bought a parts car from NM to cut out all the rust patch panels I need. Also bought some new body panels and some rims, kind of keeping things under wraps for now, hehe.Your signature picture has been removed since it contained the Photobucket "upgrade your account" image.
Build Thread
Rear Diff Rebuild
Rebuildable Viscous Coupling
Transfer Case Rebuild
"Life is simpler with 12 valves"Comment
-
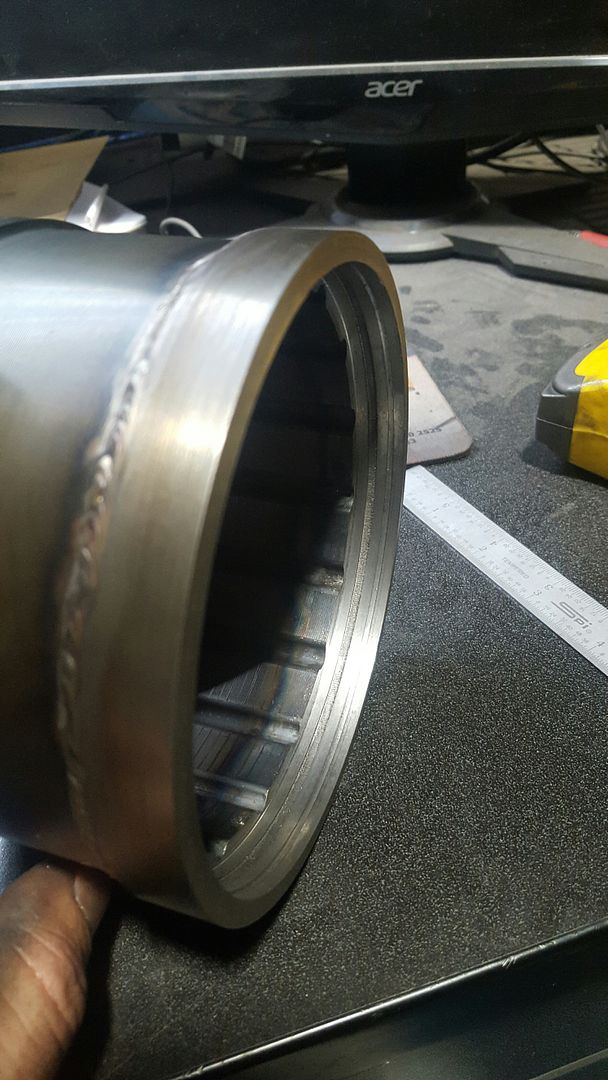
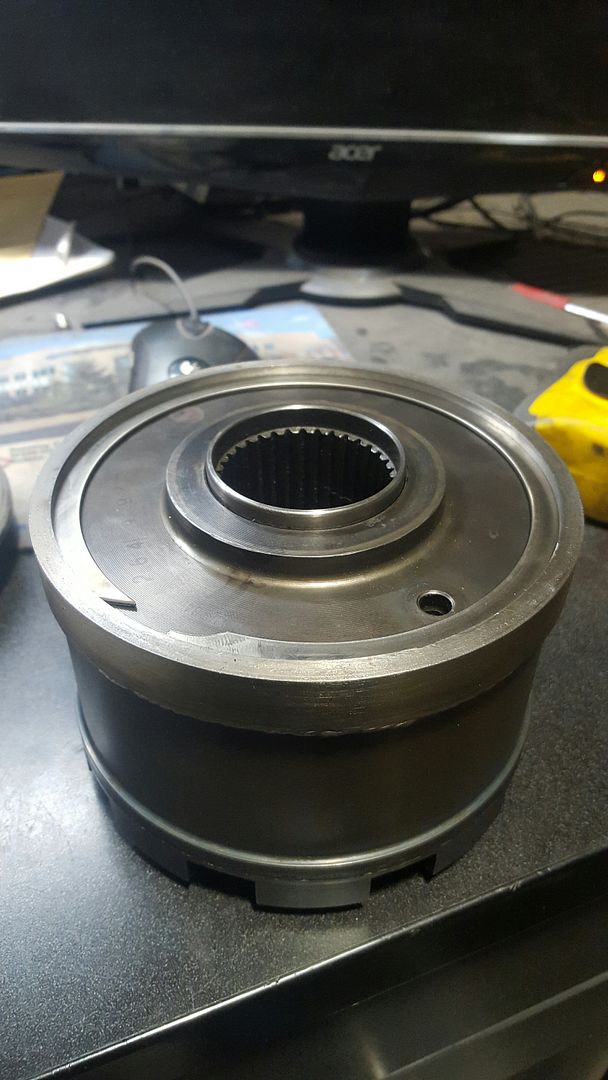
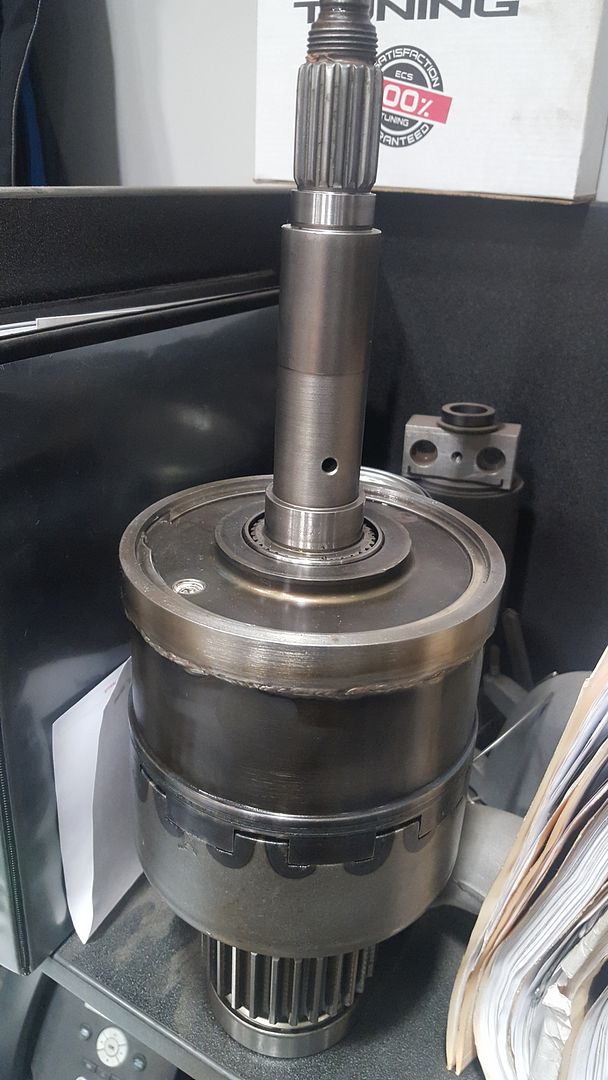
Finished up another little side project. A rebuildable viscous coupling. First started with cutting a burnt out one open on a lathe.
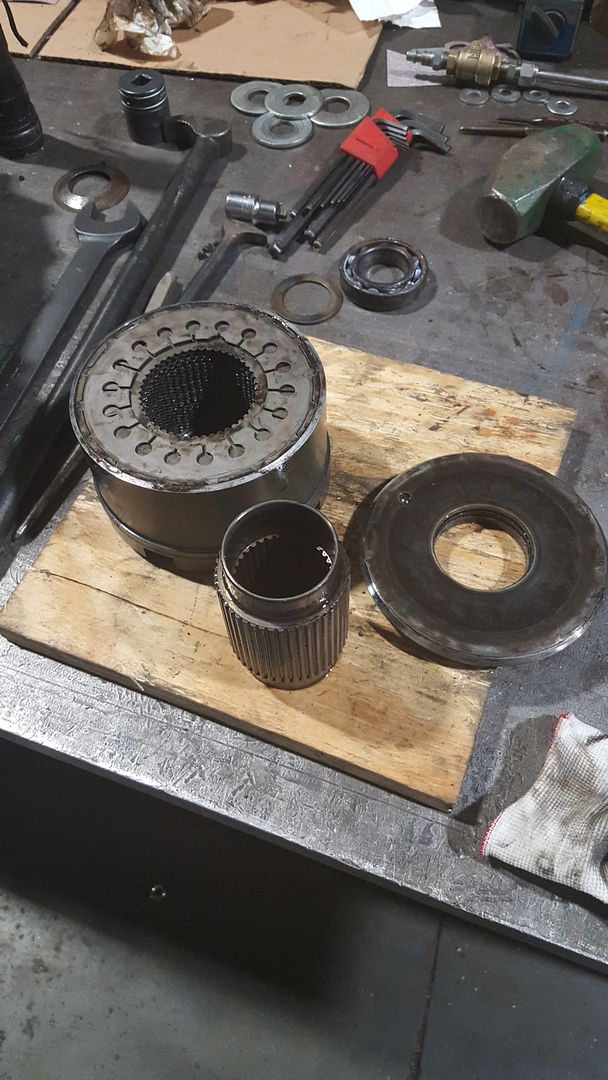
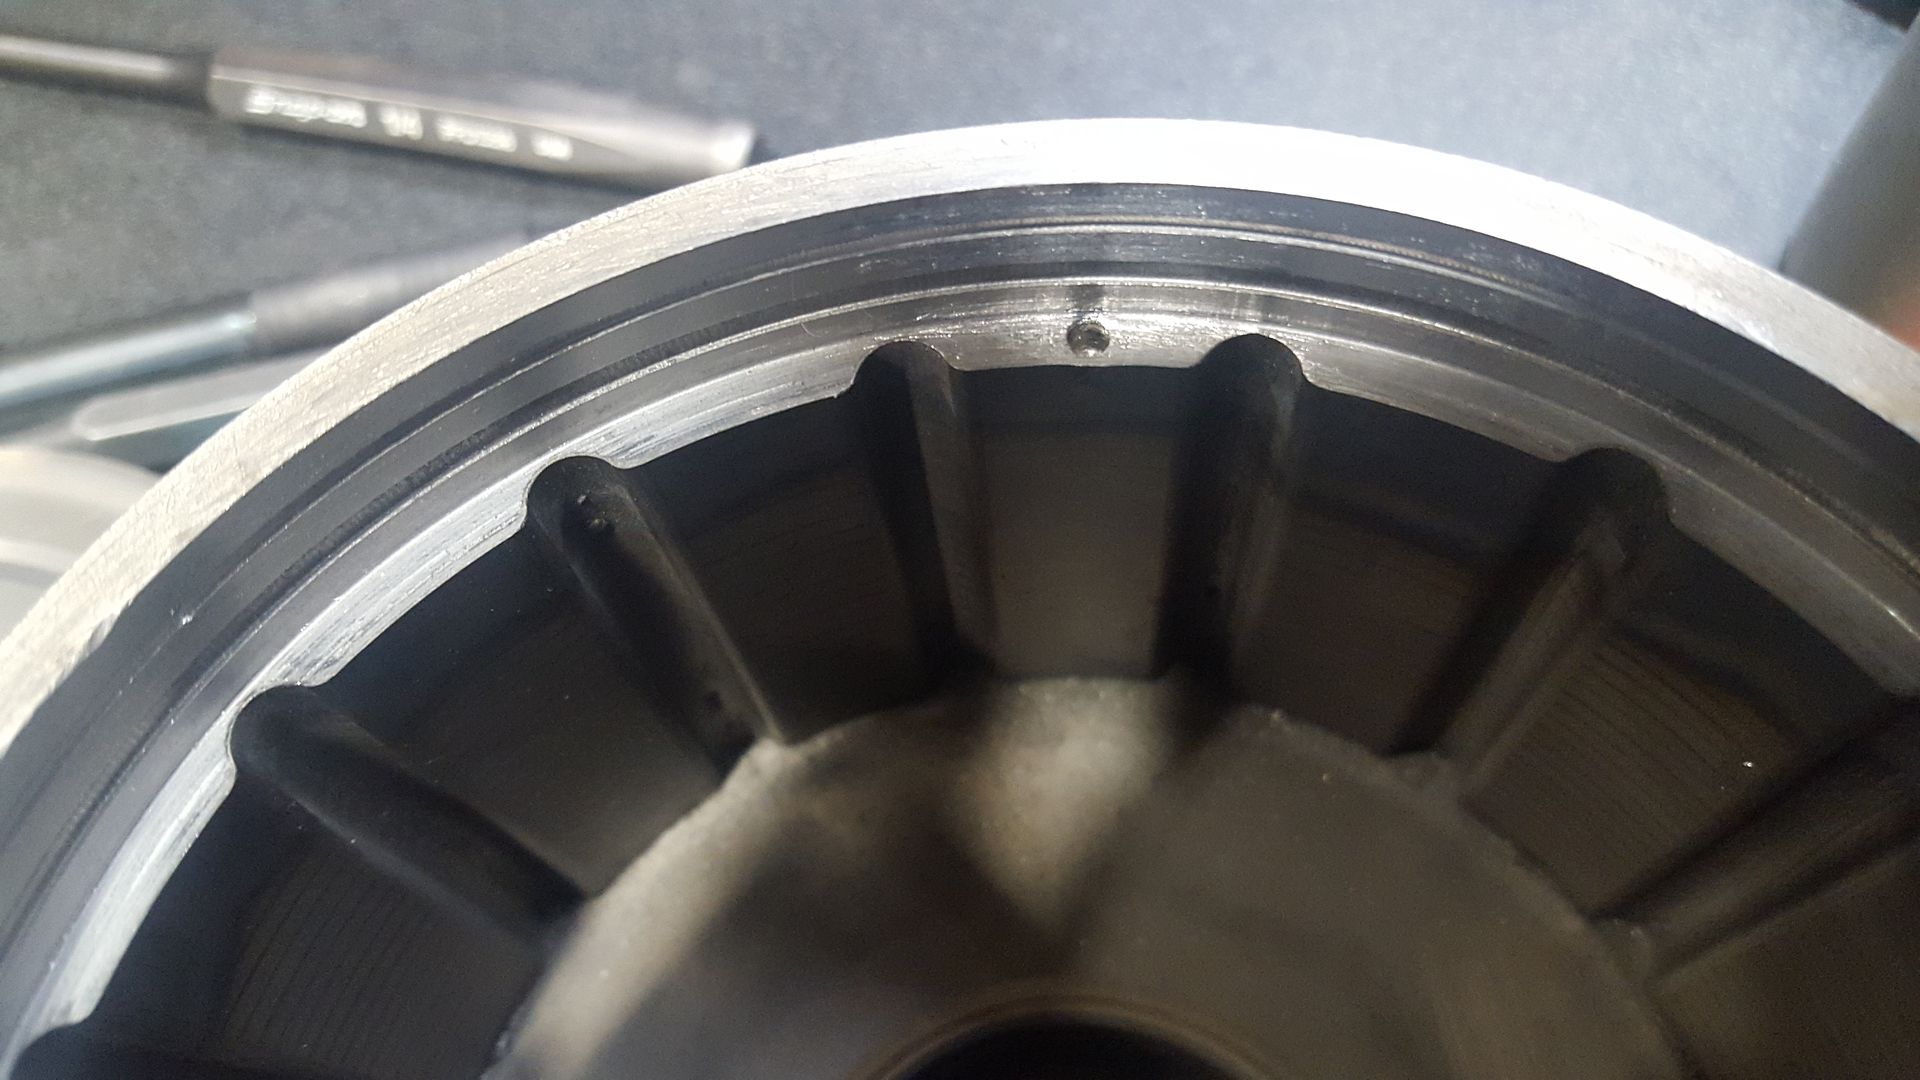
The basic idea was to add an extension to the VC barrel for the addition of an o-ring groove and a snap ring groove. After taking a few measurements I mocked everything up in autocad. I rough machined the ring from CA40 420SS and welded it to the VC.
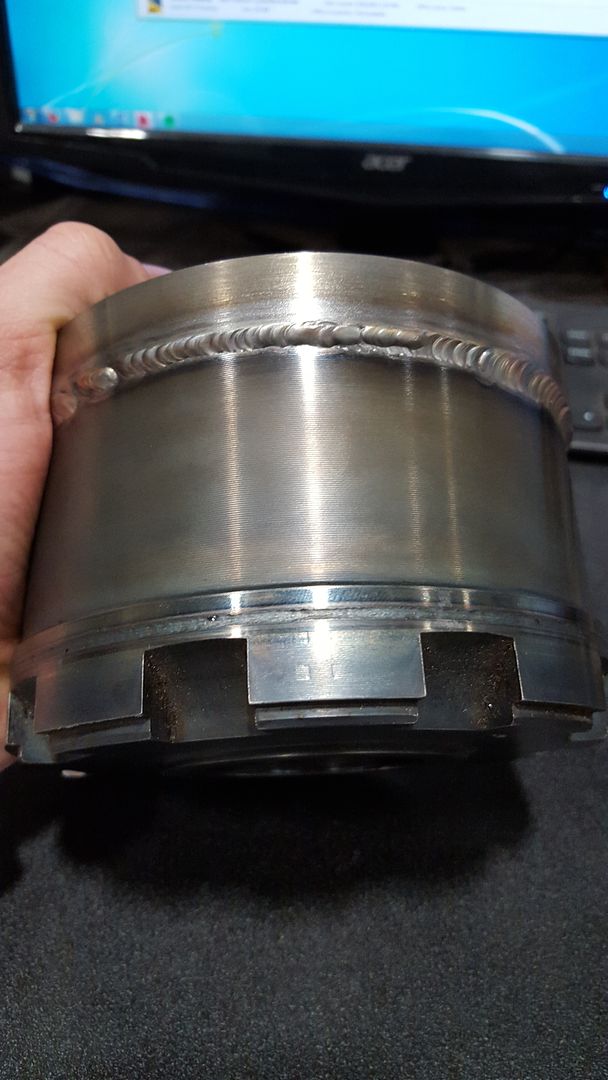
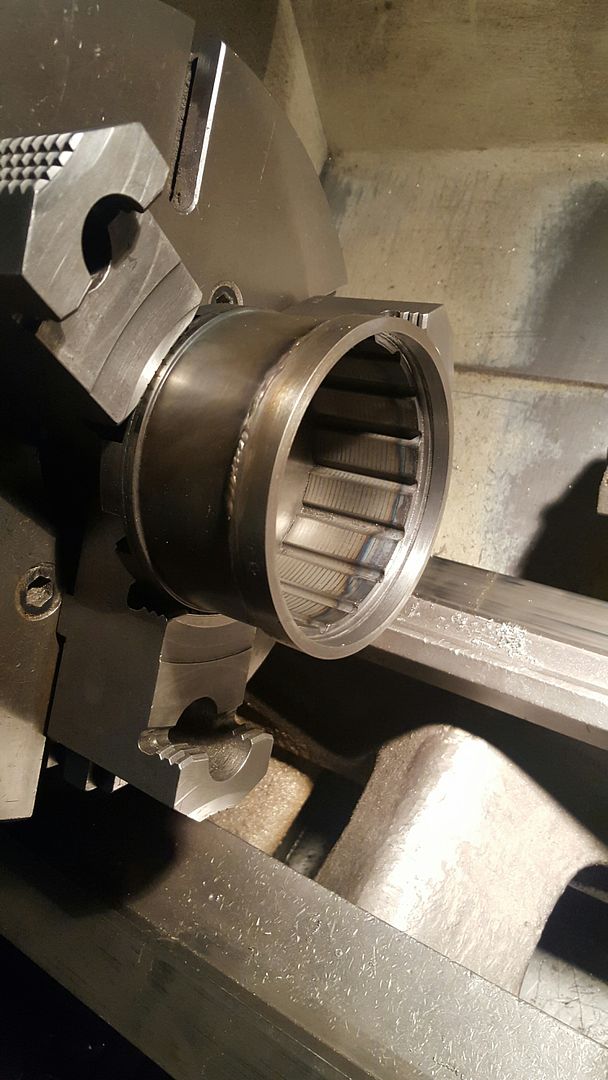
The cover that was removed from the VC was machined to the max ID of the stator plates. Then the VC extension was finish machined for a 0.001"-0.003" loose fit to the cover. Then the o-ring and snap rings were added.
And whala, a rebuildable viscous coupling
 Your signature picture has been removed since it contained the Photobucket "upgrade your account" image.
Build Thread
Rear Diff Rebuild
Rebuildable Viscous Coupling
Transfer Case Rebuild
"Life is simpler with 12 valves"Comment
-
oh man was wondering what was going on with your build....that rust sucks! I wish we didn't have to drive on salted roads, but thats just the name of the game.
I just coated the undercarriage of my car w/ Formula 3000. hoping it will help even just a little from this winter.www.instagram.com/snwmble
#snwmble
Current:
'05 BMW M3 - Silver Grey/Imola Red
'90 BMW 325iX - Sterling Silver/Houndstooth sport(5-speed converted)
'15 Mini Countryman - Blazing Red/Carbon Black
Past:
'01 Audi Allroad - Light Silver/Platinum Saber Black
'88 BMW 325iX - Diamond Schwarz/Silver sport *Sold*
'01.5 1.8TQ - Brilliant Black/Nogaro Alcantara ...after 8.5yrs, *Sold* =(
'90 BMW 325i - Schwarz/Tan sport *Sold*
'89 BMW 325ix - Diamond Schwarz/Black sport *Sold*Comment
-
Yeah it was pretty shocking and depressing when I stripped everything down, but now I've got all the panels to make it new again. I'm going to strip all of the undercoating off and paint everything in this industrial epoxy we use on salt water pumps at work. should hold up well haha.
Thanks!Your signature picture has been removed since it contained the Photobucket "upgrade your account" image.
Build Thread
Rear Diff Rebuild
Rebuildable Viscous Coupling
Transfer Case Rebuild
"Life is simpler with 12 valves"Comment
-
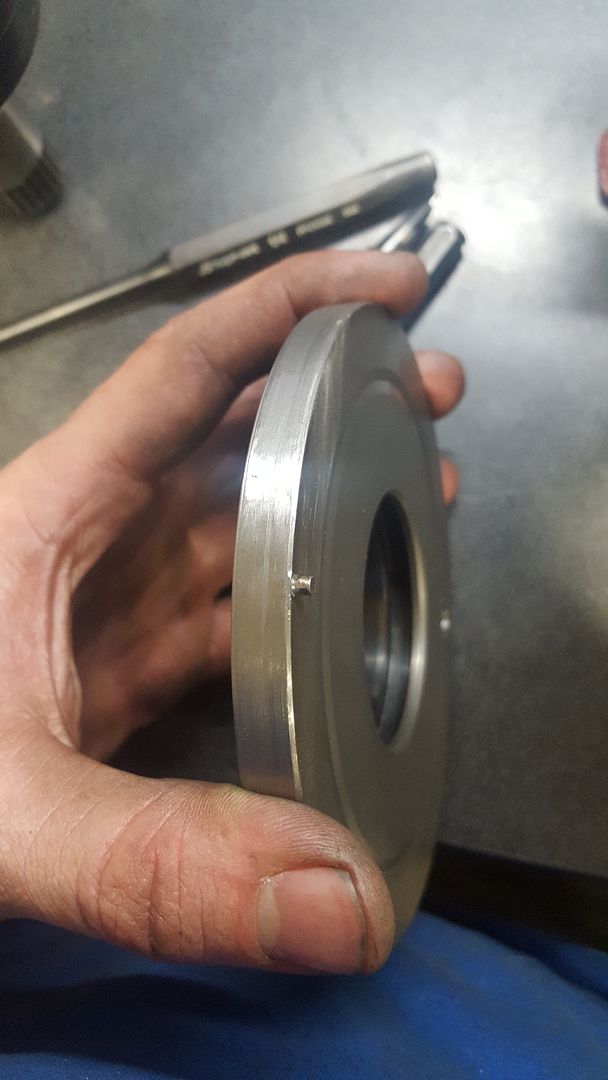
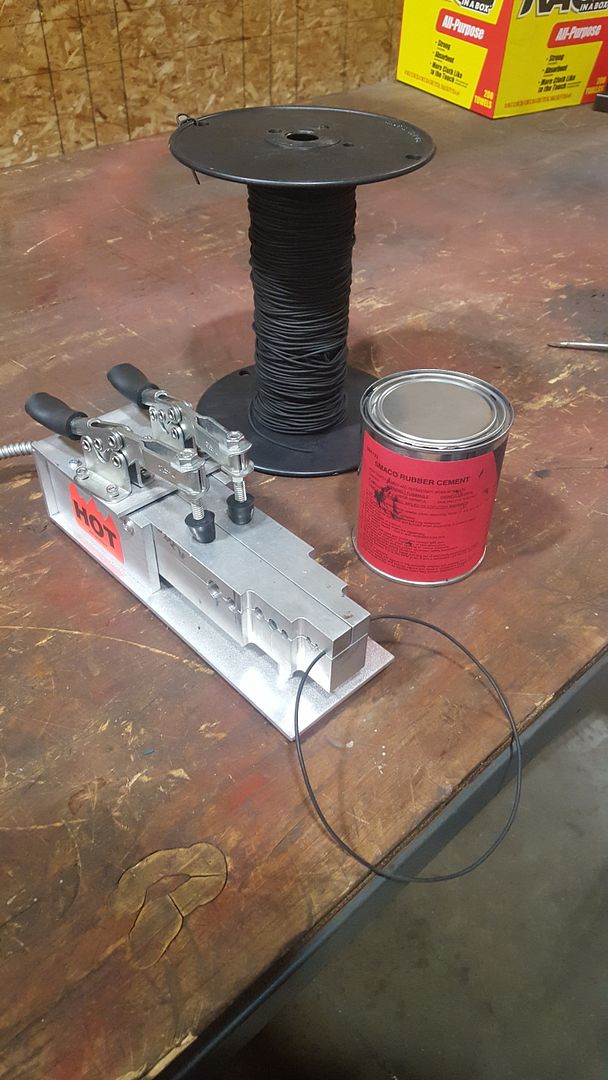
Fill hole has been drilled, reamed, and tapped for a 3/8 NPT plug. I also made the custom 0.070" o-ring. Hopefully next week I can pressure test everything and put it together for real.Your signature picture has been removed since it contained the Photobucket "upgrade your account" image.
Build Thread
Rear Diff Rebuild
Rebuildable Viscous Coupling
Transfer Case Rebuild
"Life is simpler with 12 valves"Comment
-
Man its been a while since I've seen this thread. Great work, we need more ix love on the forums.My Garage
2001 Z3 2.5i Steel Gray/Black (Lexi)
1988 325ix Diamond Schwartz/Black (Izzy)
1989 325i Cirrus Blue/Houndstooth (Stitch)
Feedback

Instagram: Stone.HopkinsComment
-
Nice work!E30 325ix M50 turbo 7 spd DCT 4wd 840awhp @ 31 psi.
E30 M50 6 spd 764whp @ 24psi.
E30 M20 6 spd 675whp.Comment
-
Thanks guys!
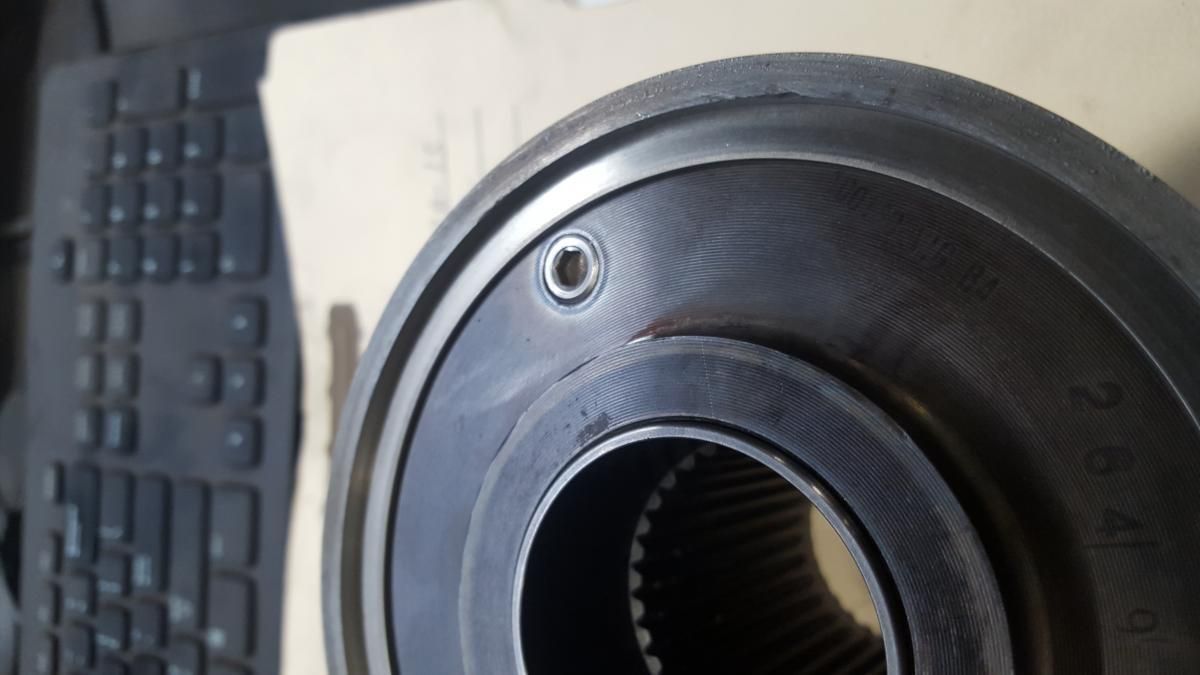
I added a small anti-rotation pin to the cover. There shouldn't a lot of torque put on the cover with in service but just in case, I wanted to make sure it couldn't go anywhere.
 Your signature picture has been removed since it contained the Photobucket "upgrade your account" image.
Build Thread
Rear Diff Rebuild
Rebuildable Viscous Coupling
Transfer Case Rebuild
"Life is simpler with 12 valves"Comment
-
hope you enjoy my ID1000 fuel injectors via ebay88 325is. S54, CSL airbox, Motec M800, Motec C127, Motec PDM15, Stoptech STR, MCS 2 way coilovers, Forgeline wheels, Recaro SPA, Eisenmann, Personal, lots of custom.
90 318is. As new OEM+, BBS LM, AST 4210 2 way coilovers, Wilwood SL6R/SL4R, Dynaudio, Recaro ExpertsComment
-
I'll try to use them to their full potential haha!Your signature picture has been removed since it contained the Photobucket "upgrade your account" image.
Build Thread
Rear Diff Rebuild
Rebuildable Viscous Coupling
Transfer Case Rebuild
"Life is simpler with 12 valves"Comment
-
Custom O-ring made
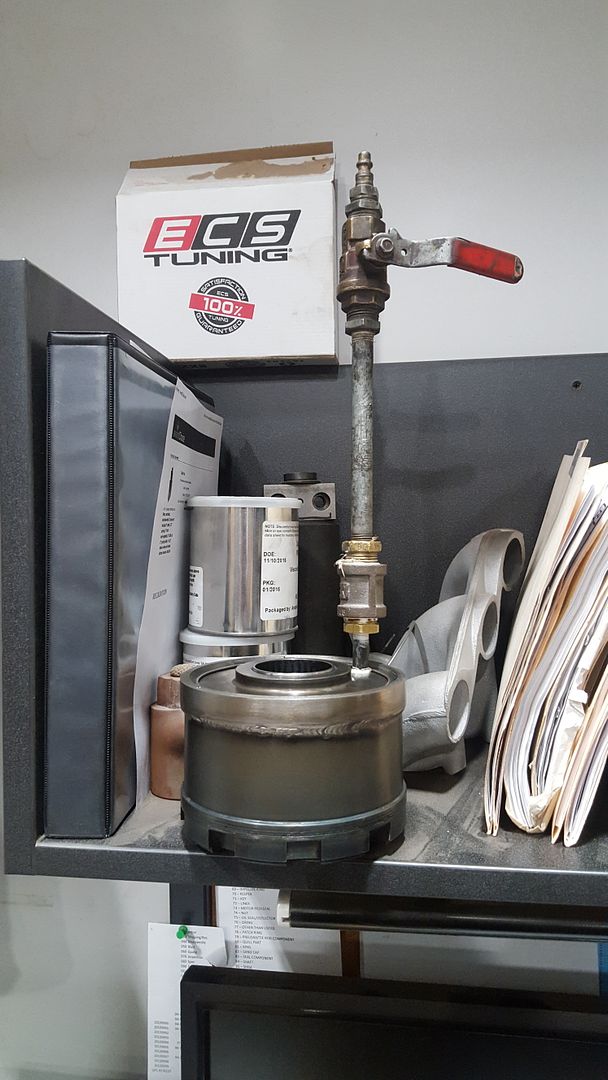
Pressure test was a success! I'm not sure how much pressure I tested it at but shop pressure is 125psi. I just cracked the valve for a second and let it sit overnight. Still was pressurized in the morning. :D
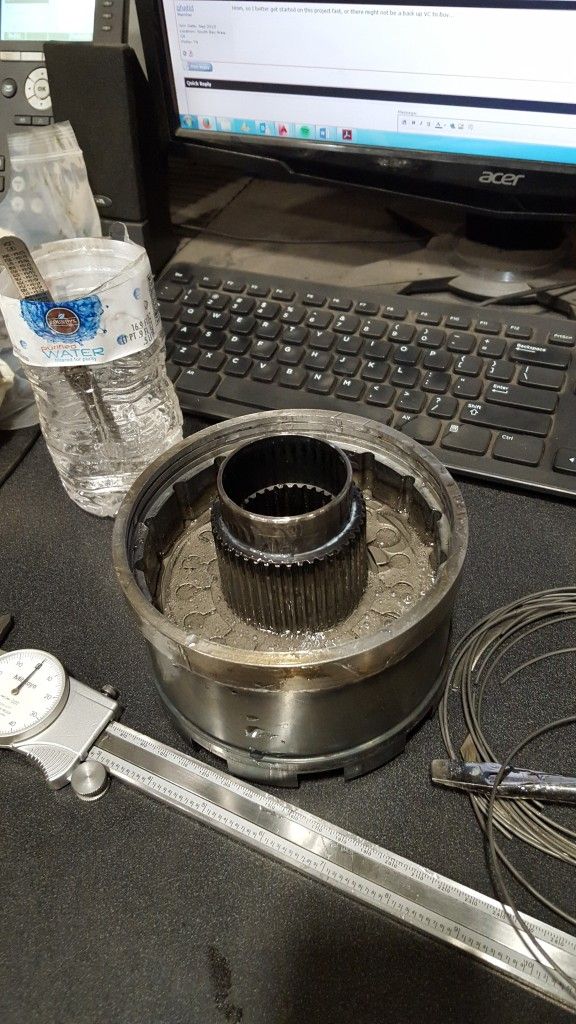
I filled the VC last week after work. Ended up using roughly 3 parts 100,000 cs and one part 60,000 cs silicone fluid. Unfortunately, I only have the one picture, my hands got covered with silicone haha. My method was to add silicone slowly as I added plates to make sure every plate had a film. I used a hand press to push the plates down and squeeze out the silicone as I added more plates. I kept having an issue where when I pressed the plates down the center sleeve would rise up with the silicone, disengaging the first few plates in the bottom of the VC. Had to be very careful to push it back down with out turning it and having the splines get misaligned. With all the plates and spacer rings installed I put the cover on and installed the snap ring. I made sure it wasn't over filled by leaving the fill plug out and removing any excess silicone. Some thread sealant on the pipe plug and its all ready to go. I'm going to try and reassemble the transfer case this weekend with all new bearings, seals, gaskets, and of course the "new and improved" VC :D
 Last edited by TehRaydarlover; 01-21-2016, 04:40 AM.Your signature picture has been removed since it contained the Photobucket "upgrade your account" image.
Build Thread
Rear Diff Rebuild
Rebuildable Viscous Coupling
Transfer Case Rebuild
"Life is simpler with 12 valves"Comment


Comment