
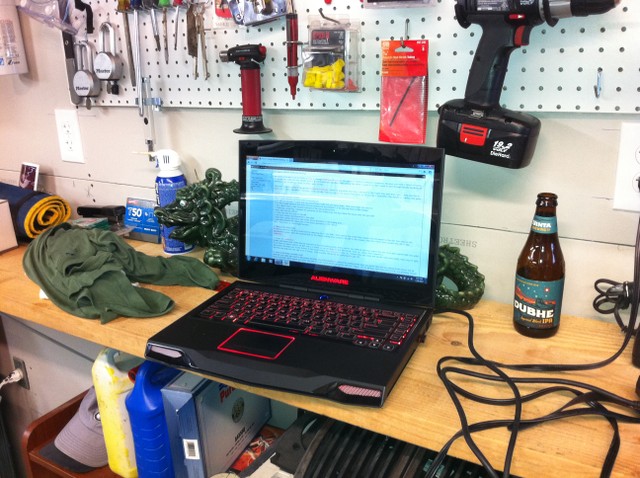
I finally got around to doing this headache of a job. I’m glad I did though because my car feels fantastic and I addressed all the issues I had while I was in there, including trailing arm bushings, rear differential seal replacement, soft brake line replacement, new e-brake shoes, and new rear wheel bearings. I like to get my computer out to the garage just in case I need to reference anything or beg for help.
Okay, I’m going to basically go through the steps that I did for this job. So, it doesn’t necessarily have to be in this order…It’s just how I did it. Hope this helps a few folks who are about to tackle this job. Be prepared to NOT drive the car for a while as problems are inevitable and you’ll always find something that needs attention that you didn’t plan for… This took me nearly a month because of my limited time and repeated runs to the hardware store or BMW. Remember to plan ahead and replace all lock nuts! And it’s a good idea to go stainless steal on the bolts that hold the flanges together on the muffler.
Before jacking up the car, loosen the lug bolts for the rear wheels.
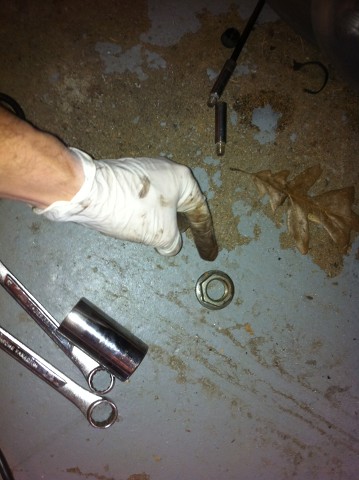
Remove safety retainer covering the axle nut
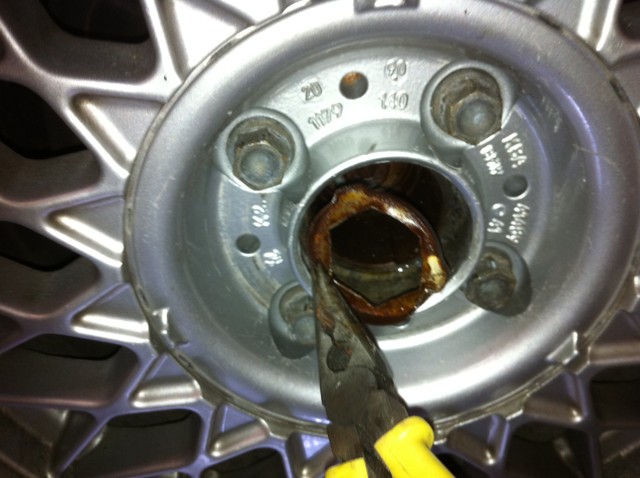
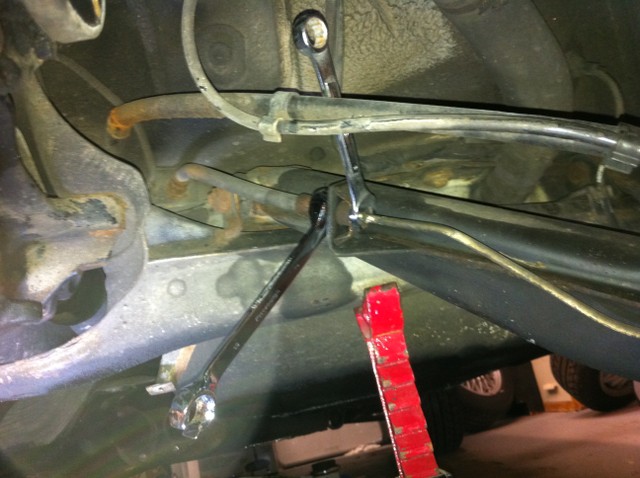
Loosen the axle nut. They are usually on very tight so a cheater bar like this might be necessary. I just slip a pipe over a breaker bar and the nut came loose.
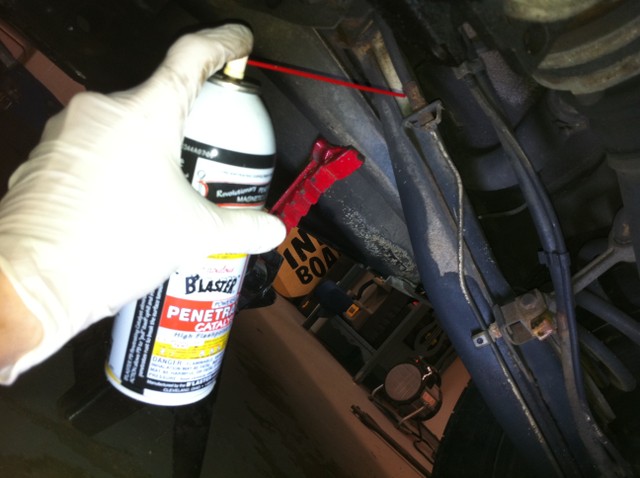
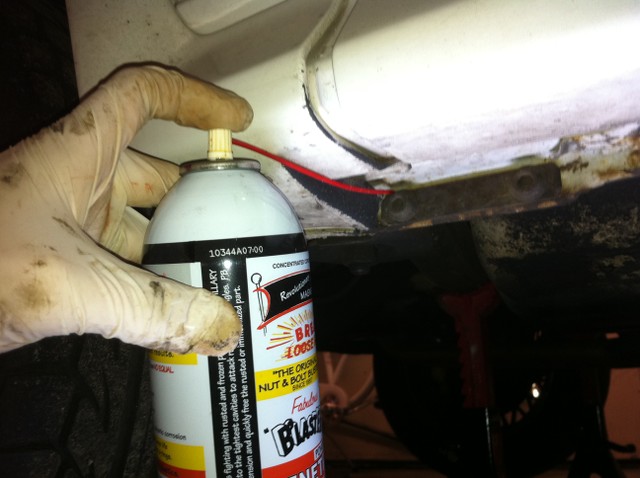
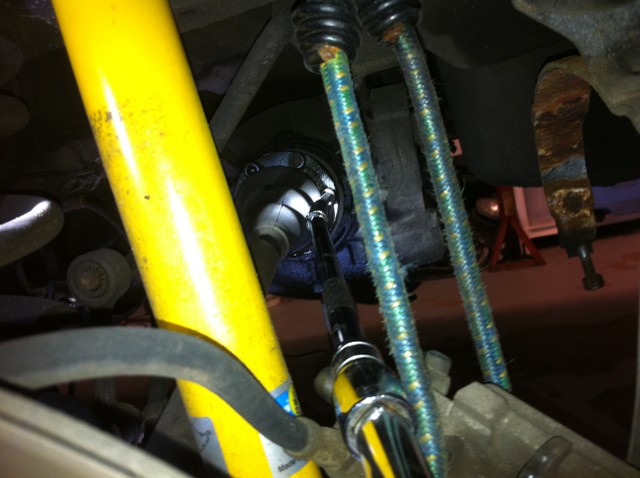
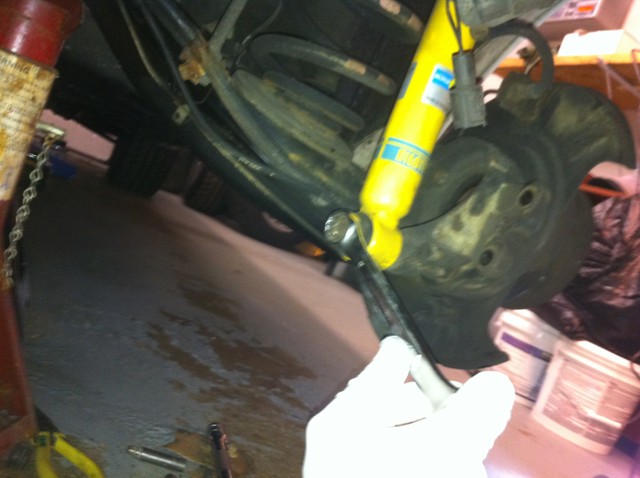
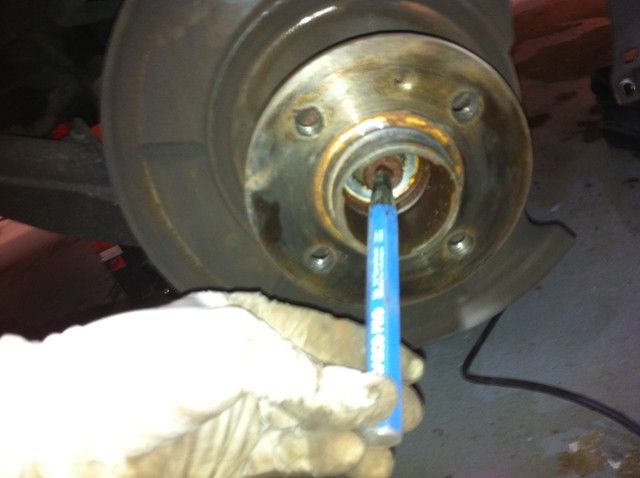
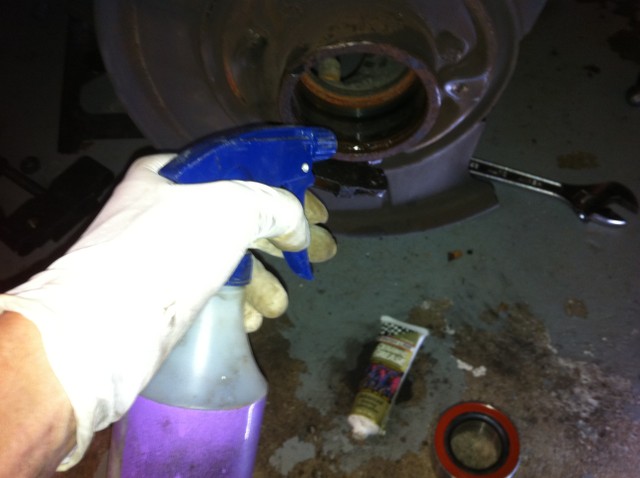
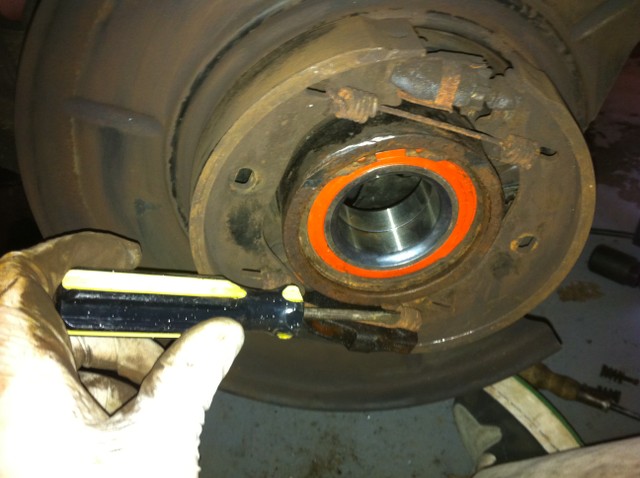
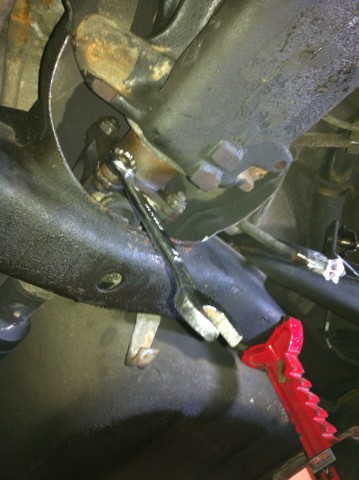
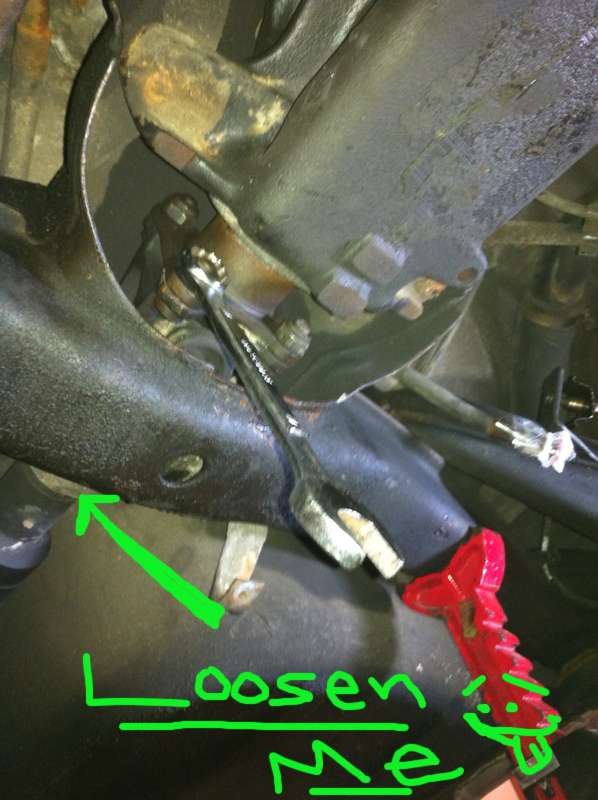
Spray penetrating oil on all the bolts you’ll need to loosen. Especially the bolts you see I’m spraying below.
Jack up the car and put it on jack stands. Don’t forget to chock the front wheels. You might also want to disconnect the battery if the car is going to sit a while. …oh, it will…. Lol
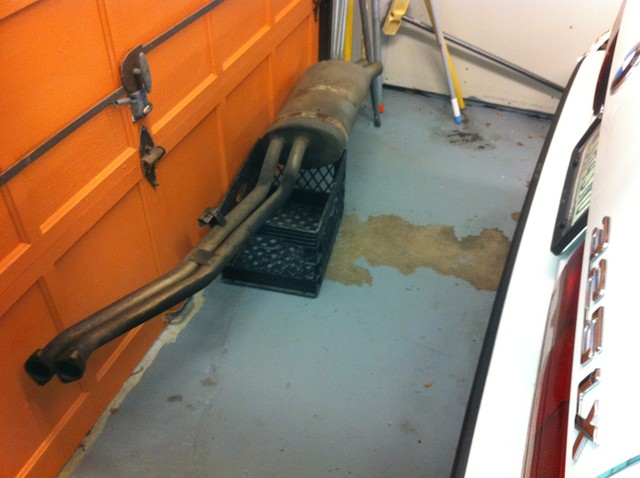
Remove muffler
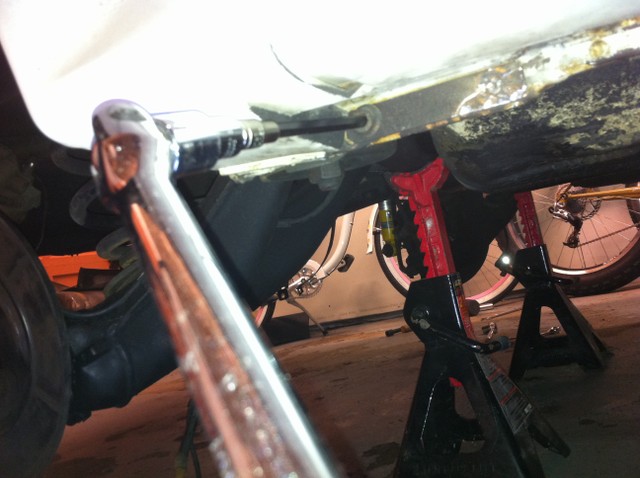
Move jack stands to rear of car on the frame rails under the trunk. I guess you can also support the car at the factory jack points but I wasn't getting under the car with that. Love my car - but not that much. lol.
I purchased some big jack stands from Harbor Freight. I didn't want to mess around with blocks of wood... And it'll be good to have these at my disposal in the future.
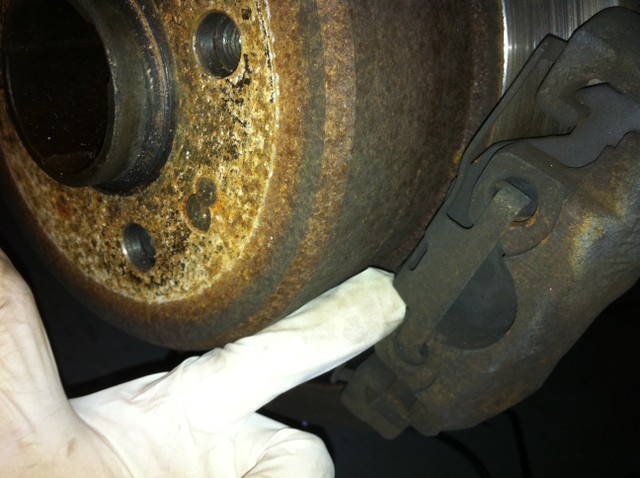
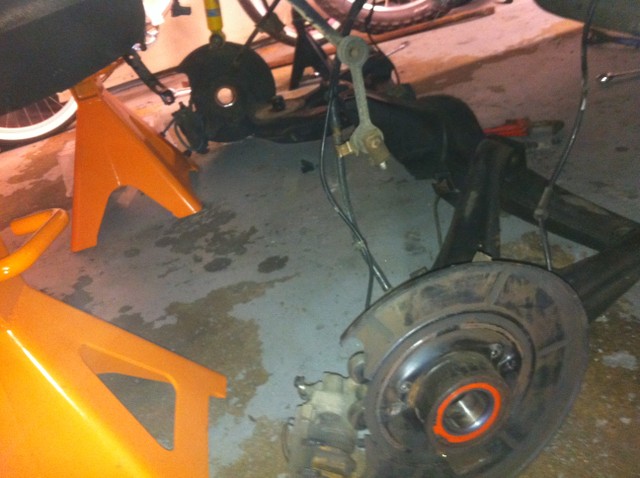
Remove brakes, including pads, calipers, and rotor.


Remove axle nut
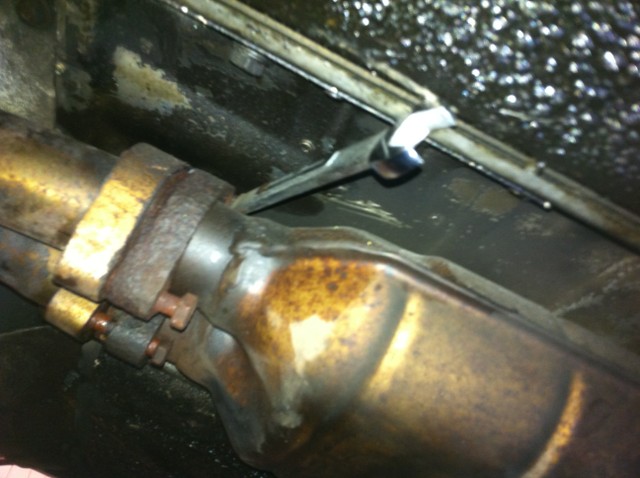
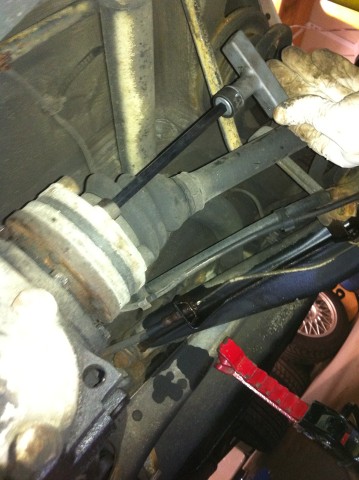
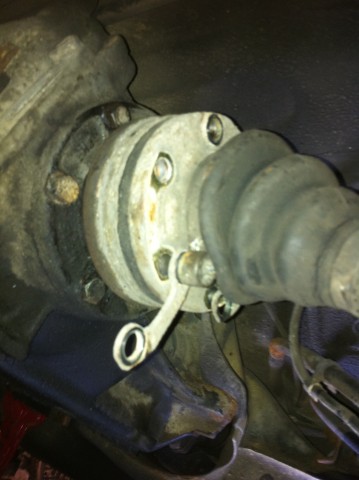
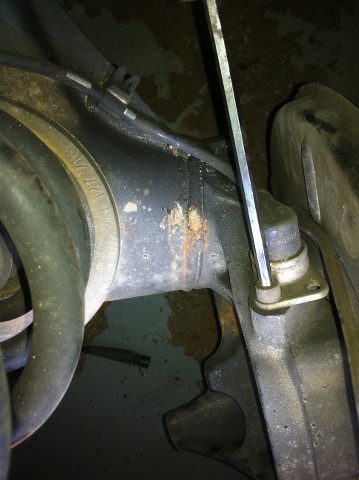
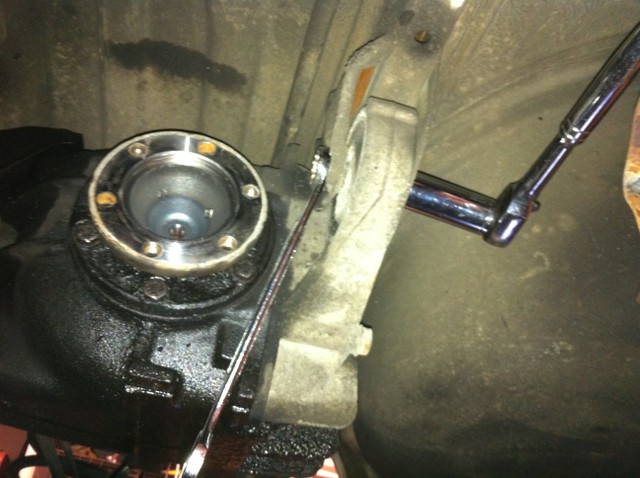
Remove the bolts that hold the axle to the rear differential. The first pic is to show you what you are removing but you'll really need a breaker bar and some extensions. These bolts are on very tight!
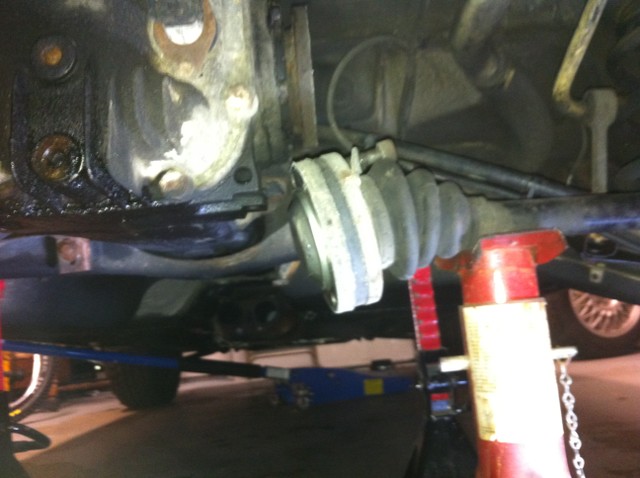
Support the axle with a jack stand
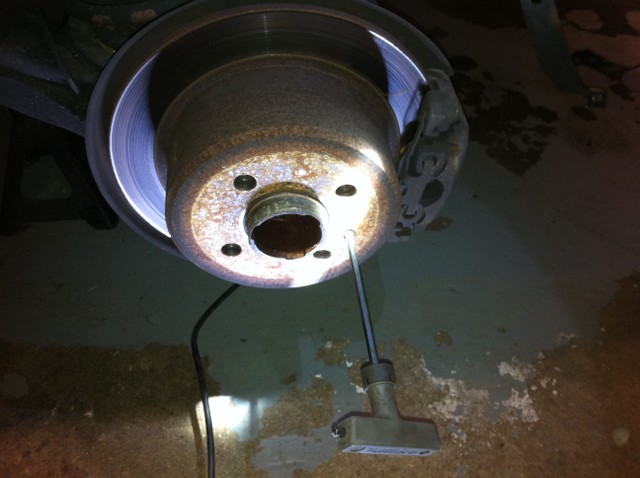
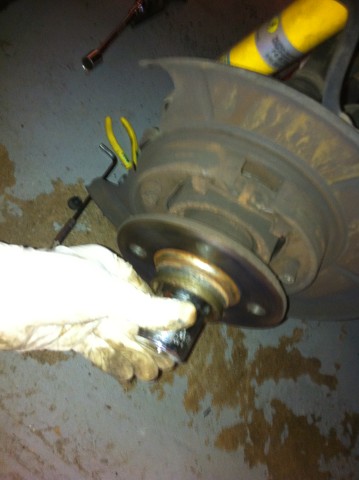
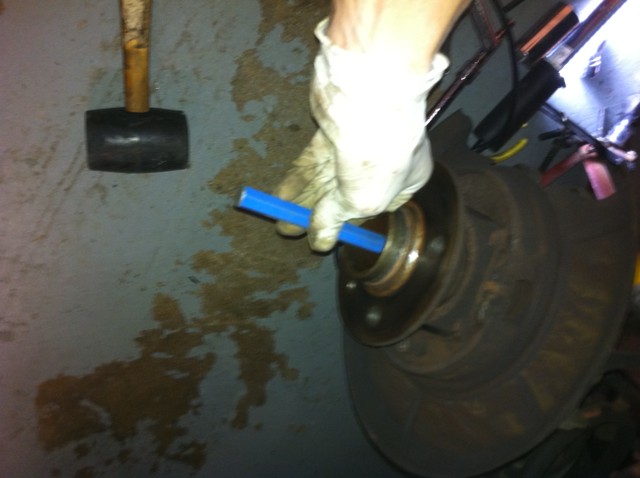
Using a hammer and a punch, knock the axle out of the hub
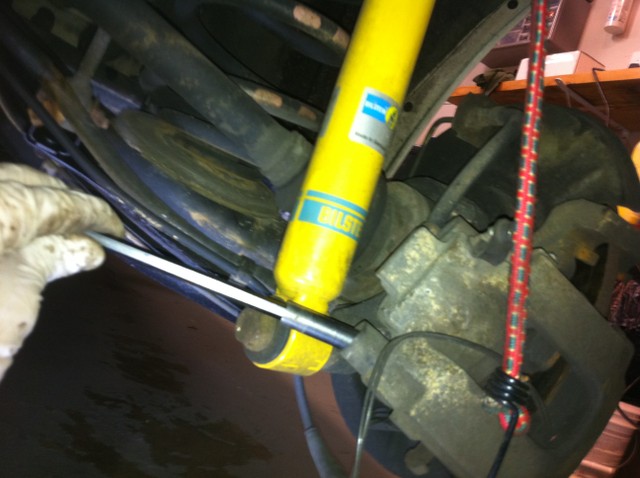
Remove bolt that holds the shock to the spindle.
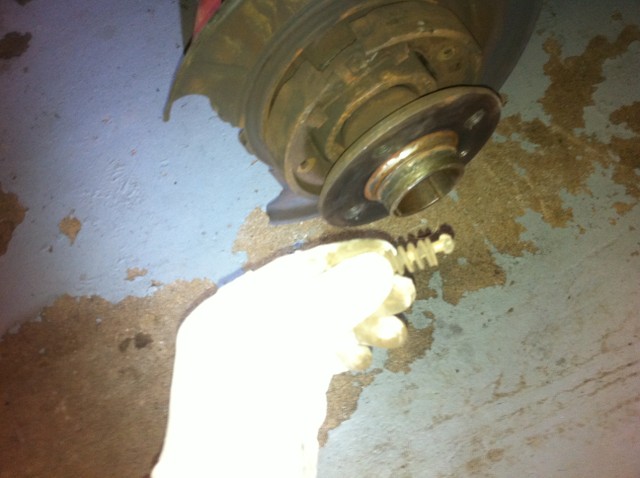
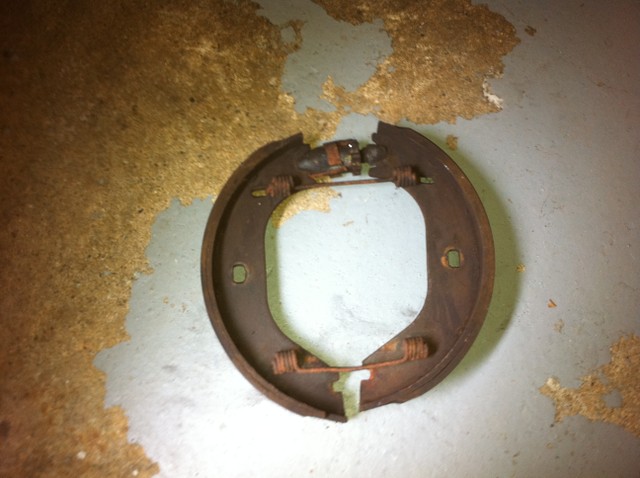
Remove brake shoes
Using a hammer and a punch, knock the axle out of the hub
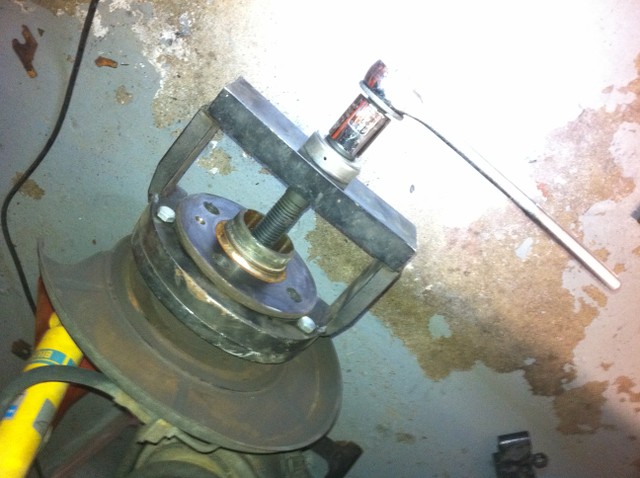
This is the SIR-B90 Tool I used to do both wheel bearings. Makes it such an easy job. Glad I bought this a while back.
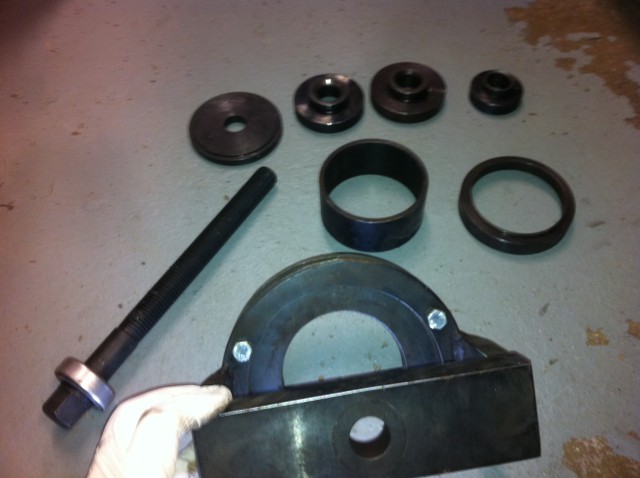
Here are the bits of the tool you’ll need to remove the hub.
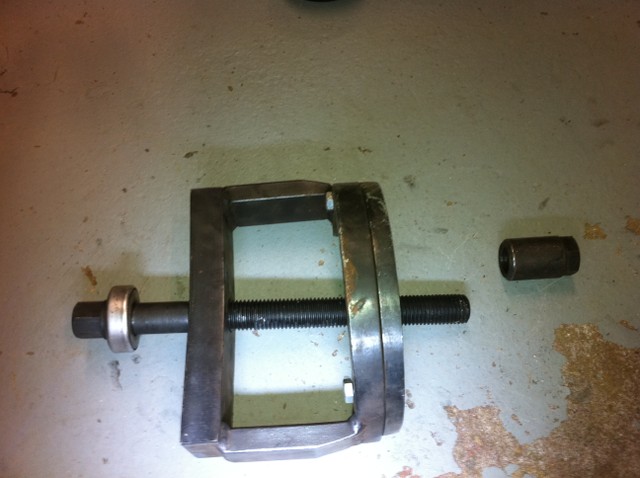
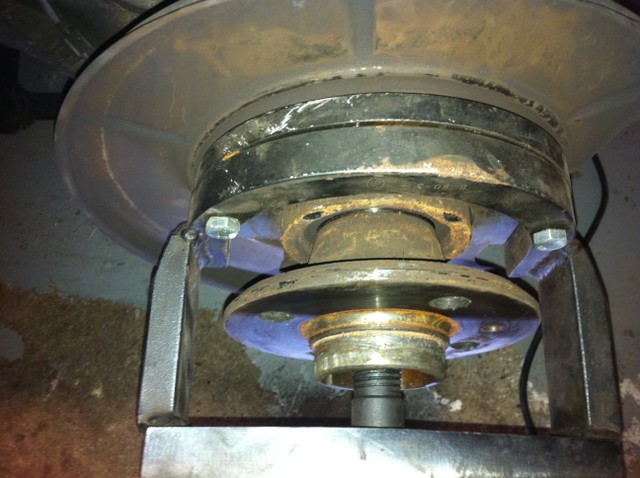
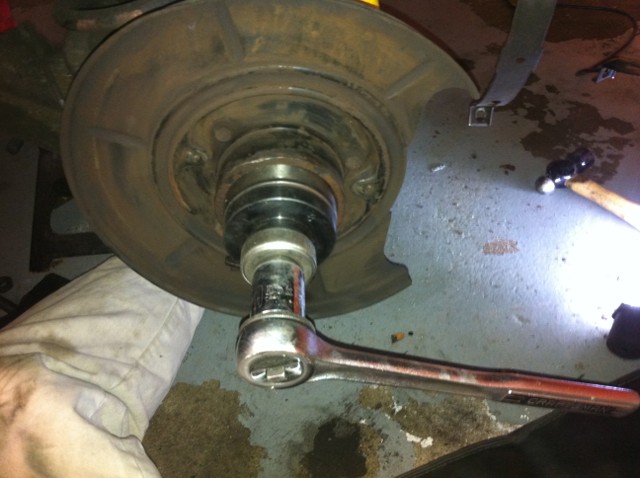
You set it up like this
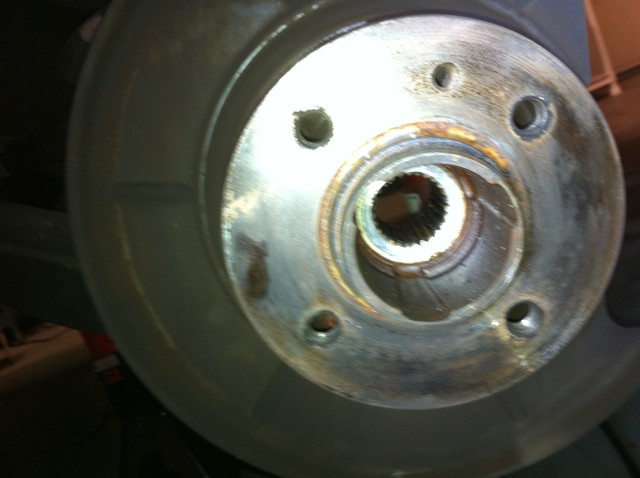
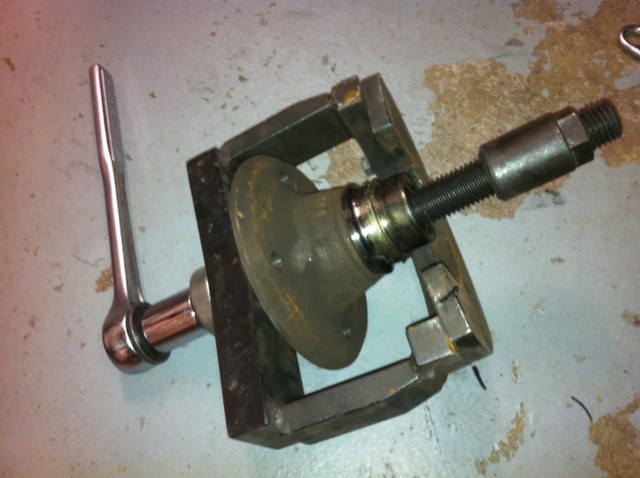
And this is what it looks like when removed
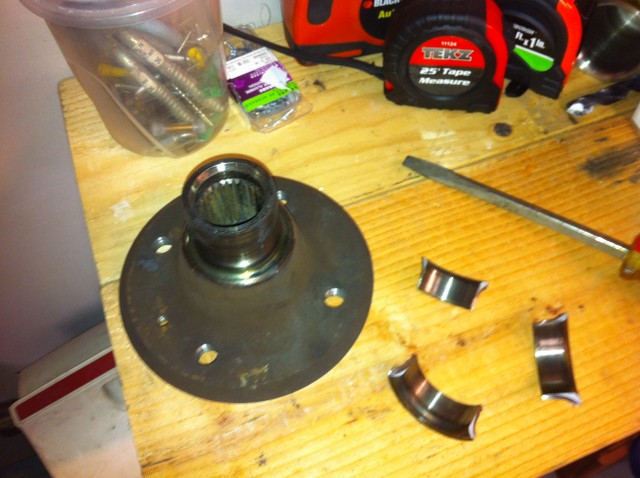
The inner bearing race was seized on there so I simply made 3 cuts with a Dremel, pried them with a screw driver and I got it off without issue.

You’ll now need to move the circlip before removing the bearing. They can get rusted in there pretty good so spray some penetrating fluid on there.

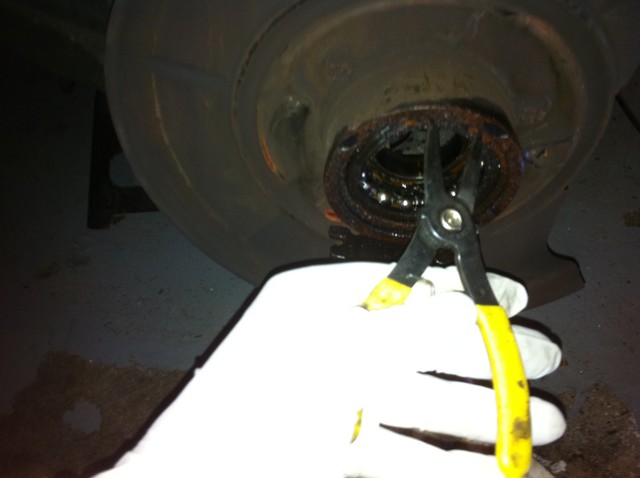
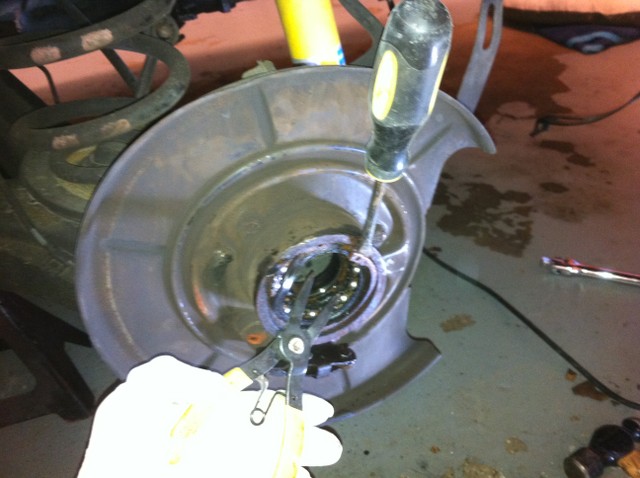
Remove circlip with circlip pliers and tame it out with a flathead screwdriver
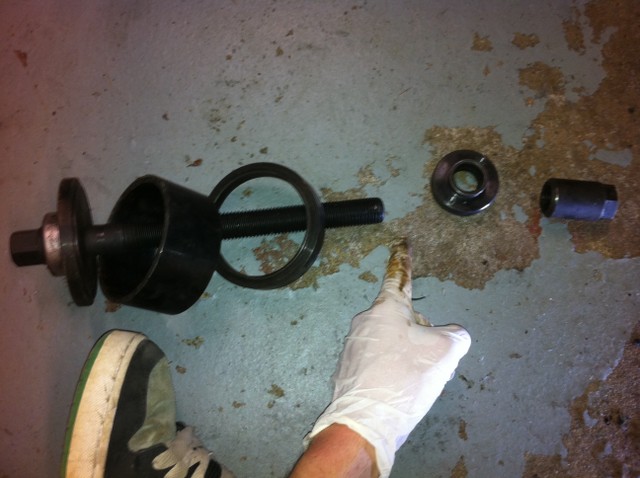
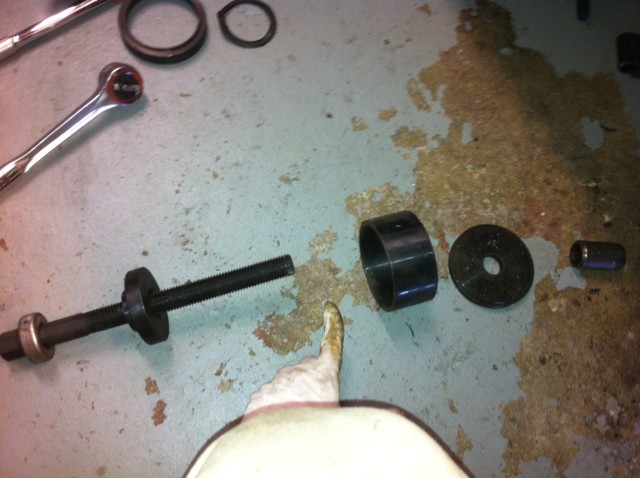
Now remove the bearing with the B90 Tool. This is the sequence of adapters. I’m pointing to where the bearing will sit when you put it all together.
Clean it up
Here’s the order of adapter to put the new bearing in. Once complete put a new circlip in.
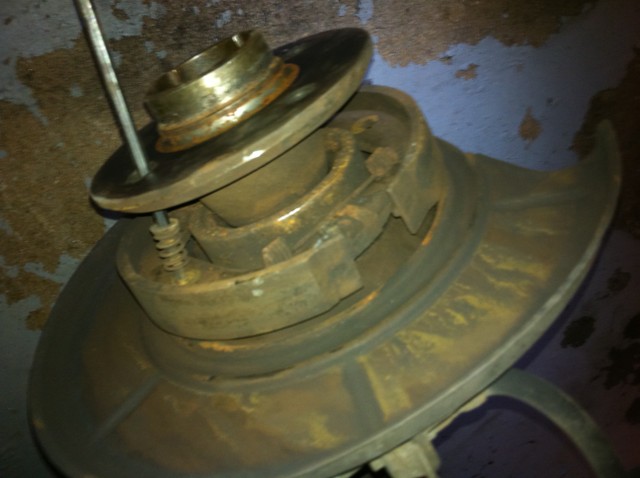
I wanted to get my e-brakes working better so I decided to install new shoes and lube up the rest of the system with lithium grease.
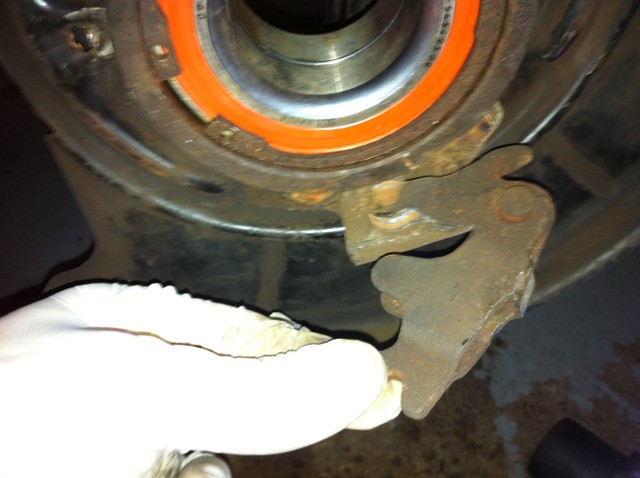
Below is the harness for the e-brake cable. Simply pull it out and push the retaining pin out with an awl or some other means. The pin is the little rusty circle closest to the bearing in the pic below.
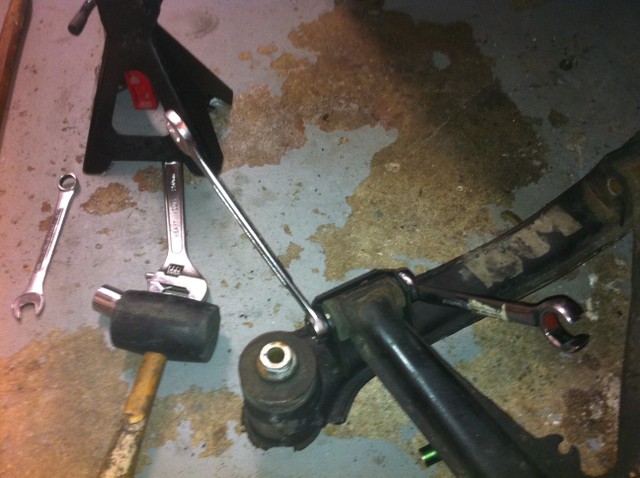
Remove bolts that holds the rear swaybar to the trailing arm.
Put saran wrap over the brake reservoir to keep brake fluid from pouring out of your lines when you remove them.
Now remove 4 inner and outer soft brake lines at the unions
Remove ABS sensors
Remove the bolts that hold the subframe bracket to the car. These can be a HUGE pain and I had to dremel one off because I stripped it. Another bolt simply cracked in half from all the torque. Tons of penetrating fluid here! I should have let it soak for along time….

Remove speed sensor from rear diff

Remove 4 lock nuts that hold the drive axle to the diff
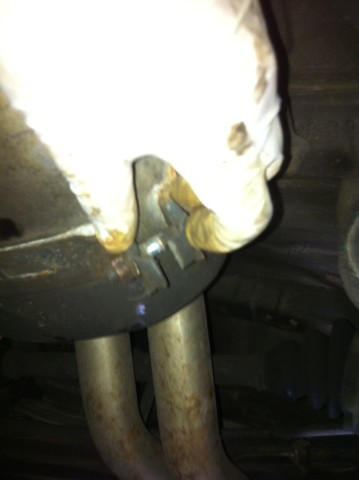
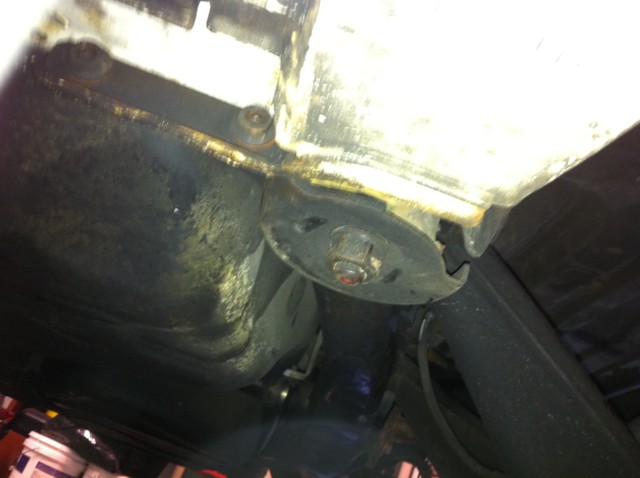
Remove the nut and bolt that holds the diff to the frame through the diff bushing.
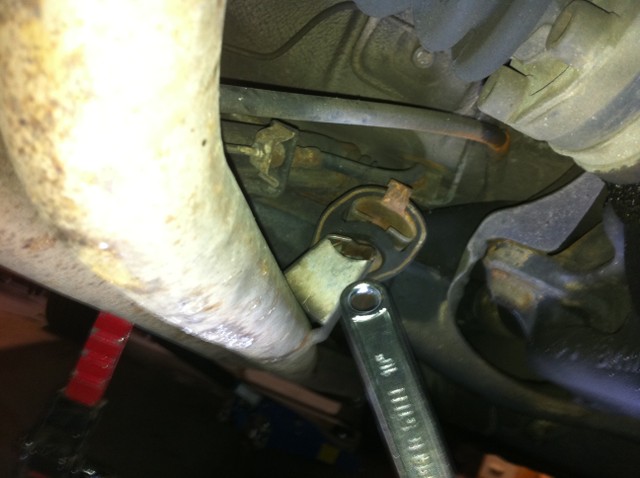
Loosen (do not remove) the 4 bolts at the top of the rear diff. These can be tight and difficult to get to. I used a wrench and had to position myself to get enough torque. But they eventually came out. No pic of this but just feel around for the bolts. You can't miss them. Get a jack in place. Remove the 4 bolts and very carefully lower the diff

Support you subframe with jackstands.
Remove the large nuts that hold the subframe to the car.
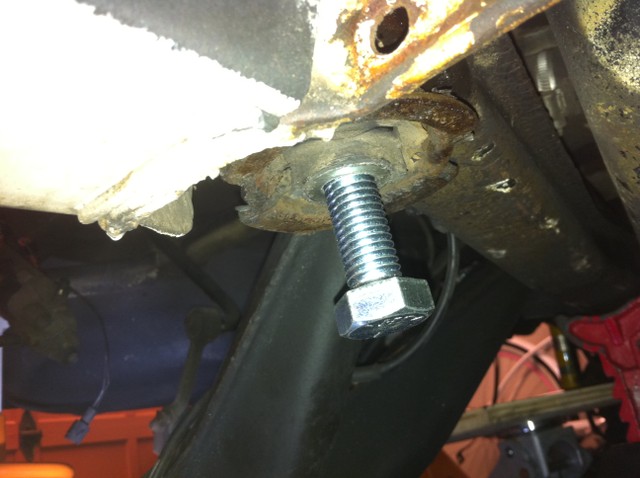
Once I got those nuts off, I was hopeful that the subframe would drop out with a little encouragement but no chance. So I tapped the sleeve from the bottom and threaded a bolt in there.
I used one of my bike tools to hold the tap
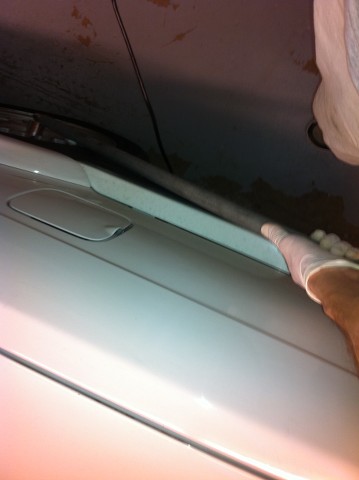
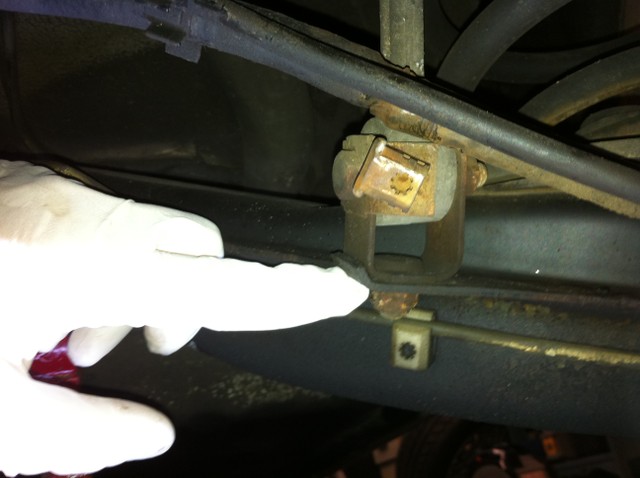
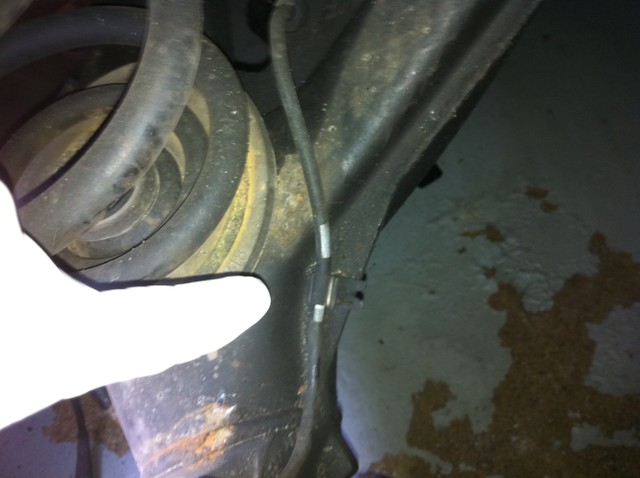
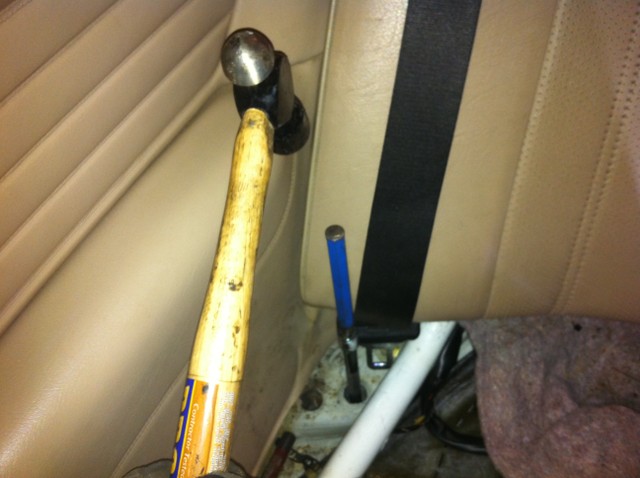
Using a screw driver remove the “gunk?” over the bolt found under the rear seat. This pic should help.

Then, using a punch, hammer down on the subframe from inside the car through that hole. You’ll contact the bolt you threaded from the bottom. A couple of good strong whacks and the subframe finally came out. Remember to support you subframe with jackstand before you do this. Otherwise it will all come crashing down on the ground.
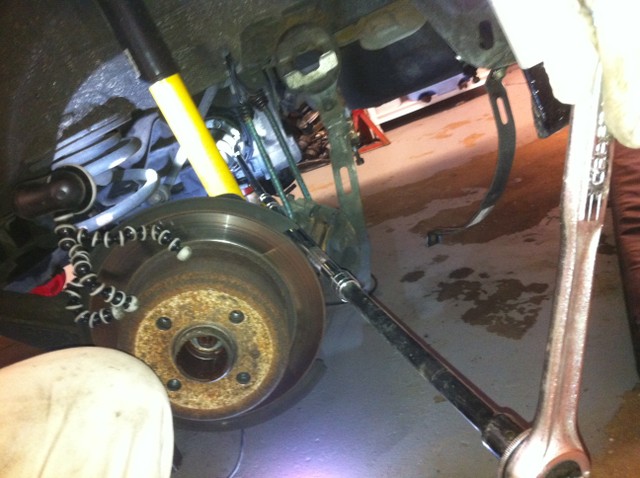
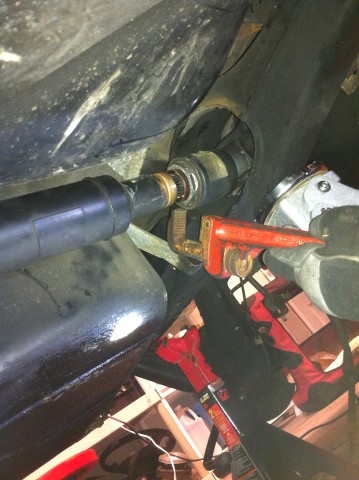
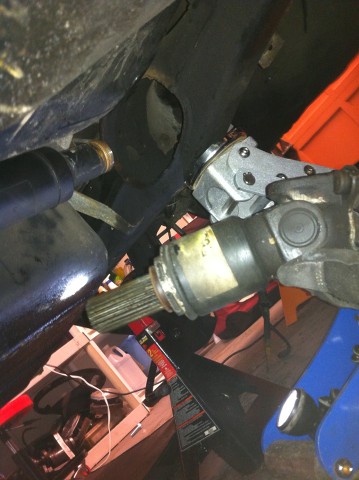
Collapse the drive shaft with a large wrench and remove. I can't see skipping this step. I tried but the subframe would not get around the driveshaft.
Carefully lower the entire subframe with trailing arms intact. I used a jack to lower it...
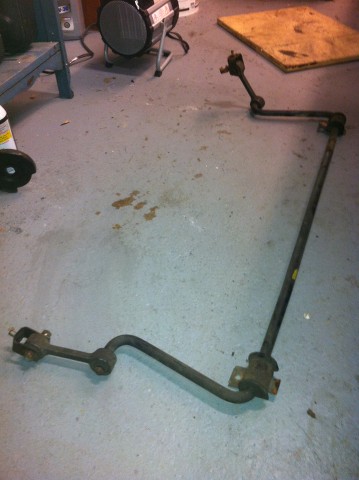
I removed my swaybar for painting and new bushings and hardware
Now remove the trailing arms from the subframe
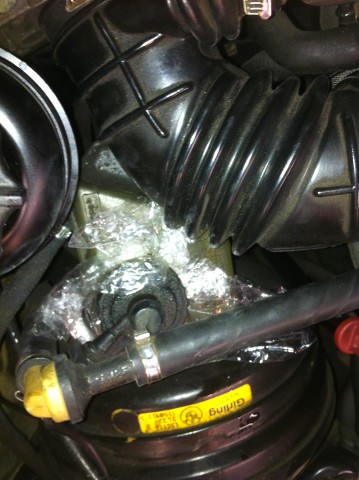
All the bits out!

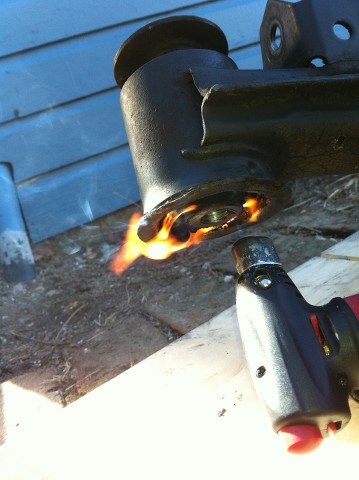
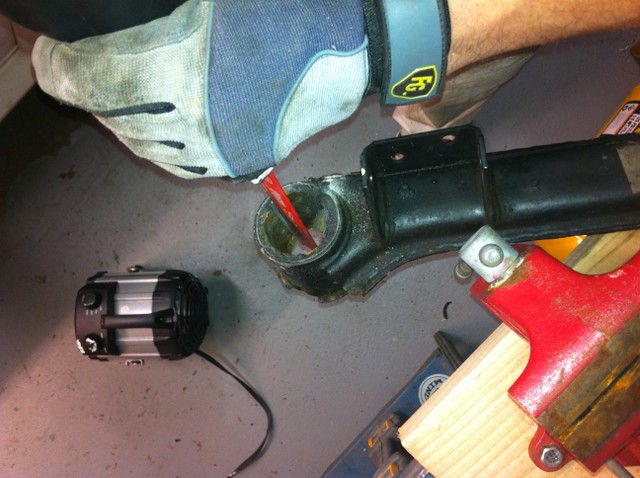
Remove the subframe bushings. I started by using a butane torch to burn them out a little.
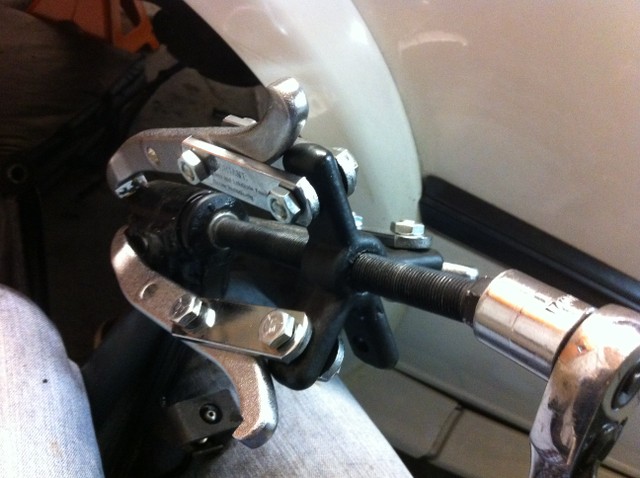
Then I used a 3 jaw puller to get it the rest of the way out.
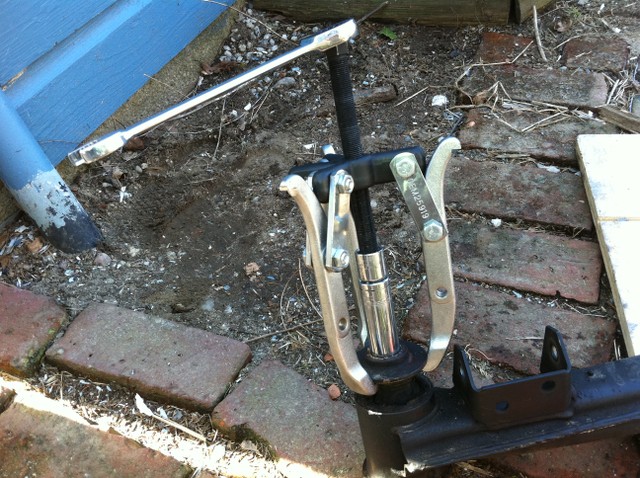
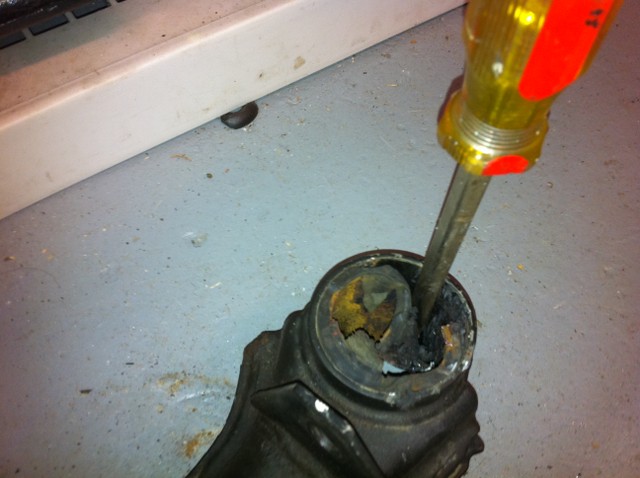
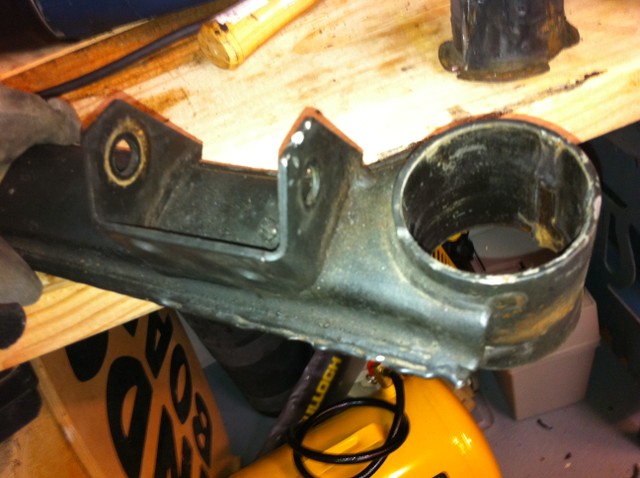
The outer sleeve will most definitely get stuck in the subframe. I used a sawzall to to make a deep cut.
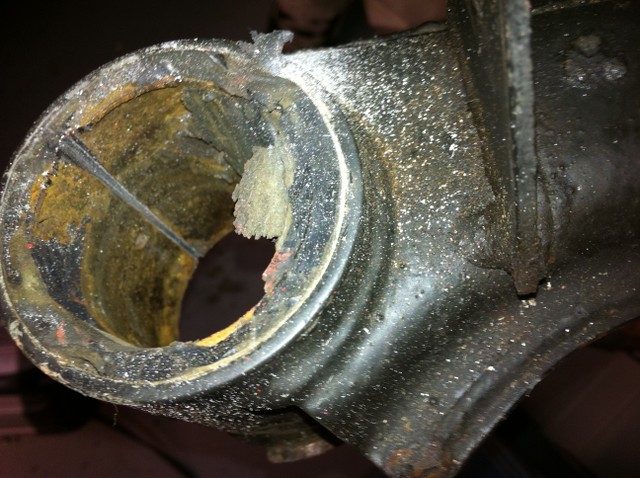
Then pried it out with a flathead screwdriver
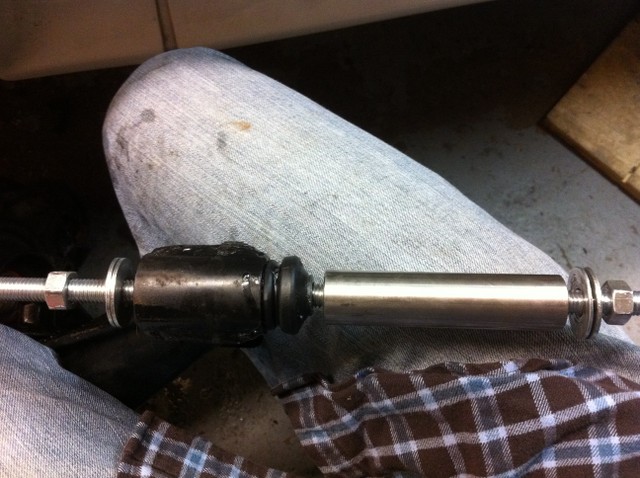
I used this homemade tool to remove the trailing arm bushings. The metal sleeve from my new Powerflex bushings worked perfectly to push it through.
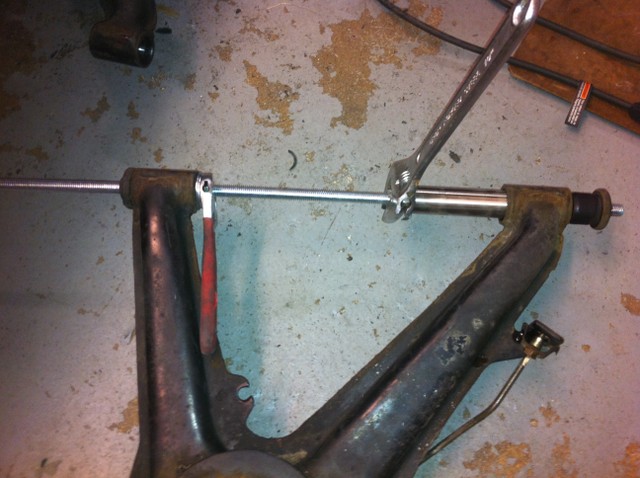
I then used the following arrangement to get the new trailing arm bushings in.
I got it all the way in with a 3 jaw puller
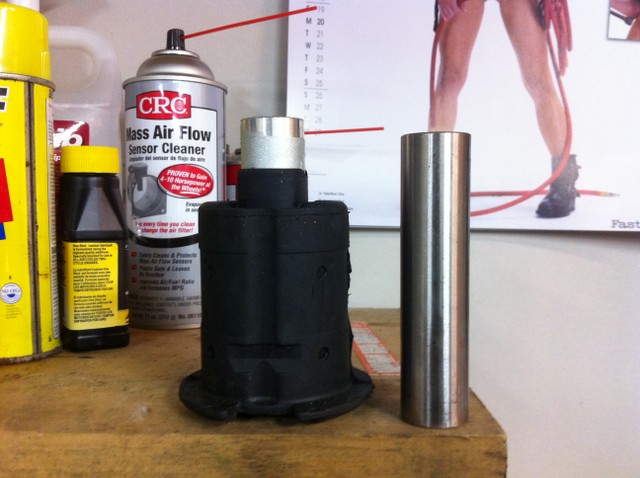
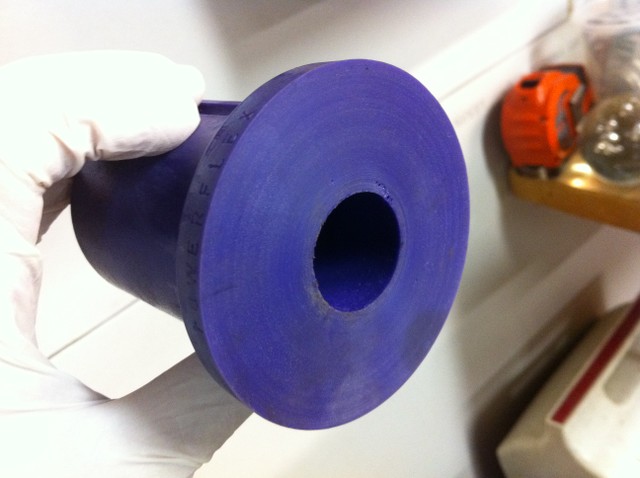
So, thankfully I got the heads up about the Powerflex bushings being shorter than the stock iX bushings (thanks Chris!). I would have had to put washers between the diff and subframe to make up the difference in height so that it did not put undue strain on my drivetrain parts. This would mean new bolts as well. And possibly spacers at the bushing itself... This is ONLY an issue if you are keeping the stock springs. Which I am….Here you can see the difference in height between the OE bushing on the left and the Powerflex bushing sleeve on the right.
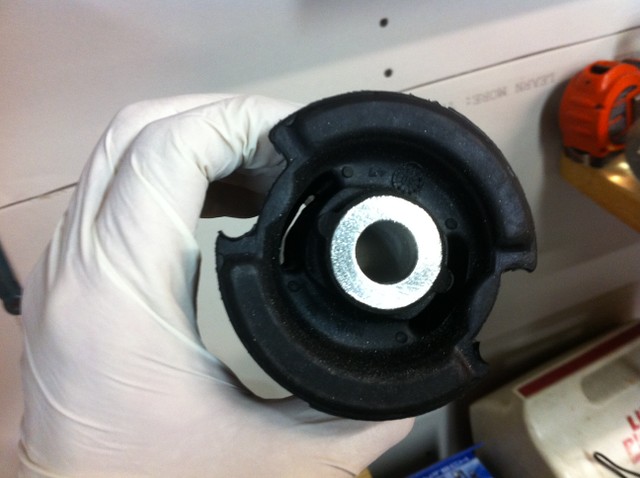
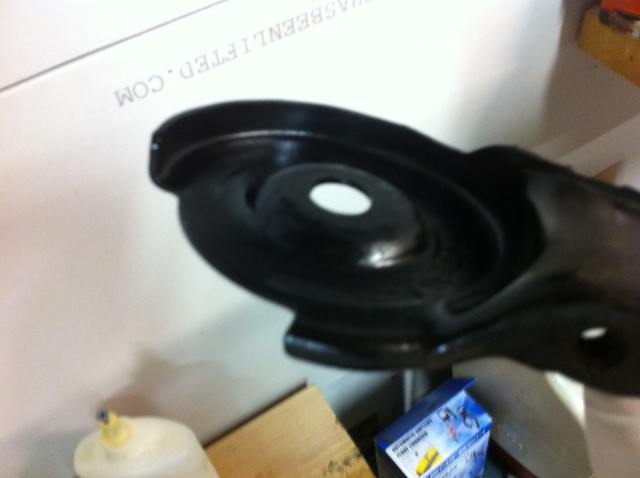
Also the base of the bushing is different. Notice how the OE bushing bottom fits into the groove of the subframe bracket. After installing, I noticed they don’t actually make contact but during driving the rubber should flex enough so that it does. In hindsight the Powerflex bushing would probably have flexed just the same way and would have been okay. It really boils down to the sleeve height. If you can get a sleeve the same length as the OE sleeve, you can use the Powerflex bushings without issue.
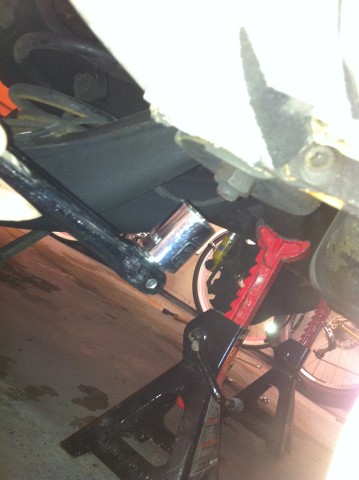
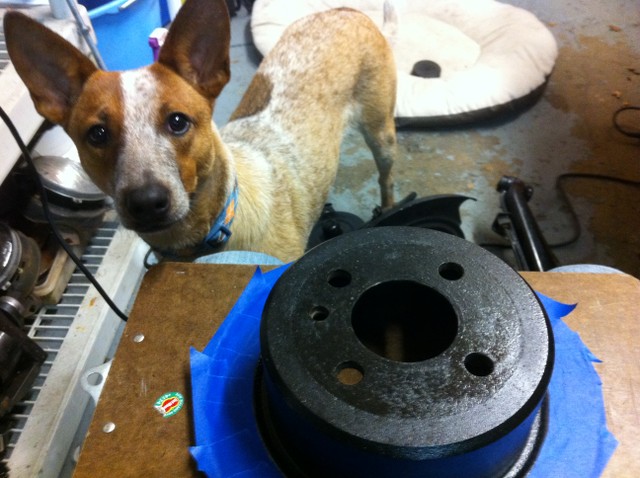
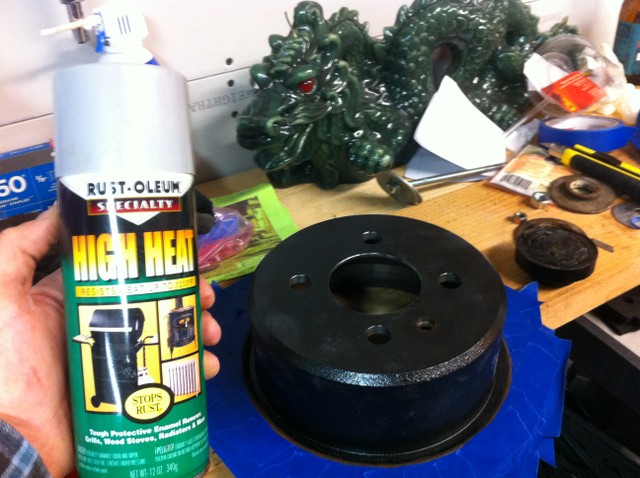
I bought POR-15 paint and painted everything. The subframe, trailing arms, brake calipers, some rust spots under the car (thankfully very little) and my brake drums. The stuff is amazing. Here’s my newly painted brakes. ....I didn't paint the dog.
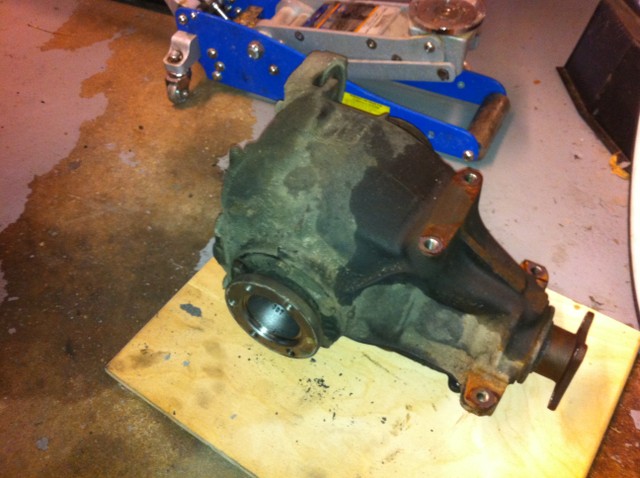
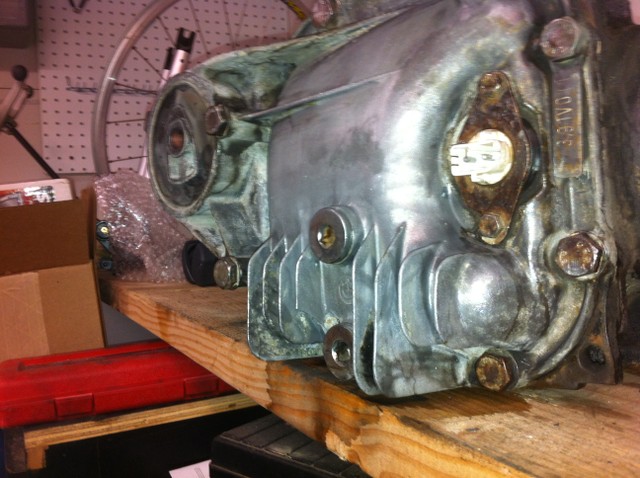
I also cleaned up my rear diff a little. Not fantastic but worlds better than it was.
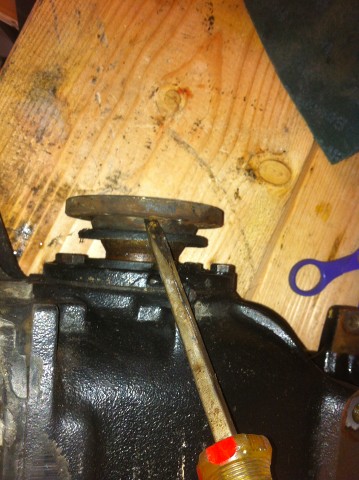
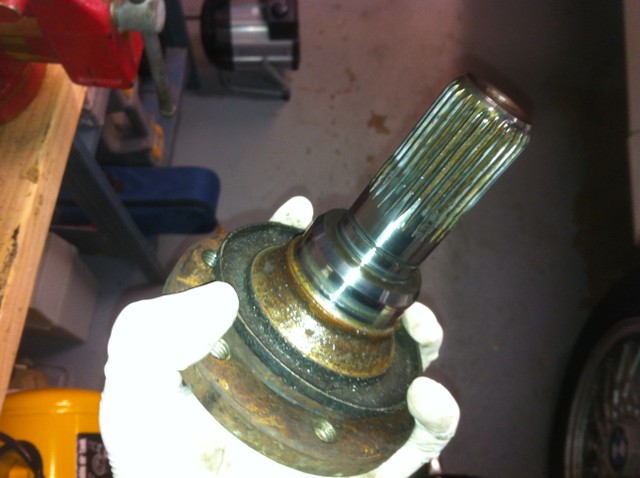
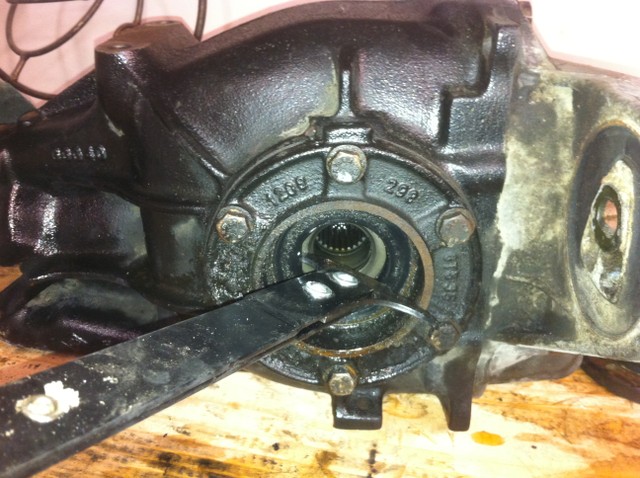
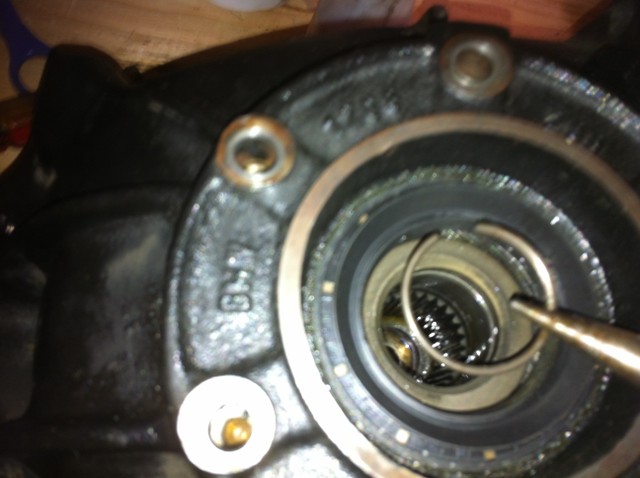
I had a major leak on one side of the diff, so I replaced the seal and O-ring. To do this you need to pry out the splined flange
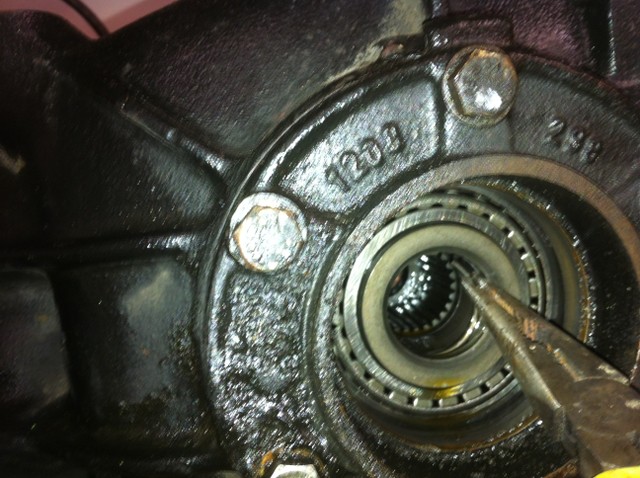
Pry out the seal.
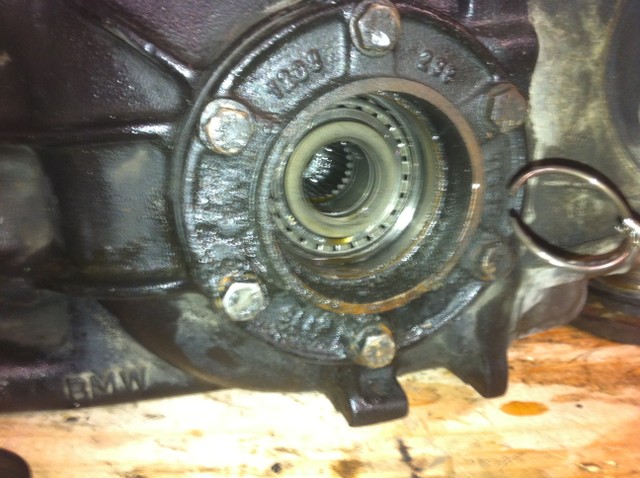
Remove the inner circlip
Unbolt the plate below
And pry it off like so. This can be a little tricky…
You might think to drain your diff fluid first. I didn’t and it poured out when I removed that plate above. I had a catch container on hand.
Remove O-ring
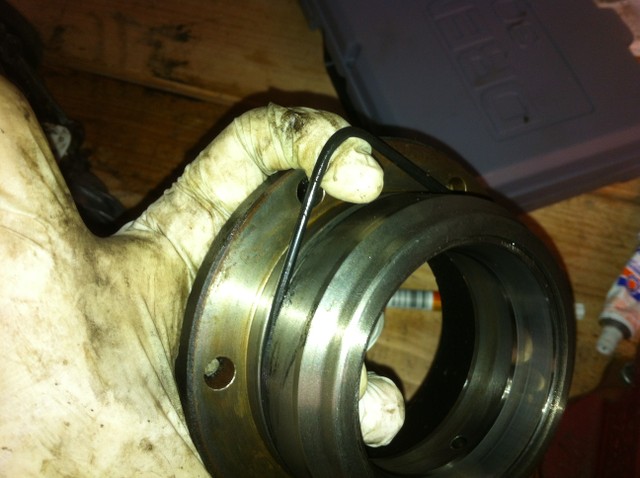
Clean everything up

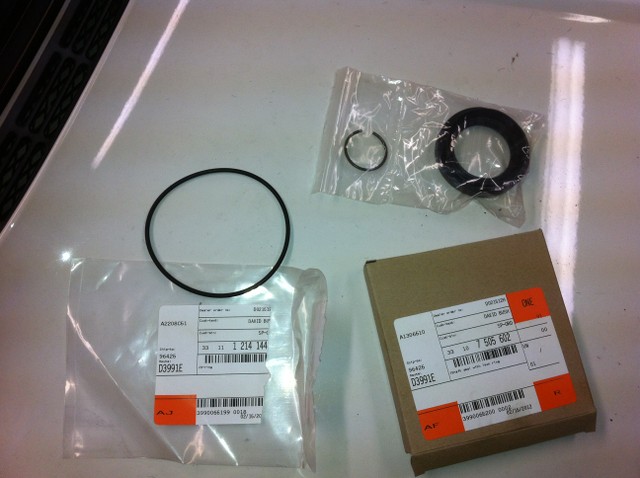
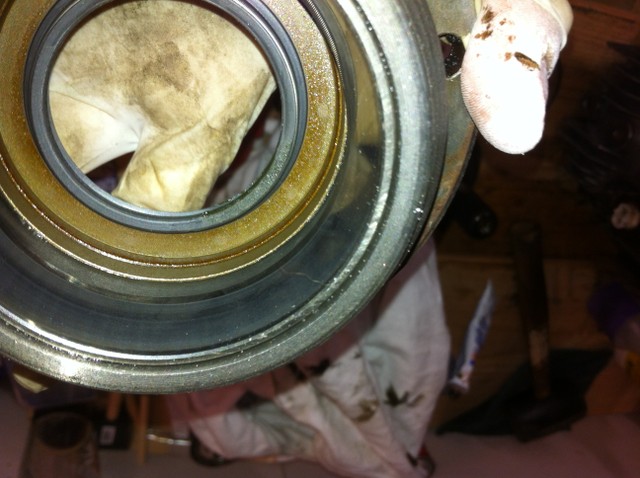
New seals and O-ring.
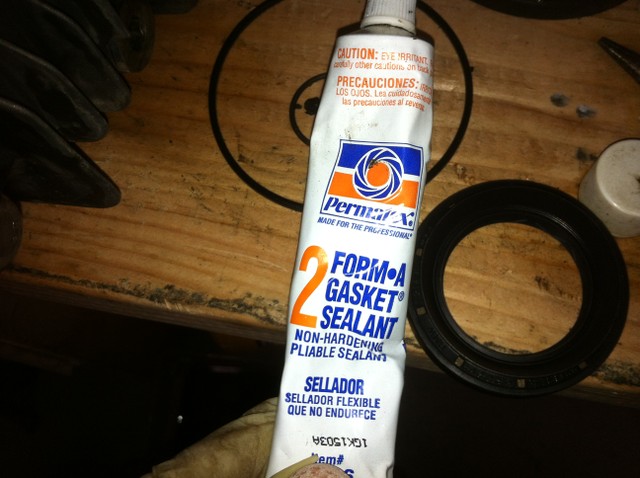
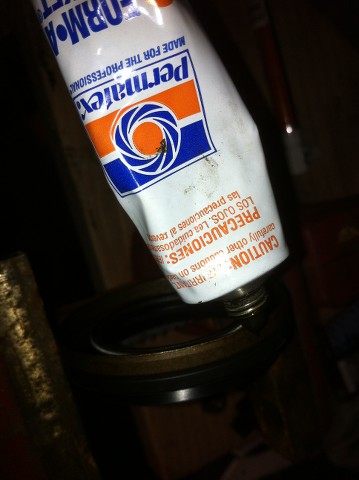
Put some sealant around the new seal
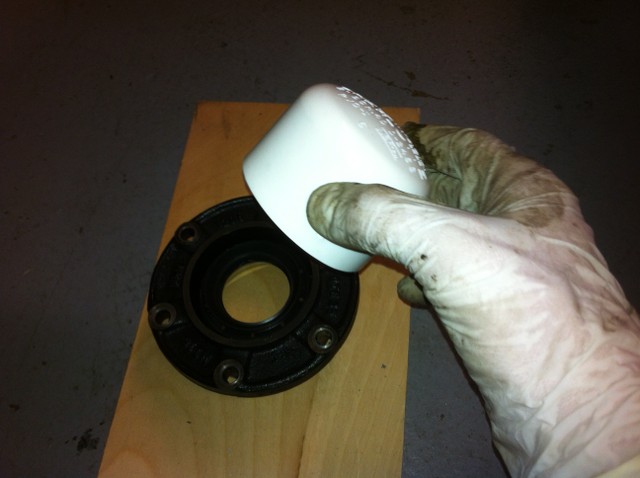
I used a 2 inch PVC cap to neatly and gently hammer in the new seal
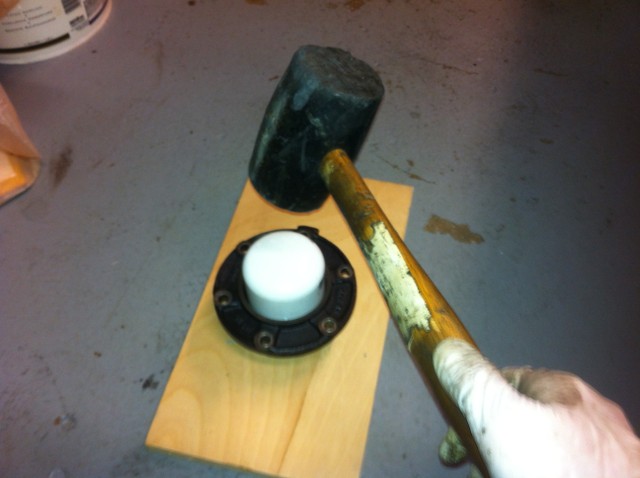
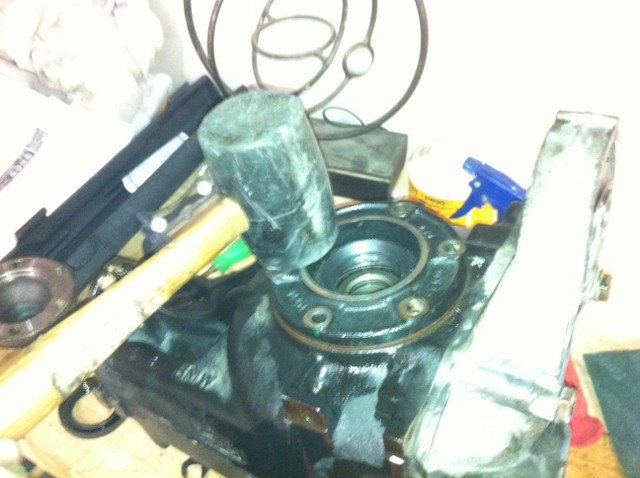
Reinstall. I used the rubber mallet to gently get it back on.
Install new circlip
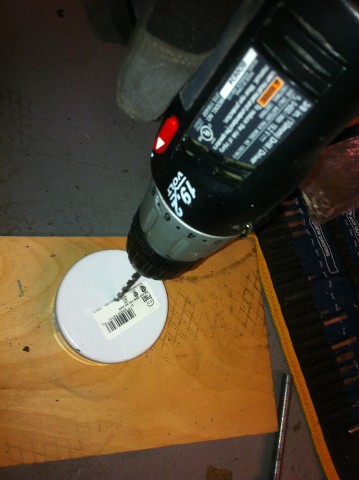
Now, time to install the subframe bushings. Again, I used a PVC cap for this job. Drill a hole big enough to get a threaded rod through it.
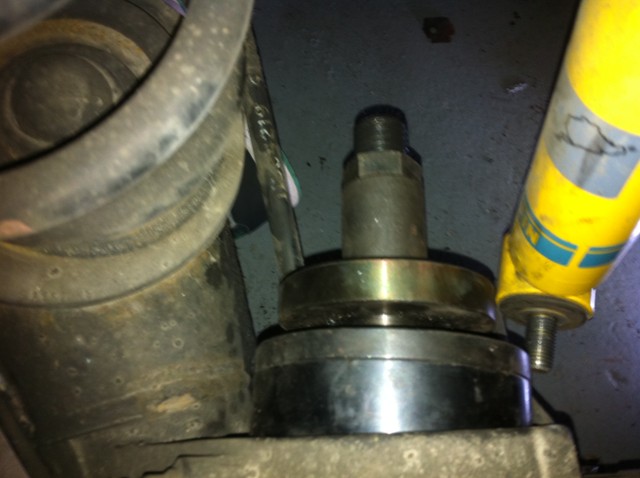
Soap the bushing up and arrange the threaded rod, bolts and a metal sleeve like so.
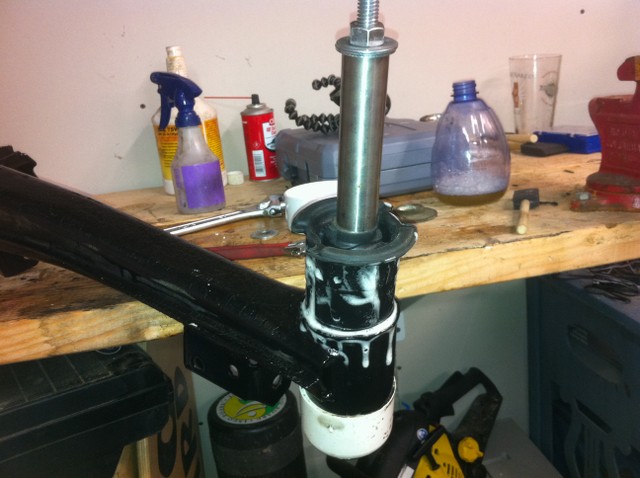
I got it most of the way in and finished it off with a puller.

Be sure to get it all the way in like so.
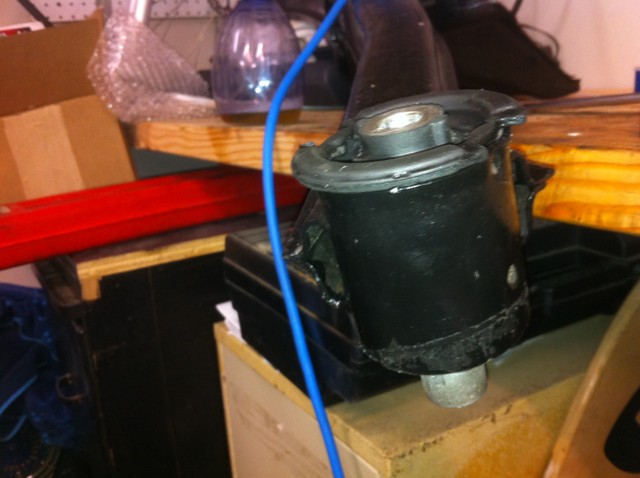
Reinstall everything!
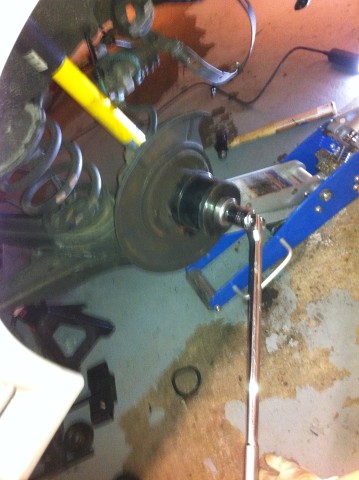
Getting the hub back on I used the SIR-B90 tool arranged like this.
Nothing like new bits!!
Good luck

Okay, I’m going to basically go through the steps that I did for this job. So, it doesn’t necessarily have to be in this order…It’s just how I did it. Hope this helps a few folks who are about to tackle this job. Be prepared to NOT drive the car for a while as problems are inevitable and you’ll always find something that needs attention that you didn’t plan for… This took me nearly a month because of my limited time and repeated runs to the hardware store or BMW. Remember to plan ahead and replace all lock nuts! And it’s a good idea to go stainless steal on the bolts that hold the flanges together on the muffler.
Before jacking up the car, loosen the lug bolts for the rear wheels.
Remove safety retainer covering the axle nut
Loosen the axle nut. They are usually on very tight so a cheater bar like this might be necessary. I just slip a pipe over a breaker bar and the nut came loose.
Spray penetrating oil on all the bolts you’ll need to loosen. Especially the bolts you see I’m spraying below.
Jack up the car and put it on jack stands. Don’t forget to chock the front wheels. You might also want to disconnect the battery if the car is going to sit a while. …oh, it will…. Lol
Remove muffler
Move jack stands to rear of car on the frame rails under the trunk. I guess you can also support the car at the factory jack points but I wasn't getting under the car with that. Love my car - but not that much. lol.
I purchased some big jack stands from Harbor Freight. I didn't want to mess around with blocks of wood... And it'll be good to have these at my disposal in the future.
Remove brakes, including pads, calipers, and rotor.
Remove axle nut
Remove the bolts that hold the axle to the rear differential. The first pic is to show you what you are removing but you'll really need a breaker bar and some extensions. These bolts are on very tight!
Support the axle with a jack stand
Using a hammer and a punch, knock the axle out of the hub
Remove bolt that holds the shock to the spindle.
Remove brake shoes
Using a hammer and a punch, knock the axle out of the hub
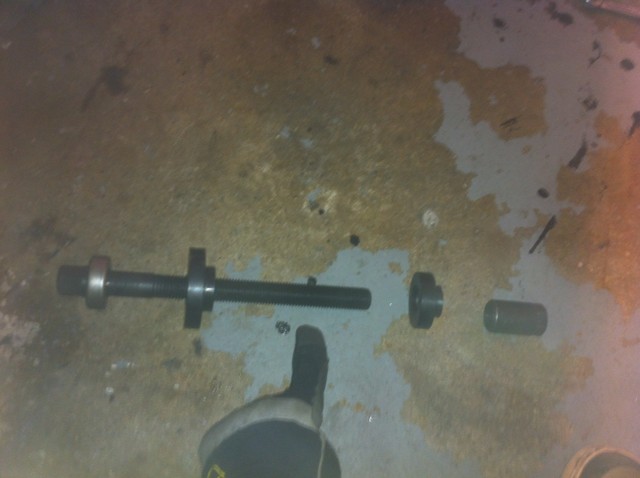
This is the SIR-B90 Tool I used to do both wheel bearings. Makes it such an easy job. Glad I bought this a while back.
Here are the bits of the tool you’ll need to remove the hub.
You set it up like this
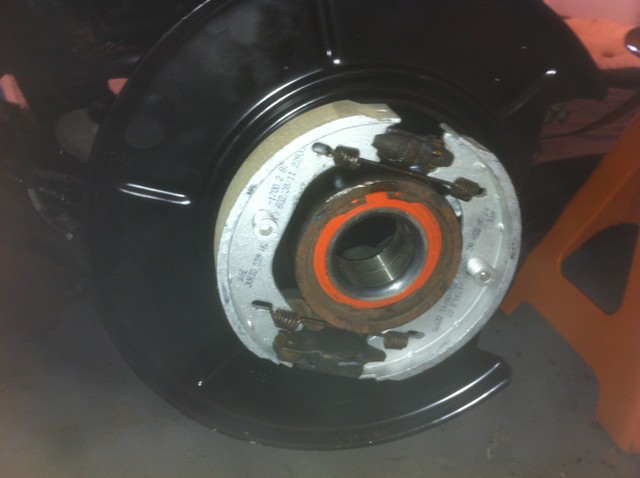
And this is what it looks like when removed
The inner bearing race was seized on there so I simply made 3 cuts with a Dremel, pried them with a screw driver and I got it off without issue.
You’ll now need to move the circlip before removing the bearing. They can get rusted in there pretty good so spray some penetrating fluid on there.
Remove circlip with circlip pliers and tame it out with a flathead screwdriver
Now remove the bearing with the B90 Tool. This is the sequence of adapters. I’m pointing to where the bearing will sit when you put it all together.
Clean it up
Here’s the order of adapter to put the new bearing in. Once complete put a new circlip in.
I wanted to get my e-brakes working better so I decided to install new shoes and lube up the rest of the system with lithium grease.
Below is the harness for the e-brake cable. Simply pull it out and push the retaining pin out with an awl or some other means. The pin is the little rusty circle closest to the bearing in the pic below.
Remove bolts that holds the rear swaybar to the trailing arm.
Put saran wrap over the brake reservoir to keep brake fluid from pouring out of your lines when you remove them.
Now remove 4 inner and outer soft brake lines at the unions
Remove ABS sensors
Remove the bolts that hold the subframe bracket to the car. These can be a HUGE pain and I had to dremel one off because I stripped it. Another bolt simply cracked in half from all the torque. Tons of penetrating fluid here! I should have let it soak for along time….
Remove speed sensor from rear diff
Remove 4 lock nuts that hold the drive axle to the diff
Remove the nut and bolt that holds the diff to the frame through the diff bushing.
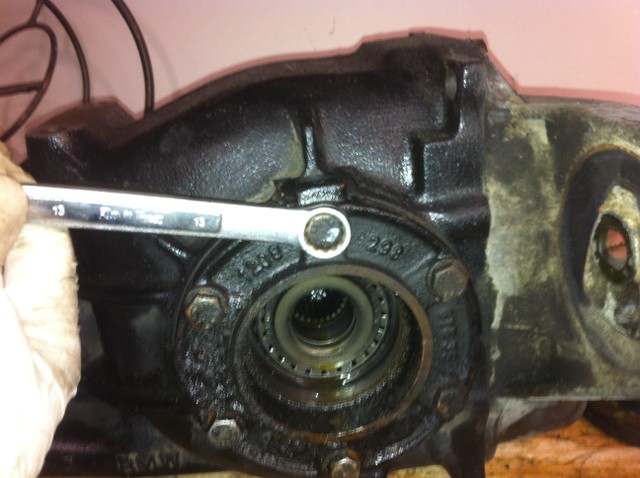
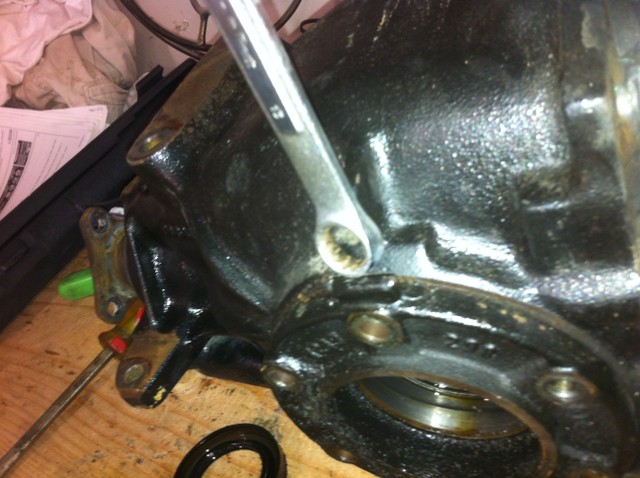
Loosen (do not remove) the 4 bolts at the top of the rear diff. These can be tight and difficult to get to. I used a wrench and had to position myself to get enough torque. But they eventually came out. No pic of this but just feel around for the bolts. You can't miss them. Get a jack in place. Remove the 4 bolts and very carefully lower the diff
Support you subframe with jackstands.
Remove the large nuts that hold the subframe to the car.
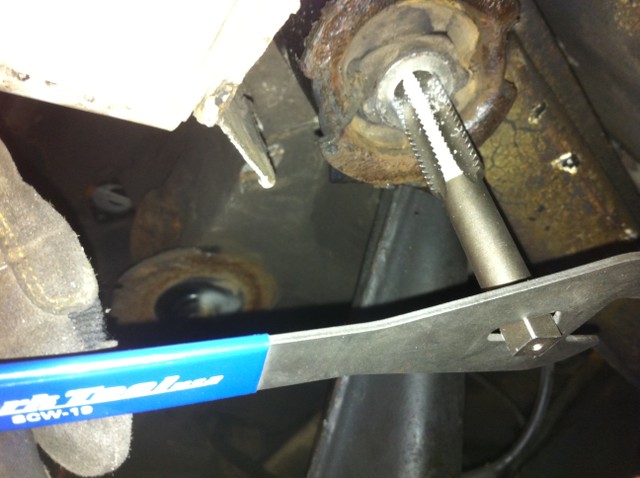
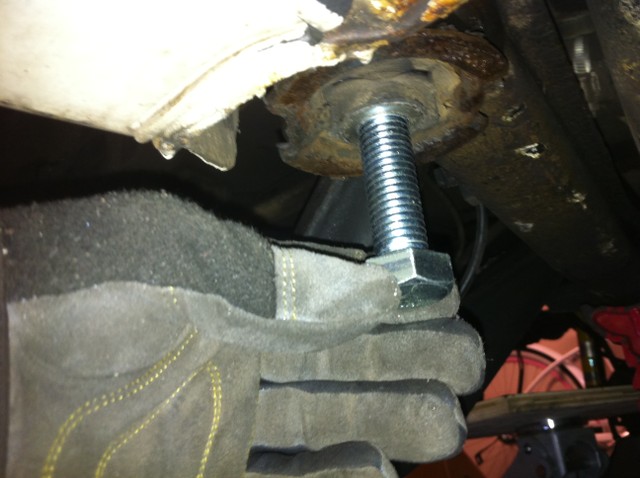
Once I got those nuts off, I was hopeful that the subframe would drop out with a little encouragement but no chance. So I tapped the sleeve from the bottom and threaded a bolt in there.
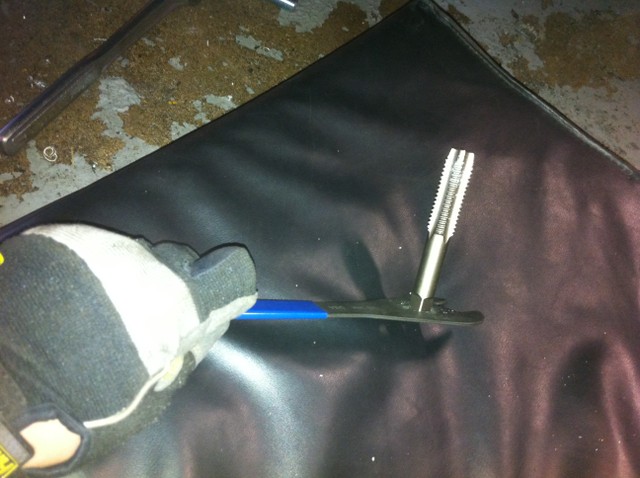
I used one of my bike tools to hold the tap
Using a screw driver remove the “gunk?” over the bolt found under the rear seat. This pic should help.
Then, using a punch, hammer down on the subframe from inside the car through that hole. You’ll contact the bolt you threaded from the bottom. A couple of good strong whacks and the subframe finally came out. Remember to support you subframe with jackstand before you do this. Otherwise it will all come crashing down on the ground.
Collapse the drive shaft with a large wrench and remove. I can't see skipping this step. I tried but the subframe would not get around the driveshaft.
Carefully lower the entire subframe with trailing arms intact. I used a jack to lower it...
I removed my swaybar for painting and new bushings and hardware
Now remove the trailing arms from the subframe
All the bits out!
Remove the subframe bushings. I started by using a butane torch to burn them out a little.
Then I used a 3 jaw puller to get it the rest of the way out.
The outer sleeve will most definitely get stuck in the subframe. I used a sawzall to to make a deep cut.
Then pried it out with a flathead screwdriver
I used this homemade tool to remove the trailing arm bushings. The metal sleeve from my new Powerflex bushings worked perfectly to push it through.
I then used the following arrangement to get the new trailing arm bushings in.
I got it all the way in with a 3 jaw puller
So, thankfully I got the heads up about the Powerflex bushings being shorter than the stock iX bushings (thanks Chris!). I would have had to put washers between the diff and subframe to make up the difference in height so that it did not put undue strain on my drivetrain parts. This would mean new bolts as well. And possibly spacers at the bushing itself... This is ONLY an issue if you are keeping the stock springs. Which I am….Here you can see the difference in height between the OE bushing on the left and the Powerflex bushing sleeve on the right.
Also the base of the bushing is different. Notice how the OE bushing bottom fits into the groove of the subframe bracket. After installing, I noticed they don’t actually make contact but during driving the rubber should flex enough so that it does. In hindsight the Powerflex bushing would probably have flexed just the same way and would have been okay. It really boils down to the sleeve height. If you can get a sleeve the same length as the OE sleeve, you can use the Powerflex bushings without issue.
I bought POR-15 paint and painted everything. The subframe, trailing arms, brake calipers, some rust spots under the car (thankfully very little) and my brake drums. The stuff is amazing. Here’s my newly painted brakes. ....I didn't paint the dog.
I also cleaned up my rear diff a little. Not fantastic but worlds better than it was.
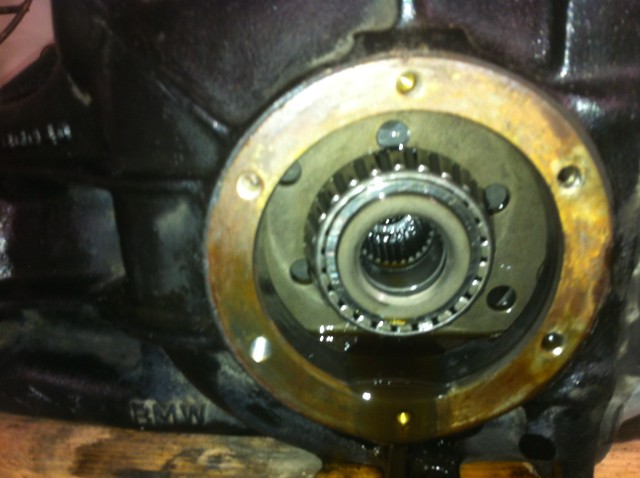
I had a major leak on one side of the diff, so I replaced the seal and O-ring. To do this you need to pry out the splined flange
Pry out the seal.
Remove the inner circlip
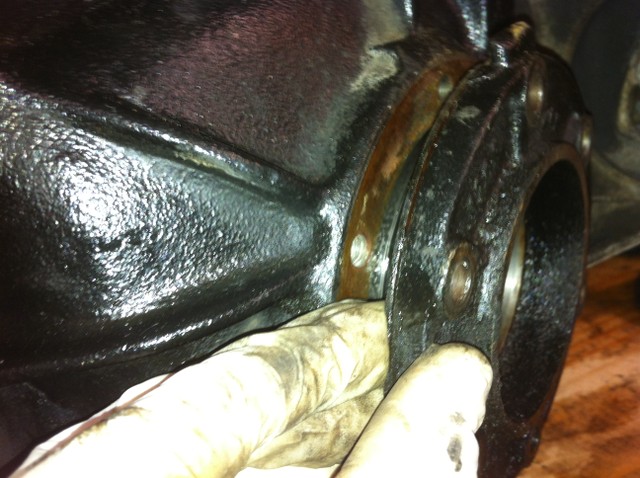
Unbolt the plate below
And pry it off like so. This can be a little tricky…
You might think to drain your diff fluid first. I didn’t and it poured out when I removed that plate above. I had a catch container on hand.
Remove O-ring
Clean everything up
New seals and O-ring.
Put some sealant around the new seal
I used a 2 inch PVC cap to neatly and gently hammer in the new seal
Reinstall. I used the rubber mallet to gently get it back on.
Install new circlip
Now, time to install the subframe bushings. Again, I used a PVC cap for this job. Drill a hole big enough to get a threaded rod through it.
Soap the bushing up and arrange the threaded rod, bolts and a metal sleeve like so.
I got it most of the way in and finished it off with a puller.
Be sure to get it all the way in like so.
Reinstall everything!
Getting the hub back on I used the SIR-B90 tool arranged like this.
Nothing like new bits!!
Good luck
Comment