

A few notes before we begin:
- You will have to modify (drill holes in the frame, cut the fabric) your existing sport seats. Fortunately, the only piece that is visibly altered (with the seat assembled) is the side of the seat back, which easy to replace / cheap to buy (or find).
- The armrests have two pieces – the armrest itself and the attachment bracket. All the moving bits that make the armrest go up and down / lock into place are within the armrest. I was only able to fasten one of the two studs on the bracket to the seat frame. Both studs will fit on the frame, but I only had room to get a nut on one of them. A bit of loctite or nylock nut should hold it on just fine (mine hasn't budged). Just something to be aware of.
- I wasn't able to get the original pin back in the bracket to hold the armrest on due to the thickness of the seat back fabric / cardboard getting in the way. Close, but not close enough. I was able to set a small screw in there instead and this has worked great. Second thing to be aware of.
- I'm not sure how well this works on comfort seats. Will probably try at some point and let you know.
- Get a good metal bit the diameter of the bracket studs for drilling into your seat. One hole requires drilling through about 1/8” of steel. Again – a good bit.
- The “hard” part is mounting the brackets. Mounting and removing the armrests is easy. I grabbed lousy one from the pick yard and painted them. I'll mount nice black ones later when I come across them.
- The armrest locks in 5 positions. 1 up and 4 down. One of those 4 down positions should be comfortable, but you only get one shot at making that up position look good. Not too far forward or back – this is the position you should try to get right.
- The driver's side seat has an existing hole in the frame that's convenient for locating the top stud of your bracket. So – do the driver's side first and use it for reference when doing the passenger side.
Things you'll need:
- 2 armrests & brackets from an E34
- A few washers to fit the bracket studs
- A few small screws (size based off the pin that holds the armrest to the - bracket)
- Basic tools (sockets, screwdrivers, etc)
- A dremel. Not necessary, but helpful
- A drill bit the diameter of the bracket stud. A good one. For metal.
Take your time establishing where you want the armrest to sit. Pretend you're driving along your favorite winding road. Imagine cruising down the freeway.
And... enjoy:
1) Get your armrests. I got mine at the pick yard from an E34. I think the E32 ones work as well / are the same / someone correct me if I'm wrong
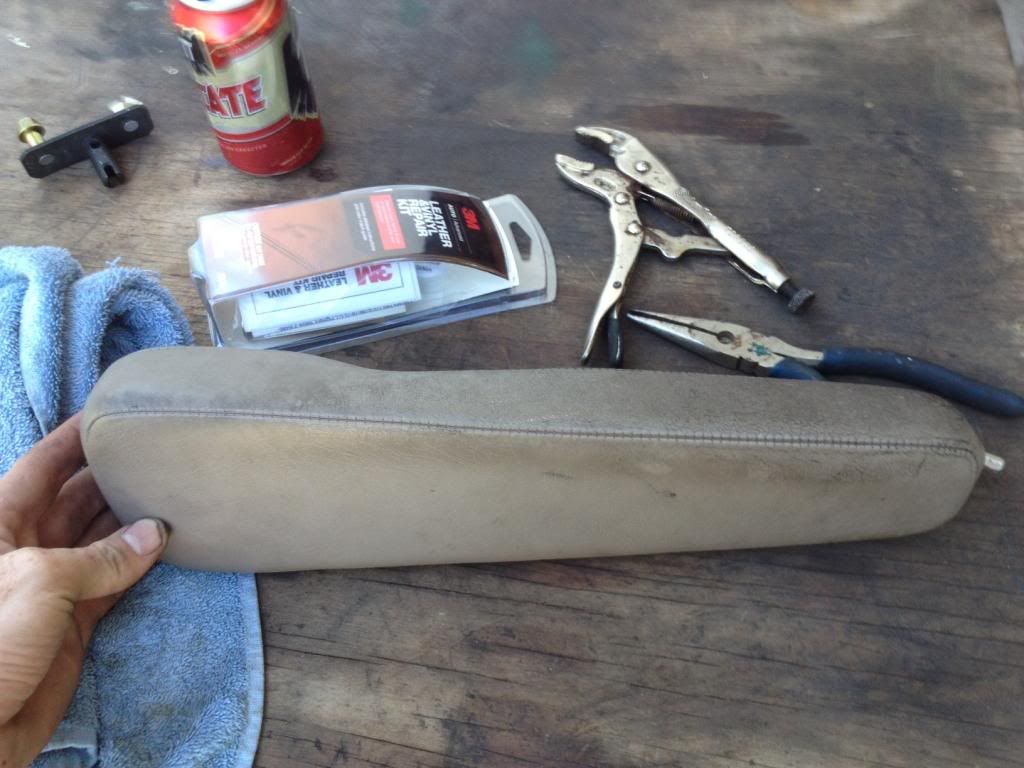
2) Remove the bracket by pushing the pin out (hammer and screwdriver / vicegrips) from the armrest. Now is the time to clean the vinyl and, if the color doesn't match, paint it. I used Dupli-color vinyl and fabric paint, and it works well. Use pliers to remove the metal sleeve on the longer stud – it should just unscrew.
[IMG]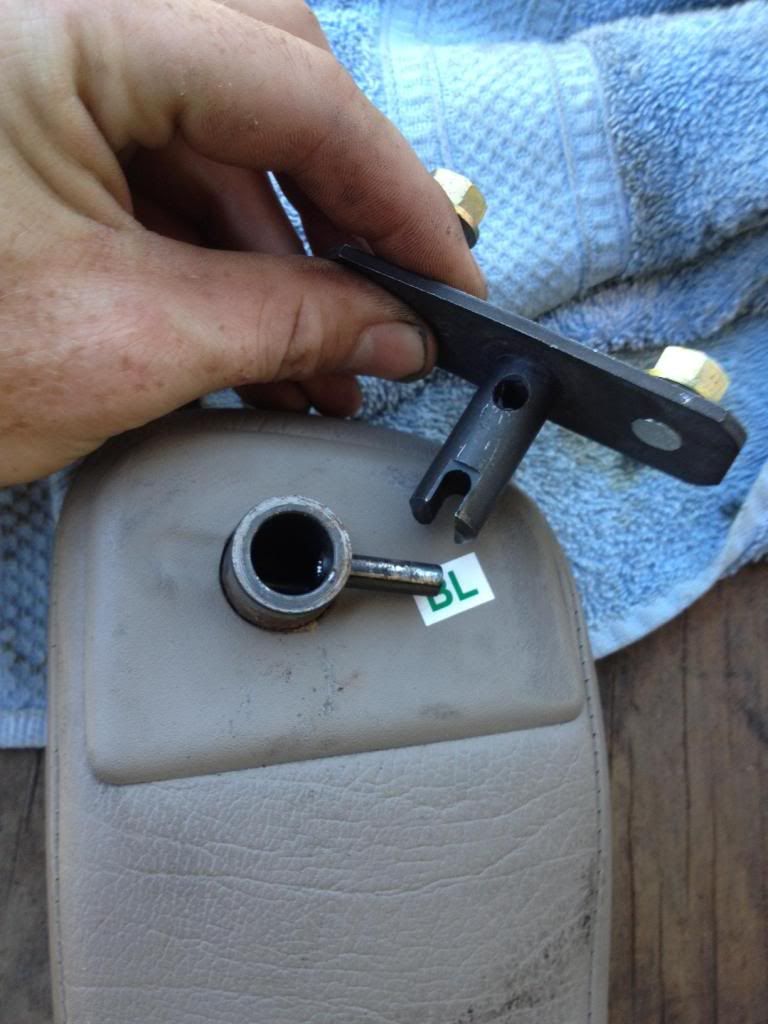 [/IMG]
[IMG]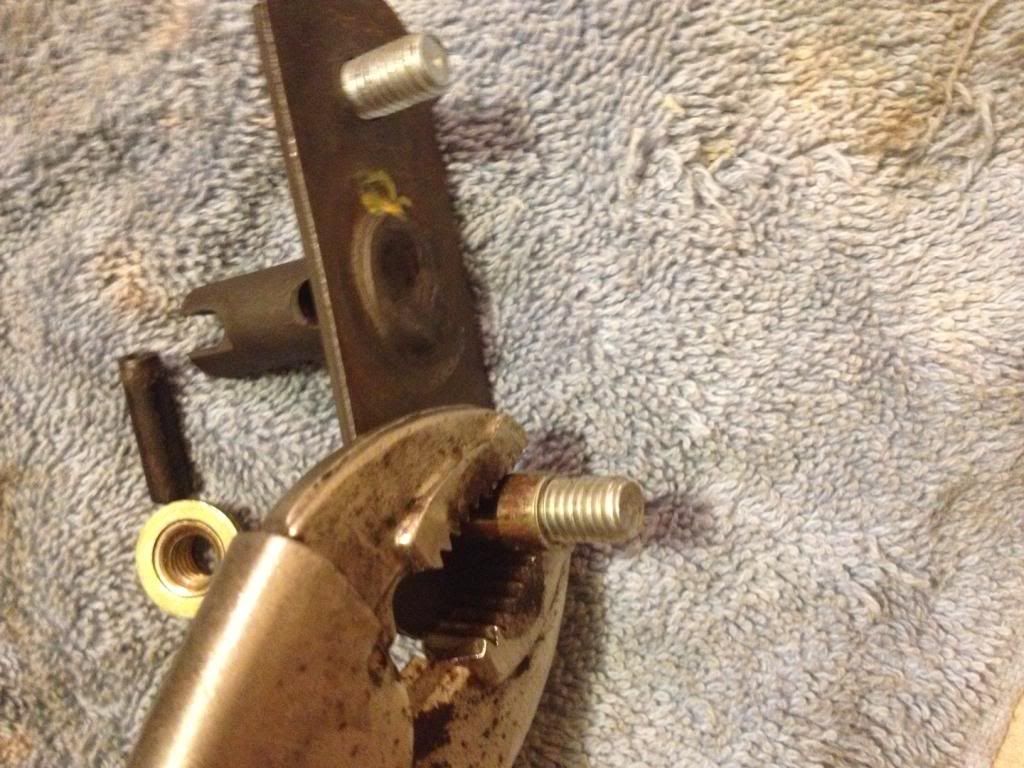 [/IMG]
3) Remove the seat from the car. This example uses the driver's seat, which is the one I suggest you start with (we'll address that again, later).
4) Remove the plastic reclining lever cover and plate. Lever simply pries off, and the plate pops off with the help of a flat-head. Start from the bottom and then slide the cover down (see photos).
[IMG]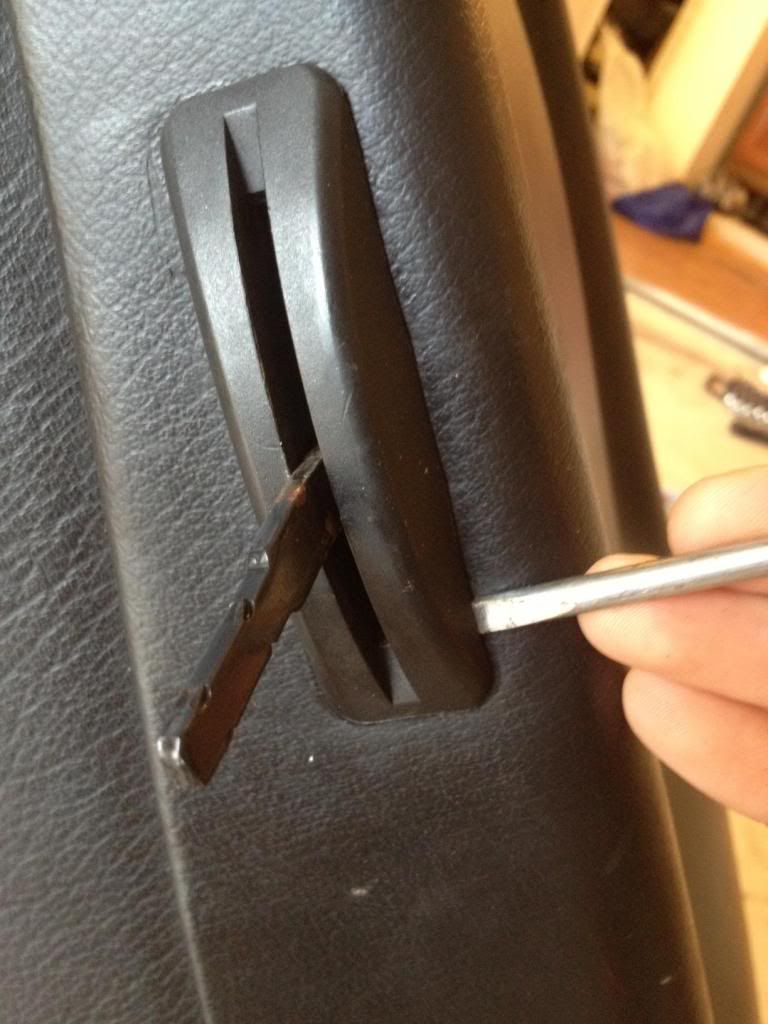 [/IMG]
[IMG]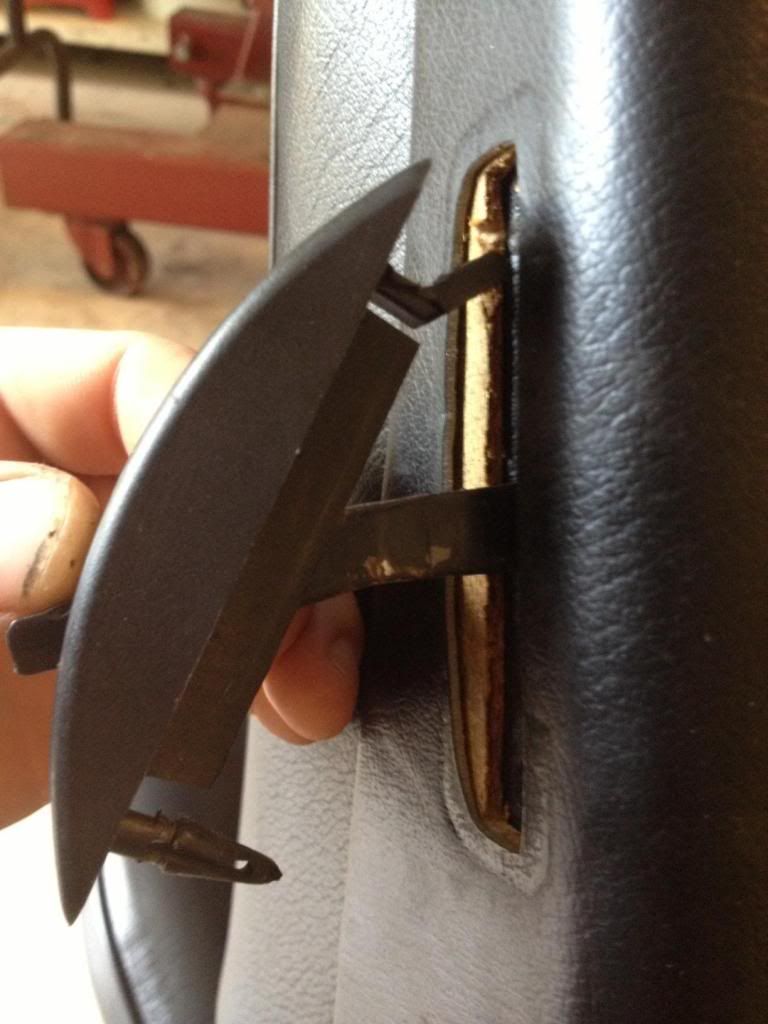 [/IMG]
5) Mark your seat and seat back. Tape the seat bolster where the seat-back meets it, and then tape the edge of the seat back. Draw corresponding ticks every few inches on both pieces of tape – you'll use these as reference points later to make your cut in the seat back. Run one piece of tape across both the seat back and the seat side roughly perpendicular to the tape you ran along the seam, and cut it at the seam between seat back and side.
[IMG]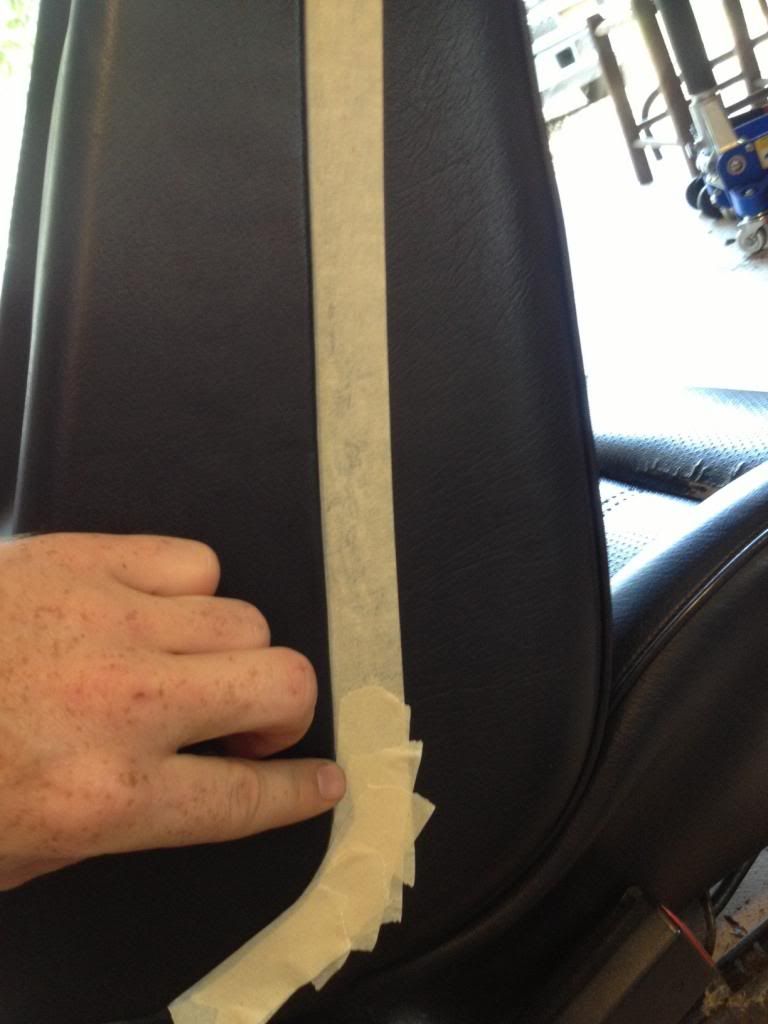 [/IMG]
[IMG]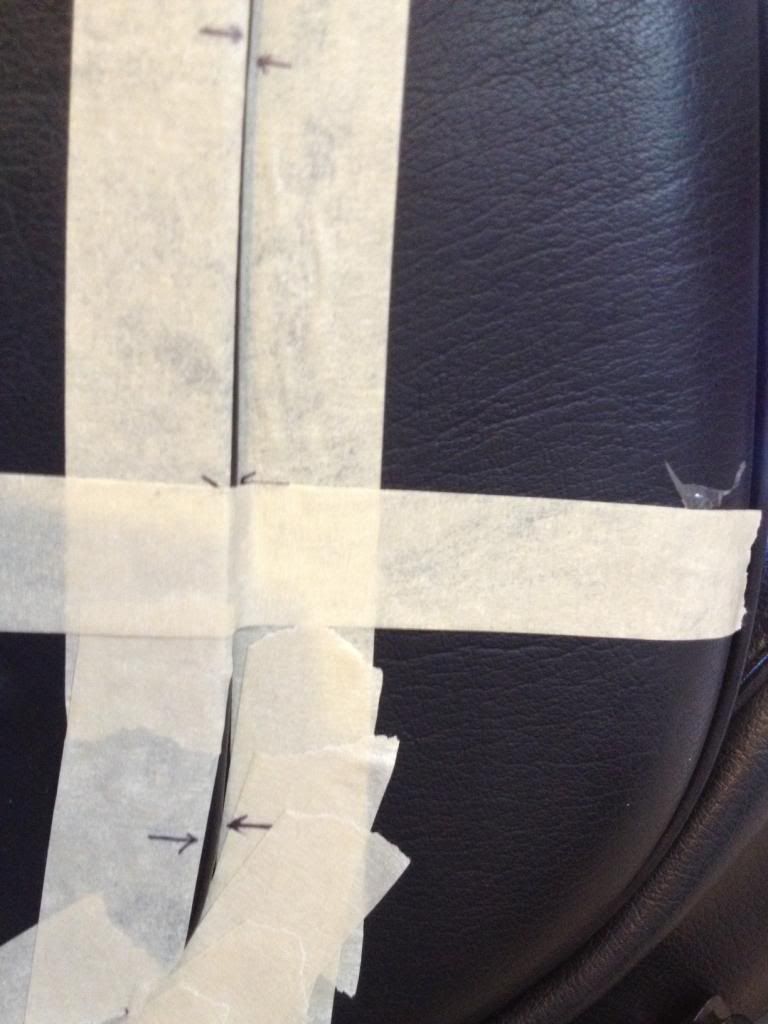 [/IMG]
6) Remove the seat back. If you've done this before, skip to the next step. If you haven't... first, unscrew the two screws at the bottom, then pry the side off the reclining lever as you lift the seat back up. The screws at the bottom should have washers – don't lose these. The top is held in place by two metal clips and these should simply pop off.
[IMG]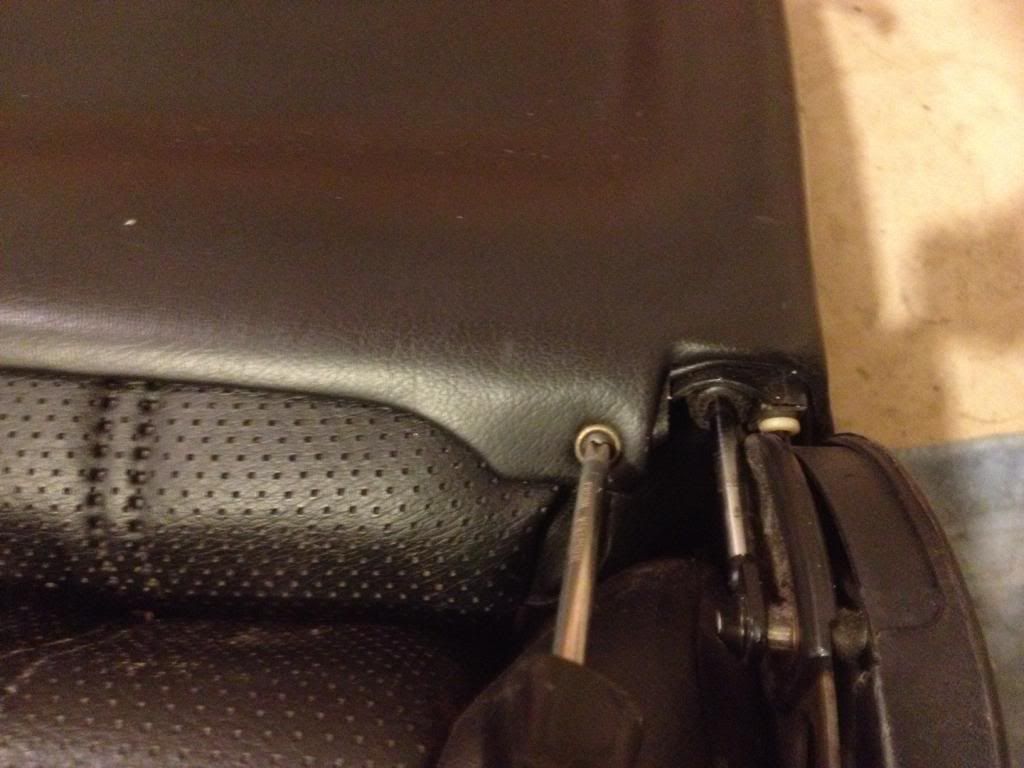 [/IMG]
[IMG]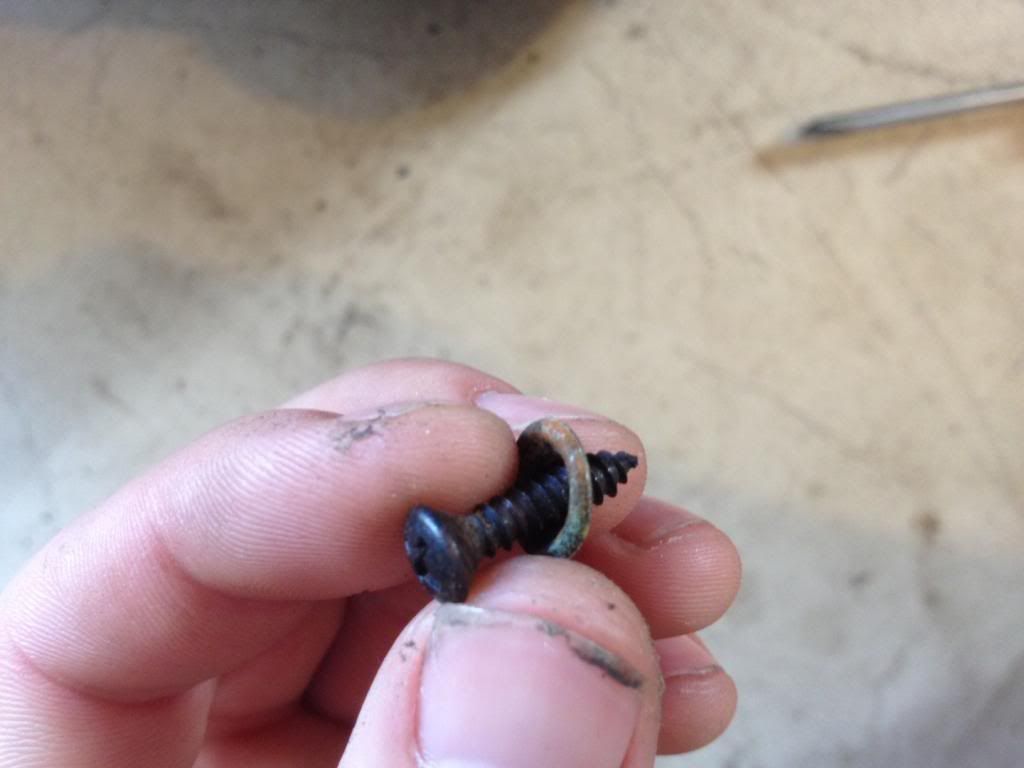 [/IMG]
7) Begin removing the seat bolster fabric from the frame. Start at the bottom, pulling the fabric off the tabs. You'll have to remove a corner of the bottom fabric as well. Remove enough to get a drill bit on the frame without mangling the fabric.
[IMG]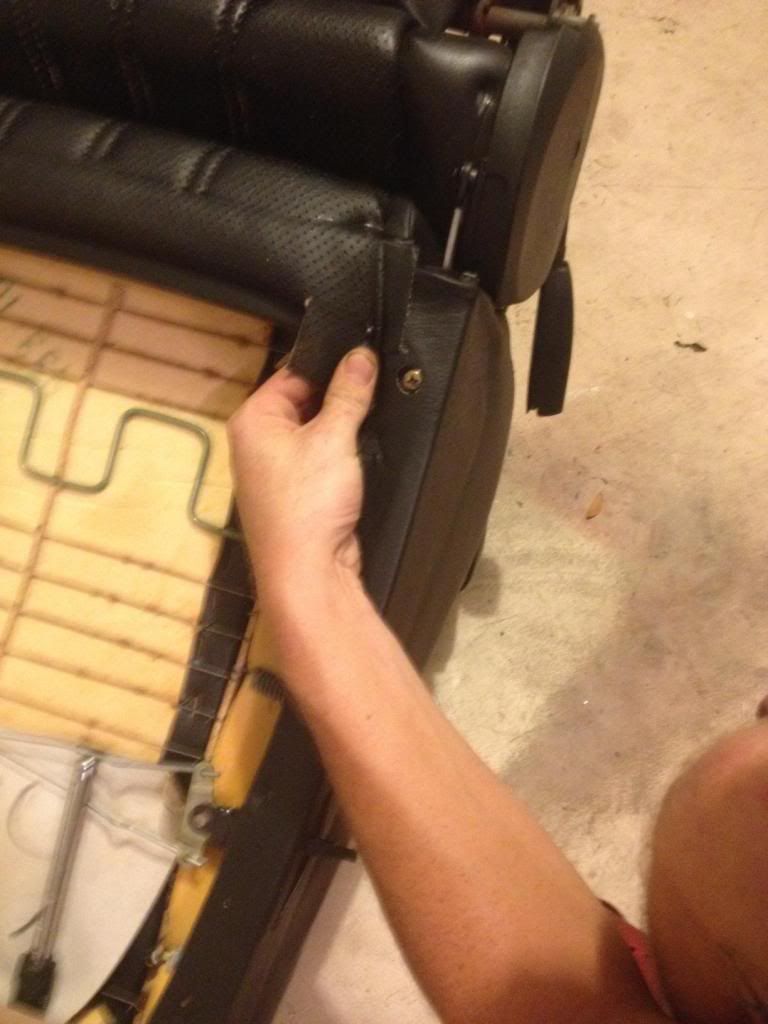 [/IMG]
[IMG]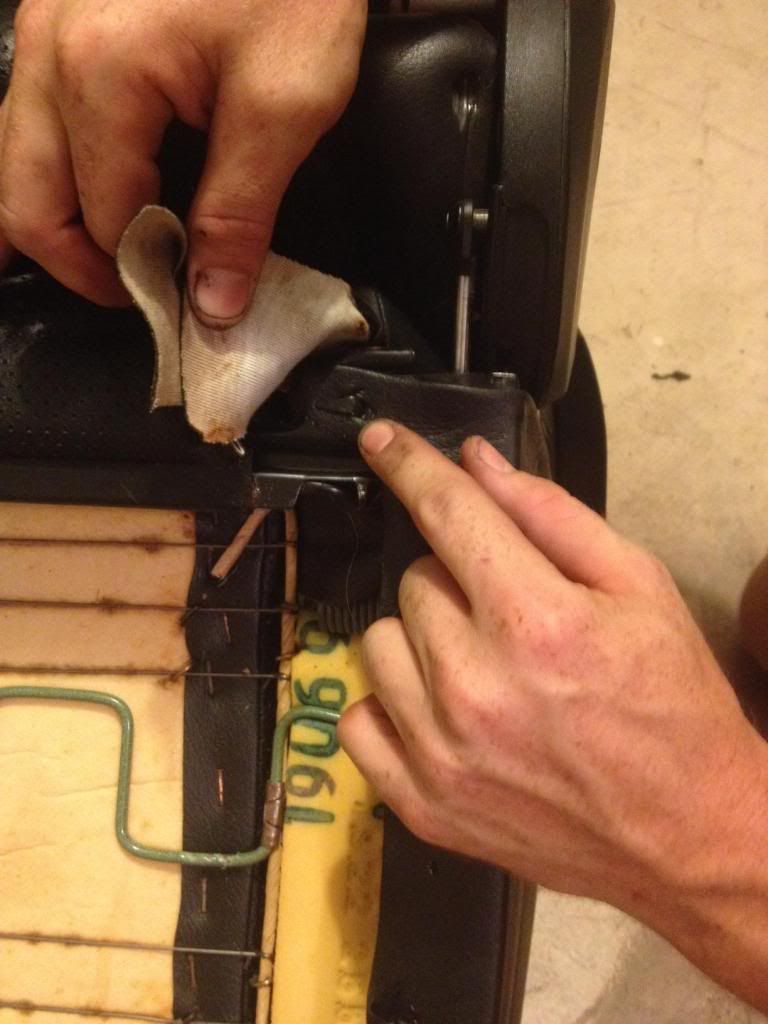 [/IMG]
8) Set the seat up as you normally sit in it. Hop in and have someone hold the armrest up (attached to the bracket) where it feels comfortable. Mark the rough location. Have a beer. Do it again. Don't worry about angle for now, worry about relative height off the seat bottom.
9) Drilling the holes: The photos are going to be your best friend for this part. I discovered, on the seat frame, there was one existing hole (again, driver's side seat) that was pretty close to where I wanted the top stud of the armrest bracket. It was about 1/2” higher than I wanted, but I went for it. Turns out any lower would have caused the armrest to interfere with the center console when the seat was lowered – so I strongly suggest using this hole for your top stud. Plus, it's easier to widen the existing hole (using your fancy metal drill bit) than it is to locate and drill a new one. Note: The passenger side seat does not have this existing hole, so I suggest using you driver's side as reference when mounting the bracket on the other seat.
Where to drill:
[IMG] [/IMG]
Drilled out:
[IMG]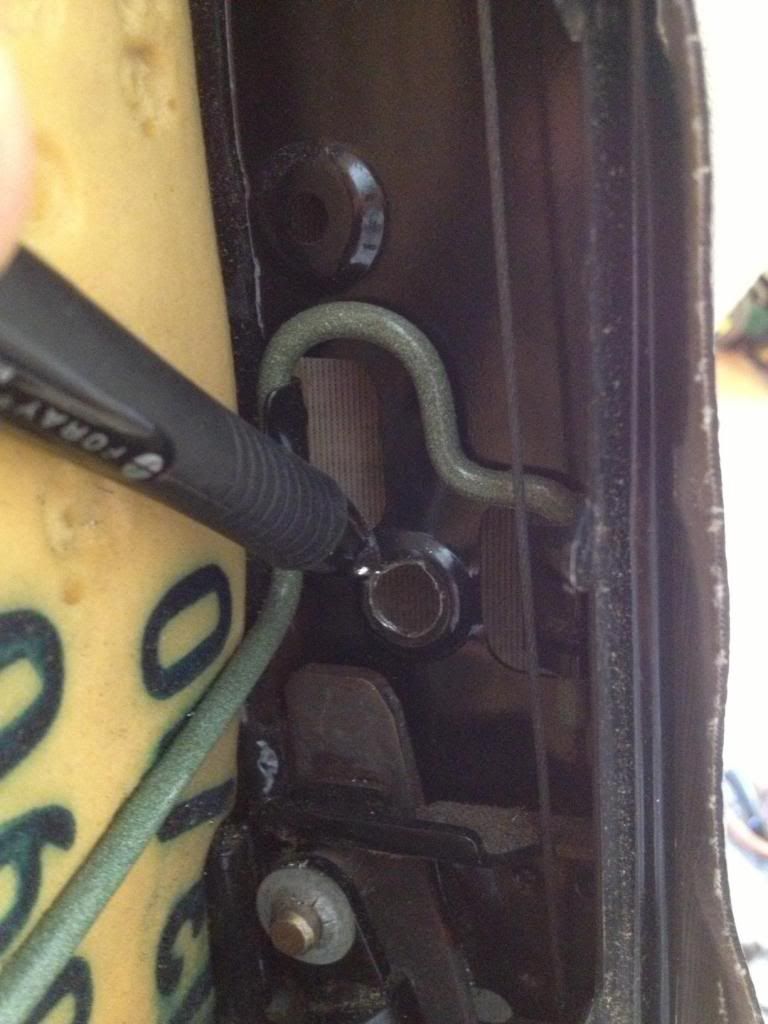 [/IMG]
Passenger side (no reference hole):
[IMG]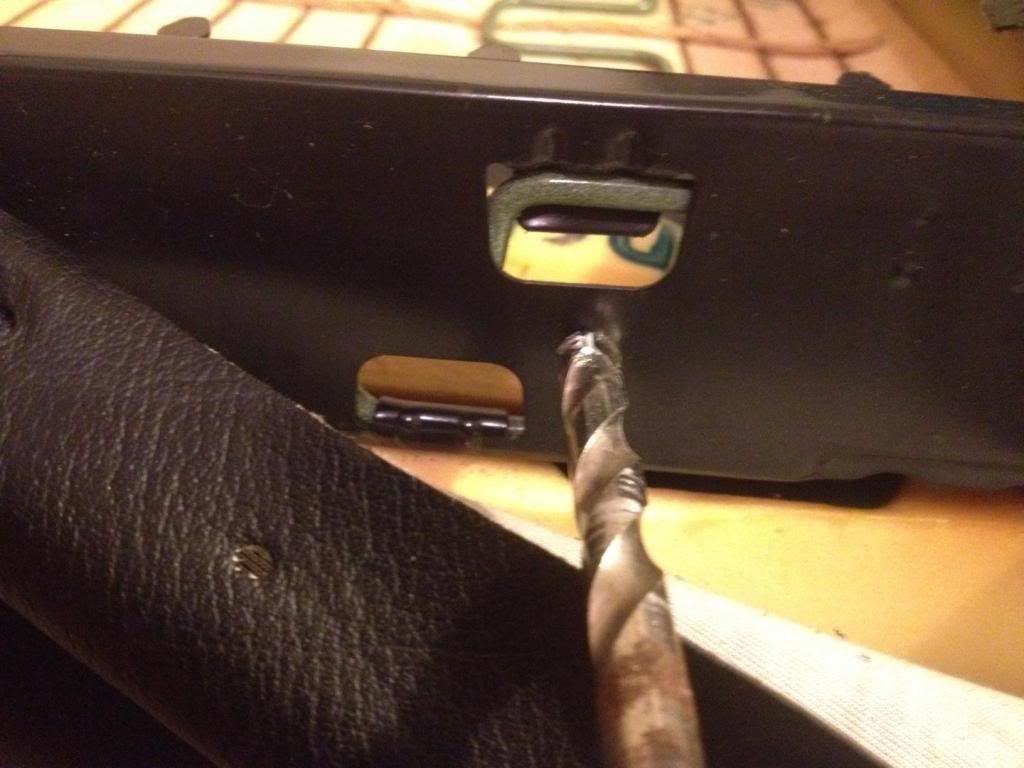 [/IMG]
10) Mark your second hole. This is where you set the angle, which I suggest setting based on the up position of the armrest. Again, 4 positions for down, only 1 for up. Put the armrest on the bracket, stick the top stud in the hole you just widened, put the armrest in the up position, place it where it looks best, and mark the second stud on the frame. Make sure that, in the up position, the armrest clears the reclining lever.
Armrest clearance check:
[IMG]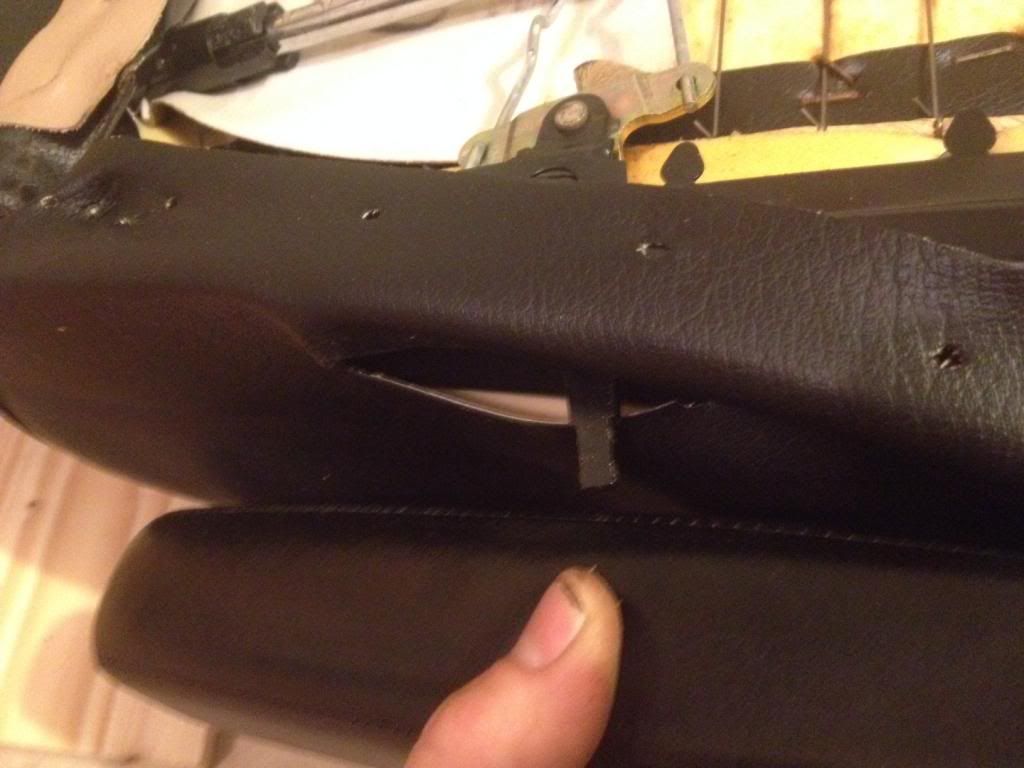 [/IMG]
11) The lower stud won't line up with anything. Take a deep breath and start drilling. You're going through two pieces of metal, here, and the hole is directly in way of one of the seat struts. Don't drill through the strut (oh, ok thanks for the advice).
12) Keep drilling. PITA
Holes drilled:
[IMG]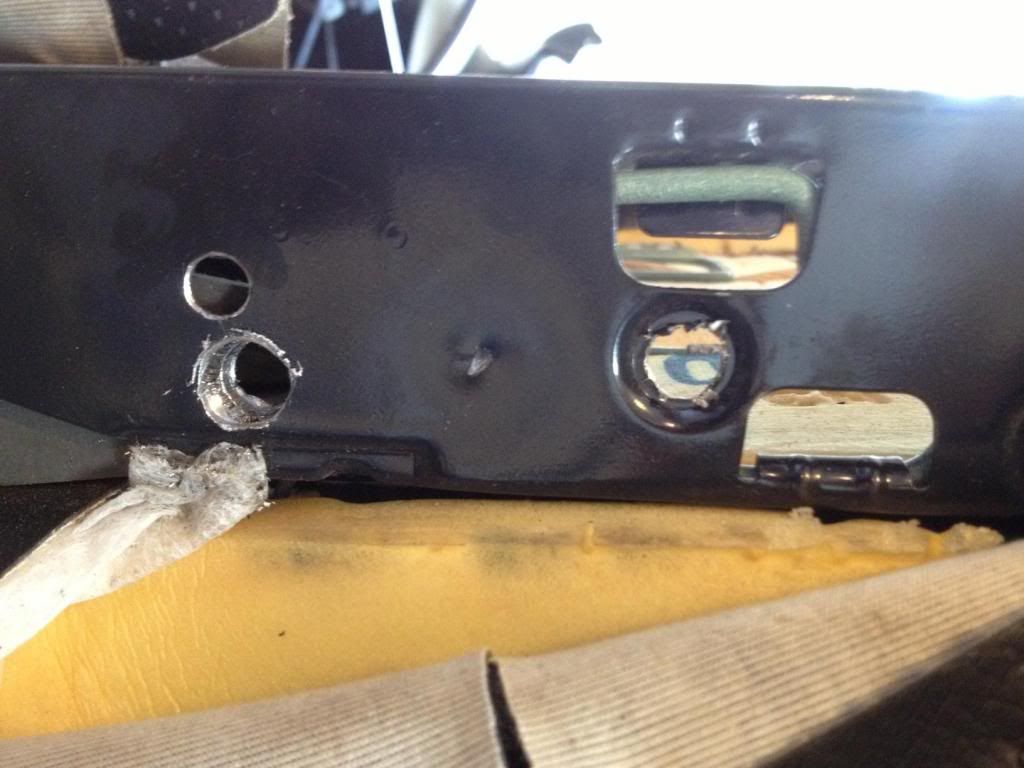 [/IMG]
13) With your holes drilled, prepare to mount the bracket. Before inserting the studs, place a washer on the top stud between the bracket and the frame. There's weld build-up on the back side of the bracket and, without a washer in there, this will force it to mount at an angle when you tighten the nut.
Washer on stud. Notice long stud trimmed and weld build-up on back of bracket:
[IMG]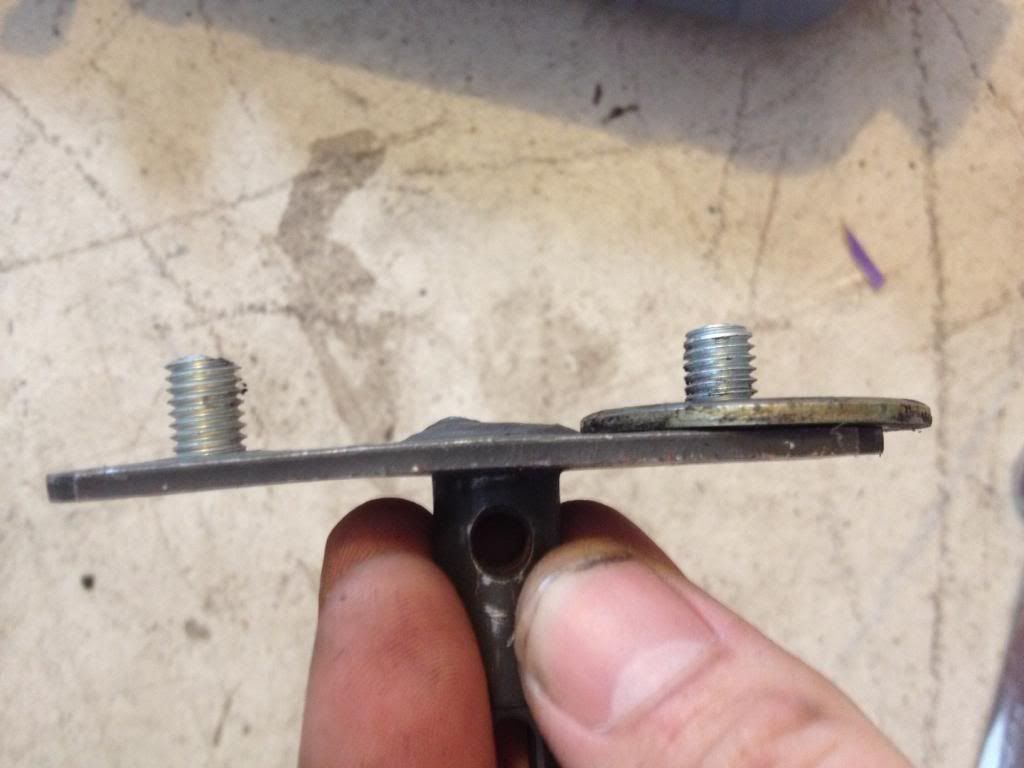 [/IMG]
14) The long stud will only fit in the top hole. If you can get a nut on that bottom stud, great – I didn't have room. For the top stud, I cut part of it off (dremel) so I could get a socket on the nut to really torque it down. Up to you. I used a nylock nut.
[IMG]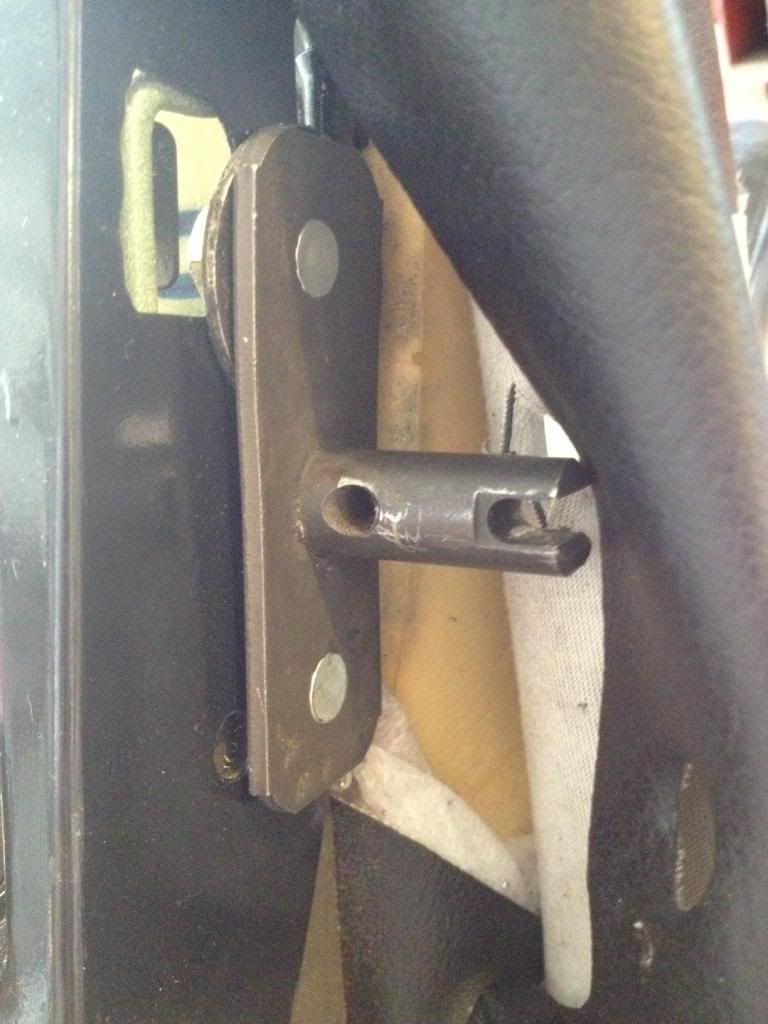 [/IMG]
15) Fold the seat bolster fabric up to the stud and trim a hole around it. You can cut a cross (two slits), but be careful not to cut too far and, if possible, cut little perpendicular slits at the end of the big ones to prevent them from perpetuating. I cut the slits too long on the first go, so I suggest cutting a hole.
16) Use the corresponding tick marks on the seat back / seat side pieces of tape to locate the hole through the seat back for the stud. Take a socket the diameter of the stud and use it to cut a circle in the fabric where the hole will go. Then cut the cardboard out slightly wider than this hole.
[IMG] [/IMG]
17) Put the seat back on the seat by prying the sides out to clear the stud / reclining lever, push in the metal clips at the top, and screw the screws in at the bottom.
[IMG]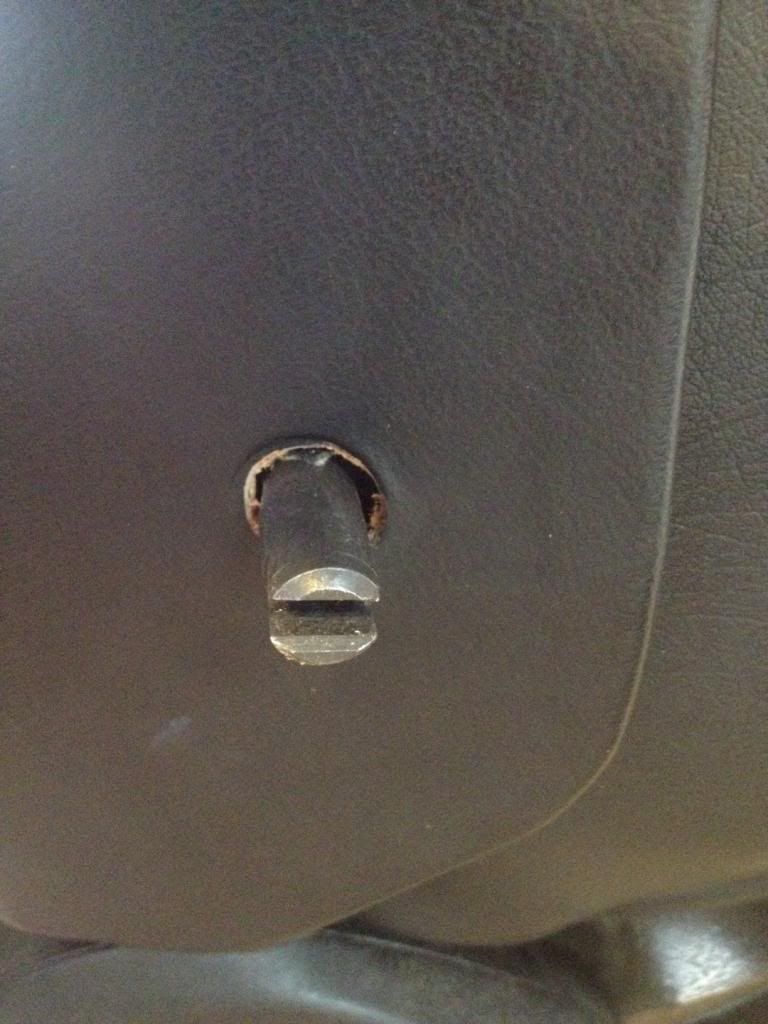 [/IMG]
18) Lean your seat on its side (stud facing up), put the armrest on the stud and push down until the holes line up. I couldn't get mine in all the way, so this is where I used a small screw instead of the original pin. If you're in the same boat, use the biggest 'small screw' that will fit, since you want the connection to be tight. I've used my armrest for a few weeks now and they haven't budged.
Top View - screw is on the back side where the pin would go (hidden)
[IMG]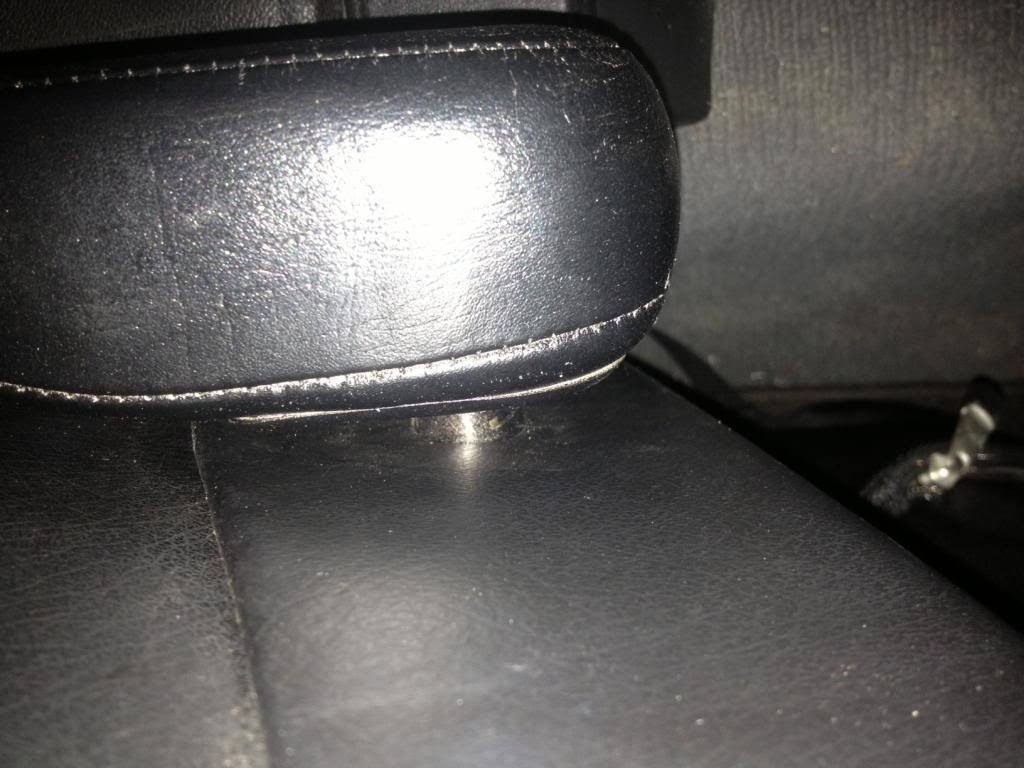 [/IMG]
19) Put the seats back in your car.
20) Whenever your friends see the car, ask them to look inside and see if they can tell what's different. When they tell you they're stumped, pat yourself on the shoulder for doing a good job.
If anyone has any suggestions re: getting a nut on the second stud and getting the pin in the armrest / bracket, please throw 'em up here. Or suggestions for anything else...
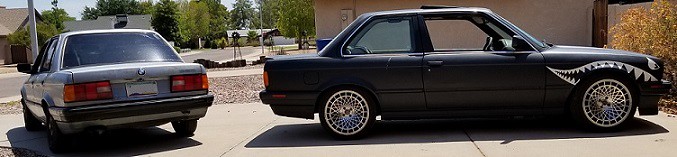
Results:
[IMG]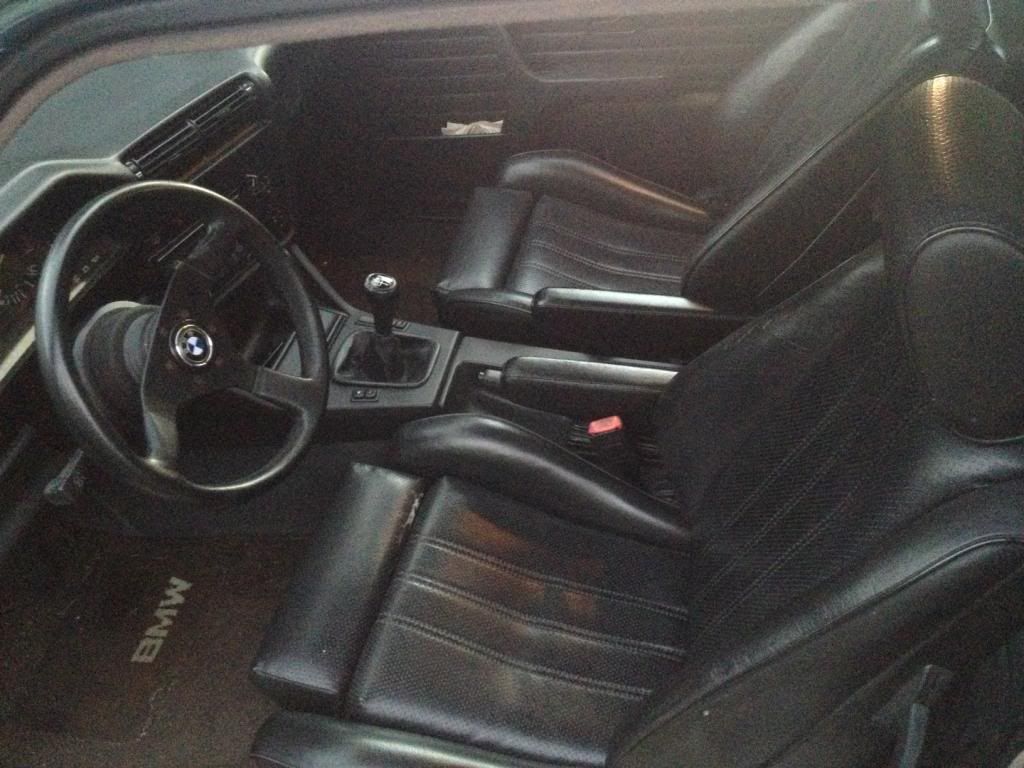 [/IMG]
[IMG]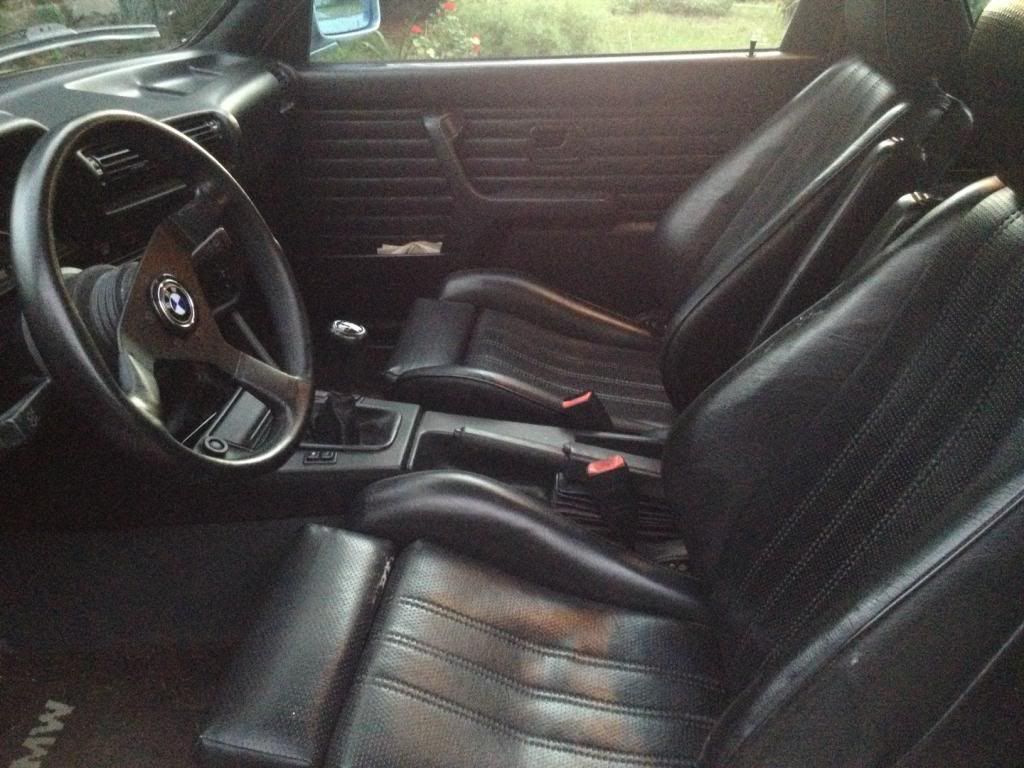 [/IMG]
[IMG] [/IMG]
- You will have to modify (drill holes in the frame, cut the fabric) your existing sport seats. Fortunately, the only piece that is visibly altered (with the seat assembled) is the side of the seat back, which easy to replace / cheap to buy (or find).
- The armrests have two pieces – the armrest itself and the attachment bracket. All the moving bits that make the armrest go up and down / lock into place are within the armrest. I was only able to fasten one of the two studs on the bracket to the seat frame. Both studs will fit on the frame, but I only had room to get a nut on one of them. A bit of loctite or nylock nut should hold it on just fine (mine hasn't budged). Just something to be aware of.
- I wasn't able to get the original pin back in the bracket to hold the armrest on due to the thickness of the seat back fabric / cardboard getting in the way. Close, but not close enough. I was able to set a small screw in there instead and this has worked great. Second thing to be aware of.
- I'm not sure how well this works on comfort seats. Will probably try at some point and let you know.
- Get a good metal bit the diameter of the bracket studs for drilling into your seat. One hole requires drilling through about 1/8” of steel. Again – a good bit.
- The “hard” part is mounting the brackets. Mounting and removing the armrests is easy. I grabbed lousy one from the pick yard and painted them. I'll mount nice black ones later when I come across them.
- The armrest locks in 5 positions. 1 up and 4 down. One of those 4 down positions should be comfortable, but you only get one shot at making that up position look good. Not too far forward or back – this is the position you should try to get right.
- The driver's side seat has an existing hole in the frame that's convenient for locating the top stud of your bracket. So – do the driver's side first and use it for reference when doing the passenger side.
Things you'll need:
- 2 armrests & brackets from an E34
- A few washers to fit the bracket studs
- A few small screws (size based off the pin that holds the armrest to the - bracket)
- Basic tools (sockets, screwdrivers, etc)
- A dremel. Not necessary, but helpful
- A drill bit the diameter of the bracket stud. A good one. For metal.
Take your time establishing where you want the armrest to sit. Pretend you're driving along your favorite winding road. Imagine cruising down the freeway.
And... enjoy:
1) Get your armrests. I got mine at the pick yard from an E34. I think the E32 ones work as well / are the same / someone correct me if I'm wrong
2) Remove the bracket by pushing the pin out (hammer and screwdriver / vicegrips) from the armrest. Now is the time to clean the vinyl and, if the color doesn't match, paint it. I used Dupli-color vinyl and fabric paint, and it works well. Use pliers to remove the metal sleeve on the longer stud – it should just unscrew.
[IMG]
 [/IMG]
[IMG]
 [/IMG]
3) Remove the seat from the car. This example uses the driver's seat, which is the one I suggest you start with (we'll address that again, later).
4) Remove the plastic reclining lever cover and plate. Lever simply pries off, and the plate pops off with the help of a flat-head. Start from the bottom and then slide the cover down (see photos).
[IMG]
 [/IMG]
[IMG]
 [/IMG]
5) Mark your seat and seat back. Tape the seat bolster where the seat-back meets it, and then tape the edge of the seat back. Draw corresponding ticks every few inches on both pieces of tape – you'll use these as reference points later to make your cut in the seat back. Run one piece of tape across both the seat back and the seat side roughly perpendicular to the tape you ran along the seam, and cut it at the seam between seat back and side.
[IMG]
 [/IMG]
[IMG]
 [/IMG]
6) Remove the seat back. If you've done this before, skip to the next step. If you haven't... first, unscrew the two screws at the bottom, then pry the side off the reclining lever as you lift the seat back up. The screws at the bottom should have washers – don't lose these. The top is held in place by two metal clips and these should simply pop off.
[IMG]
 [/IMG]
[IMG]
 [/IMG]
7) Begin removing the seat bolster fabric from the frame. Start at the bottom, pulling the fabric off the tabs. You'll have to remove a corner of the bottom fabric as well. Remove enough to get a drill bit on the frame without mangling the fabric.
[IMG]
 [/IMG]
[IMG]
 [/IMG]
8) Set the seat up as you normally sit in it. Hop in and have someone hold the armrest up (attached to the bracket) where it feels comfortable. Mark the rough location. Have a beer. Do it again. Don't worry about angle for now, worry about relative height off the seat bottom.
9) Drilling the holes: The photos are going to be your best friend for this part. I discovered, on the seat frame, there was one existing hole (again, driver's side seat) that was pretty close to where I wanted the top stud of the armrest bracket. It was about 1/2” higher than I wanted, but I went for it. Turns out any lower would have caused the armrest to interfere with the center console when the seat was lowered – so I strongly suggest using this hole for your top stud. Plus, it's easier to widen the existing hole (using your fancy metal drill bit) than it is to locate and drill a new one. Note: The passenger side seat does not have this existing hole, so I suggest using you driver's side as reference when mounting the bracket on the other seat.
Where to drill:
[IMG]
 [/IMG]
Drilled out:
[IMG]
 [/IMG]
Passenger side (no reference hole):
[IMG]
 [/IMG]
10) Mark your second hole. This is where you set the angle, which I suggest setting based on the up position of the armrest. Again, 4 positions for down, only 1 for up. Put the armrest on the bracket, stick the top stud in the hole you just widened, put the armrest in the up position, place it where it looks best, and mark the second stud on the frame. Make sure that, in the up position, the armrest clears the reclining lever.
Armrest clearance check:
[IMG]
 [/IMG]
11) The lower stud won't line up with anything. Take a deep breath and start drilling. You're going through two pieces of metal, here, and the hole is directly in way of one of the seat struts. Don't drill through the strut (oh, ok thanks for the advice).
12) Keep drilling. PITA
Holes drilled:
[IMG]
 [/IMG]
13) With your holes drilled, prepare to mount the bracket. Before inserting the studs, place a washer on the top stud between the bracket and the frame. There's weld build-up on the back side of the bracket and, without a washer in there, this will force it to mount at an angle when you tighten the nut.
Washer on stud. Notice long stud trimmed and weld build-up on back of bracket:
[IMG]
 [/IMG]
14) The long stud will only fit in the top hole. If you can get a nut on that bottom stud, great – I didn't have room. For the top stud, I cut part of it off (dremel) so I could get a socket on the nut to really torque it down. Up to you. I used a nylock nut.
[IMG]
 [/IMG]
15) Fold the seat bolster fabric up to the stud and trim a hole around it. You can cut a cross (two slits), but be careful not to cut too far and, if possible, cut little perpendicular slits at the end of the big ones to prevent them from perpetuating. I cut the slits too long on the first go, so I suggest cutting a hole.
16) Use the corresponding tick marks on the seat back / seat side pieces of tape to locate the hole through the seat back for the stud. Take a socket the diameter of the stud and use it to cut a circle in the fabric where the hole will go. Then cut the cardboard out slightly wider than this hole.
[IMG]
 [/IMG]
17) Put the seat back on the seat by prying the sides out to clear the stud / reclining lever, push in the metal clips at the top, and screw the screws in at the bottom.
[IMG]
 [/IMG]
18) Lean your seat on its side (stud facing up), put the armrest on the stud and push down until the holes line up. I couldn't get mine in all the way, so this is where I used a small screw instead of the original pin. If you're in the same boat, use the biggest 'small screw' that will fit, since you want the connection to be tight. I've used my armrest for a few weeks now and they haven't budged.
Top View - screw is on the back side where the pin would go (hidden)
[IMG]
 [/IMG]
19) Put the seats back in your car.
20) Whenever your friends see the car, ask them to look inside and see if they can tell what's different. When they tell you they're stumped, pat yourself on the shoulder for doing a good job.
If anyone has any suggestions re: getting a nut on the second stud and getting the pin in the armrest / bracket, please throw 'em up here. Or suggestions for anything else...
Results:
[IMG]
 [/IMG]
[IMG]
 [/IMG]
[IMG]
 [/IMG]


Comment